Okta Workforce Identity
Built for everyone in your workforce
- Overview
- Configuration
- Build Integration
Okta is a cloud-based identity management platform that provides authentication, authorization, and user management solutions for organizations. Integrating ADManager Plus with Okta's identity management system allows for synchronisation and enhanced management of user identities, permissions, and access across the network. This streamlines user provisioning, providing a more centralised and efficient system for managing user identities within the organization.
Centralized Identity Management
Streamlines user identity management by syncing user data and permissions, ensuring consistency across systems.
Workflow-controlled automation
Implement multi-level business workflows to oversee and control automations.
How to integrate ADManager Plus with Okta to streamline identity life cycle management
- Log in to ADManager Plus.
- Navigate to the Automation tab. Click Application Integrations under Configuration.
- Click Okta.
- In the Authorization section, copy the Callback URL which will be used in the future step to obtain credentials from Okta.
- Enter the Client ID and Client Secret values as obtained from the Steps to obtain Client ID and Client Secret in Okta given below.
- Click Configure.
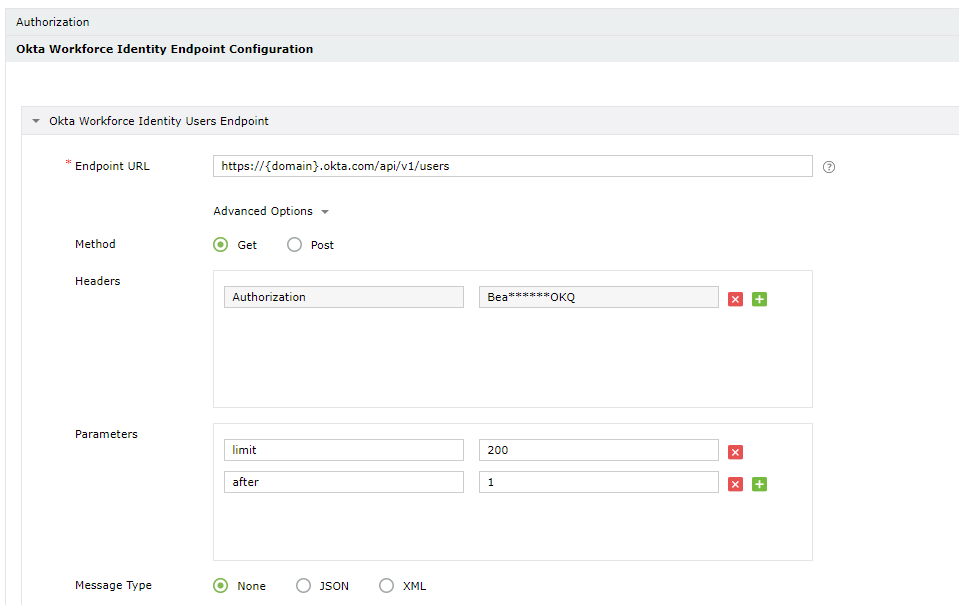
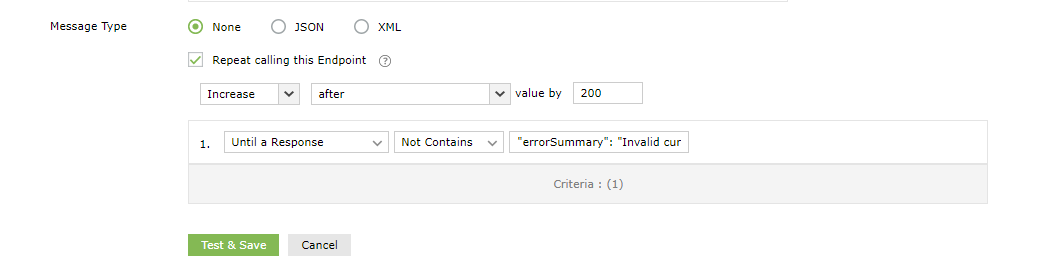
- In the endpoint configuration section, replace the {domain} in the Endpoint URL with the subdomain of your Okta instance and click Test & Save.
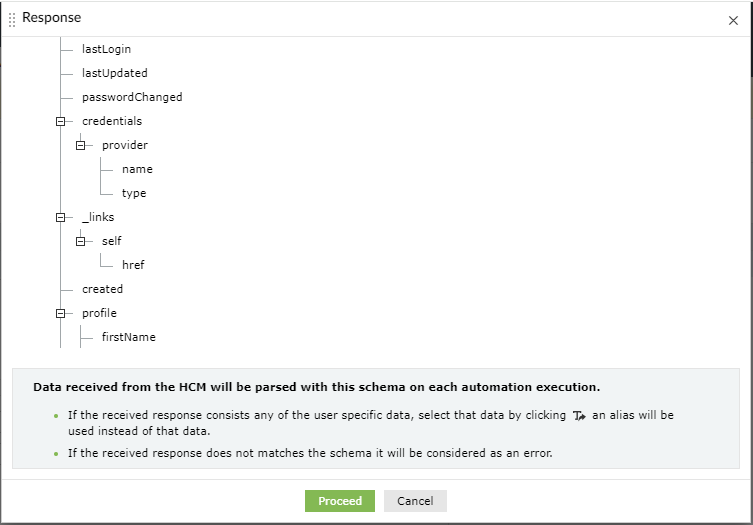
- The response schema will be displayed, you can verify and click Proceed.
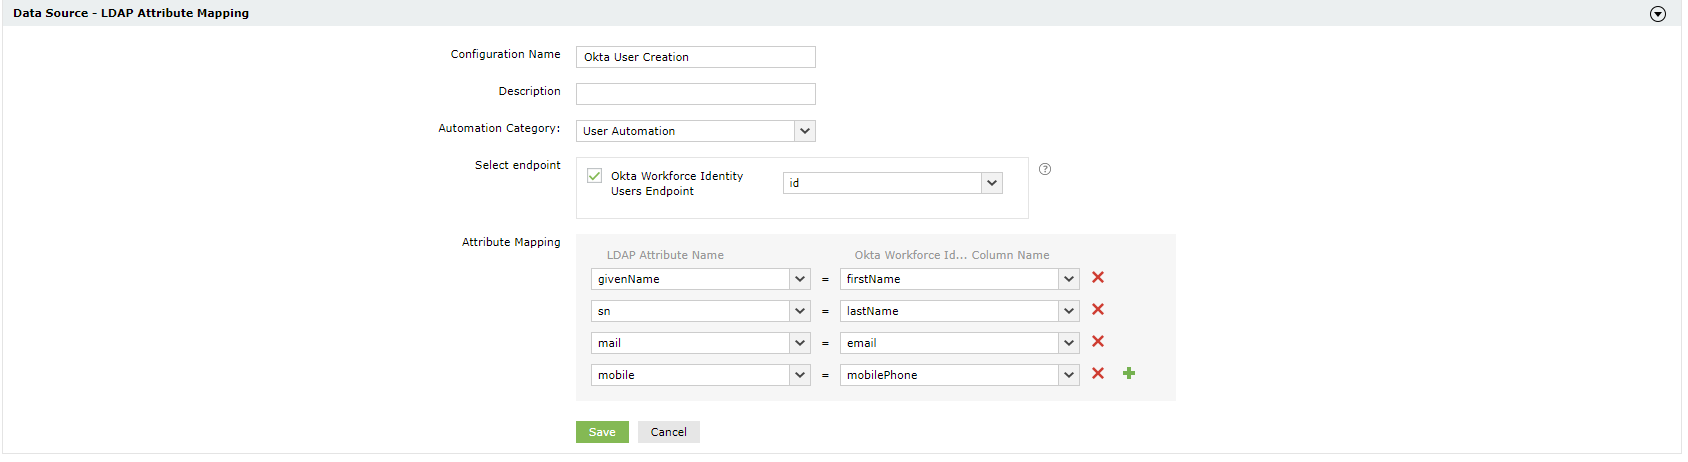
- Click Data Source - LDAP Attribute Mapping to map AD LDAP attributes with the respective attributes in Okta.
- Enter the Configuration Name and Description and select the Automation Category from the drop-down menu.
- In the Select Endpoint field, select the primary key column that has unique values for each user (e.g. employeeIdenifier) Note: When multiple endpoints are configured, this attribute must hold the same value in all the endpoints.
- In the Attribute Mapping field, select the attribute from the LDAP Attribute Name drop-down menu and map it with the respective column in Okta.
- Click Save.

While configuring an automation in ADManager Plus, select Okta as the Data Source and automate user management in a flash. Click here to learn more about automation configuration.
Steps to obtain Client ID and Client Secret in Okta
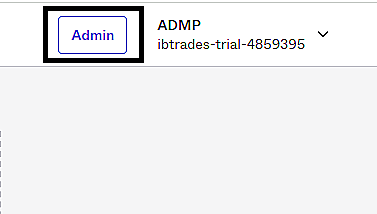
- Log into the Okta portal and click Admin button on the right corner of the window
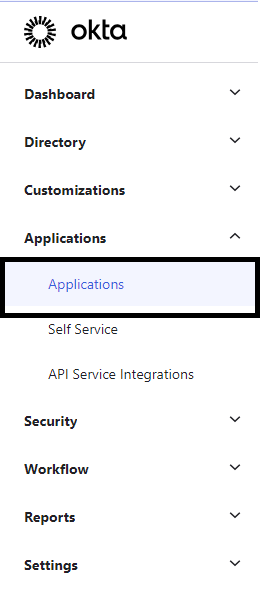
- Click Applications from the left panel.
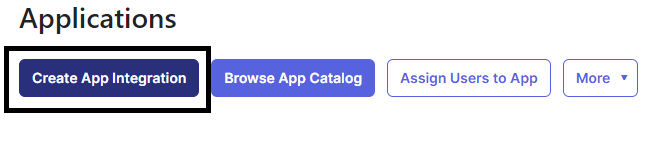
- Click Create App Integration button, select the OIDC - OpenID Connect option as the sign-in method and click Next.
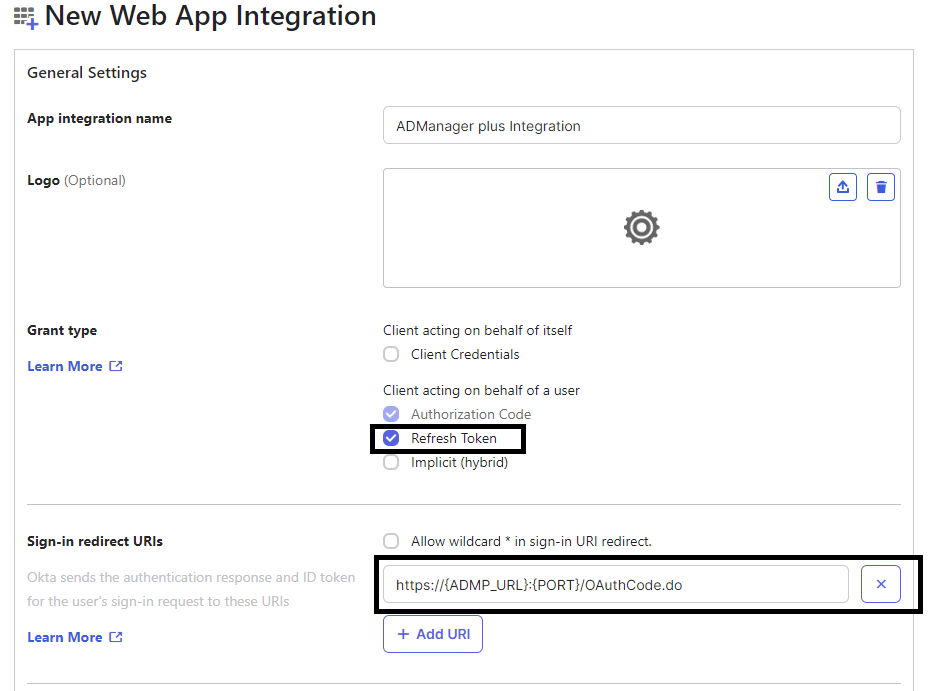
- Select the application type as Web Application, and click Next.
- Provide the App integration name, enable Refresh Token and then paste the Callback URL copied from the previous step in the Sign-in redirect URIs field.
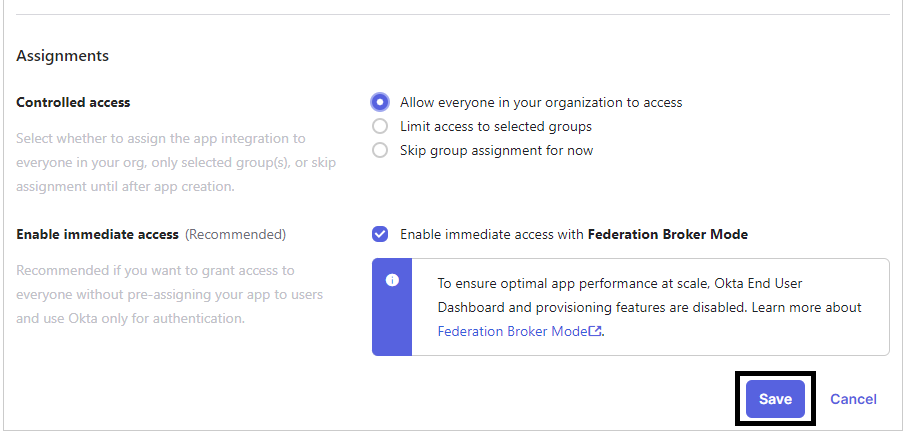
- Select any one of the Controlled access option and click Save.
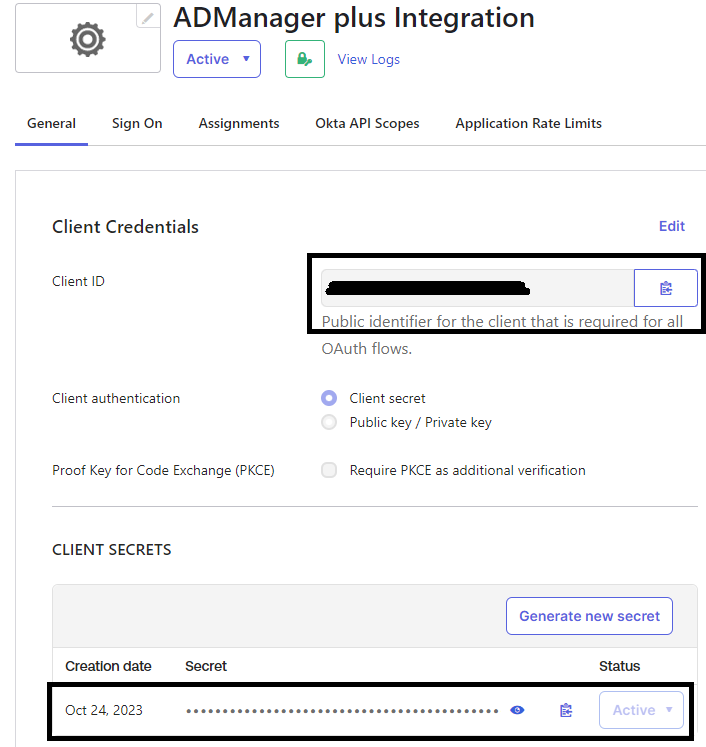
- The upcoming page will display the the ClientID and Client Secret values.


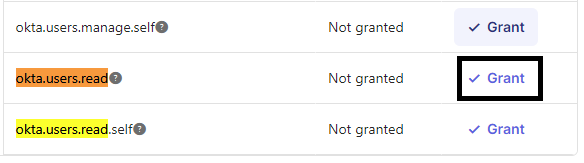
Go to Okta API Scopes tab search for okta.users.read scope and click Grant.
Actions supported:
Upon integration, administrators can configure automations to carry out desired tasks. These automations can be monitored and controlled by implementing multi-level business workflows, which ensure that they are reviewed and approved before execution. The following actions can be automated:
- Create user accounts
- Modify user attributes
- Modify user accounts by template
- Reset passwords
- Unlock user accounts
- Enable user accounts
- Disable user accounts
- Delete user accounts
- Run custom scripts
- Move users across groups
- Add users to groups
- Remove users from groups
- Create mailbox
- Disable or delete mailbox
- Move home folder
- Delete home folder
- Revoke Microsoft 365 licenses
- Manage users' photos
- Disable Lync accounts
- Configure auto reply settings
Need help integrating your application with ADManager Plus?
Get custom support from our solution experts to match your specific requirements.
- Eliminate any scope for error.
- Save time and resources.
- Expedite time-to-value.