Agent reinstall via SCCM
This document talks about how agent can be reinstalled via SCCM.
Steps:
- Create the exe of the agent to be reinstalled manually using the steps mentioned in the document
- Copy the .exe file
- Paste the exe in a share path accessible by all the computers on which the agent is to be installed.
- Download the script given below and update the shared path with your network share path.
- Now, open System Center Configuration Manager (SCCM) and navigate to Software Library > Overview > Application Management >Packages.
- This will launch Create Package and Program Wizardwindow, in which you will be asked to fill in the necessary information like Name, Description, Manufacturer, etc.
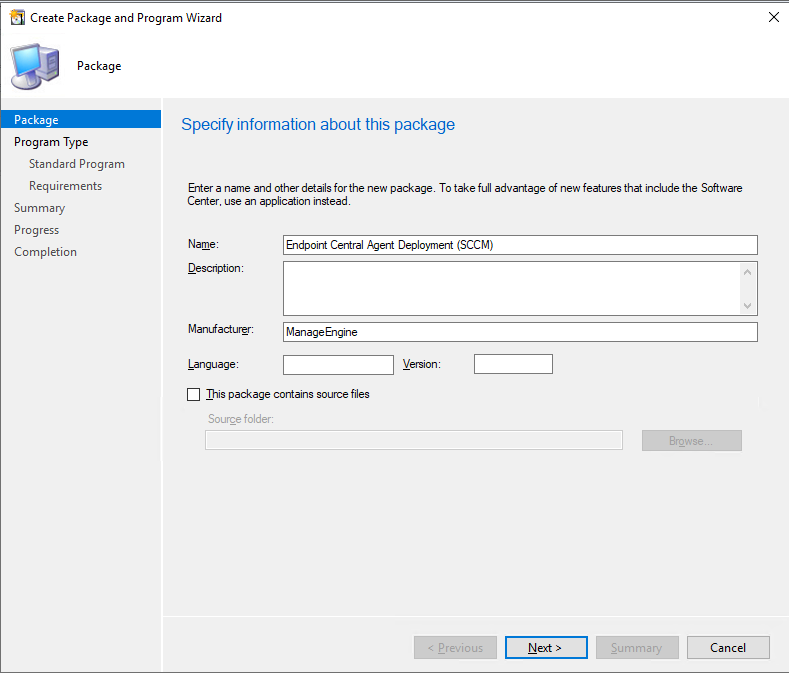
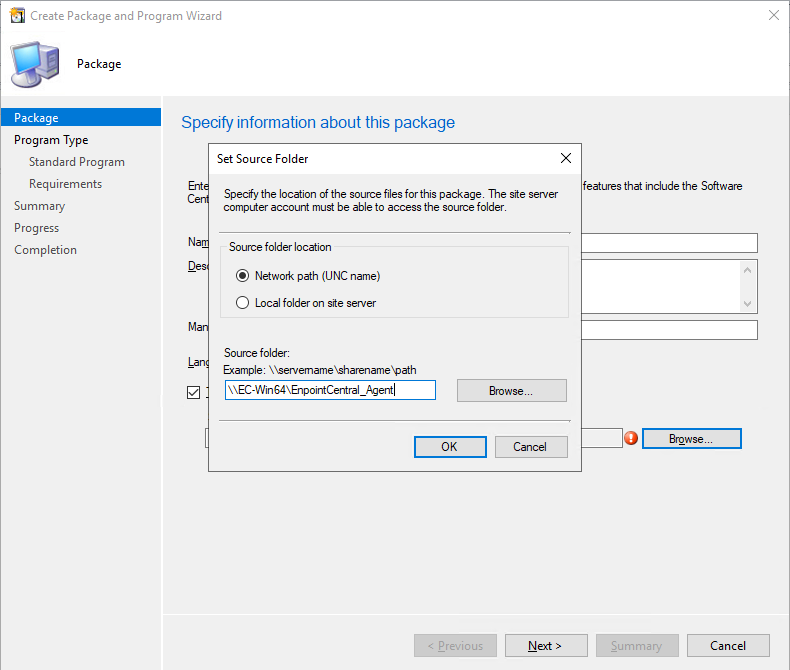
- Enable the checkbox This package contains source files. Select Network path and enter the path of the shared folder as shown below.
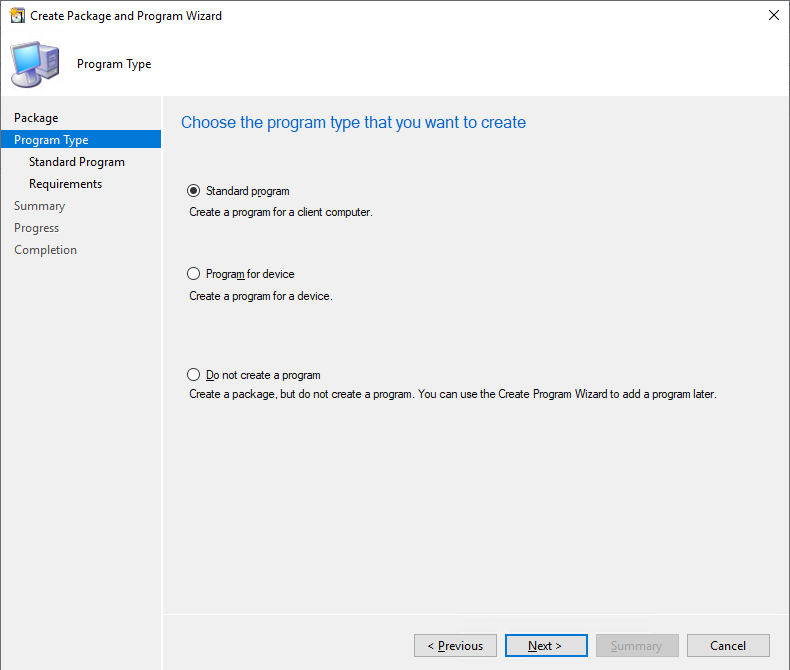
- Select Architecture as x86 (if available) and the program type as Standard and click Next.
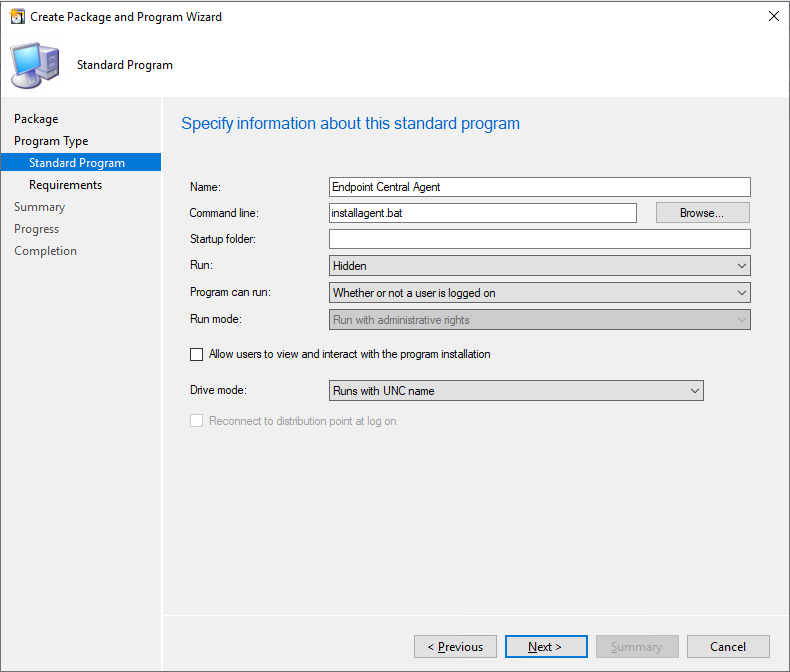
- Fill in the necessary information, as shown in the image below and click Next.
- Review the requirements and ensure they are like as shown in the image below and click Next.
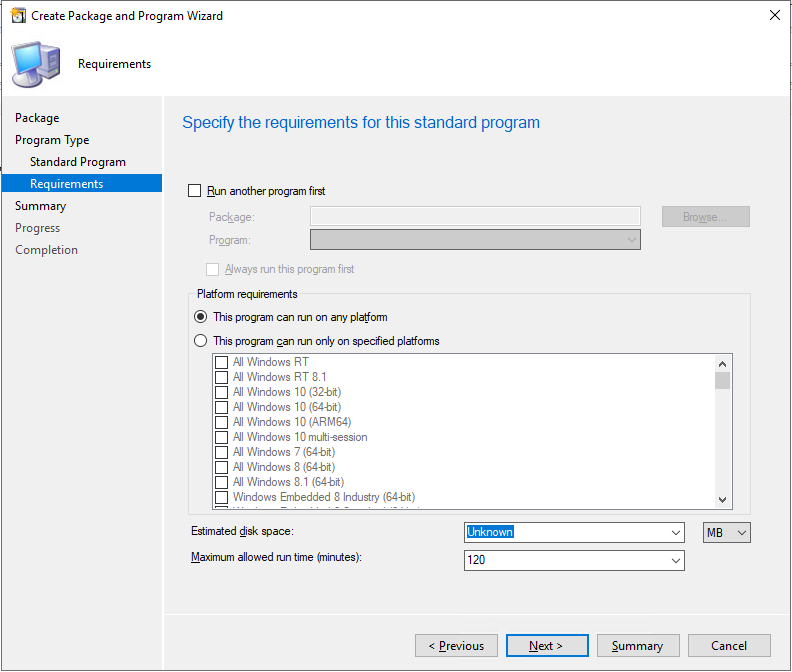
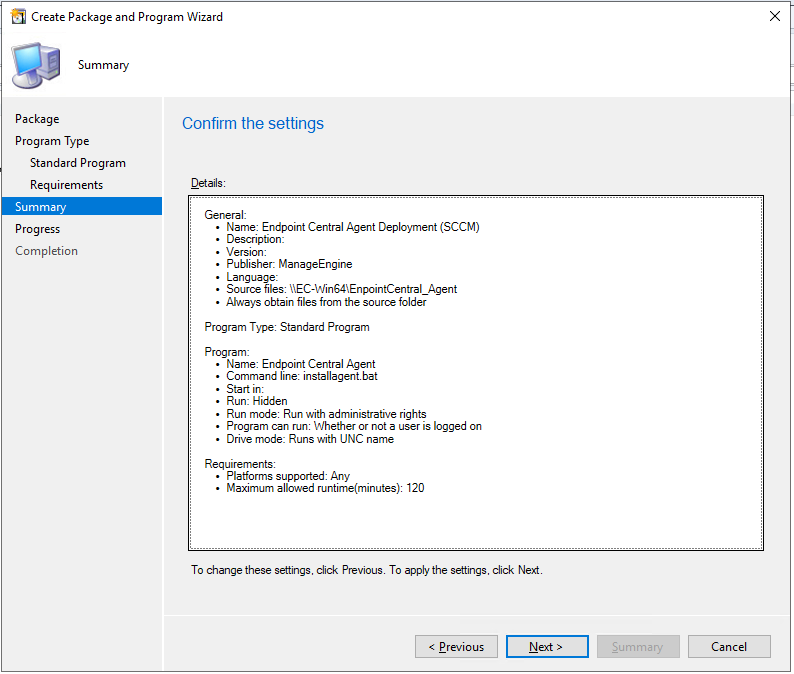
- After reviewing, confirm the settings to proceed to create the package
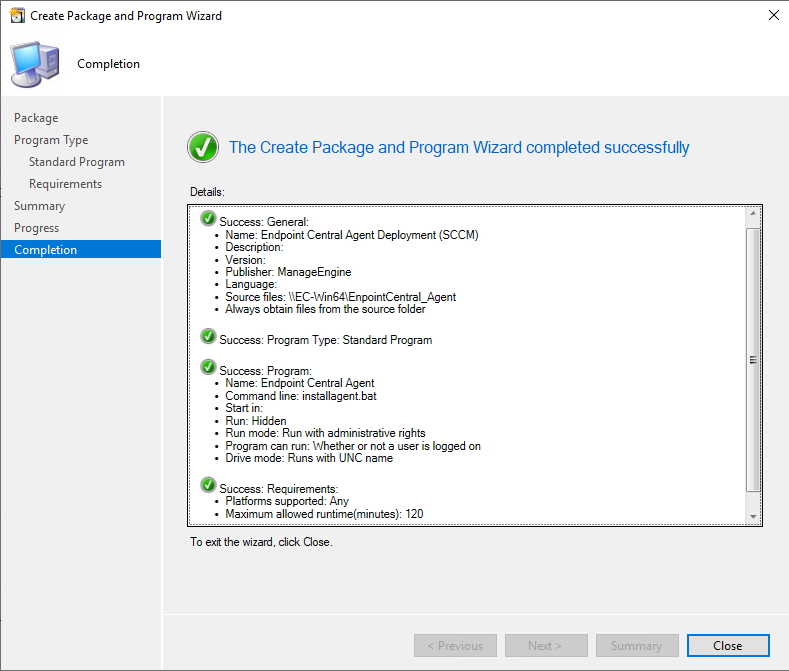
- The package has been created successfully.
- The package can now be deployed to the end user's computers.
- You have now successfully reinstalled agents in target endpoints using SCCM.