Building Your Extension
The extension builder in your application allows you to create an extension using various features and functionalities that are native to the application. The features and functionalities used to build extensions are called Components. Essentially, you combine these components to solve problems specific to your business or organization.
Follow the links below to learn more about the components and how to add and manage them in your extension.
Note: You can add up to 100 components to an extension.
Customization
Helpdesk
You can create custom helpdesk properties that can be used with your incident or service templates configured in the extensions. The supported helpdesk properties are category, status, level, mode, impact, urgency, priority, request type, task type, worklog type, and closure code.
Category
Categories allow you to classify and group your help desk requests. You can use this classification to identify requests, assign technicians, generate reports, etc. A category can have many sub categories which in turn can be classified into many items.
To create a category,
- Go to CUSTOMIZATION > Helpdesk > Category.
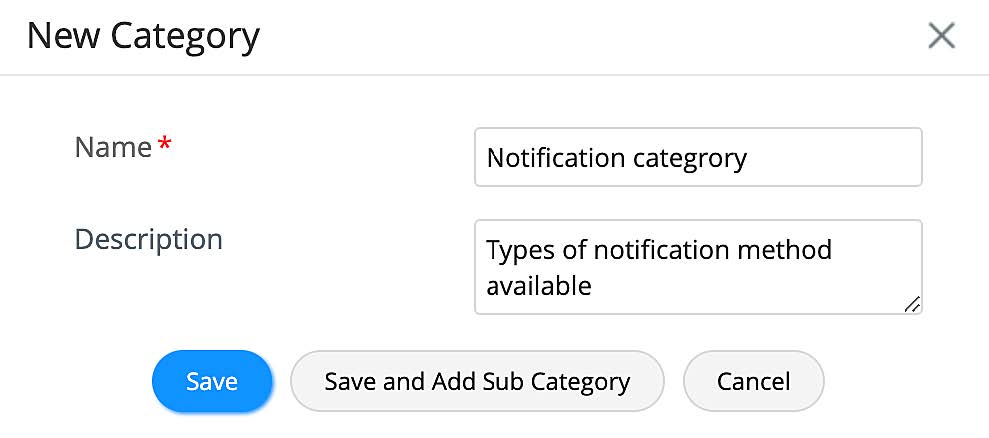
- Click New Category.
- Provide a name and description.
- Click Save or click Save and Add Sub Category.
- To add a Sub Category, provide a name and description for the sub category.
- Click Save or click Save and Add Item.
- To add an Item, provide a name and description for the item.
- Finally, click Save.
Manage Categories
You can manage categories configured in your extension from the list view. To access the list view, go to CUSTOMIZATION > Helpdesk > Category.
- To edit a category, click the gear icon beside the category, choose Edit Category, make necessary changes, and click Save.
- To delete a category, click the gear icon beside the category, choose Delete, and confirm your action.

Status
Status is a property of requests to show the progress as well as the state of the requests. A status can be of the type "In Progress" or "Completed", which indicates the request state.
To create a status,
- Go to CUSTOMIZATION > Helpdesk > Status.
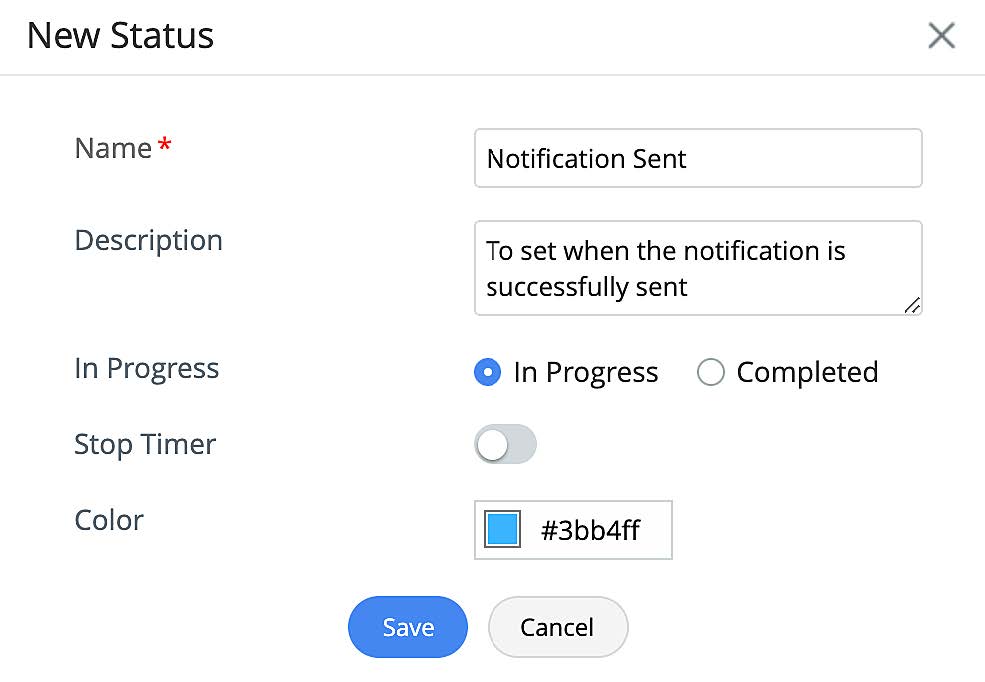
- Click New Status.
- Provide a name and description.
- Choose type: In Progress or Complete.
- Stop Timer: Use the toggle to choose whether to stop the timer or not when the request moves to this status.
- Color: Choose a color code for the status using the color gamut.
- Finally, click Save.
Manage Status
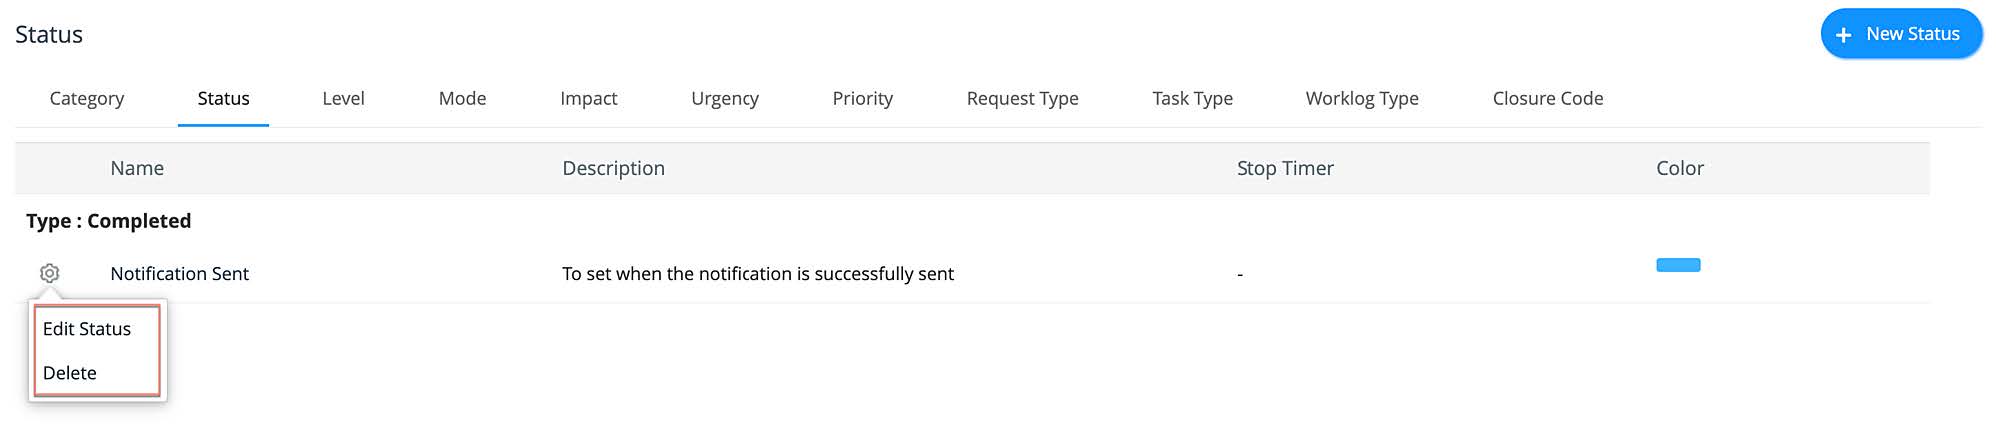
You can manage status configured in your extension from the status list view. To access the list view, go to CUSTOMIZATION > Helpdesk > Status.
- To edit a status, click the gear icon beside the status, choose Edit Status, make necessary changes, and click Save.
- To delete a status, click the gear icon beside the status, choose Delete, and confirm your action.
Level
Levels are used to classify requests based on their complexity. This classification can be used to assign requests to technicians with relevant expertise or competence.
To create a level,
- Go to CUSTOMIZATION > Helpdesk > Level.
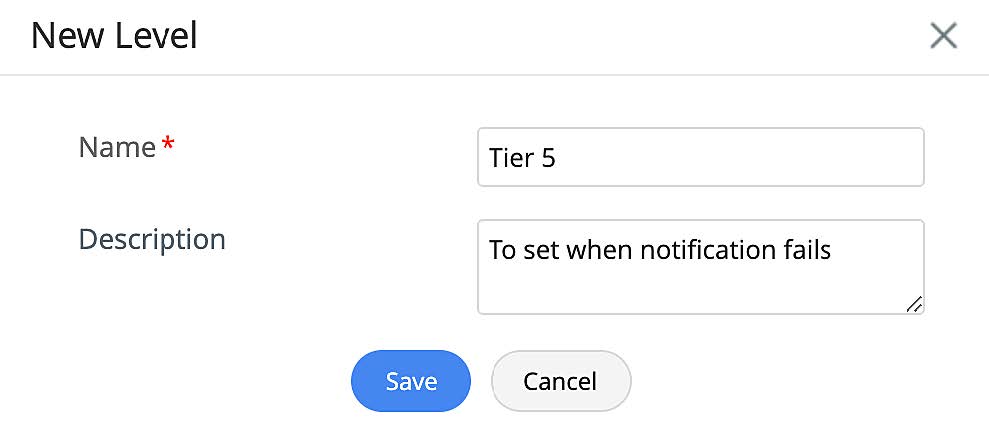
- Click New Level.
- Provide a name and description.
- Finally, click Save.
Manage Levels
You can manage the levels configured in your extension from the list view. To access the list view, go to CUSTOMIZATION > Helpdesk > Level.
- To edit a level, click the gear icon beside the level, choose Edit Level, make the necessary changes, and click Save.
- To delete a level, click the gear icon beside the level, choose Delete, and confirm your action.

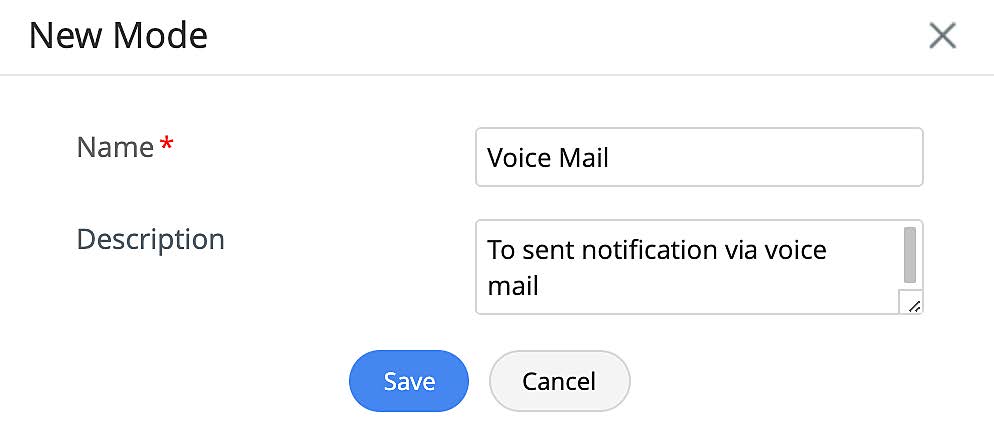
Mode
Modes are used to classify requests based on the channel used to raise requests.
To create a mode,
- Go to CUSTOMIZATION > Helpdesk > Mode.
- Click New Mode.
- Provide a name and description.
- Finally, click Save.
Manage Mode
You can manage the modes configured in your extension from the list view. To access the list view, go to CUSTOMIZATION > Helpdesk > Mode.
- To edit a mode, click the gear icon beside the mode, choose Edit Mode, make necessary changes, and click Save.
- To delete a mode, click the gear icon beside the mode, choose Delete, and confirm your action.

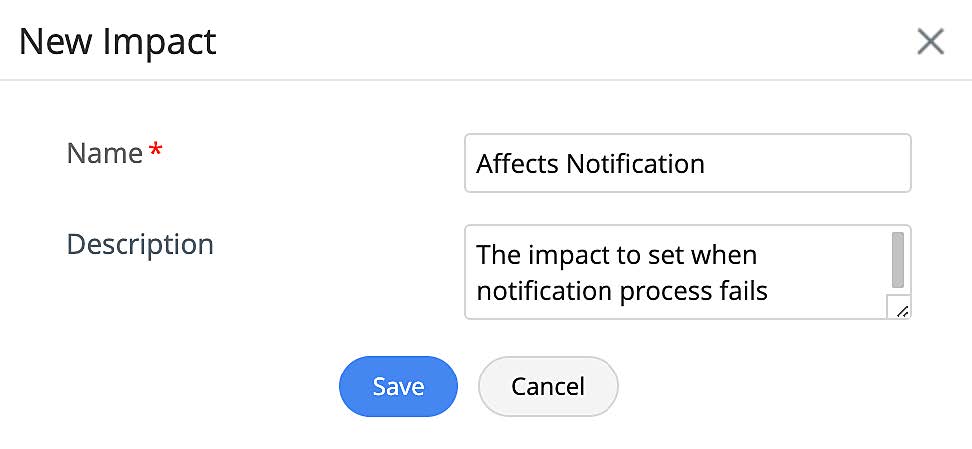
Impact
Impact is a classification based on the business criticality of an incident or problem . It is often measured by the number of people or systems affected due to an incident. If the priority matrix is configured, urgency and impact can affect the priority of the requests
To create an impact type
- Go to CUSTOMIZATION > Helpdesk > Impact.
- Click New Impact.
- Provide a name and description.
- Finally, click Save.
Manage Impact Types
You can manage the impact types configured in your extension from the list view. To access the list view, go to CUSTOMIZATION > Helpdesk > Impact.
- To edit an impact type, click the gear icon beside the type, choose Edit Impact, make necessary changes, and click Save.
- To delete an impact type, click the gear icon beside the type, choose Delete, and confirm your action.

Urgency
Urgency is a classification based on how quickly a resolution would be needed for the raised requests. If the priority matrix is configured, urgency and impact can affect the priority of the requests.
To create an urgency type,
- Go to CUSTOMIZATION > Helpdesk > Urgency.
- Click New Urgency.
- Provide a name and description.
- Finally, click Save.
Manage Urgency Types
You can manage the urgency types configured in your extension from the list view. To access the list view, go to CUSTOMIZATION > Helpdesk > Urgency.
- To edit an urgency type, click the gear icon beside the type, choose Edit Urgency, make necessary changes, and click Save.
- To delete an urgency type, click the gear icon beside the type, choose Delete, and confirm your action.

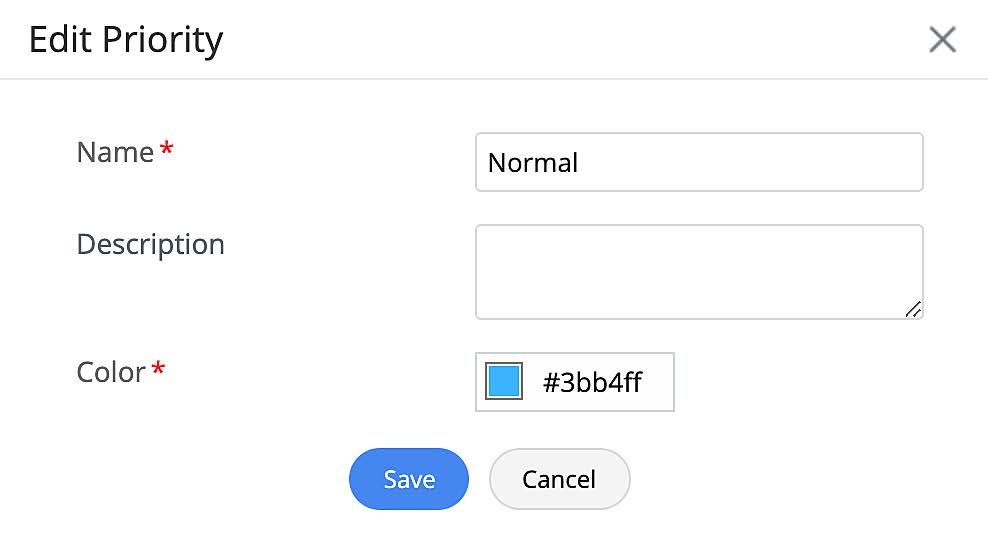
Priority
Priority is a classification based on the level of importance of the requests.
To create a priority level,
- Go to CUSTOMIZATION > Helpdesk > Priority.
- Click New Priority.
- Provide a name and description.
- Choose a color code for the priority using the color gamut.
- Finally, click Save.
Manage Priority Levels
You can manage the priority levels configured in your extension from the list view. To access the list view, go to CUSTOMIZATION > Helpdesk > Priority.
- To edit a priority level, click the gear icon beside the level, choose Edit Priority, make necessary changes, and click Save.
- To delete a priority level, click the gear icon beside the level, choose Delete, and confirm your action.

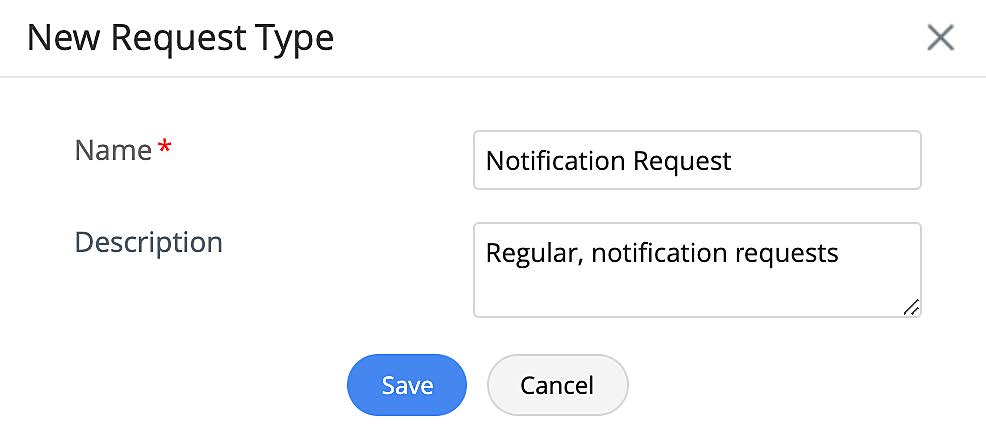
Request Type
You can classify requests into different types like incident, request for service, request for information, request for an asset, or any other custom classification based on your business needs.
To create a request type,
- Go to CUSTOMIZATION > Helpdesk > Request Type.
- Click New Request Type.
- Provide a name and description.
- Finally, click Save.
Manage Request Types
You can manage the request types configured in your extension from the list view. To access the list view, go to CUSTOMIZATION > Helpdesk > Request Type.
- To edit a request type, click the gear icon beside the type, choose Edit Request Type, make necessary changes, and click Save.
- To delete a request type, click the gear icon beside the type, choose Delete, and confirm your action.

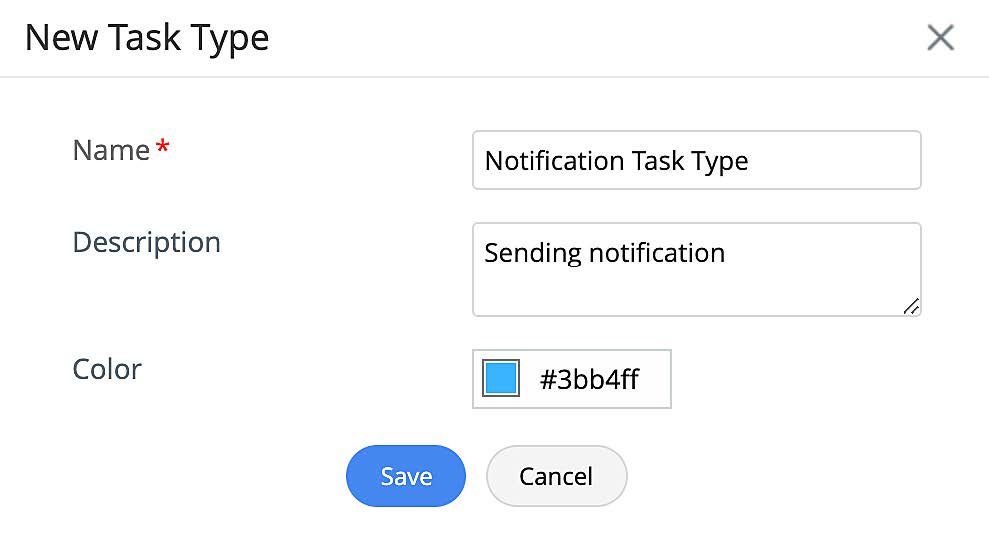
Task Type
Task types are used to classify and group tasks of similar nature.
To create a task type,
- Go to CUSTOMIZATION > Helpdesk > Task Type.
- Click New Task Type.
- Provide a name and description.
- Choose a color code for the task type using the color gamut.
- Finally, click Save.
Manage Task Types
You can manage the task types configured in your extension from the list view. To access the list view, go to CUSTOMIZATION > Helpdesk > Task Types.
- To edit a task type, click the gear icon beside the type, choose Edit Task Type, make necessary changes, and click Save.
- To delete a task type, click the gear icon beside the type, choose Delete, and confirm your action.

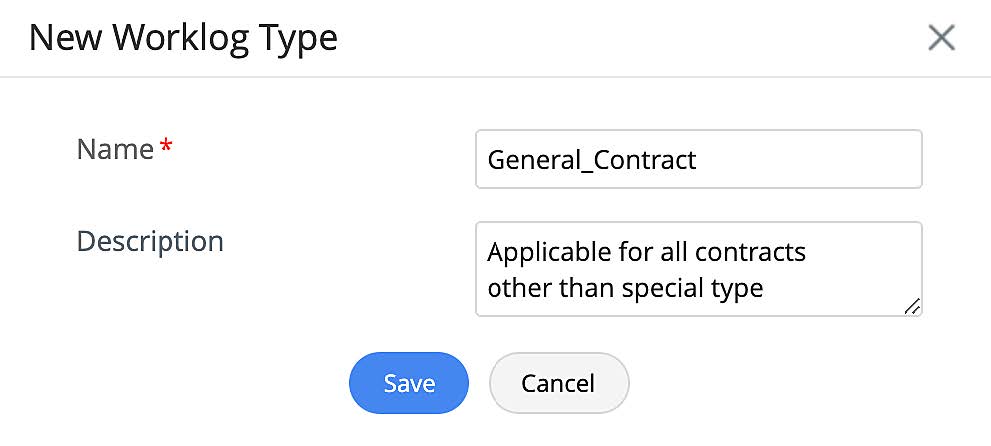
Worklog Type
To create a worklog type,
- Go to CUSTOMIZATION > Helpdesk > Worklog Type.
- Click New Worklog Type.
- Provide a name and description.
- Finally, click Save.
Manage Worklog Types
You can manage the worklog types configured in your extension from the list view. To access the list view, go to CUSTOMIZATION > Helpdesk > Worklog Type.
- To edit a worklog type, click the gear icon beside the type, choose Edit Worklog Type, make necessary changes, and click Save.
- To delete a worklog type, click the gear icon beside the type, choose Delete, and confirm your action.

Closure Code
To create a closure code,
- Go to CUSTOMIZATION > Helpdesk > Closure Code.
- Click New Closure Code.
- Provide a name and description.
- Finally, click Save.

Manage Closure Codes
You can manage the closure codes configured in your extension from the list view. To access the list view, go to CUSTOMIZATION > Helpdesk > Closure Codes.
- To edit a closure code, click the gear icon beside the code, choose Edit Closure Code, make necessary changes, and click Save.
- To delete a closure code, click the gear icon beside the code, choose Delete, and confirm your action.

Change Management
You can configure change request properties that can be used in the change templates or workflows configured in the extension. The supported change request properties are change type, change risk, reason for change, stage and status, and change role.
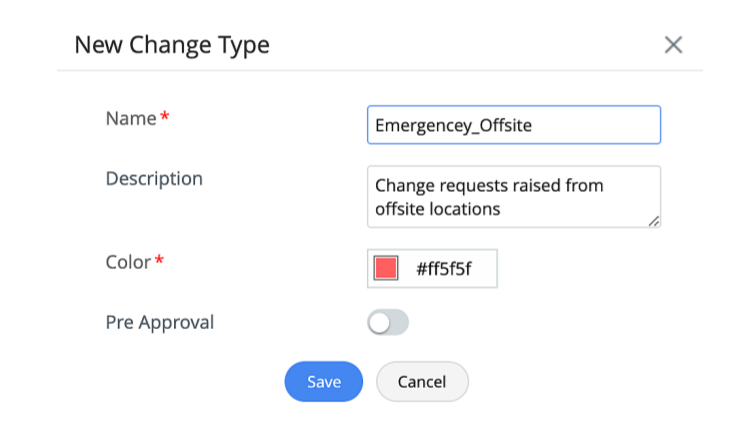
Change Type
To create a change type,
- Go to CUSTOMIZATION > Change Management > Change Type.
- Click New Change Type.
- Provide a name and description.
- Color: Choose a color code for the change type from the color gamut.
- Pre Approval: Choose whether the changes of this type should be pre-approved or not using the toggle.
- Finally, click Save.
Manage Change Types
You can manage the change types configured in your extension from the list view. To access the list view, go to CUSTOMIZATION > Change Management > Change Type.
- To edit a change type, click the gear icon beside the type, choose Edit, make necessary changes, and click Save.
- To delete a change type, click the gear icon beside the type, choose Delete, and confirm your action.

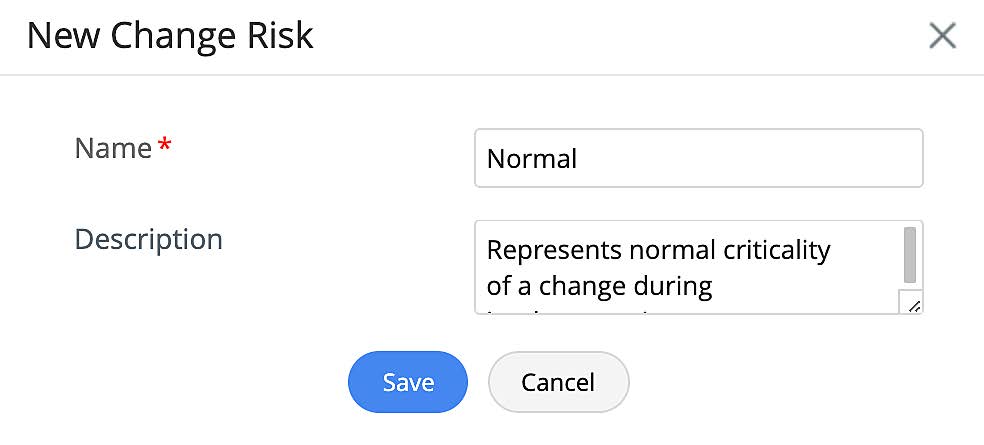
Change Risk
To create a change risk,
- Go to Go to CUSTOMIZATION > Change Management > Change Risk..
- Click New Change Risk.
- Provide a name and description.
- Finally, click Save.
Manage Change Risks
You can manage the change risks configured in your extension from the list view. To access the list view, go to CUSTOMIZATION > Change Management > Change Risk.
- To edit a change risk, click the gear icon beside the risk, choose Edit, make necessary changes, and click Save.
- To delete a change risk, click the gear icon beside the risk, choose Delete, and confirm your action.

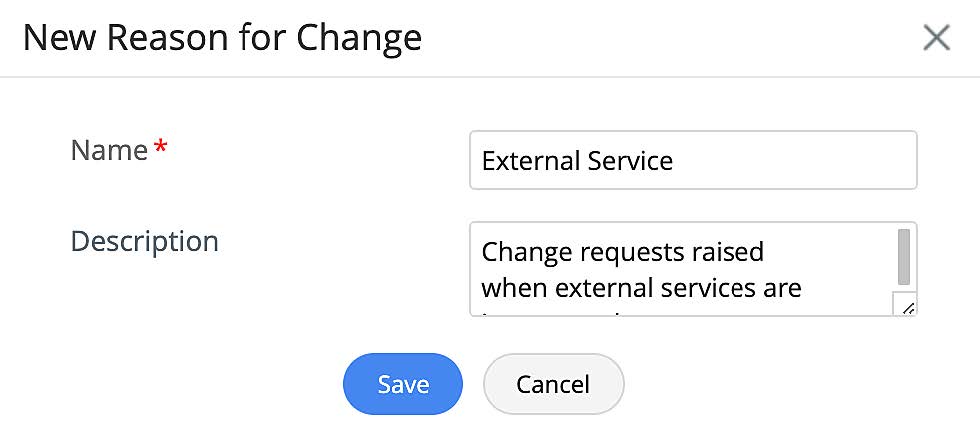
Reason for Change
To create a reason for change,
- Go to CUSTOMIZATION > Change Management > Reason for Change.
- Click New Reason for Change.
- Provide a name and description.
- Finally, click Save.
Manage Reason for Reason for Change
You can manage the reason for changes configured in your extension from the list view. To access the list view, go to CUSTOMIZATION > Change Management > Reason for Change.
- To edit a reason for change type, click the gear icon beside the type, choose Edit, make necessary changes, and click Save.
- To delete a reason for change type, click the gear icon beside the type, choose Delete, and confirm your action

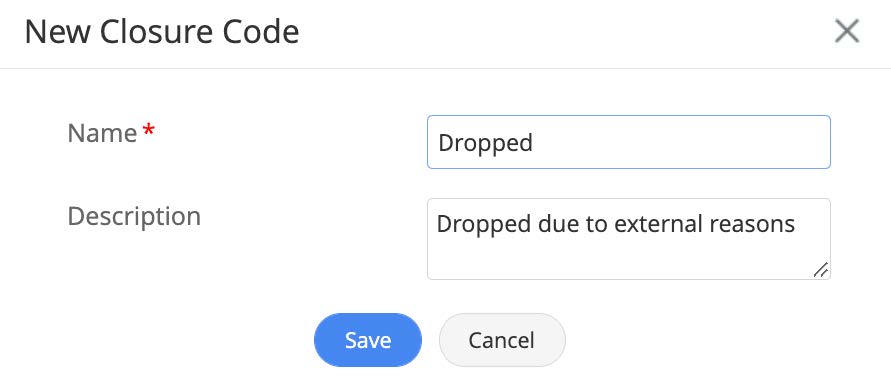
Closure Code
To create a closure code for change requests,
- Go to Customization > Change Management > Closure Code.
- Click New Closure Code.
- Provide a name and description.
- Finally, click Save.
Manage Closure Codes
You can manage the change closure codes configured for your extension from the list view. To access the list view, go to Customization > Change Management > Closure Codes.
- To edit a closure code, click the gear icon beside the code, choose Edit Closure Code, make necessary changes, and click Save.
- To delete a closure code, click the gear icon beside the code, choose Delete, and confirm your action.

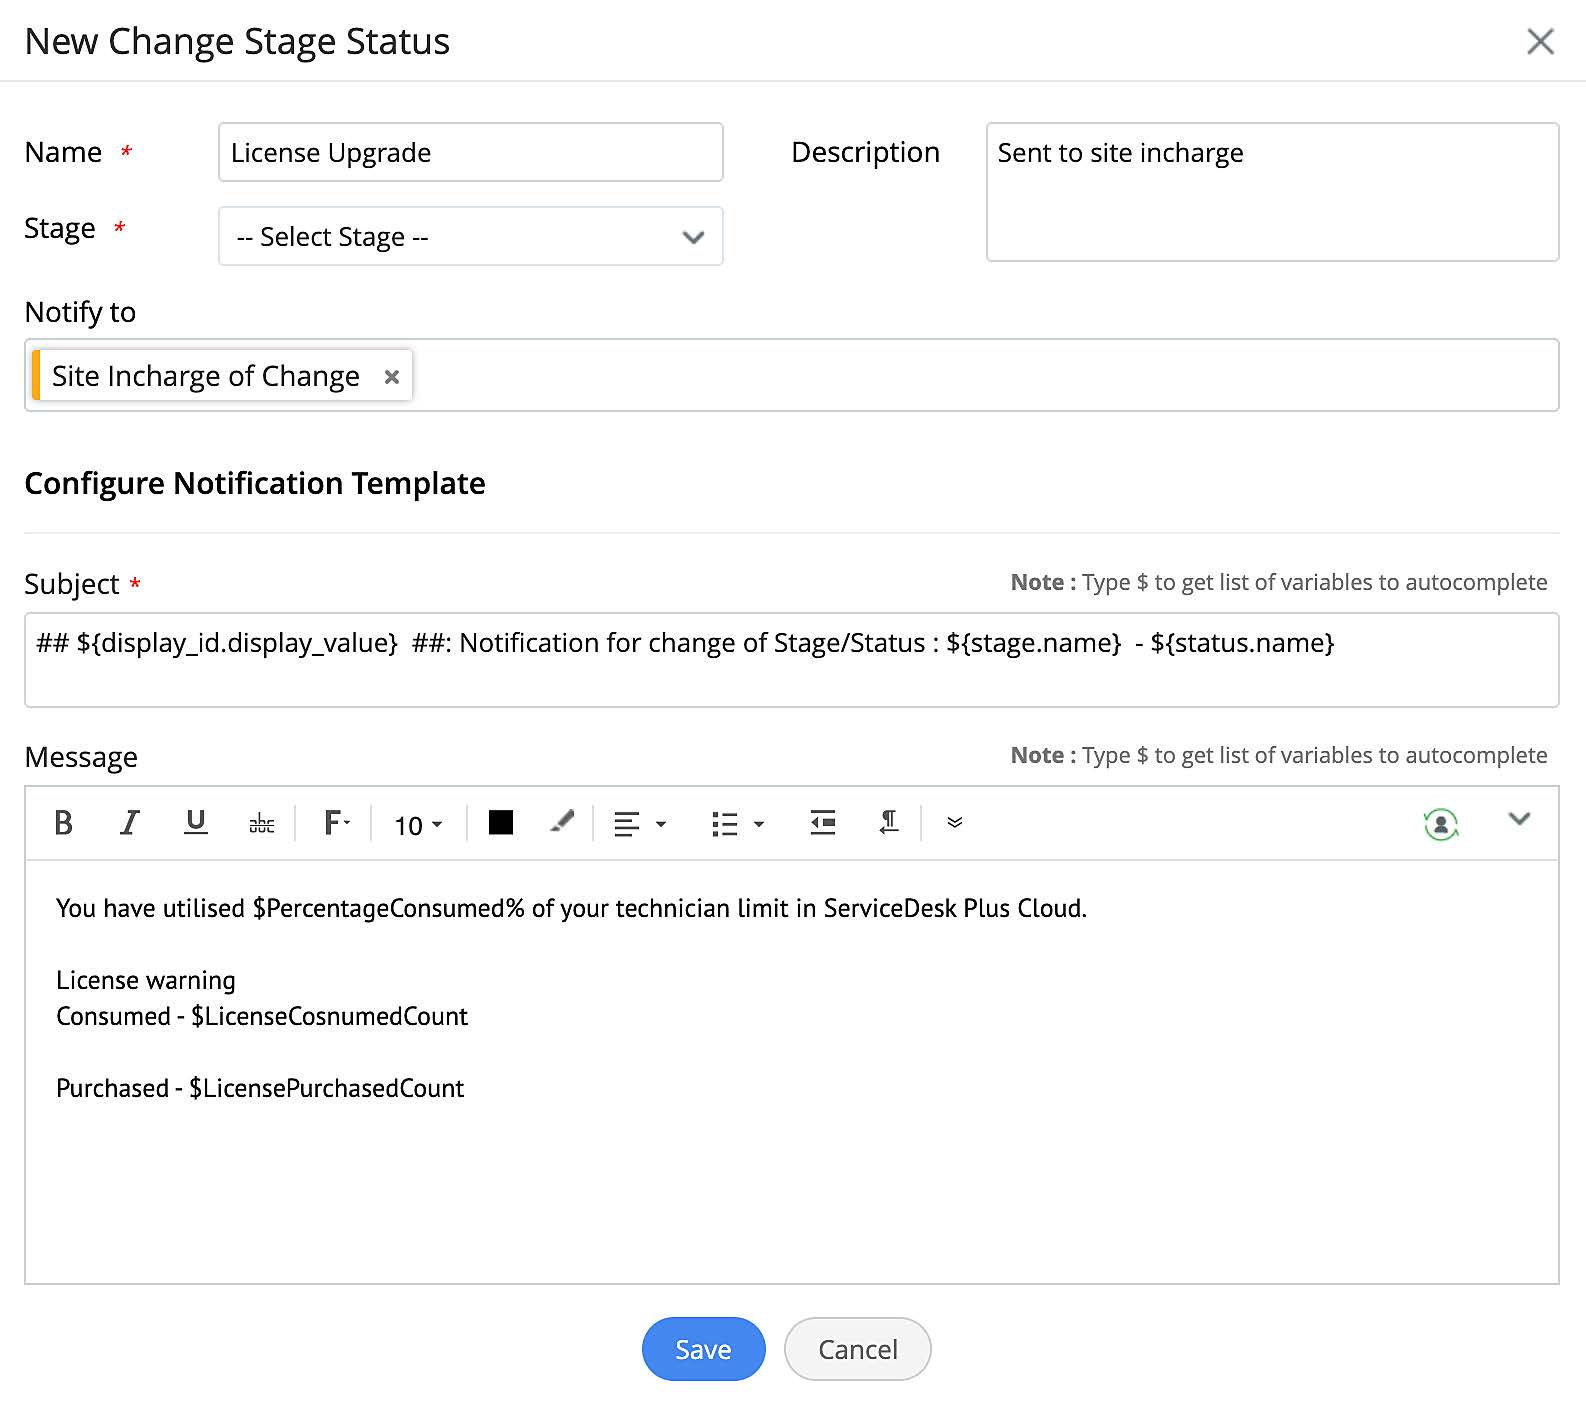
Stage and Status
To create change stage status,
- Go to CUSTOMIZATION > Change Management > Stage and Status.
- Click New Change Stage Status.
- Provide the following:
- Name: Provide a relevant name.
- Description: Add an appropriate description.
- Stage: Choose the stage for which this status is applicable.
- Notify to: Select the recipients that you want to be notified when a change progresses to this status.
- Provide relevant subject and message for the notification. Use "$" to add variables for dynamic content.
- Finally, click Save.
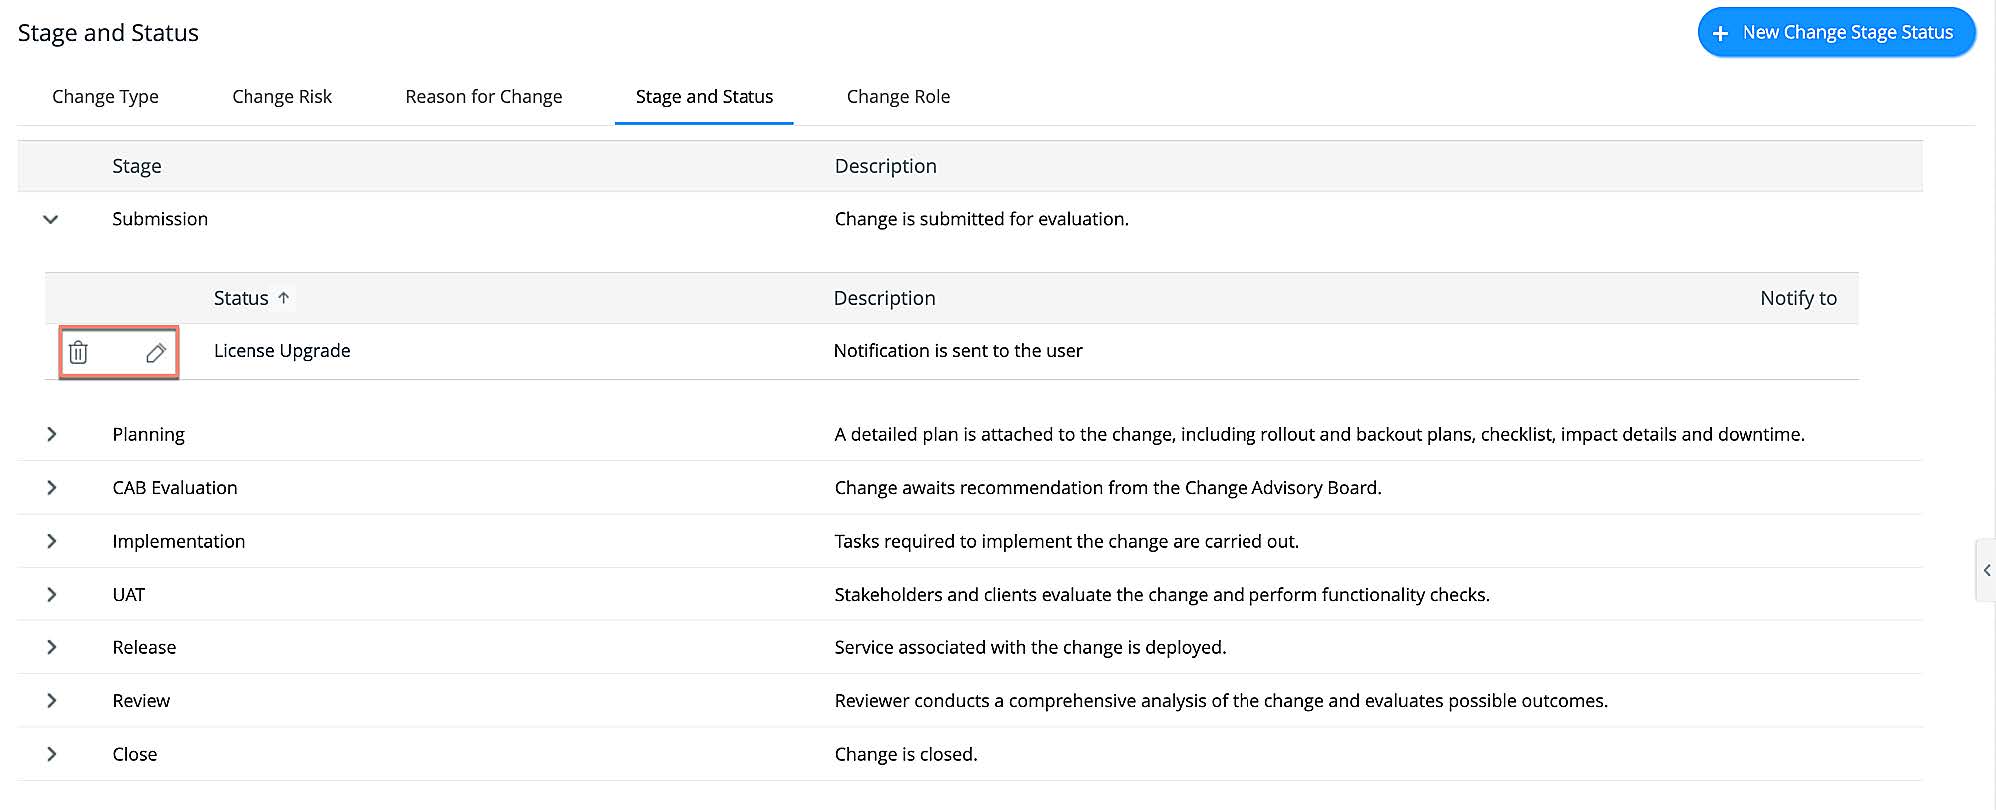
Manage Stage and Status
You can manage the change stage and status configured in your extension from the list view. To access the list view, go to CUSTOMIZATION > Change Management > Stage and Status.
- To edit a stage status, expand the corresponding stage, click Edit beside your preferred status, make necessary changes, and click Save.
- To delete a stage status, expand the corresponding stage and click Delete beside your preferred status, and confirm your action.
Change Role.
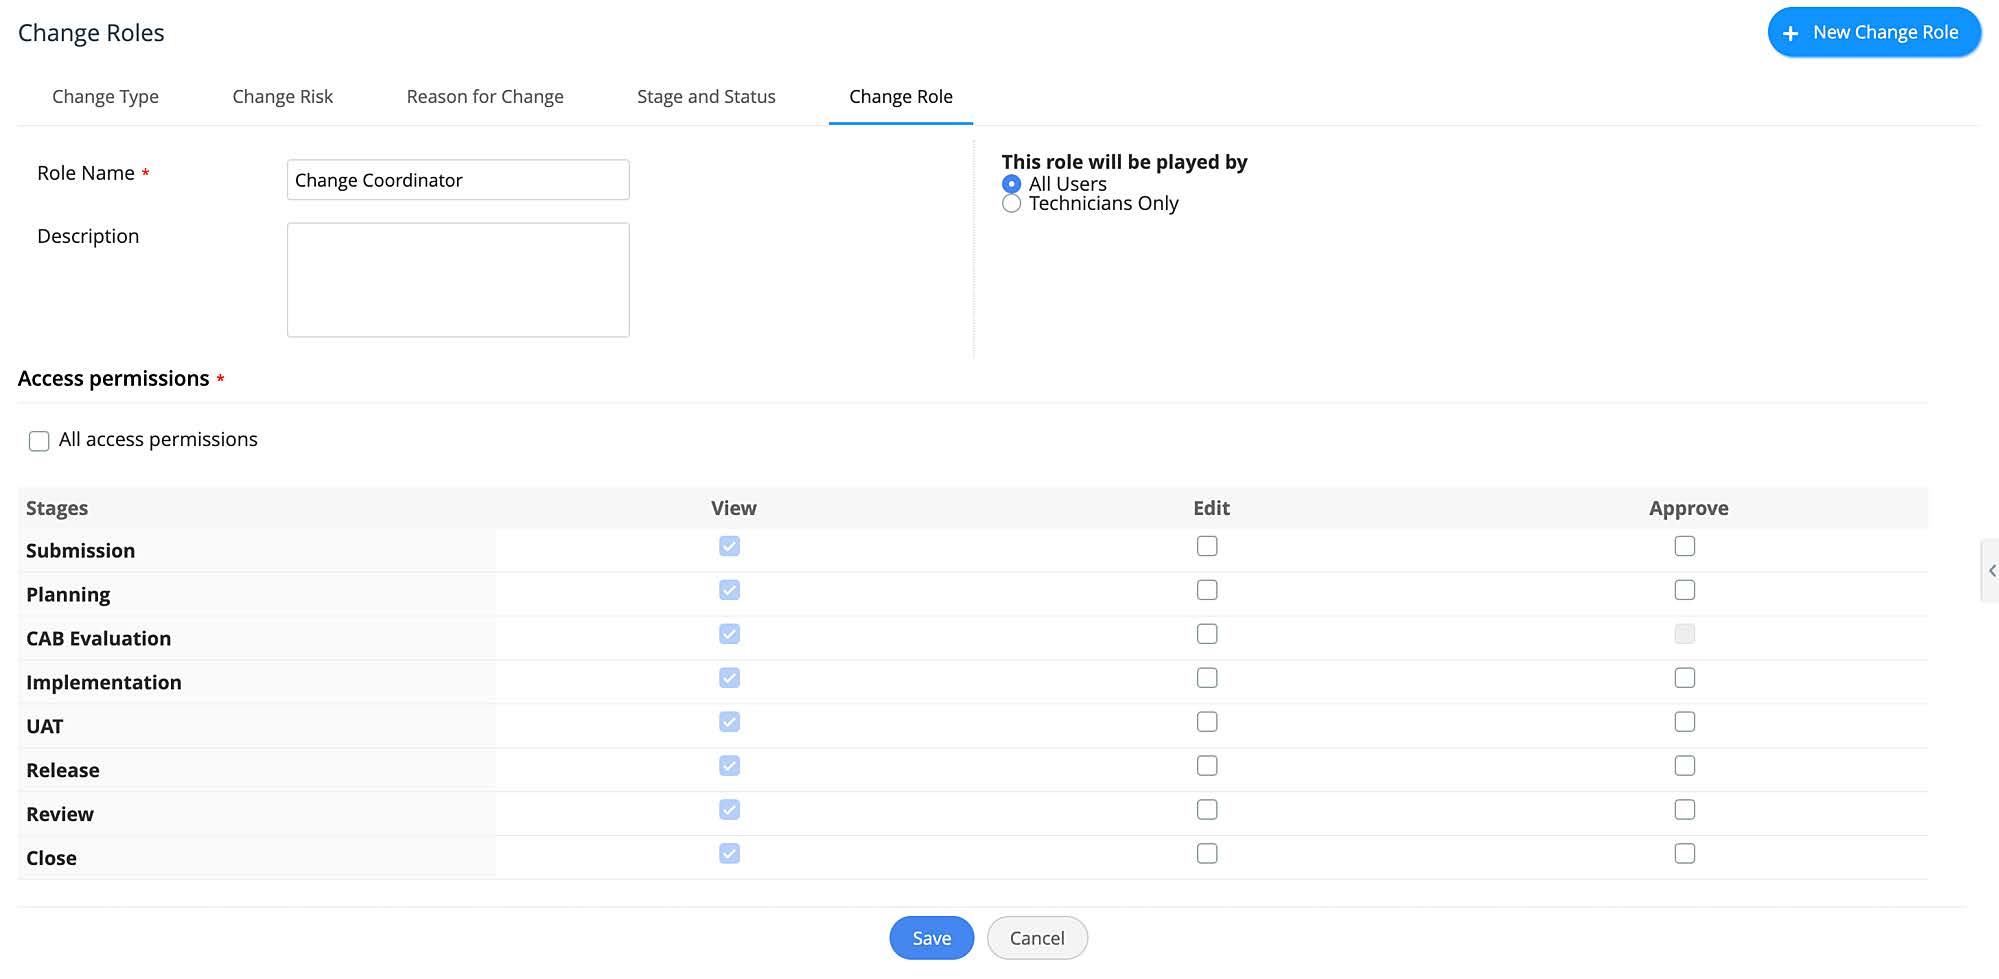
To create a change role,
- Go to CUSTOMIZATION > Change Management > Change Role.
- Click New Change Role.
- Provide a name and description.
- Select applicability: All Users or Technicians Only.
- Configure required access permissions.
- Finally, click Save.
Manage Change Roles
You can manage the change roles configured in your extension from the list view. To access the list view, go to CUSTOMIZATION > Change Management > Change Role.
- To edit a change role, click the gear icon beside the role, choose Edit, make necessary changes, and click Save.
- To delete a change role, click the gear icon beside the role, choose Delete, and confirm your action.

Additional Fields
Additional fields are custom fields that are used to collect more information from the users via forms across different modules. You can configure your extension to create additional fields for requests and change forms in the instance in which the extension is installed.
To create an additional field,
- Go to Customization > Additional Fields.
- Select your preferred option from the drop-down: Request Additional Fields or Change Additional Fields.
- Click New Field.
- Provide necessary information such as field name, field type, description, default value, etc.
- Finally, click Save.

Depending on the field type, you may need additional configuration. To learn more, click here.
Manage Additional Fields
You can manage your additional fields from the list view. To access the list view, go to Customization > Additional Fields, and select an option (Request Additional Fields or Change Additional Fields) from the drop-down to view additional for your preferred module.
- To edit an additional field, go to your preferred tab, click the gear icon beside your preferred field, choose Edit, make changes as required, and click Save.
- To delete an additional field, go to your preferred tab, click the gear icon beside your preferred extension, choose Delete, and confirm your action.

Template and Forms
Service Category
The service category is a comprehensive list of business services provided by various departments to the end-users. Each service category has a classified group of service items (templates) that can be used to create service requests.
You can configure extensions to add service categories and service templates to the instance in which the extension is installed.
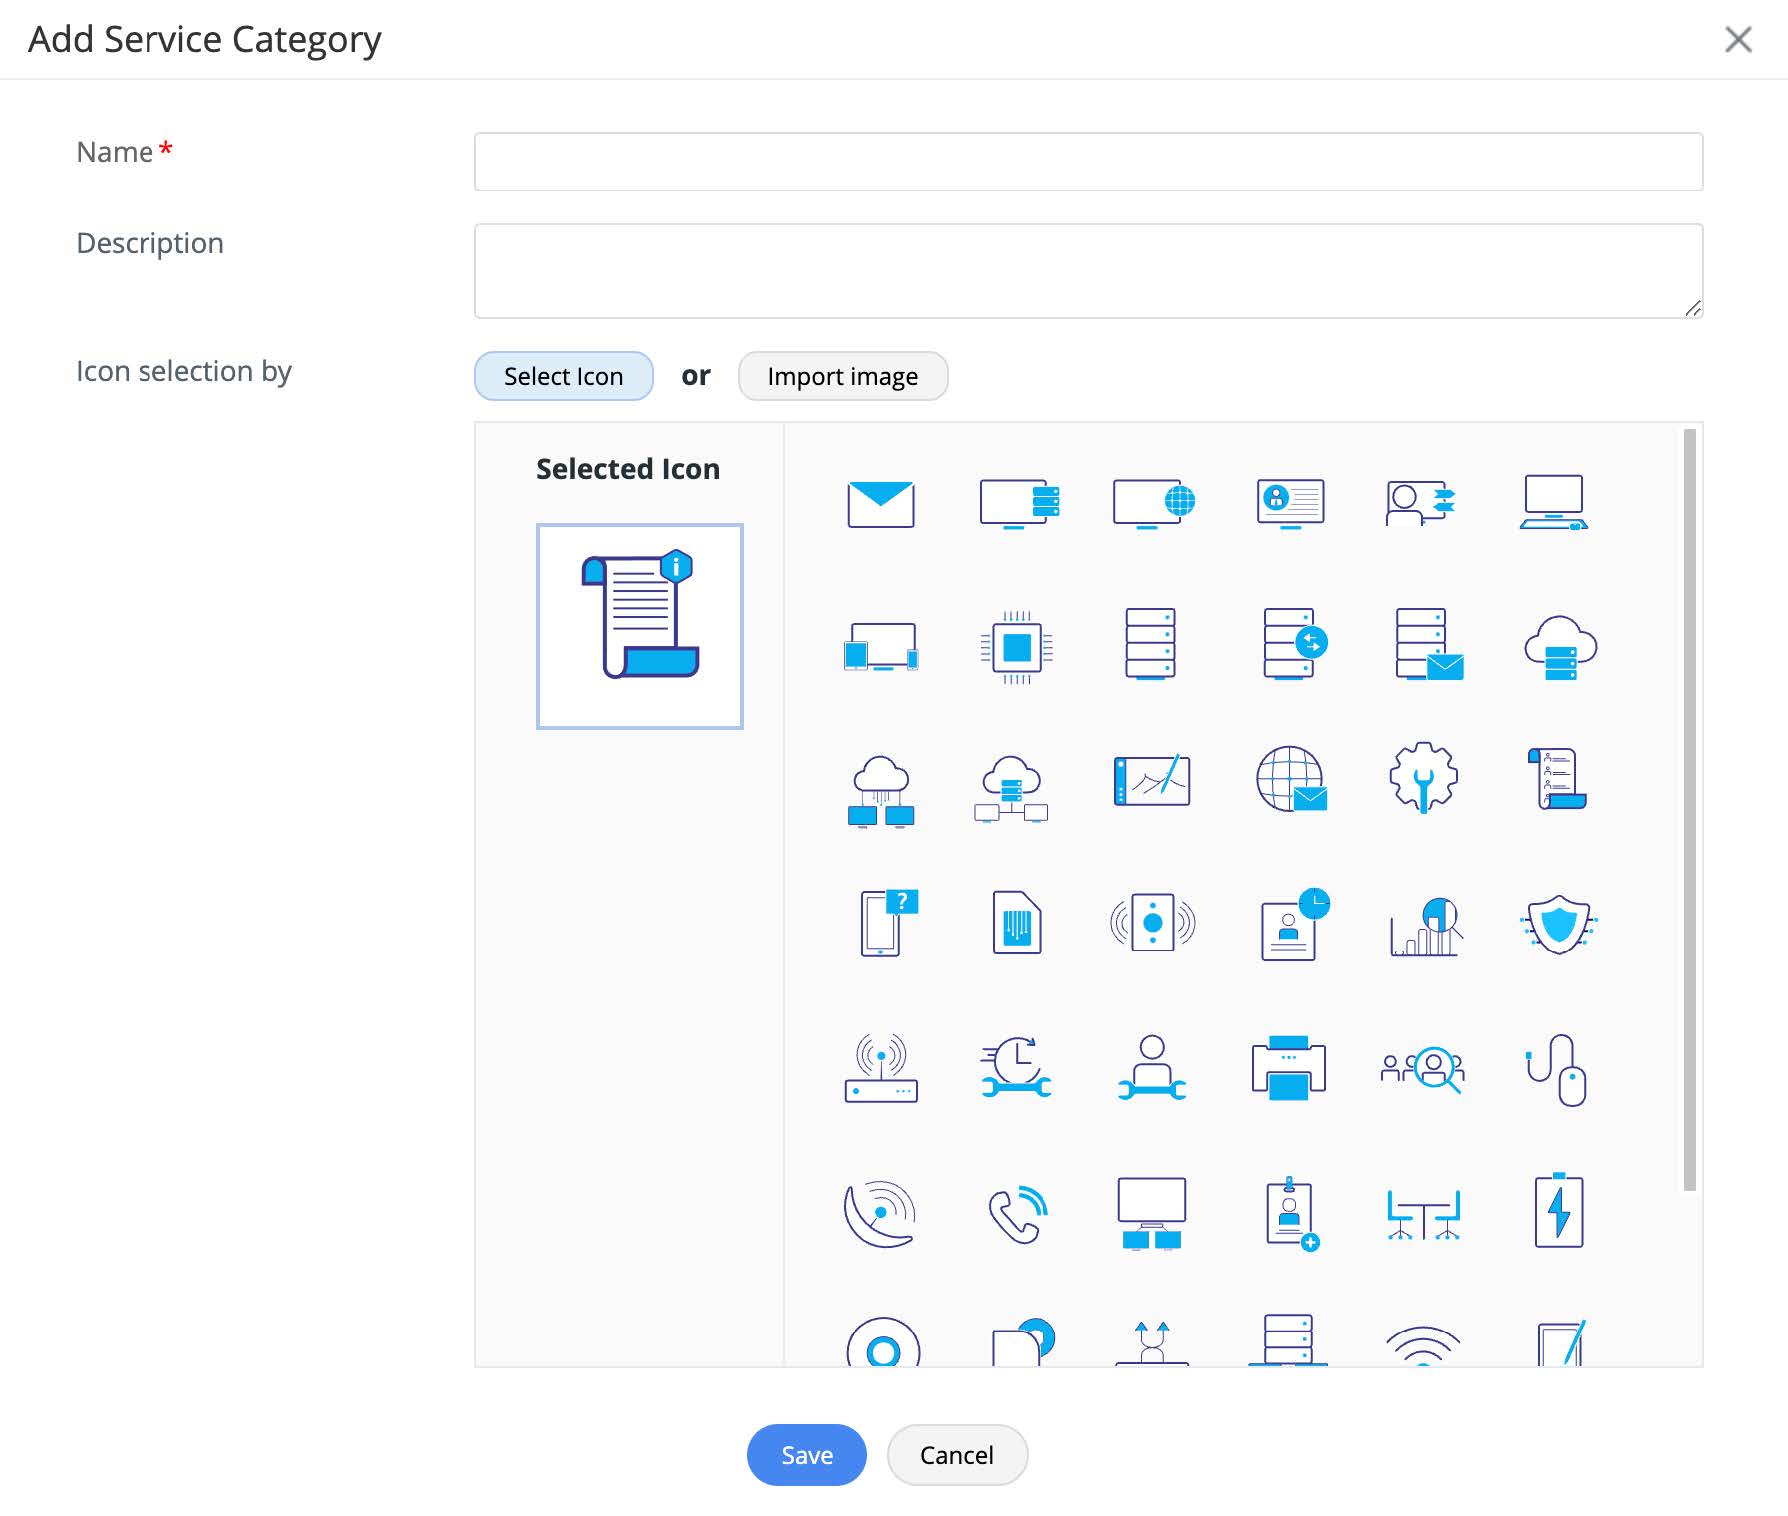
To create a service category,
- Go to TEMPLATES & FORMS > Service Category.
- Click New Service Category.
- Provide a name and description.
- Select or import a relevant icon.
- Finally, click Save.
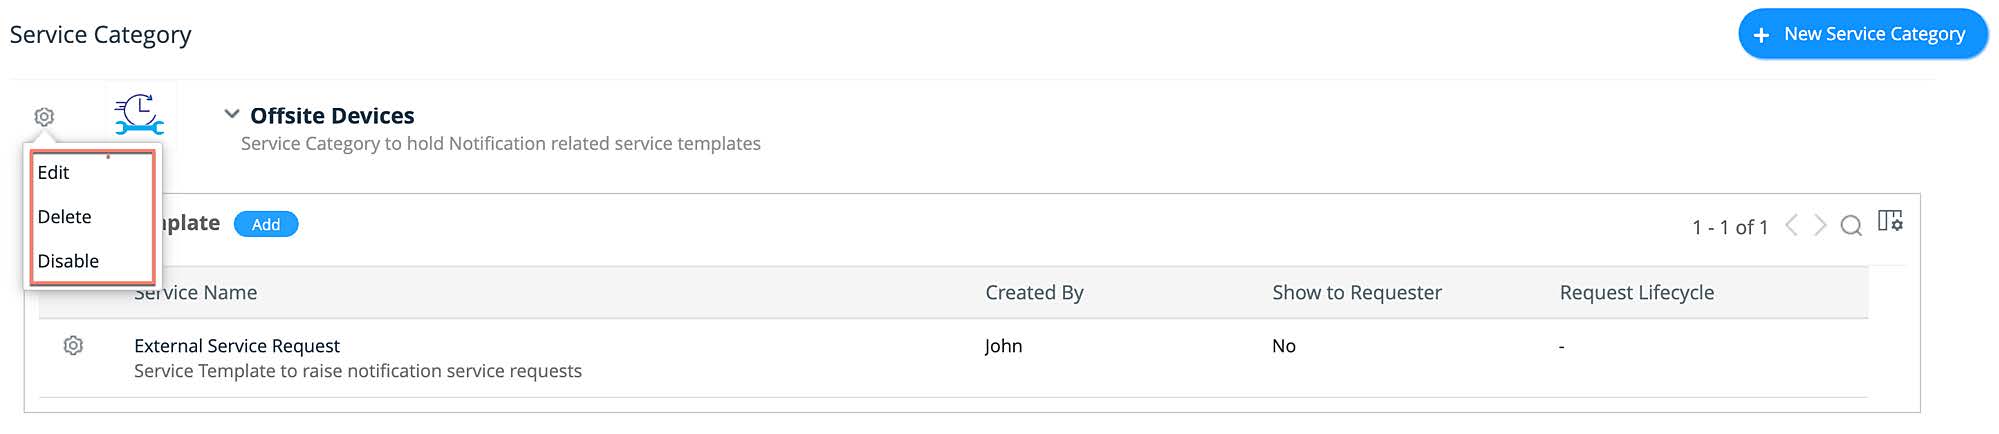
Manage Service Categories
You can manage the service categories in your extension from the list view. To access the list view, go to TEMPLATES & FORMS > Service Category.
- To edit a service category, click the gear icon beside the template, choose Edit, make necessary changes, and click Save.
- To delete a service category, click the gear icon beside the template, choose Delete, and confirm your action.
- To enable/disable a service category, click the gear icon beside the template, and choose Enable/Disable.
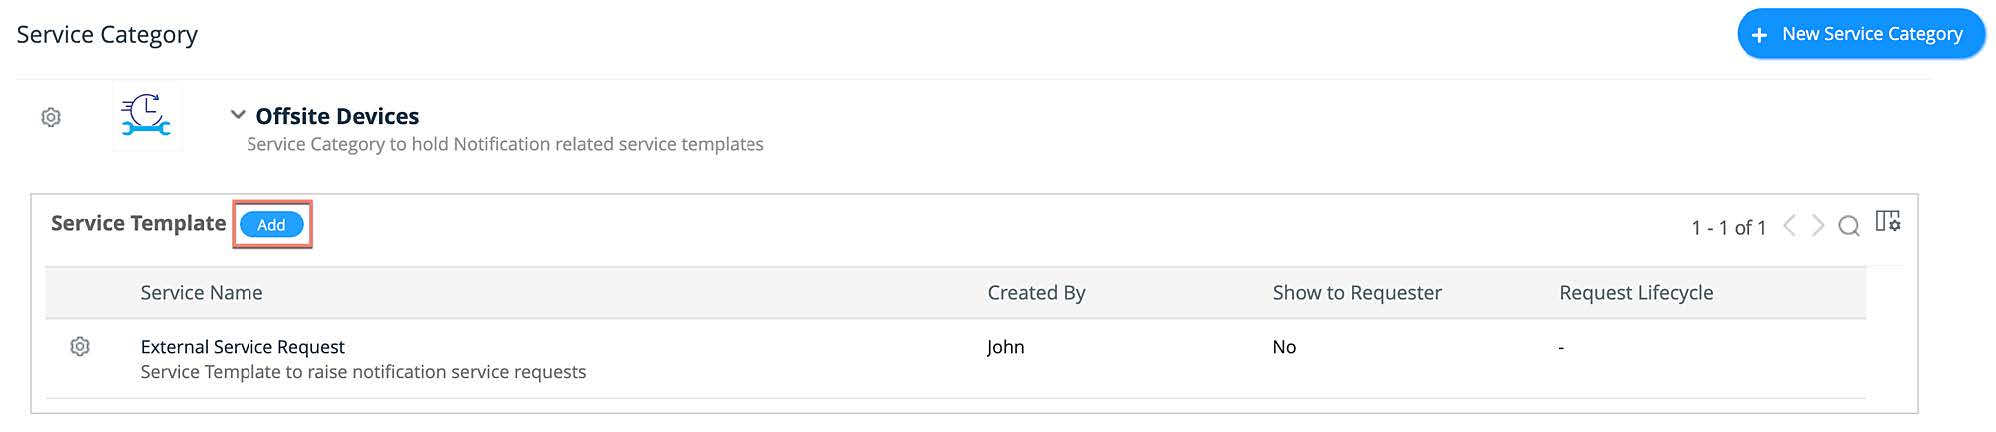
Add service templates to a service category
To add a service template to a service category,
- Go to TEMPLATES & FORMS > Service Category.
- Expand the service category to which you want to add the template.
- Click Add to go to the template editor and configure the template as discussed below.
For detailed instructions, refer to this guide.
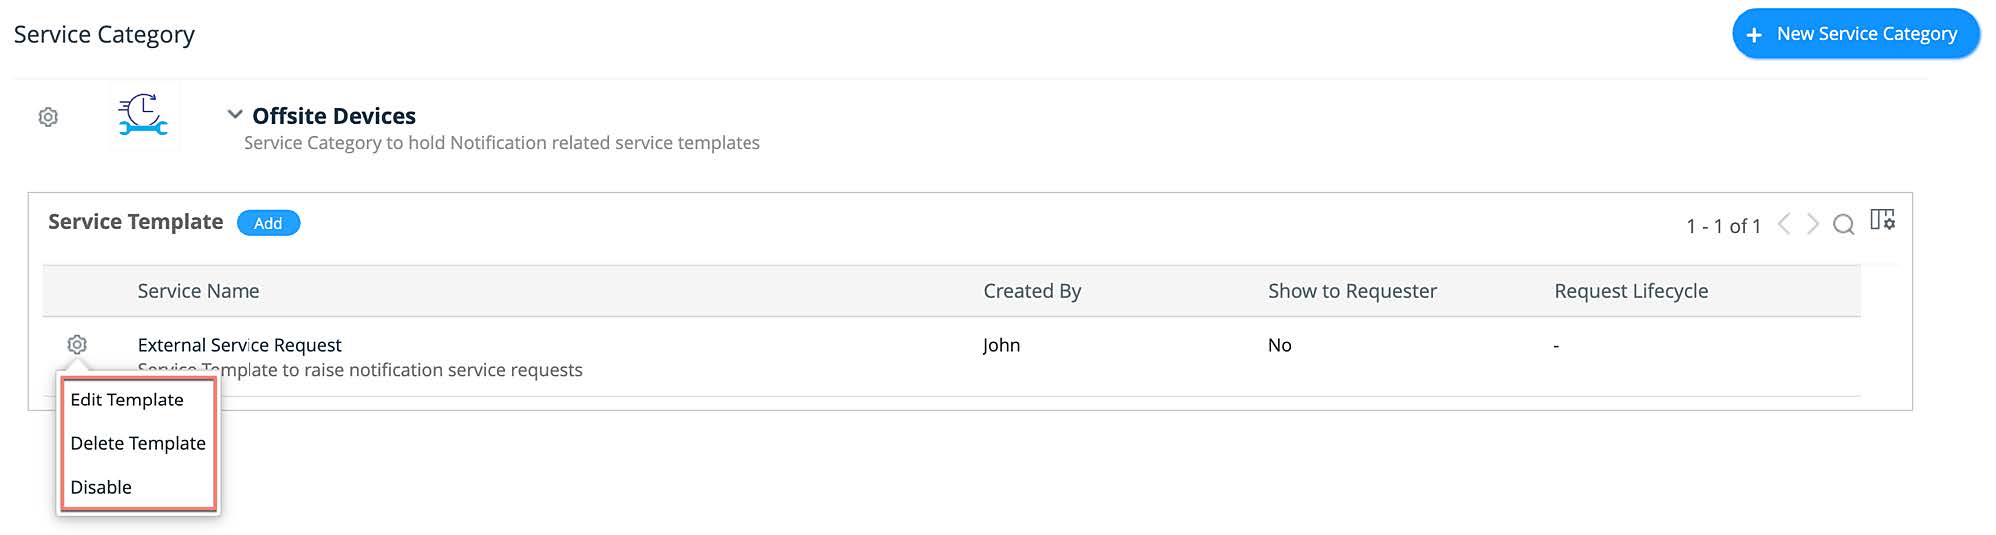
Manage Service Templates
You can manage the service templates in your extension from the list view. To access the list view, go to TEMPLATES & FORMS > Service Template.
- To edit a service template, click the gear icon beside the template, choose Edit Template, make necessary changes, and click Save.
- To delete a service template, click the gear icon beside the template, choose Delete Template, and confirm your action.
- To enable/disable a service template, click the gear icon beside the template, and choose Enable/Disable.
Incident Template
Incident templates are used to raise incident requests. You can configure your extension to add incident templates to the instances in which the extension is installed.
To create an incident template,
- Go to TEMPLATES & FORMS > Incident Template.
- Click New Incident Template to go to the template editor and configure the template. For detailed instructions, refer to this guide.
Manage Incident Templates
You can manage the incident templates in your extension from the list view. To access the list view, go to TEMPLATES & FORMS > Incident Template.
- To edit an incident template, click the gear icon beside the template, choose Edit Template, make necessary changes, and click Save.
- To delete an incident template, click the gear icon beside the template, choose Delete Template, and confirm your action.
- To enable/disable an incident template, click the gear icon beside the template, and choose Enable Template/Disable Template.

Change Template
Change templates are used to raise change requests. You can configure your extension to add change templates that can be used in the configured change workflows.
To create a change template,
- Go to TEMPLATES & FORMS > Change Template.
- Click New Change Template to go to the template editor and configure the template. For detailed instructions, refer to this guide.
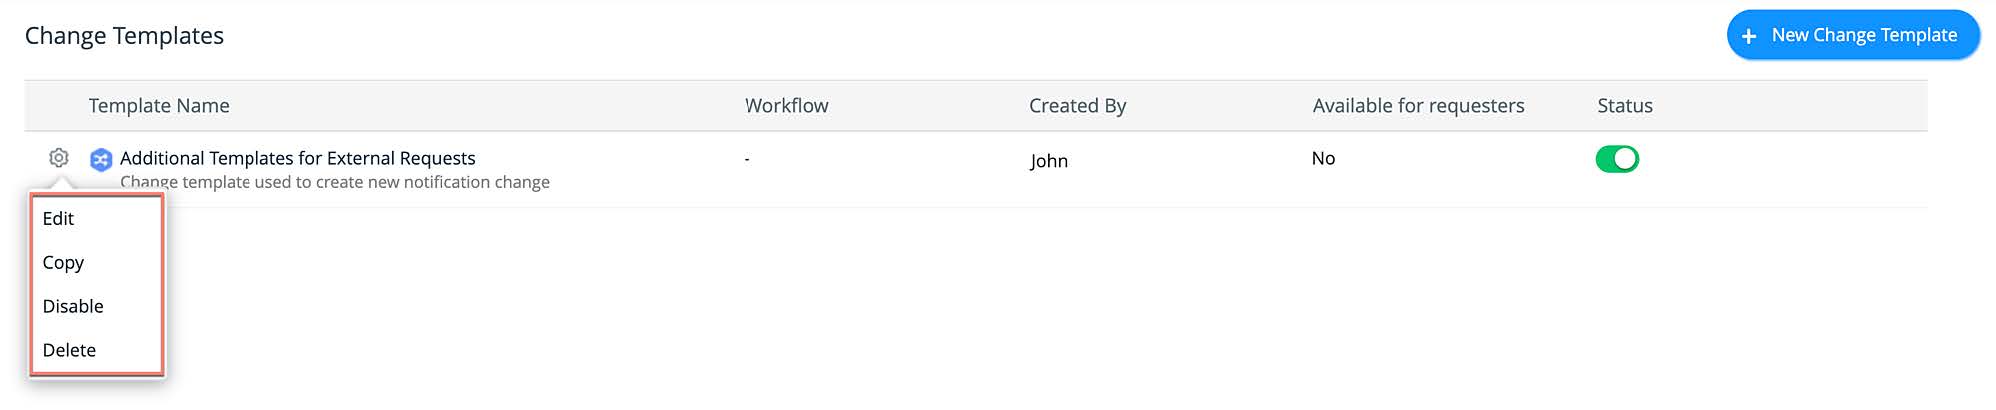
Manage Change Templates
You can manage the change templates in your extension from the list view. To access the list view, go to TEMPLATES & FORMS > Change Template.
- To edit a change template, click the gear icon beside the template, choose Edit, make necessary changes, and click Save.
- To duplicate a change template, click the gear icon beside the template, choose Copy, provide a name for the new template in the copy template pop-up, and click Copy.
- To enable/disable a change template, click the gear icon beside the template, and choose Enable/Disable.
- To delete a change template, click the gear icon beside the template, choose Delete, and confirm your action.
Resolution Template
Resolution templates are pre-configured resolutions that can be added to the requests as resolutions. You configure an extension with resolution templates that can be added to the instance where it is installed.
To create a resolution template,
- Go to TEMPLATES & FORMS > Resolution Template.
- Click New Resolution Template.
- Add a name and description for the resolution.
- Finally, click Save.
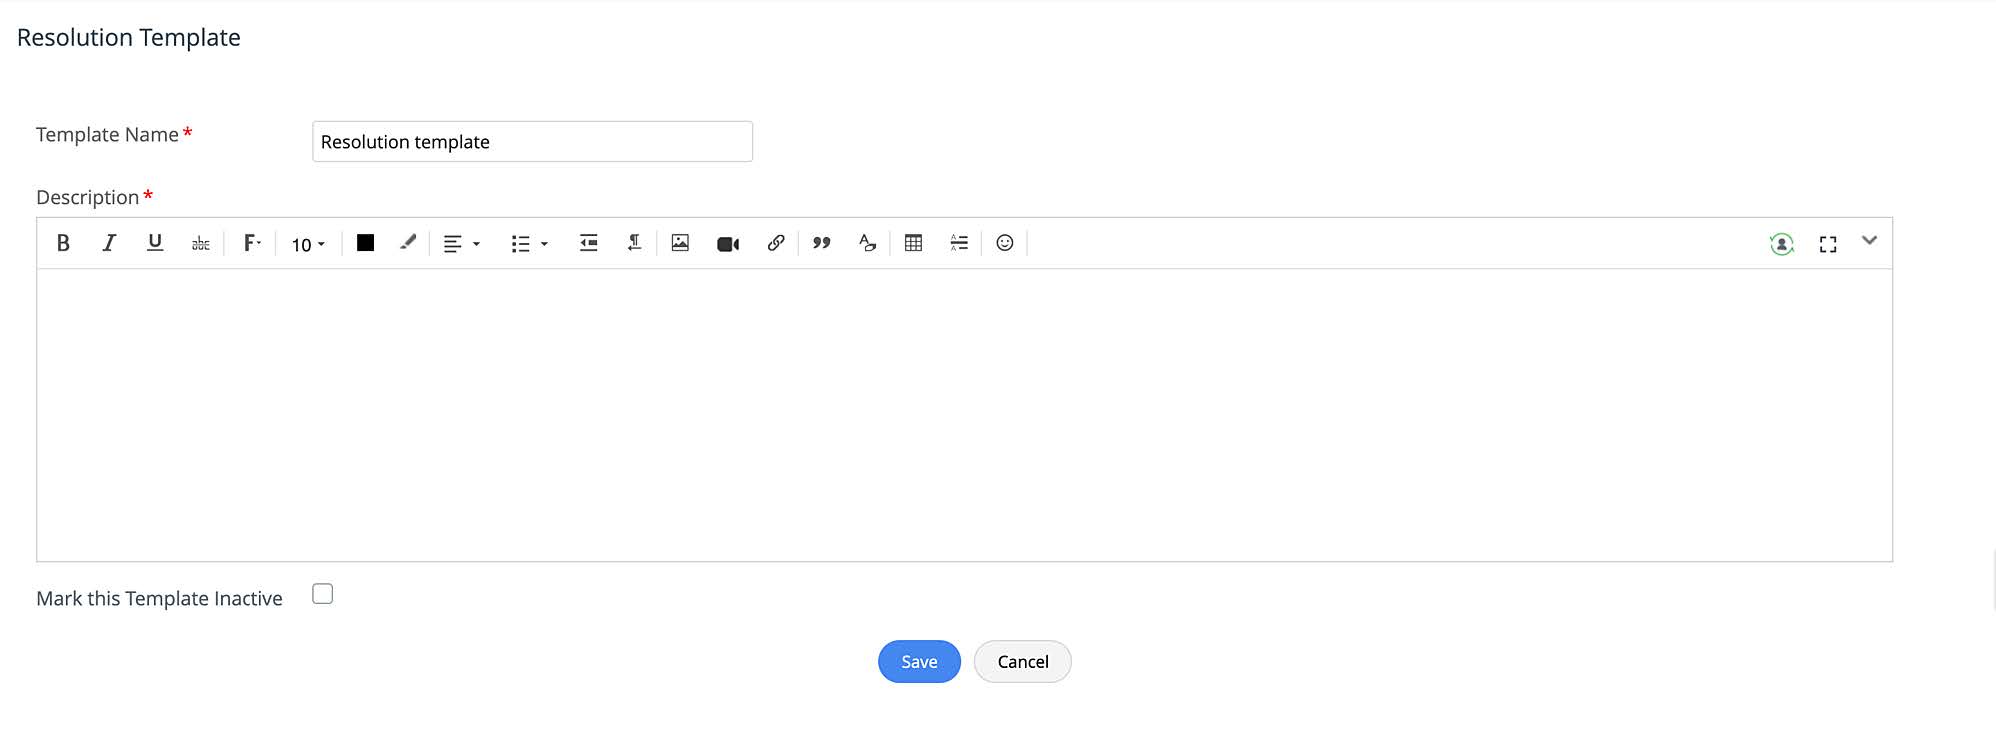
Note: By default, templates will be in the active state. However, you can select Mark this Template inactive if you want the template to be in an inactive state.
Manage Resolution Templates
You can manage the resolution templates in your extension from the list view. To access the list view, go to TEMPLATES & FORMS > Resolution Template.
- To edit a resolution template, click the gear icon beside the template, choose Edit, make necessary changes, and click Save.
- To delete a resolution template, click the gear icon beside the template, choose Delete, and confirm your action.

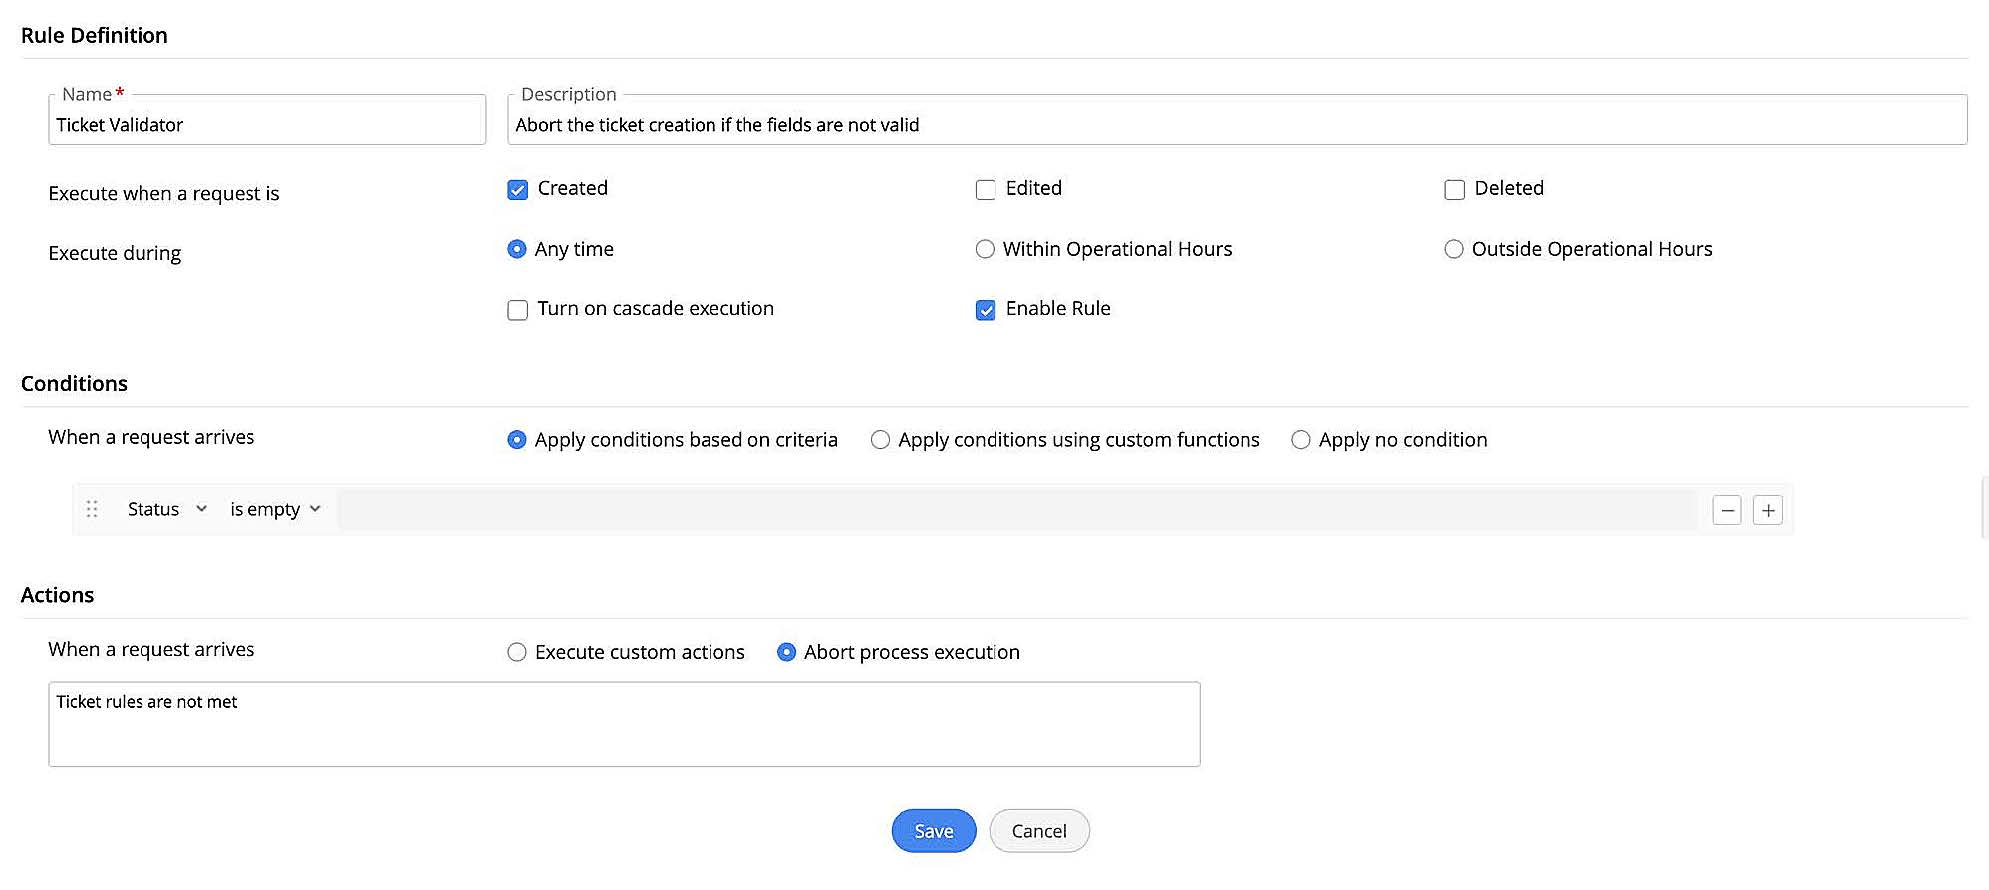
Form Rules
Form Rules allow you to define rules to automate certain actions on form fields based on custom conditions. You can create form rules for incident requests, service requests, or change requests created using the corresponding forms configured in the extensions.
To create form rules,
- Go to TEMPLATES & FORMS > Form Rules.
- Navigate to your preferred tab: Incident Request Form Rules, Service Request Form Rules, or Change Form Rules.
- Click and appropriate option: New Incident Request Form Rules, New Service Request Form Rules, or New Change Form Rules.
- Provide a rule definition and configure necessary conditions and actions. For detailed instructions, click here.
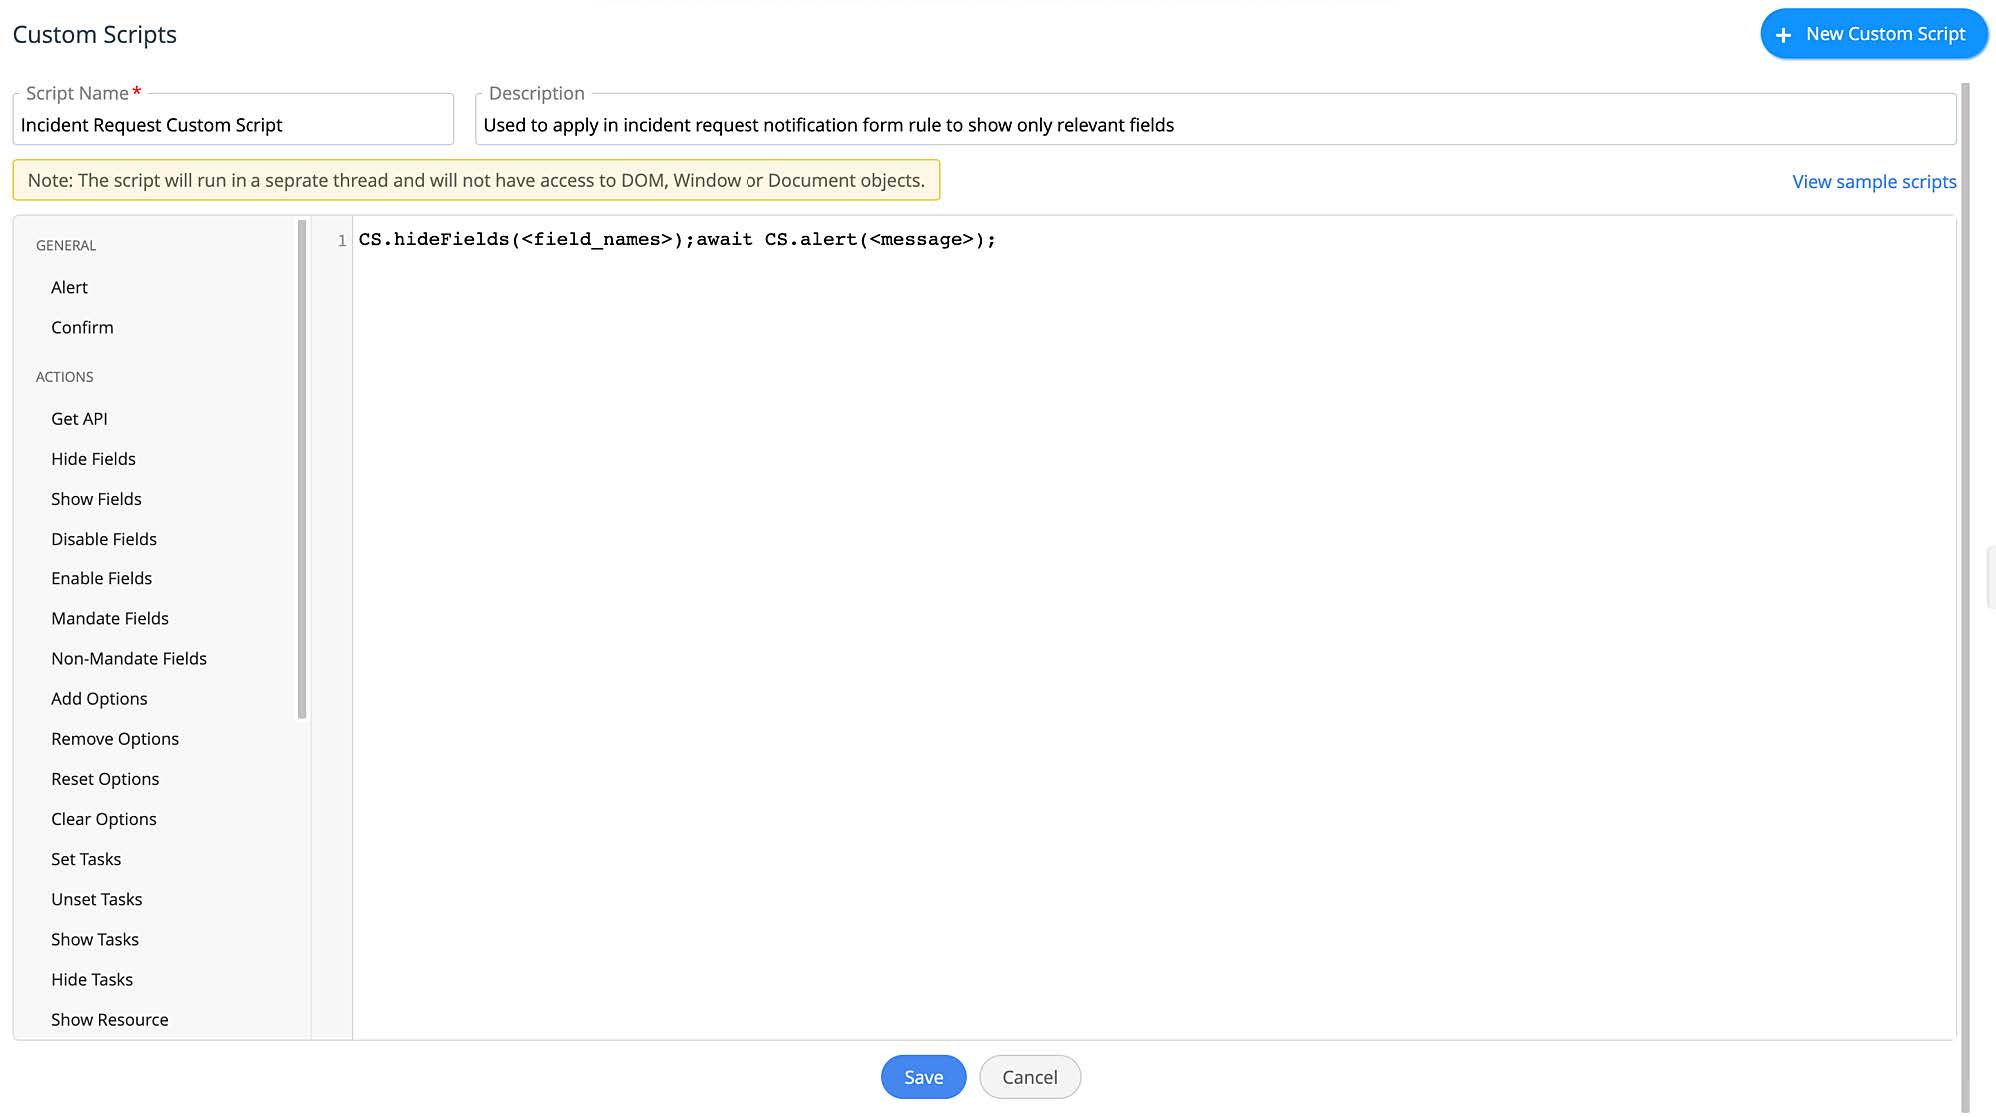
Custom scripts
Custom scripts are used as actions in form rules to modify requests in different ways. You can create custom scripts for the form rules configured in the extension.
To create a custom script,
- Go to TEMPLATES & FORMS > Custom Scripts.
- Click New Custom Scripts.
- Provide a name and description for the script.
- Use the script editor to create your own script. For sample scripts, click here.
- Finally, click Save.
Manage Custom Scripts
You can manage custom scripts configured in your extensions from the list view. To access the list view, go to TEMPLATES & FORMS > Custom Scripts.
- To edit a custom script, click the gear icon beside the script, choose Edit, make necessary changes, and click Save.
- To enable/disable a custom script, click the gear icon beside the script, choose an appropriate option. Alternatively, you can also use the toggle under the Status column.
- To delete a custom script, click the gear icon beside the script, choose Delete, and confirm your action.

Automation
Business Rules
Business rules automate various tasks, such as delivering incident and service requests to technicians or support groups, assigning a technician, status, or priority to a request, or even sending email notifications. Business rules are sitespecific and run on all incoming requests. If an incoming request meets certain conditions, business rules perform certain actions automatically.
You can configure your extension to add business rules to the instance in which the extension is installed.
To create a business rule,
- Go to AUTOMATION > Business Rules.
- Select an option by clicking the preferred tab: Incident Business Rules or Request Business Rules.
- Click New Business Rule.
- Fill out the form as required.
- Finally, click Save.
Note:
- You cannot configure the Field Update action for deleted requests.
- If you do not specify a condition, the business rule will apply for all incoming requests.
Manage Business Rules
You can manage your business rules from the list view. To access the list view, go to Automation > Business Rules, go to Incident Business Rules or Service Request Business Rules.
- To edit a business rule, click the gear icon beside your preferred rule, choose Edit, make changes as required, and click Save.
- To enable/disable cascading execution for a rule, click the gear icon beside your preferred rule, and select an appropriate option. You can also do this when editing the rules.
- To enable/disable a rule, click the gear icon beside your preferred rule, and select an appropriate option. Alternatively, you can also use the toggle under the Status column or use the appropriate option when editing the rule.
- To delete a rule, click the gear icon beside your preferred extension, choose Delete, and confirm your action.

You can also delete, enable, disable, or turn on/off cascade execution in bulk. To do this, select the required business rules, and choose an appropriate option from the Actions drop-down.

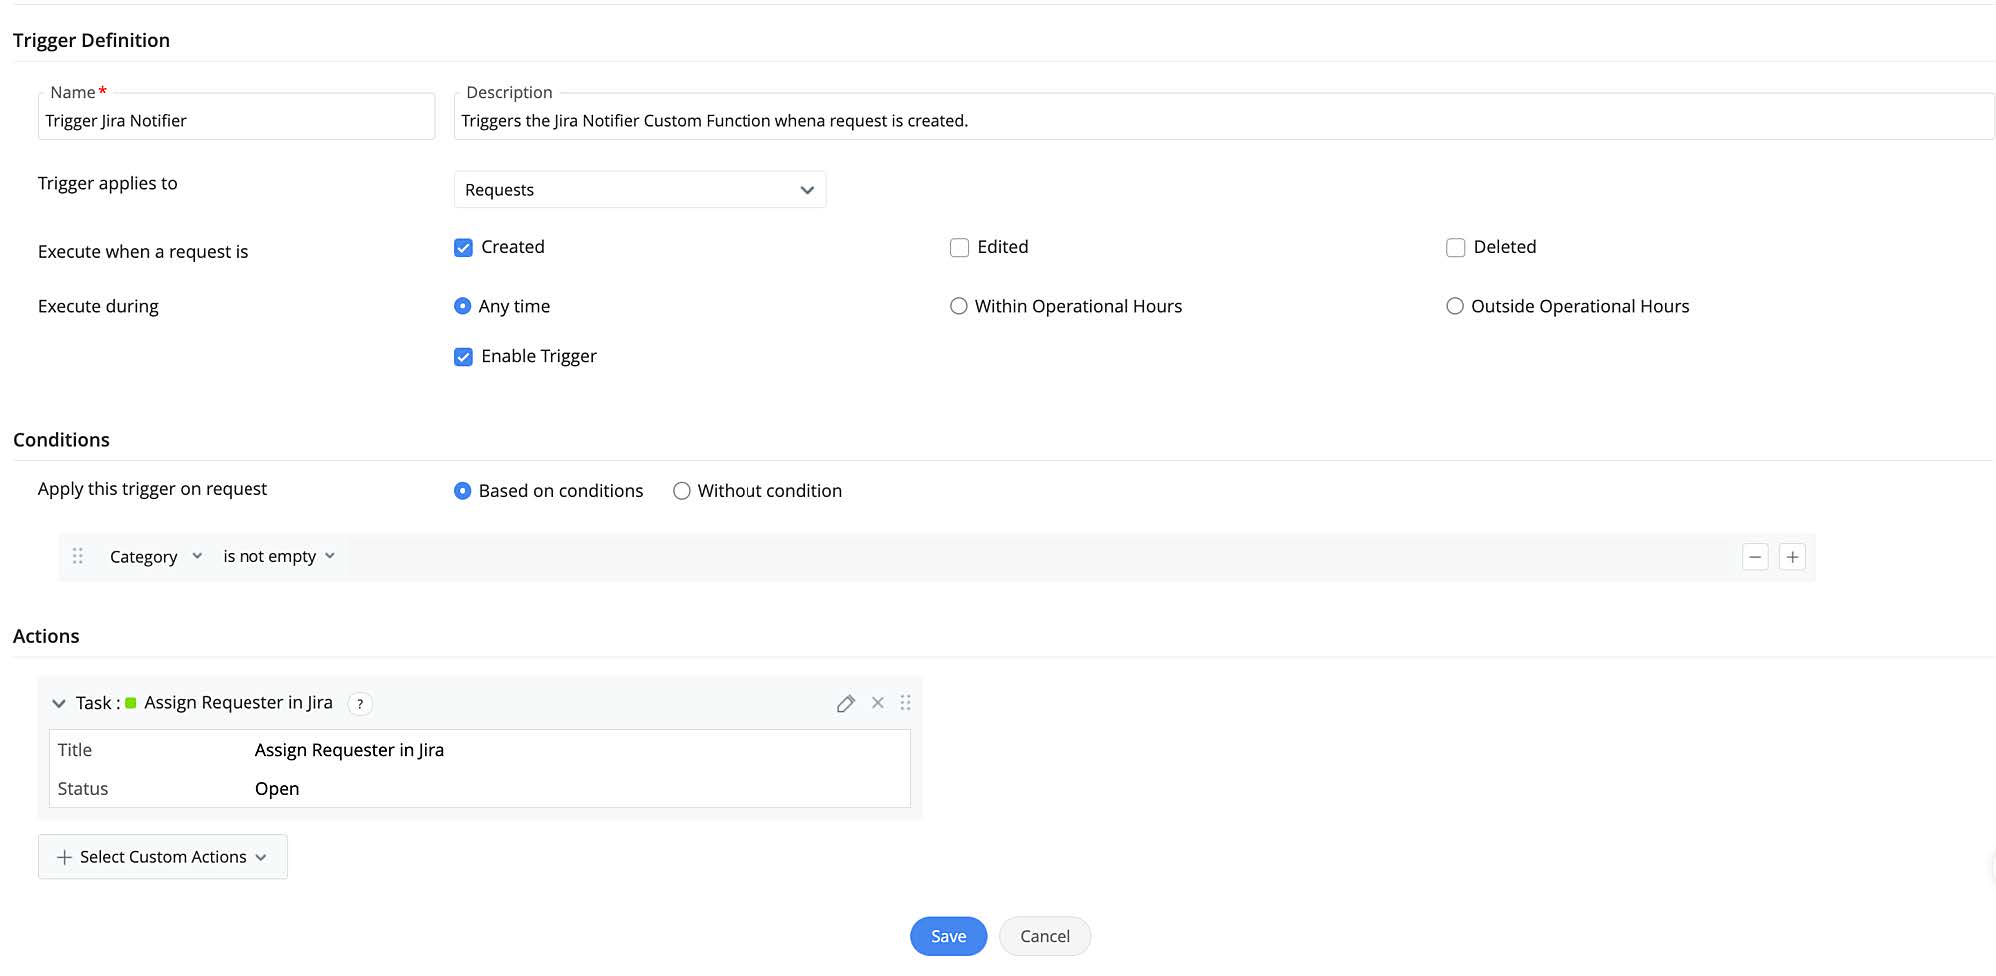
Triggers
Triggers are used to perform actions such as executing a custom function, adding a task, or invoking a webhook action based on configured conditions. You can configure your extension to add triggers for requests or changes in instances where the extension is installed.
To configure a trigger,
- Go to AUTOMATION > Triggers
- Select your preferred option from the drop-down: Triggers for Requests or Triggers for Changes.
- Click New Trigger.
- Fill out the form as required.
- Finally, click Save.
Manage Triggers
You can manage triggers from the list view. To access the list view, go to AUTOMATION > Triggers and select an option (Triggers for Requests or Triggers for Changes) from the drop-down to view triggers for your preferred module..
- To edit a trigger, click the gear icon beside your preferred trigger, choose Edit, make changes as required, and click Save.
- To enable/disable a trigger, click the gear icon beside your preferred trigger, and select an appropriate option. Alternatively, you can also use the toggle under the Status column or use the appropriate option when editing the trigger.
- To delete a trigger, click the gear icon beside your preferred extension, choose Delete, and confirm your action.
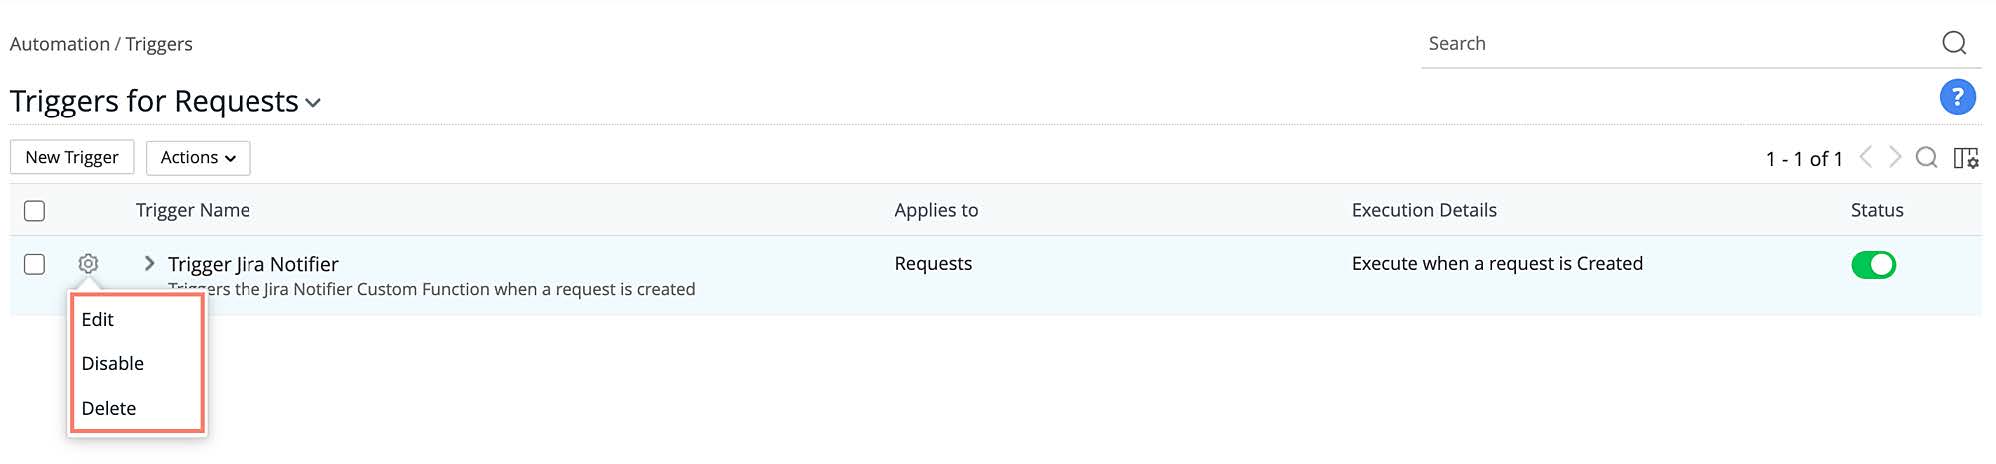
You can also enable, disable, or delete triggers in bulk. To do this, select the required triggers, and choose an appropriate option from the Actions drop-down.

Custom Actions
Notifications
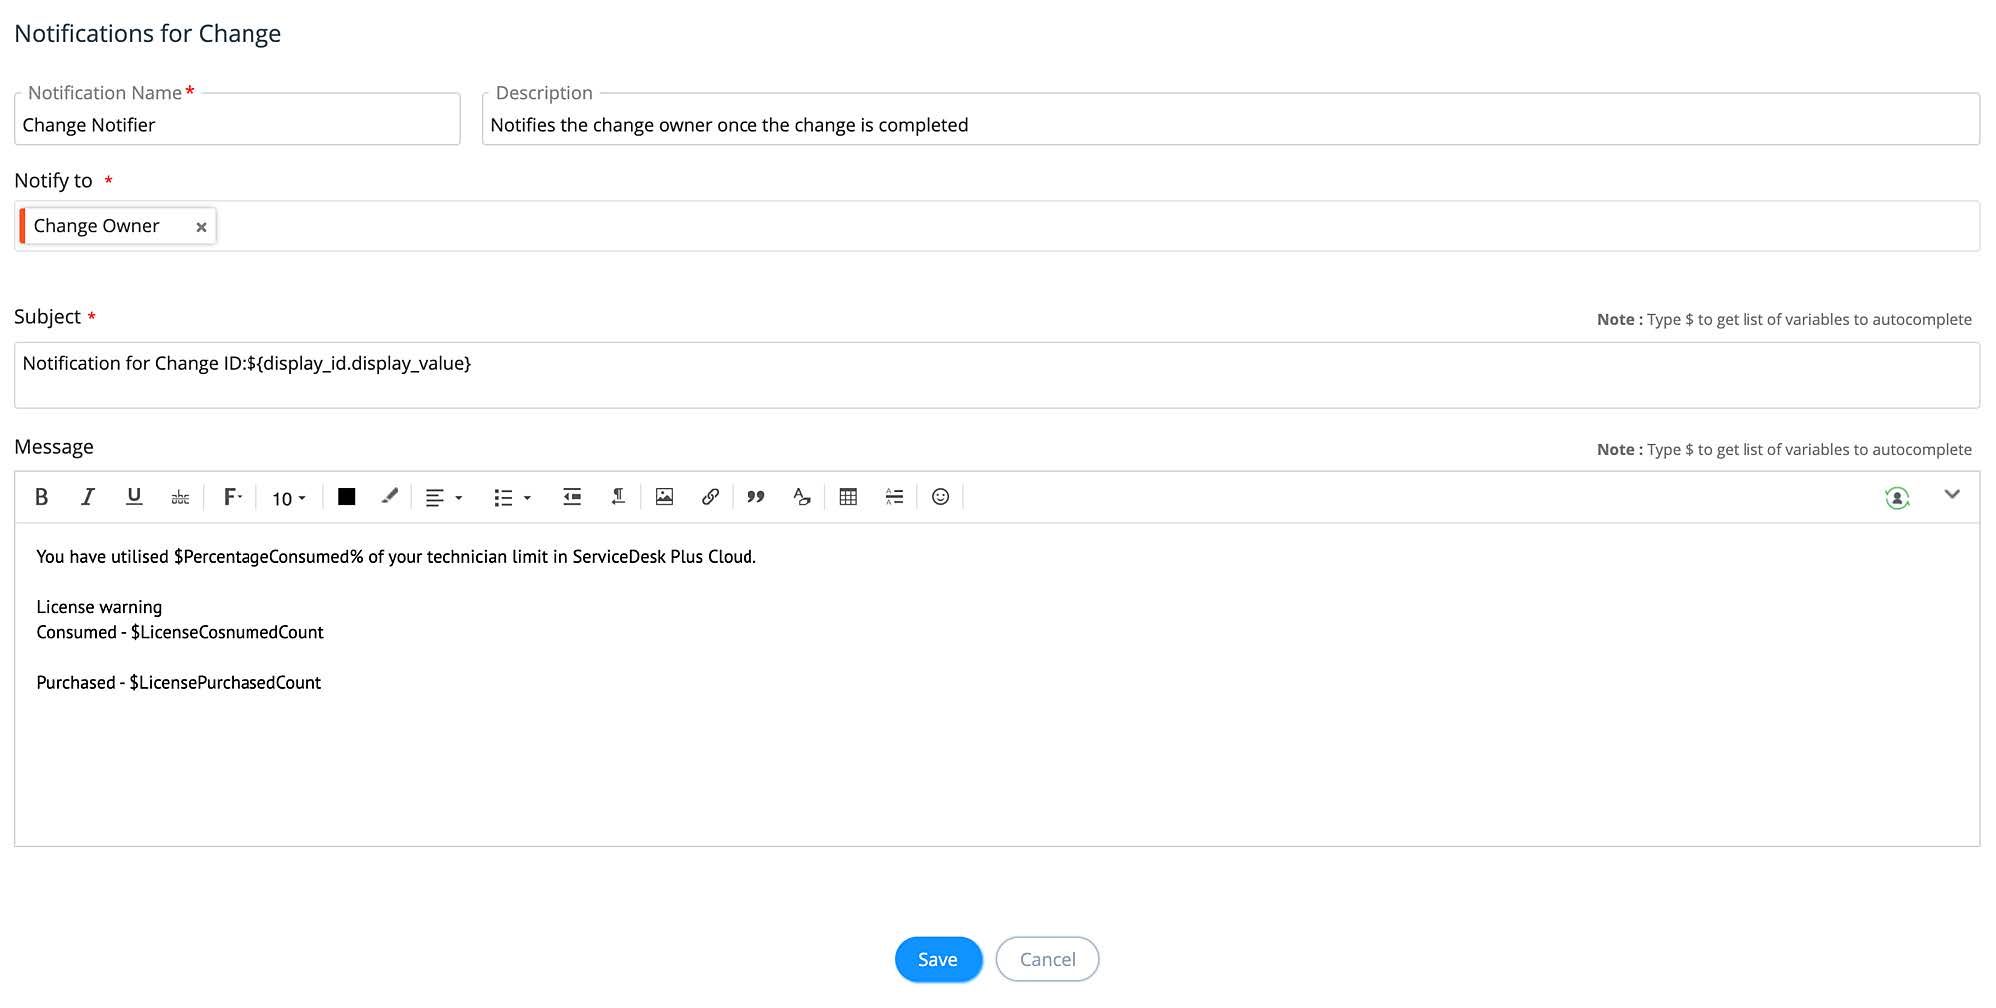
You can create custom notifications for supported modules that can be used with the respective business rules, triggers, or workflows that you have configured in the extension.
To create a custom notification,
- Go to Automation > Custom Actions > Notifications.
- Choose an option based on your preferred module from the drop-down: Notification for Requests or Notification for Changes.
- Click New Notification.
- Provide a name and description, choose a mode, select the recipients that you want to be notified, and also provide a relevant subject and message body. You can use variables for adding dynamic content to the subject and message body. Use "$" to add variables.
- Finally, click Save.
Manage Custom Notifications
You can manage custom notifications to your extension from the list view. To access the list view, go to Automation > Custom Actions > Notifications, and select an option (Notification for Requests or Notification for Changes) from the drop-down to view notifications for your preferred module.
- To edit a notification, click the gear icon beside the notification, choose Edit, make necessary changes, and click Save.
- To enable/disable a notification, click the gear icon beside the notification, choose an appropriate option. Alternatively, you can also use the toggle under the Status column.
- To delete a notification, click the gear icon beside the action, choose Delete, and confirm your action.

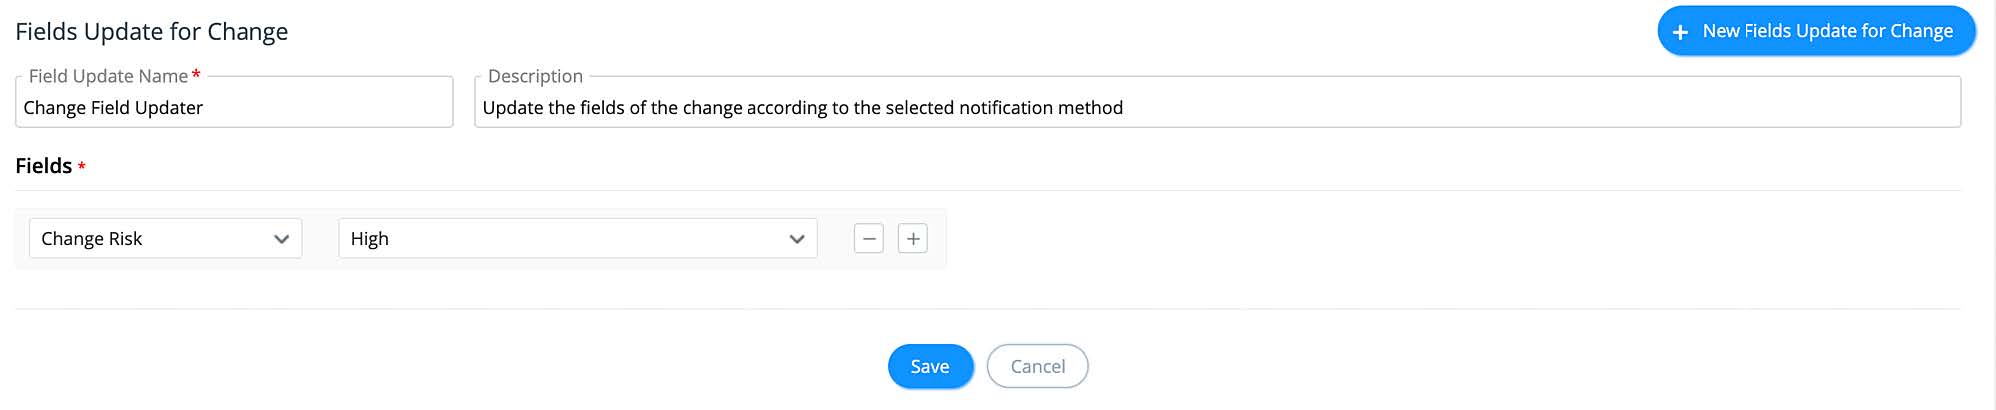
Field Updates
The field updates can be used to update any fields in changes. You can use this in the business rules, triggers, or workflows that you have configured in the extension.
To create a field update for changes,
- Go to Automation > Custom Actions > Field Updates.
- Click New Fields Update.
- Provide a name and description for the field update action..
- Choose the fields that you want to be updated along with their values. You can add or remove an entry using the appropriate icon beside the entry.
- Finally, click Save.
Manage Field Update Actions
You can manage the field update actions added to your extension from the list view. To access the list view, go to Automation > Custom Actions > Field Updates.
- To edit a field update action, click the gear icon beside the action, choose Edit, make necessary changes, and click Save.
- To enable/disable a field update action, click the gear icon beside the action, choose an appropriate option. Alternatively, you can use the toggle under the Status column.
- To delete a field update action, click the gear icon beside the action, choose Delete, and confirm your action.

Timers
Tasks
Tasks are used to split up a complex piece of work into many discrete entities that can be owned and managed by different users. You can use the tasks as custom actions in business rules, triggers, or workflows.
You can configure tasks in your extension to add them to the instance in which the extension is installed.
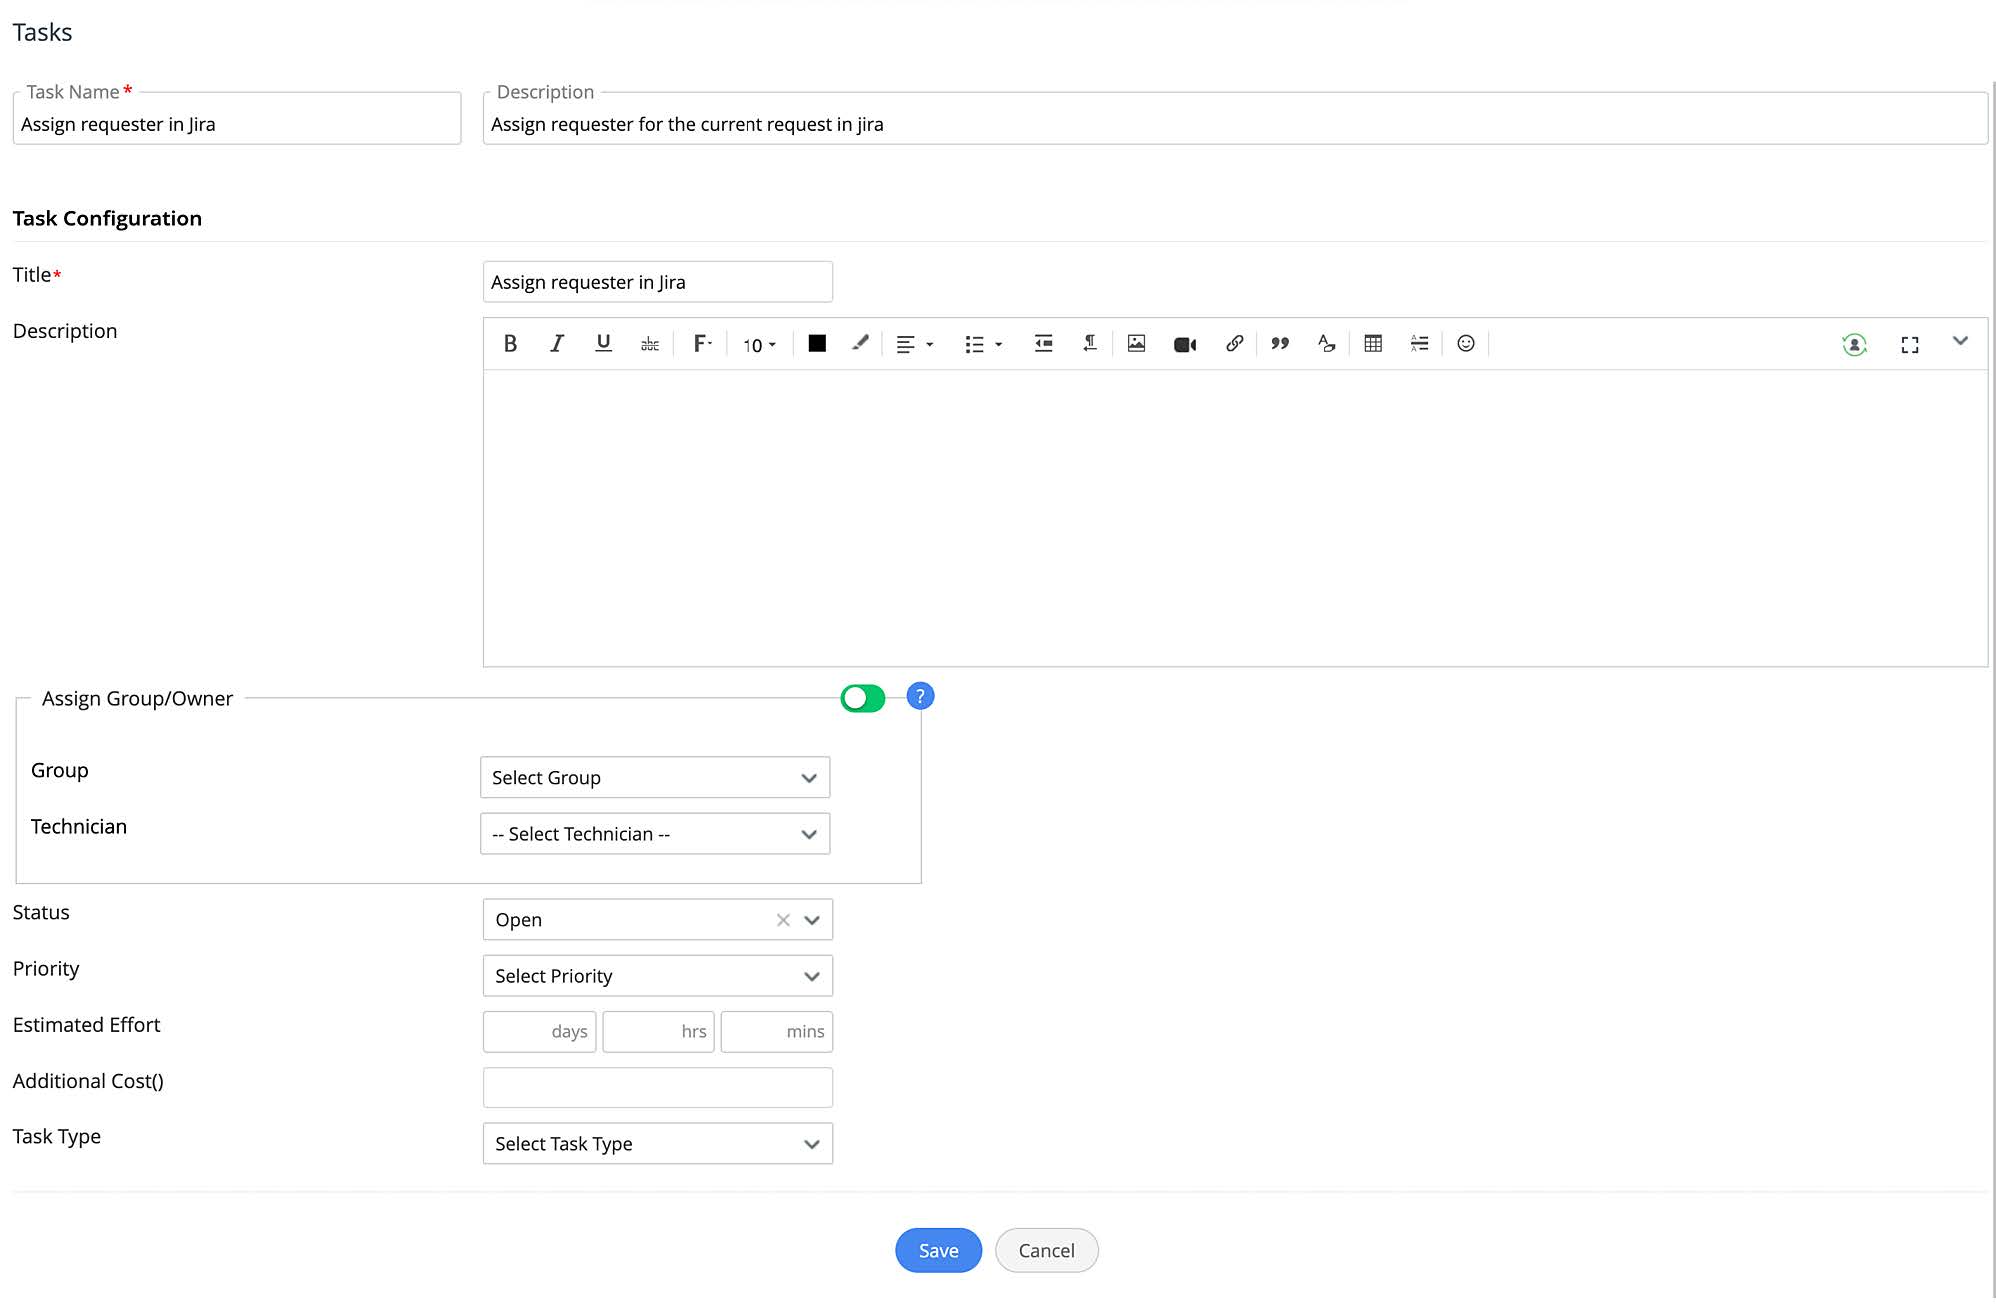
To configure a task,
- Go to CUSTOM ACTIONS > Tasks.
- Click New Task.
- Provide the following information:
- Task Name: Provide a name for the task.
- Description: Add a relevant description.
- Copy from a Template: If you want to copy the content from a task template, choose the task template from the drop-down.
- Title: Provide a title for the task.
- Description: Add a relevant description for the task.
- Assign Group/Owner: To assign the task to a group or technician, choose them from the corresponding drop-down. Use the toggle to define when to assign: at the time of creating the task or triggering the task.
- Status: Choose a status value.
- Priority: Choose a priority value.
- Estimated Effort: Provide the effort as a number of days, hours, and/or minutes that would be required to complete the task.
- Additional Cost: Provide additional costs that would be incurred for completing the task.
- Task Type: Choose an appropriate task type.
- Finally, click Save.
Manage Tasks
You can manage the tasks added to your extension from the list view. To access the list view, go to CUSTOM ACTIONS > Tasks.
- To edit a task, click the gear icon beside the task, choose Edit, make necessary changes, and click Save.
- To enable/disable a task, click the gear icon beside the task, choose an appropriate option. Alternatively, you can use the toggle under the Status column.
- To delete a task, click the gear icon beside the task, choose Delete, and confirm your action

Custom Functions
Custom functions are used to manipulate data within ServiceDesk Plus Cloud and other external applications. For example, you can modify a request data or modify field data using another field data. Custom functions are written in Zoho's proprietary scripting language called Deluge. To learn more about Deluge and how to write custom functions in Deluge, click here.
The custom function can be used in Business Rule Condition, Business Rule Action, or Triggers.
To create a custom function,
- Go to CUSTOM ACTIONS > Custom Functions.
- Click New Custom Function.
- Provide a name and description.
- Select how to use the custom function: Business Rule Condition, Business Rule Action, or Trigger/Request Lifecycle Action.
- Use the Deluge script editor to build your custom function.
- Finally, click Save.
Manage Custom Functions
You can manage the custom functions configured in your extension from the list view. To access the list view, go to CUSTOM ACTIONS > Custom Function.
- To edit a custom function, click the gear icon beside the function, choose Edit, make necessary changes, and click Save.
- To enable/disable a custom function, click the gear icon beside the function, and choose an appropriate option. Alternatively, you can also use the toggle under the Status column.
- To delete a custom function, click the gear icon beside the function, and choose Delete.
Webhooks
Webhook facilitates communication between ServiceDesk Plus Cloud and any third-party applications via an external URL or API. For example, you can sync information between two different services, say between ServiceDesk Plus Cloud and any third-party service you might use to maintain your information. You can use webhooks in the triggers configured in the extension.
You can configure your extension to add a webhook to the instance in which the extension is installed.
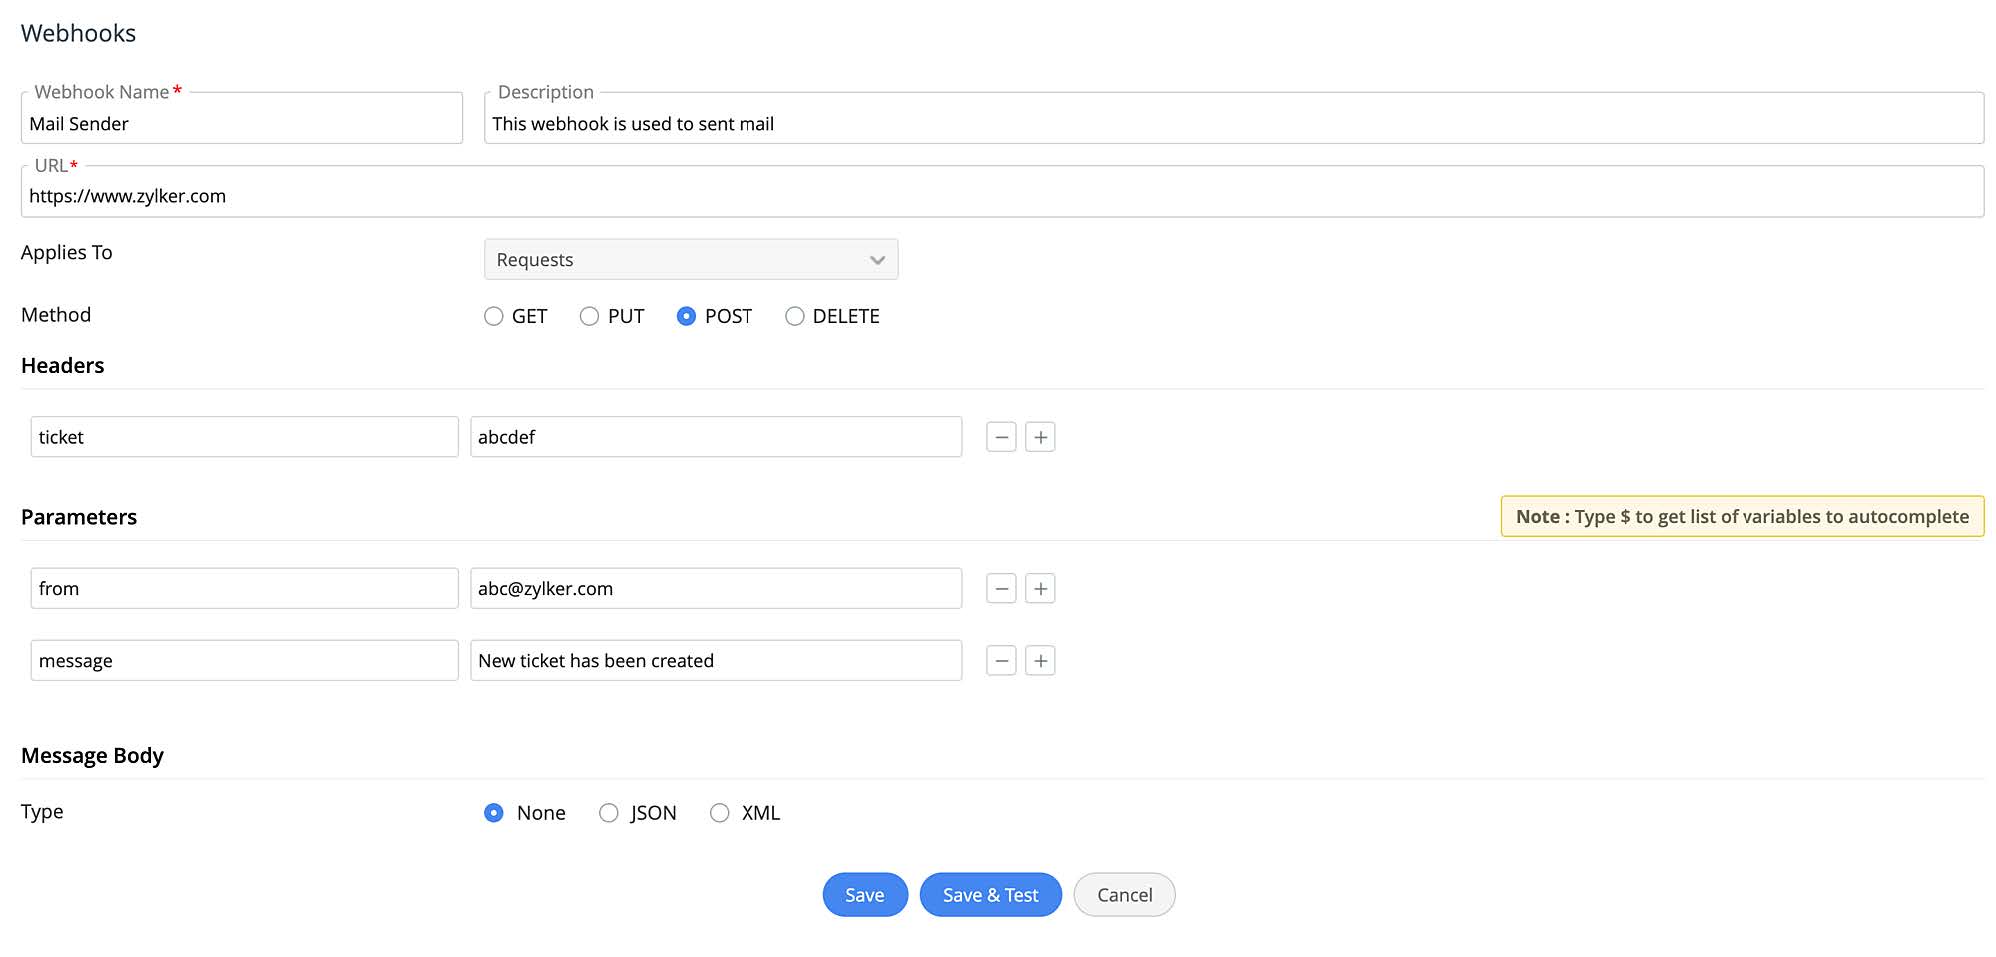
To configure a webhook,
- Go to CUSTOM ACTIONS > Webhooks.
- Click New Webhook.
- Provide webhook name, description, and URL.
- Choose a method: GET, PUT, POST, or DELETE.
- Add header key-value pairs. You can add or remove key-value pairs using the Add or Remove icon beside the entry.
- Add Parameters: Provide a name and value. You can up to 10 parameters. To add or remove parameters, use the appropriate icons beside the entry.
- Finally, click Save.
Manage Webhooks
You can manage your webhooks configured in your extension from the list view. To access the list view, go to CUSTOM ACTIONS > Webhooks.
- To edit a webhook, click the gear icon beside the webhook, choose Edit, make necessary changes, and click Save.
- To enable/disable a webhook, click the gear icon beside the webhook, and choose an appropriate option. Alternatively, you can also use the toggle under the Status column.
- To delete a webhook, click the gear icon beside the webhook, choose
Delete, and confirm your action.
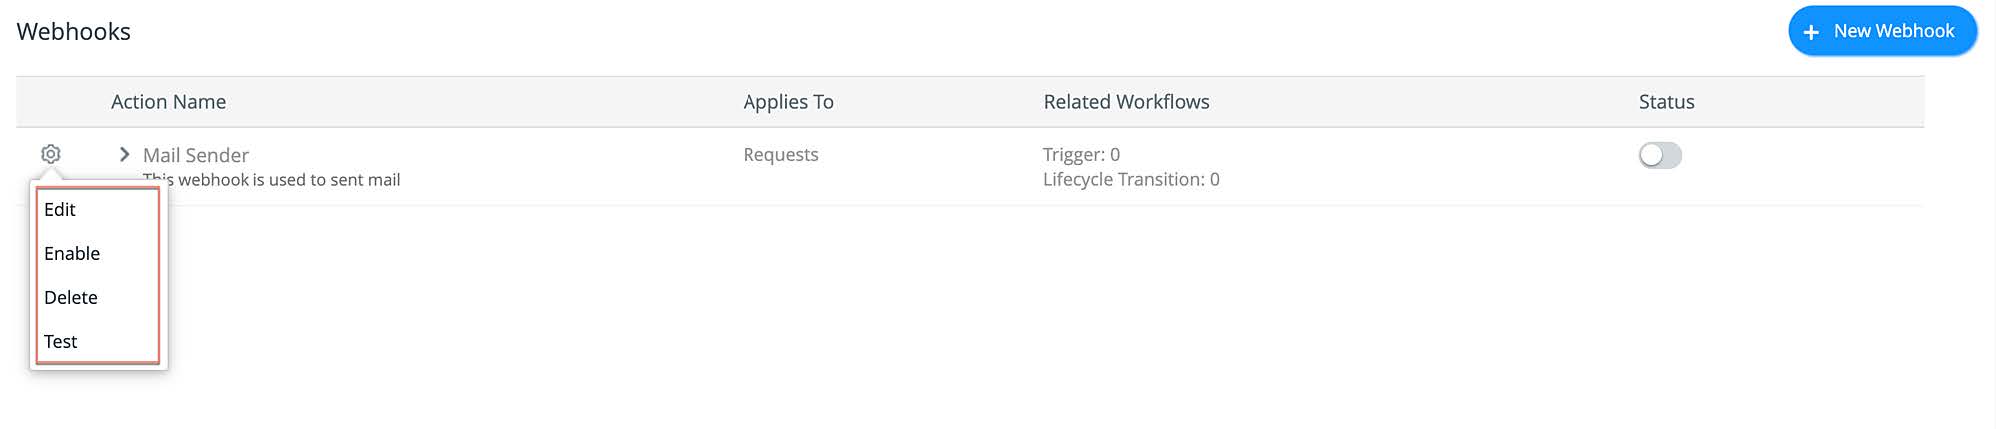
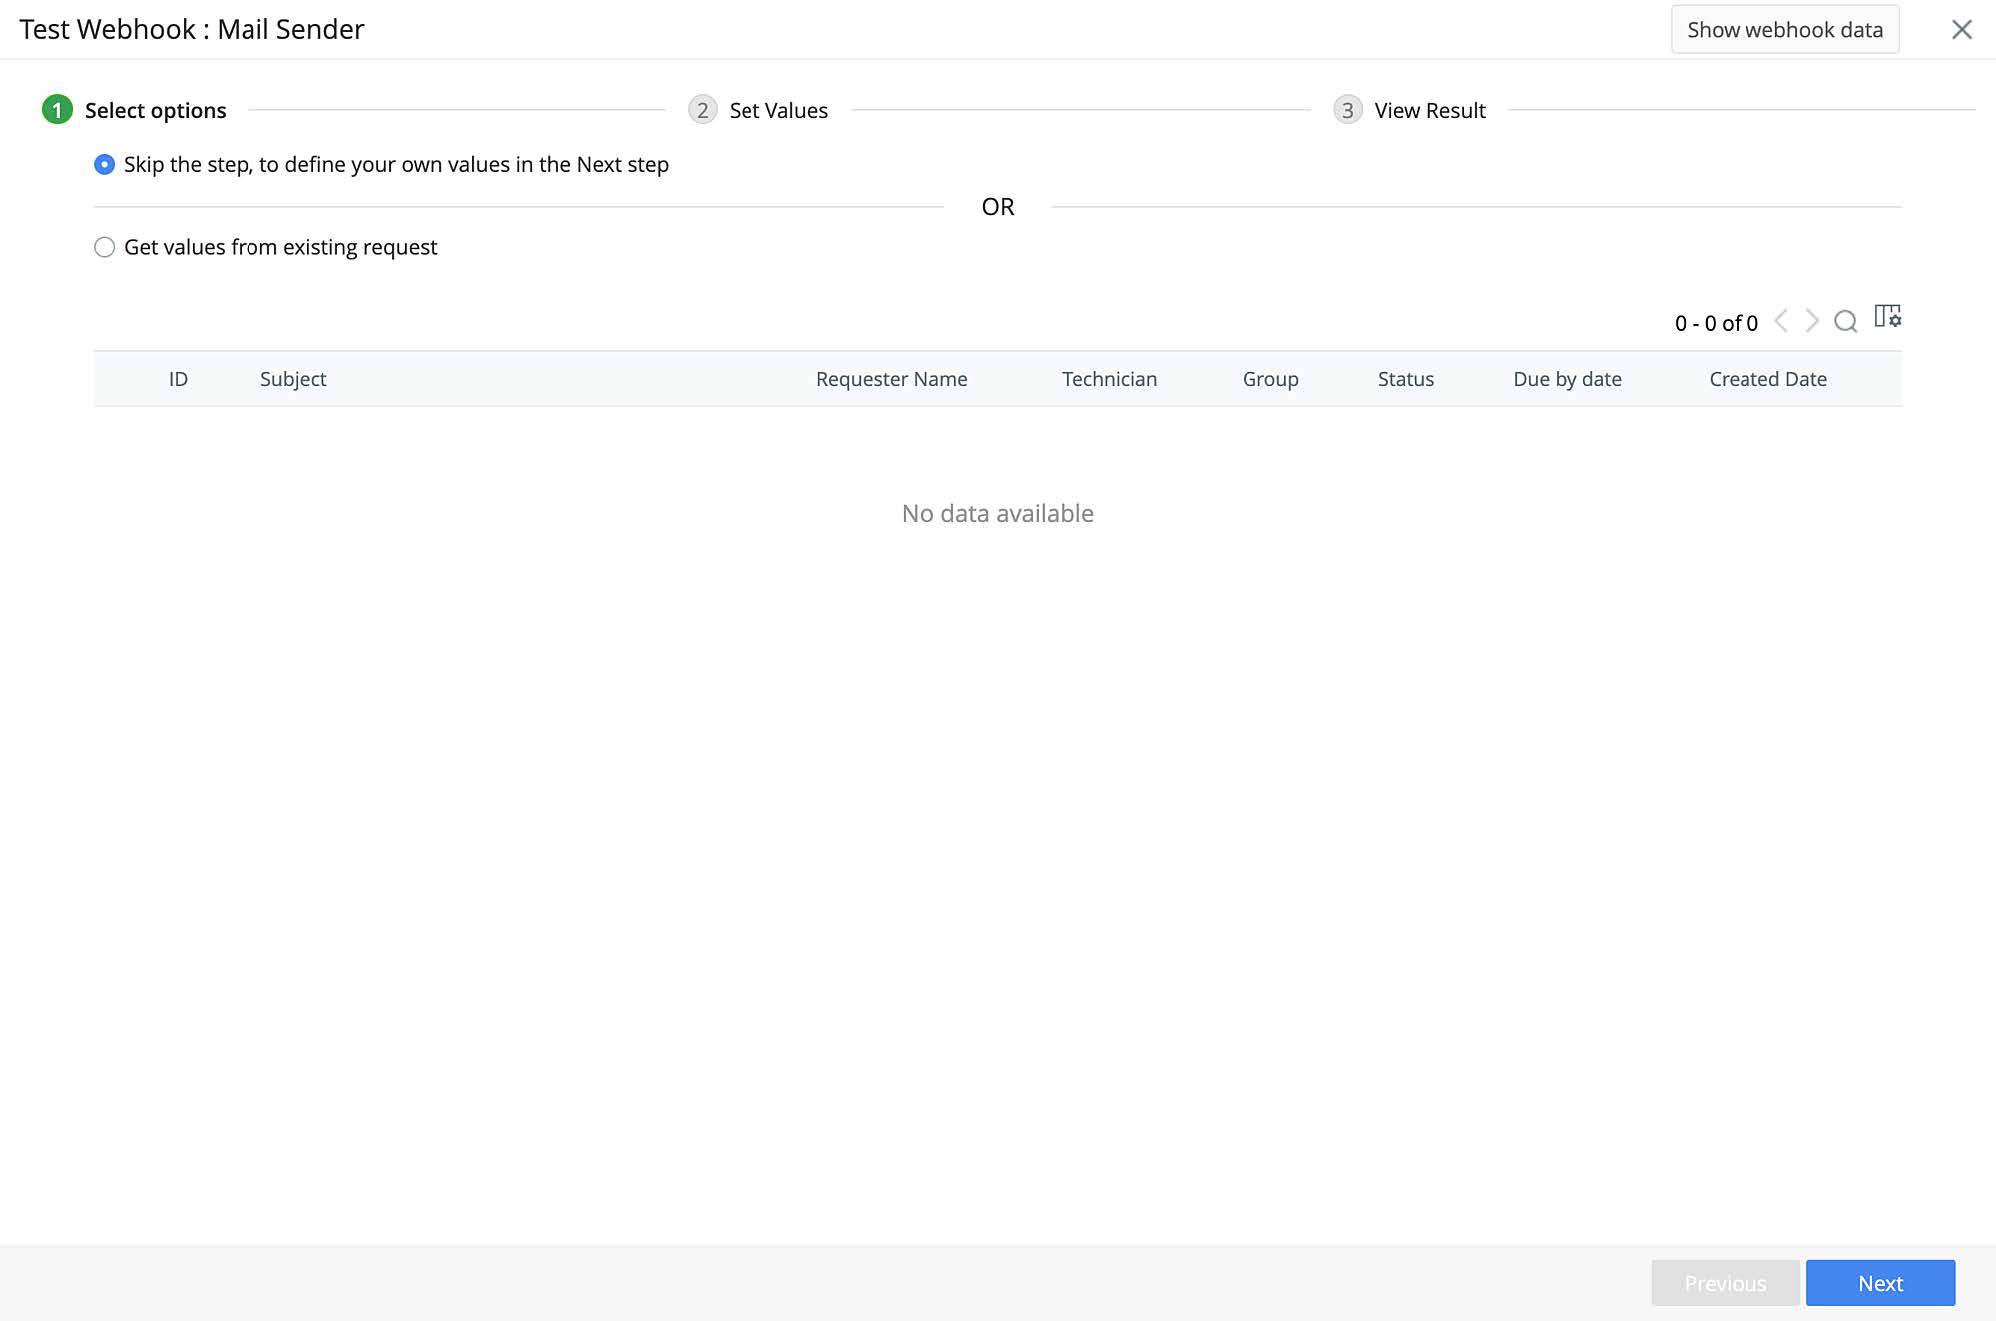
- To test a webhook, click the gear icon beside the webhook, choose Test,
and follow the on-screen instructions.
Workflows
Change Workflows
Change workflow allows you to define a sequence for change progression with a customized number of stages, approvals, field updates, notifications, conditions, etc. You can configure your extensions to add a custom change workflow to the instance in which the extension is installed.
To create a change workflow, go to Automation > Workflows, click New Workflow, and build your workflow using the workflow editor. For detailed instructions, click here.
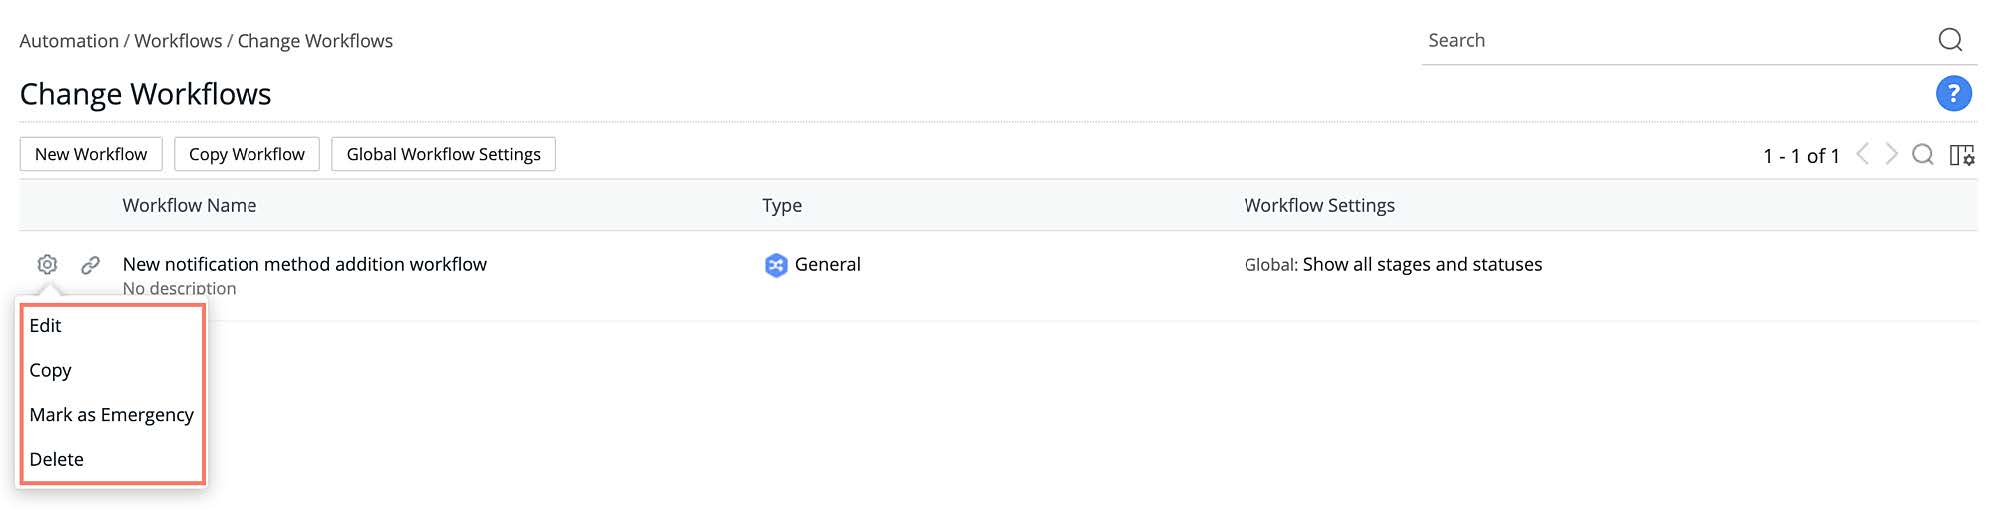
Manage Change Workflows
You can manage change workflows from the list view. To access the list view, go to Automation > Workflows.
- To edit a workflow, click the name of the workflow or choose Edit from the gear icon, make necessary changes, and click Save.
- To create a new workflow from an existing workflow, click the gear icon, choose Copy, provide a name for the new workflow, and click Copy. Alternatively, click Copy Workflow, choose source template for the Copy Workflow From drop-down, provide a name for the new workflow in the Copy as field, and click Copy.

Note: When the copy action is invoked using the gear icon, the Copy Workflow From option cannot be modified.
- To mark a workflow as emergency or general, click the gear icon beside the workflow, and choose an appropriate option.
- To delete a workflow, click the gear icon beside the workflow, and choose Delete.
- To view templates associated with a workflow, click Show Associated Templates
 beside the workflow.
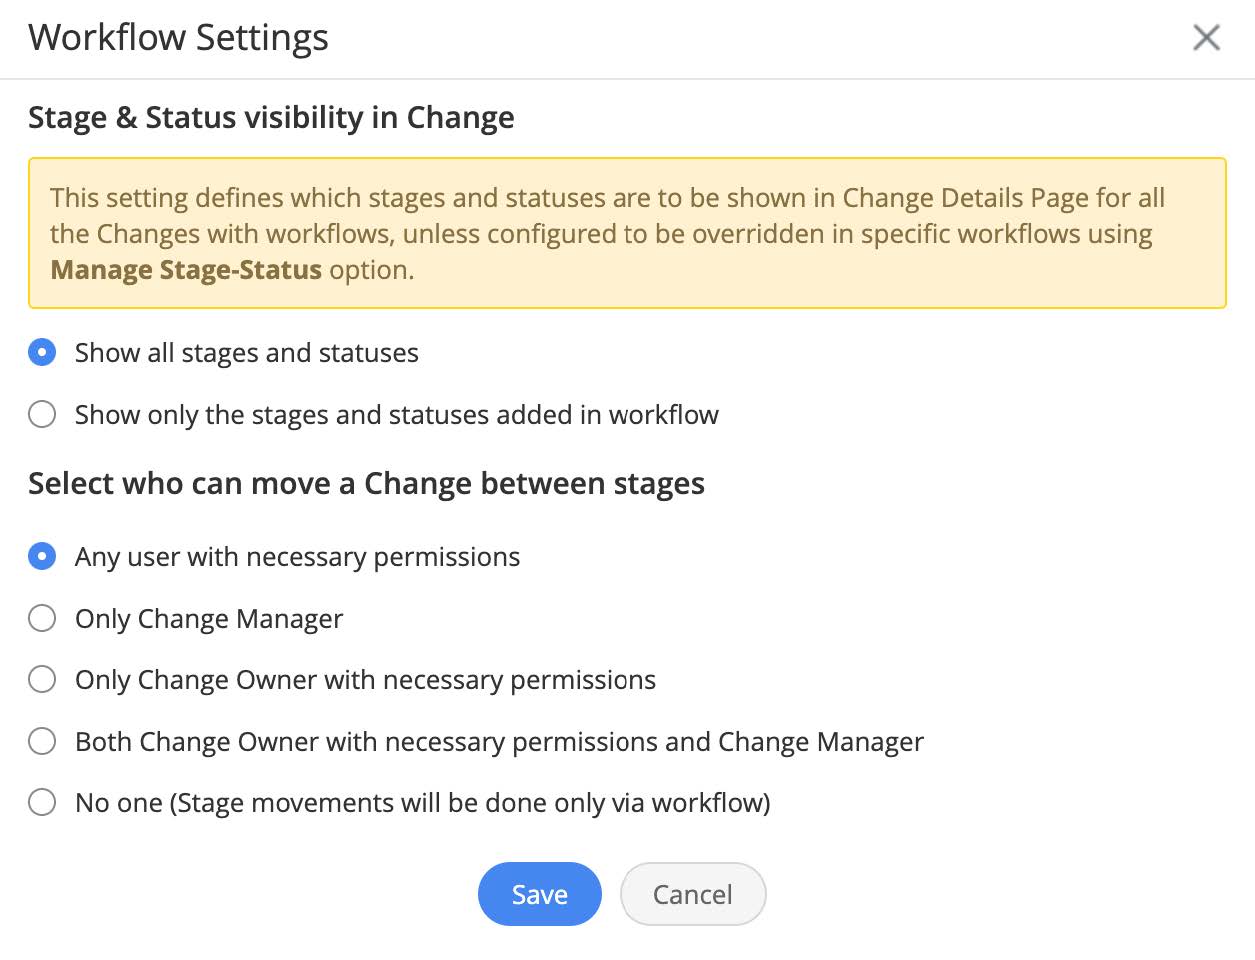
 - To configure stage and status visibility for changes globally and choose which user can move changes between stages by default across, click Global Workflow Settings, and select your preferred options.
Developer Space
Custom Menu
Using custom menus, you can create menu items to perform customized actions from the request or change details page. The custom menus can be invoked from the Actions drop-down from the request details page or change details page. You can configure an action for a custom menu by using a custom function, custom widgets, or by invoking a URL. You can include custom menus in your extensions and the custom menus will respective modules of the instance in which the extension is installed.
To create a custom menu,
- Go to Developer Space > Custom Menu.
- Select your preferred option from the drop-down: Custom Menu for Request or Custom Menu for Change.
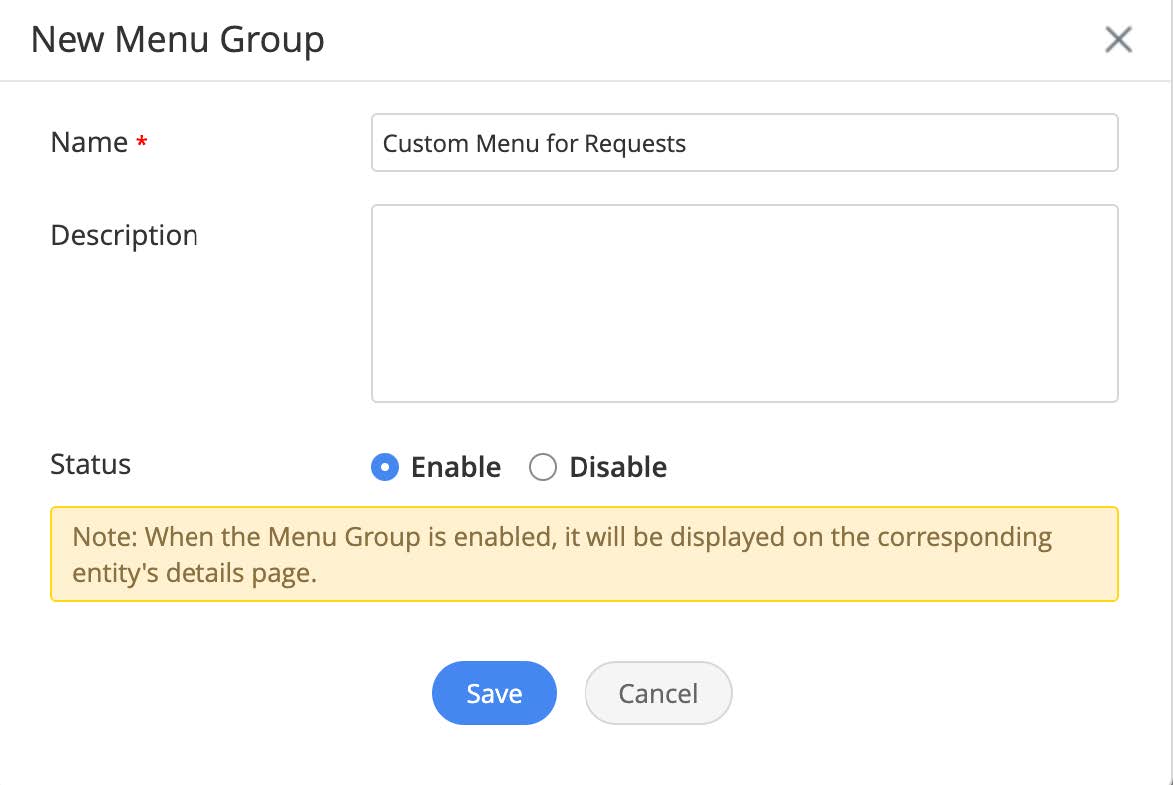
- Create a Menu Group:
- Click New Custom Menu (when no menu group already exists) or select New Menu Group from Add drop-down (when menu groups already exist).
- Provide name, description, and set status.
- Click Save.
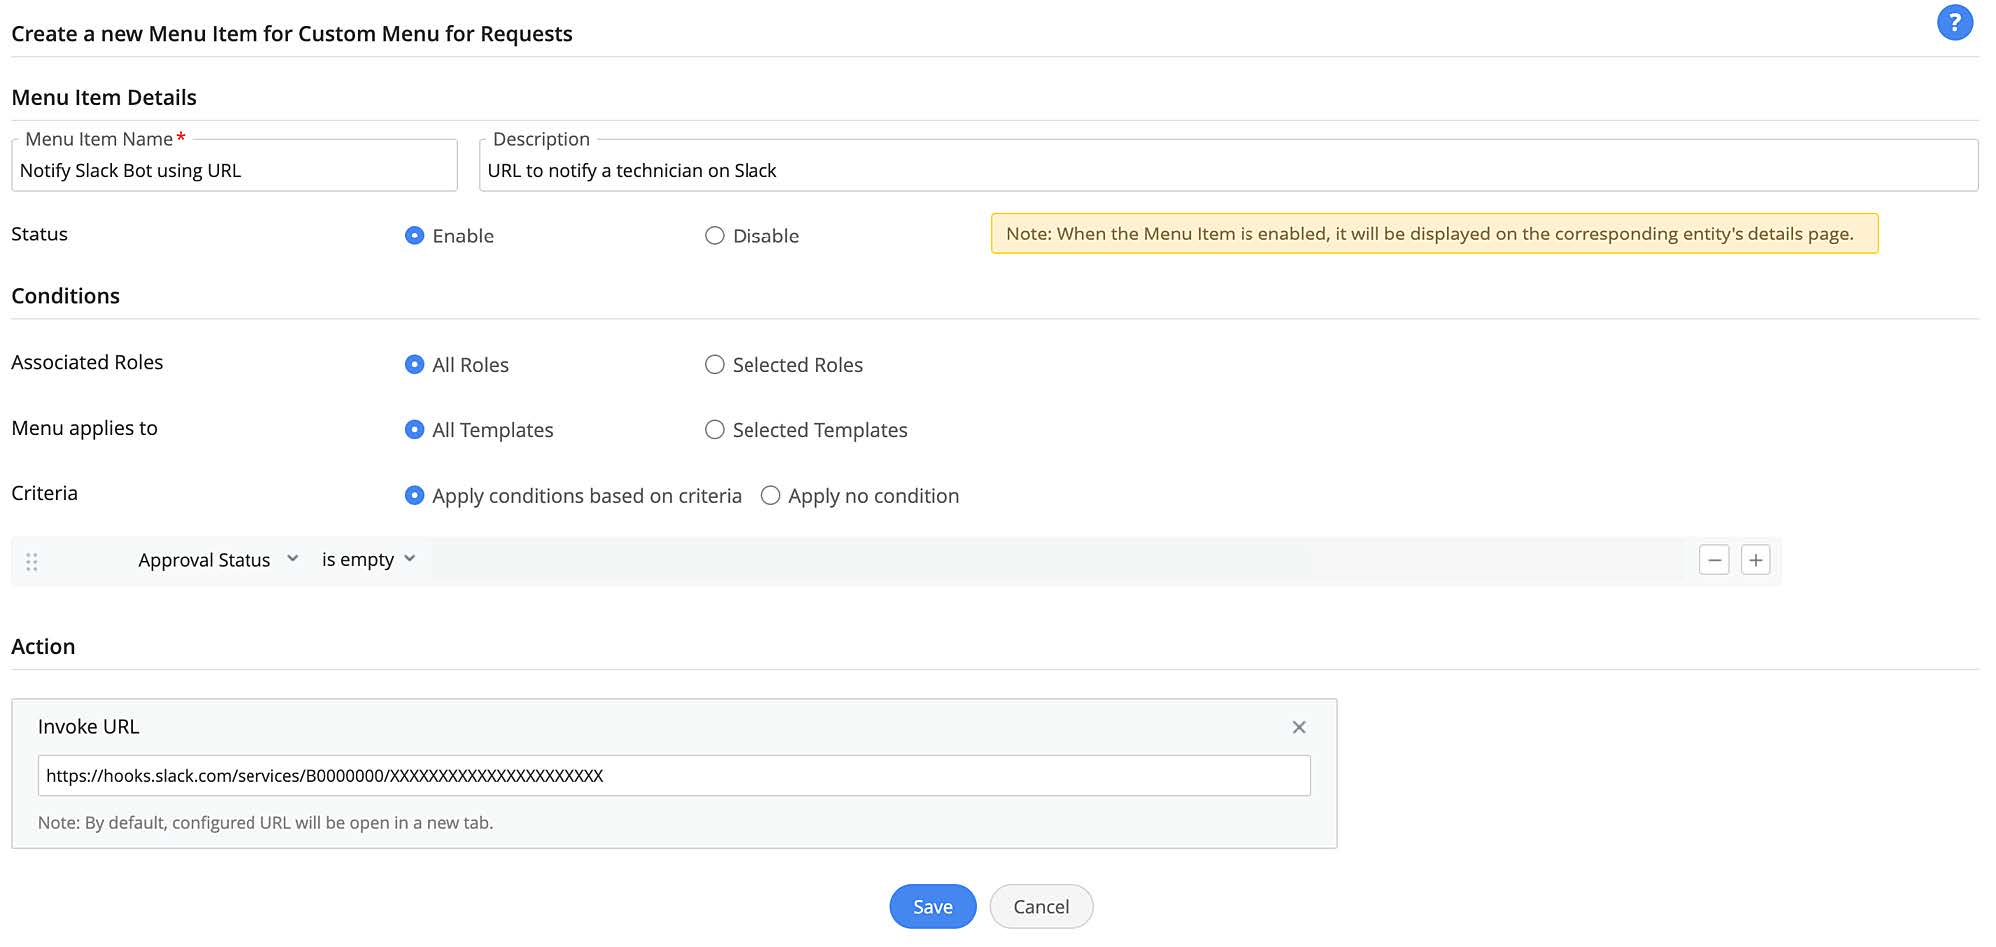
- Add items to Menu Group:
- Go to the menu group to which you want to add a menu item.
- Select New Menu Item from the Add> drop-down.
- Fill out the necessary details and click Save.
For detailed instructions on how to create a custom menu, click here.
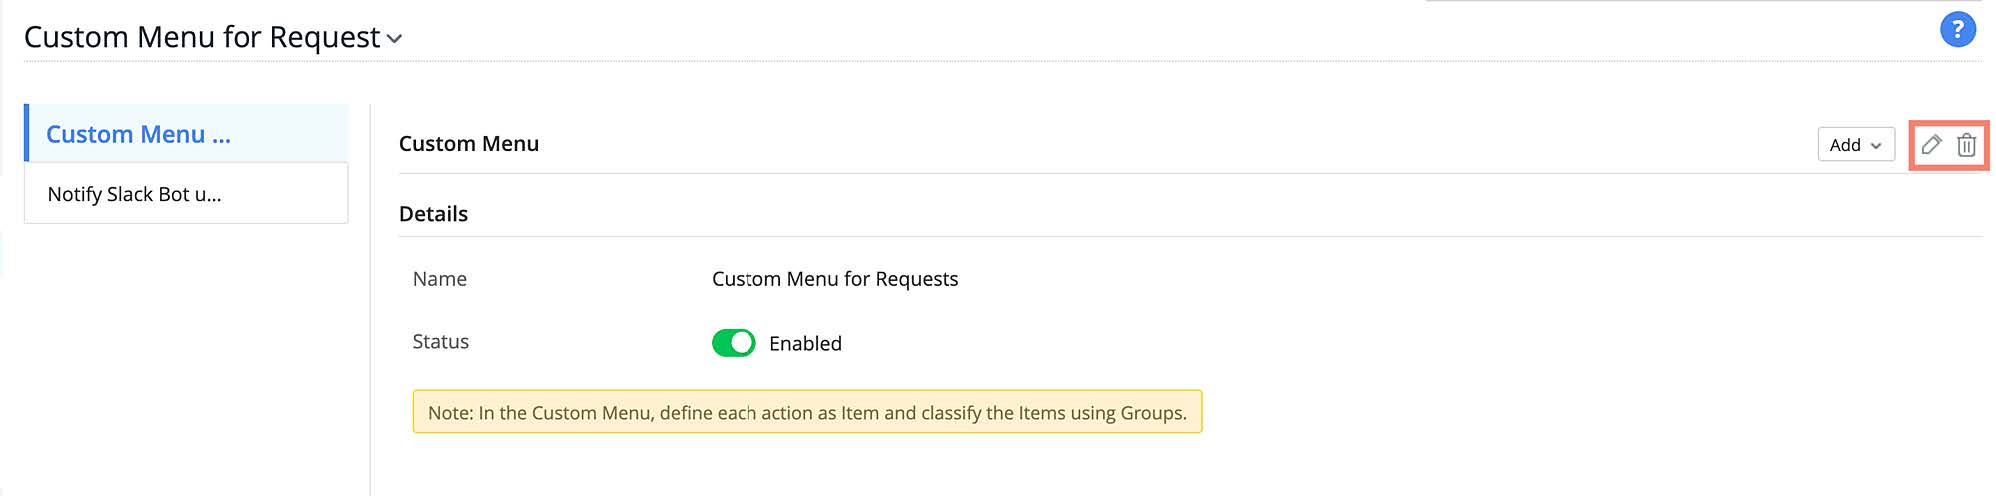
Mange custom menu
You can manage your custom menus included in the extension from the list view. To access the list view, go to Developer Space > Custom Menu and select an option (Custom Menu for Request or Custom Menu for Change) from the dropdown to view custom menus for your preferred module.
- To edit a custom menu group, click the menu group name, click Edit
 ,
make changes as required, and click Save.
,
make changes as required, and click Save. - To delete a custom menu group, click the menu group name, click Delete
 , and confirm your action.
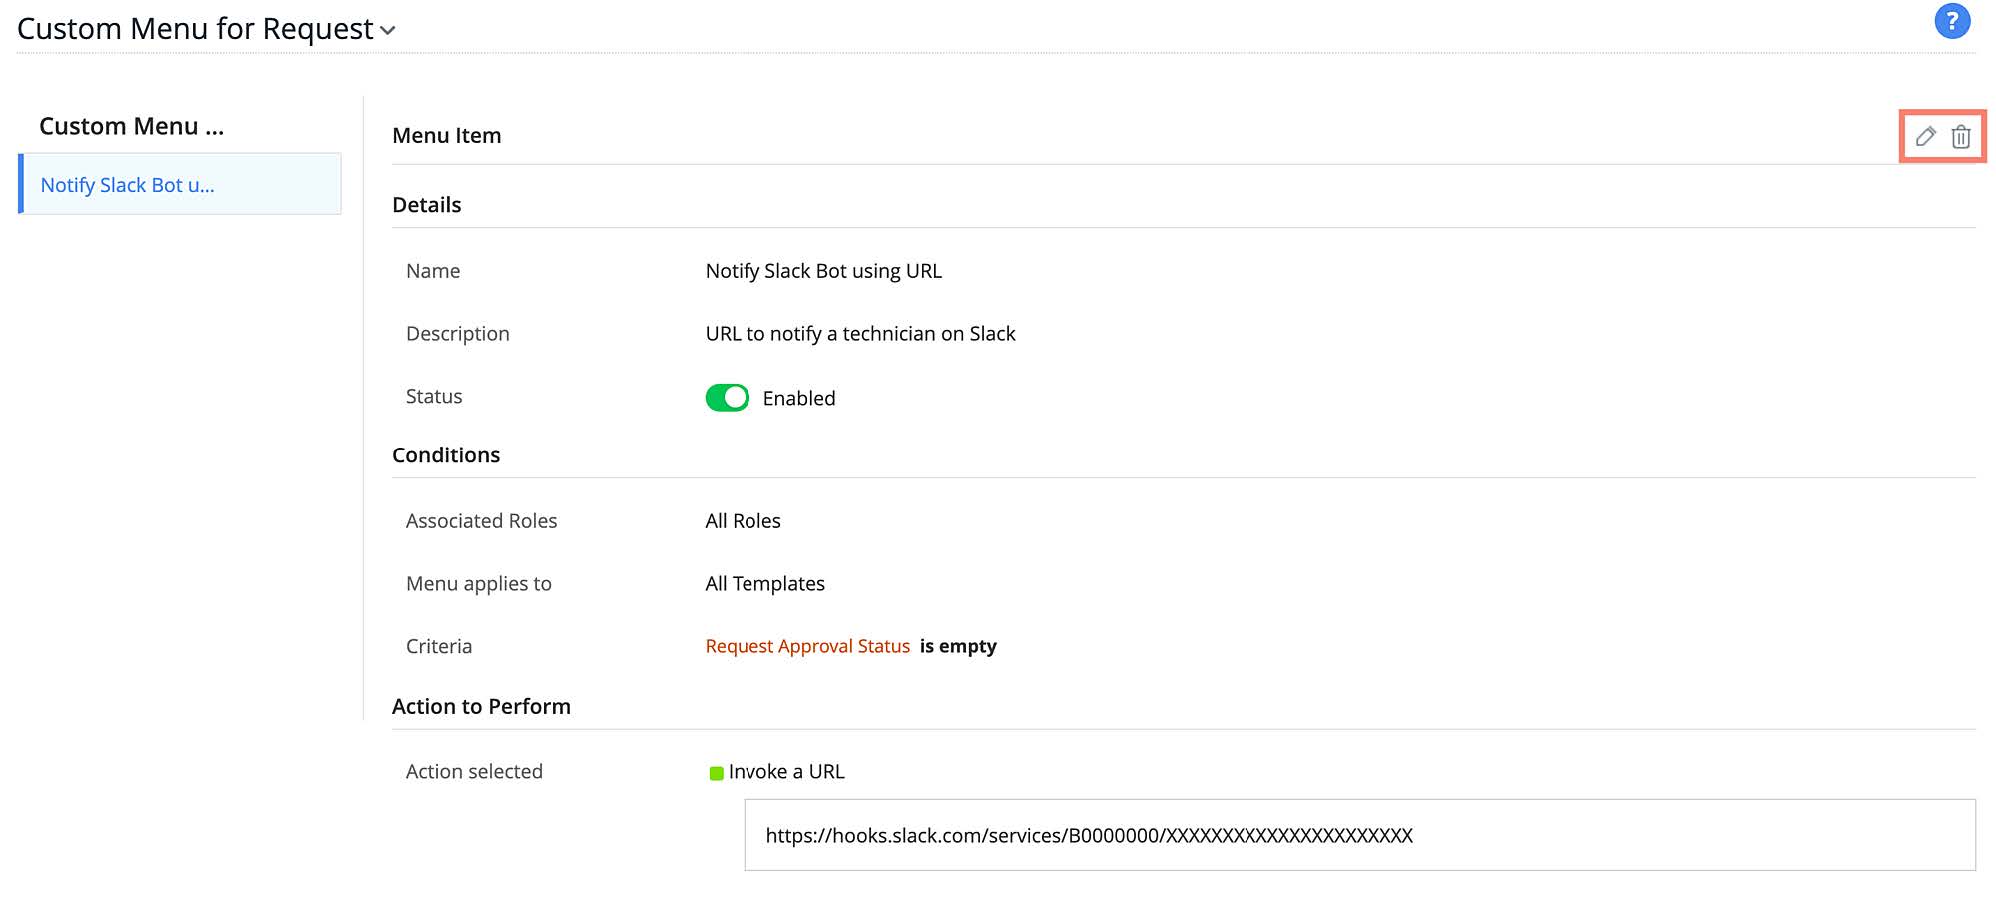
- To edit a custom menu item, click the menu item name, click Edit , make changes as required, and click Save.
- To delete a custom menu item, click the menu item name, click Delete , and confirm your action.
To learn more, click here.
Custom Widgets
Custom Widgets bring external services inside ServiceDesk Plus Cloud and extend the capabilities of your application. Widgets are embeddable UI components that you can create on your own, using our JS Software Development Kit. Custom widgets enable you to access third-party applications and web pages from within ServiceDesk Plus Cloud. You can include custom widgets in your extensions to add the widgets to the instances in which the extension is installed.
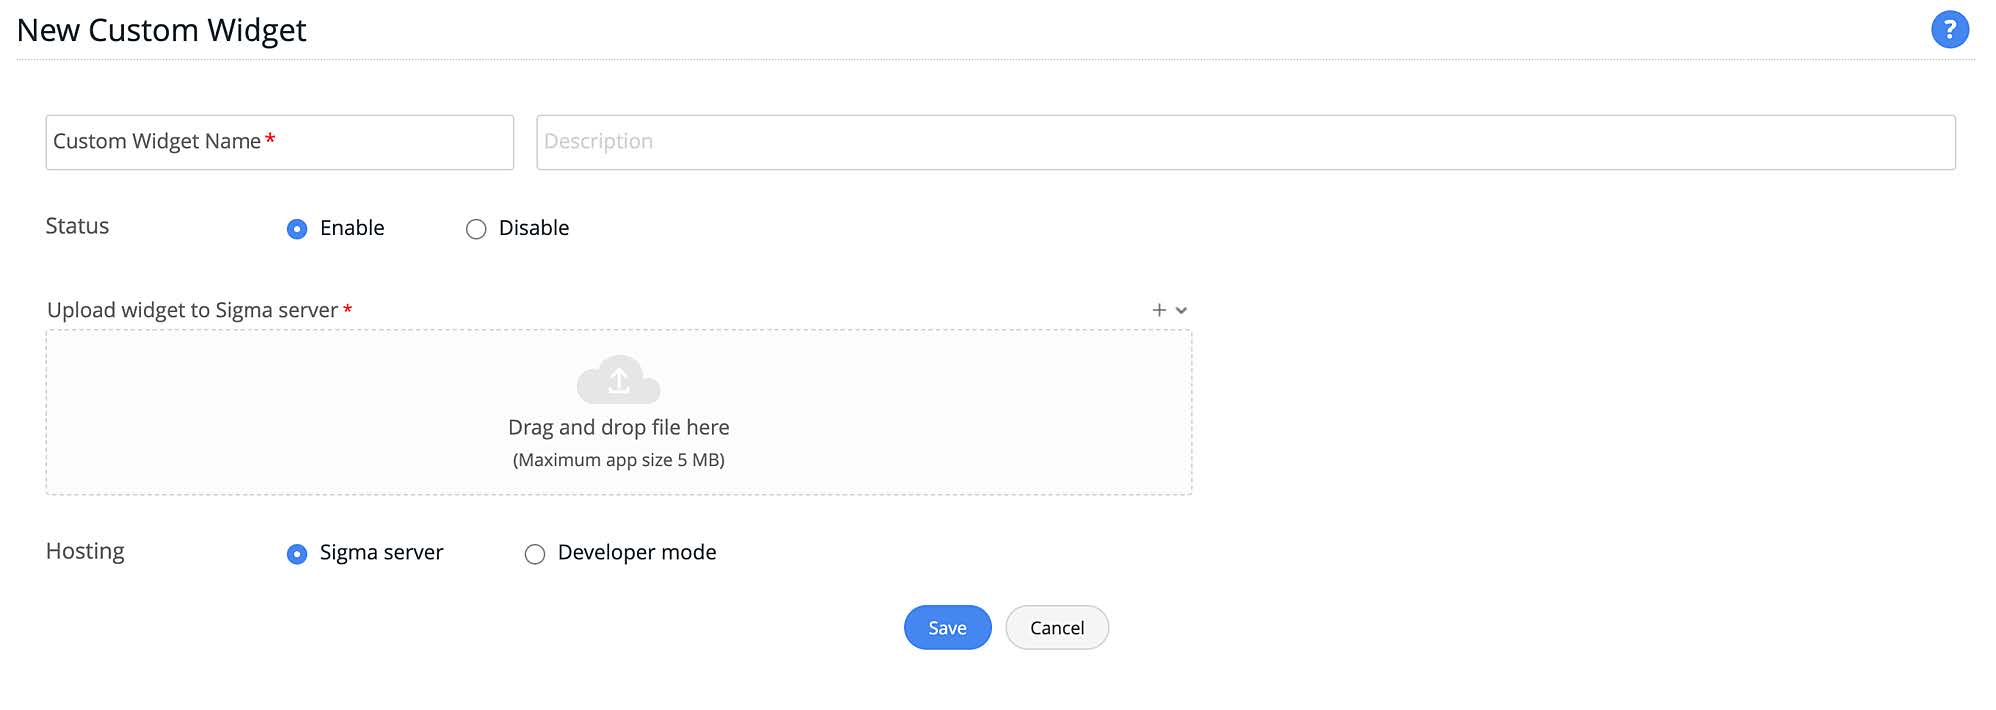
To create a custom widget,
- Go to Developer Space > Custom Widgets.
- Click New Custom Widget.
- Provide a name and description.
- Set status and upload your widget.
- Choose hosting type as Sigma server. Extensions can be published only if the hosting type of the widget is set to Sigma server.
- Click Save.
For detailed instructions on creating custom widgets, click here. For more information on custom widgets, click here
Custom Functions
Custom functions are used to manipulate data within ServiceDesk Plus Cloud and other external applications. For example, you can modify a request data or modify field data using another field data. Custom functions are written in Zoho's proprietary scripting language called Deluge. To learn more about Deluge and how to write custom functions in Deluge, click here.
The custom functions under Developer Space allow you to create functions that can be used in Custom Modules, Scheduled Functions, and Callback Functions.
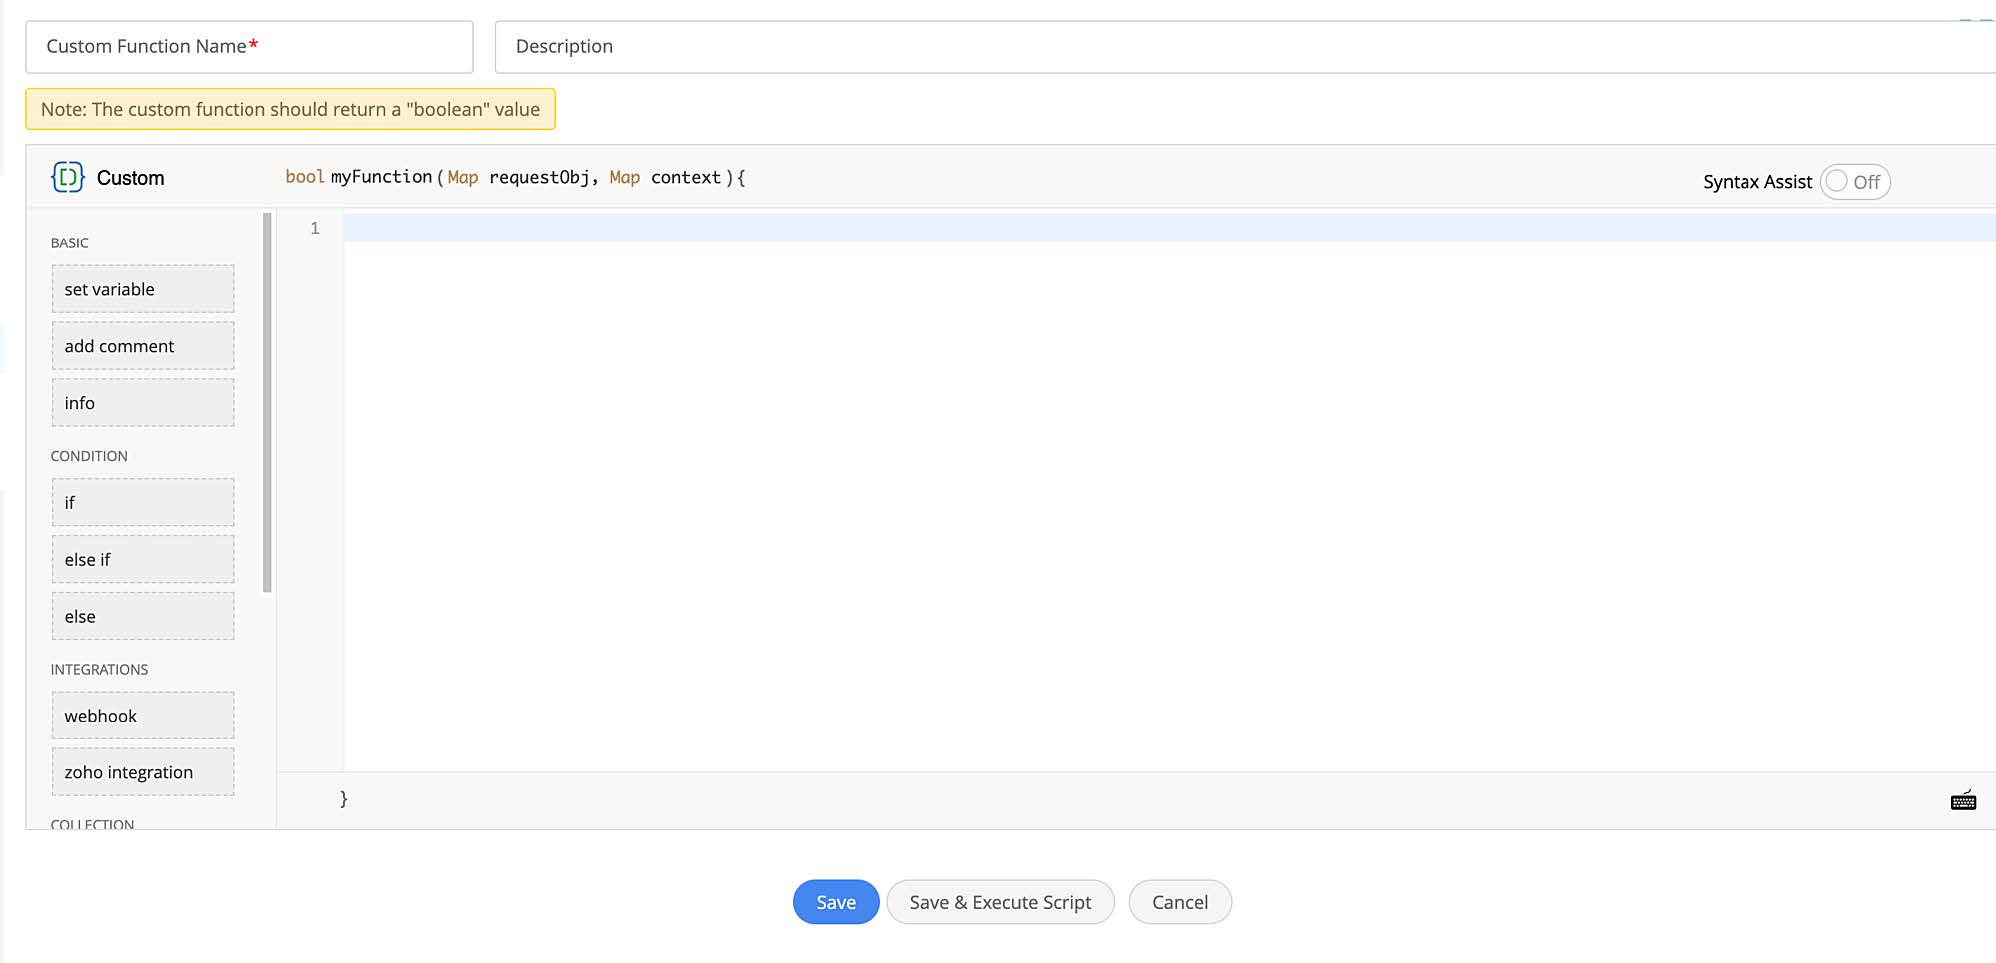
To create a custom functions,
- Go to Developer Space > Custom Functions.
- Click New Custom Function.
- Provide a name and description.
- Use the Deluge script editor to build your custom function.
- Finally, click Save.
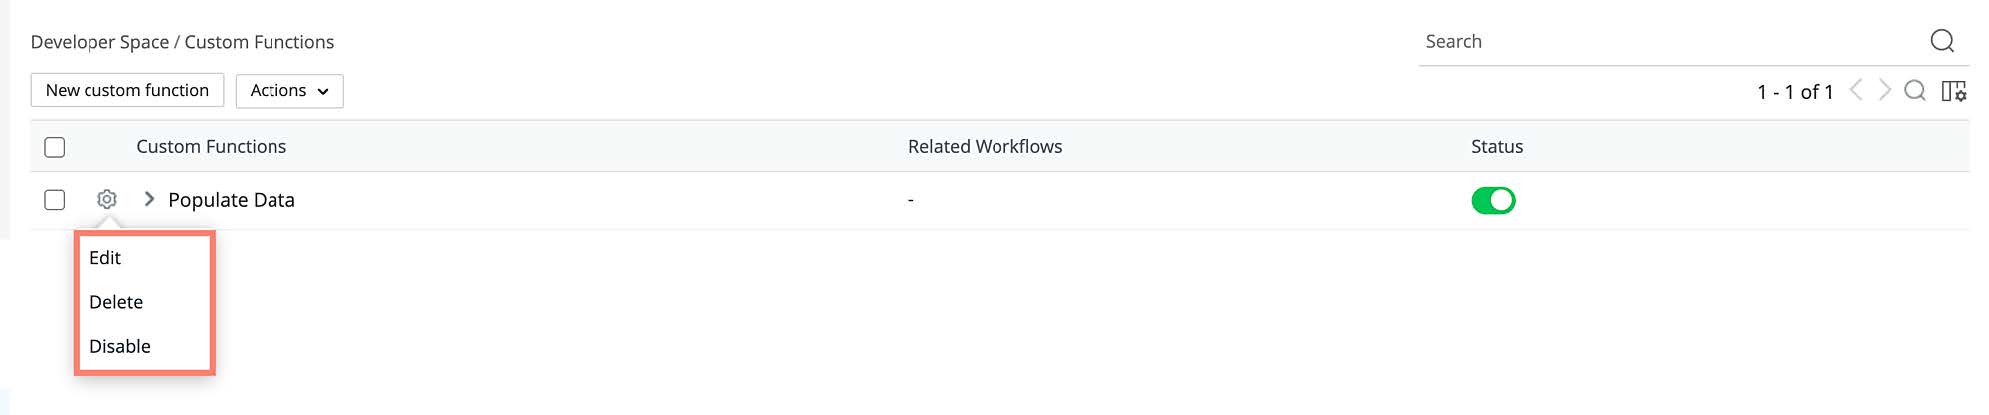
Manage Custom Functions
You can manage the custom functions configured in your extension from the list view. To access the list view, go to Developer Space > Custom Function.
- To edit a custom function, click the gear icon beside the function, choose Edit, make necessary changes, and click Save.
- To enable/disable a custom function, click the gear icon beside the function, and choose an appropriate option. Alternatively, you can also use the toggle under the Status column.
- To delete a custom function, click the gear icon beside the function, and choose Delete.
You can also delete, enable, disable, or turn on/off cascade execution in bulk. To do this, select the required business rules, and choose an appropriate option from the Actions drop-down.

Connections
Connections is a simple authentication mechanism to connect your ServiceDesk Plus Cloud account with external applications. You can use Connections inside custom functions to invoke any third-party applications' REST APIs.
To set up a connection,
- Go to Developer Space > Connections.
- Click Create Connection.
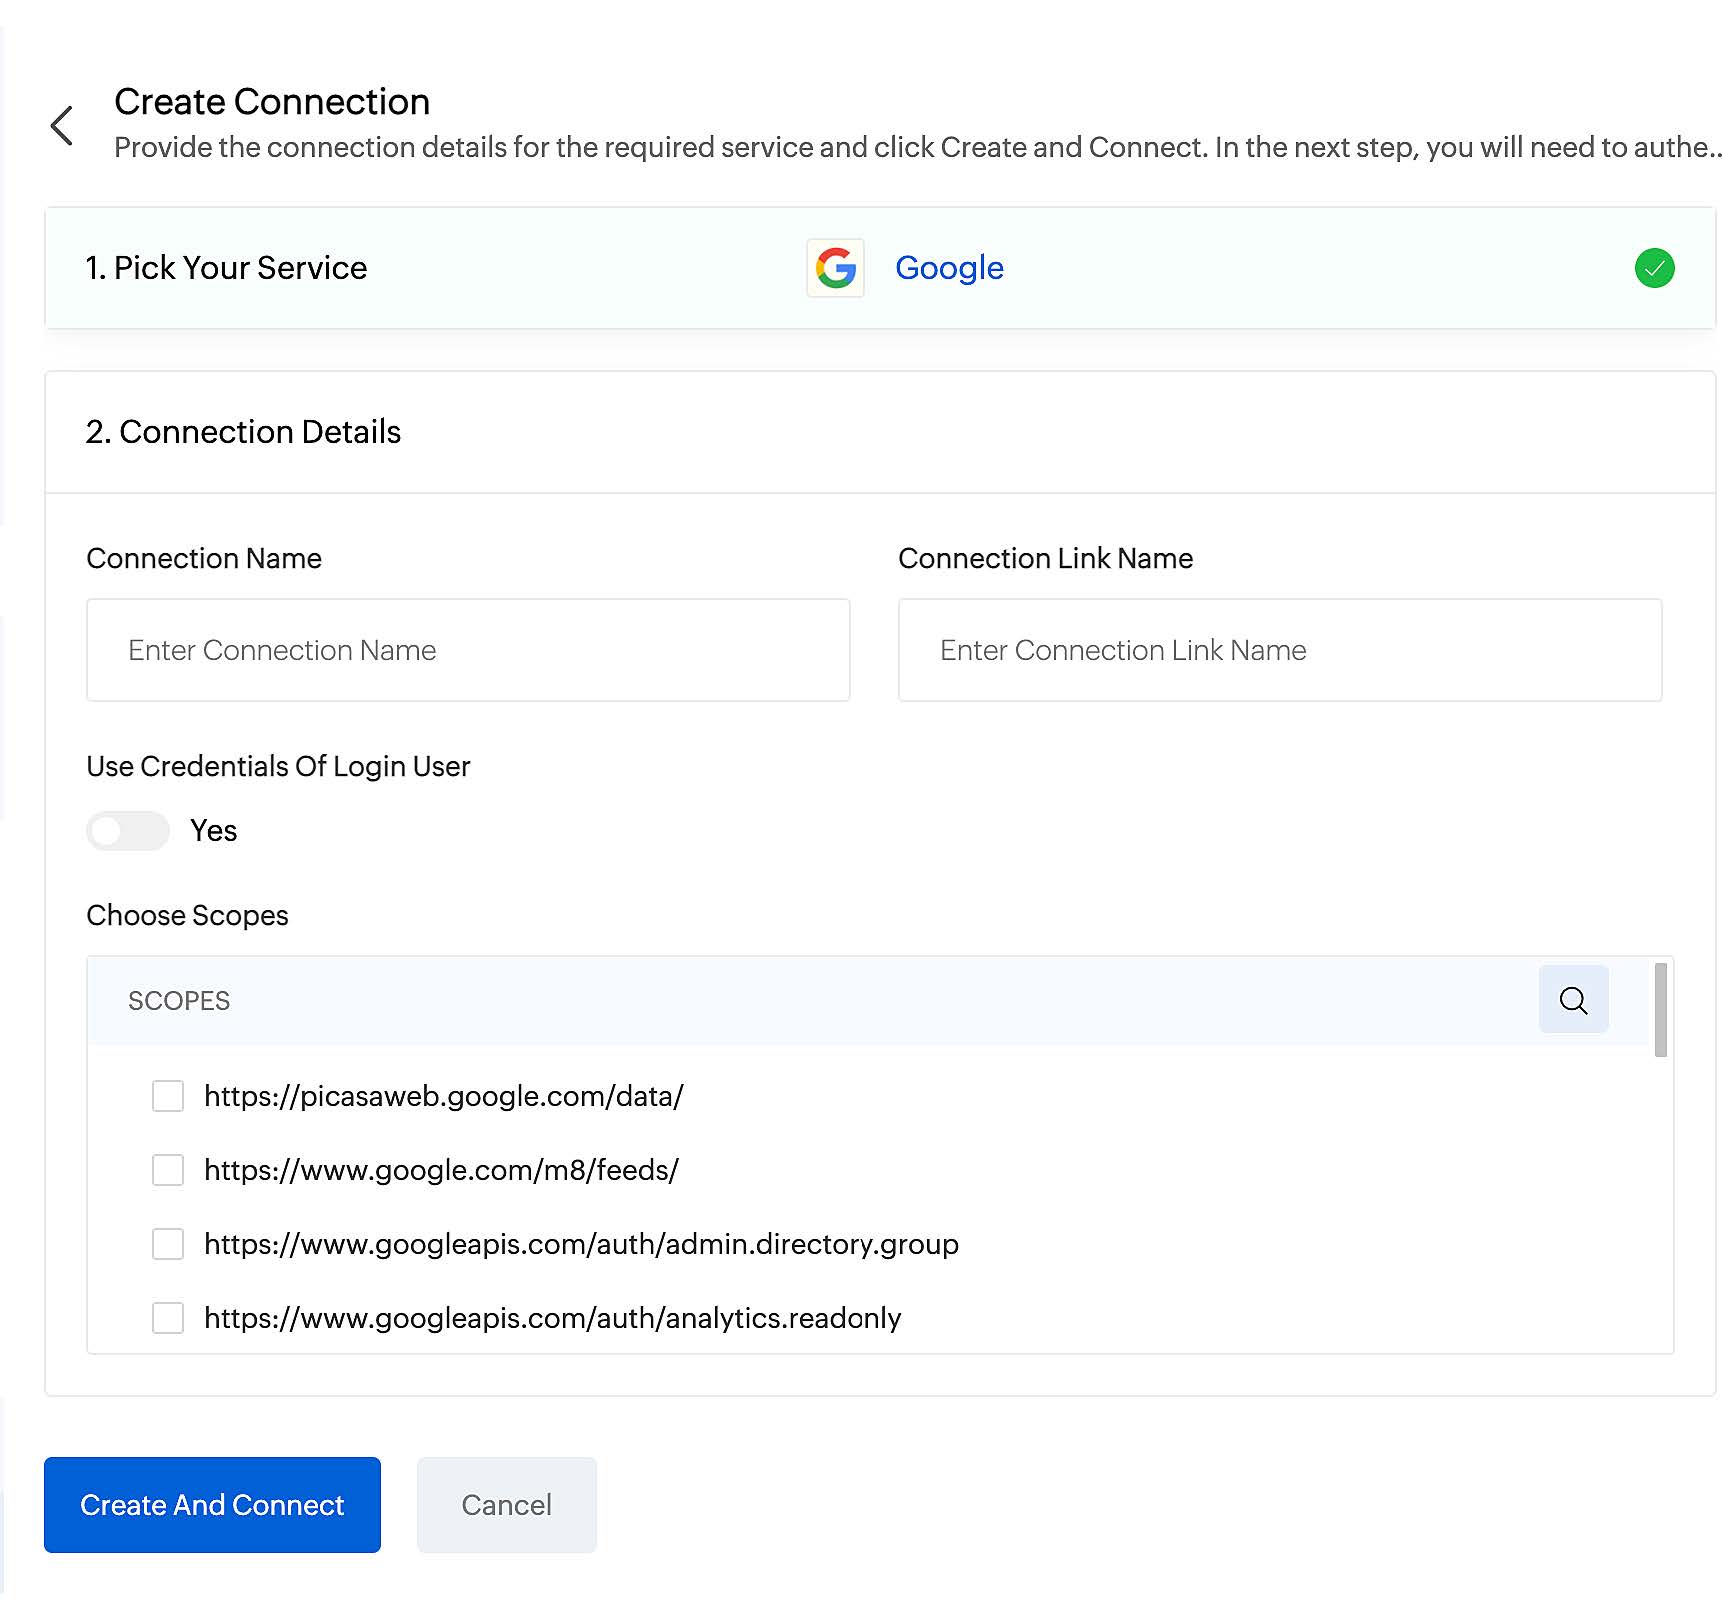
- Select Service Type and follow the instructions:
- Default Services:
- Choose a default service.
- Provide connection details such as connection name, connection link name, credentials, scopes, etc, as applicable.
- Click Create and Connect.
For detailed instructions on creating connections for default services, click here.
- Custom Services:
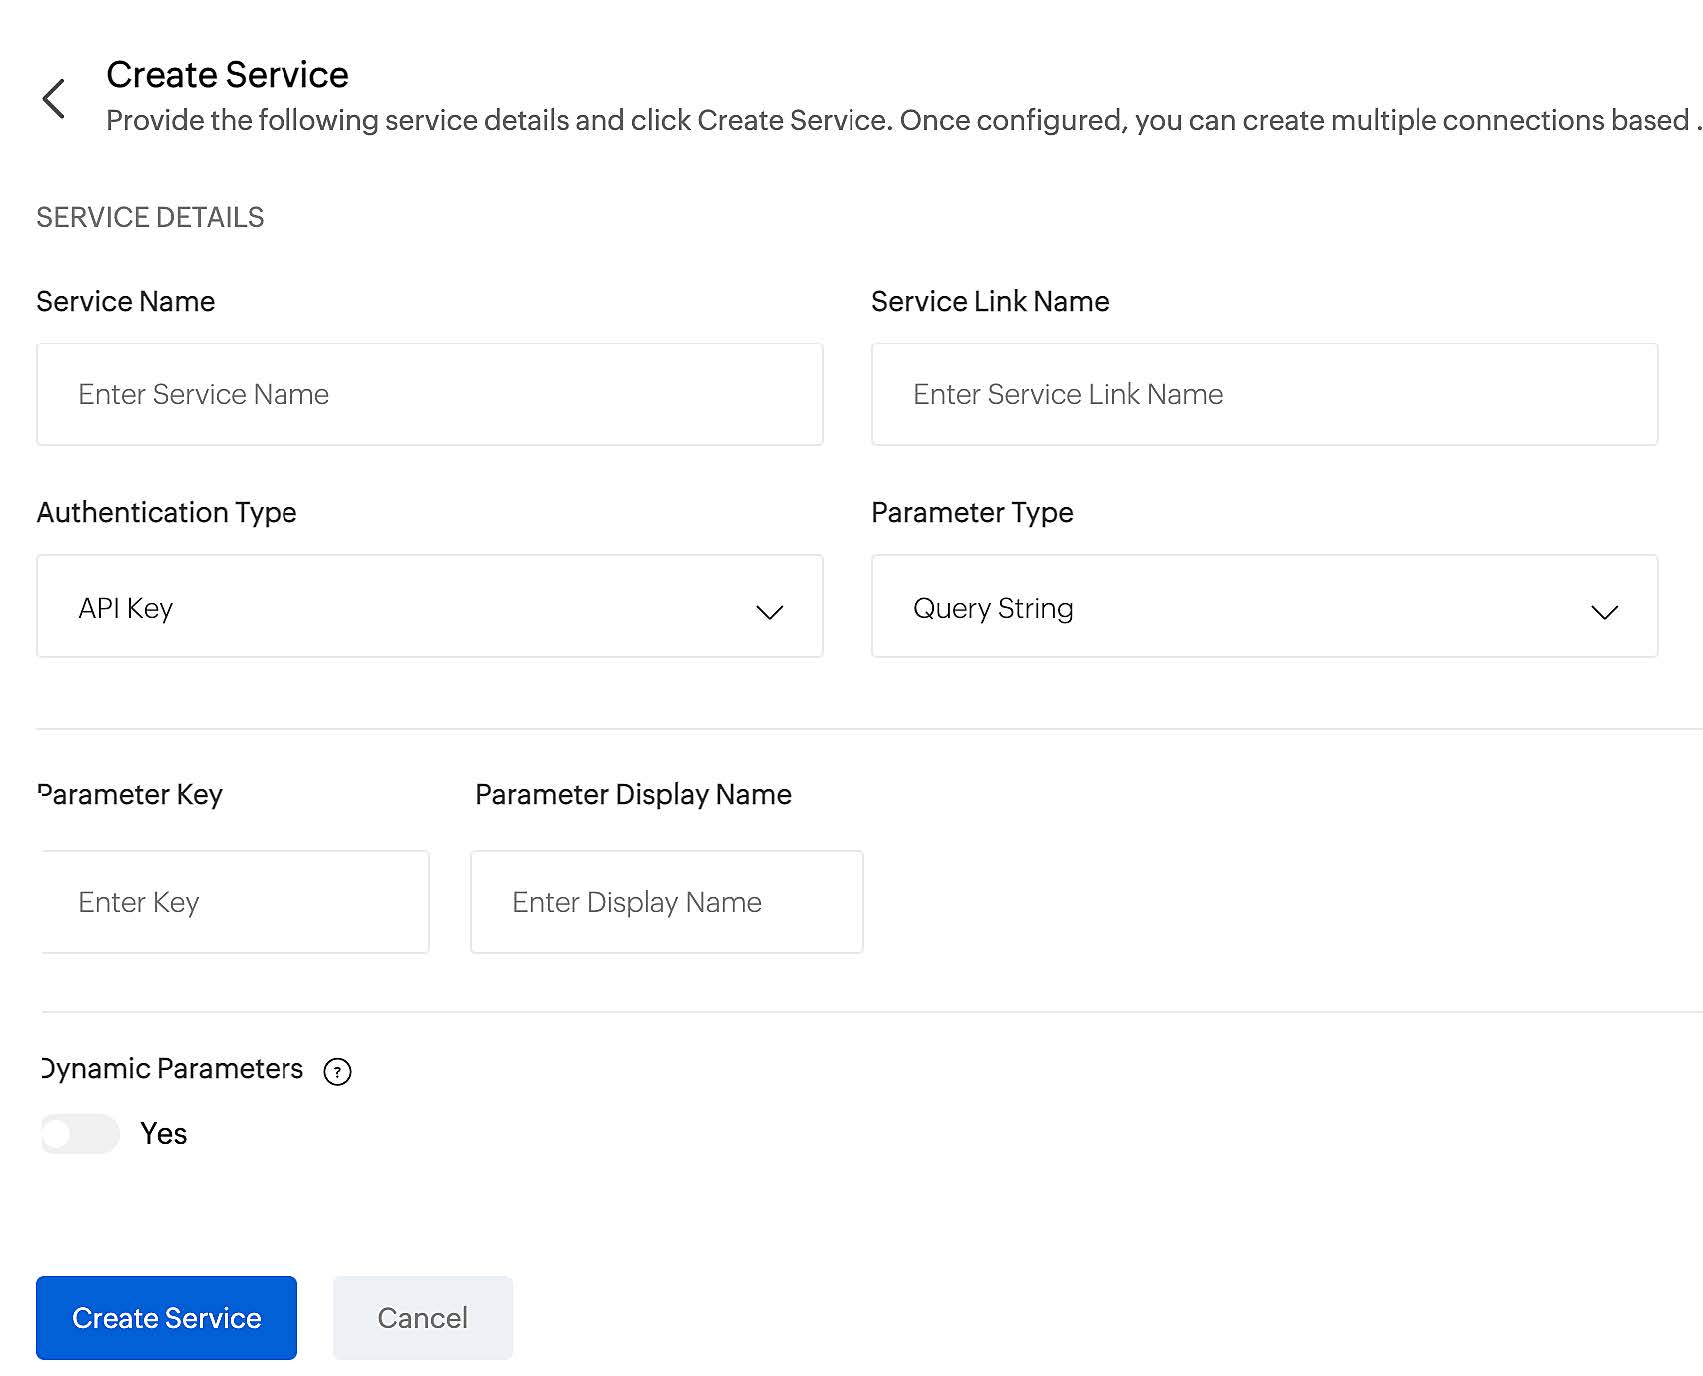
- Click Create New Service.
- Provide service name, service link name, choose an authentication type, parameter type, provide parameter key, parameter display name, add dynamic parameter, as required.
- Click Create Service.
For detailed instructions on creating connections for custom services, click here.
- Default Services:
Manage connections
You can manage connections added to your extension from the list view. To access the list view, go to Developer Space > Connections.
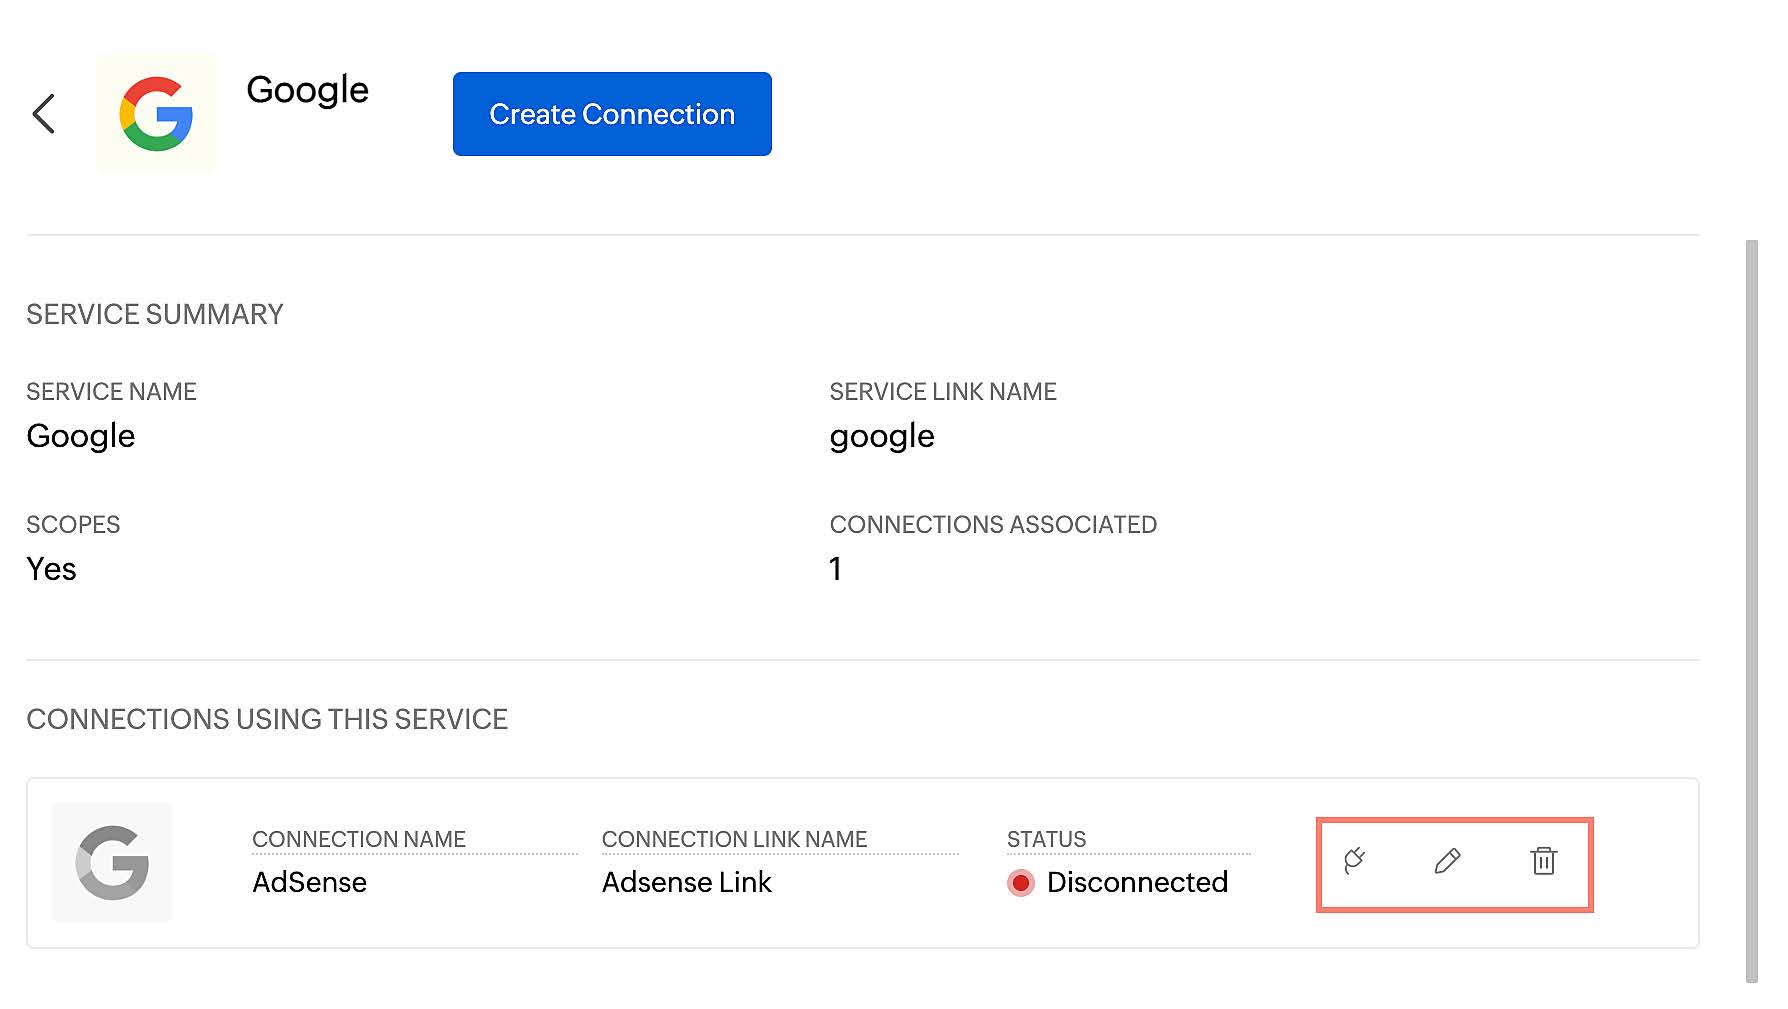
- To edit a default service connection, click Default Services, click the card of
your preferred default service, hover over the connection and click Edit ,
make changes as required, and click Save.
- To delete a default service connection, click Default Services, click the card
of your preferred default service, hover over the connection and click Delete , and confirm your action.
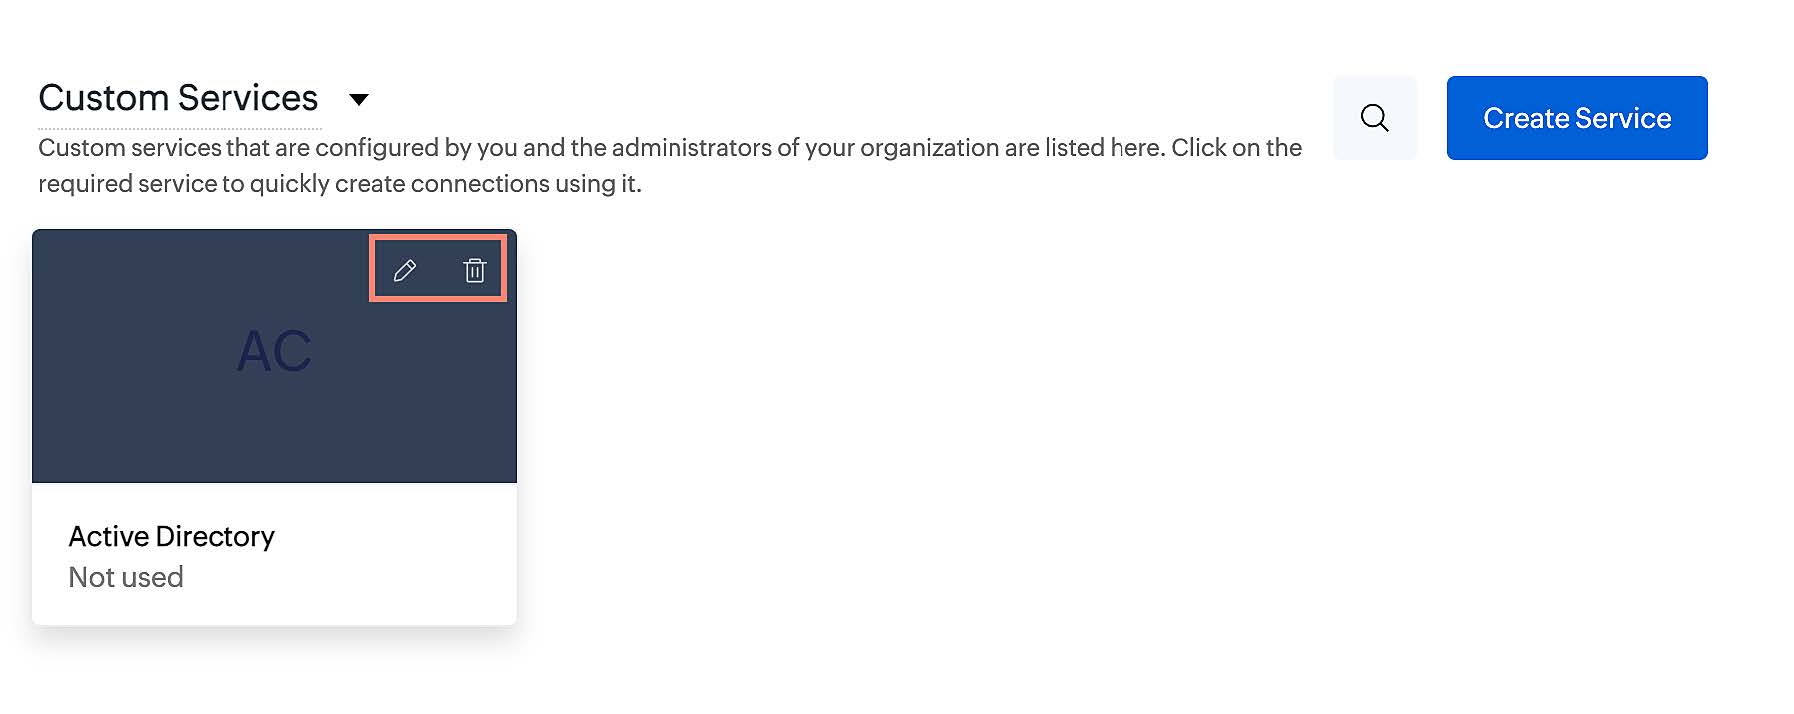
- To edit a custom service connection, click Custom Services, hover over the connection and click Edit , make changes as required, and click Save.
- To delete a custom service connection, click Custom Services, hover over the connection and click Delete , and confirm your action.
- To edit a custom service connection, click Custom Services, over your preferred custom service connection and click Edit , make changes as required, and click Save.
- To delete a default service connection, click Custom Services, and click the card of your preferred custom service connection and click Delete , and confirm your action.
You can also delete edit or delete a connection from the details page by clicking More  and selecting the corresponding option.
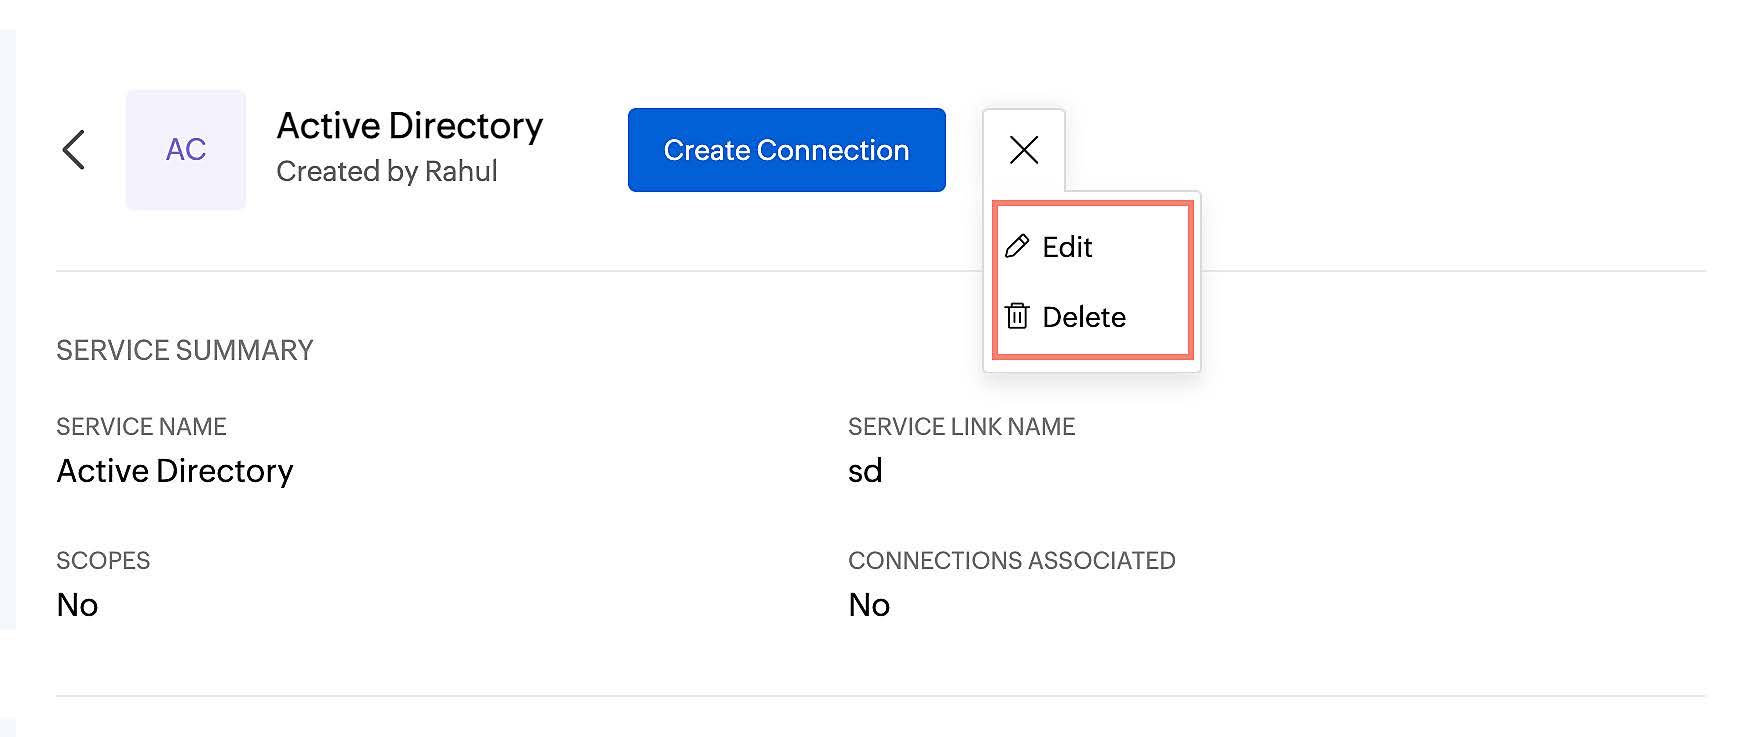
You can also manage all your connections from My Connections.
Custom Modules
Custom modules allow you to create modules to manage custom records similar to the default modules such as requests, solutions, problems, etc., as well as manage custom admin configurations similar to status, priority, impact, etc. A collection of records are managed using the Web Tab type custom modules and custom admin configurations are managed using the Custom Configurations type custom modules. You can include custom modules in your extension to add them to the instance in which the extension is installed.
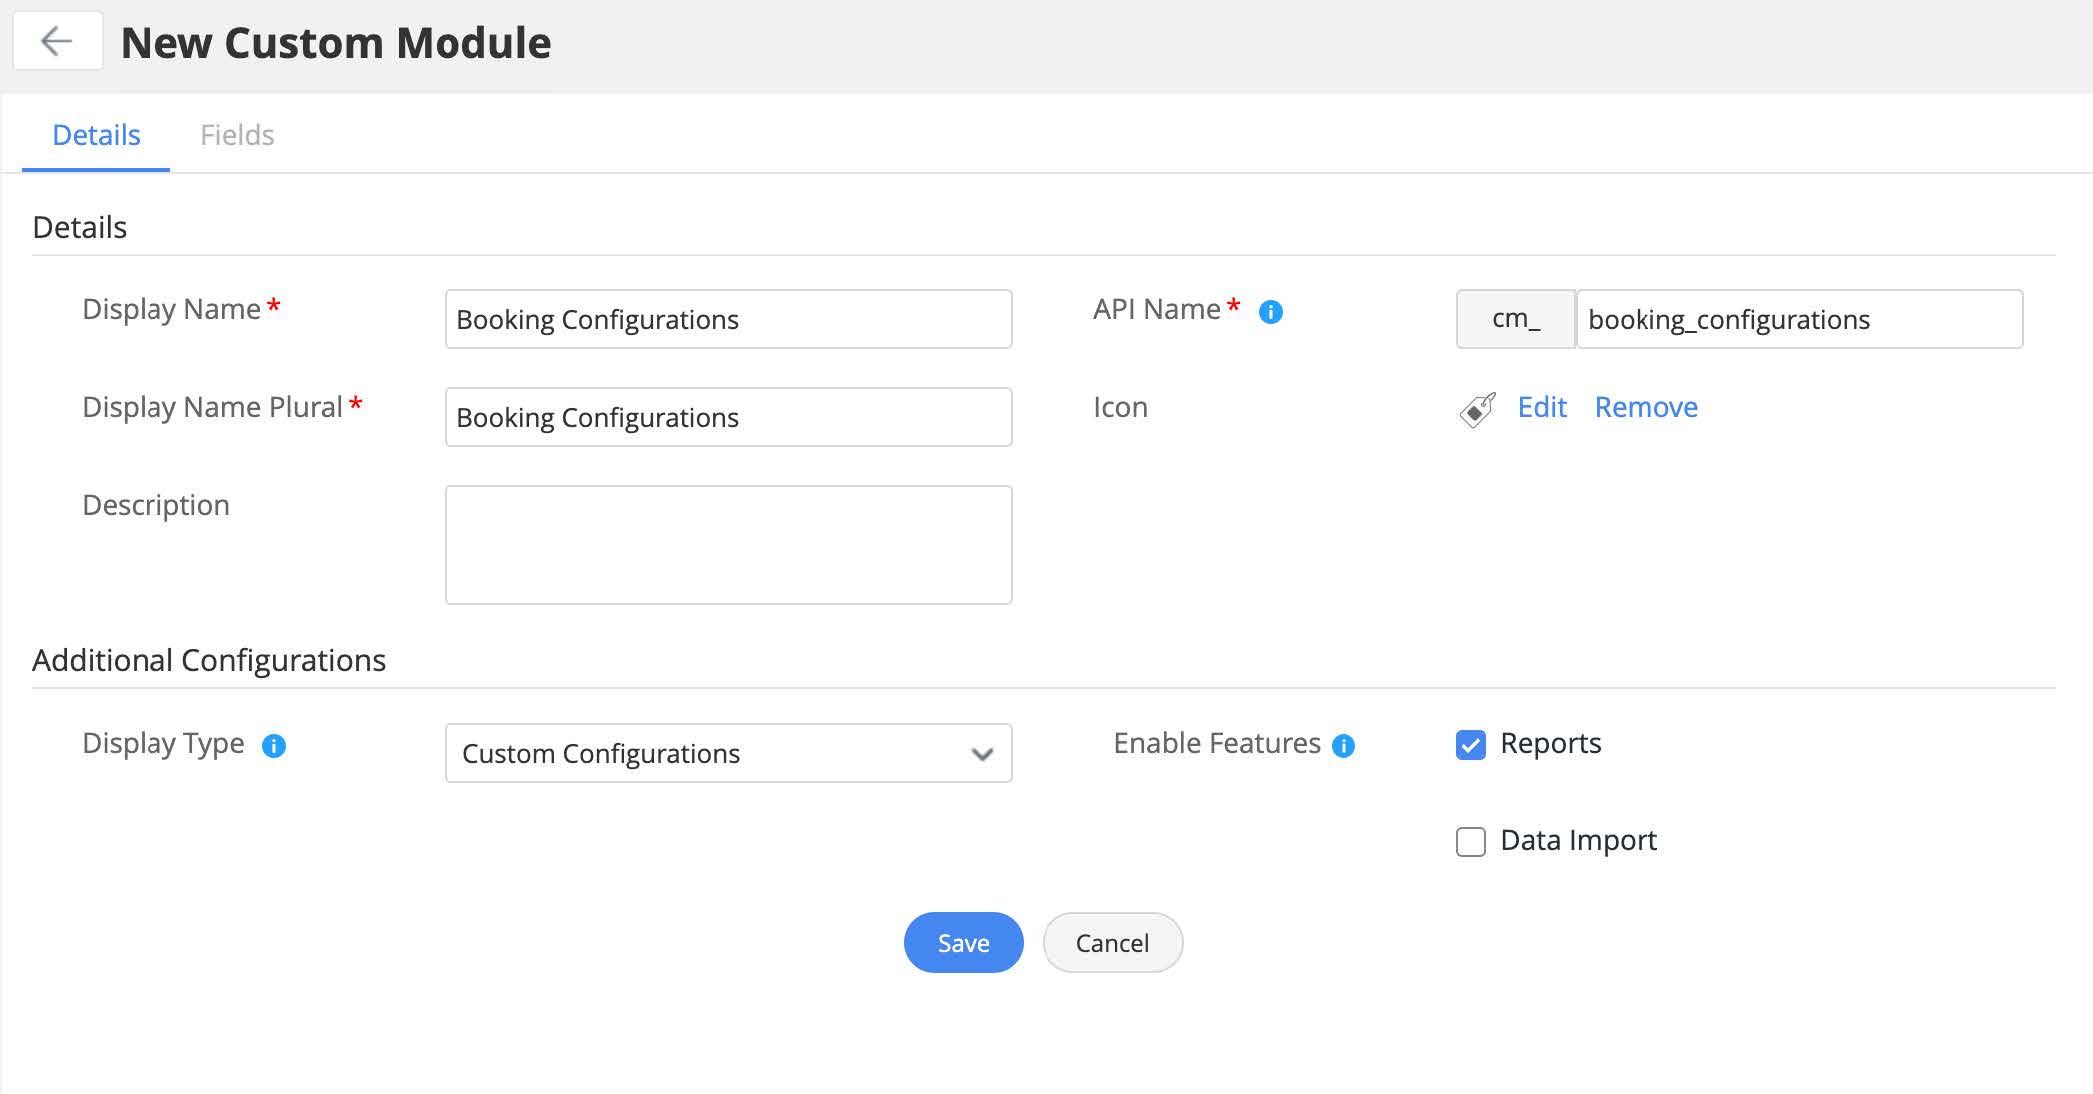
To create a custom module,
- Go to Developer Space > Custom Modules.
- Click New.
- Under the Details tab, provide the display name, display plural name, API name, description, select or upload an icon, choose display type (Web Tab or Custom Configurations), and enable required features (reports, data import).
- Click Save.
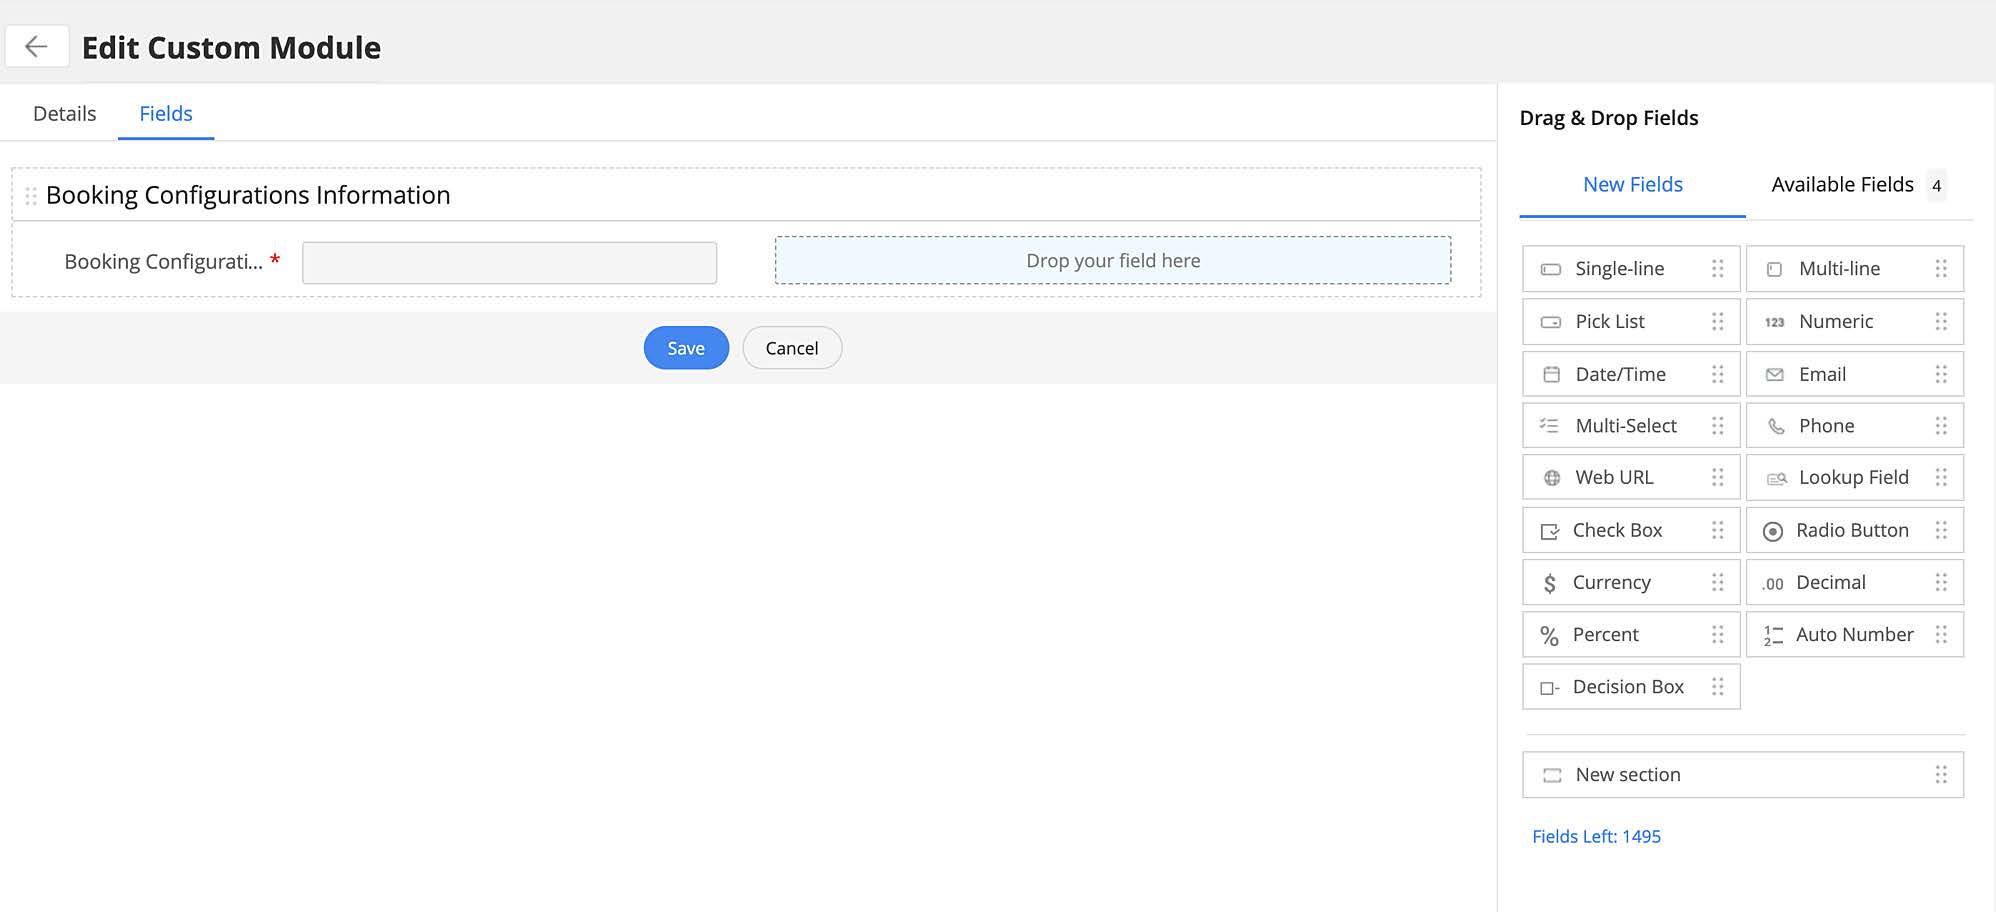
- Under the Fields tab, add or remove fields based on your requirement to collect the necessary information for each record. You can also add or remove sections as required.
- Finally, click Save.
For detailed instructions on creating custom modules, click here.
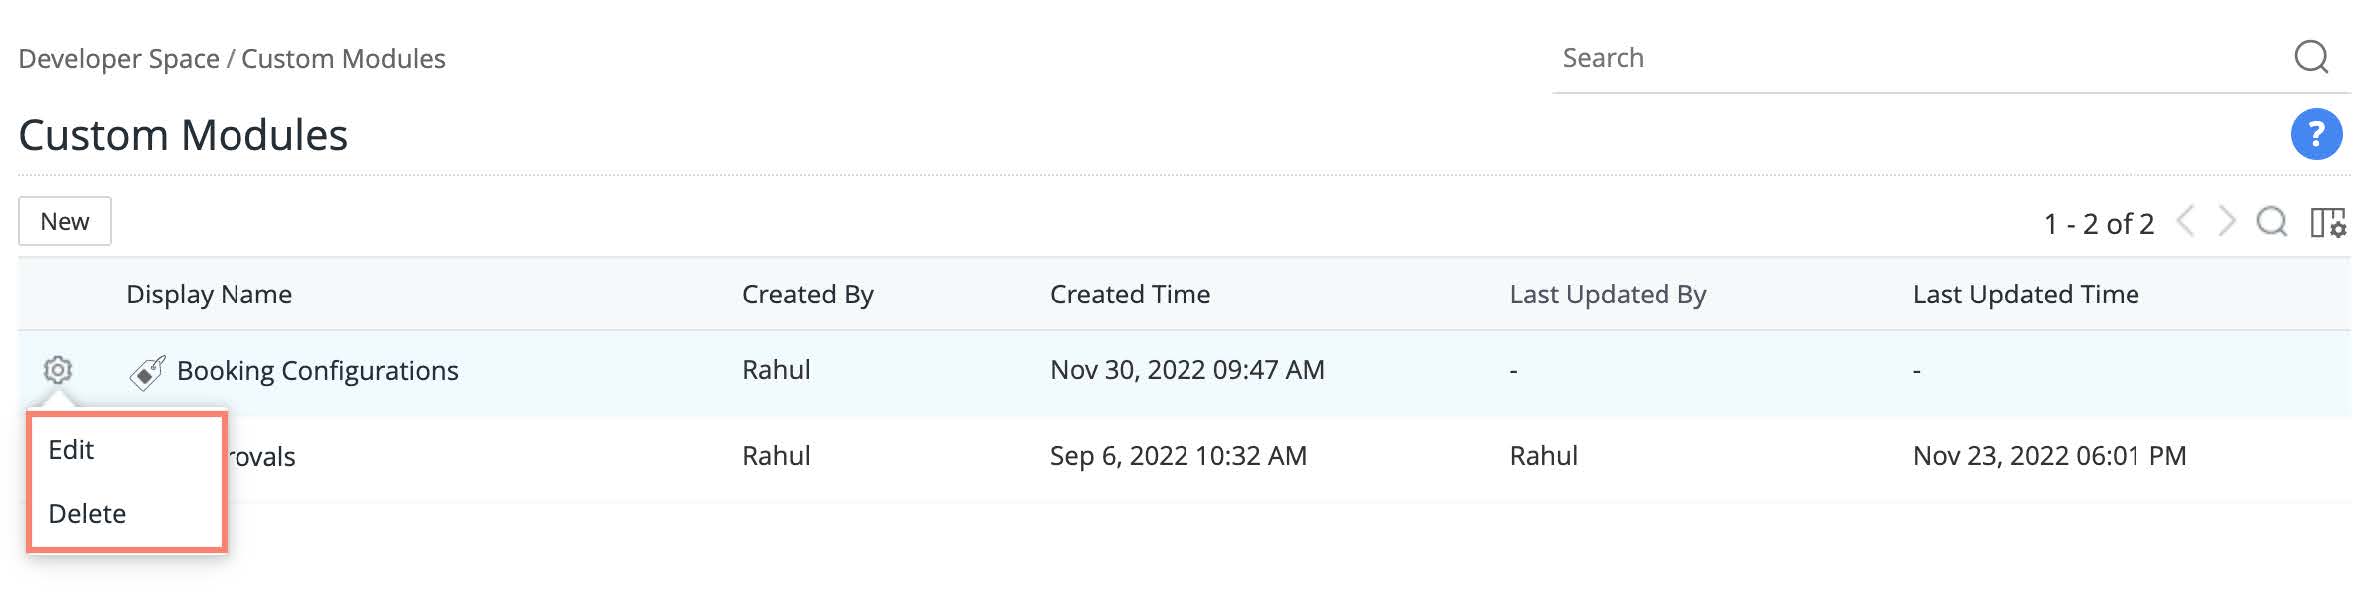
Managing Custom Modules
You can manage custom modules added to your extension from the list view. To access the list view, go to Developer Space > Custom Modules.
To delete a custom module, click the gear icon beside the custom module, choose Delete, and confirm your action
Extension Configurations
Extension Variables
Extension variables are custom variables that can be used to hold information within custom functions specific to the extension. You can use extension variables to store data such as auth tokens, usernames, passwords, etc that would be required when the extension interacts with third-party applications.
To create an extension variable,
- Go to Extension Configurations > Extension Variable, and click New Extension Variable.
- Provide display name, API name, and value (optional).
- Select Read-only to prevent the value from any modifications (optional).
- Finally, click Save.
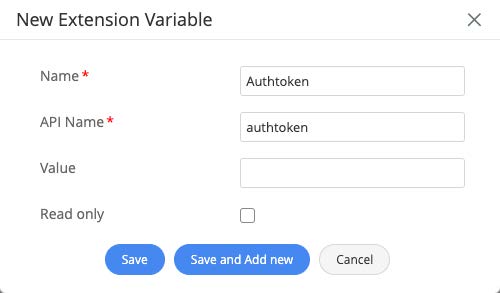
Note: After saving the variable, the API will be prefixed with the extension name. So, the complete API name will be of the format " <extension_name>_ <given_API_name>". For example, if the user-provide API name is "authtoken" and the extension name scheduler, then the full API name will be : scheduler_authtoken.
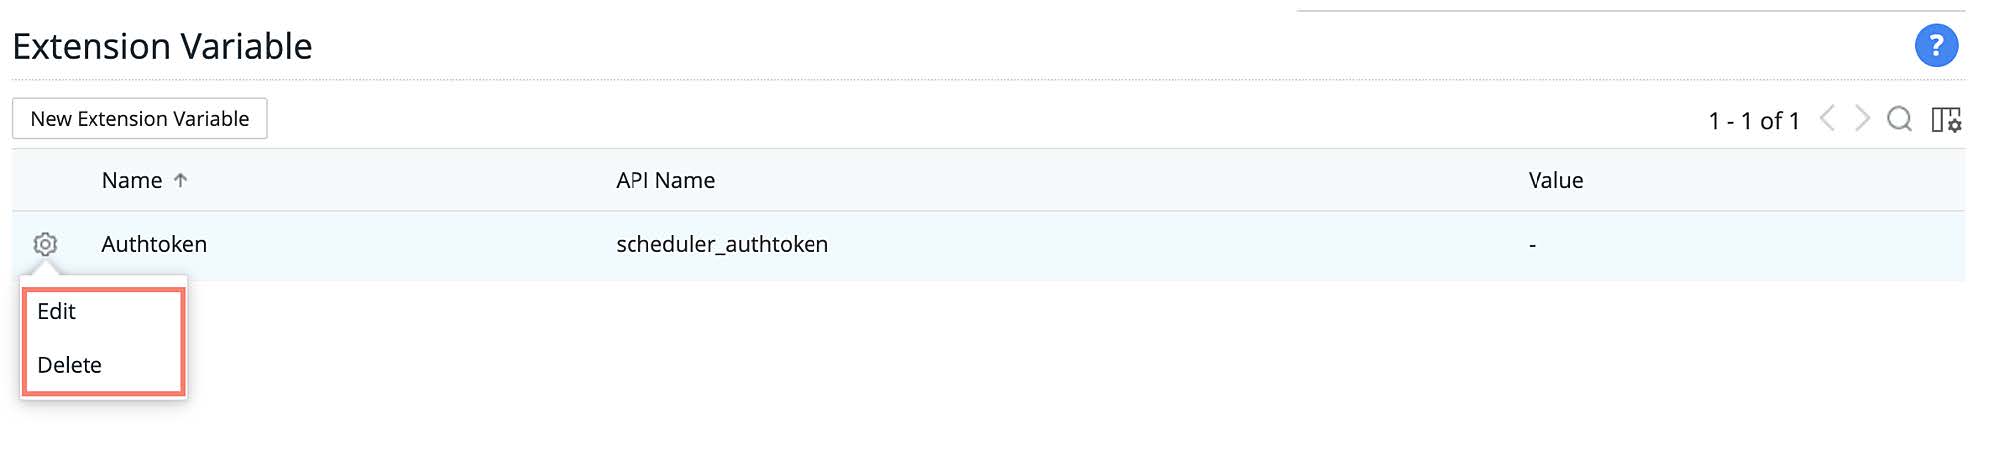
Manage Extension Variables
You can manage your extension variables from the list view. To access the list view, go to Extension Configurations > Extension Variable.
- To edit an extension variable, click the gear icon beside your preferred extension, choose Edit, make changes as required, and click Save.
- To delete an extension variable, click the gear icon beside your preferred extension, choose Delete, and confirm your action.
Extension Actions
Extension actions are custom functions written in the Deluge scripting language specifically for extension-related activities that be executed after installation and before the uninstallation of the extensions. For example, you can write scripts to check for prerequisites, conflicts, etc during installation and perform maintenance tasks like cleanup or restoring to the original state before the uninstallation.
To create an extension action,
- Go to Extension Configurations > Extension Action.
- Navigate to the tab based on your preferred action type: After Extension Installation or Before Extension Uninstallation.
- Use the Deluge script editor to write your own function. To learn more, click here.
- Finally, Save.
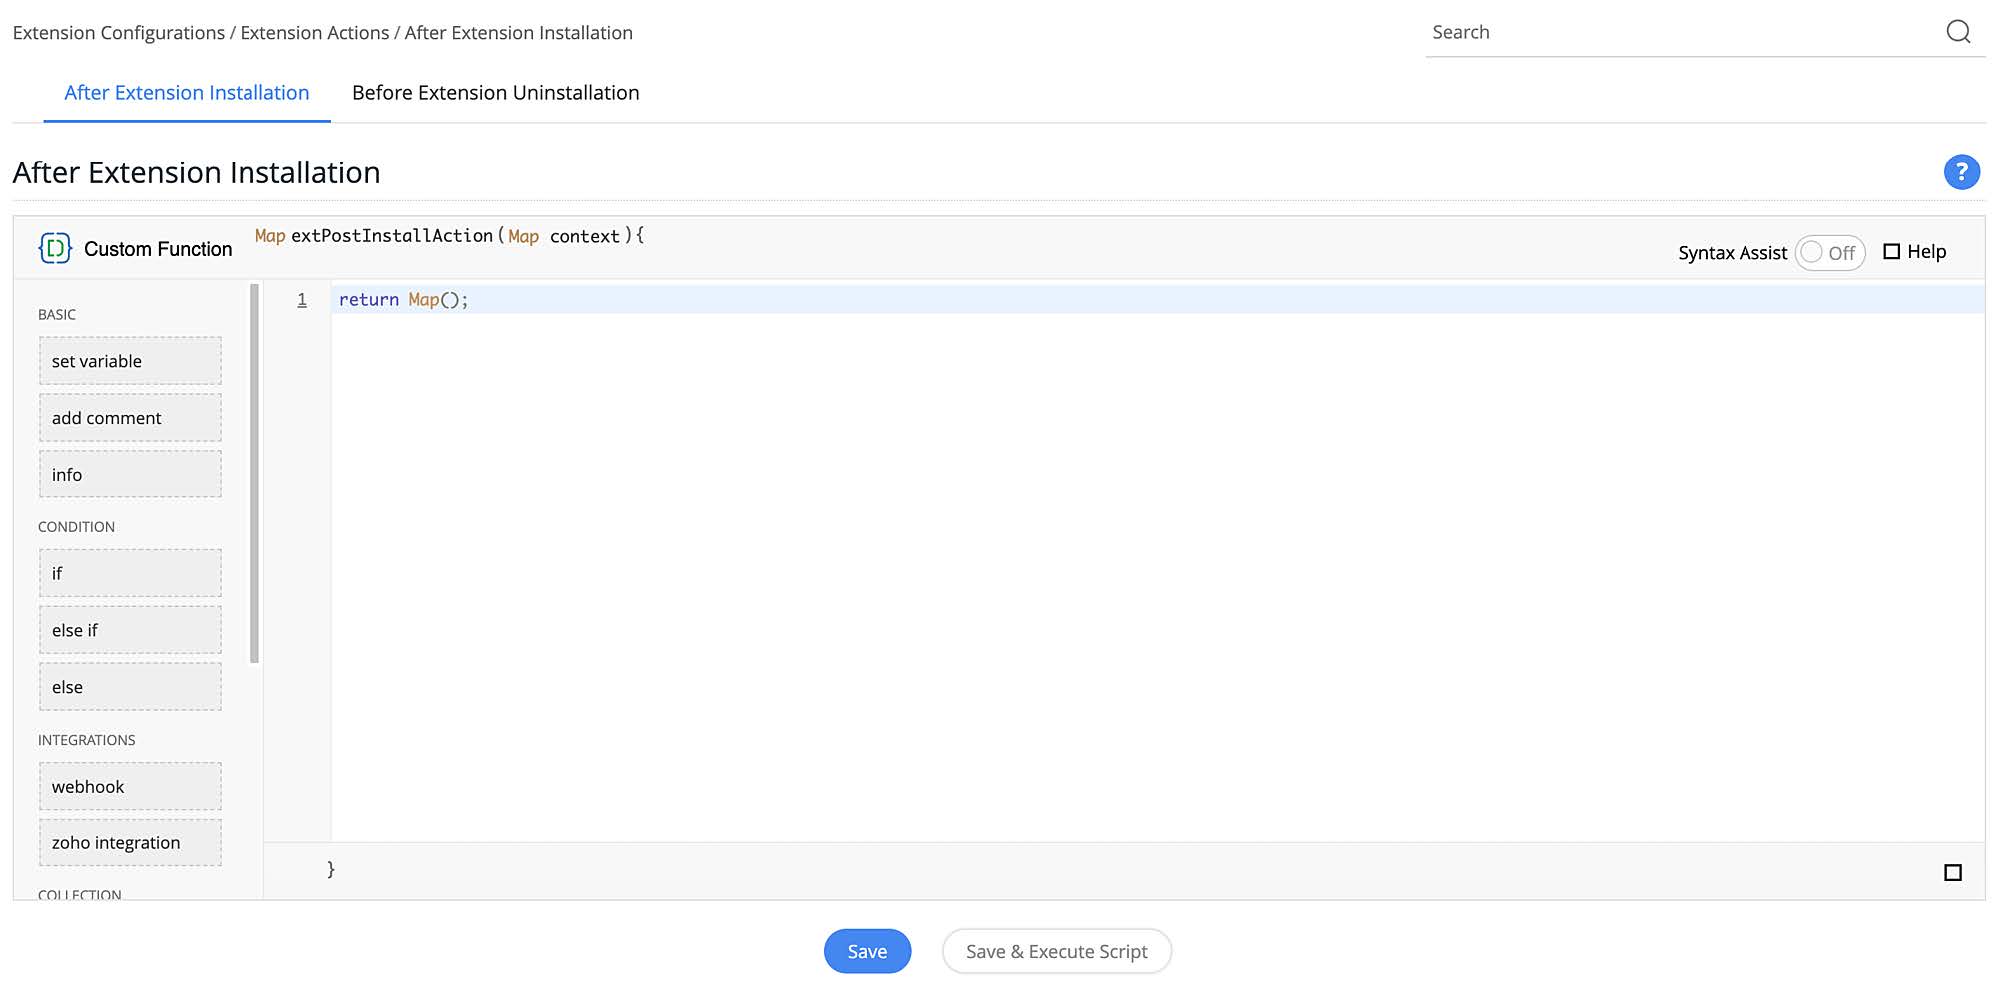
Note: You can have only a single script in each category for an extension.