Backup Exchange Online Data
Note: To enable Exchange Online backup in M365 Manager Plus, you need to purchase the
Exchange Online backup add-on. Visit our
online store or contact
sales@manageengine.com for more information.
ManageEngine M365 Manager Plus allows you to back up Exchange Online data for an indefinite period of time, and restore data granularly or completely as and when required. After the initial complete backup, the product takes incremental backups to help save storage space. Mailbox data like emails, calendar entries, contacts, journals, notes, posts, and tasks can all be backed up using this option. With M365 Manager Plus, you can view history of the backup, restoration operations, and get information about various versions of backup.
This section discusses:
- Backup settings
- Restore
- Operation summary
Backup settings
Creating a backup schedule
To create a new backup schedule for your Exchange Online mailboxes:
- Log in to M365 Manager Plus and click the Auditing & Monitoring tab.
- Navigate to Backup > Exchange Online > Backup Settings.
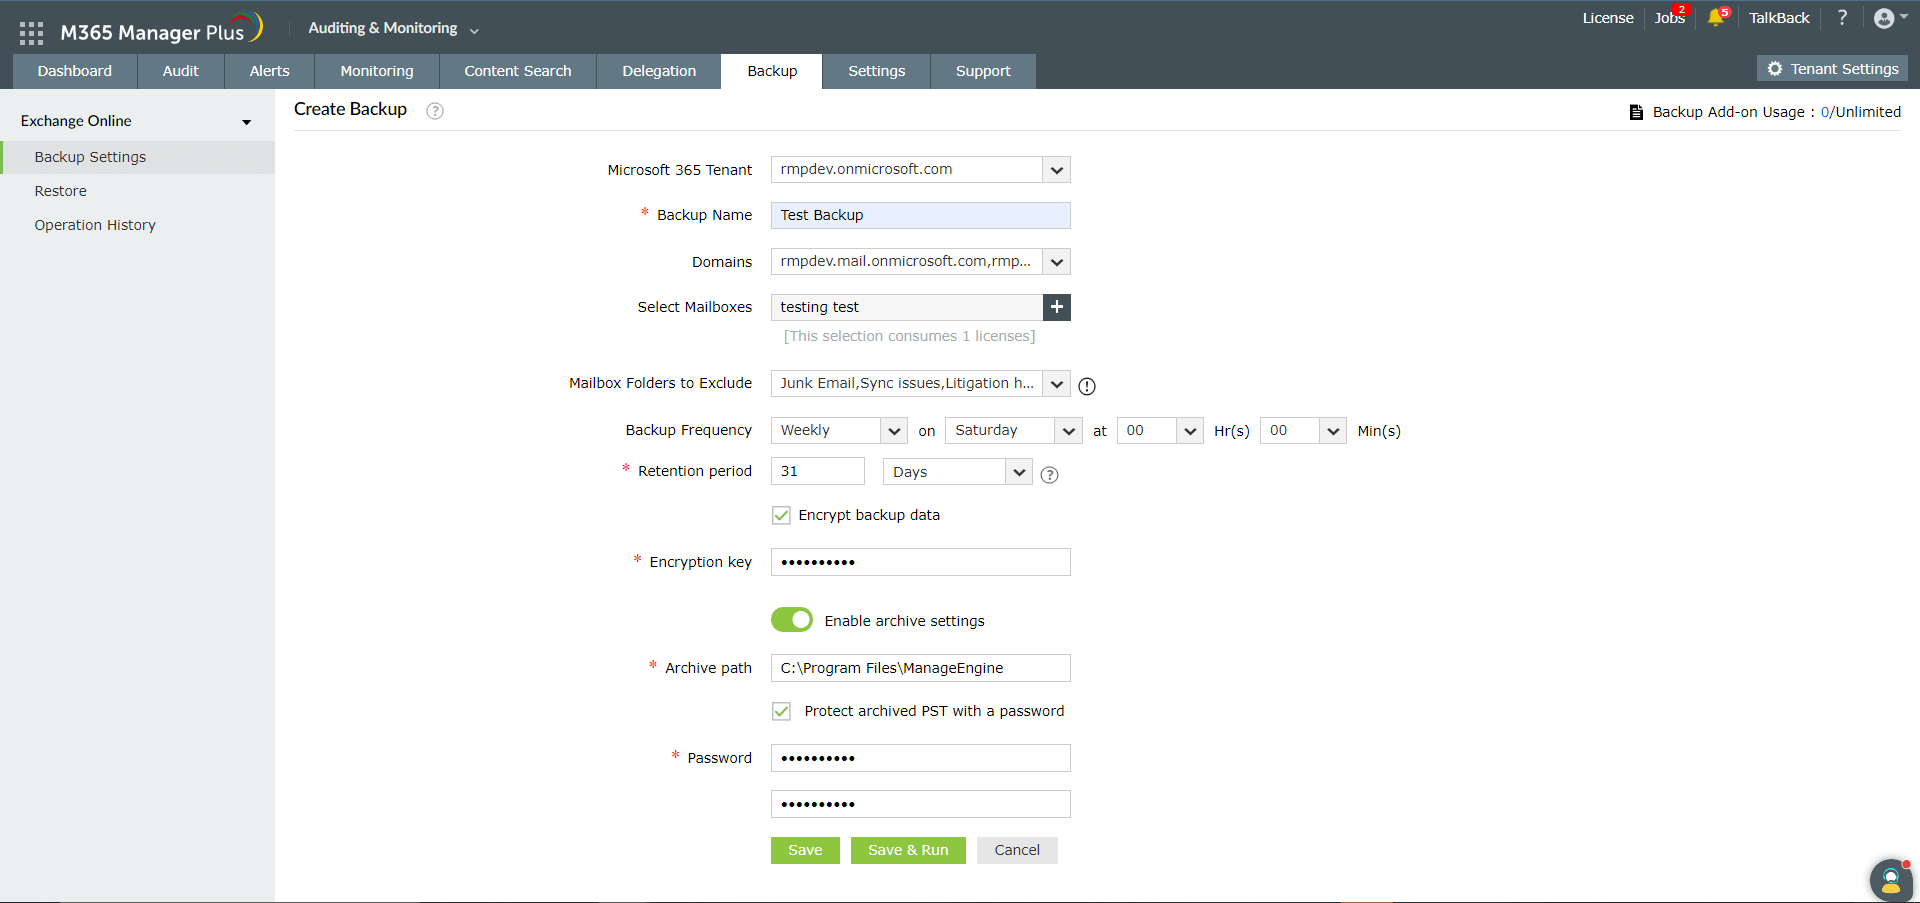
- Click the Create Backup option in the top-right corner.
- Select the Microsoft 365 Tenant from the drop-down option.
- Provide a Name for the backup schedule, and choose specific Domains if you wish to.
- Select the mailboxes that you wish to backup by clicking the
 icon in the Select Mailboxes field.
Note: You can backup a mailbox only if it has an active Microsoft 365 License.
- If you want to exclude certain mailbox folders, like junk or spam, choose these folders from the Mailbox Folders to Exclude drop-down option.
- Select the desired Frequency (daily, weekly, or monthly) for running the schedule.
- In the Retention Period field, enter the number of days, months, or years for which Exchange Online backups should be stored. Backups older than the specified age will be discarded.
Note: If you've set the retention period to be 30 days, when the backup schedule runs on the 31st day, the backups taken on the first day will be discarded. You can choose to back up forever, in which case backups will not be discarded. To learn more about the retention period, refer to this page.
- If you would like to secure the backed up data, choose the Encrypt backup data option and enter the Encryption key.
- You can archive the backed up items as PST files after their retention period is over by choosing the Enable archive settings option. Provide a suitable storage location for the PST files in the Archive path field as in the image below.
Note: If you wish to add an additional layer of security for your PST, select Secure archived PST with a password, and provide a password.
- Click Save to save the schedule. The backup will run at the specified time.
- Click Save & Run to save the schedule, and initiate the first backup.
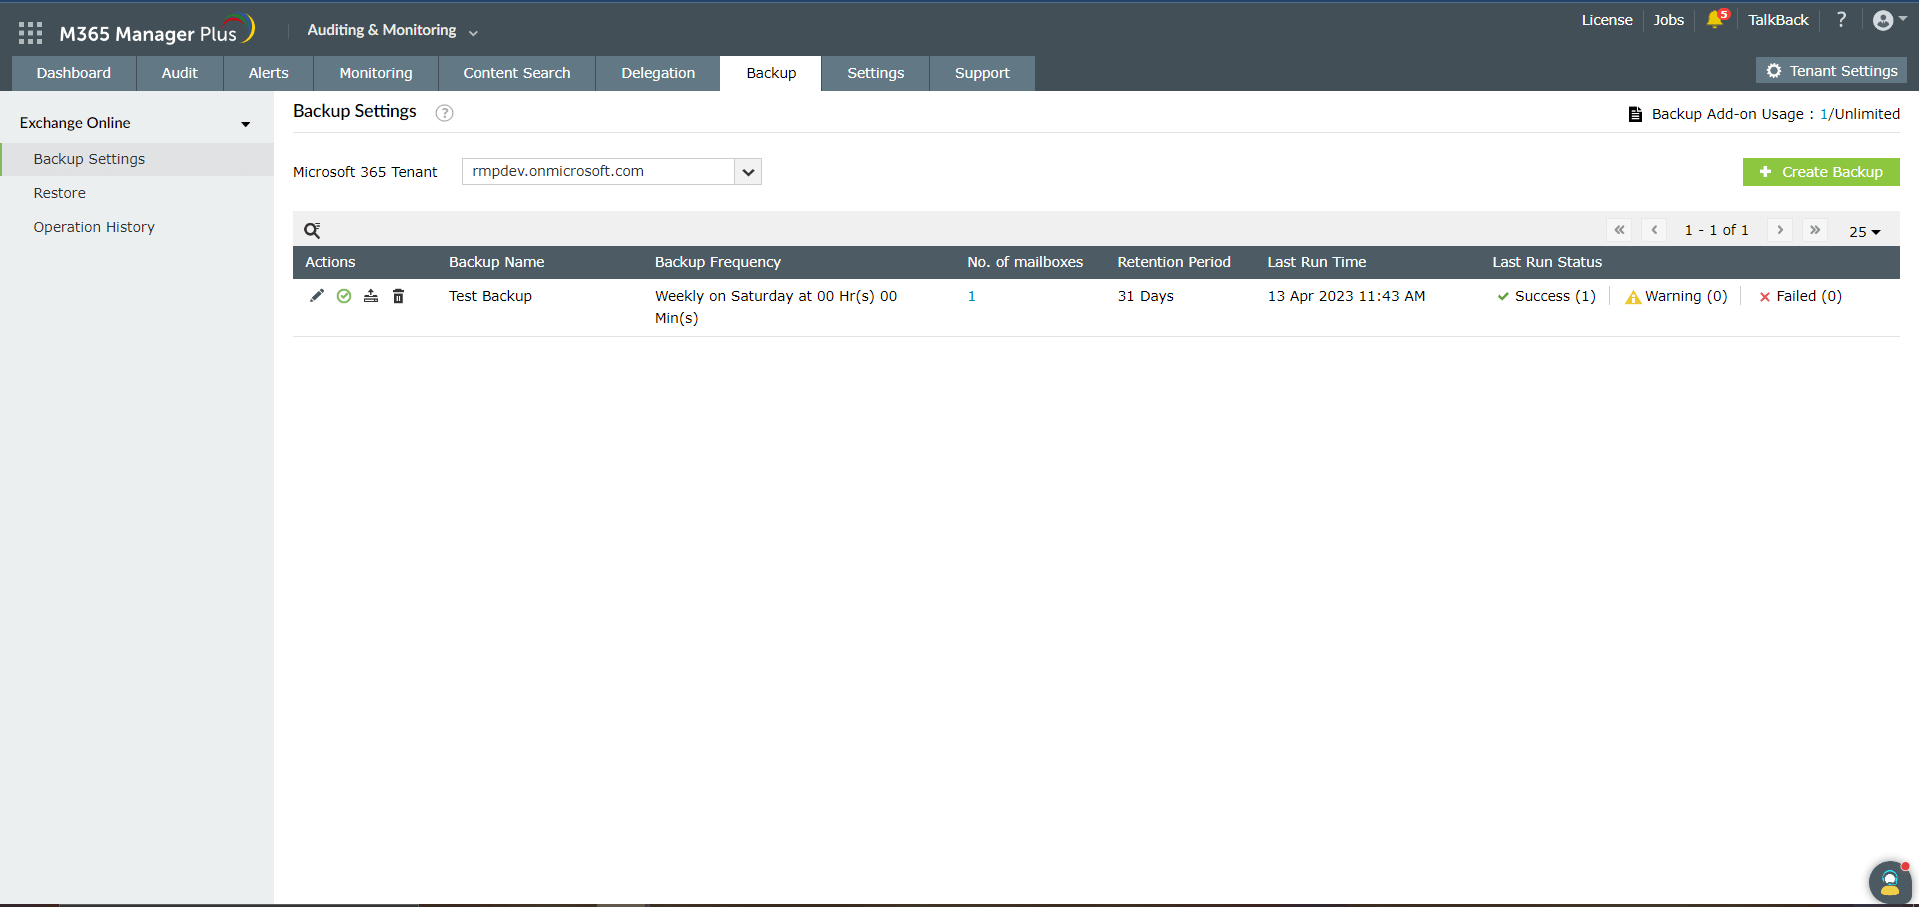
Note: The list of all configured schedules will be displayed under the Backup Settings page. The status of the last backup can be viewed by clicking on the View Details option corresponding to a particular schedule.
Editing the backup schedule
To edit the backup schedule:
- Navigate to Backup > Exchange Online > Backup Settings.
- Click the
 icon under the Actions column corresponding to the backup schedule you wish to edit.
- Make changes to the required fields, and click on Update.
Enabling/disabling the backup schedule
- Navigate to Backup > Exchange Online > Backup Settings.
- Click the
 and
and  icons under the Actions column corresponding to the backup schedule that you wish to disable or enable, and click OK.
Manually triggering a backup
- Navigate to Backup > Exchange Online > Backup Settings.
- Click the
 icon under the Actions column corresponding to the backup schedule to run a backup instantly.
Deleting the backup schedule
- Navigate to Backup > Exchange Online > Backup Settings.
- Click the
 icon under the Actions column corresponding to the backup schedule you wish to delete, tick the Permanently delete backup data checkbox, and click OK.
Restore
This part will explain how you can restore entire mailboxes, or individual mailbox folders from a backup, and export mailbox backups as PST files. To restore a backed up mailbox:
- Log in to M365 Manager Plus and click the Auditing & Monitoring tab.
- Navigate to Backup > Exchange Online > Restore.
- Select Microsoft 365 Tenant from the drop-down option.
- Choose one or multiple backups that you would like to restore from the list displayed. Click the Review and Restore option.
- Once you click the option, the Restore window opens where you can choose specific folders and mailboxes from the list displayed on the left side. Click Restore.
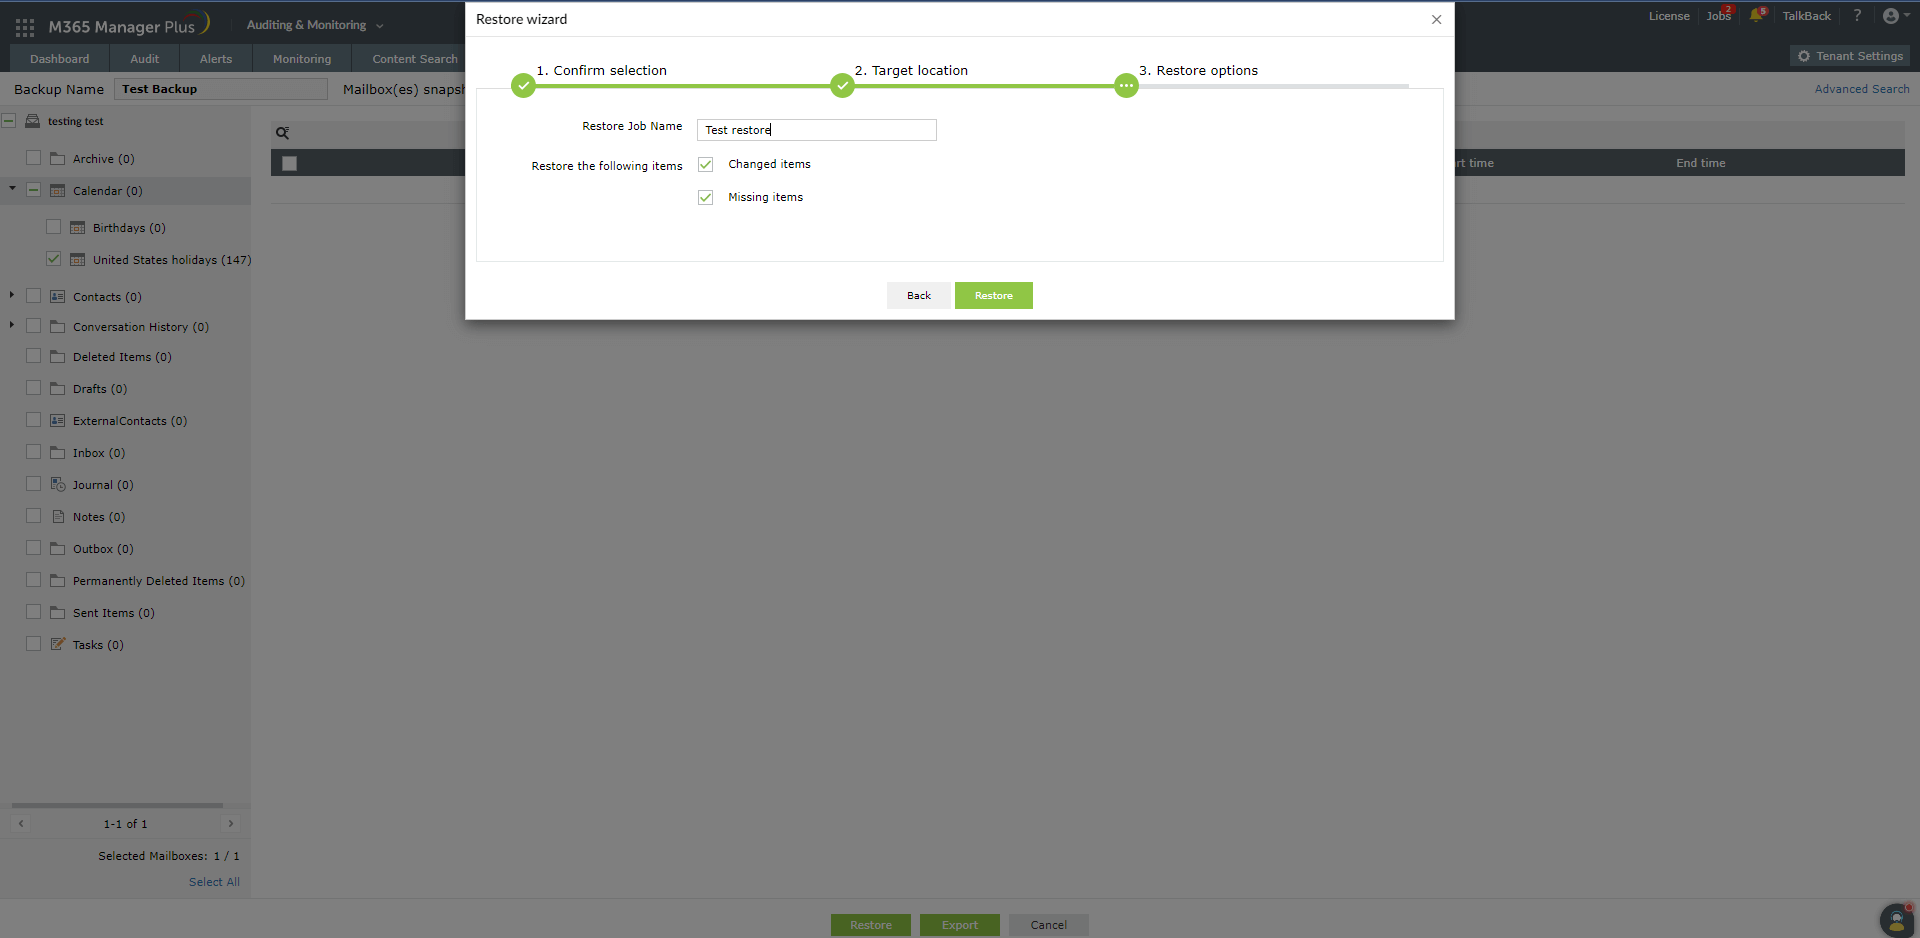
- Next, a Restore wizard will be displayed, as shown in the image below.
- Click Next after you confirm your selection.
- Provide a suitable location to save the restored files, and click next.
- Choose if you want to restore only the changed or missing items, and provide a Name for the restored file.
- Click Restore.
- You can also choose to save the backed up files in PST format, protected by a password, by clicking on the Export option in the bottom.
- Provide a suitable path and name for the PST file.
- To secure the PST file, choose Secure PST with a password option, and provide a password under the Password and Confirm password fields.
- Click Export.
Operation summary
This tab lists all the restore and export operations carried out using M365 Manager Plus. To view this summary:
- Log in to M365 Manager Plus and click the Auditing & Monitoring tab.
- Navigate to Backup > Exchange Online > Operation Summary.
- Select the Microsoft 365 Tenant from the drop-down option.
- Navigate between the Restore and Export tabs to check the status and other information about specific operations.
ApplicationImpersonation role
While using the Exchange Online backup add-on in M365 Manager Plus, in certain cases, your service account must have the ApplicationImpersonation role to perform the data backup process. By default, no groups or users have the ApplicationImpersonation role in Microsoft 365. It must be manually provided to the service user account via the Microsoft 365 admin center or PowerShell.
Using Microsoft 365 admin center:
- Log in to the Microsoft 365 portal using a global administrator account.
- Click the Admin icon on the left pane.
- In the Microsoft 365 admin center window, go to Admin centers > Exchange Online.
- Navigate to Permissions > Admin Roles.
- Click the + icon to add a new role.
- Enter a suitable Name and Description for the role.
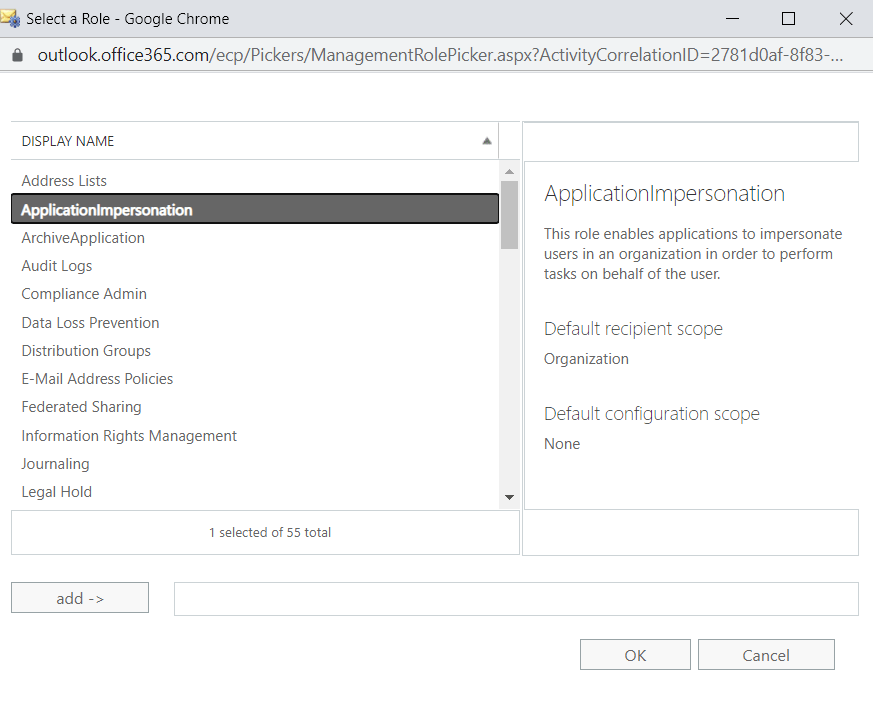
- Under Roles, click the + icon and choose ApplicationImpersonation > Add > OK.
- Under Members, click the + icon to add a new member to the role group.
- Click Add > OK.
- Click Save.
Using PowerShell cmdlets:
- Log in to Microsoft 365 via Windows PowerShell.
- Use the below PowerShell cmdlet to apply the ApplicationImpersonation role to the account used for backing up data:
New-ManagementRoleAssignment -Role "ApplicationImpersonation" –User <user account name>
Note: It can take up to 48 hours for the new ApplicationImpersonation role to take effect in Microsoft 365.


