Read-Only Server Model using PostgreSQL Database
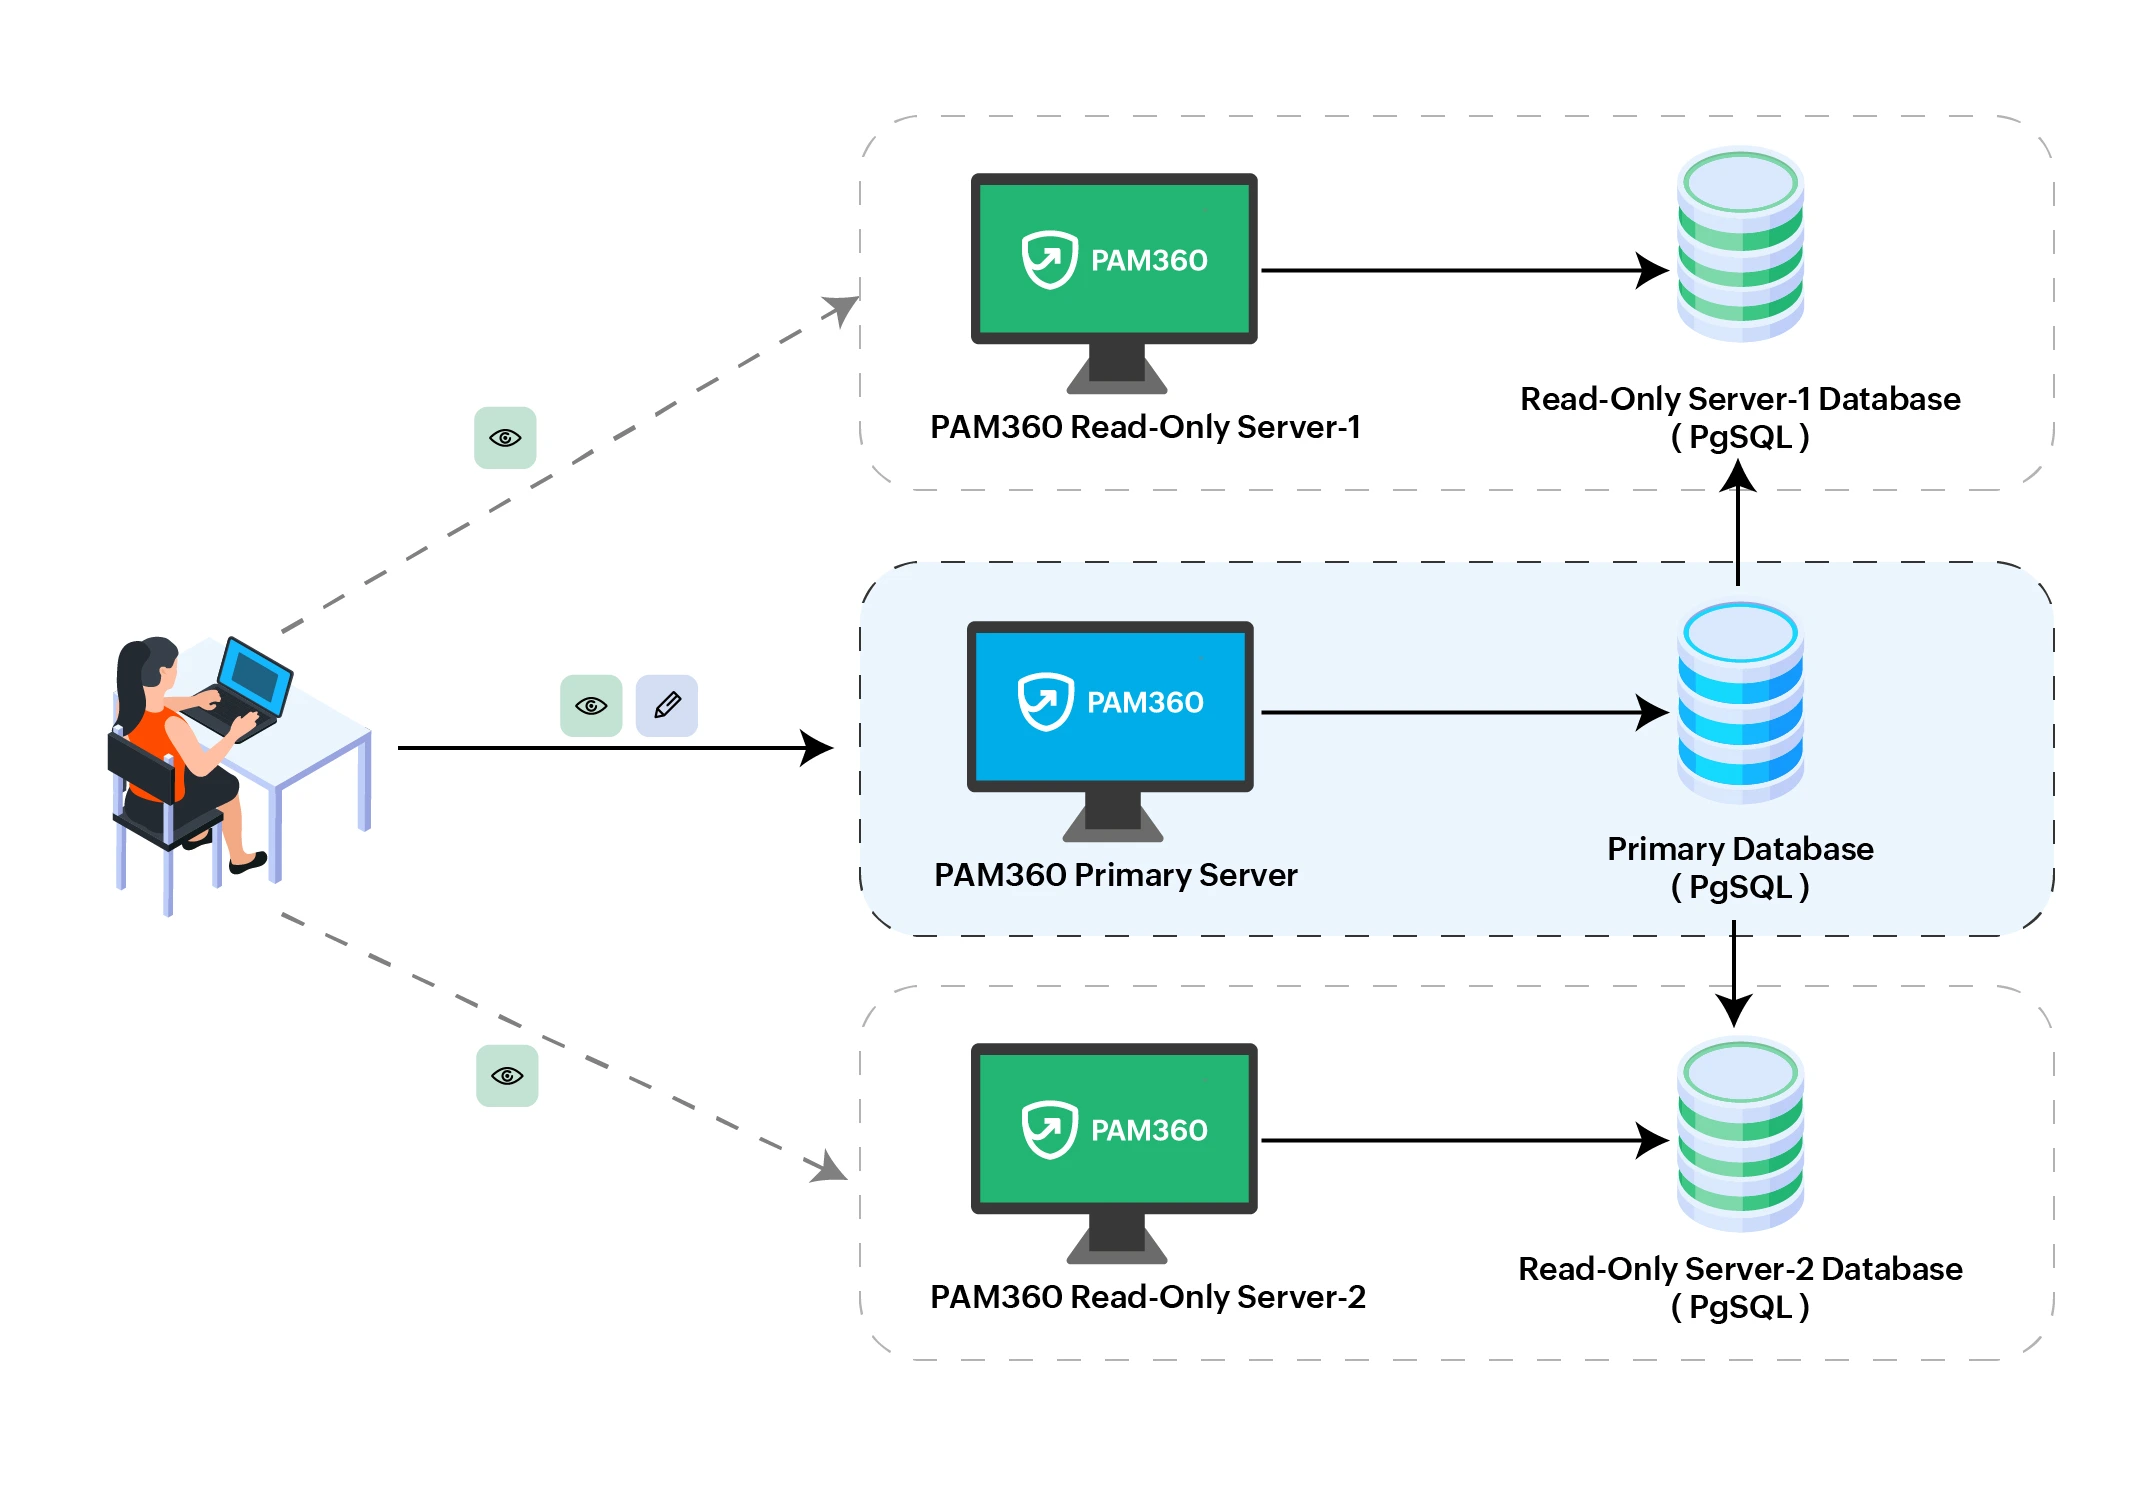
The Read-Only Server model enhances PAM360’s high availability strategy by adding a critical layer of resilience. Configurable across multiple locations, Read-Only servers are dedicated to executing read operations, thereby preserving data integrity by preventing modifications. These servers operate in synchronization with the primary server, effectively functioning as mirror servers. In case of a Primary server failure, any Read-Only server can be configured as the Primary server.
Caution
- PAM360 will allow users to retrieve only the passwords through the Read-Only server.
- All the operations carried out in the Read-Only server will be returned and audited in the Primary server and then replicated to other Read-Only servers.
- In the event of Primary server failure, administrators can convert any Read-Only server into the Primary server and reconfigure all other Read-Only servers to point to the new Primary server.
- From build 8400 onwards, PAM360 allows users to launch RDP, SSH, and VNC connections via the available Read-Only servers. Also, to playback the recorded sessions from the Read-Only server, the storage configuration for session recording should be configured with a network path in the Session Configuration setting.
How Does the Read-Only Server Model Work?
In the event of a primary server failure or catastrophic incident, any Read-Only server can seamlessly transition to assume the role of the primary server, ensuring uninterrupted operational continuity. Unlike other high-availability configurations, which allow for only one secondary server, organizations can configure multiple Read-Only servers in various locations, offering greater flexibility.
When the primary server fails, administrators can easily convert any Read-Only server into the primary server, reconfiguring the remaining servers to point to the new primary instance. This capability ensures that PAM360 remains resilient and operational, even in the face of unexpected disruptions. However, PAM360 allows only password retrieval and remote session initiation operations to be performed through Read-Only servers. All operations conducted on these servers are logged and audited by the primary server, with records replicated to other Read-Only servers.

Setting up Primary Server and Read-Only Servers
Before beginning the configuration process on your Primary and Read-Only servers, ensure that PAM360 is successfully installed on all Read-Only servers within your environment. Once installation is complete, proceed with the following document to apply the necessary configuration adjustments on both the Primary and Read-Only servers. Additionally, find detailed instructions below on how to promote a Read-Only server to function as the Primary server in the event of a Primary server failure.
Caution
If you have secondary server model with the PostgreSQL database configured in your server environment, remove the secondary server configuration before configuring the Read-Only server.
- Creating a Read-Only Server Configuration Pack in the Primary Server
- Setting up the Read-Only Server
- Configuring a Read-Only Server as the Primary Server
- Deleting a Read-Only Server from the Cluster
- Read-Only Server Audit Trials
- Troubleshooting Tip
1. Creating a Read-Only Server Configuration Pack in the Primary Server
- Navigate to the <PAM360-Installation-Directory>/bin folder in the primary server and execute the following commands based on your operating system. This will create a ROPack.zip file which will contain the files needed to be copied to the Read-Only server.
Windows:
ROSetup.bat <IP_of_RO_Server> <userName> <password> <slotName>
Linux:
ROSetup.sh <IP_of_RO_Server> <userName> <password> <slotName>
Additional Details
- Every Read-Only server must have a unique slotName while creating ROPack.zip.
- Supply a userName and password of your choice when creating the replication pack for the first time to configure the Read-Only server. To generate additional replication packs in the future, you must provide the same username and password. Please note that the PAM360 database will not store the username and password. Hence, we recommend you save them in a secure location.
Where,- IP_of_RO_Server is the valid IP address of a Read-Only server.
- userName is the Username used for replication.
- password is the Password for the replication user.
- slotName is the Slot name of the Read-Only server for the replication.
Caution
- Single username and password is enough for all Read-Only servers.
- Username can only contain lower case letters, numbers, and underscores.
- Replication slot names may only contain lower case letters, numbers, and underscores.
- Each Read-Only server should have a unique slot name.
The replication pack zip will be succesfully generated and found under <PAM360-Installation-Directory>/replication folder. - Now, execute the following commands to import the certificates:
Windows:
importCert.bat <PAM360-Installation-Directory>\conf \ServerCer.cer
importCert.bat <PAM360-Installation-Directory>\conf\CACert.pem
importCert.bat <PAM360-Installation-Directory>\agent\ServerCer.cer
Linux:
sh importCert.sh <PAM360-Installation-Directory>/conf/ServerCer.cer
sh importCert.sh <PAM360-Installation-Directory>/conf/CACert.pem
sh importCert.sh <PAM360-Installation-Directory>/agent/ServerCer.cer
Additional Details
To install the custom certificates, replace the entire path of the certificate in the above command with the absolute path.
You have successfully created the Read-Only configuration pack and set up the Primary server.
2. Setting up the Read-Only Server
- Navigate to the PAM360 installation directory in Read-Only server and extract the ROPack.zip file. This will replace the files from the Primary server that are already available here.
- Copy the pam360_key.key file from Primary server to the Read-Only servers and update the path of the pam360_key.key file in the <PAM360-Installation-Directory>/conf/manage_key.conf file.
- If the manage_key.conf file is not present in the Read-Only server, then create a new file named manage_key.conf and mention the location of the encryption key. If the encryption key is in a remote path, mention the path in a UNC format.
- Now, execute the following commands to import the certificates:
Windows:
importCert.bat <PAM360-Installation-Directory>\conf \ServerCer.cer
importCert.bat <PAM360-Installation-Directory>\conf\CACert.pem
importCert.bat <PAM360-Installation-Directory>\agent\ServerCer.cer
Linux:
sh importCert.sh <PAM360-Installation-Directory>/conf/ServerCer.cer
sh importCert.sh <PAM360-Installation-Directory>/conf/CACert.pem
sh importCert.sh <PAM360-Installation-Directory>/agent/ServerCer.cer
Additional Details
If you are using a custom SSL certificate for the PAM360 installation, copy the SSL certificate from the primary server and paste it in this path in the Read-Only server: <PAM360-Installation-Directory>/conf. To install custom certificates, replace the path of the certificate in the above command.
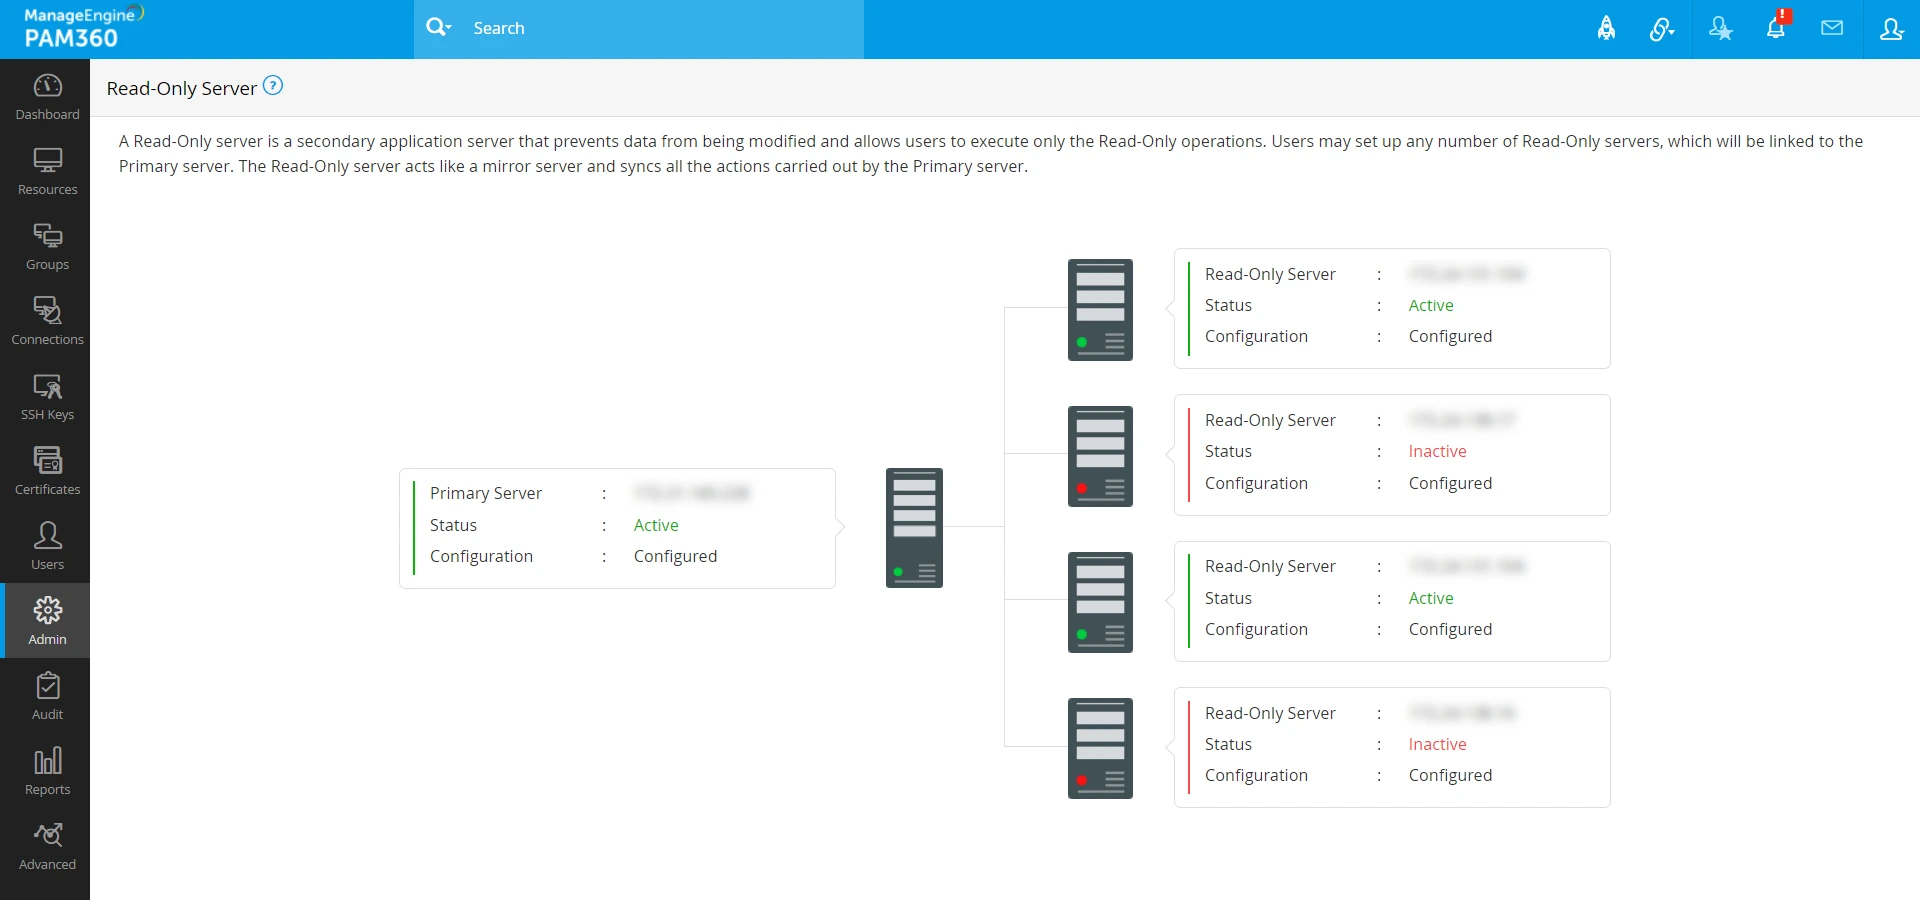
You have successfully set up the Read-Only server. Navigate to Admin >> Business Continuity >> Read-Only server to view the configured Read-Only servers in the PAM360 interface.
3. Configuring Read-Only Server as the Primary Server
- Stop the Read-Only server that is to be converted as the Primary server.
- Remove the standby.signal file from the <PAM360-Installation-Directory>/pgsql/data folder.
- Open the postgres_ext.conf file from the <PAM360-Installation-Directory>/pgsql/ext_conf folder. Remove all the entries below recovery props.
- Delete the entry readonly.mode=true in the <PAM360-Installation-Directory>/conf/configurations.properties file.
- Open the serverstate.conf file from the <PAM360-Installation-Directory>/conf folder. Search for ro and change it to master.
- Start the PAM360 server and now this Read-Only server will start as the Primary server. You have successfully configured the Read-Only server as the Primary server.
- Now, execute the following commands to remove the IP address of the converted Read-Only server from the database.
Windows:
<PAM360-Installation-Directory>\bin\DeleteROServerIP.bat <RO_IP_Address_that_was_converted_to_Primary>
<PAM360-Installation-Directory>\bin\DeleteSlot.bat <slotName_of_RO_that_was_converted_to_Primary>
Linux:
<PAM360-Installation-Directory>/bin/DeleteROServerIP.sh <IP_Address_of_RO_that_was_converted_to_Primary>
<PAM360-Installation-Directory>/bin/DeleteSlot.sh <slotName_of_RO_that_was_converted_to_Primary>
- Now, follow step 1 (Creating a Read-Only server Configuration Pack in the Primary Server) and step 2 (Setting up the Read-Only server) to reconfigure the existing Read-Only servers to be in sync with this Primary server.
4. Deleting a Read-Only Server from the Cluster
Execute the following commands from the Primary Server to remove a Read-Only server from the cluster:
- To delete an existing Read-Only server, execute the following command:
Windows:
<PAM360-Installation-Directory>\bin\DeleteROServerIP.bat <RO_IP_Address>
Linux:
<PAM360-Installation-Directory>/bin/DeleteROServerIP.sh <RO_IP_Address>
- To delete an existing slot configured to the Read-Only server, execute the following command:
Windows:
<PAM360-Installation-Directory>\bin\DeleteSlot.bat <RO_Slot_Name>
Linux:
<PAM360-Installation-Directory>/bin/DeleteSlot.sh <RO_Slot_Name>
Additional Details
After upgrading to build 6600, deleting existing slots configured to the Read-Only server will be executed automatically by the PostgreSQL server.
5. Read-Only Server Audit Trials
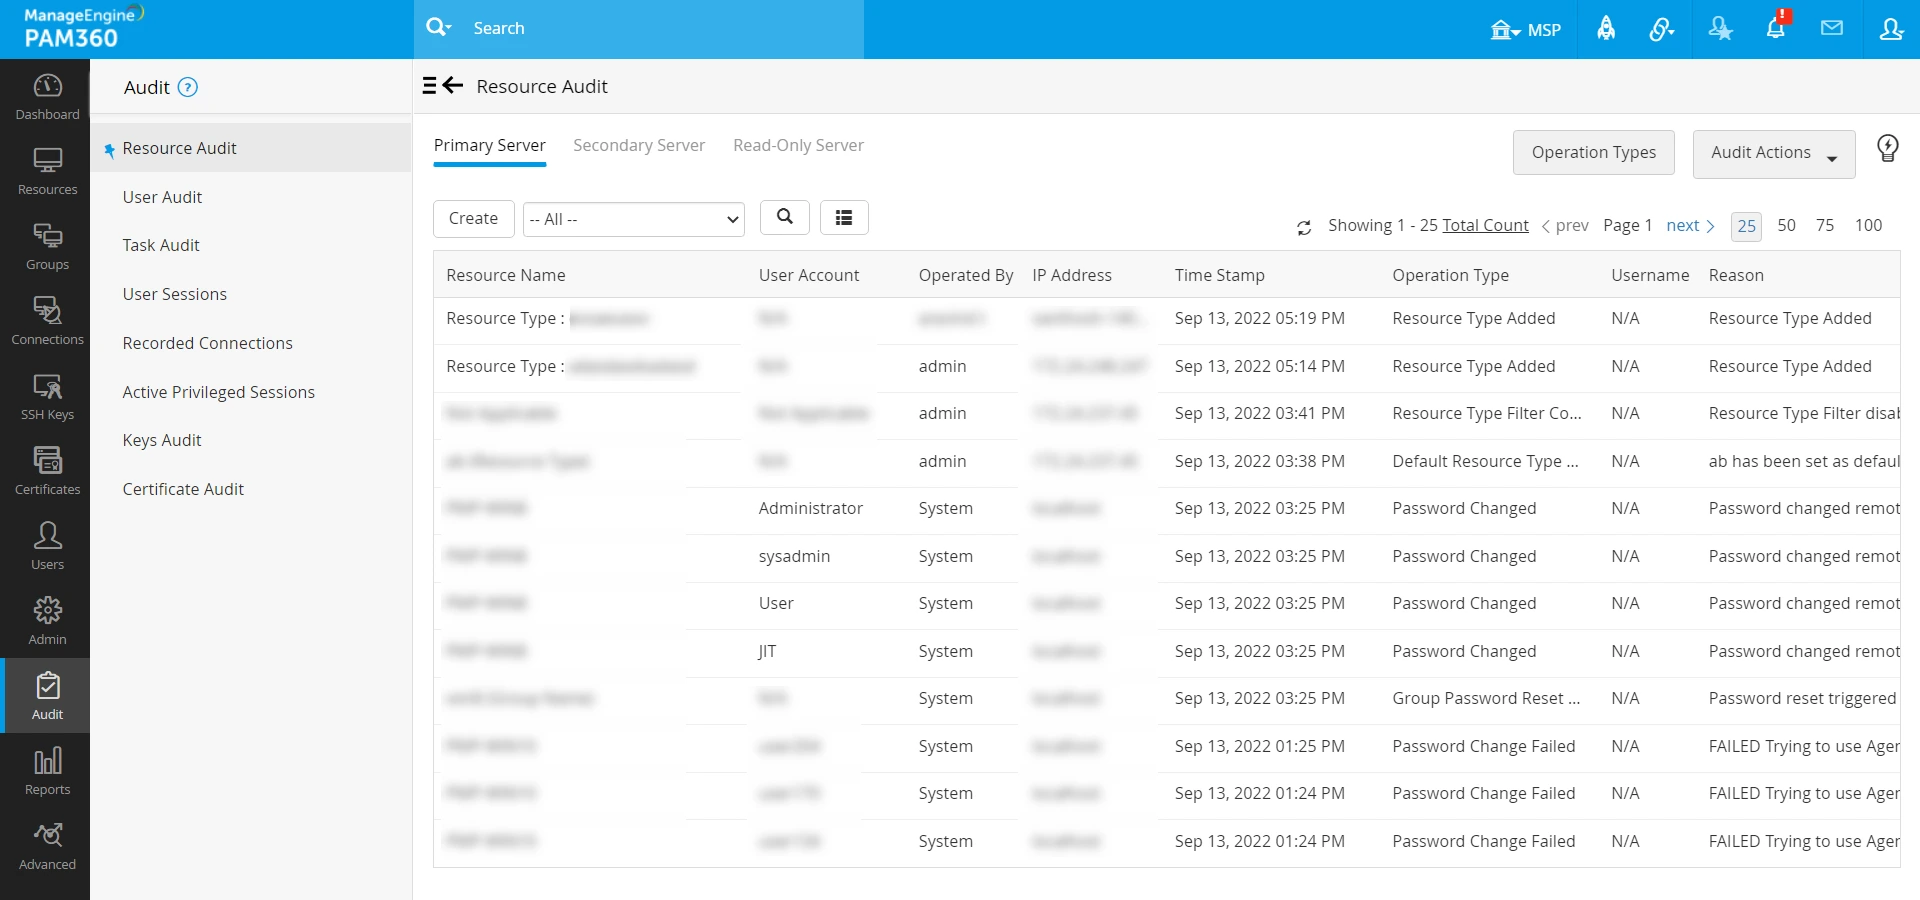
When Read-Only server is enabled, the Read-Only server audits will be displayed as separate columns with the full audit trails under Resource Audit and User Audit. Click here to learn more about audits.
6. Troubleshooting Tip
Navigate to Admin >> Business Continuity >> Read-Only Server and check if the status of the Read-Only servers is inactive. If so, follow the below steps to troubleshoot:
Follow these steps for the Primary Server:
- Navigate to the <PAM360_installation_folder>/pgsql/data folder.
- Open the pg_hba.conf file and check if the IP Address of the Read-Only server and the replication user name are correct.
Follow these steps for the Read-Only Server:
- Navigate to the <PAM360-Installation-Directory>/pgsql/data folder and perform the following actions:
- Open the pg_hba.conf file and check if the Primary and Read-Only server IP address are correct.
- Additionally, navigate to the # TYPE DATABASE USER ADDRESS METHOD section and verify that the replication username, IP address, and slot details are correctly formatted. For example, host replication pmpuser 10.214.147.123/32 md5.
- Now, open the configuration.properties file and check for the value readonly.mode=true.
If the problem persists, send us the log files from the directory paths <PAM360_installation_folder>/logs and <PAM360_installation_folder>/pgsql/data/pg_log to pam360-support@manageengine.com for further assistance.