- Related Products
- AD360
- Log360
- ADAudit Plus
- ADSelfService Plus
- EventLog Analyzer
- Exchange Reporter Plus
ADMT installation and setup
The Active Directory Migration Tool (ADMT) is available for download from the Microsoft website and requires a preconfigured Microsoft SQL Server instance to store its underlying data.
- For SQL Server Express users: ADMT needs to be installed and operated directly on the server hosting the SQL Server Express database instance.
- For full SQL Server users: You have the flexibility to install and run the ADMT console on a remote machine, with the option to operate multiple ADMT consoles on different remote computers.
ADMT prerequisites and recommendations
- The account used for ADMT migration must be a Domain Admin in the target domain.
- It must also be a member of the Administrators group in the source domain.
- Additionally, the target domain Administrator account should be added to the Administrators group in the source domain to facilitate trust and migration permissions.
- ADMT has to be installed on the machine in which ADManager Plus is installed.
- After installing ADMT, restart ADManager Plus to ensure that the Command Prompt recognizes the newly installed program.
- An empty group named <DomainDNS>$$$ has to be created in both the source and target domains.
- Before installing ADMT, ensure that all previous versions are removed via Add or Remove Programs in the Control Panel.
- While ADMT doesn't support direct upgrades, you can reuse an existing SQL Server database v3.0 and above. SQL Server databases v1.0 and v2.0 are not compatible.
- Avoid installing ADMT on servers running Server Core or a Read-Only Domain Controller (RODC) for optimal performance.
- When setting up SQL Server, you have two options:
- Install SQL Server Express locally.
- Use an existing SQL Server instance to create the necessary ADMT database.
- For best results, it's recommended to install ADMT on the target domain controller.
- Log in to the ADMT installed machine using the ADManager Plus service account or run both SQL Server and ADMT installations using this account. This helps avoid permission-related issues during installation and execution.
Setting up SQL Server for ADMT
ADMT v3.2 requires a preconfigured SQL Server instance as its data store. If you opt to use SQL Server Express, make sure it meets the following requirements:
- SQL Server 2005 Express must be installed with Service Pack 3 (SP3) and above.
- SQL Server 2008 Express requires Service Pack 1 (SP1) and above.
Note:
- Ensure that the service account used during the Server Configuration step of the SQL Server installation is the same one used throughout the migration process, including in the Domain settings configuration of ADManager Plus.
- On the Database Engine Configuration page, select Windows authentication mode and add the migration service account under Specify SQL Server administrators to ensure the correct permissions.
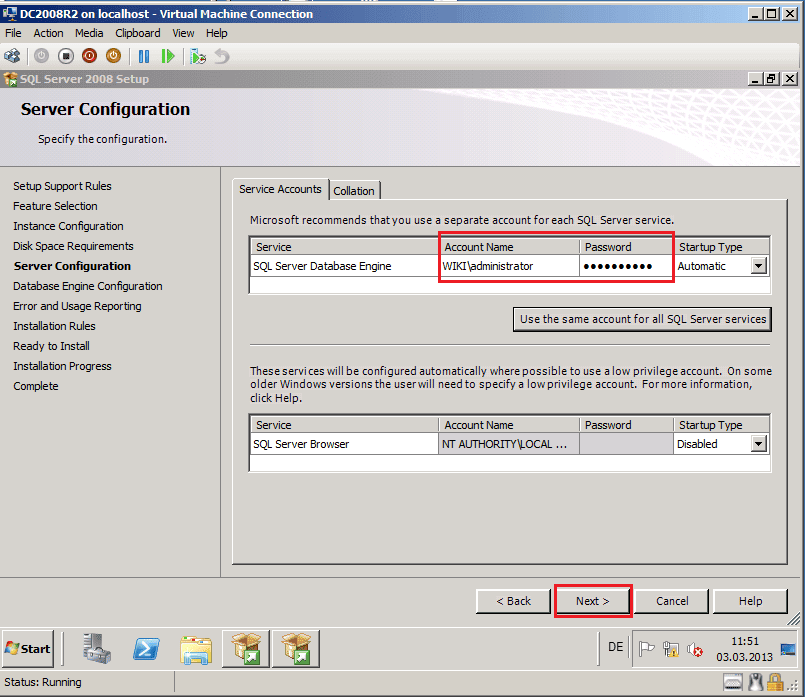
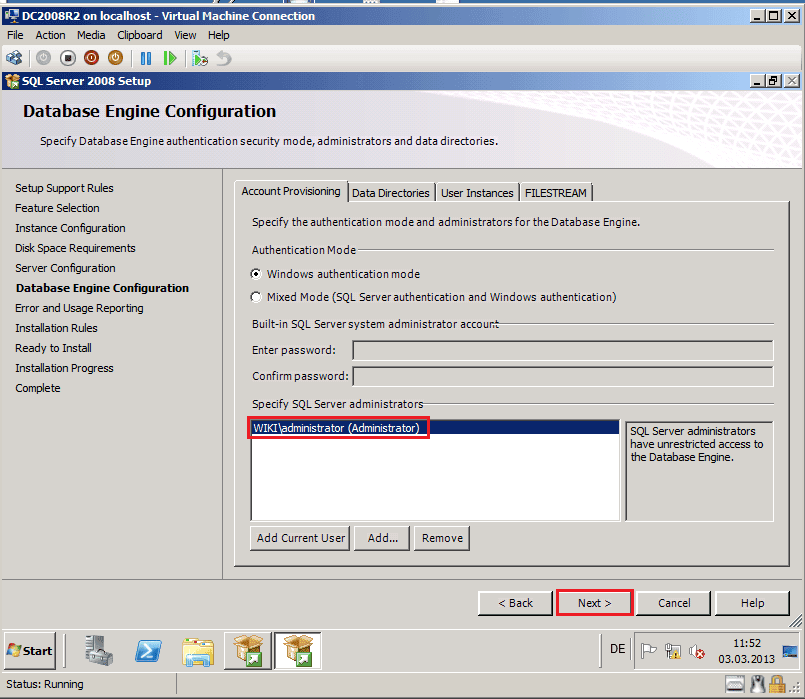
Installing ADMT
To install ADMT, you'll need administrative privileges or equivalent permissions. Follow these steps to complete the installation:
- Double-click admtsetup32.exe from the ADMT download package to launch the setup.
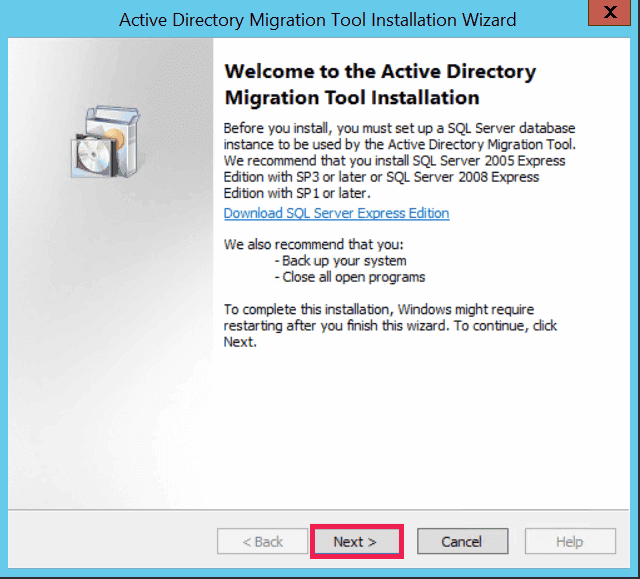
- On the Welcome page, confirm that all prerequisites and recommendations have been completed, then click Next.
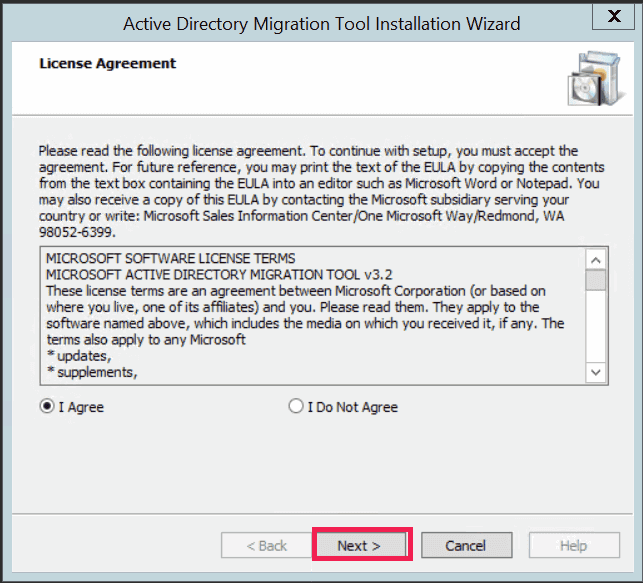
- Accept the license agreement and proceed by clicking Next.
- On the Database Selection page, enter the Database (Server\Instance) name. For local installations, you can use a full stop (“.”) to represent the local server. By default, the SQL Server Express instance is named SQLEXPRESS.
- For example, to use a default SQL Server Express instance on the local server, enter ".\SQLEXPRESS".
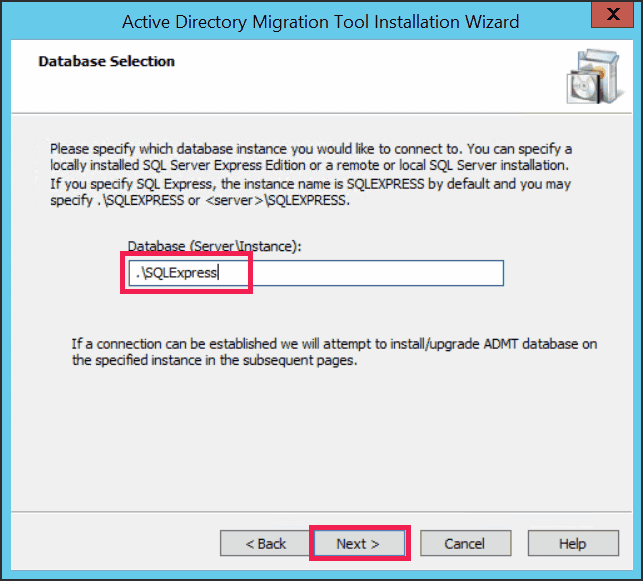
- If SQL Express is selected and the ADMT.mdf database file is not found in the default location (%windir%\ADMT\Data), the Database Import page will appear. If the file is present, ADMT will automatically attach it, and the Summary page will be displayed.
- On the Database Import page, if you do not wish to import data, select No, do not import data from an existing database (default). If you need to import data from a previous ADMT installation, select Yes, import data from an existing ADMT v3.0 or ADMT v3.1 database, and browse to the file's location.
- Before importing data from an existing database, make sure to detach the database file from the SQL Server using the appropriate SQL Server commands.
- Finally, review the details on the Summary page, and click Finish to complete the installation.
sIDHistory migration requirements
To successfully migrate sIDHistory, ensure the following dependencies are in place:
- Enable success and failure auditing
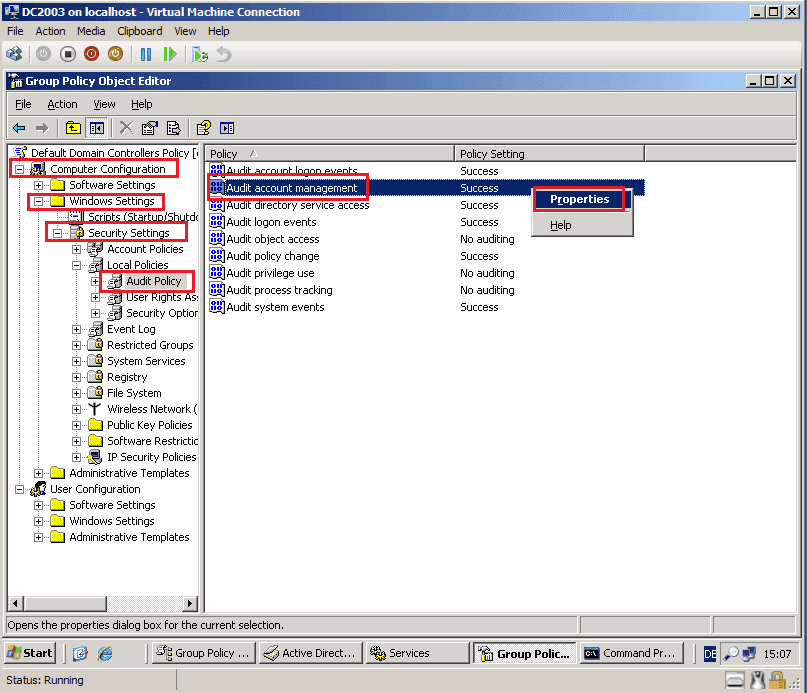
Both the source and target domains require auditing for account management. To enable this, navigate to Default Domain Controllers Policy > Computer Configuration > Policies > Windows Settings > Security Settings > Local Policies > Audit Policy.
- Right-click Audit account management and select Properties.
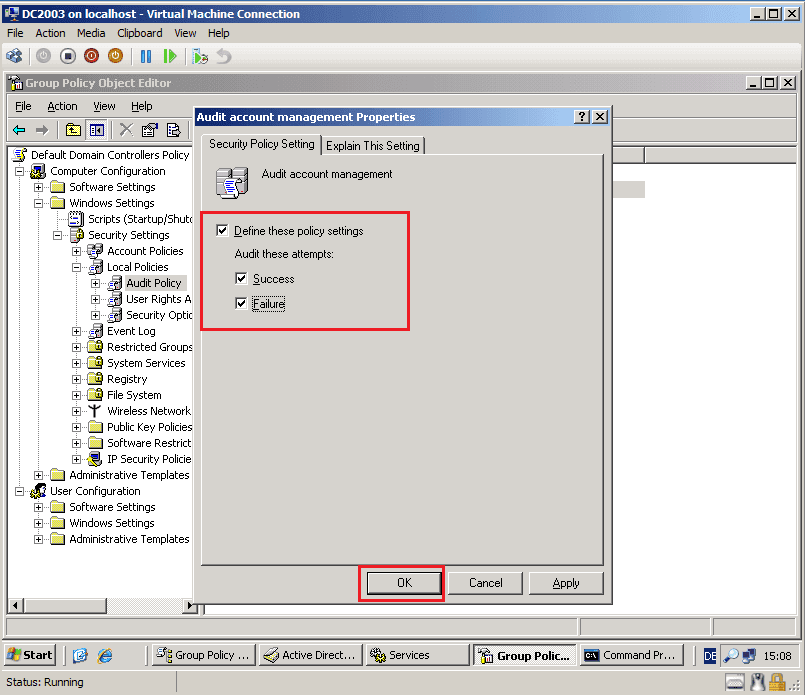
- Click the checkbox for Define these policy settings, and enable both Success and Failure options.
- Click OK to apply.
- Create an empty local group
In the source domain, create an empty local group named "{SourceNetBIOSDom}$$$".
- Registry configuration
On the primary domain controller of the source domain, set the registry key HKEY_LOCAL_MACHINE\System\CurrentControlSet\Control\LSA\TcpipClientSupport to 1.
- Restart the primary DC
After configuring the registry, restart the primary DC in the source domain for the changes to take effect.
- Administrator rights
The user account performing the migration must have administrator rights in both the source and target domains.
Optionally, ADMT can automatically repair any dependencies that are not properly configured. To use this functionality, ensure the account running ADMT has sufficient permissions in each domain to make these changes.
Installing ADMT Password Migration DLL
To successfully migrate user passwords from the source domain to the target domain, the ADMT Password Migration DLL must be installed on the domain controller in the source domain.
Follow the below steps to install ADMT Password Migration DLL:
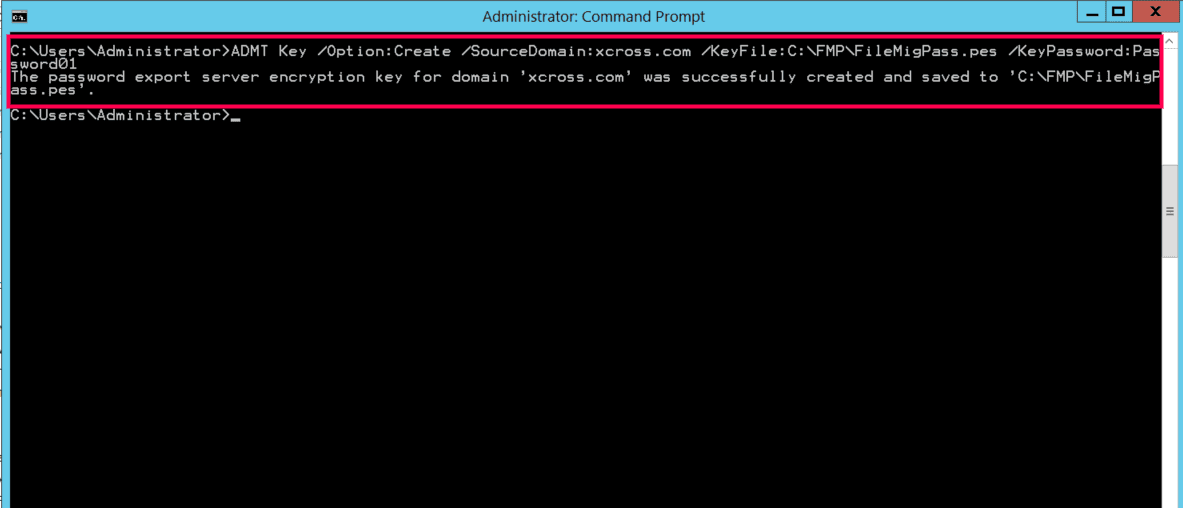
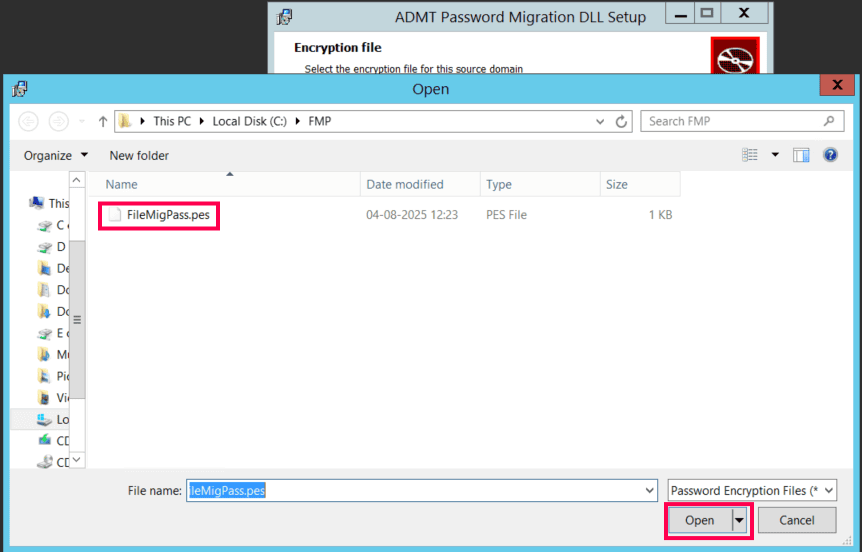
- Before you install ADMT Password Migration DLL, you need to create an encryption key from the domain controller running ADMT in the target domain. Run ADMT Key /Option:Create /SourceDomain: <SourceDomainName> /KeyFile:C:\FMP\FileMigPass.pes /KeyPassword: <Password> in the command prompt with admin privilege to create the encryption key.
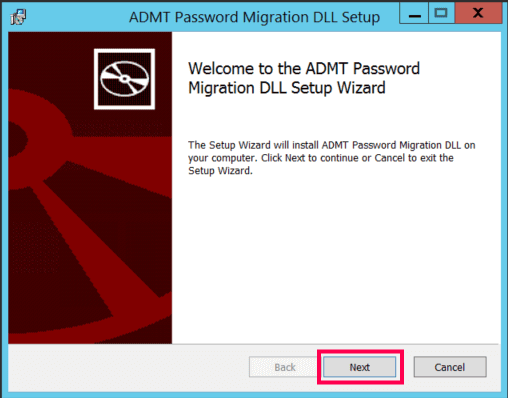
- On the Welcome to the ADMT Password Migration DLL Installation Wizard page, click Next.
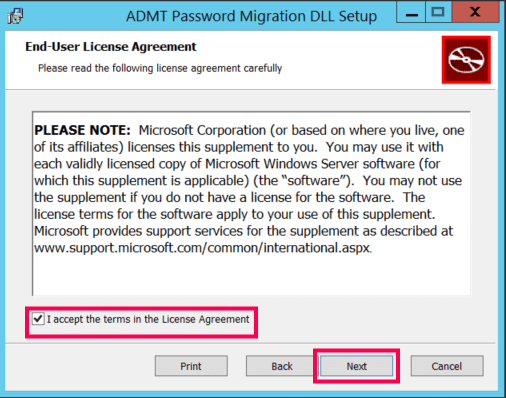
- Accept the license agreement and proceed by clicking Next.
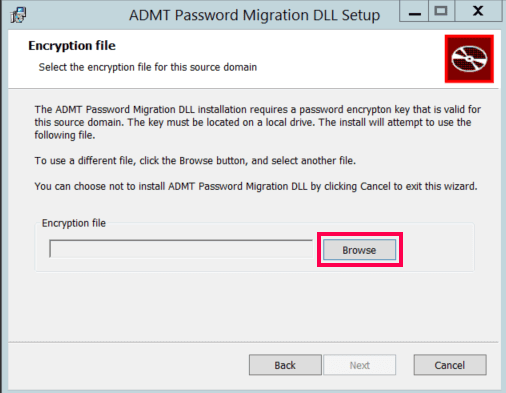
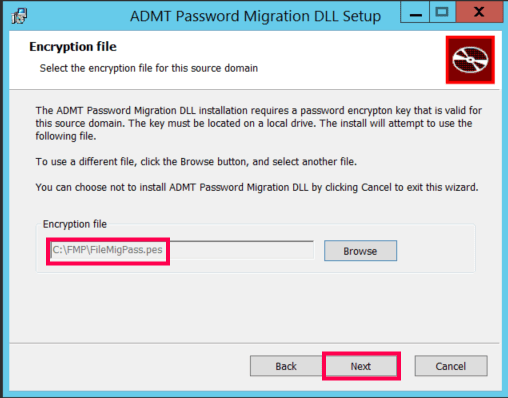
- On the Encryption File page, click on Browse and choose the key file created on the ADMT installed machine. Click Next.
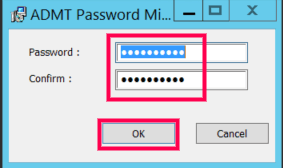
- Enter the password used while creating the encryption key in Step 1, then click OK.
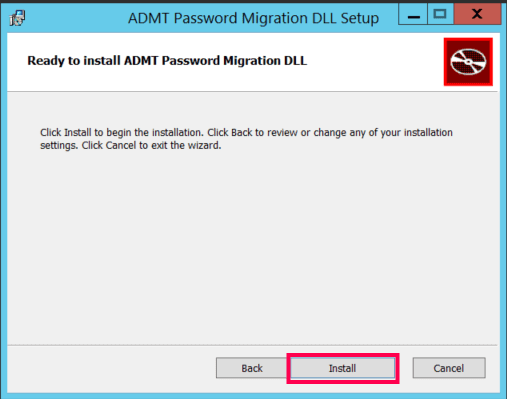
- On the Ready to install ADMT Password Migration DLL page, click Install to begin installation.
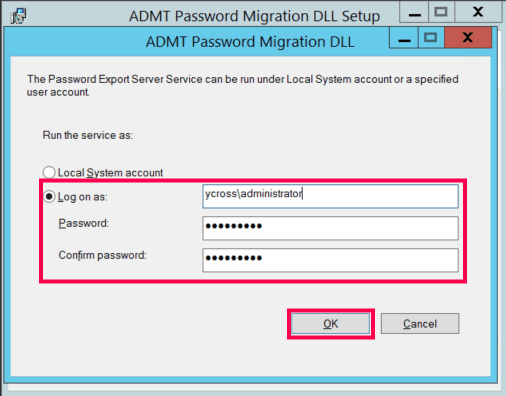
- Now, run the Password Export Server (PES) service as an ADMT account in the target domain. Enter the password and click OK.
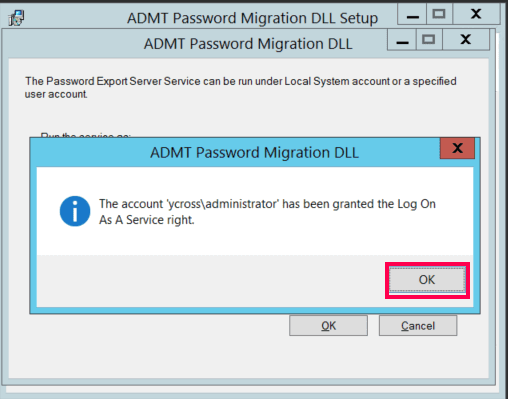
- Click OK on the dialogue box that states the 'Log On As A Service' right has been granted to the specified account.
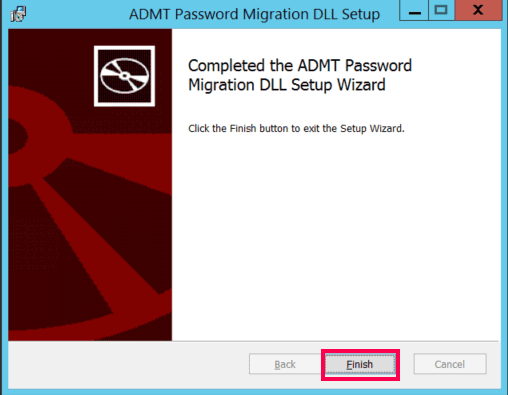
- To exit the Setup Wizard, click Finish.
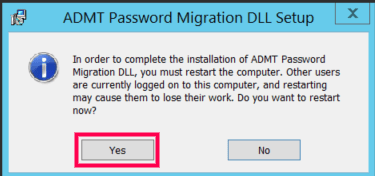
- Click Yes to restart the domain controller and complete the ADMT Password Migration DLL installation.
Starting Password Export Server Service
After restarting the domain controller, the Password Export Server Services need to be started manually. To start the service:
- Navigate to Start > Administrative Tools > Services.
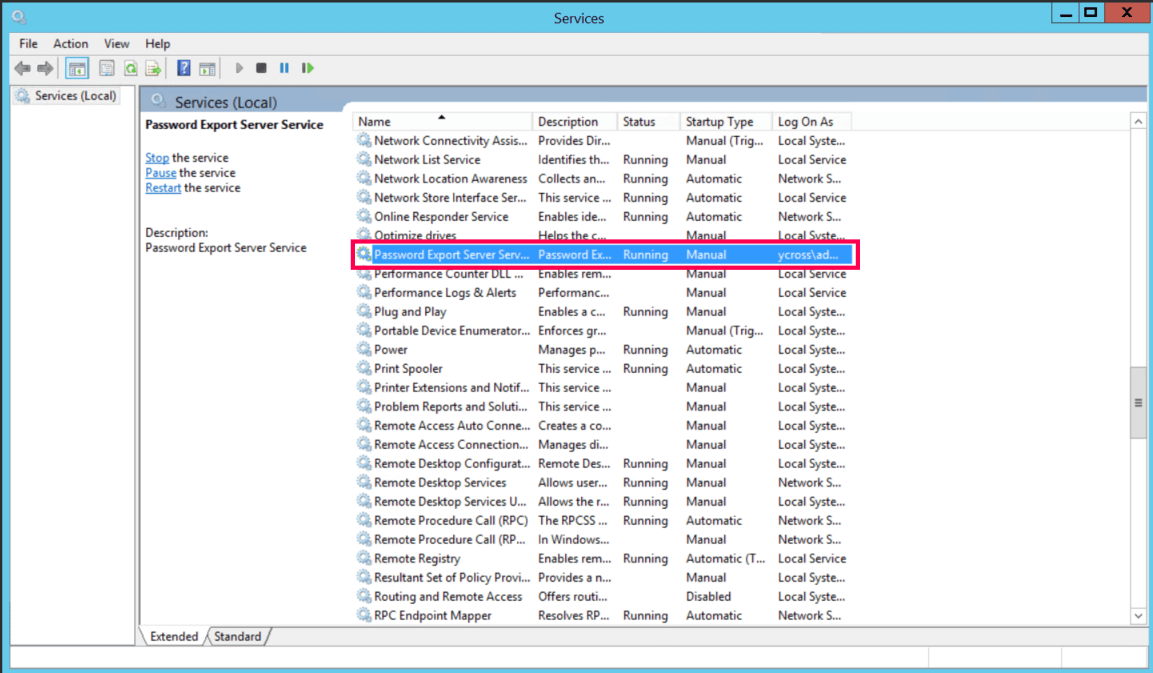
- Select Password Export Server Service on the Services (Local) page, then click Start.

The Password Export Server Service is now running as shown in the Status column.
Best practices for migration
- Regular backups: It's crucial to back up domain controllers regularly in both the source and target domains during the migration process. If you're migrating computers that contain file shares, for security translation, ensure those machines are backed up as well throughout the migration.
- Test migration first: Before starting a full migration, create a test user and add them to the necessary global groups. Verify access to resources before and after migration to confirm everything is functioning correctly.
- Test in a controlled environment: Always run your migration scenarios in a test environment before making any changes in the live production environment. This helps identify and resolve potential issues early on.
- Have a recovery plan: A good recovery plan is essential. Test it thoroughly during the pre-migration phase to ensure it works effectively if needed.
- Time synchronization: Make sure the system time is synchronized across all domains involved in the migration. Misaligned time can cause Kerberos authentication to fail, so this step is critical for a smooth migration process.
Limitations of ADMT
- Outdated OS support
ADMT was originally released to support migrations to Windows 2000 and Windows Server 2003. It has not been updated to support newer OSs, including:
- Windows 11
- Windows 10
- Windows 8.1
- Windows Server 2022
- Windows Server 2019
- Windows Server 2016
- Windows Server 2012 R2
- Issues with unsupported OS
When running ADMT on an unsupported OS, you may encounter the following known issues:
- User profiles cannot be migrated from or to OS newer than Windows 7 or Windows Server 2008 R2.
- ADMT is incompatible with the security defaults used by modern OSs.
- ADMT has not been tested with newer versions of Microsoft SQL Server, which may result in incompatibilities or errors.
- Migration failures with special characters
Migration attempts will fail if object names or OU names contain special characters such as double quotation marks when using ADMT's command line options.
- Incompatibility with Windows Defender Credential Guard
ADMT will not function on devices with Windows Defender Credential Guard enabled. You may encounter errors like:
"Failed to move source object CN=User1. Verify that the caller's account is not marked sensitive and therefore cannot be delegated. hr=0x8009030e. No credentials are available in the security package."
Solution: Temporarily disable Credential Guard on the ADMT server.
Note: Always consult your security team before altering Credential Guard settings, and ensure you back up the ADMT server prior to making any changes.
- Unconstrained delegation requirement
During migration, ADMT requires domain controllers to use unconstrained delegation, which is no longer recommended.
Solution: Install and run ADMT on the target domain controller to eliminate the need for delegation.
- Attributes excluded during migration
When you run the ADMT user migration for the first time, the tool generates a system attribute exclusion list, which is stored in its database. By default, this exclusion list contains two attributes: mail and proxyAddresses. Additionally, ADMT scans the schema of the target domain and automatically excludes any attributes not present in the base schema.
Solution: Administrators can modify the system attribute exclusion list only by using a script.
For example, to remove the mail and proxyAddresses attributes from the exclusion list:
- Copy and paste the following code into a Notepad document, then save it with a .vbs extension (e.g., DisplayExclusionList.vbs): Set o = CreateObject("ADMT.Migration") WScript.Echo o.SystemPropertiesToExclude
- Open an Administrative Command Prompt, navigate to C:\Windows\SysWow64, and run the following command to execute the script: cscript.exe <Location where the DisplayExclusionList.vbs script is stored>\DisplayExclusionList.vbs
- Verify the list of excluded attributes—including mail and proxyAddresses—in the displayed output.
- After confirming that only the necessary attributes are excluded, modify the exclusion list by running the following steps:
- Copy the following script into a Notepad document, then save it with a .vbs extension, such as ExclusionList.vbs: Set o = CreateObject("ADMT.Migration")o.SystemPropertiesToExclude = "<List of attributes from previous step after removing mail and proxyAddresses>"
- Run the script using the following command: cscript.exe <Location where the ExclusionList.vbs script is stored>\ExclusionList.vbs
This allows you to adjust the attributes excluded during the migration as needed.
