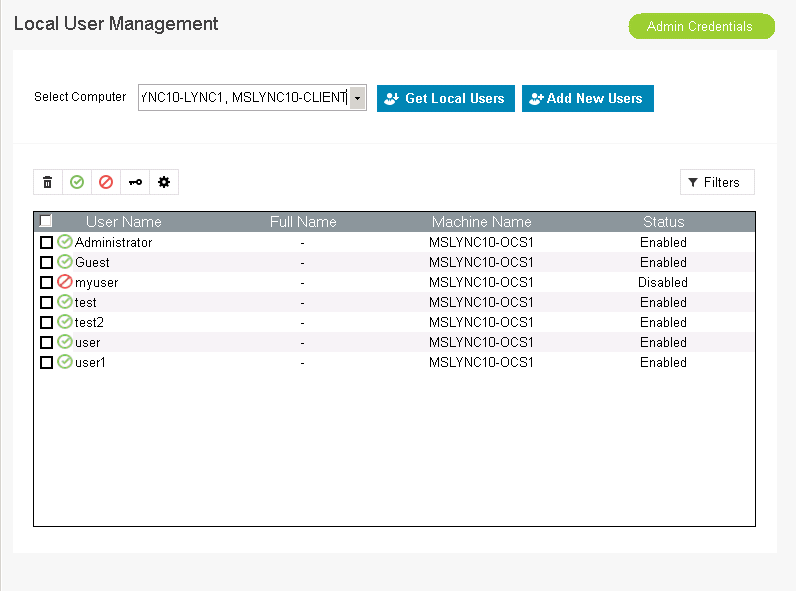
Windows local Users Management Tool
The Local User Manager freeware from ManageEngine ADManager Plus is a useful utility aimed to help administrators manage user accounts within the Domain. This tool provides information about local user accounts and also allows management of these accounts using a convenient user interface.
It provides information on computer accounts accessible / not-accessible in the Domain. It also has a Quick Search feature to search for the accessibility of specific computers. The Local User Management freeware eliminates the need to manage user accounts locally. As an administrator, you can use the software remotely to enable, disable accounts and reset their passwords.
This freeware is basically a PowerShell cmdlet which helps administrators to effectively control the local user accounts.
Pre-requisites to using the tool:
- This tool requires the user to have privileges over Domain local machines that he manages.
- The tool must be able to connect to the Domain.
Why should one consider this Local User Management tool?
- It lists all local user accounts from single/multiple computers.
- Allows addition or removal of local user accounts.
- Allows viewing the properties for any selected local user account.
- Allows to define or modify group memberships properties for any selected local user account.
- Allows one to reset password for any selected local user account.
- Allows enable/disable selected local user accounts.
How to use this Local User Management Tool?
- Double click the ADManager Plus free tool launcher icon to start the tool.
- Click Local User Management.
- Click Admin Credentials and enter the username and password for the administrator / an equivalent domain user.
(Note: By default, if you do not give any credentials, the machines local credentials will be applied)
- To retrieve the local user accounts of a computer
- Select a computer from the drop down list.
- If the desired computer doesn't appear in the list
- Click Get Computers from the drop down list.
- In the Add Computers page that appears, click Show All Computers to view all the computers in the domain.
- Select the required computer and click Done.
- Click Set As Favourite, if you want the computer to appear in the drop down list
- Click Get Local Users to get the local user accounts specific to the selected computer.

- To add new users
- Click Add Users.
- In the Add Users page that appears, enter the username, fullname, description and password of the local user.
- Select the computer and the group to which the local user belongs.
- Click Import from CSV to import multiple local user accounts via CSV file.
- Once the local user details are added, click Create Users.
- To delete a local user account
- From the list of local user accounts, select the user account to be deleted.
- Click
 icon and the local user account will be deleted.
- To enable a local user account
- Select the local user account to be enabled.
- Click
 icon and the local user account will be enabled.
- To disable a local user account
- Select the local user account to be disabled.
- Click
 icon and the local user account will be disabled.
- To reset password for a local user account
- Select a local user account from the list.
- Click
 icon.
icon. - In the Reset Password dialog box that appears, enter the new password and confirm it.
- Click OK and the password will be reset.
- To modify local user account details
- Select a local user account from the list.
- Click
 icon.
icon. - In the Properties page that appears, click Properties tab.
- Edit the required fields.
- Click Apply and the user details will be modified.
- To Change group memberships
- Select a local user account from the list.
- Click
 icon.
icon. - In the properties page that appears, click Group Membership tab.
- Select the required group and click Apply.
About Microsoft Windows PowerShell
Windows Powershell is a recent inclusion in the Microsoft family and has been been in limelight for quite a while now. A glazed version of its predecessors namely - "Monad" Shell, Microsoft Command Shell, or MSH; Microsoft Windows PowerShell is a powerful command line shell and scripting language with over a 130 standard command line tools, with consistent syntax and naming conventions. PowerShell integrates with the .NET framework and hosts a list of cmdlets (derivative of the cmdlet class of .NET API) which are specialized .NET classes implementing specific functions. Windows Powershell is gaining prominence as an efficient tool that helps control system administration with ease and facilitates automation, inturn improving the productivity of System Administrators.
Windows PowerShell is supported on the following Operating Systems:
- Windows XP Service Pack 2
- Windows Server 2003 Service Pack 1
- Windows Server 2003 R2
- Windows Vista
- Windows Server 2008
PowerShell compatible architectures:
- x86
- x64
- IA64
