Windows Local Group Management Tool
ManageEngine ADManager Plus' Windows Local Group Management free tool helps administrators easily manage local groups within a domain. This freeware provides information on all the local groups present in different computers in a domain. With a user-friendly GUI, the tool also allows you to perform multiple management operations at once to simplify your local group management.
Pre-requisites to use the tool:
- The administrator account of the tool must have sufficient privileges over the domain local computers that are to be managed with the tool.
- The tool must be able to connect to the domain.
Why do you need Local Group Management Tool?
With this tool:
- List all the local groups from single or multiple computers.
- Add existing users (or create new users and add them) to local groups, and remove users from local groups.
- Create new groups and add members to those groups.
- View properties such as description and list of all members of a specific group.
- Export the report data in CSV or HTML file formats.
How to use the Local Group Management tool?
To get started with the tool, follow these steps:
Step 1: Double-click ADManager Plus Free Tools from the desktop shortcut to run the tool. If a desktop shortcut is not available, use the default installation folder path: c:\ManageEngine\ADManager Plus Free Tools\FreeTools.exe.
Step 2: Click Local Group Management listed under the Remote Management category.
Step 3: Click Admin Credentials and enter the login credentials of the administrator or an equivalent domain user with sufficient privileges to manage groups in the domain. Note that if you do not enter any credentials, then the machine's local credentials will be applied by default.
Performing different management operations with Local Group Management tool
To retrieve all the local groups from a computer:
- In the homescreen, select a computer from the drop-down list to view all the local groups on that computer.

- If the desired computer is not present in the list,
- Click More Computers from the drop-down list.
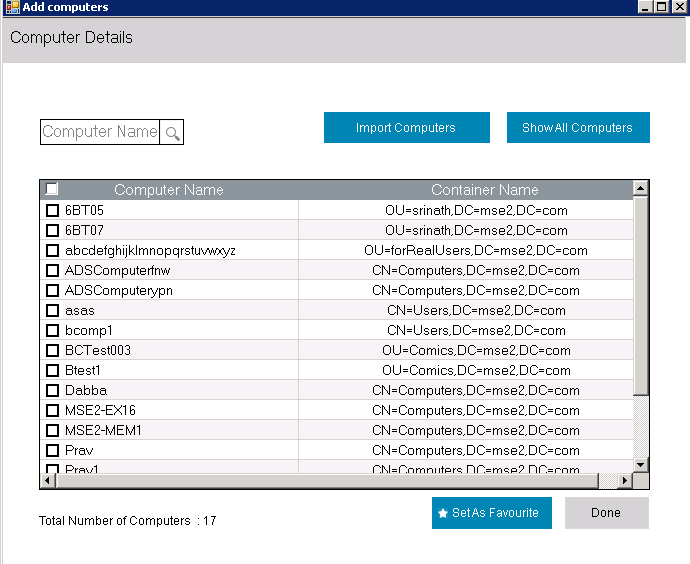
- From the Add Computers pop-up, click Show All Computers to view the list of all computers in the domain. Alternatively, you can also import the CSV file containing the list of computers using the Import Computers option.
- Select the desired computer and click Done. You can use the Set As Favourite option to have the computer appear directly in the drop-down list.
- Once a computer is selected, click Get Local Groups to fetch all the local groups associated with the selected computer.
To view the properties of a group:
- Click the check-box of the desired group and click Properties.
You can view the description of the group along with the list of all members of that particular group.
To add existing users to groups:
- Click the check-box of the desired group and click Properties.
- Click Add. Select a Location and use the Search option to locate the users, and then click Add to add the selected users to the group.
To remove users from groups:
- Click the check-box of the desired group and click Properties.
- The existing members of the group are listed under Members. Select the user accounts that you wish to remove from the group and then click Remove to complete the operation.
To create a new group and add members to it:
- Click Add New Group.
- Create a new group by specifying the Group Name and Description. You can create multiple new groups at once by clicking the '+' icon.
- Select the list of computers to be added to the groups from the Computers List table. Only those computers selected from the Select Computers option will be listed under this table.
- Click Add to search and add the desired members to groups. Once the members are selected, click OK to complete this operation.
To export data in a different format:
- Click Export As option and select the file format (CSV or HTML) in which you wish to export data.
- Select the destination folder and click Save.
