Remote booting with OpUtils
Machines connected to a network can be remotely awakened with Wake-On-LAN by OpUtils. A device in the local network sends the Wake-On-LAN remote command to the target machine to wake up (boot up) the machine. For the target machine to support such an operation, it is required to configure the machine, to support the Wake-On-LAN tool remote commands.
Basic requisites for target machines are,
- Network Interface Card (NIC) of the target computer should support Wake-On-LAN (WOL) functionalities.
- Target machines should have WOL enabled in their BIOS setting.
- Target machines should remain connected to the network.
- The External NIC's WOL cable should remain connected to the motherboard.
- The power supply to the target machine should be ON.
Basic requisites for the network,
For Wake-On-LAN to work across the subnets,
- Enable IP Directed broadcasts on the routers/gateways. This ensures that the WOL packets are not blocked.
- Depending on the network design, enable the IP directed broadcasts in all the required routers/gateways/switches along the path.
- Alternatively, you can also add an access list in the switches to allow UDP packets from a specific machine to other subnets.
Configuring Wake On LAN
Bios Settings
As said earlier, you will have to configure the Wake on LAN in BIOS settings. The WOL functionality is generally disabled by default. Methods of enabling WOL varies for different manufacturers. Widely used method in different machines is as follows,
- On turning ON the computer go to BIOS setting screen by pressing F1, INS, or DEL keys.
- Select Power Management.
- Choose Wake On LAN\WLAN.
- Under Wake on LAN\WLAN, choose LAN or WLAN.
- Save and exit the BIOS settings.
Note: If you see a mode called "Deep Sleep Mode" ensure that it is disabled. This mode is not present in all computers.
OS Settings.
Some windows OS allow the Wake On LAN features of network adapters to be enabled aided by drivers. To enable WOL using drivers, follow the steps mentioned below.
- Go to Properities and select Device Manager.
- Under Network Adapters, select "Ethernet Adapter and Wireless Adapter"
Note: The below mentioned operations are to be performed on both Ethernet and Wireless Adapters.
- Right click on the adapter, select properties and click Power Management tab.
Enable the following options,
- Allow the computer to turn off this device to save power.
- Allow this device to wake the computer.
- Only allow a magic packet to wake this computer.
For Windows 8 and above OS
- Go to Control Panel and select Power Options.
- Select the option Change what the power buttons do.
- Select Change settings that are currently unavailable.
- 4. Go to Shutdown settings and disable Turn on fast startup.
- 5. Click Save changes.
Network Adapter Settings:
- Go to Device Manager->Network Adapters->Ethernet Adapter->Advanced.
- Disable"Energy Efficient Ethernet."
- Enable "Wake on Magic Packets."
Remotely waking up a computer - Manual method
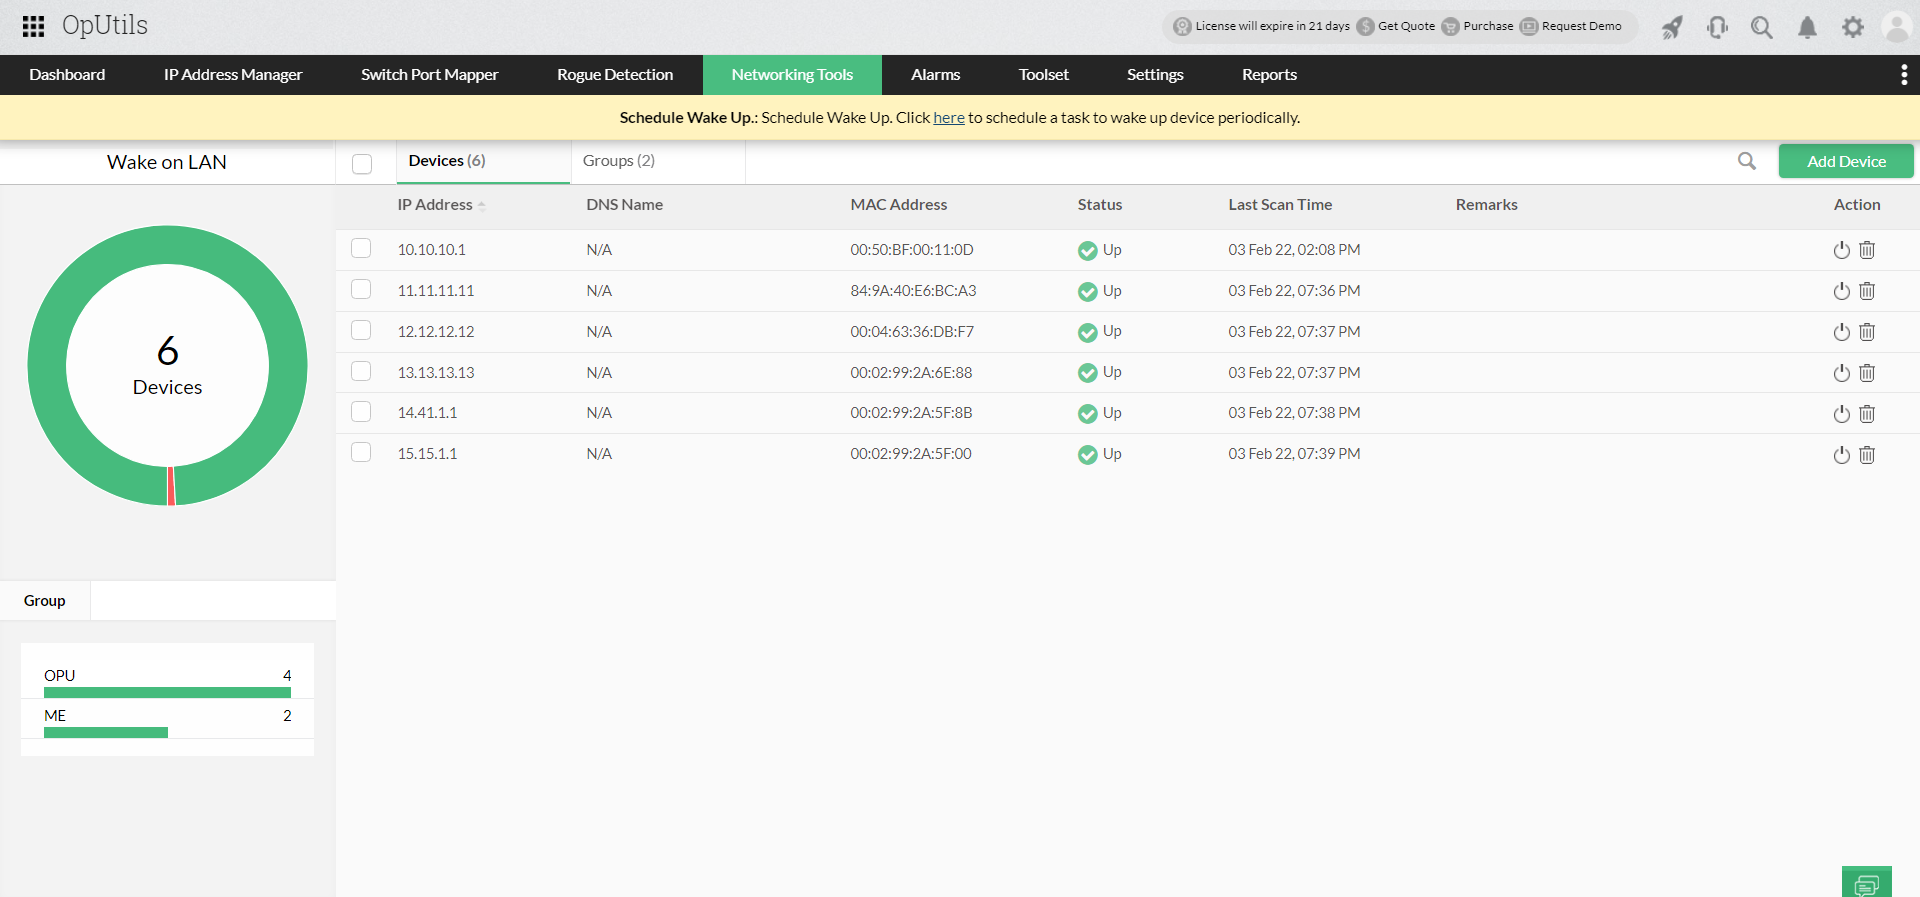
- Click the Networking Tools tab.
- Select the option "Wake On LAN" available under it.
- The Devices tab is selected by default. Initially, there is no devices listed. In order to add devices, follow the steps given below,
- Click on Add Device option.
Note: You can either manually add the hosts that have to be powered on or choose from the available list. The list is based on the input given in the Global Environment settings. - Select the required option.
- If devices are to be added manually, enter the Group name (If a new group is being created, else select a group from the already available list), IP Address, MAC Address and the sub net mask of the target machine and click on Add.
Note:For accurate results ensure that the IP address is available in the network. - If the devices are selected from the list, the corresponding subnets are defined in the global environment, the network address and the sub net address are automatically added. Else, you have to specify these values by clicking the Apply Subnet Address link before adding the machines from the link. Click Add.
- Click on Add Device option.
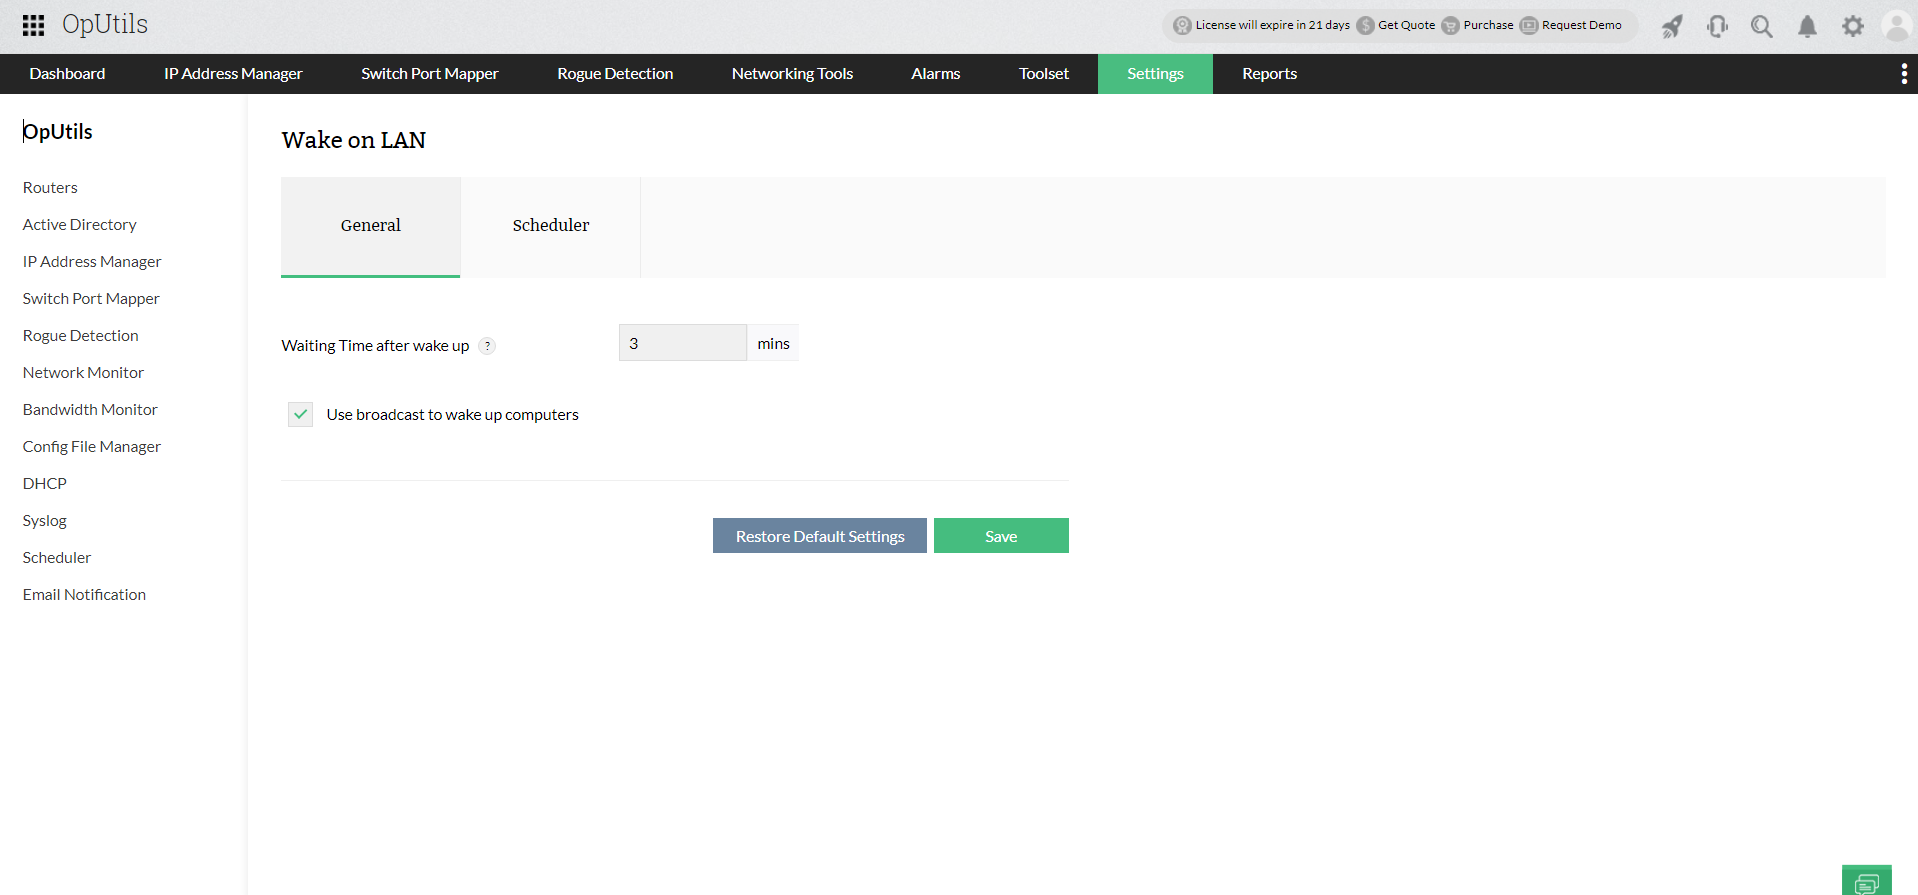
- Click on the Settings -> Wake On Lan - > General and set the Waiting time after wakeup.
- After adding all the machines, click on the power button of the target machine to wake up.
The devices that have been added can be viewed as a device view of individual devices in the Device tab or as groups in the Groups tab.
Scheduled waking up of devices remotely
You can create a schedule to perform automatic device wake up at specified periods of time. Scheduling a Wake On LAN task involves the following:
- Create a Wake On LAN task.
- View the status of each task.
- Modify a Wake On LAN task.
- Delete a task.
Create a Wake On LAN task
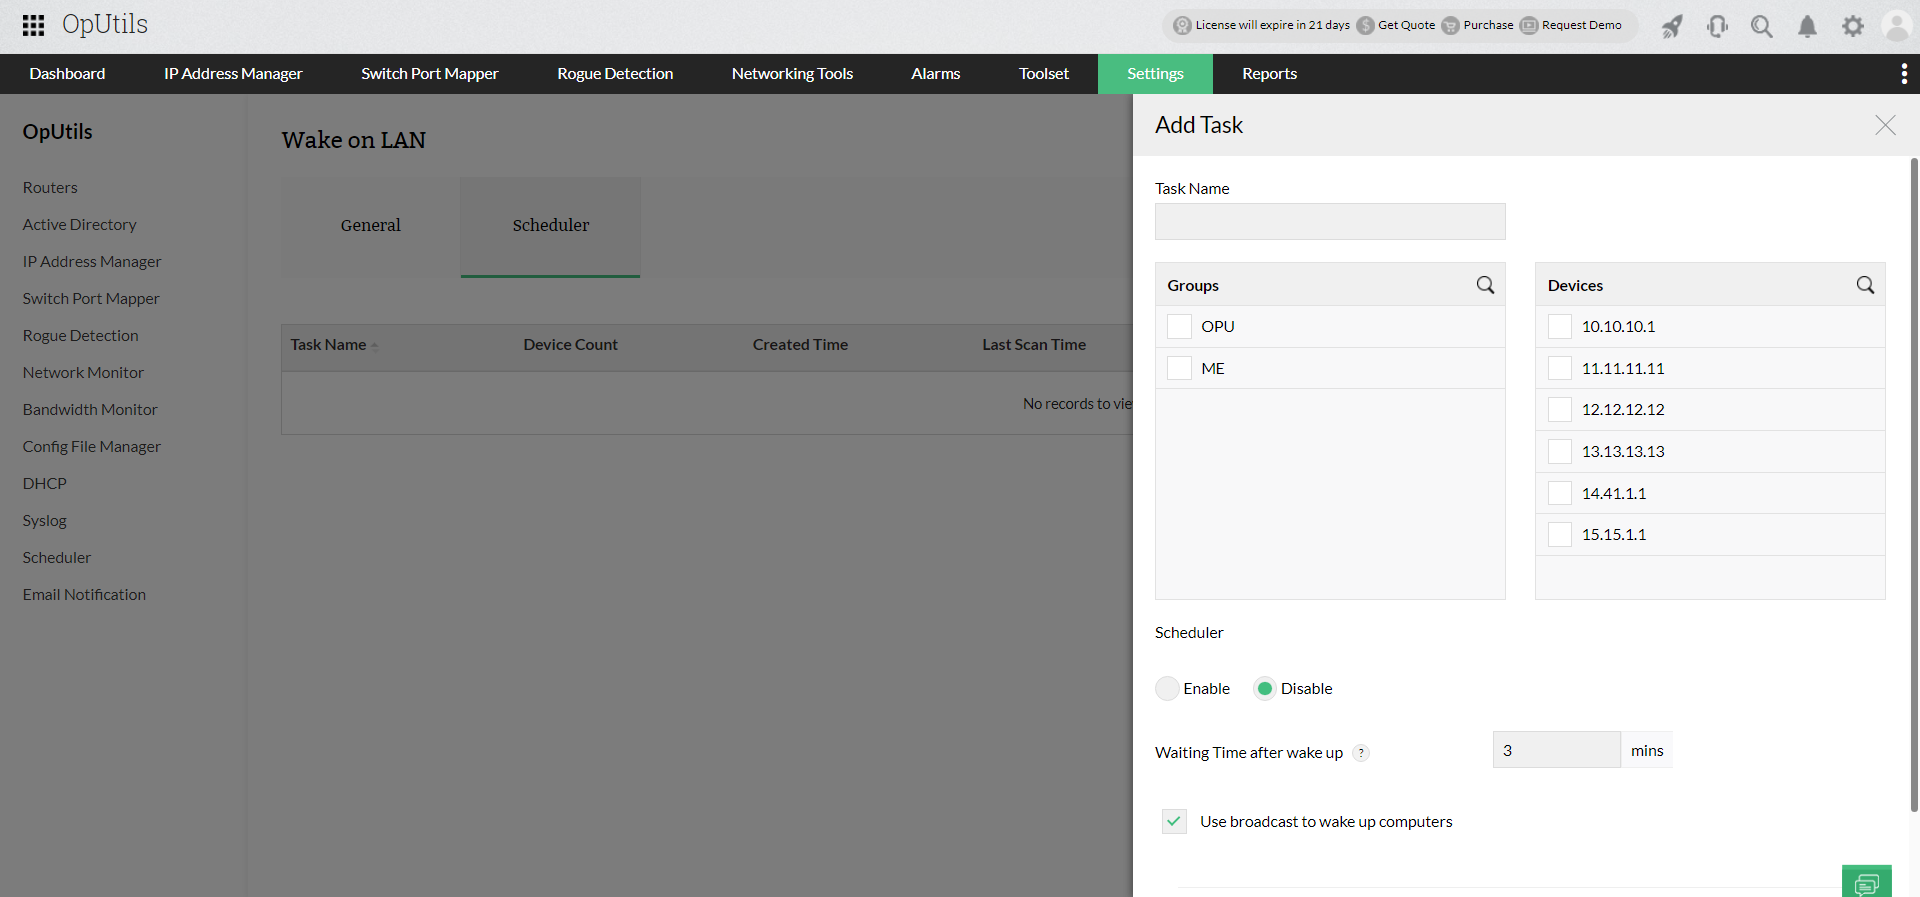
- Click on Settings -> Wake On LAN -> Schedular.
- Click on the Add Task button. Add the following details,
- A name for this task.
- Time to wait after executing a task to check the status of the computers.
- The use broad cast option when enabled will broadcast the WOL packets in the whole sub net. This will produce better results.
- Add Computers for this task either manually or from the list.
- Select Enable to schedule this task and specify the scheduler details:
- Daily - to update everyday. You need to specify the starting time.
- Weekly - to update on specific day (s) in a week. You need to specify the starting time and the day (s) on which the update should happen.
- Monthly - to update on a specific day every month (s). You need to specify starting time, select a day and select a month (s).
- Once Only - to run the tool only once at the scheduled time.
- Click Submit to save the task. The task gets added to the table.
- Repeat step 1 for creating more tasks.
- The tasks will be executed at the specified time and the status gets updated.
View the Status of each Tasks
The Wake On LAN tasks gets executed at the scheduled time and the status of the individual computers gets updated. To view the status of each task:
- Select the Settings -> Wake On LAN -> Schedular tab.
- This will list all the tasks that are created with the details like Task Name, Device Count, Created, Last Scan Time, Next Scan Time and more.
- Clicking the task name will list the status of each computer in that task.
- You can also modify or run the task from the task details view.
Modify a Wake on LAN Task
To modify a task, follow the steps below:
- Select the Settings -> Wake On LAN -> Schedular tab.
- Click the particular task.
- In the Edit Task window, modify the task and click Save.
Delete a Wake on LAN Task
To delete a task,
- Select the Settings -> Wake On LAN -> Schedular tab.
- Click the delete icon from the Actions column of a particular task.
- Click OK to confirm.
- The task gets deleted from the table
Thank you for your feedback!


