Licensed Users Report
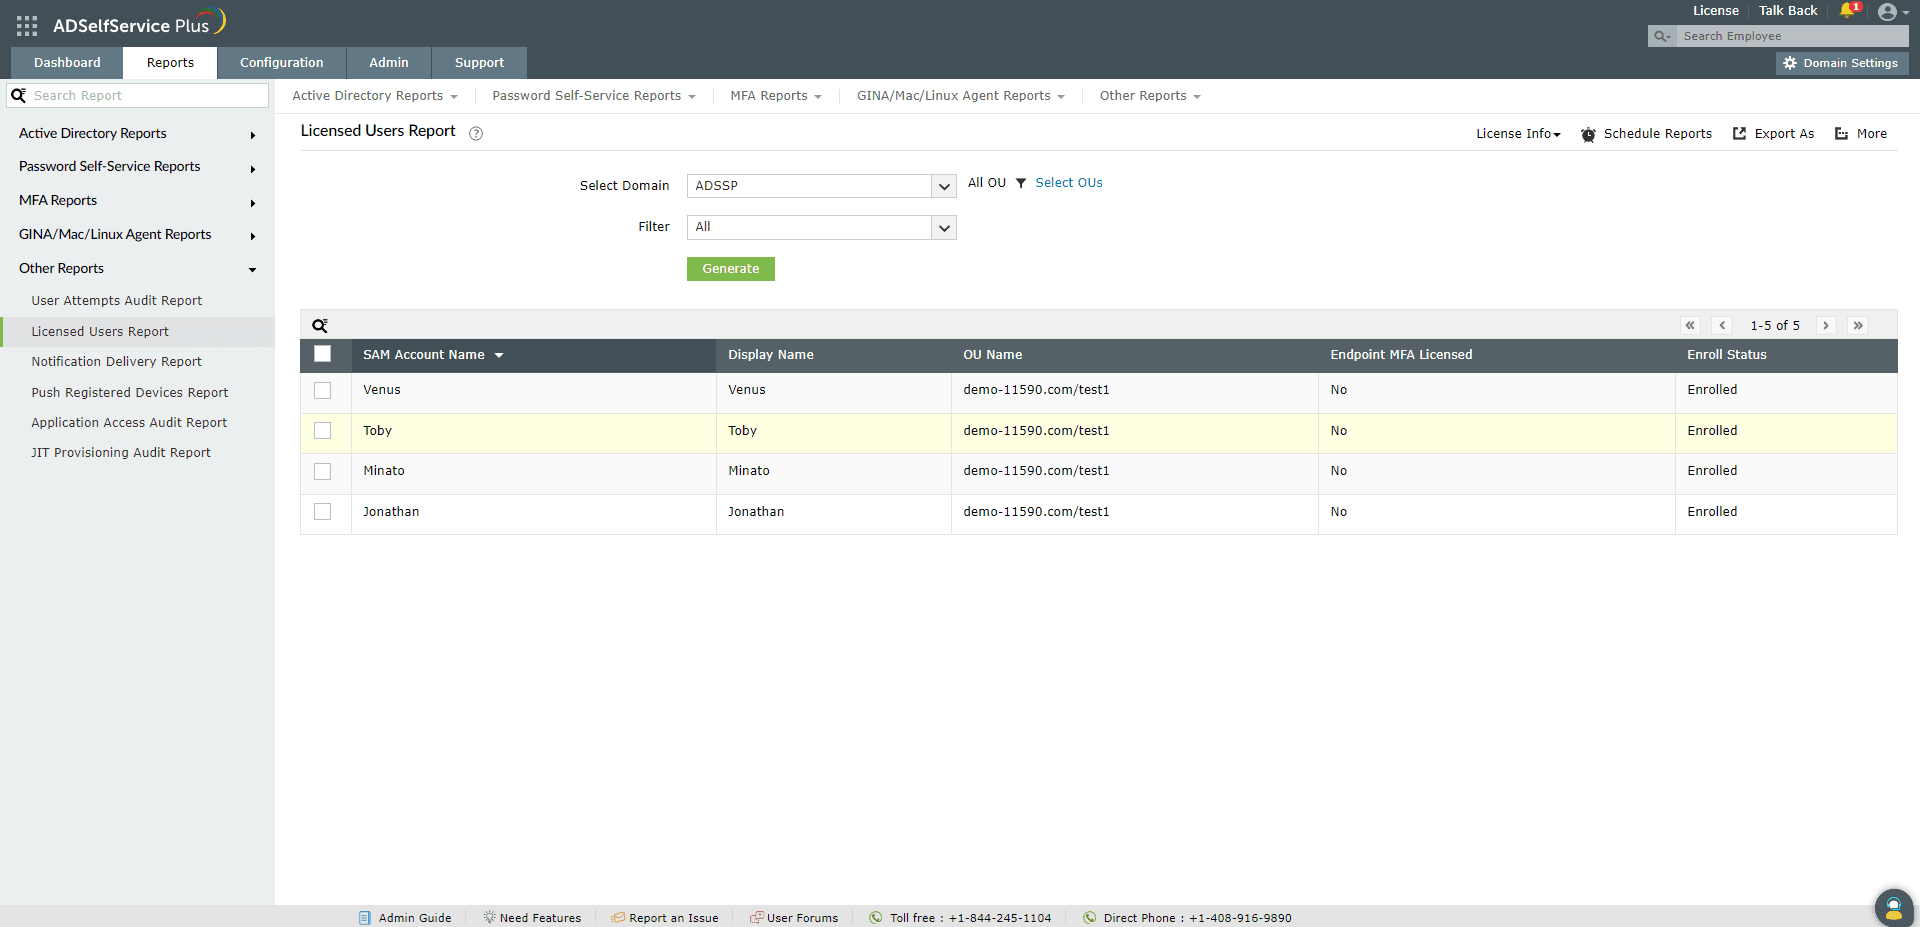
The Licensed Users Report lists the users who have been allotted with ADSelfService Plus licenses. It displays the OU the user is part of, and their enrollment status. This report can be used to effectively manage the licenses assigned to users.
To learn more about ADSelfService Plus licensing, click here.
Licenses are automatically consumed (allotted to accounts) when a user performs any of these actions for the first time:
- User login: When users successfully verify their identity and log in to the product for the first time.
- Creating technicians: When administrators create technicians for help desk roles. A license will be assigned to each new technician account.
- Password reset: When users perform multi-factor authentication for password resets using methods that do not require enrollment for the first time, such as email, SMS, and AD-based security questions and answers.
- Account unlock: When users perform multi-factor authentication for account unlocks using methods that do not require enrollment for the first time, such as email, SMS, and AD-based security questions and answers.
- Machine login: When users perform multi-factor authentication for machine login using methods that do not require enrollment for the first time, such as email, SMS, and AD-based security questions and answers.
- CSV or external DB enrollment: When users are auto-enrolled using CSV files or from external databases. One license will be consumed for each imported user.
- Automatic password reset and account unlock: One license will be consumed for each user under the OU or group where the automatic password reset or account unlock policy is applied.
Report generation

- To generate the Licensed Users Report, log into the ADSelfService Plus portal with admin or operator credentials and navigate to Reports > Password Self-Service Reports > Licensed Users Report.
- Specify the domain using the Select Domain option.
- Use the Select OUs option to specify OUs if necessary.
- You can narrow-down entries based on Enrolled Users, Not-Enrolled Users, Technicians, Self-Service Licensed Users, and Endpoint MFA Licensed Users, using the Filter drop-down.
- Then, click on Generate to generate the report.
Note: The License Info drop-down provides administrators with information on various statistics regarding license consumption, like the total number of licenses purchased, consumed, and available. It also displays the number of licensees who have or have not enrolled with the product.
Removing user licenses

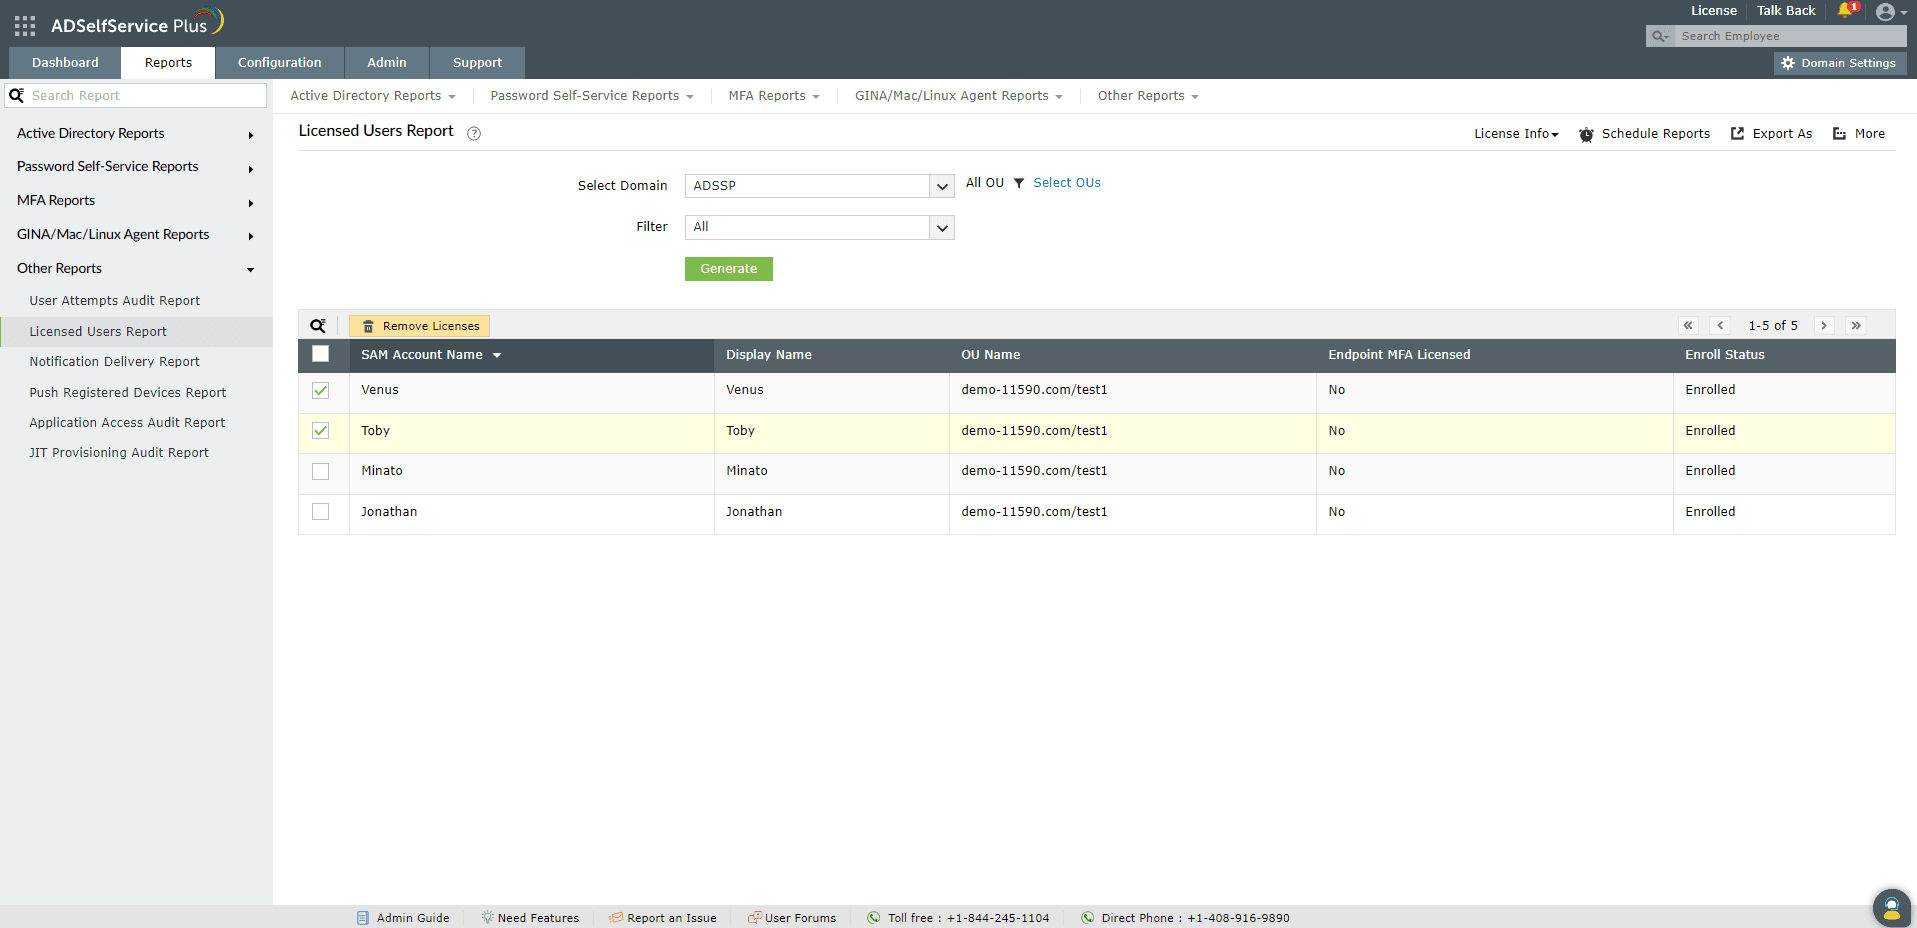
The Remove Licenses option is displayed when you select one or more entries of the report.
Users for whom licenses have been removed will be auto-assigned licenses again if they attempt to perform actions that require licenses. To prevent this, you can restrict their licenses in the License Management section.
Note: Removing all the licenses of users from the Licensed Users Report will completely remove the users' licenses along with the corresponding enrollment data from ADSelfService Plus.
Sorting
Click on any of the columns (except the Enroll Status column) to view the report's entries in ascending or descending order.
Searching
- Click on the search icon [
 ] in order to search for specific data in the report.
- Specific users can be searched for using attributes like the username and the IP Address of the device MFA was attempted from.Searching happens using the criteria contains. For example, if the word jack is searched for using the Username column, then all usernames containing the sequence jack will be displayed as a result.
Schedule Reports, Export As, and More
- The Schedule Reports option can be used to schedule the generation of reports at specified intervals, and automatically email them to administrators or specific email addresses. Learn to schedule reports here.
- The Export As option in the top-right corner of the page helps export the report in CSV, PDF, XLS, XLSX, HTML, and CSVDE formats.
- The More option in the top-right corner of the page lists the Printable View, Send Mail, and Export Settings options.
- The Printable View option can be used to preview and print the report.
- The Send Mail option can be used to mail the report to the desired email addresses.
- Additionally, you can configure custom Export Settings, such as a personalized title for the report and a header logo that you may wish to display on each page.
Don't see what you're looking for?
-
Visit our community
Post your questions in the forum.
-
Request additional resources
Send us your requirements.
-
Need implementation assistance?
Try OnboardPro

