Pricing  Get Quote


How to install existing PFX Certificate?

Summary

This article will guide you through the process of applying a multi-domain or wildcard certificate (PFX) in ADSelfService Plus.

Configuration steps

Step 1: Enable HTTPS in ADSelfService Plus

enable-https-in-adselfservice-plus

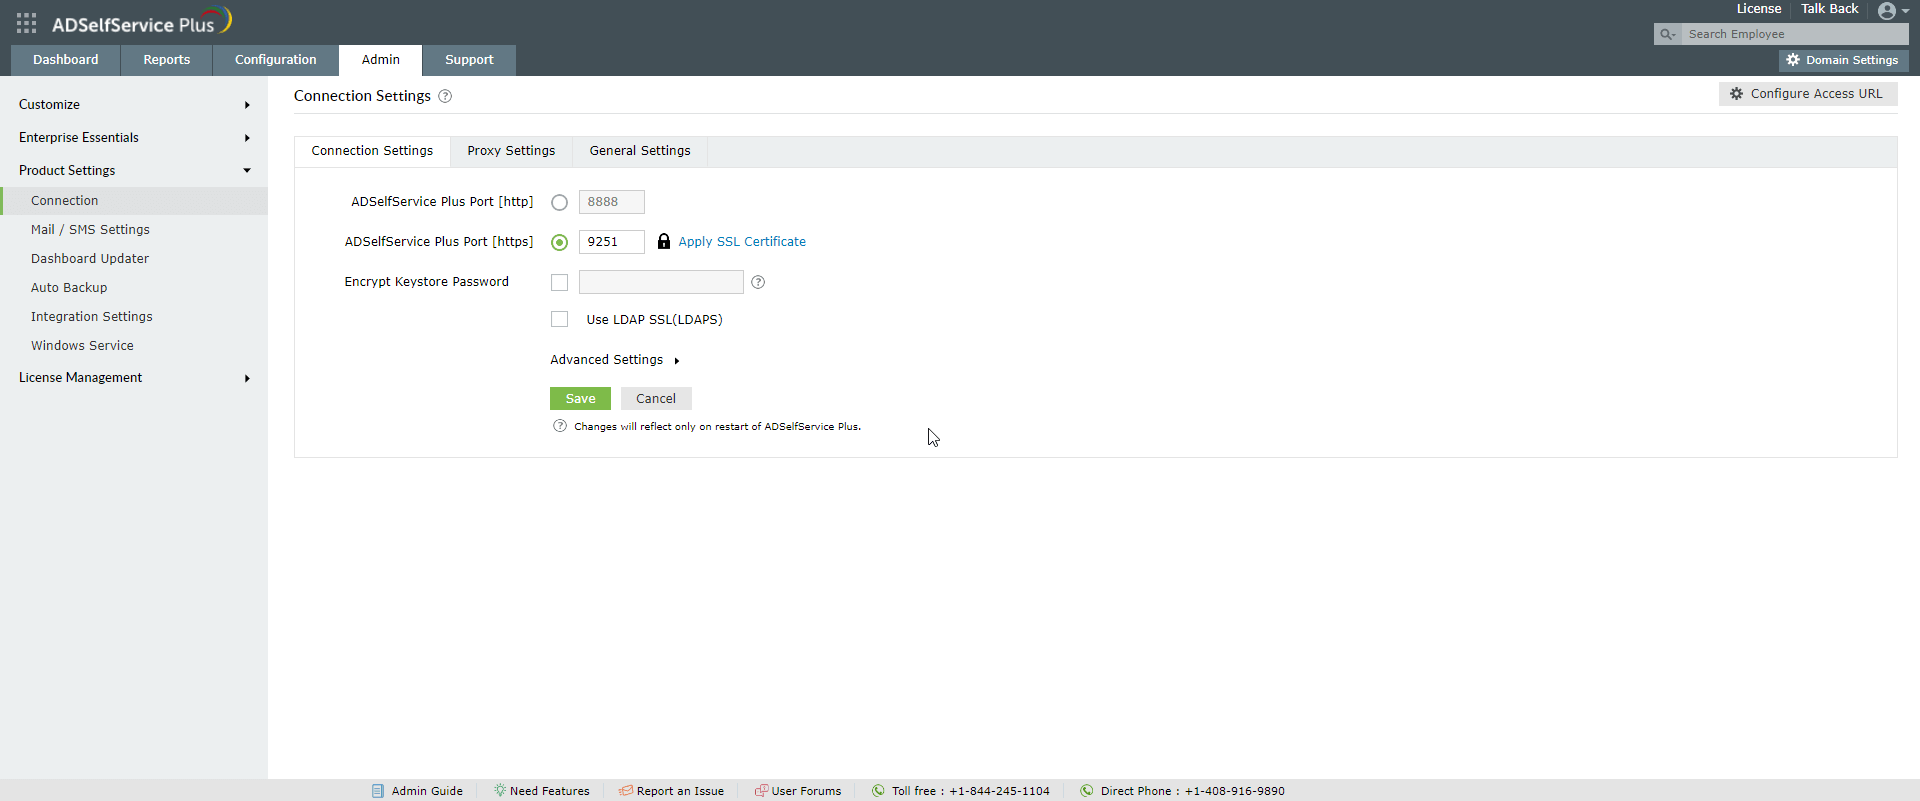
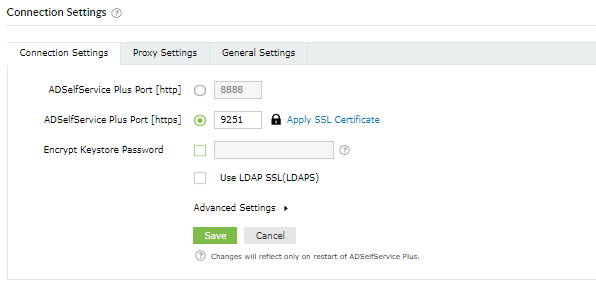
Enable the HTTPS option under the Connection settings.
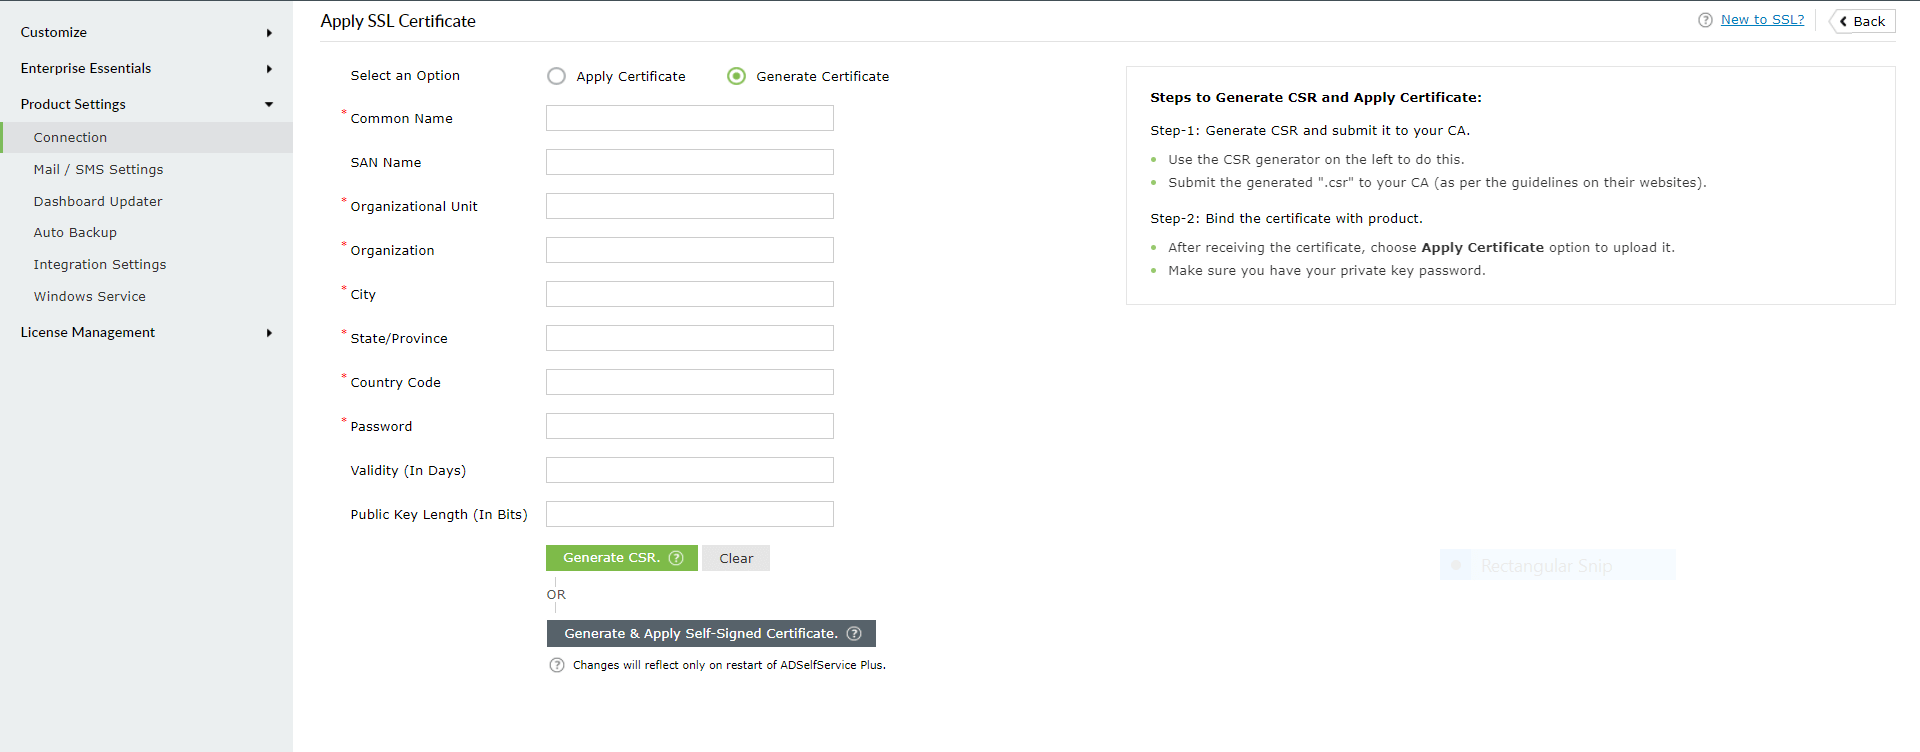
  1. Log in to ADSelfService Plus with admin credentials.
  2. Navigate to Admin → Product Settings → Connection.
  3. Check the Enable SSL Port [https] box
  4. Click Save.

Step 2: Generate CSR

Note: If you already have an SSL certificate, skip to Step 4.
  1. Click the SSL Certification Tool button.
  2. How to install existing PFX Certificate

  3. Click Generate Certificate and fill in all the necessary fields. Refer to the table below:
  4. Common Name The name of the server in which ADSelfService Plus is running.
    SAN Name The names of the additional hosts (sites, IP addresses, etc.) to be protected by the SSL certificate.
    Organizational Unit The department name that you want to appear in the certificate.
    Organization The legal name of your organization.
    City The city name as provided in your organization’s registered address.
    State/Province The state/province as provided in your organization’s registered address.
    Country Code The two-letter code of the country in which your organization is located.
    Password A password must be at least six characters. The more complex the password, the better the security.
    Validity (In days) The number of days the certificate should be valid. If no value is provided, it will be set to 90 days.
    Public Key Length (In bits) The public key length. The larger the size, the stronger the key. The default size is 1024 bits and can be incremented only in multiples of 64.

    How to install existing PFX Certificate

  5. Once you’ve entered all the details, click the Generate CSR button.

Step 3: Submit the generated CSR file to your Certification Authority

  1. When you click the Generate CSR button, two files—SelfService.csr and SelfService.keystore—will be generated.
  2. You can locate the SelfService.csr file in <install_dir>\webapps\adssp\certificates folder and the SelfService.keystore file in <install_dir>\jre\bin folder.
  3. Submit the SelfService.csr file to your Certification Authority (CA).

Step 4: Bind the CA-signed certificates with ADSelfService Plus

Option 1: Using the admin portal

  1. Go back to Admin → Product Settings → Connection.
  2. Click SSL Certification Tool at the next to HTTPS
  3. Select Apply Certificate.
  4. Click Browse to upload the certificate.
  5. In Certificate Password field, enter the password of the uploaded certificate.
  6. Click Apply.
  7. How to install existing PFX Certificate

Option 2: Manual

  1. Back up the server.keystore, SelfService.p12, server.xml, and web.xml files located at <Install_Directory>\conf folder (Default location: C:\Program Files\ManageEngine\ADSelfService Plus\conf).
  2. Copy the certificate file, say cert.pfx, and paste it under the <Install_Directory>\conf folder (Default location: C:\ManageEngine\ ADSelfService Plus\ conf).
  3. Open the server.xml file, located in the <Install_Directory>\conf folder, in a text editor. Scroll down to the end of the file where you’ll find a connector tag as shown below.
    <Connector SSLEnabled="true" ……
    />
  4. Modify the following properties:
    • Replace the value of keystoreFile with ./conf/cert.pfx
    • Replace the value of keystorePass with the password of your PFX certificate
  5. Example: <Connector SSLEnabled="true" acceptCount="100" clientAuth="false" connectionTimeout="20000" debug="0" disableUploadTimeout="true" enableLookups="false" keystoreFile="./conf/cert.pfx" keystorePass="********" keystoreType="PKCS12" maxSpareThreads="75" maxThreads="150" minSpareThreads="25" name="SSL" port="9251" scheme="https" secure="true" sslEnabledProtocols="TLSv1,TLSv1.1,TLSv1.2" sslProtocol="TLS"/>

  6. Restart ADSelfService Plus, and check if the certificates are installed correctly.
Note: The Endpoint MFA feature will be accessible after installing the SSL certificates only if the Protocol option has been set to HTTPS under Configure Access URL (Admin > Customize > Product Settings > Connection > Connection Settings > Configure Access URL).

Request for Support

Need further assistance? Fill this form, and we'll contact you rightaway.

  • Name
  •  
  • Business Email *
  •  
  • Phone *
  •  
  • Problem Description *
  •  
  • Country
  •  
  • By clicking 'Submit' you agree to processing of personal data according to the Privacy Policy.
Highlights of ADSelfService Plus

Password self-service

Allow Active Directory users to self-service their password resets and account unlock tasks, freeing them from lengthy help desk calls.

One identity with single sign-on

Get seamless one-click access to 100+ cloud applications. With enterprise single sign-on, users can access all their cloud applications using their Active Directory credentials.

Password and account expiry notification

Intimate Active Directory users of their impending password and account expiry via email and SMS notifications.

Password synchronization

Synchronize Windows Active Directory user passwords and account changes across multiple systems automatically, including Microsoft 365, Google Workspace, IBM iSeries, and more.

Password policy enforcer

Strong passwords resist various hacking threats. Enforce Active Directory users to adhere to compliant passwords by displaying password complexity requirements.

Directory self-update and corporate directory search

Enable Active Directory users to update their latest information themselves. Quick search features help admins scout for information using search keys like contact numbers.

ADSelfService Plus trusted by

Embark on a journey towards identity security and Zero Trust