
What's new inServiceDesk Plus MSP
(Cloud version)
(Cloud version)



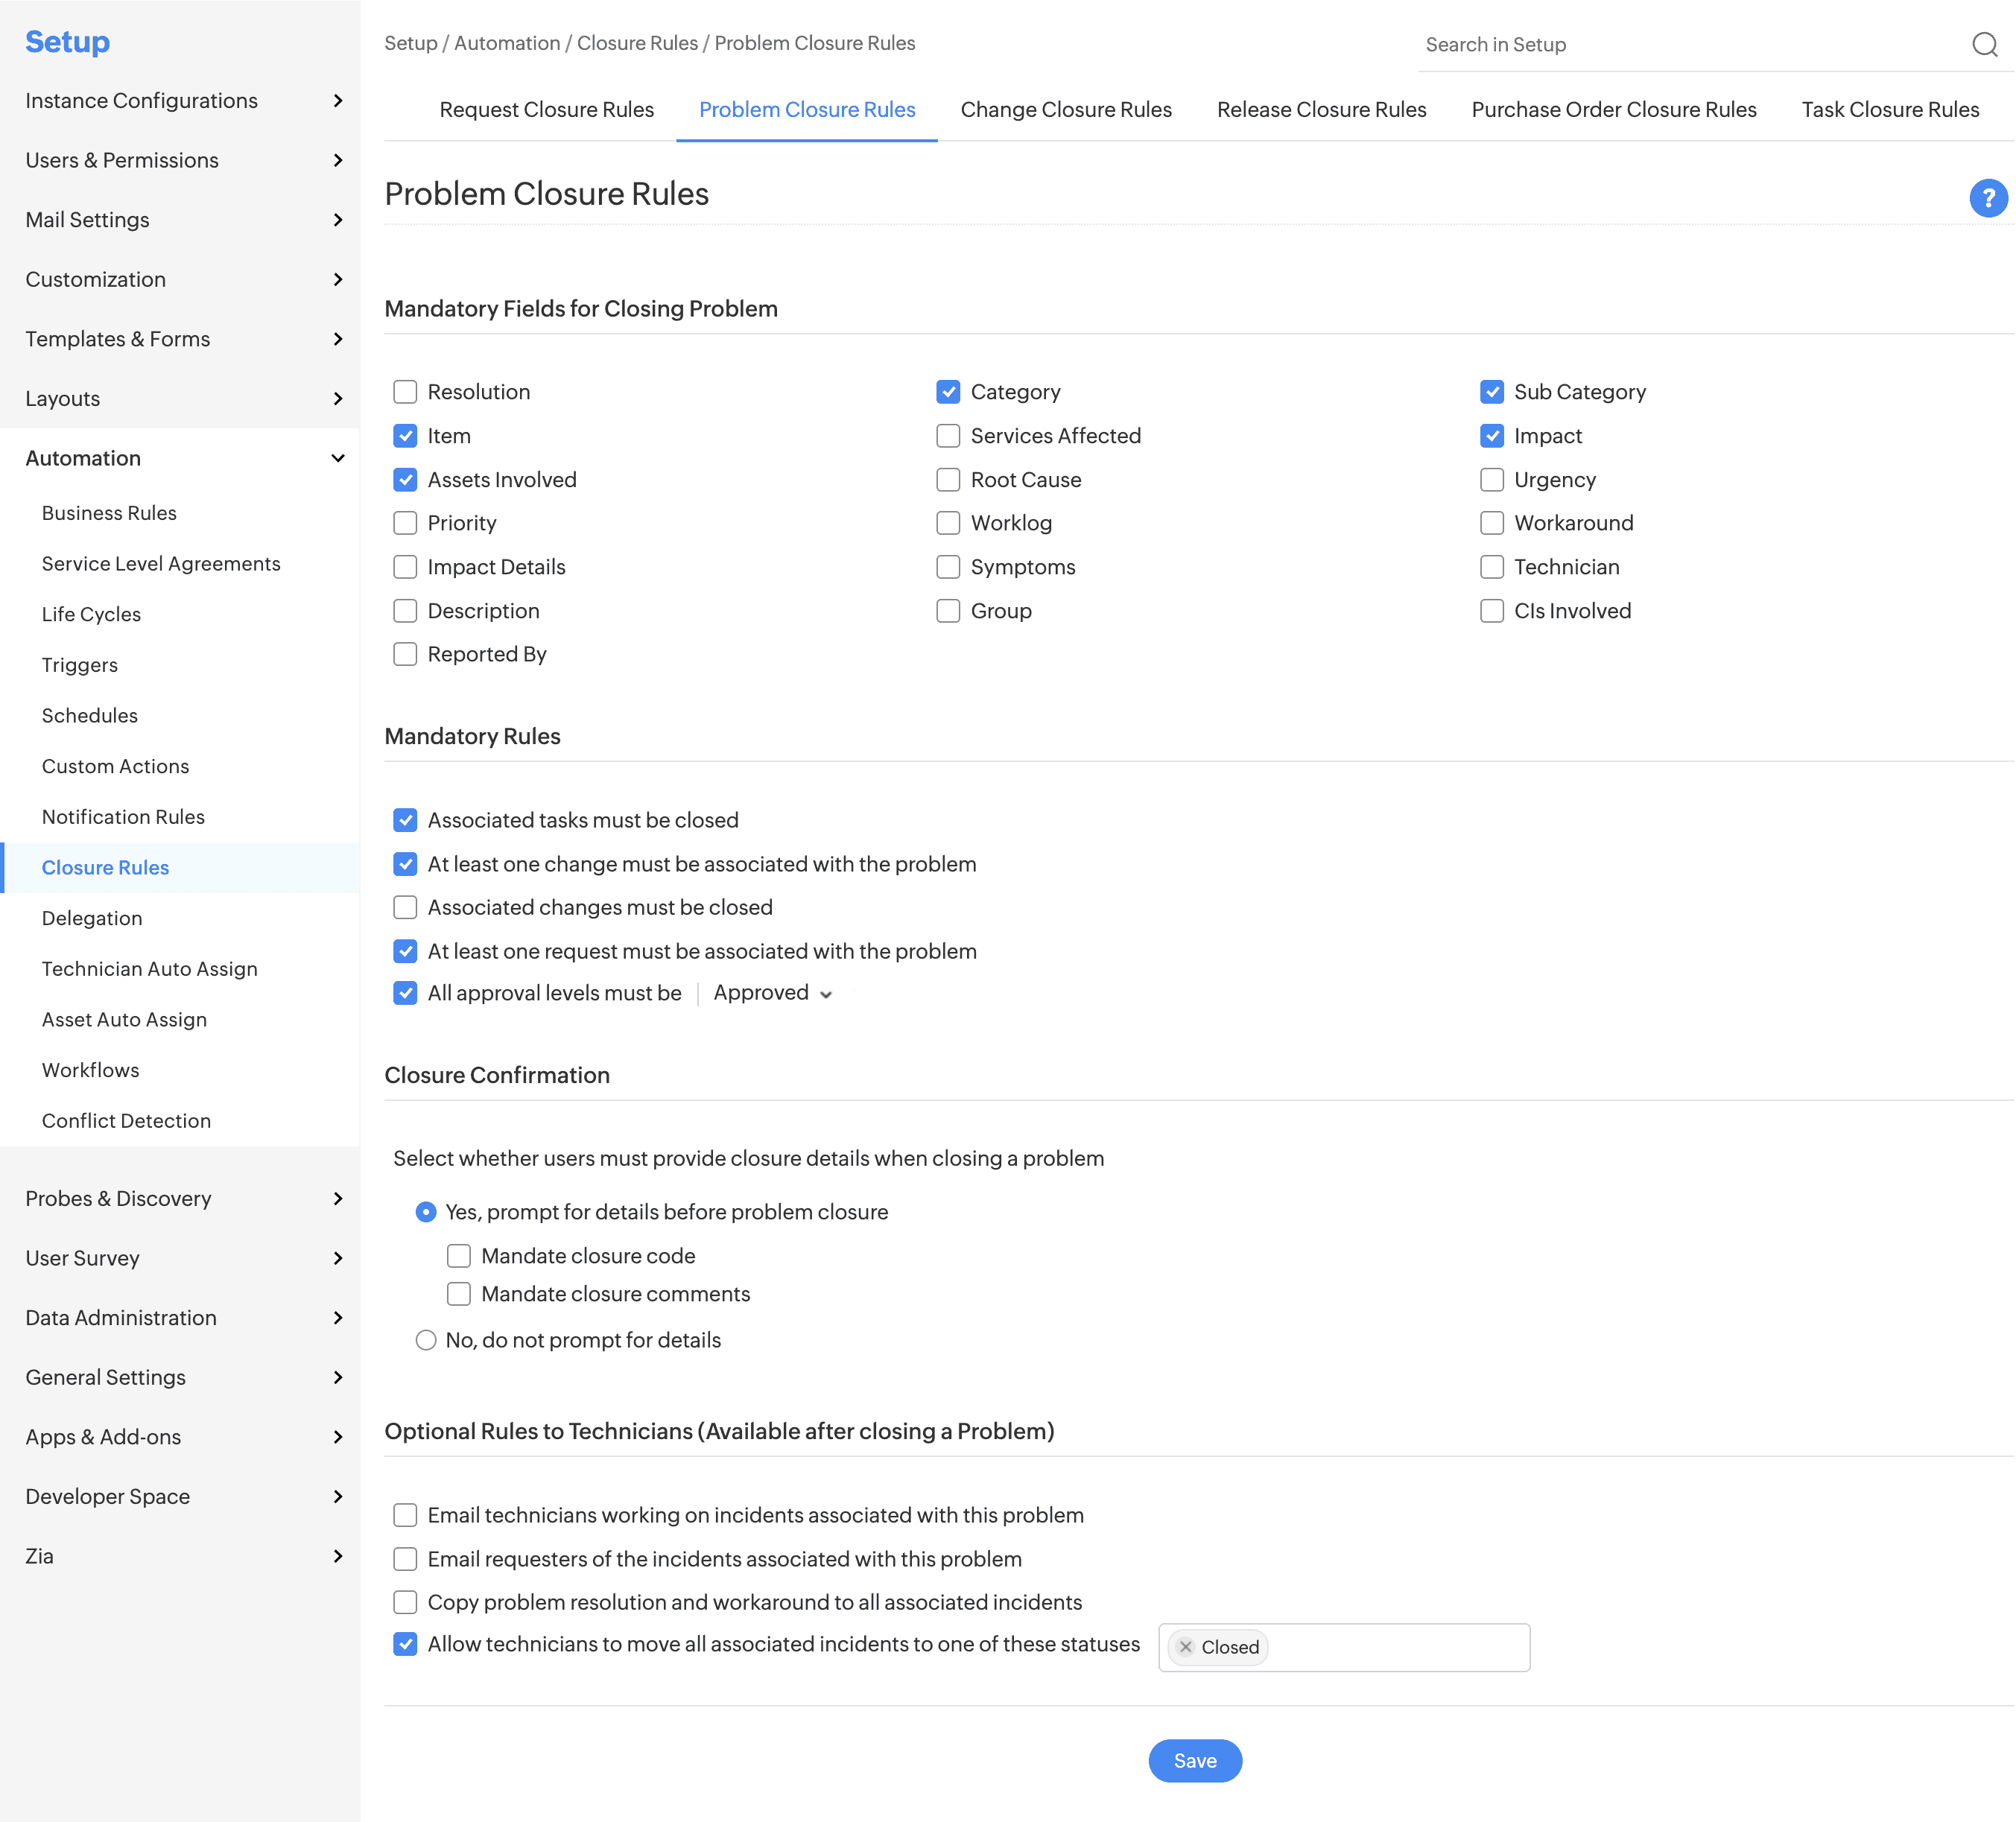
Problem Closure Rules now support mandatory fields and enhanced validation during problem closure.





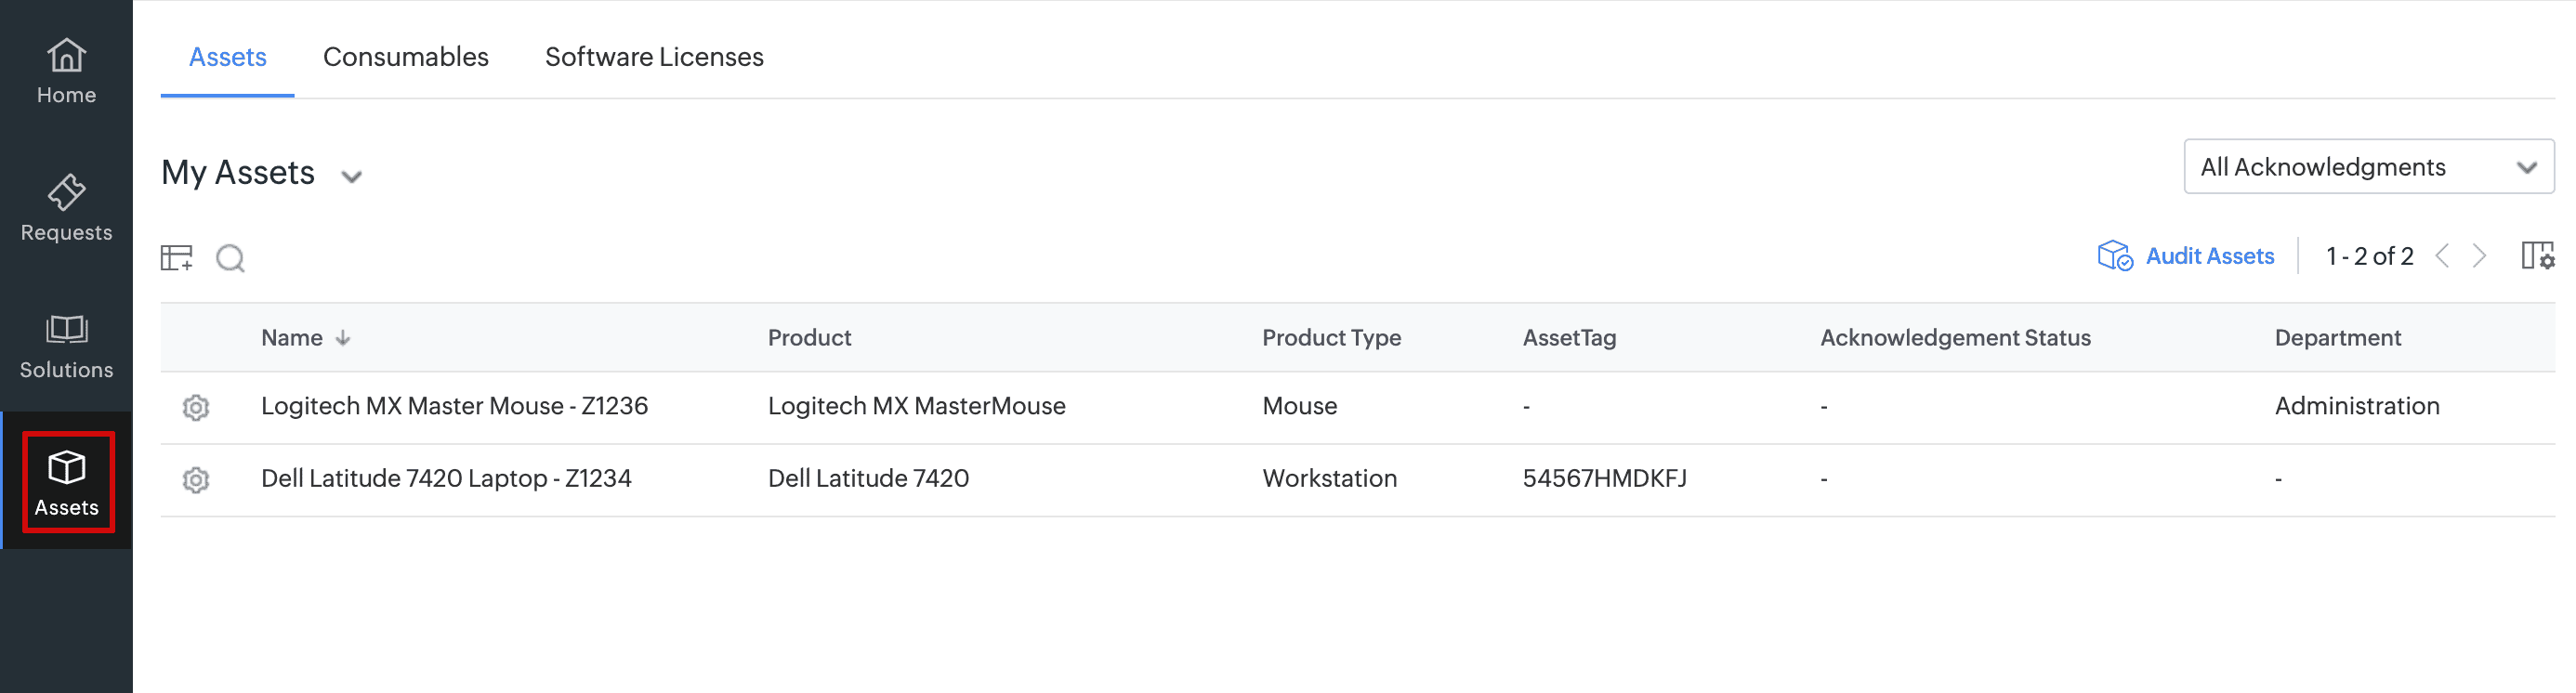
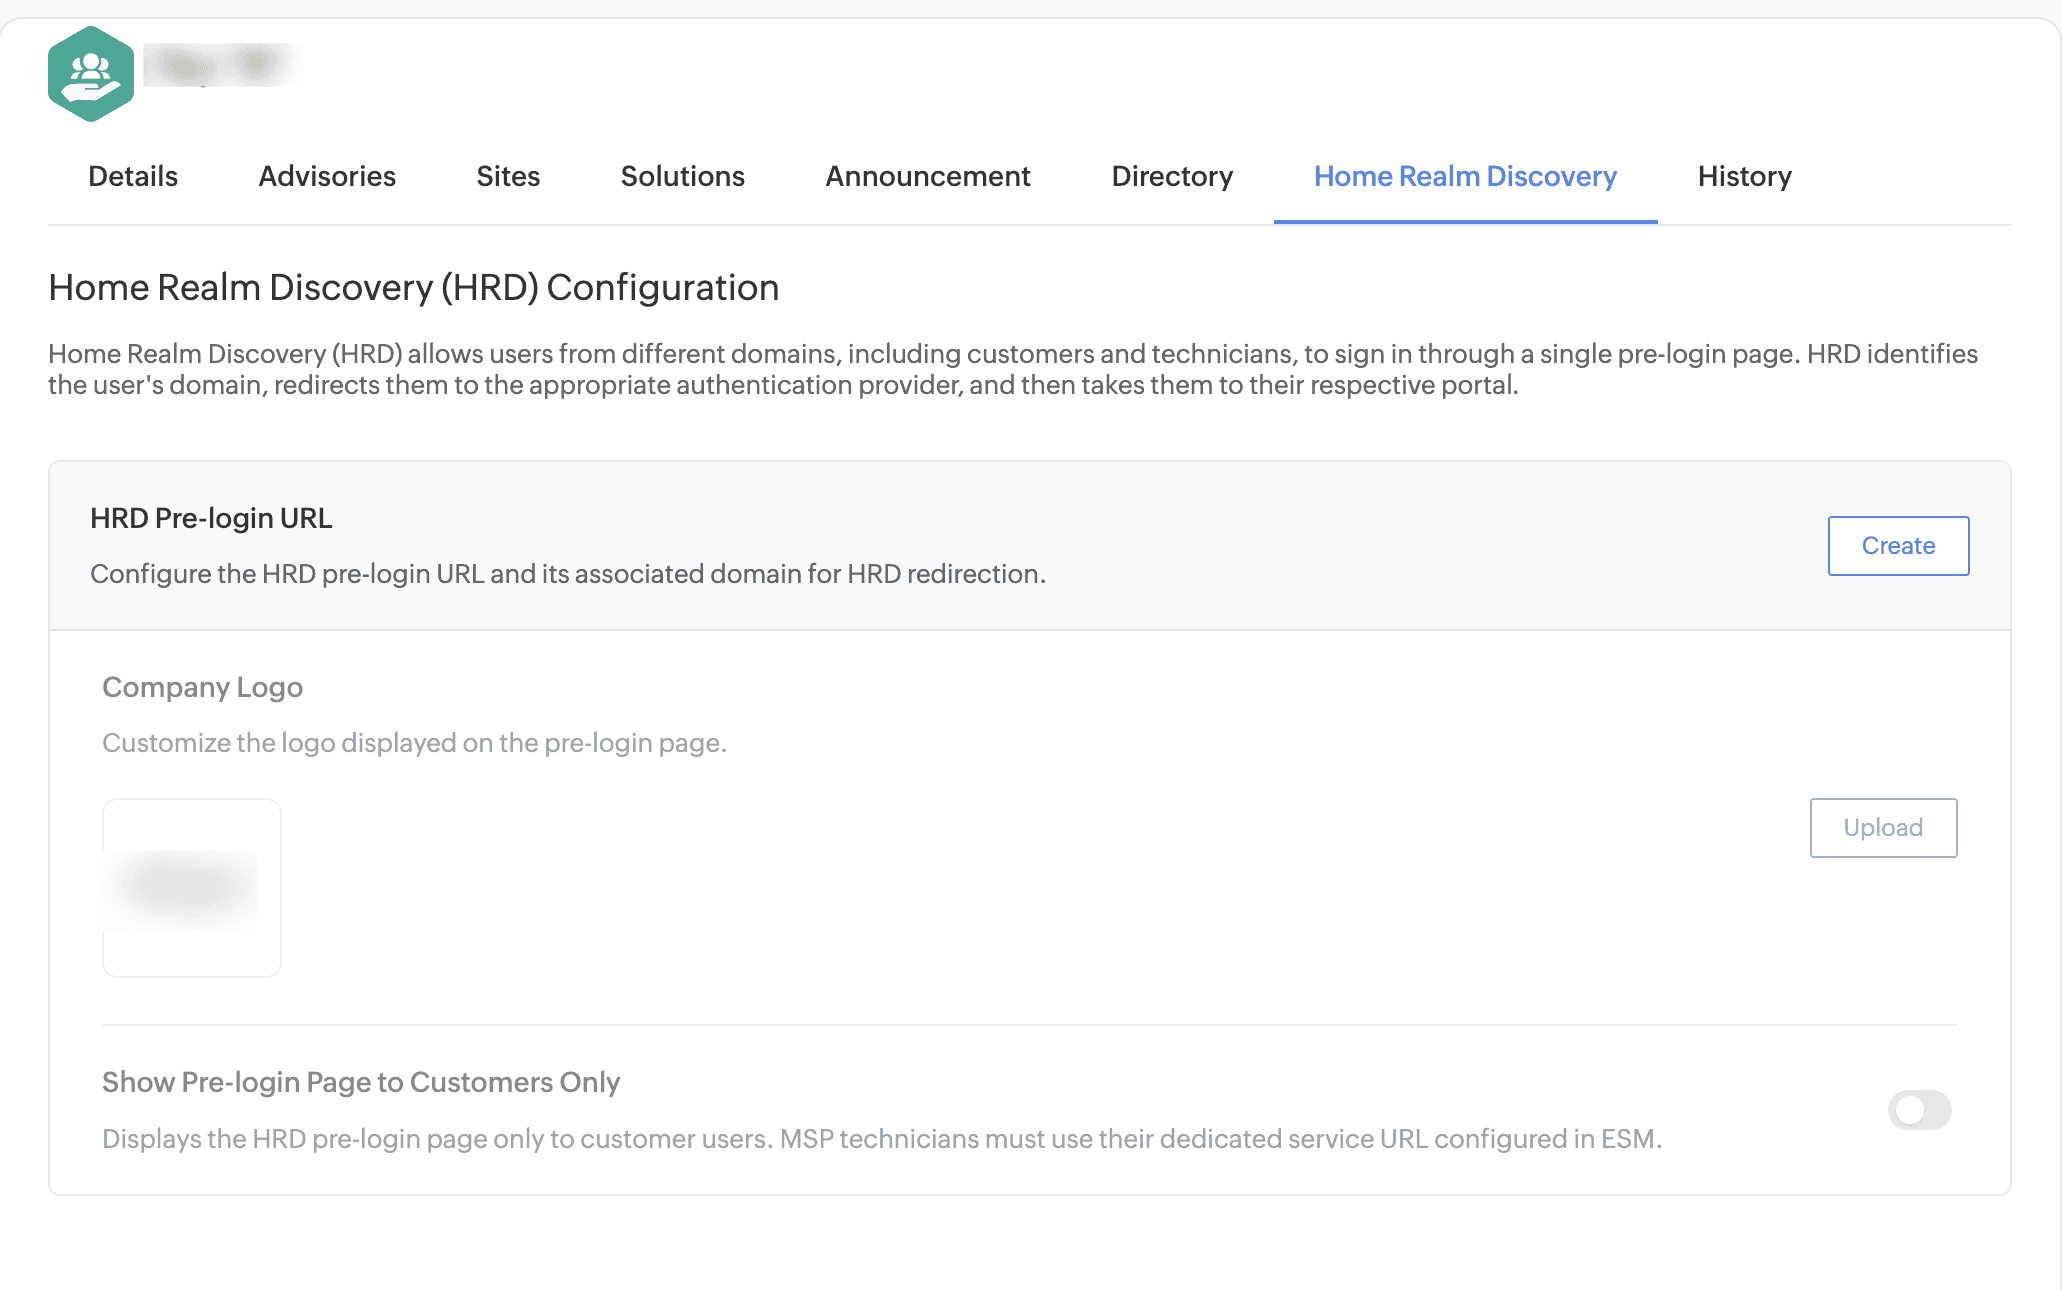
SDAdmin and SDAccountAdmin can now use Home Realm Discovery (HRD) to provide a unified pre-login experience for users across domains.
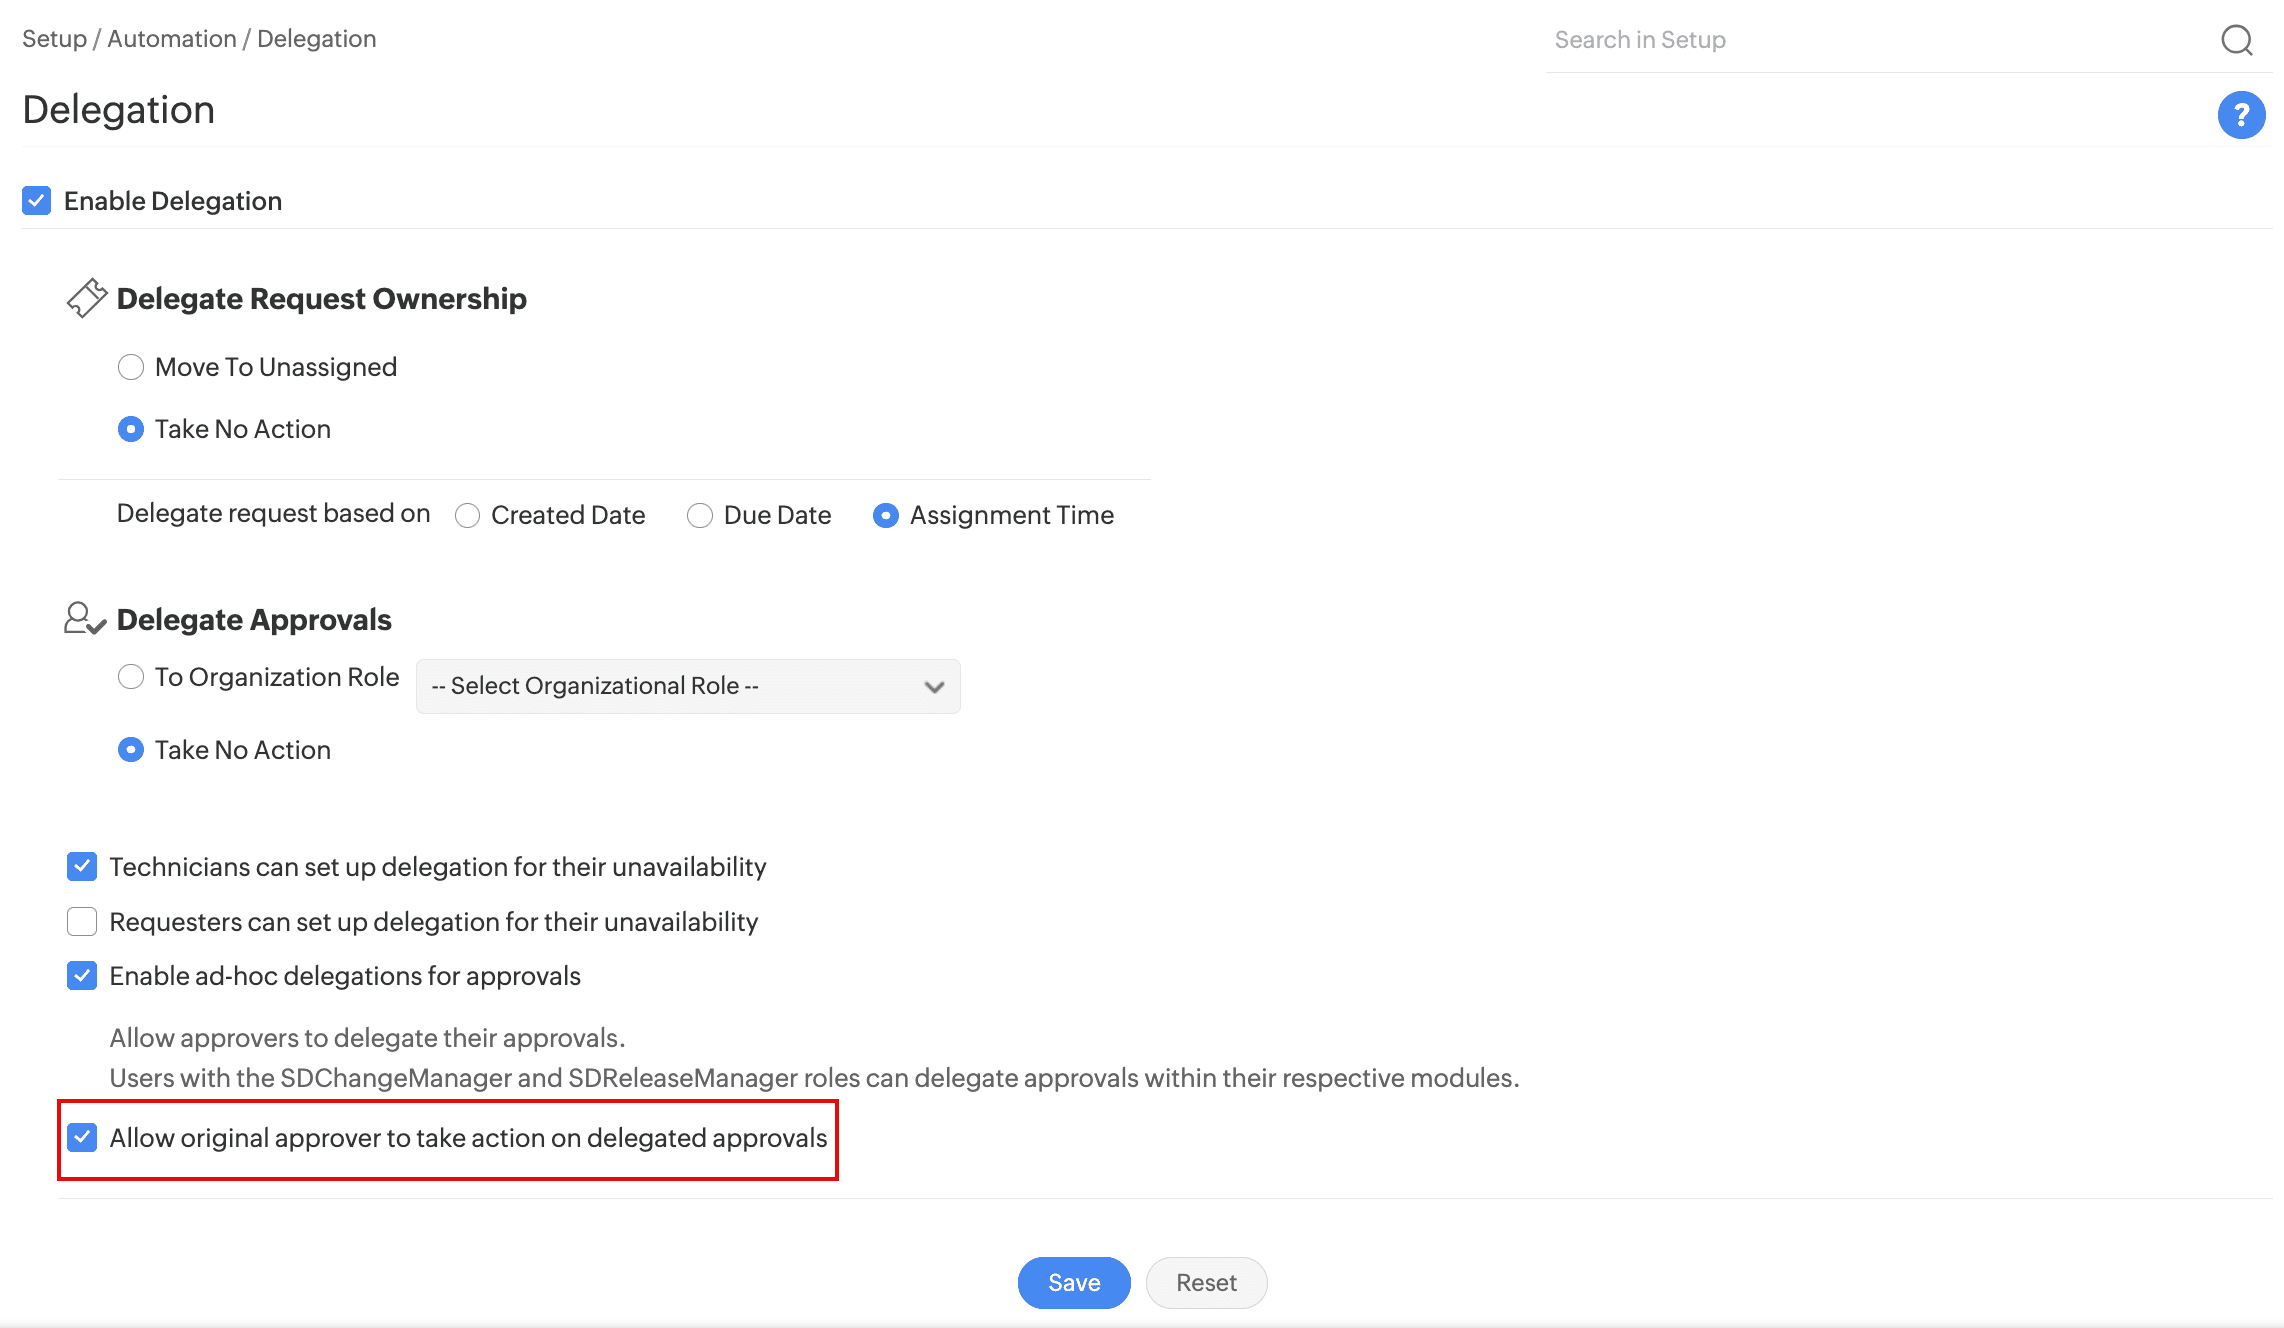
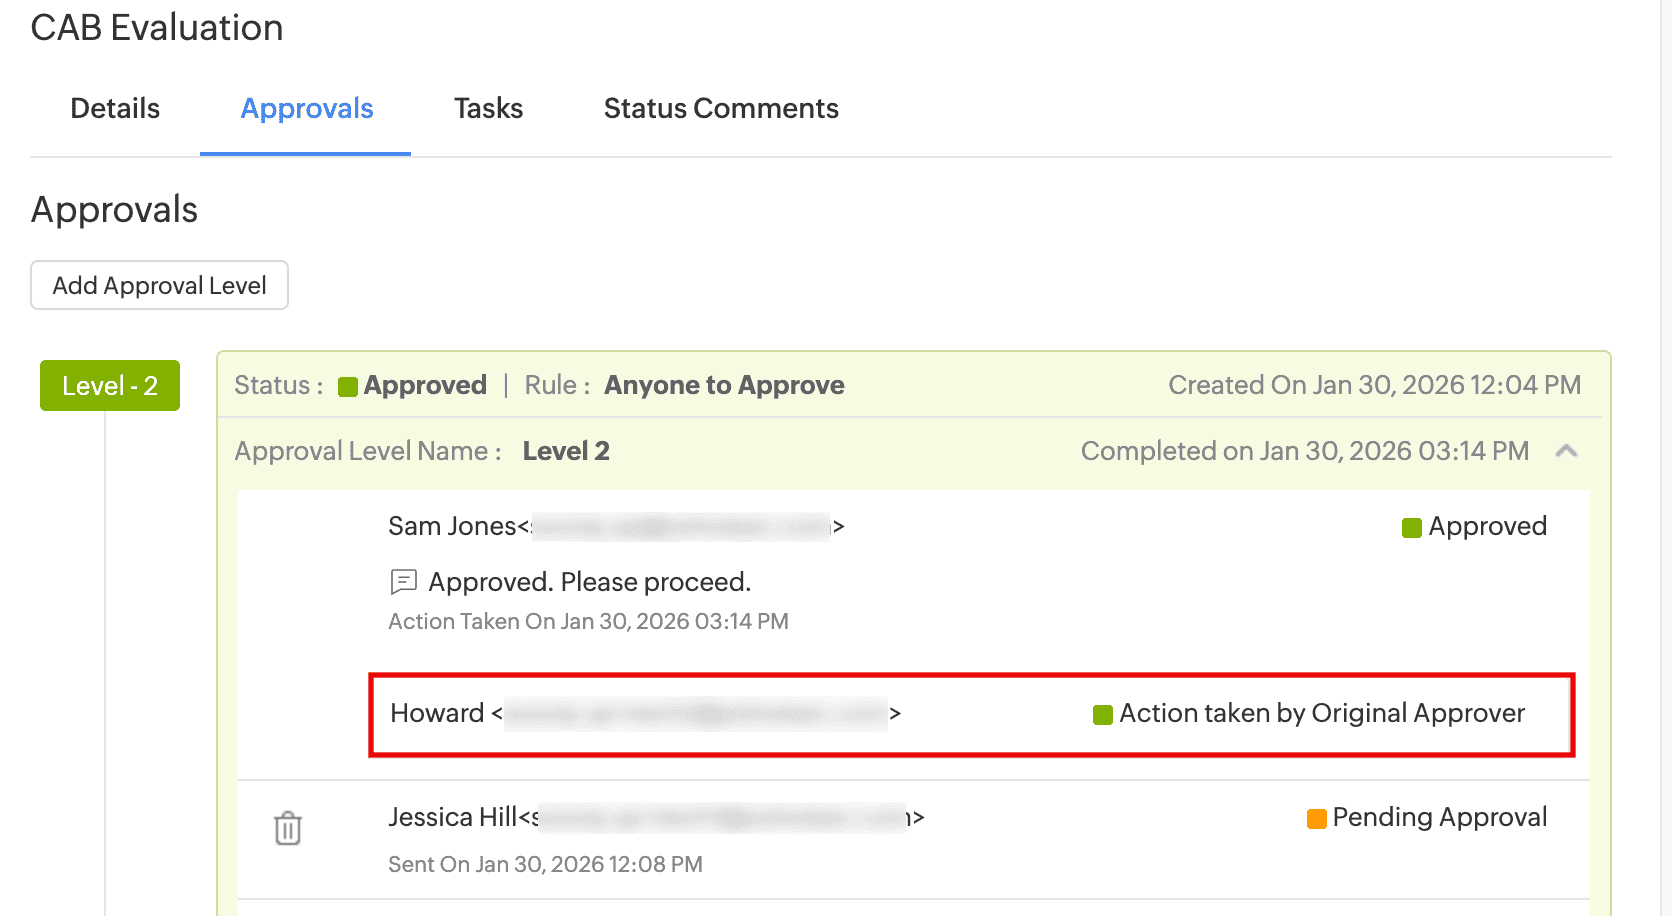
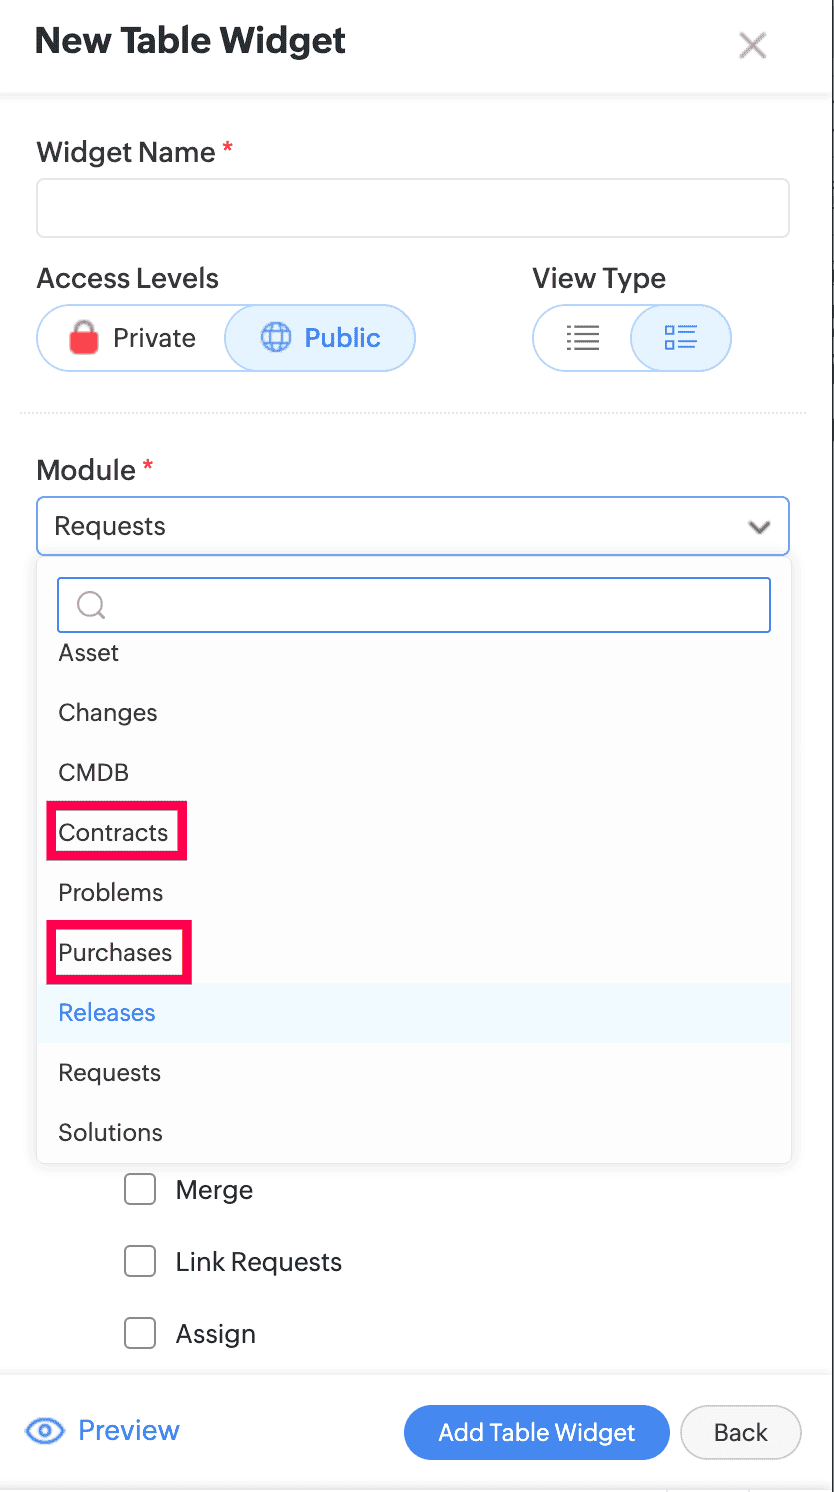
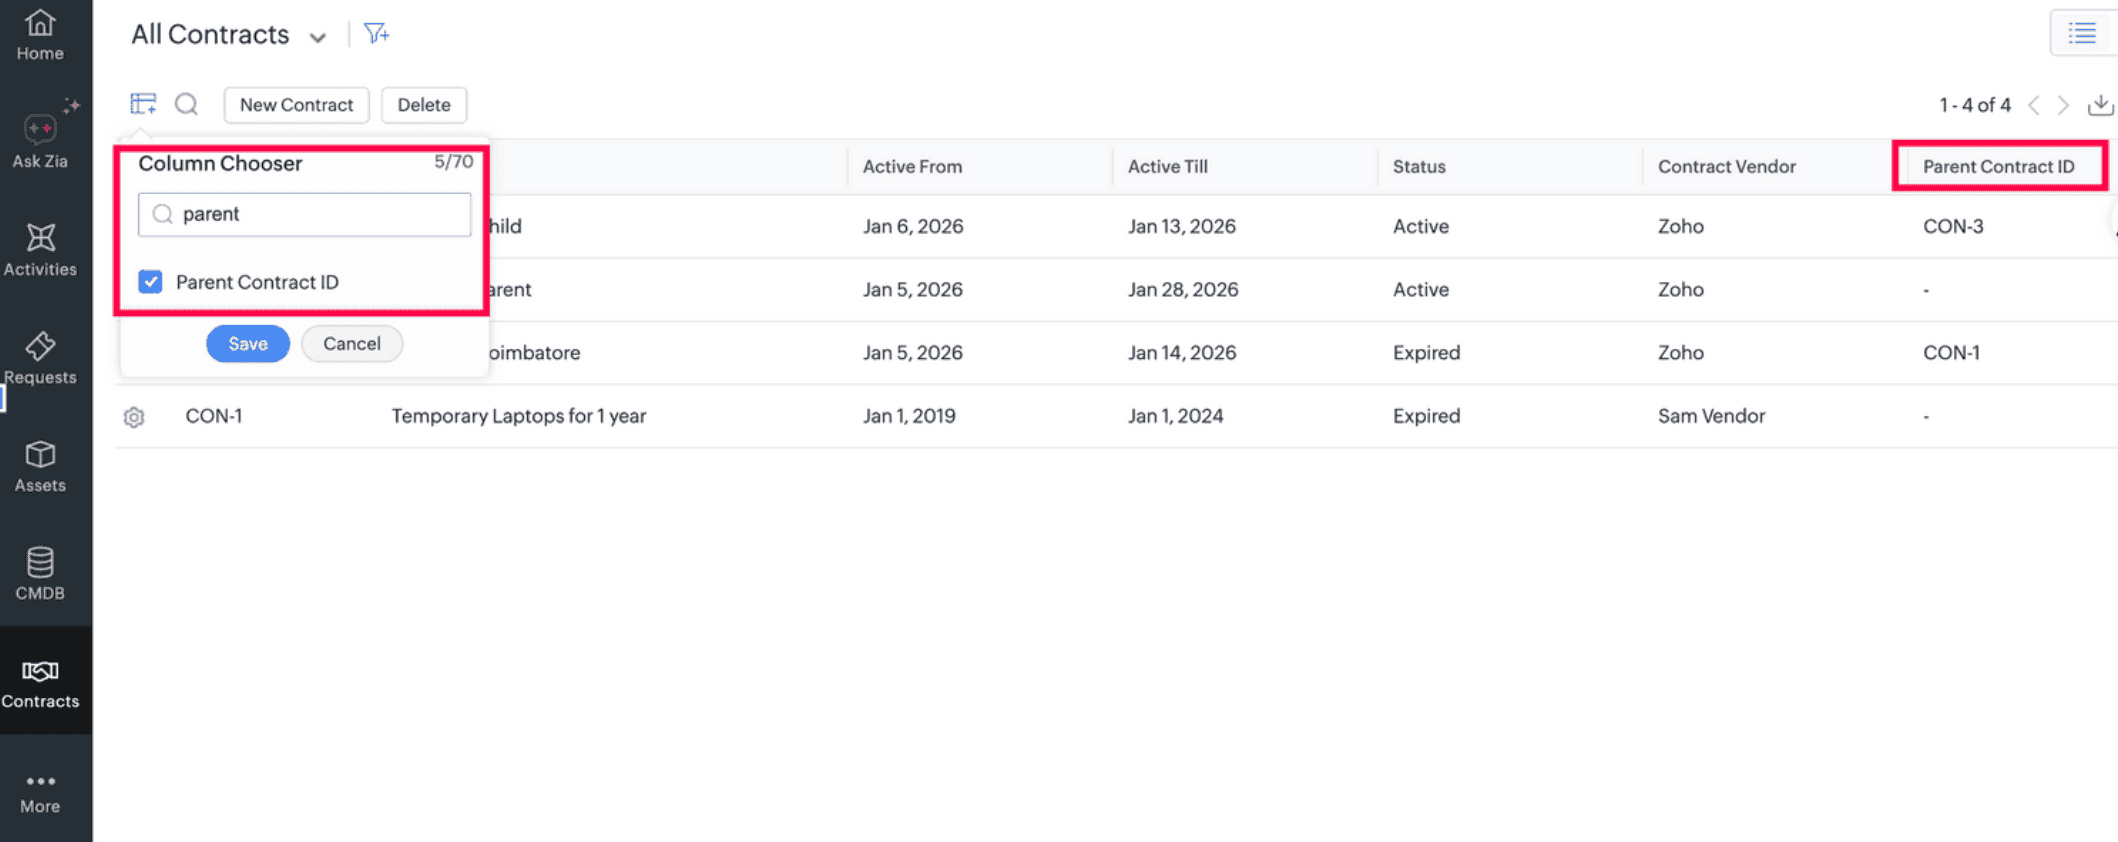
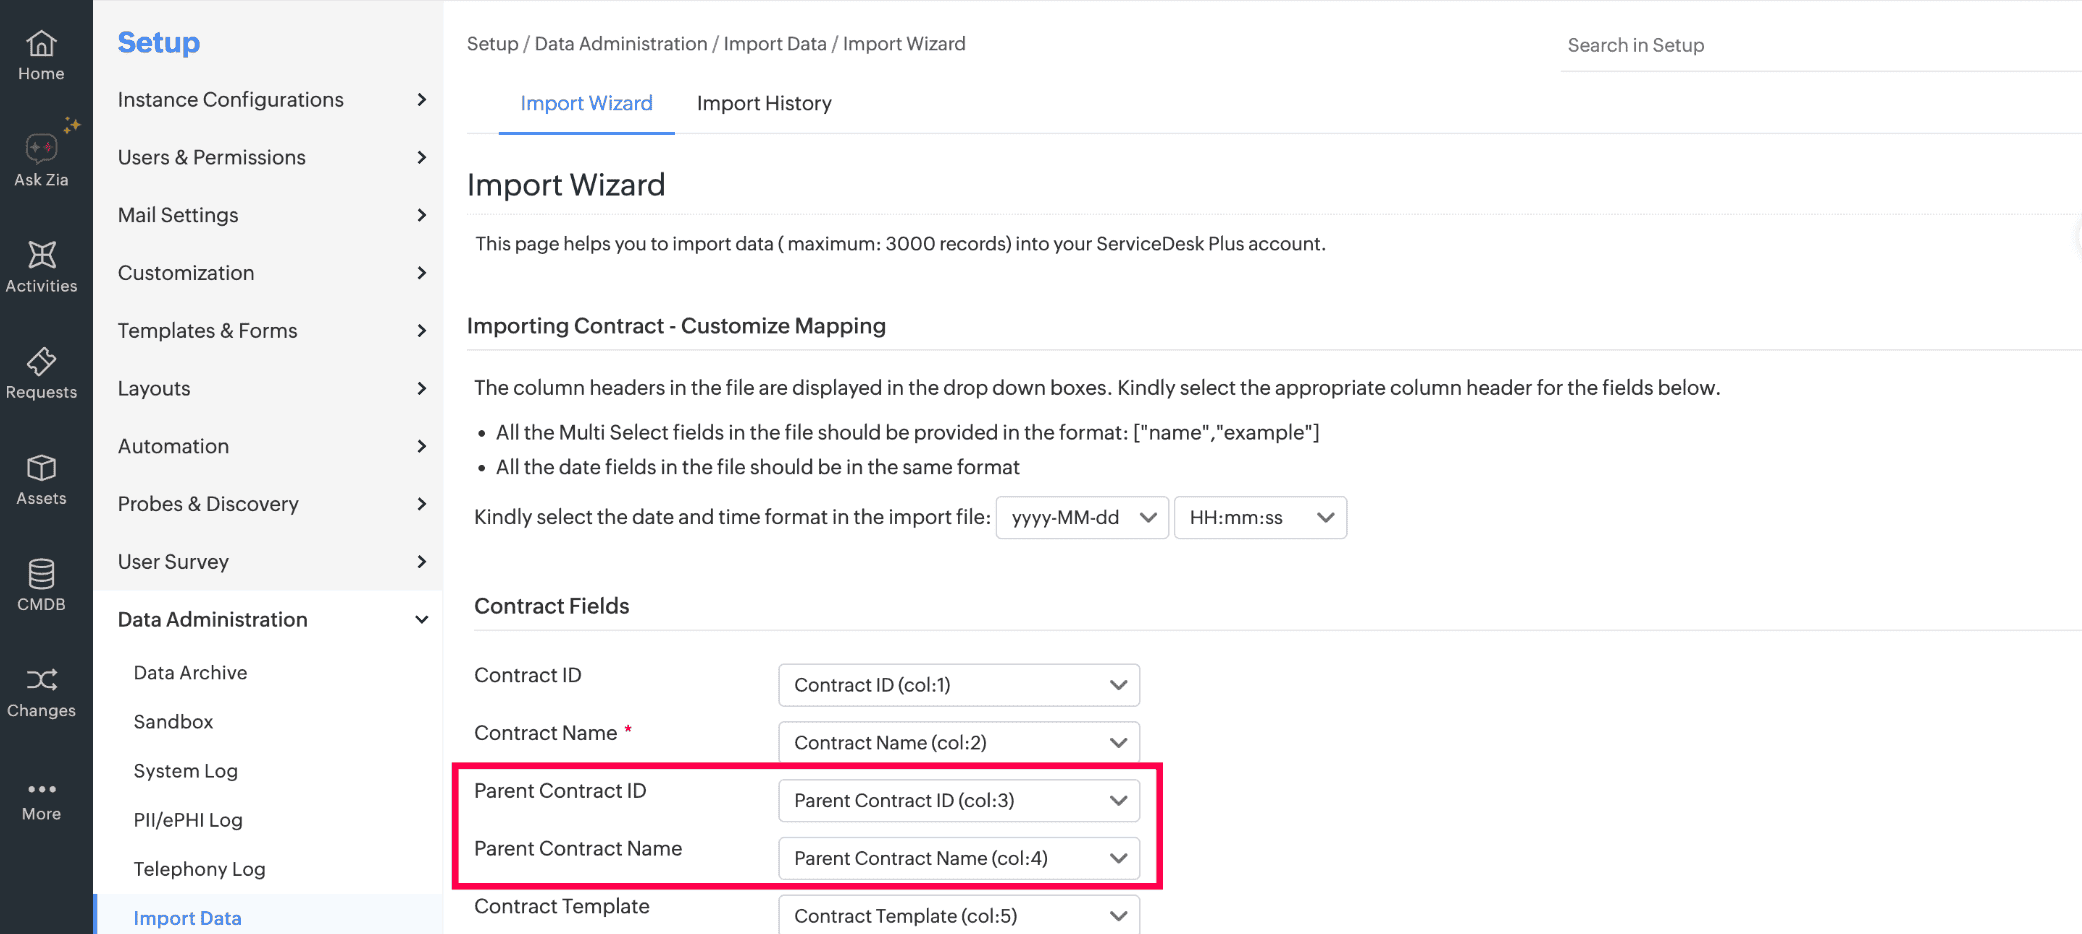
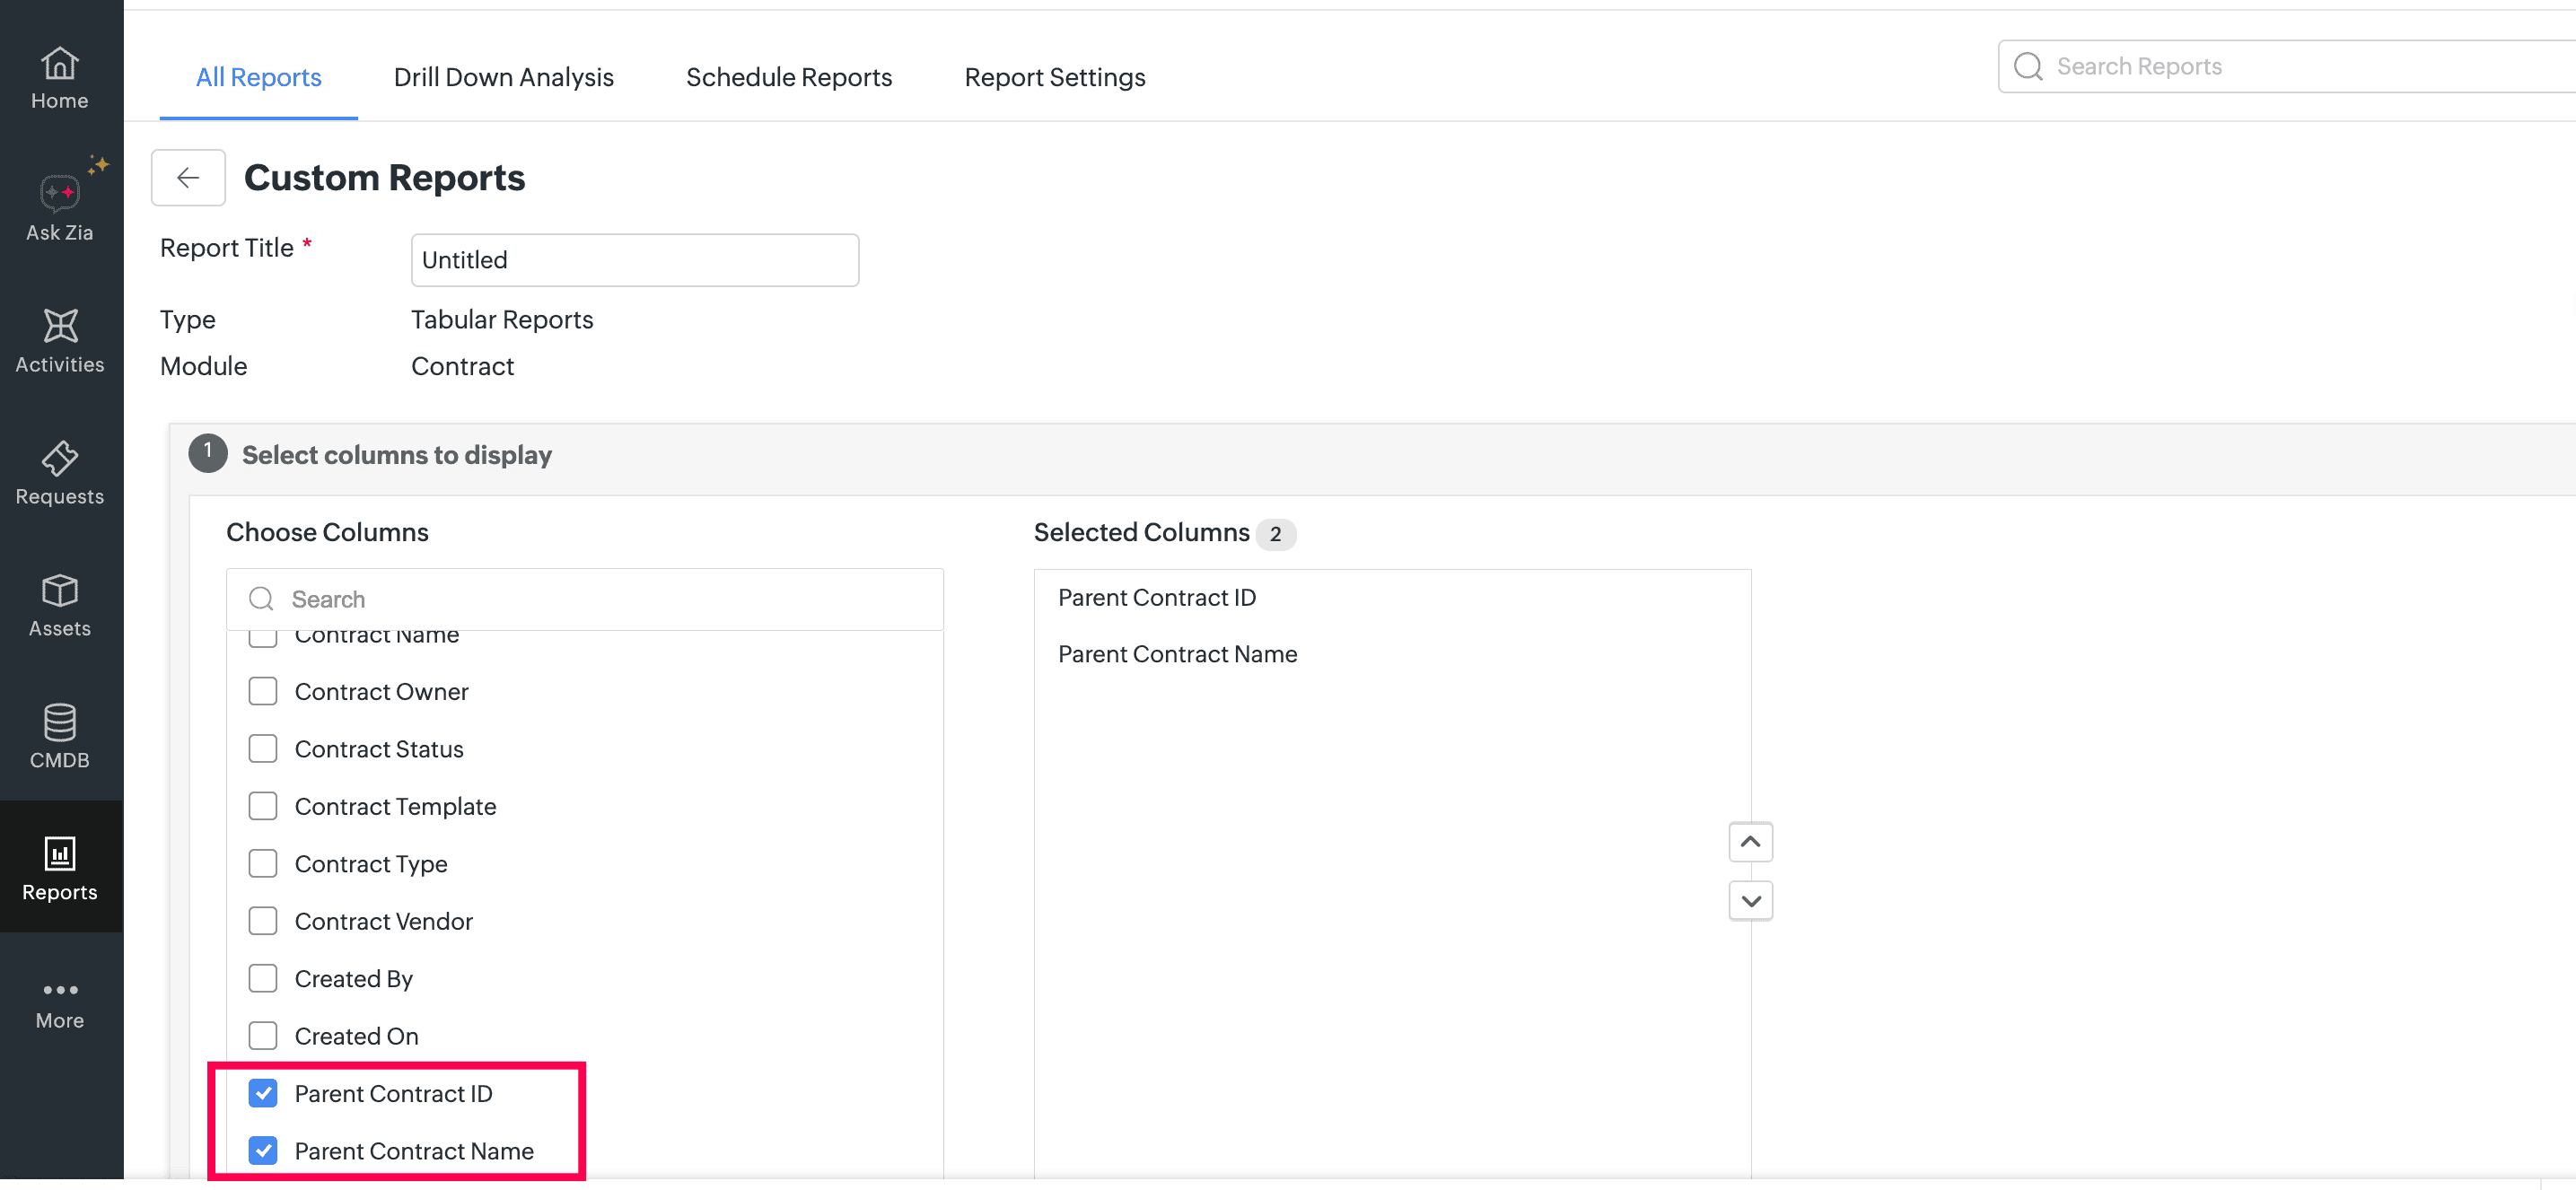
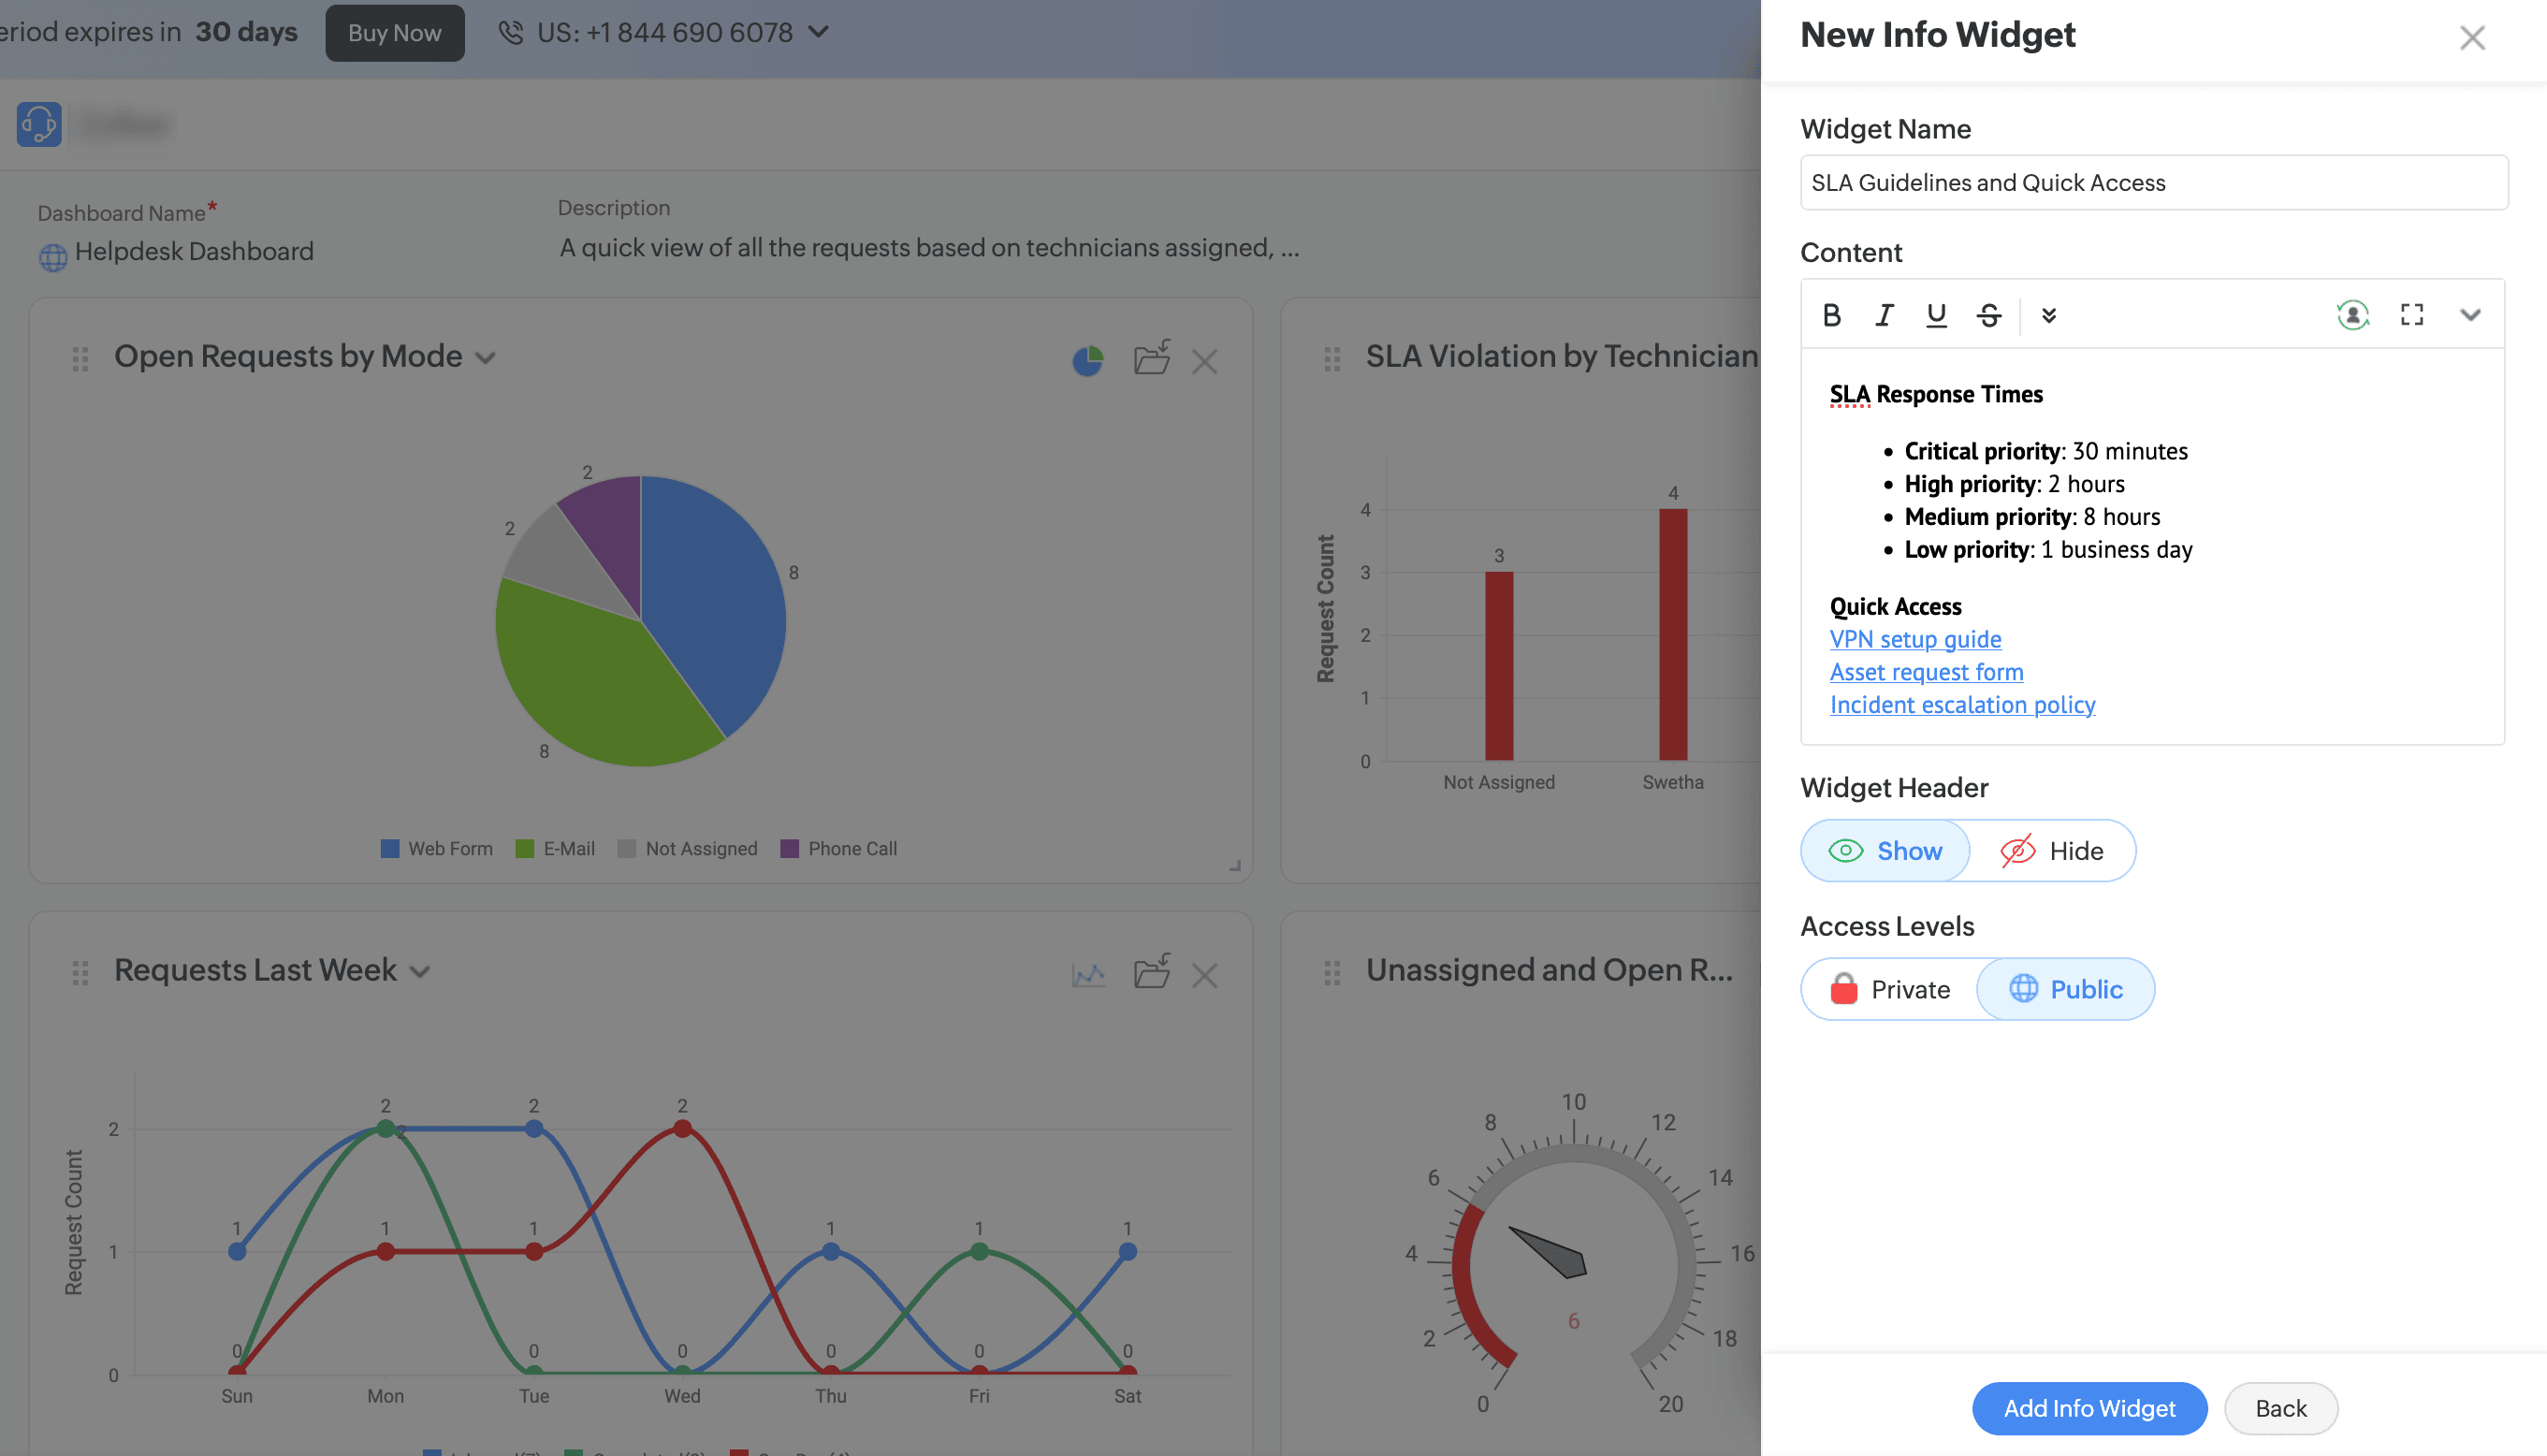
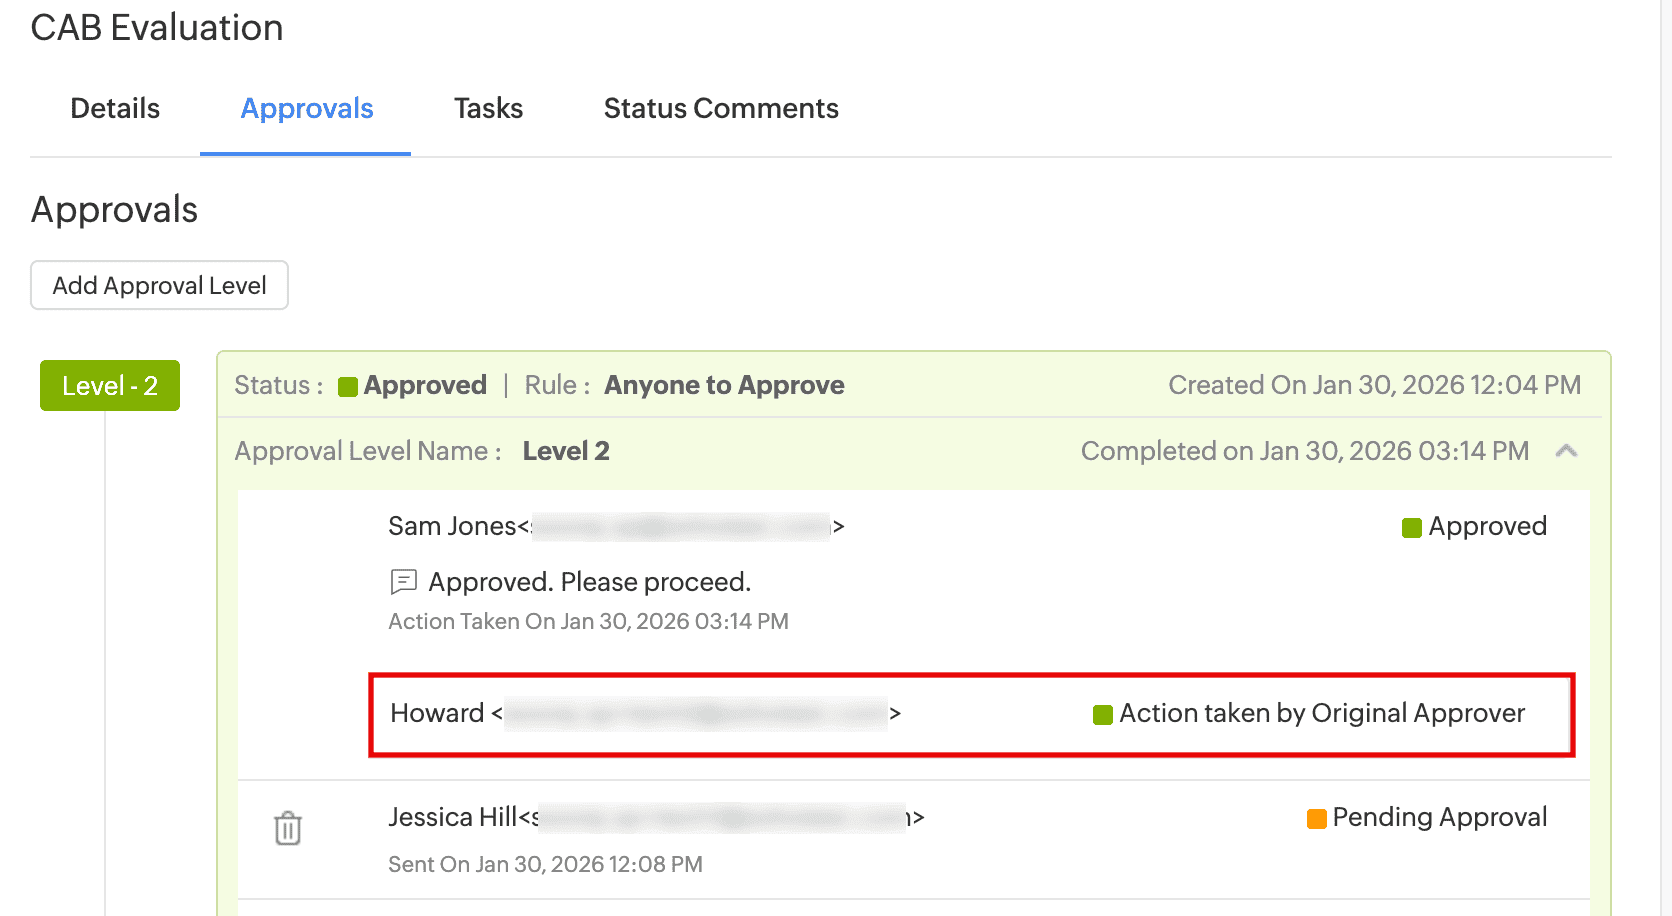
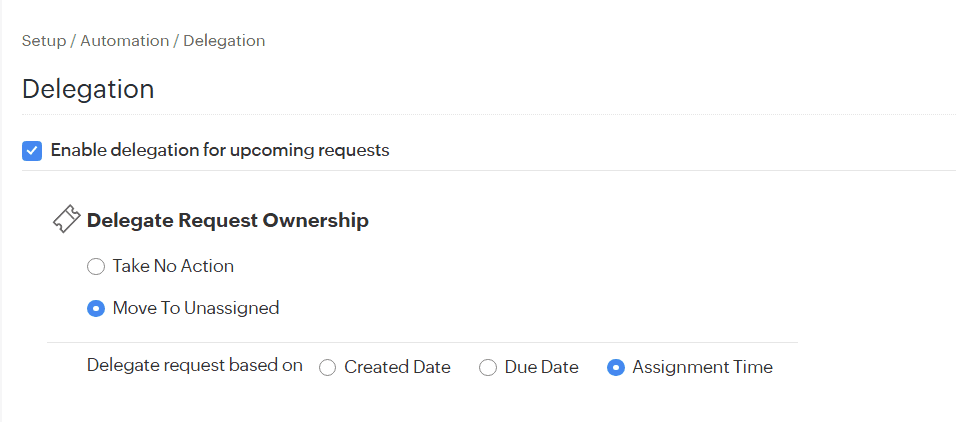
New Field | Field Mapping Support | Criteria Support |
|---|---|---|
| aboutMe | Yes | No |
| imAddresses | Yes | No |
| interests | Yes | No |
| isResourceAccount | Yes | Yes |
| mailNickname | Yes | Yes |
| mySite | Yes | No |
| pastProjects | Yes | No |
| preferredDataLocation | Yes | Yes |
| preferredLanguage | Yes | Yes |
| preferredName | Yes | Yes |
| responsibilities | Yes | No |
| schools | Yes | No |
| securityIdentifier | Yes | No |
| showInAddressList | Yes | No |
| skills | Yes | No |
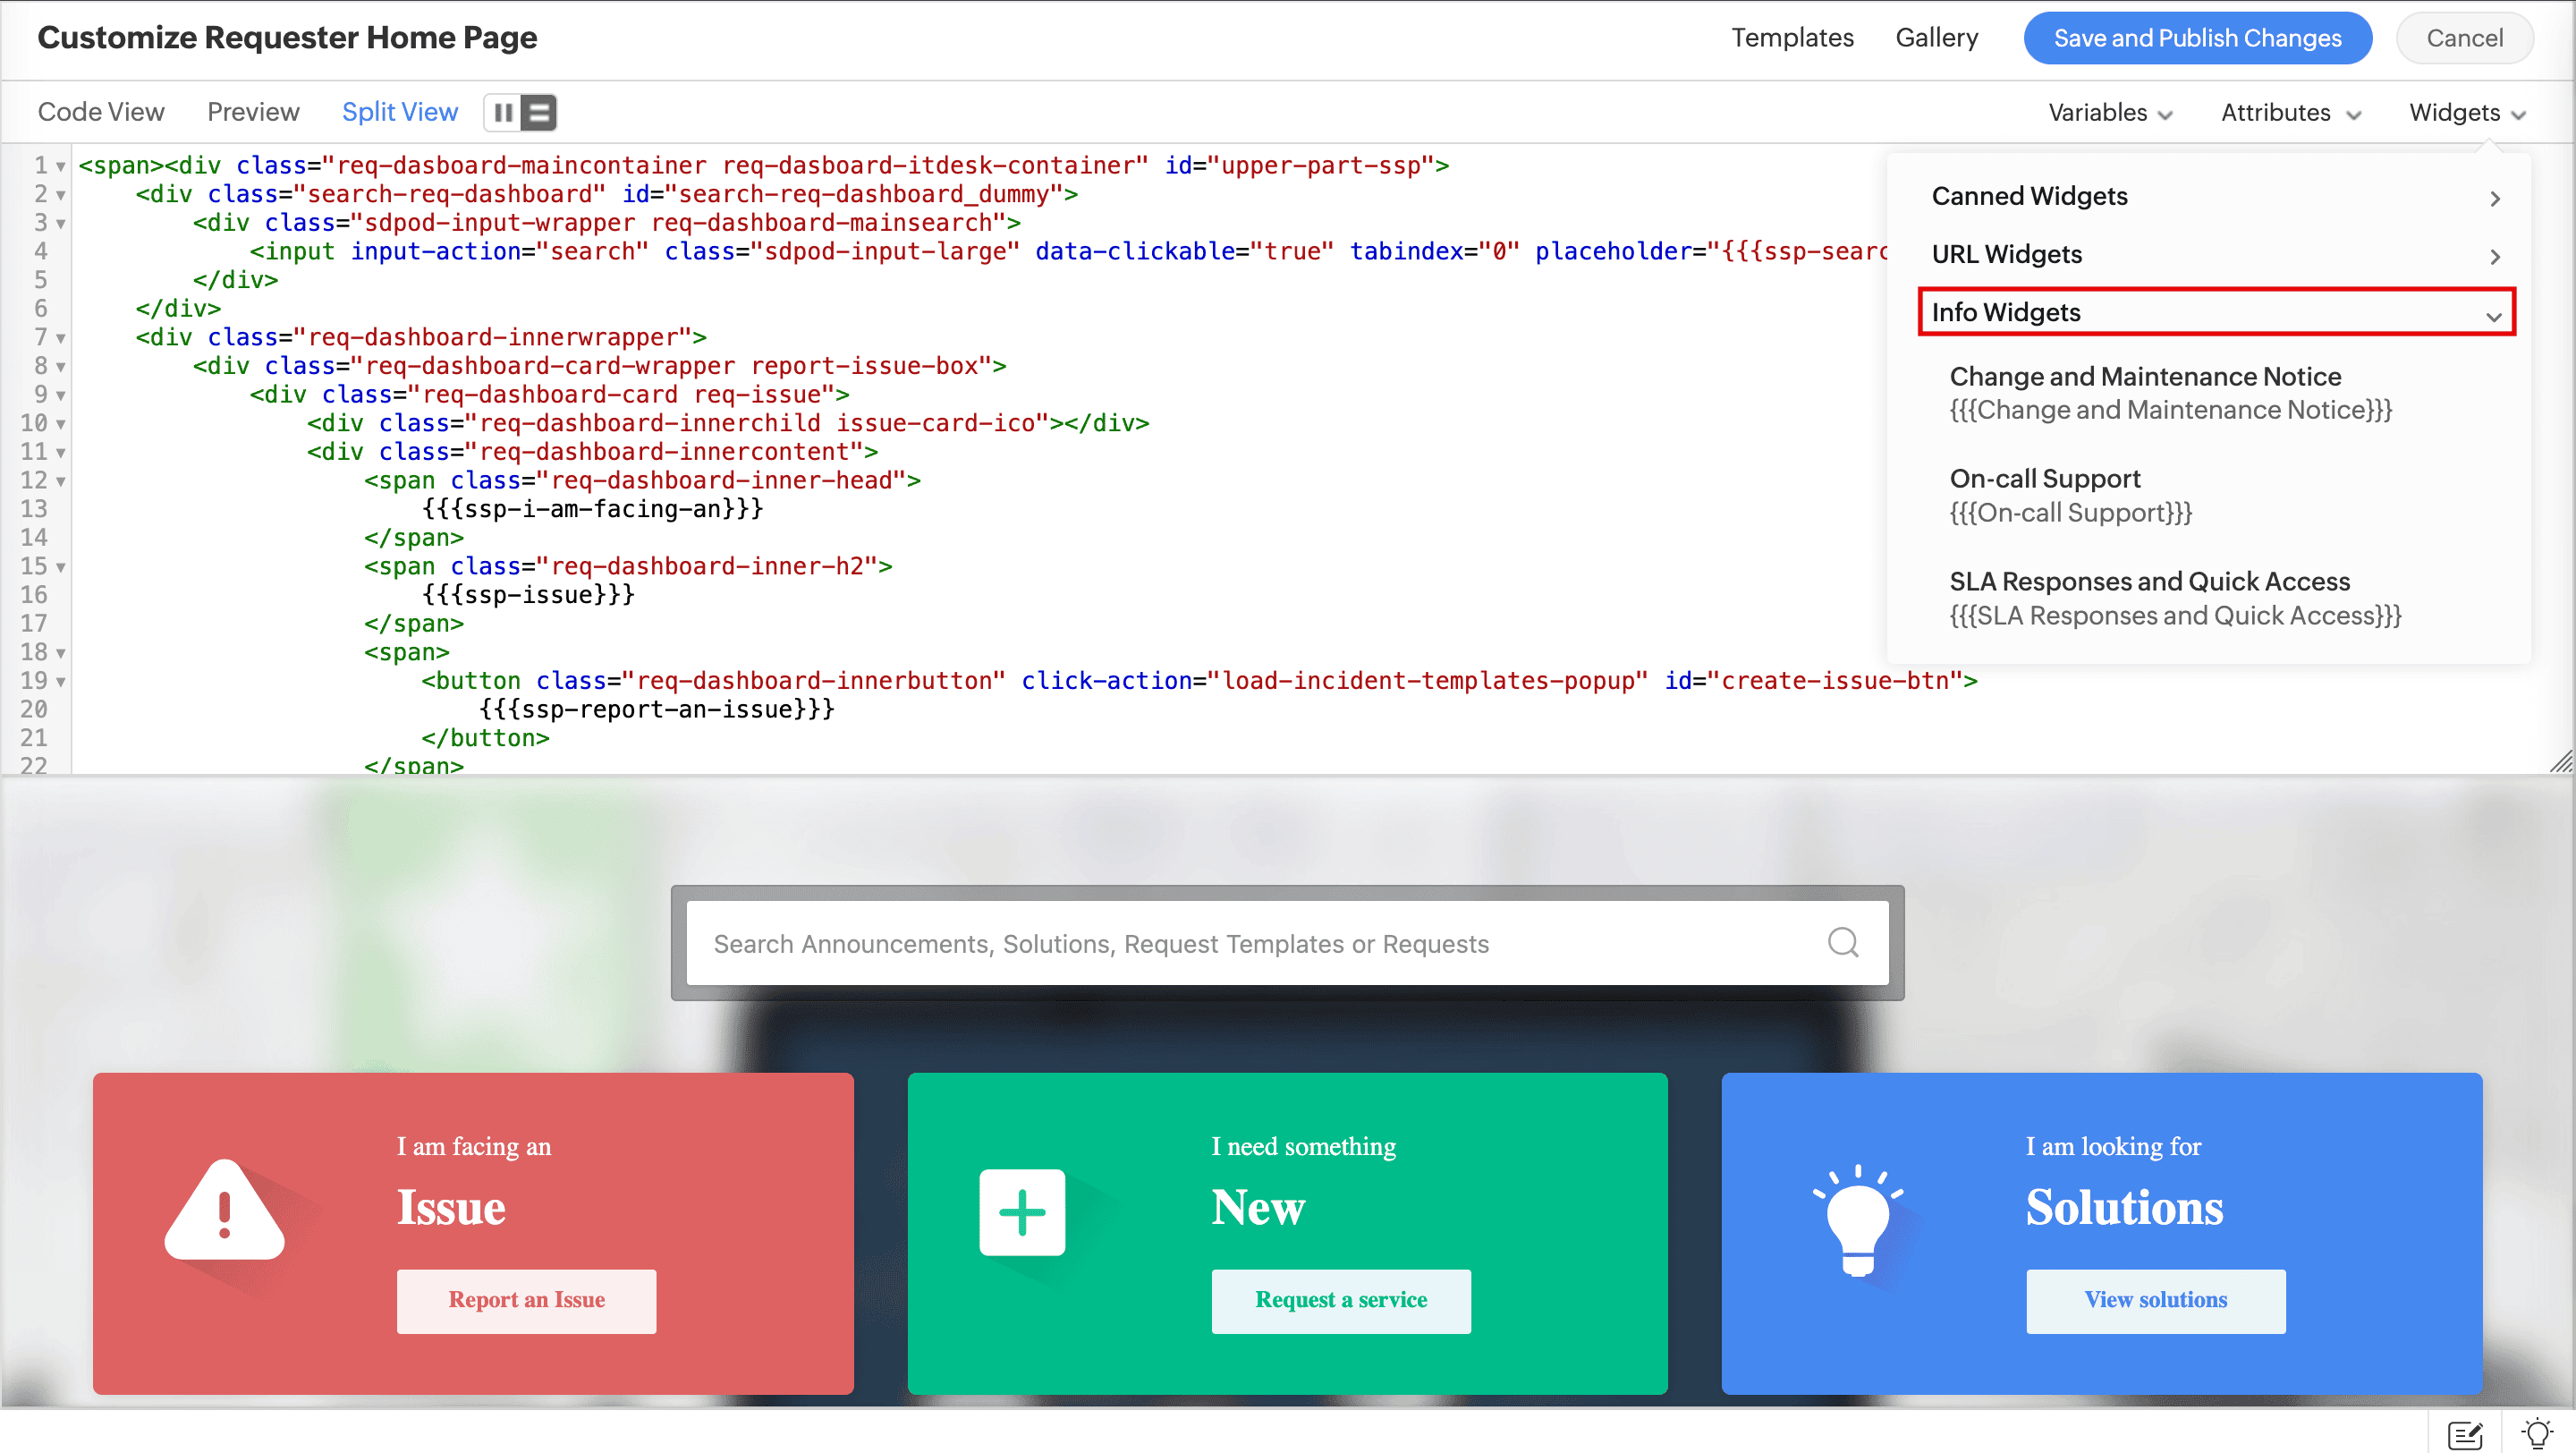
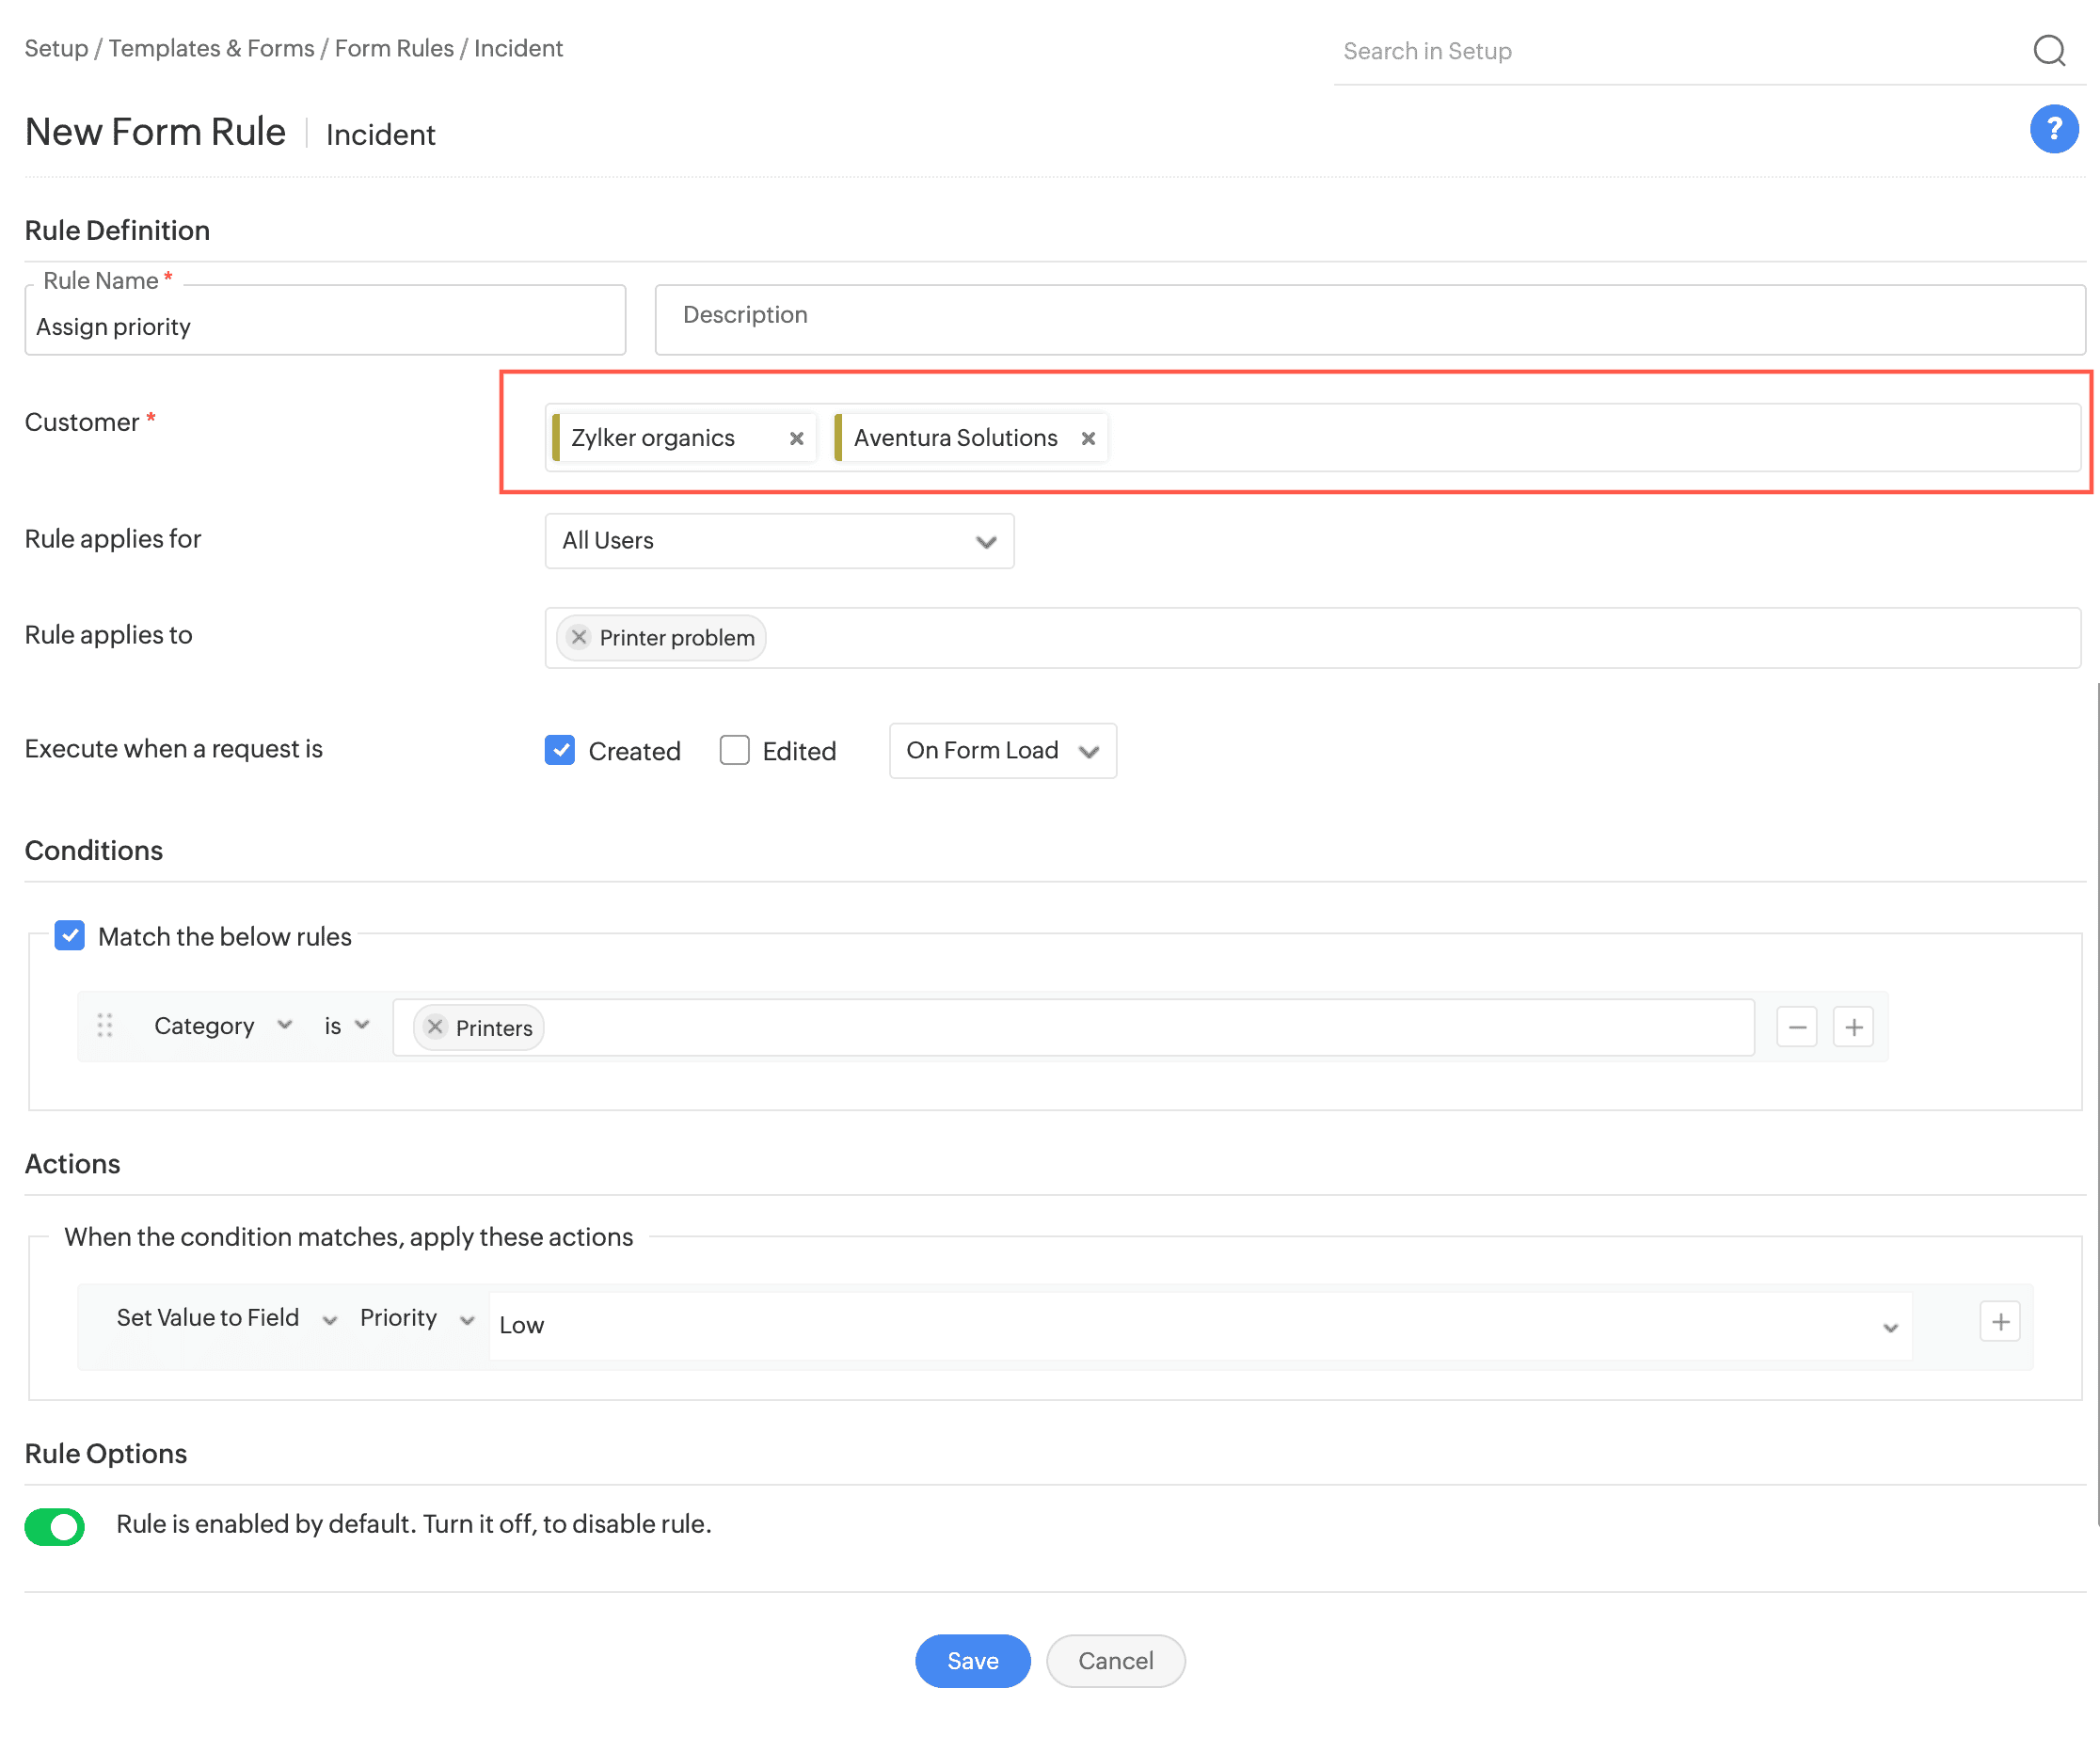
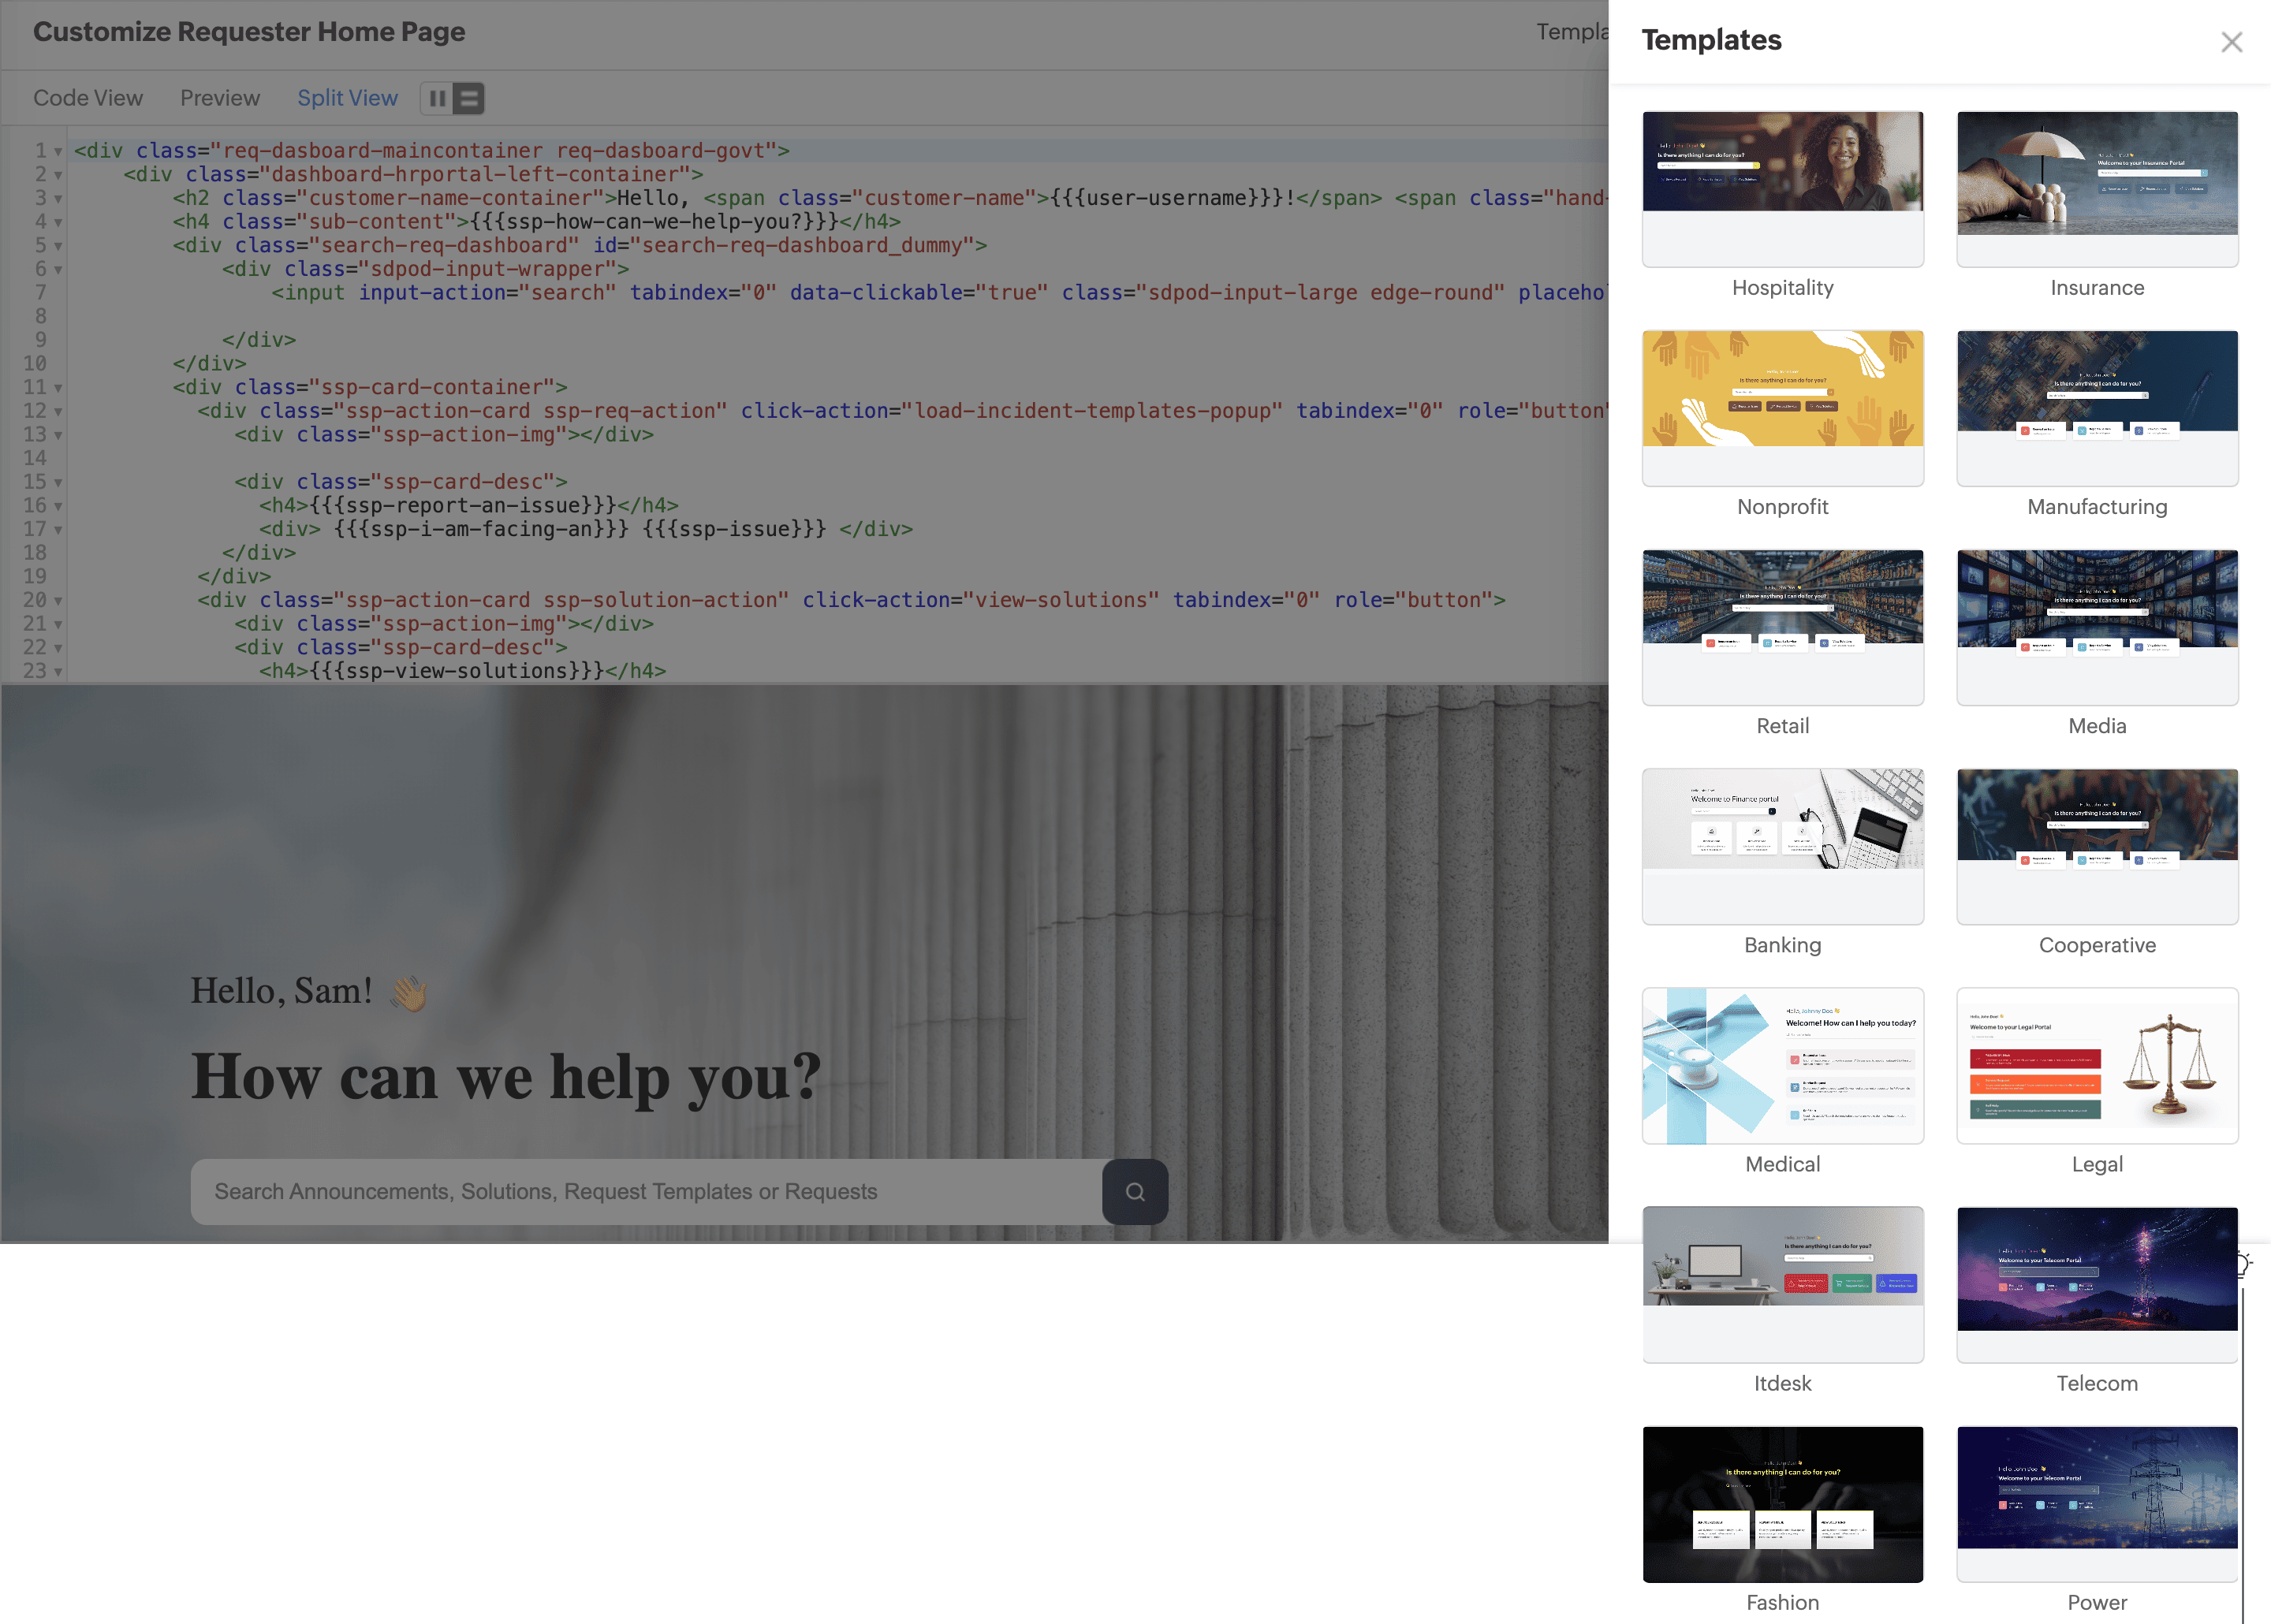
Create and customize self-service portals tailored to the needs of different customers and user groups, providing each with a personalized experience. Go to Setup > General Settings > Requester Portal > Requester Portal Customization.
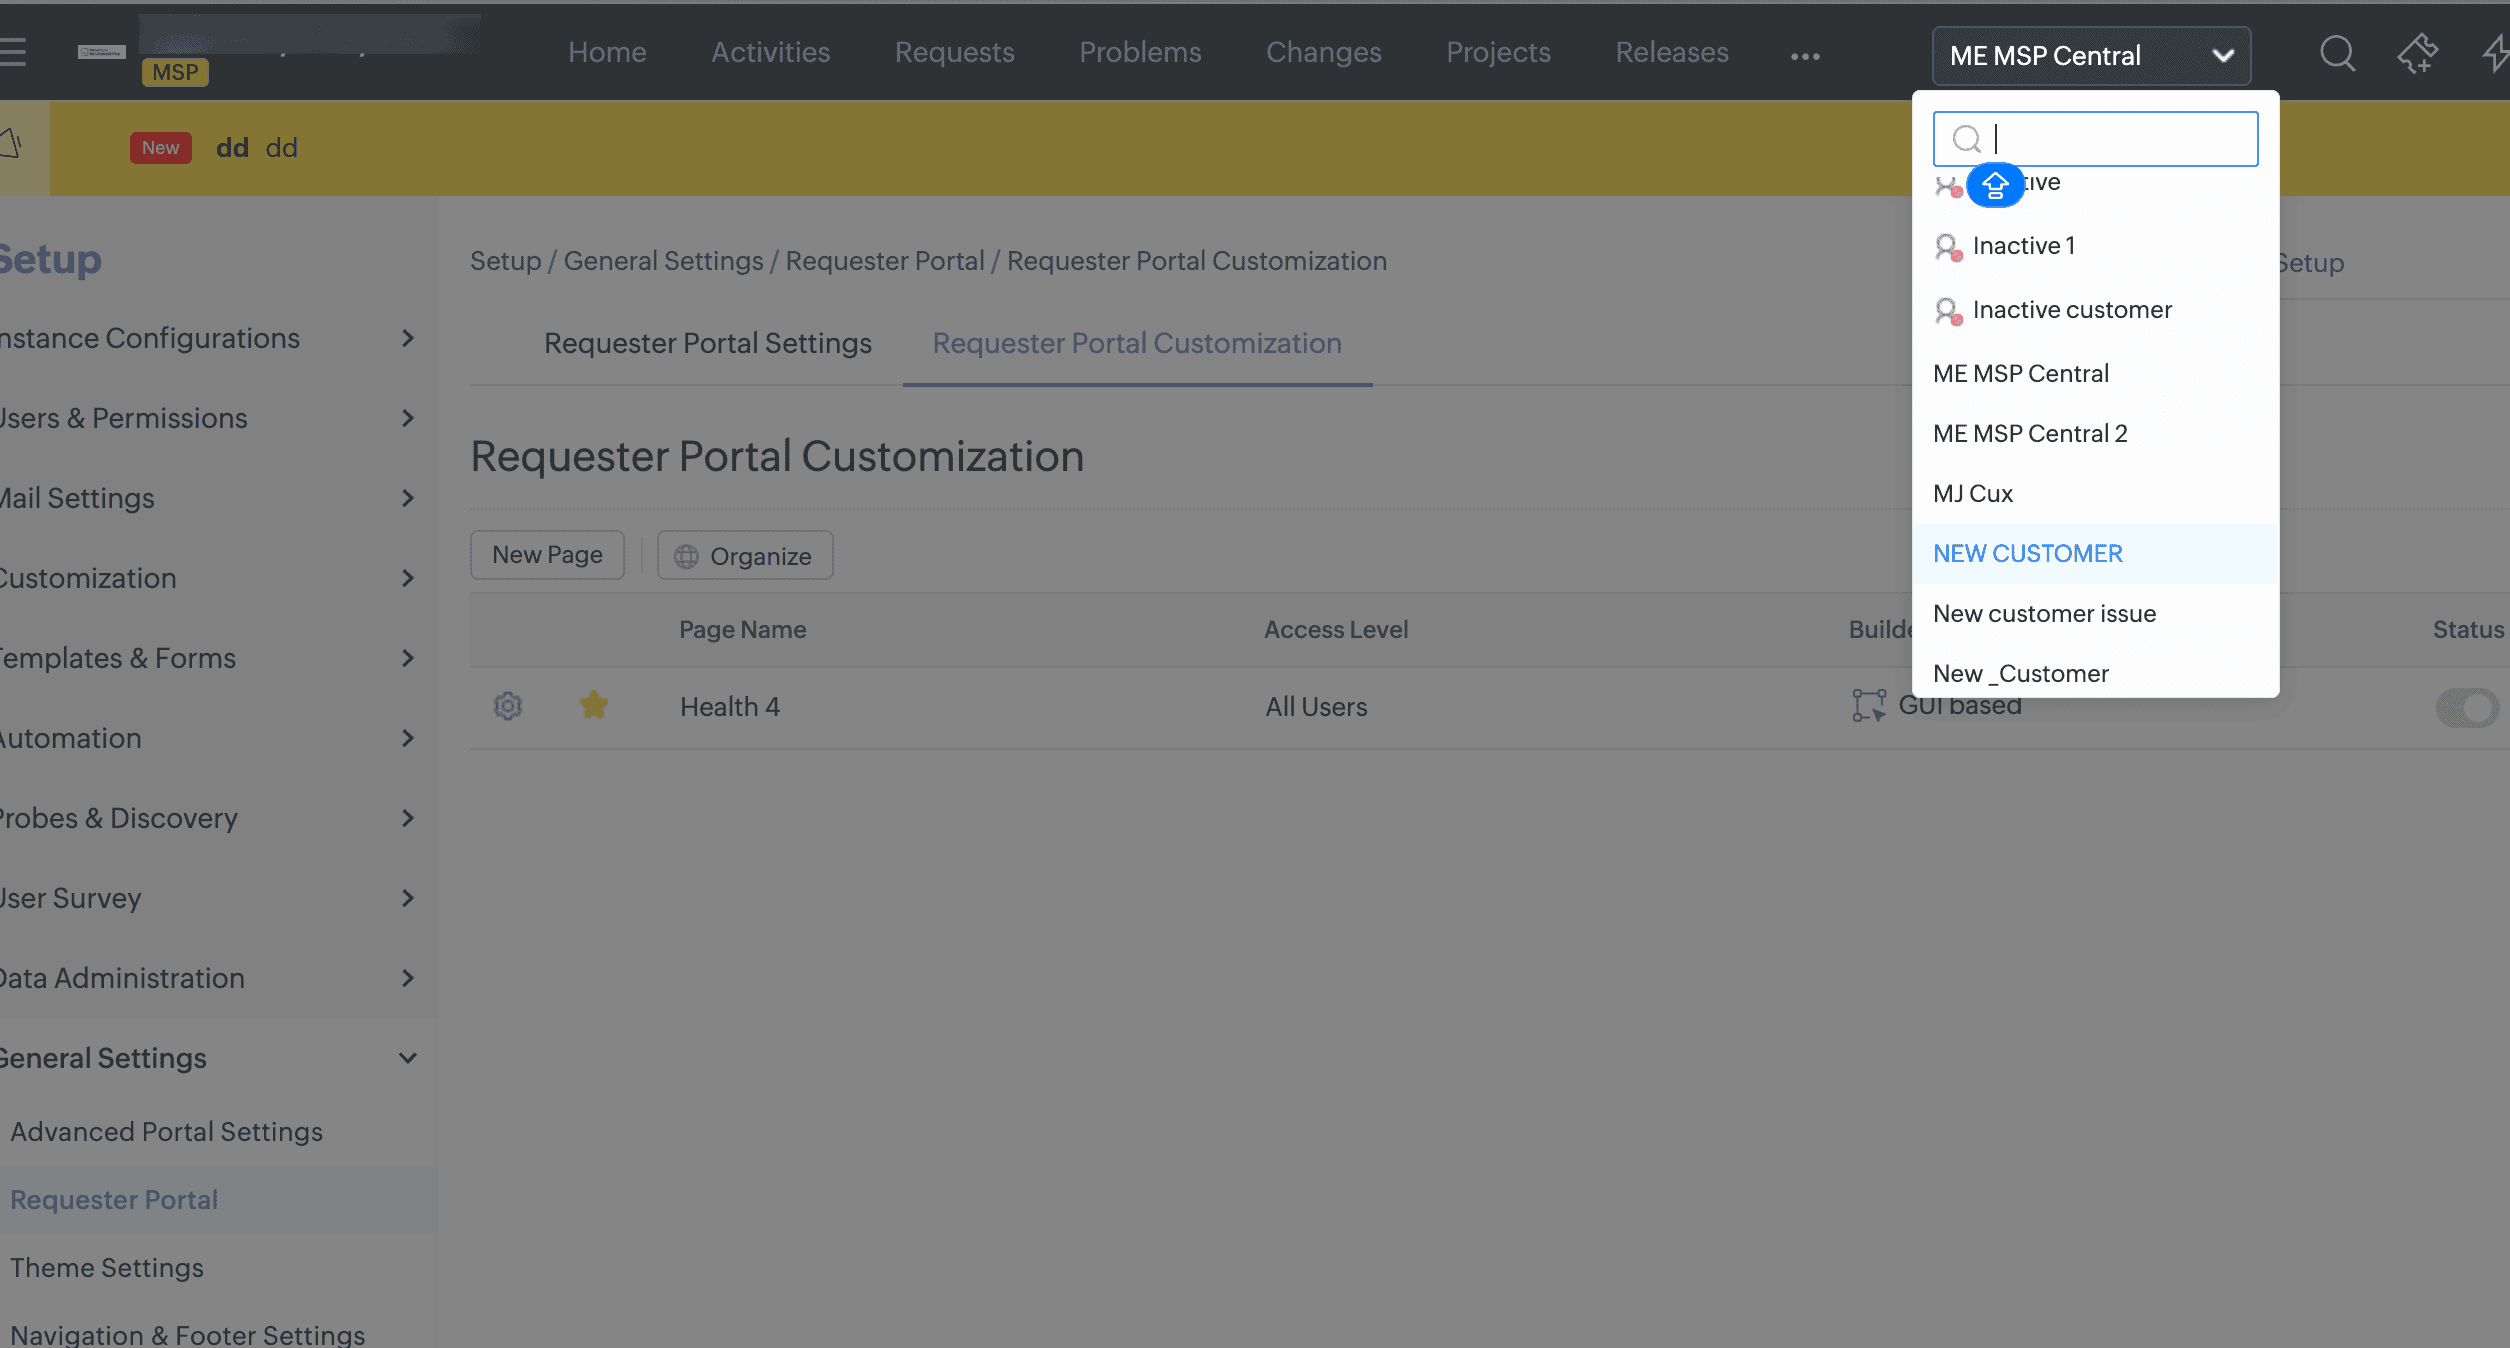
Use the customer selector on the Requester Portal Customization list view to select a customer. You can create a new portal page for the selected customer or filter and manage pages associated with that customer or their mapped user groups.
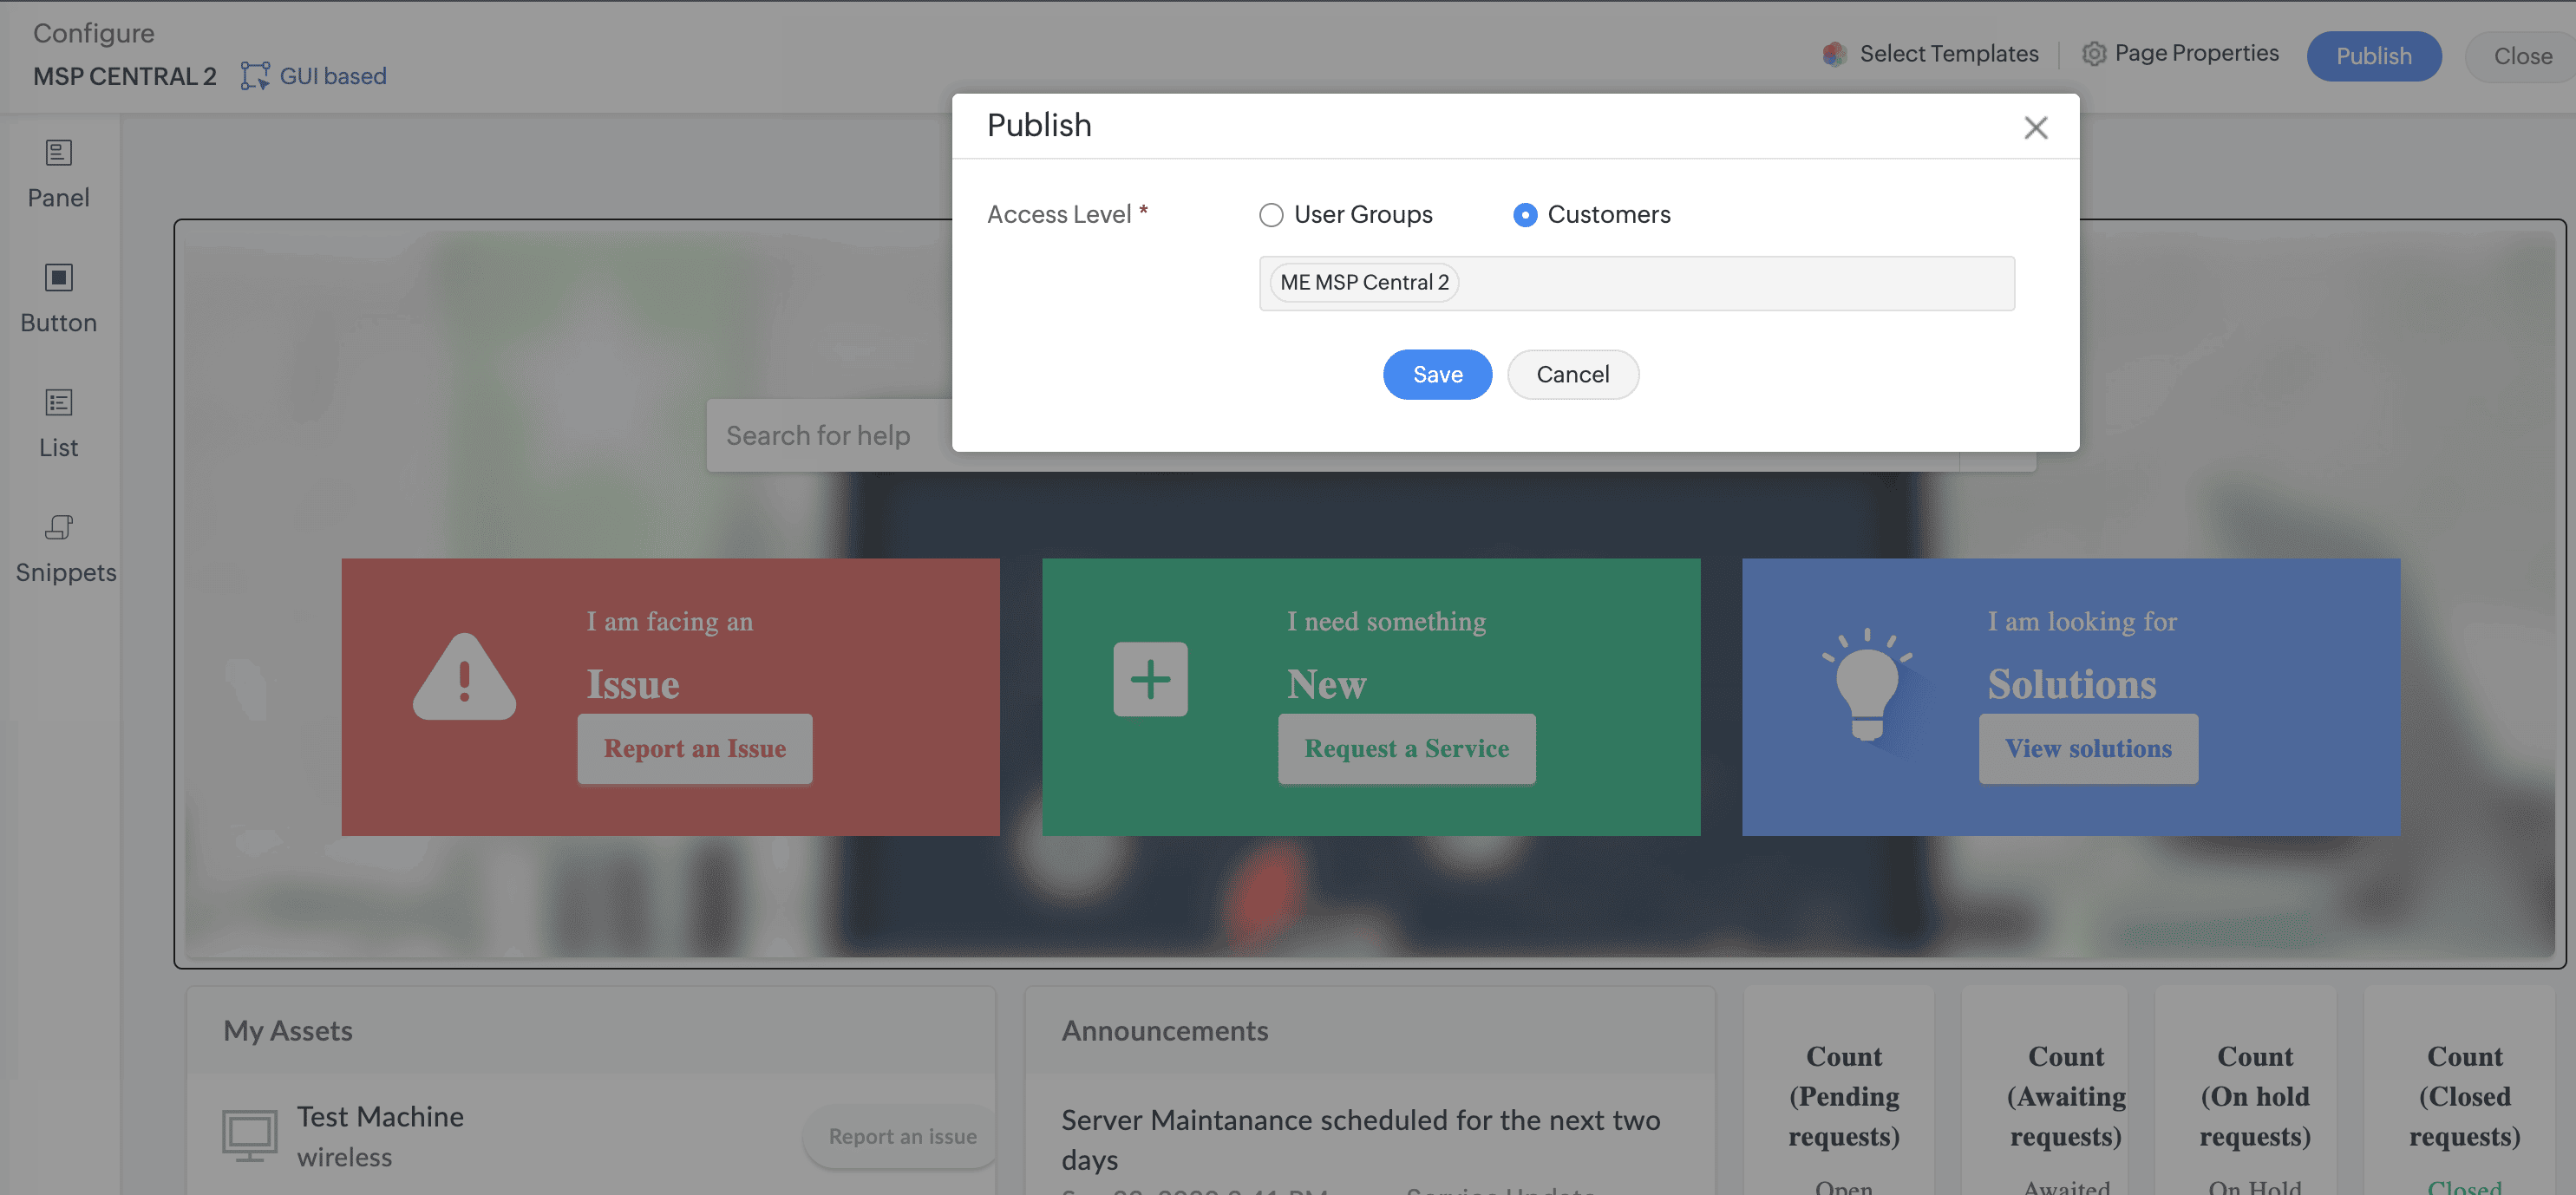
Set customer access level When publishing a page, set the access level to Customers to target the page to specific customers, or User Groups to target specific user groups.
Organize the sequence of portals If a user is part of several groups or a customer is associated with multiple home pages, use the Organize feature to define the display sequence. Choose Use Global Page Order to apply a consistent page order across all customers, or Customize for [Customer Name] to set a page order specific to that customer. The first active page in the order will be displayed to the user.
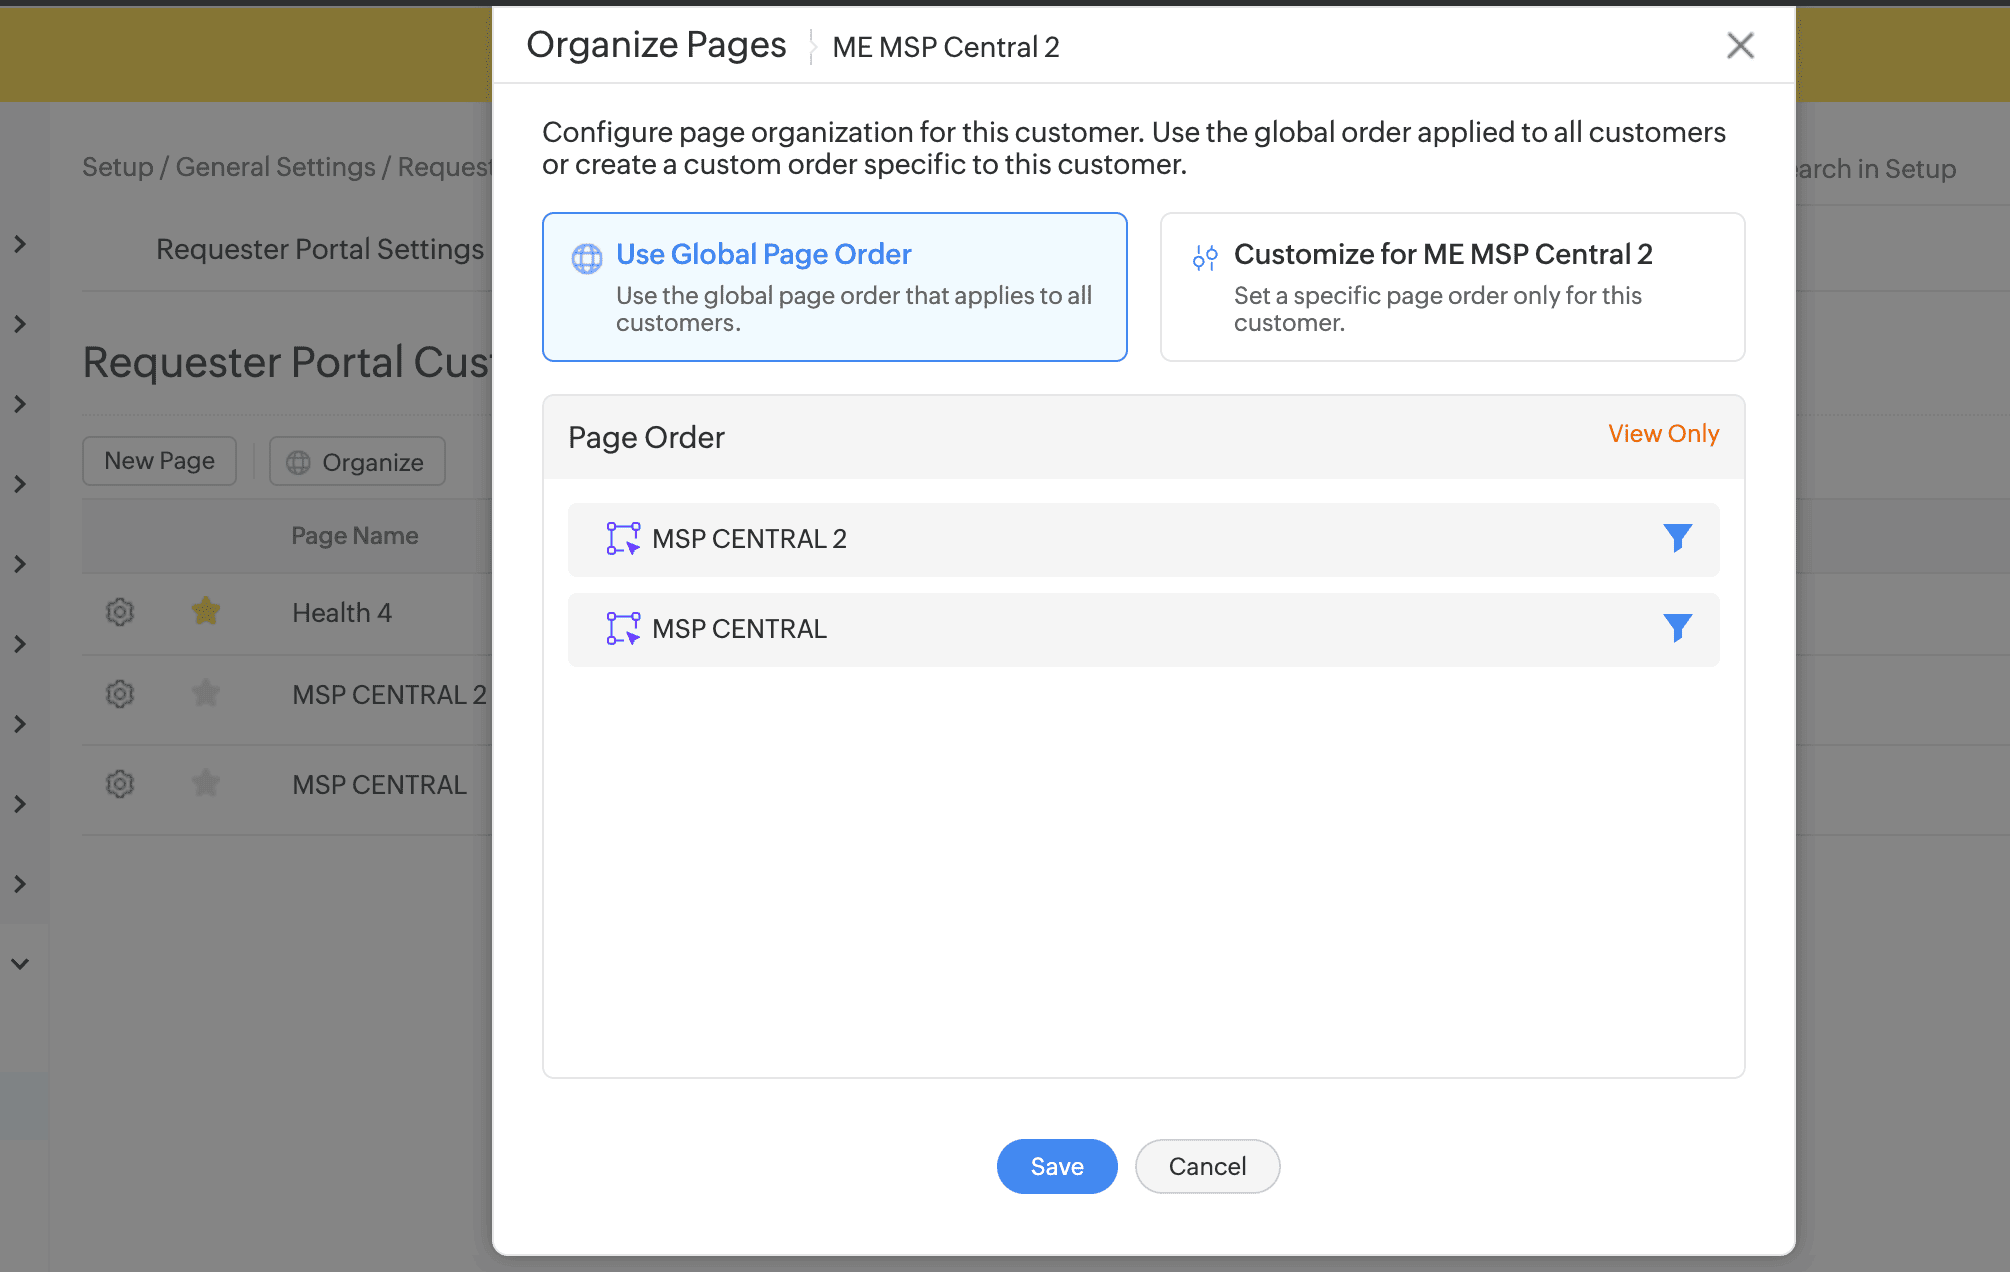
Note: Pages can be organized only when the access level is set to User Groups or Customers.
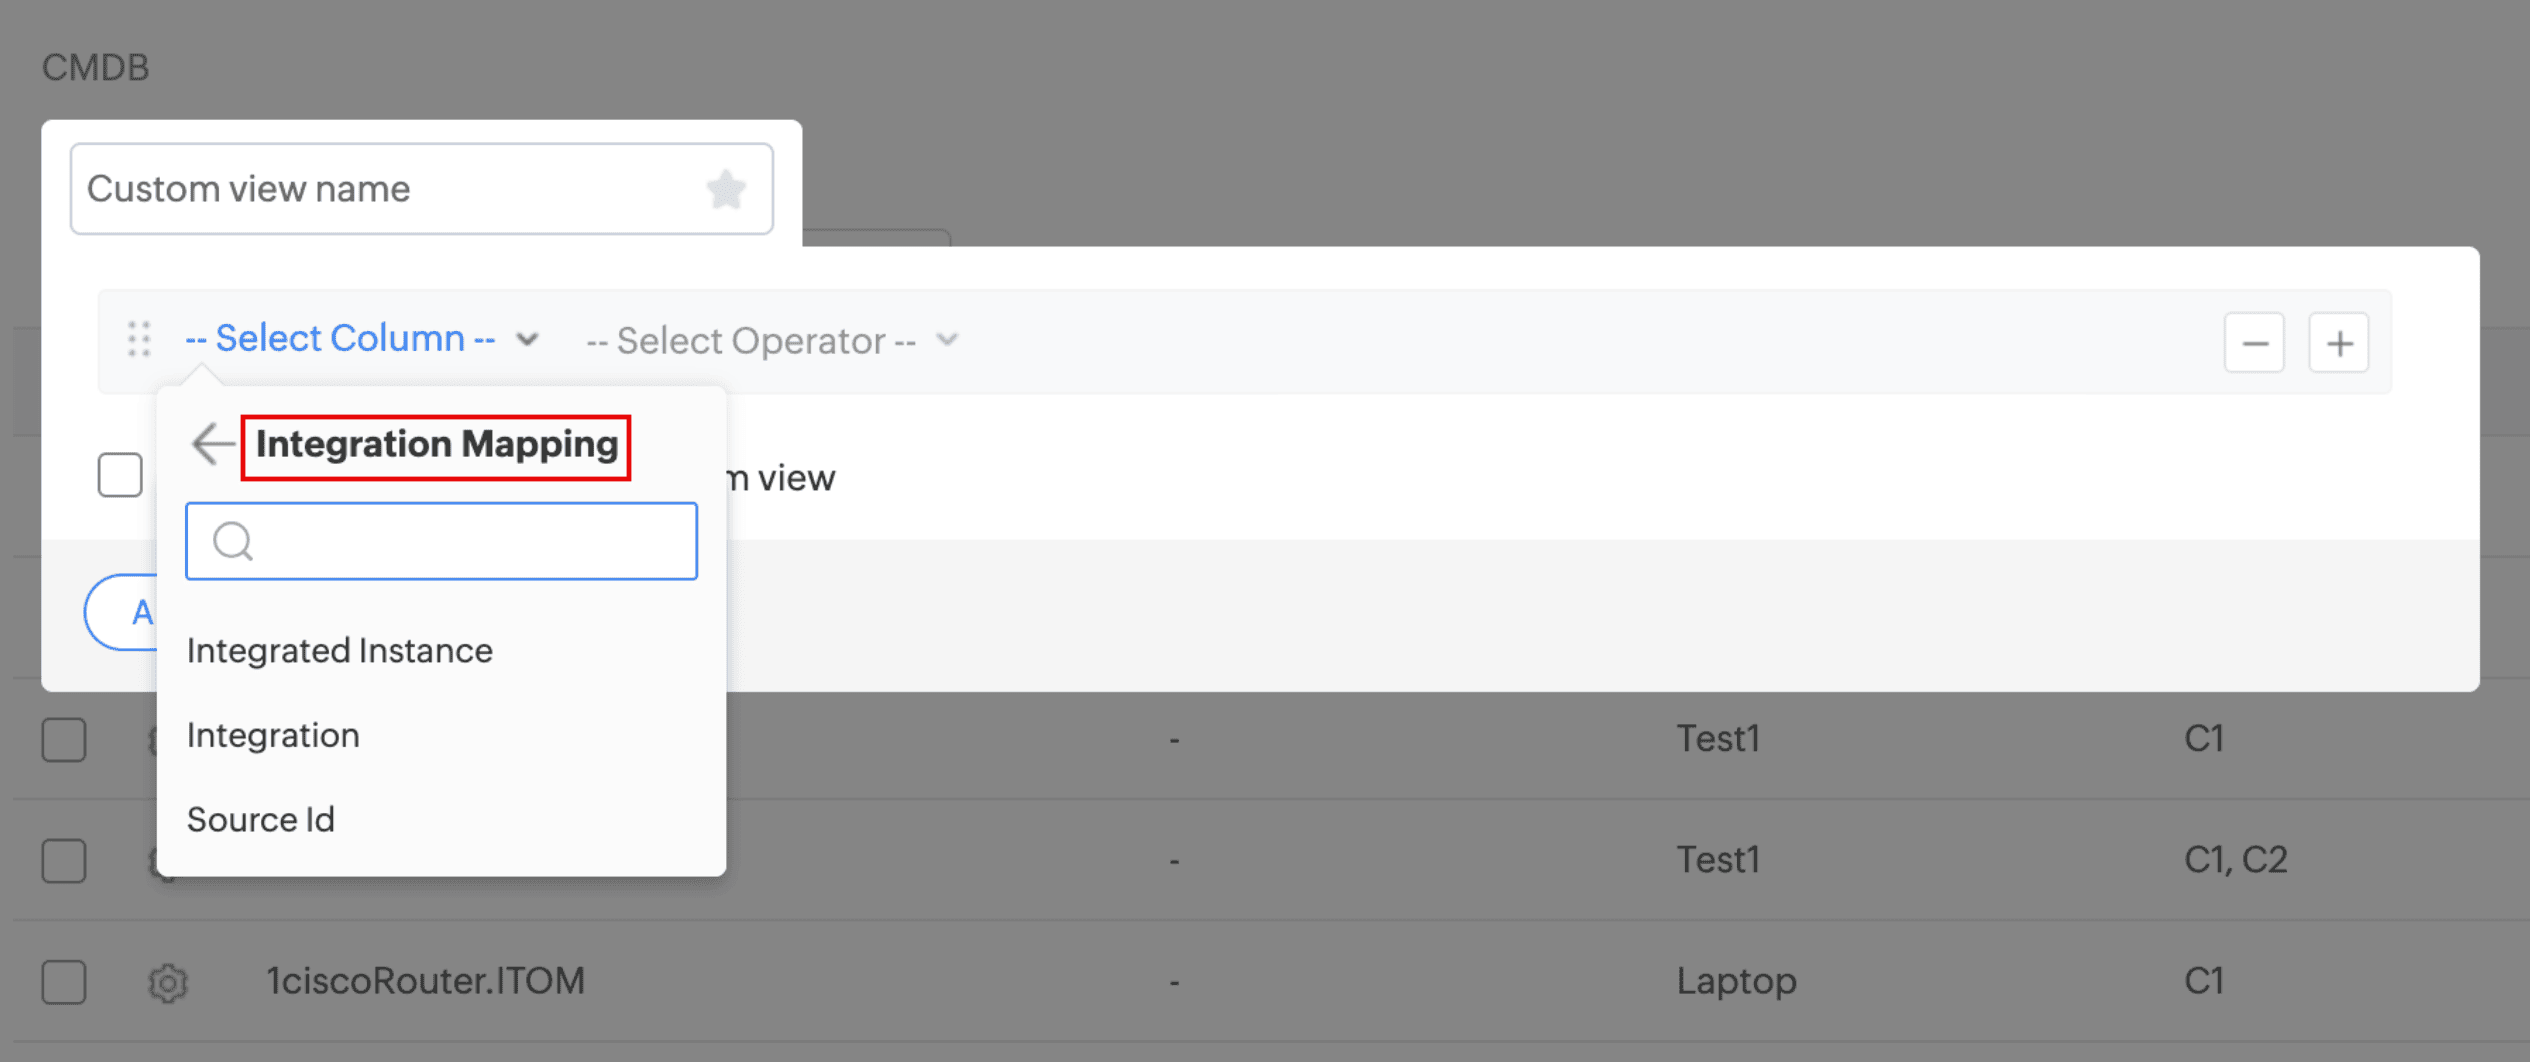
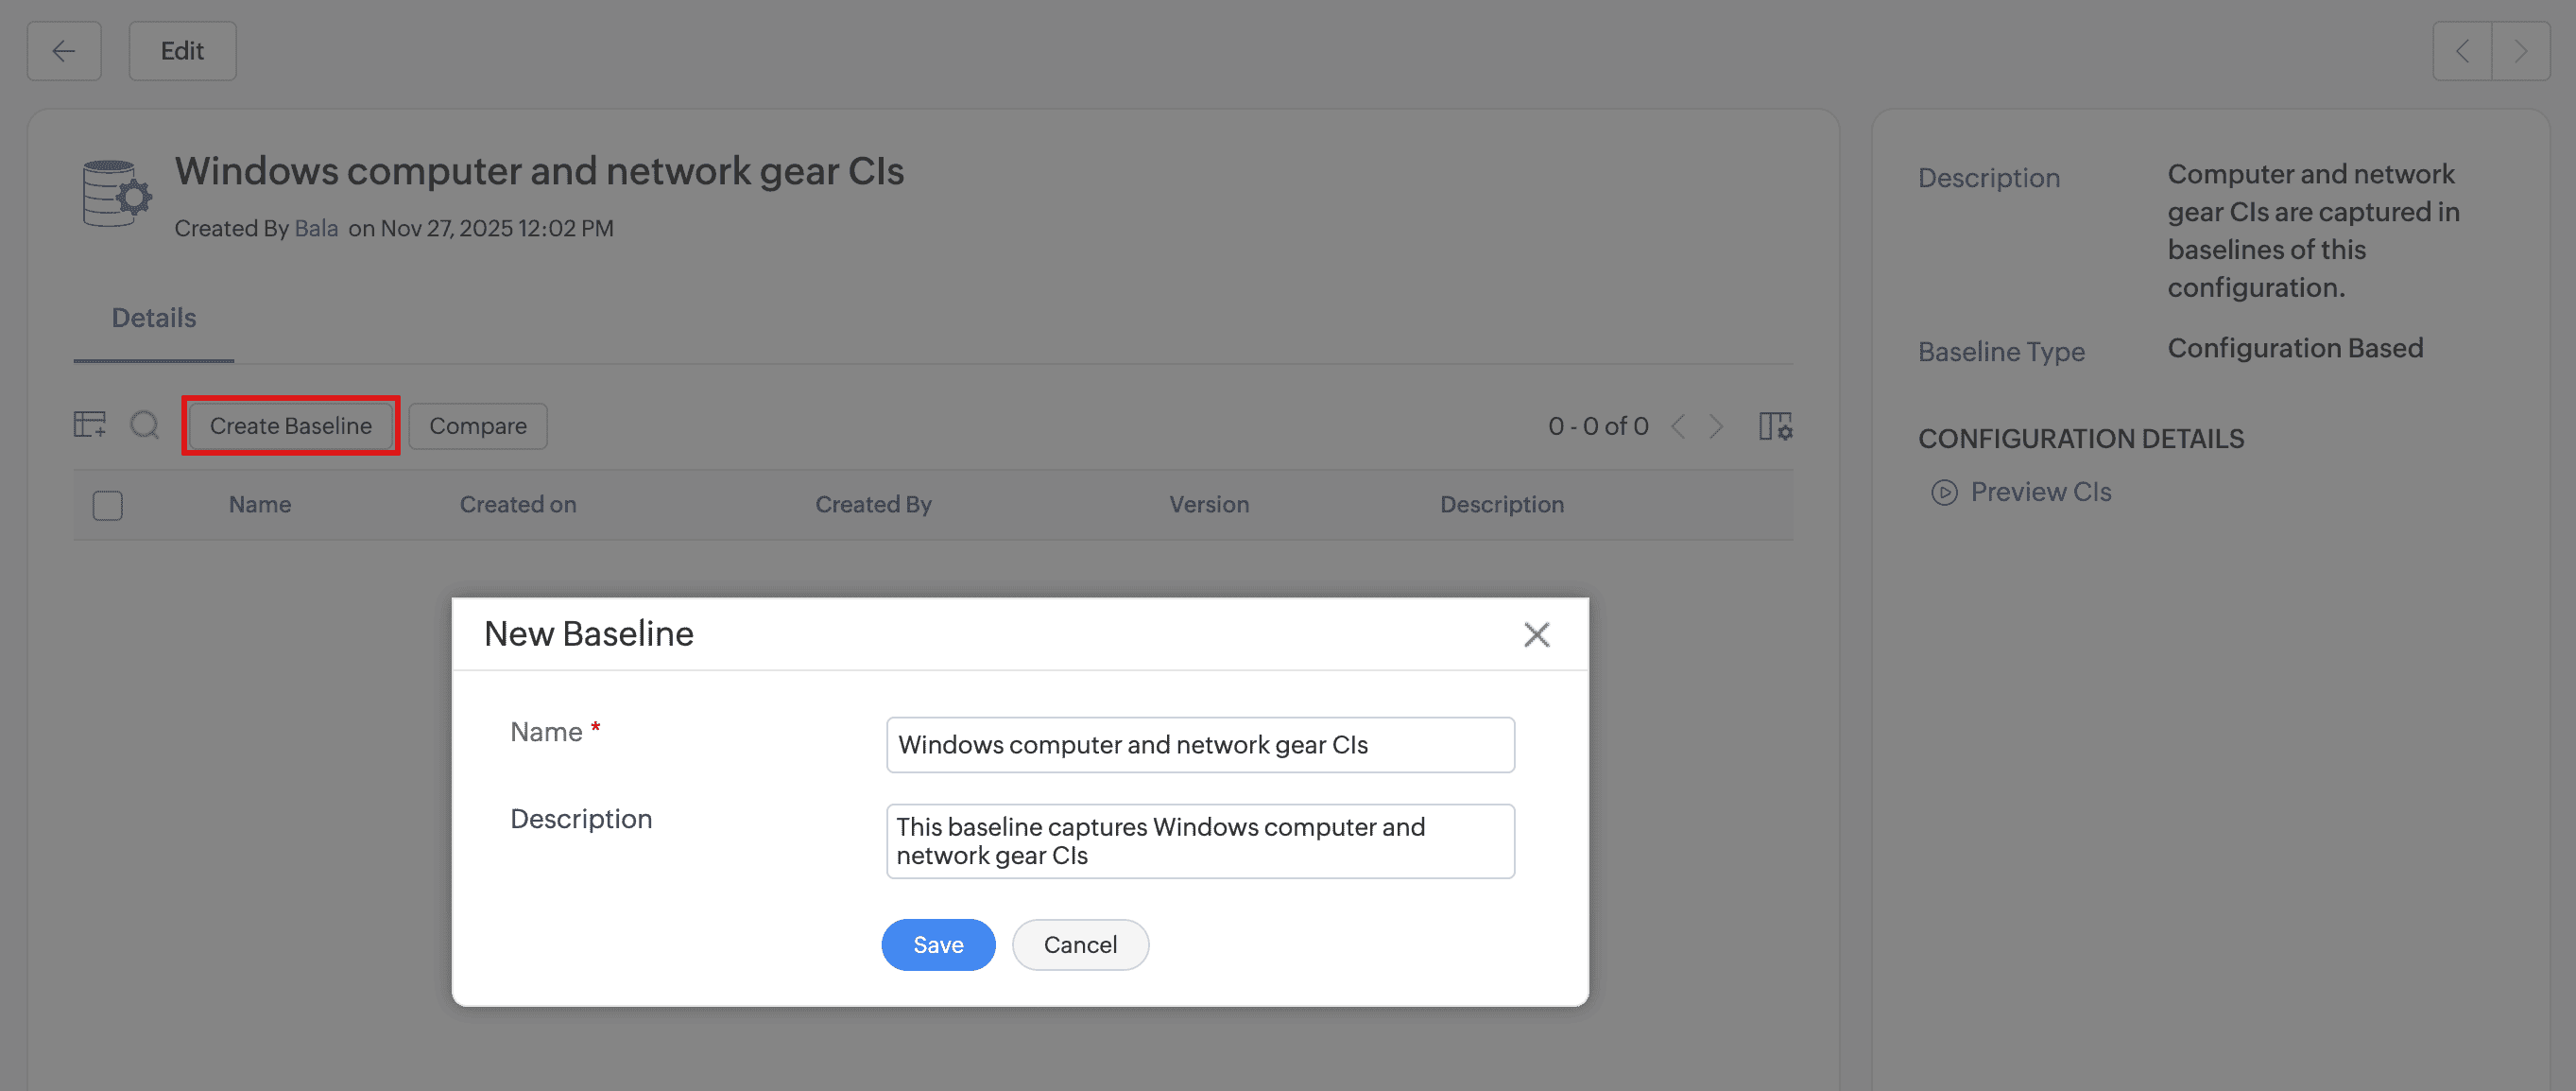
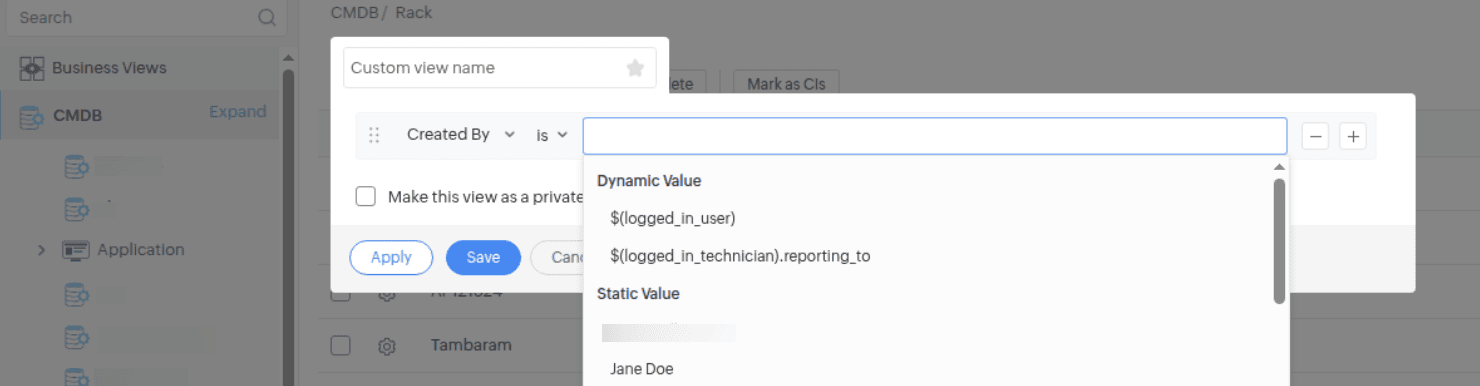
An illustration of Integration Mapping in custom list view criteria
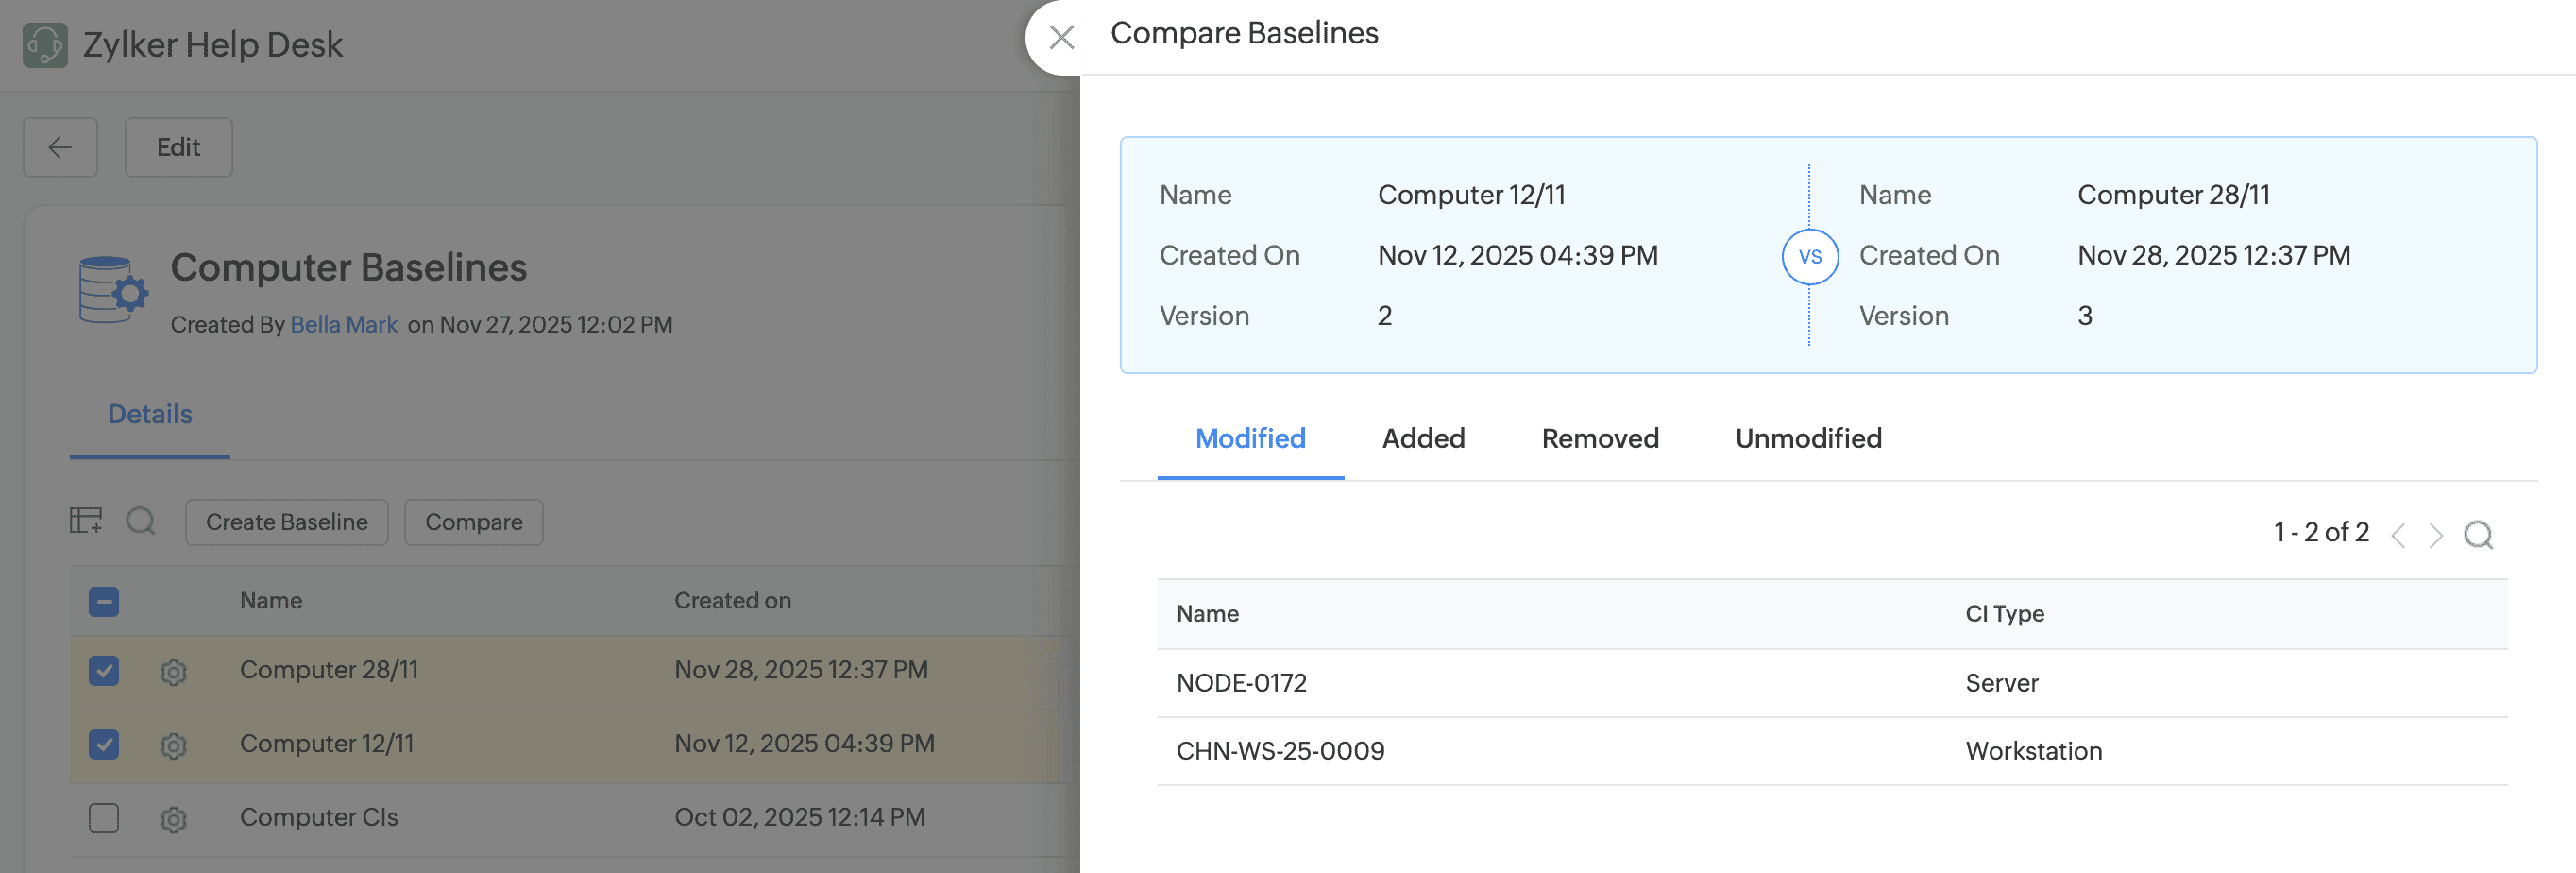
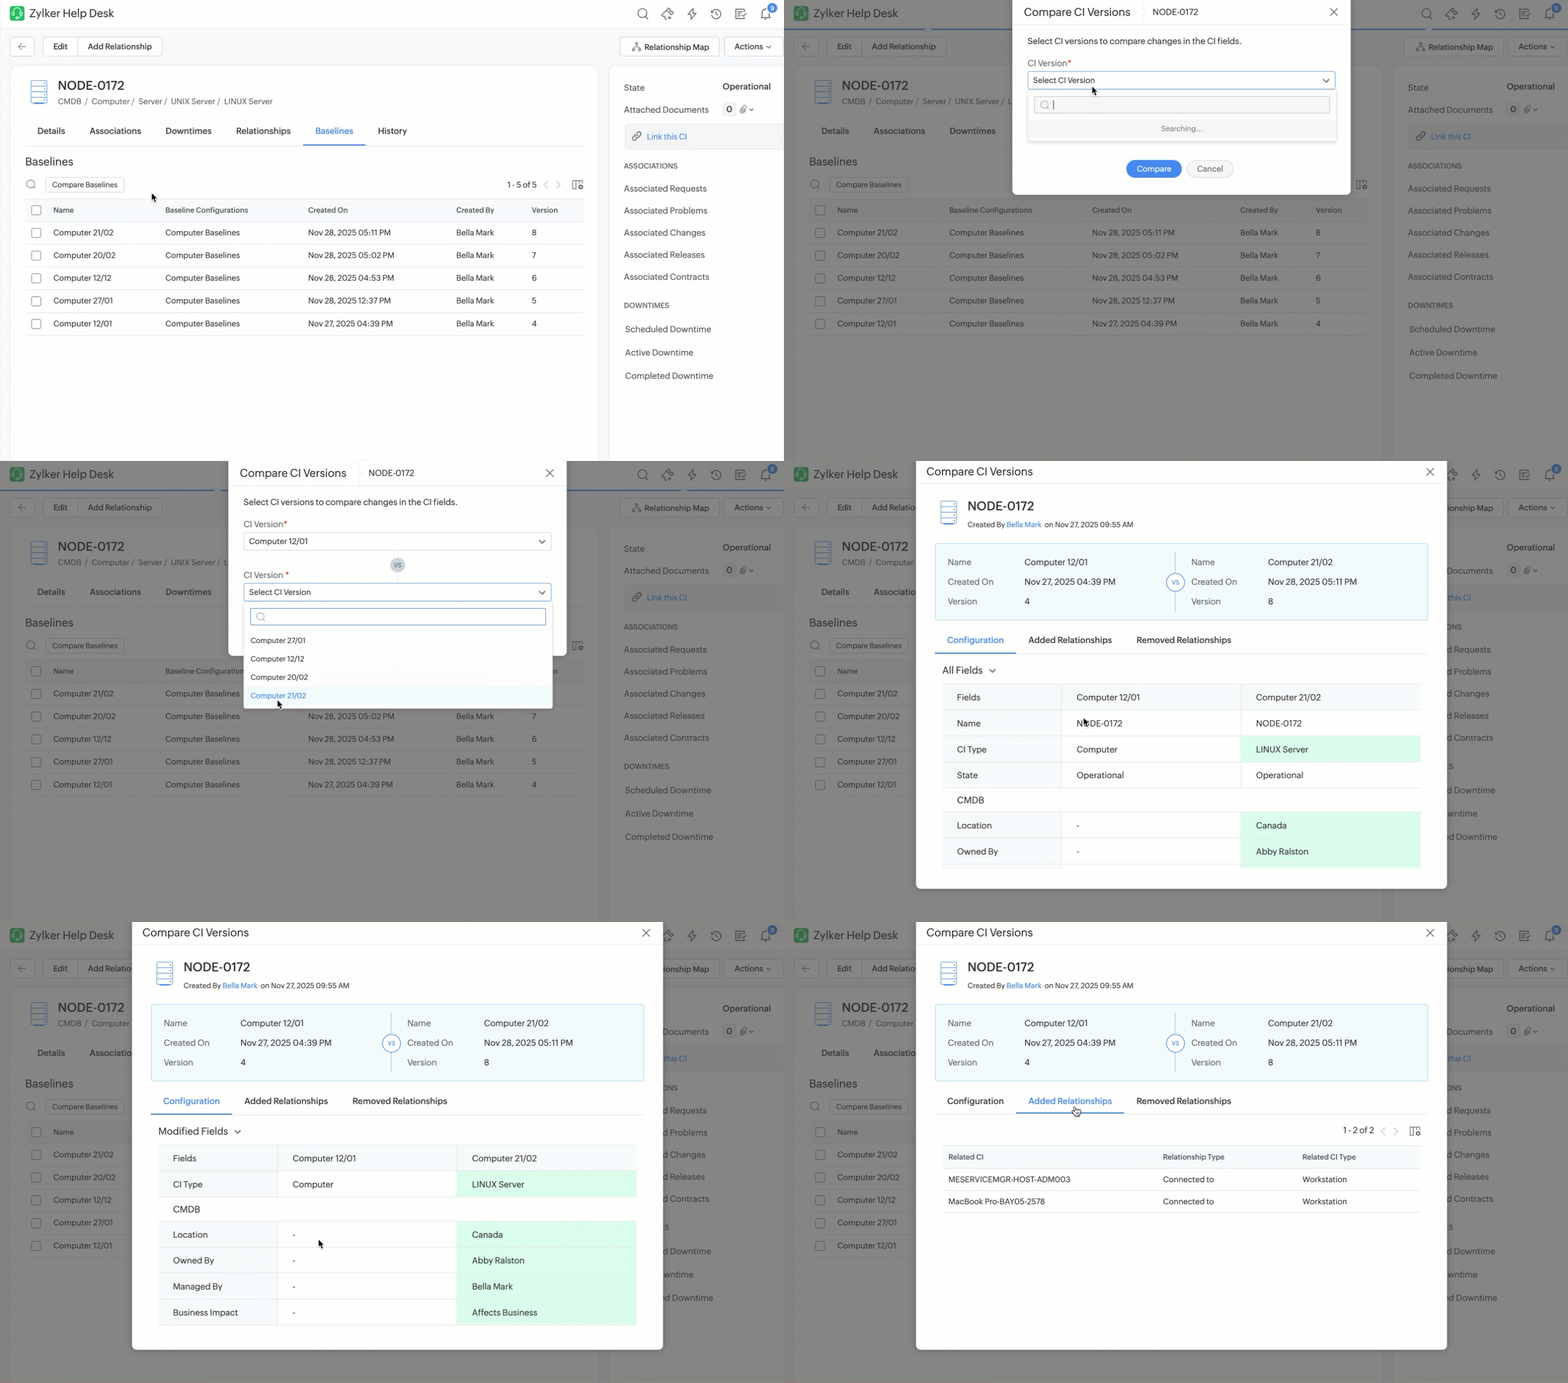
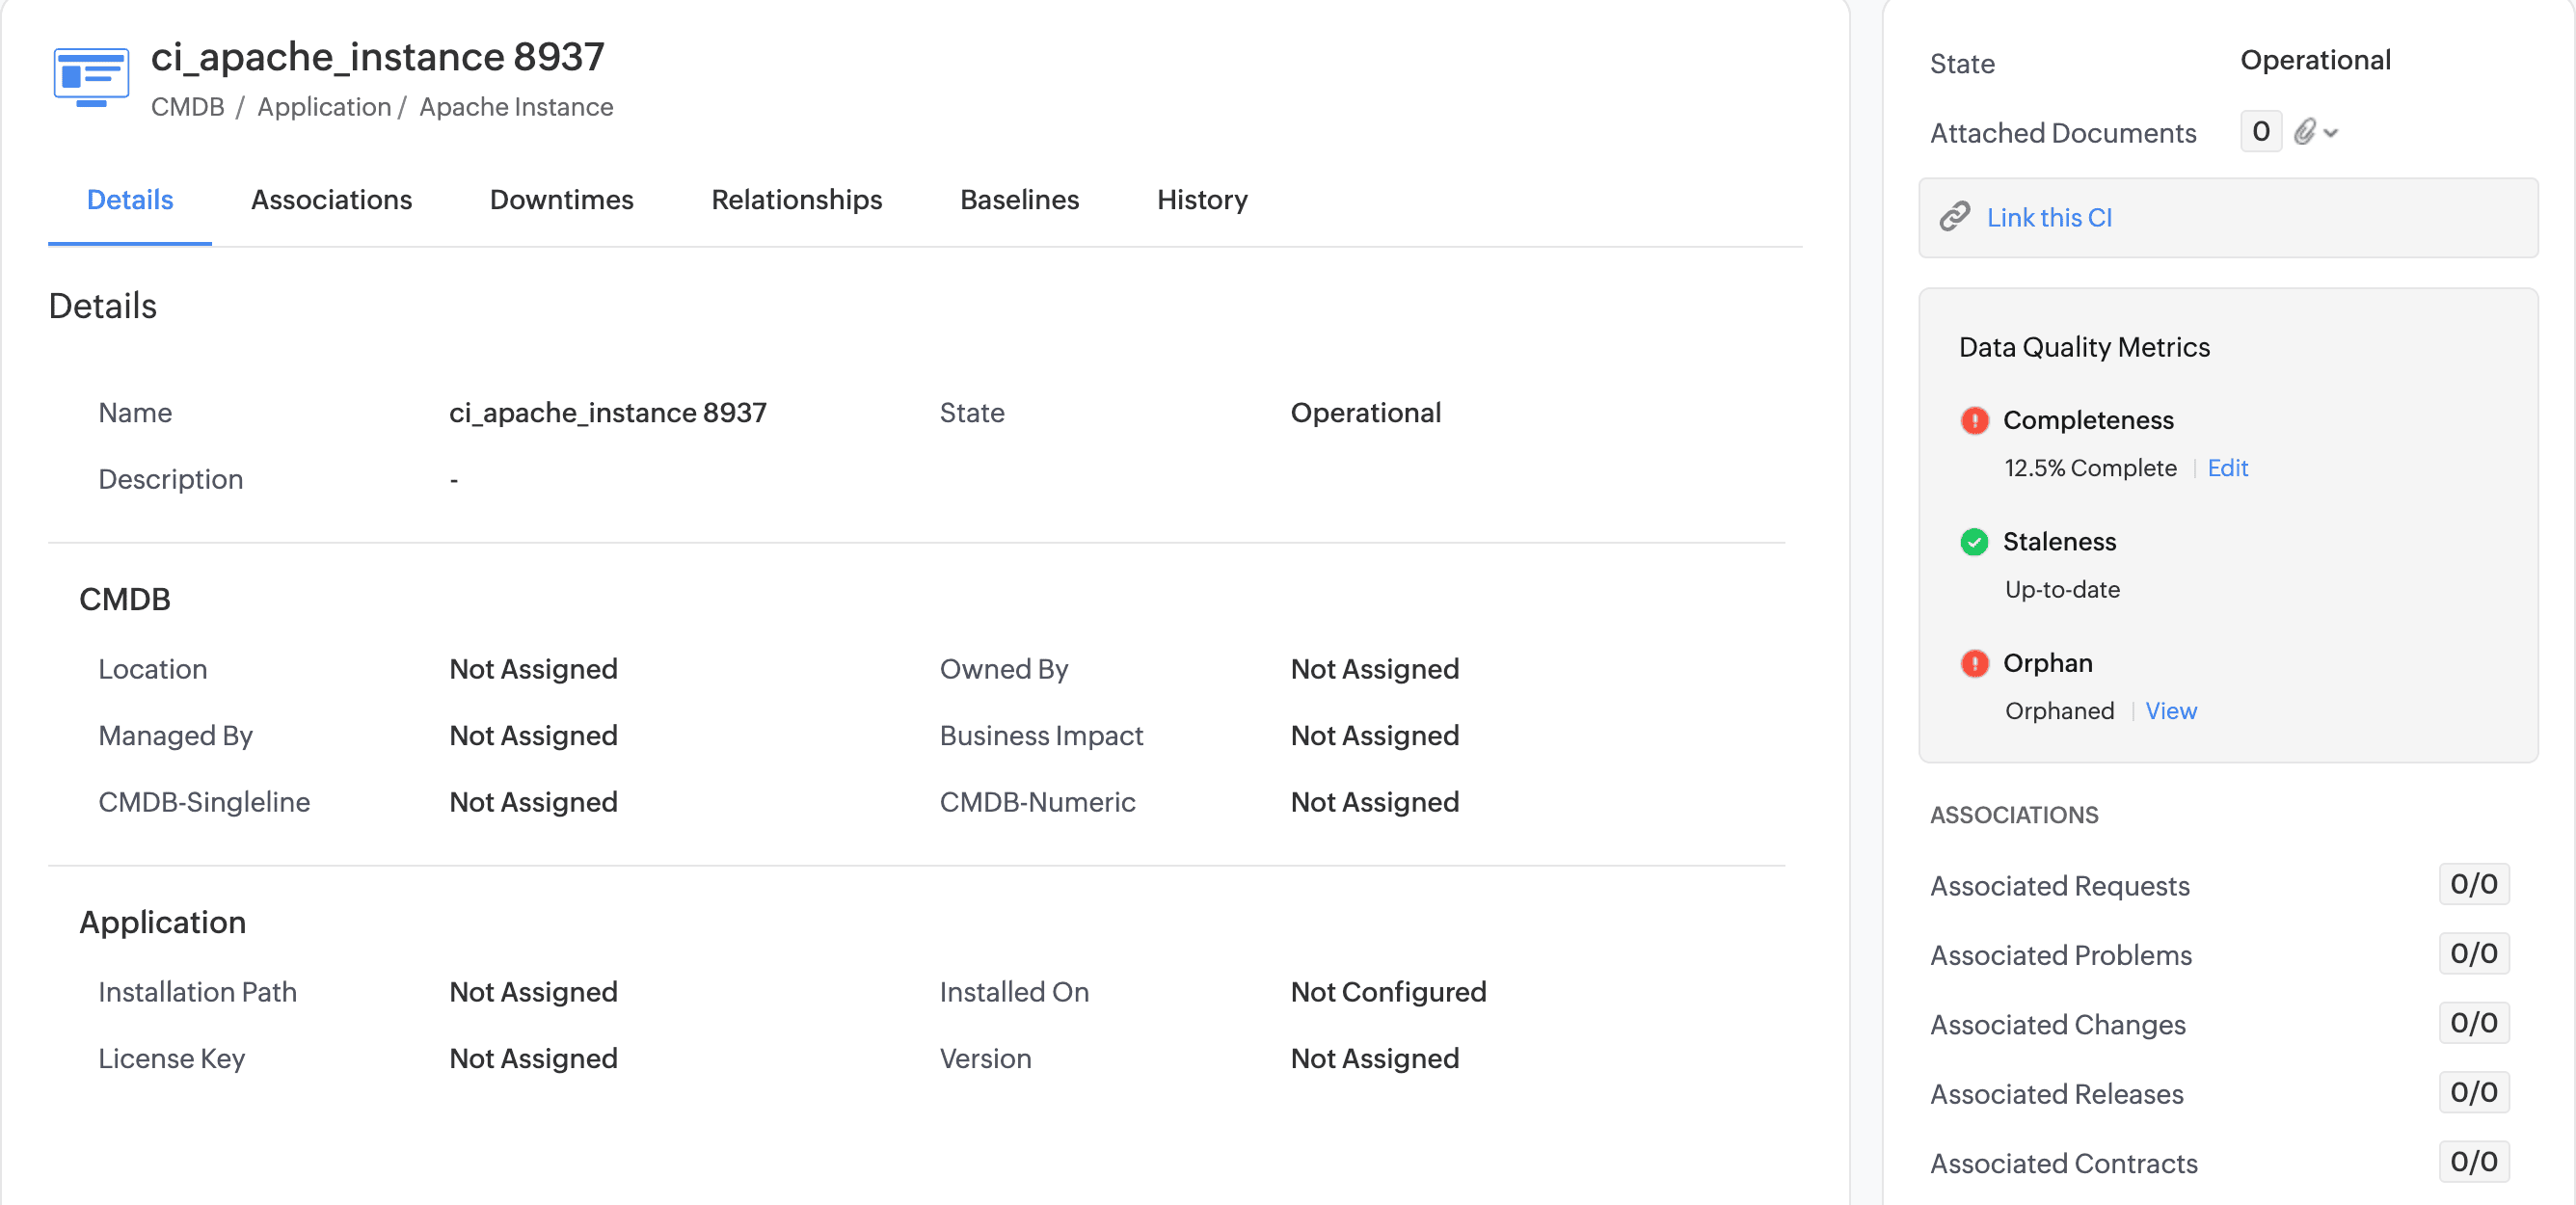
An Illustration of Comparing a CI from its Details Page
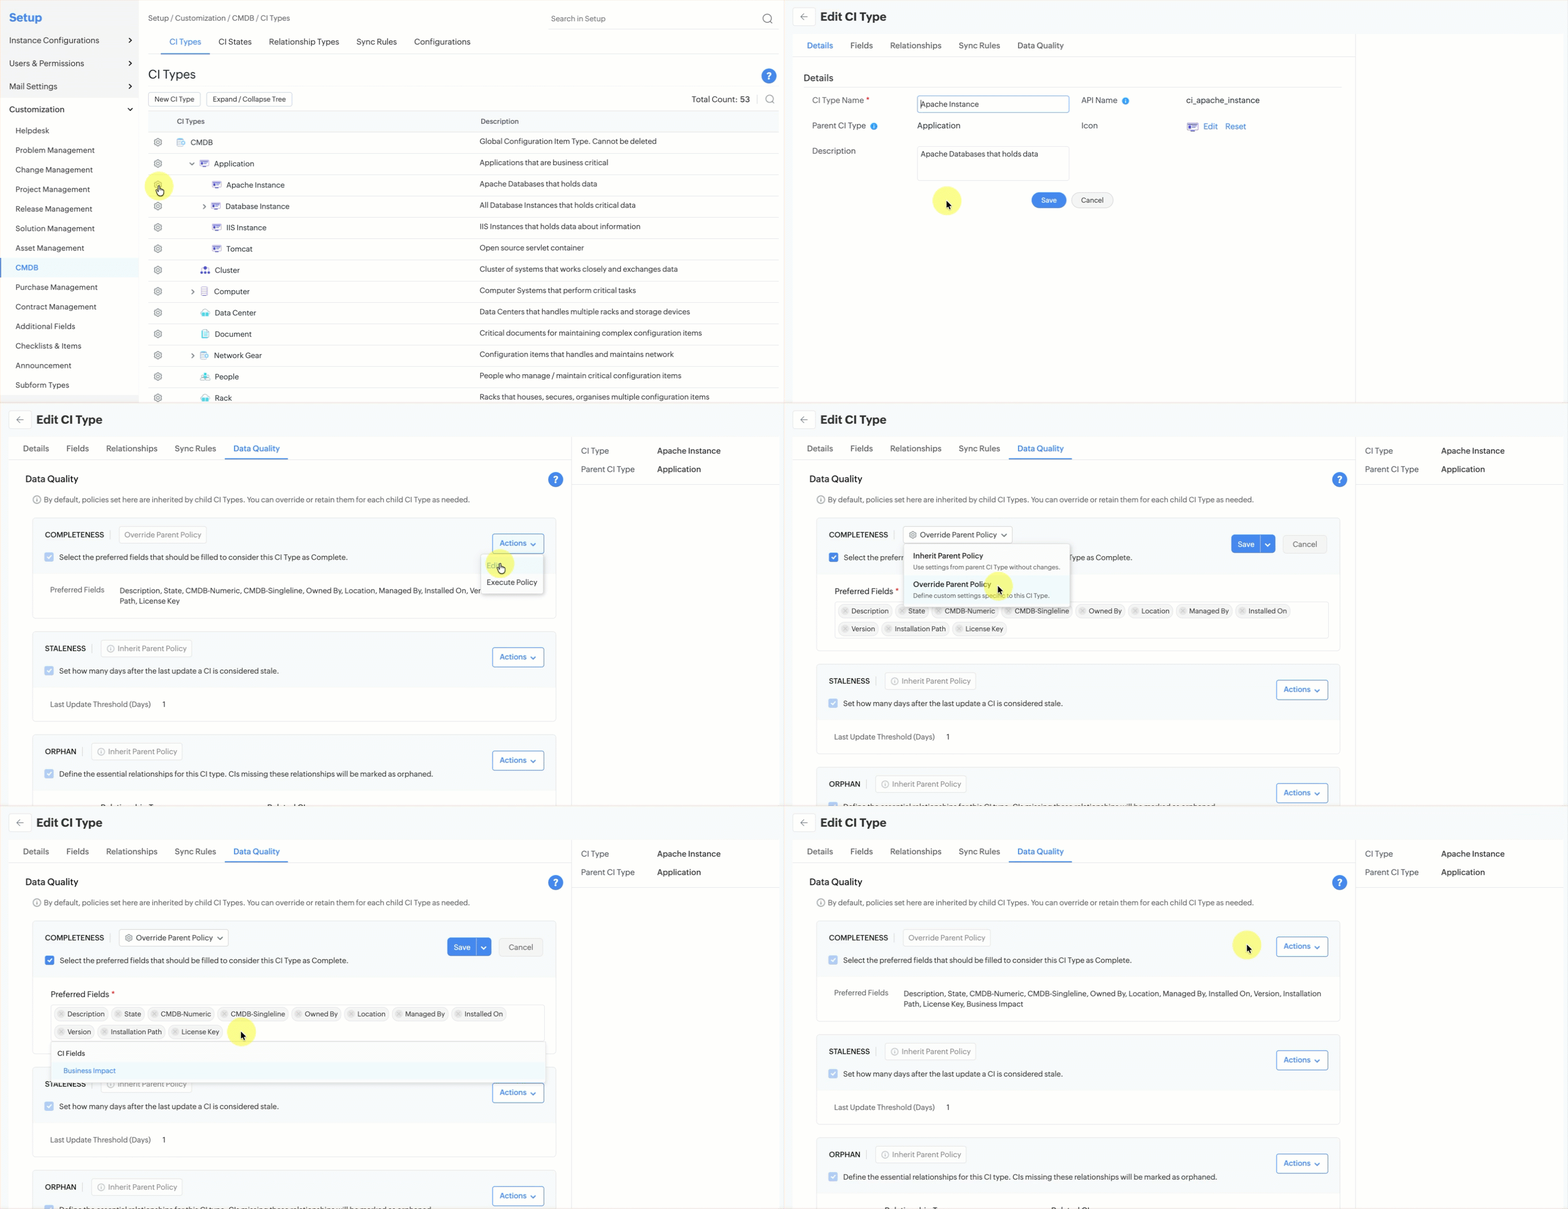
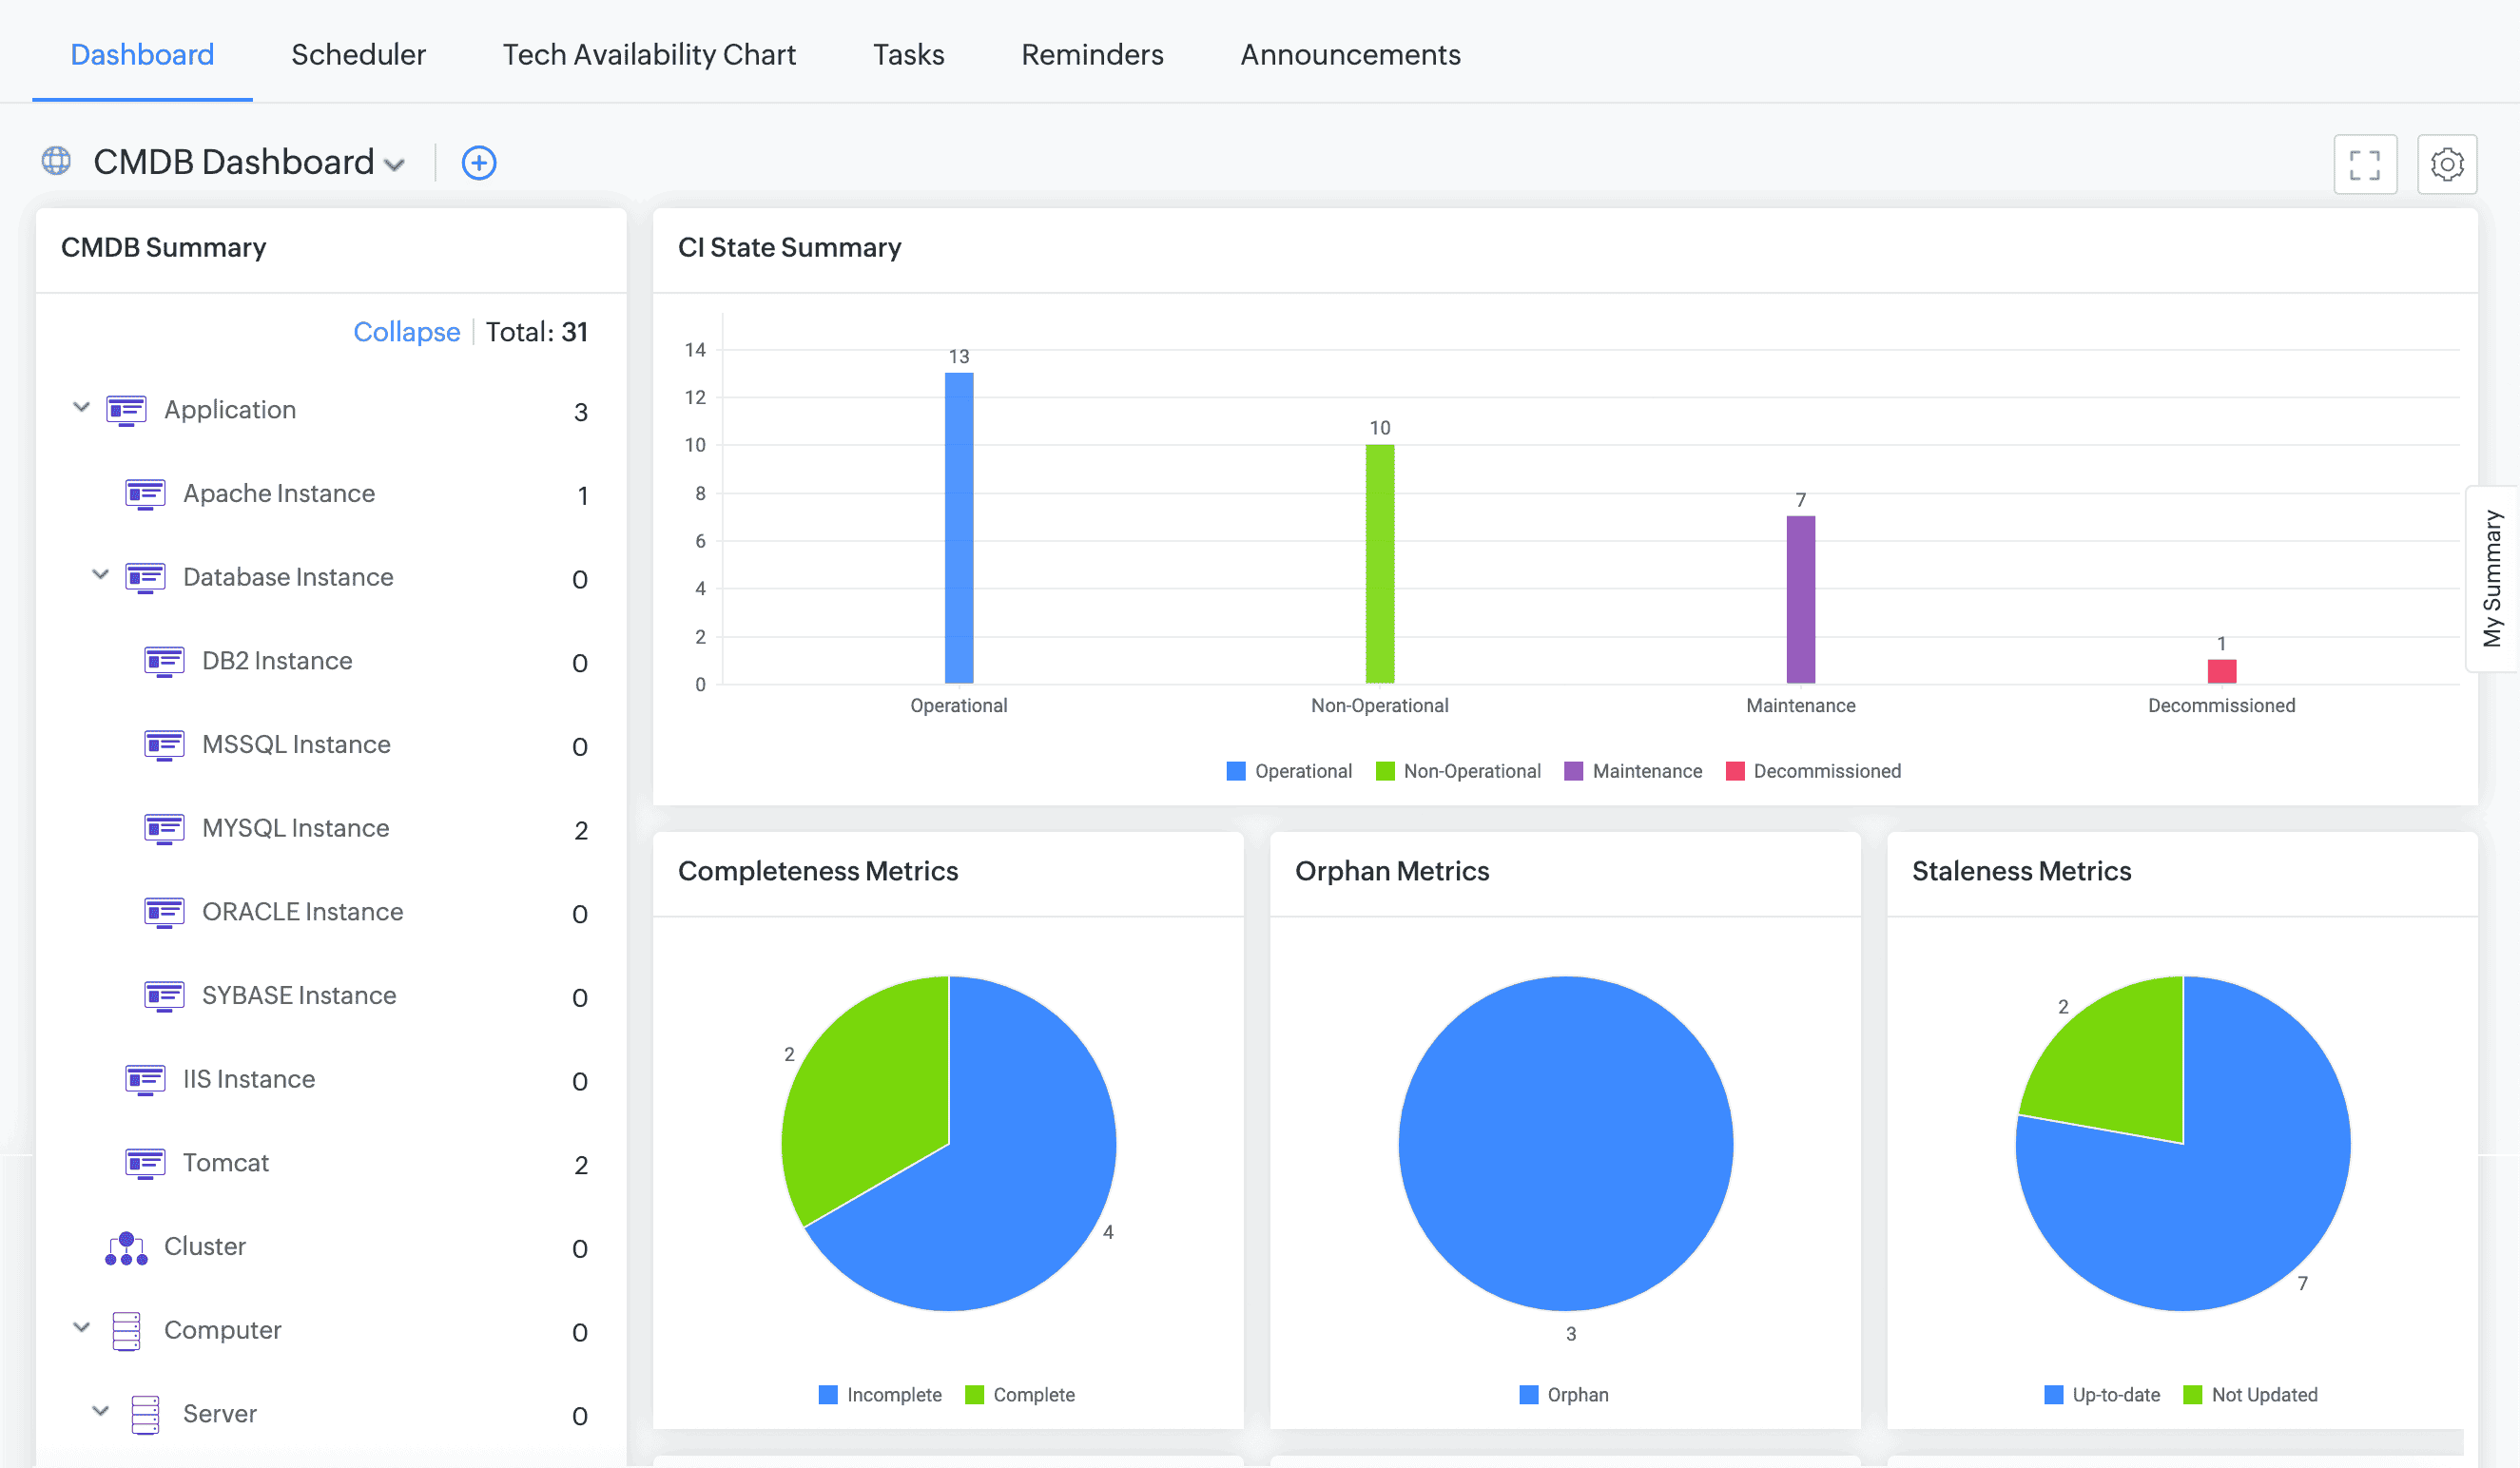
Introducing the CMDB dashboard, a centralized interface that provides a comprehensive view of all configuration items (CIs). You can track CI counts by status and monitor key data quality metrics such as completeness, orphan, and staleness and view associations of CI with other modules.
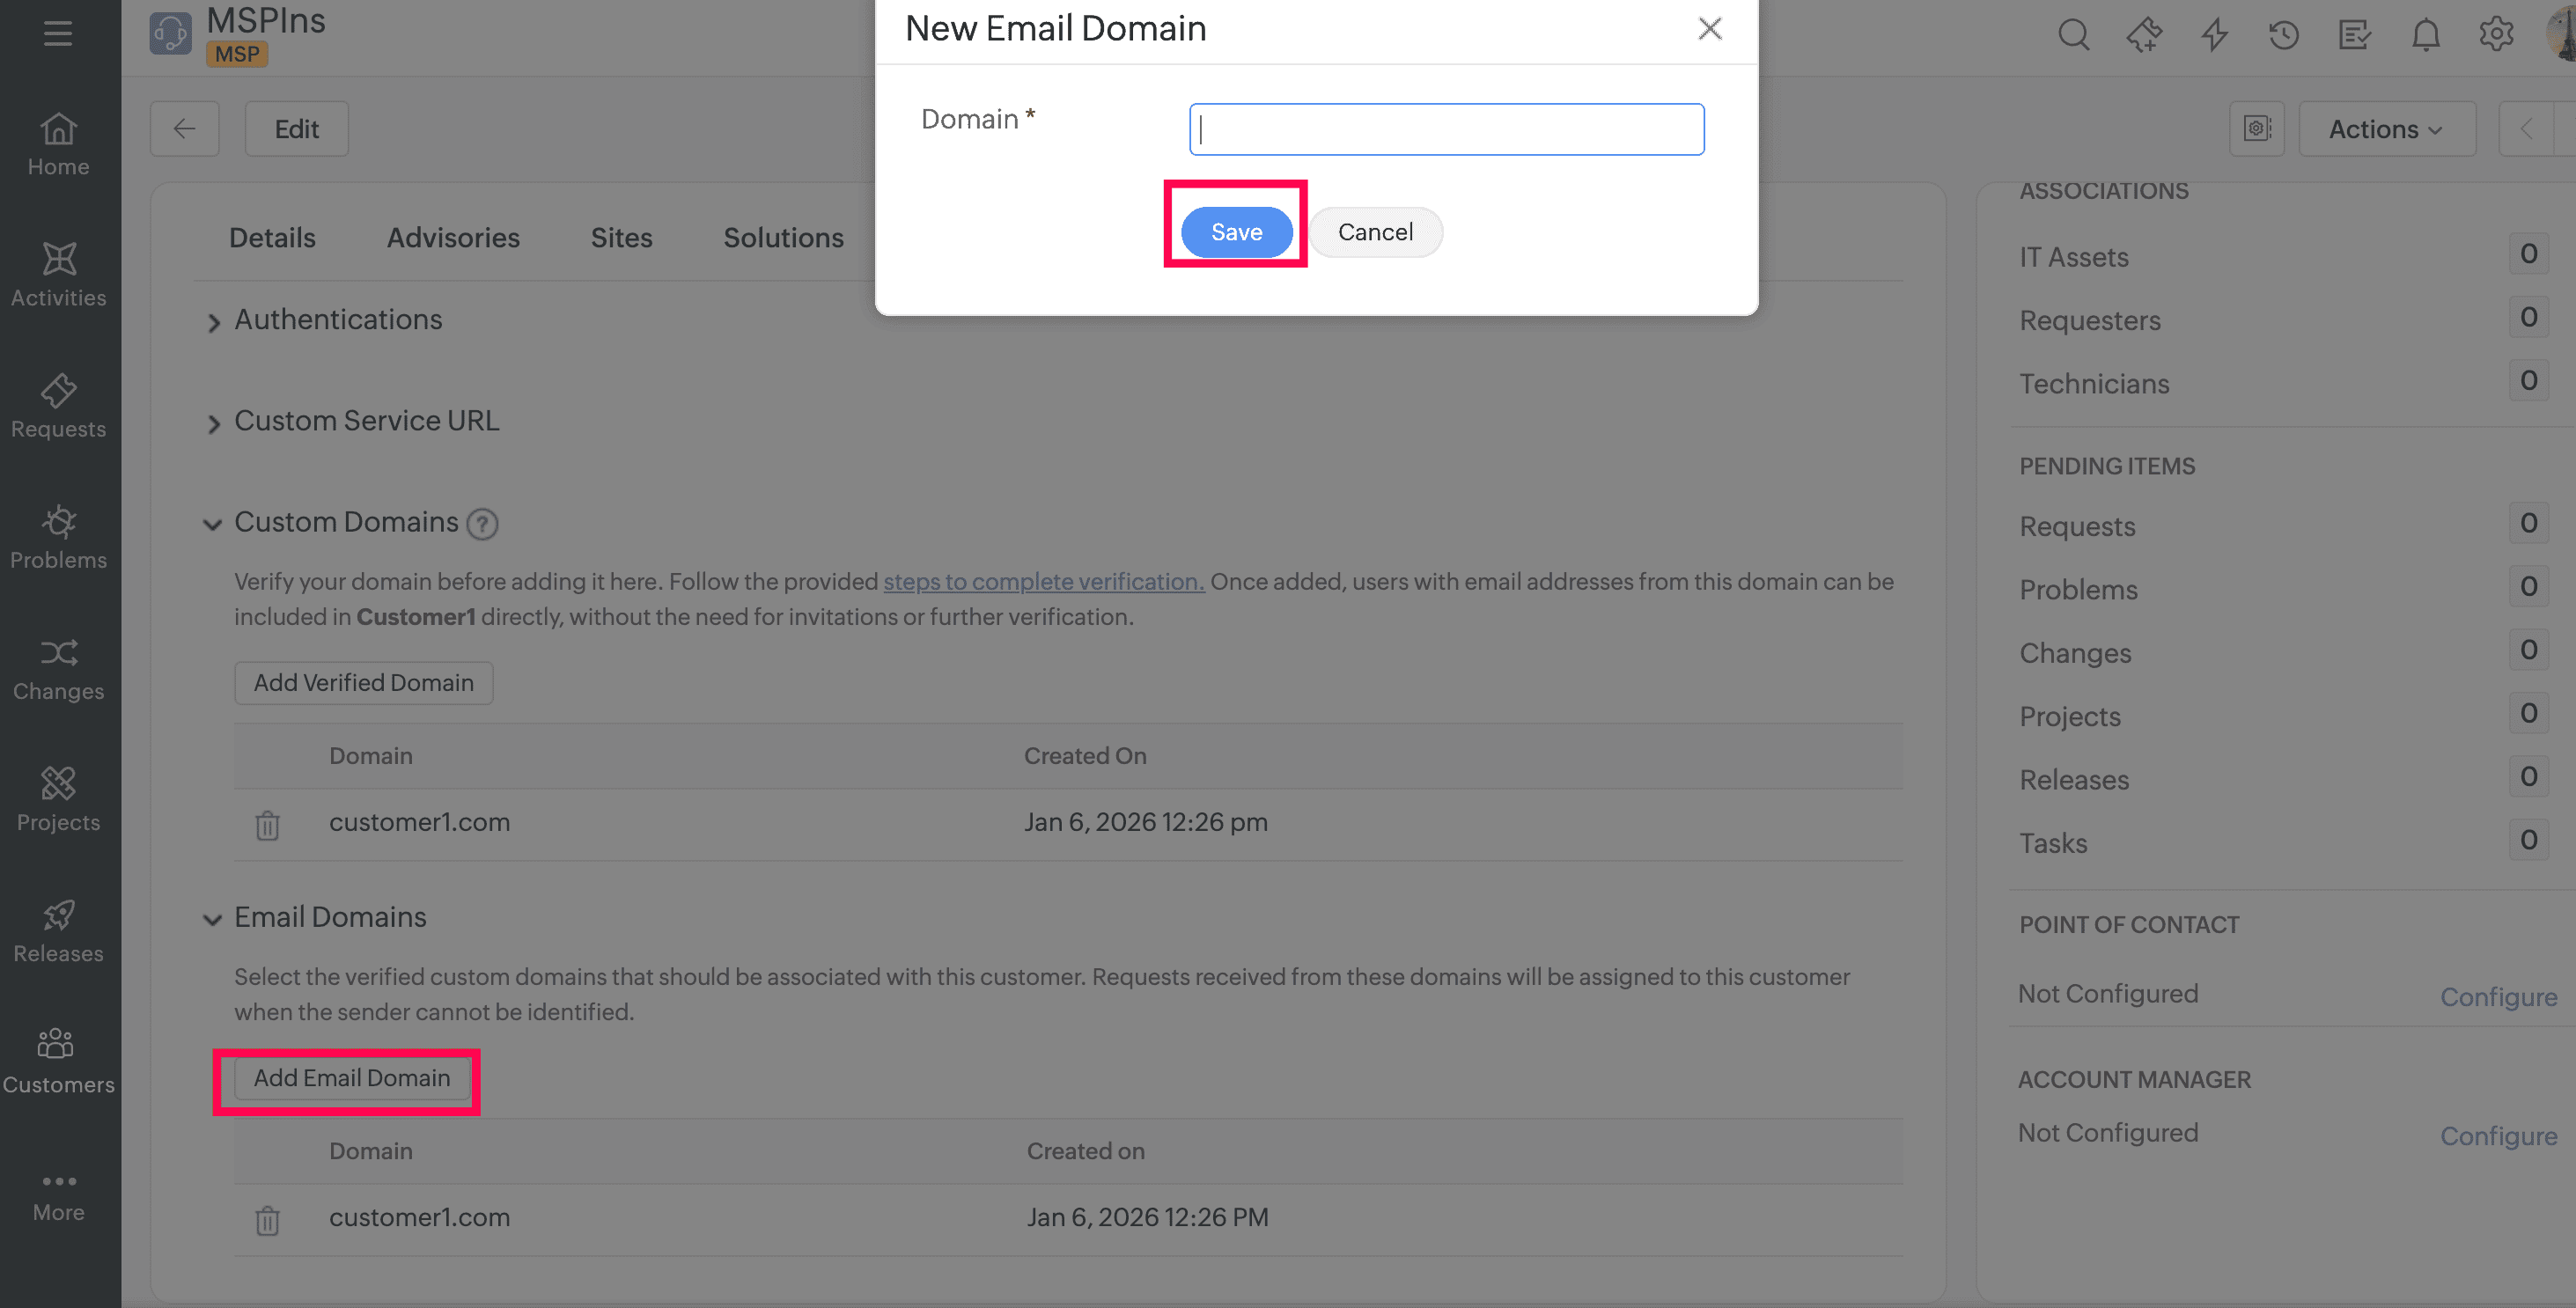
Customers can now use multiple email domains.
To add a domain:
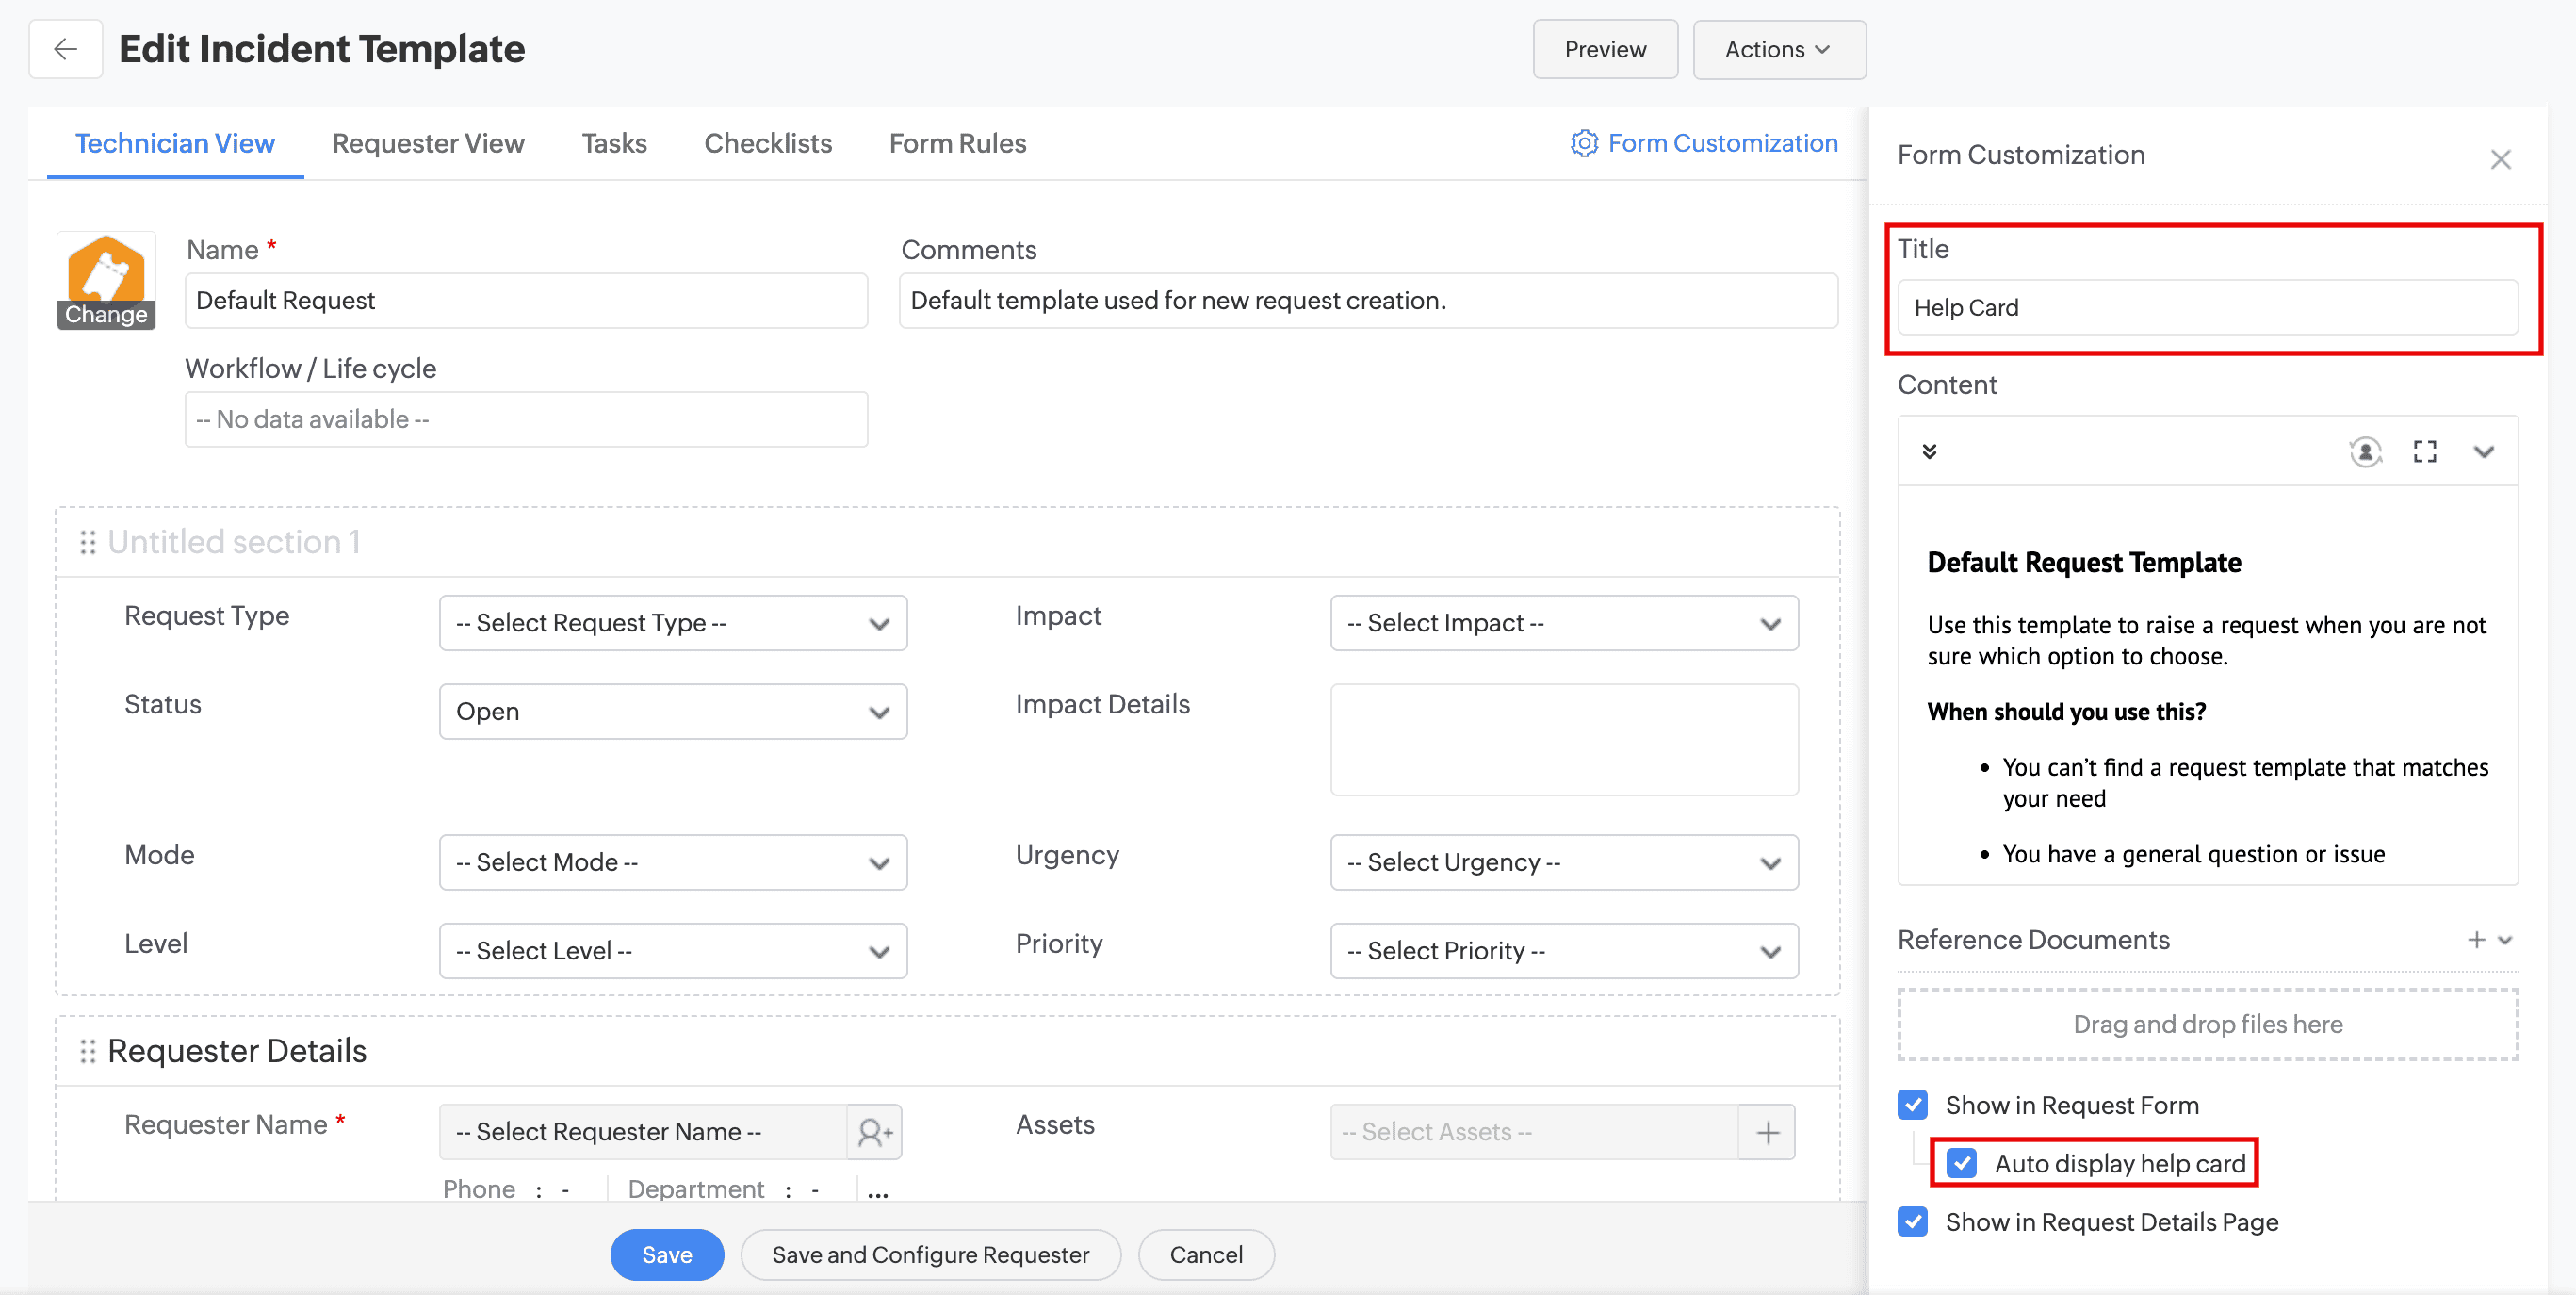
Help Card in Request Form
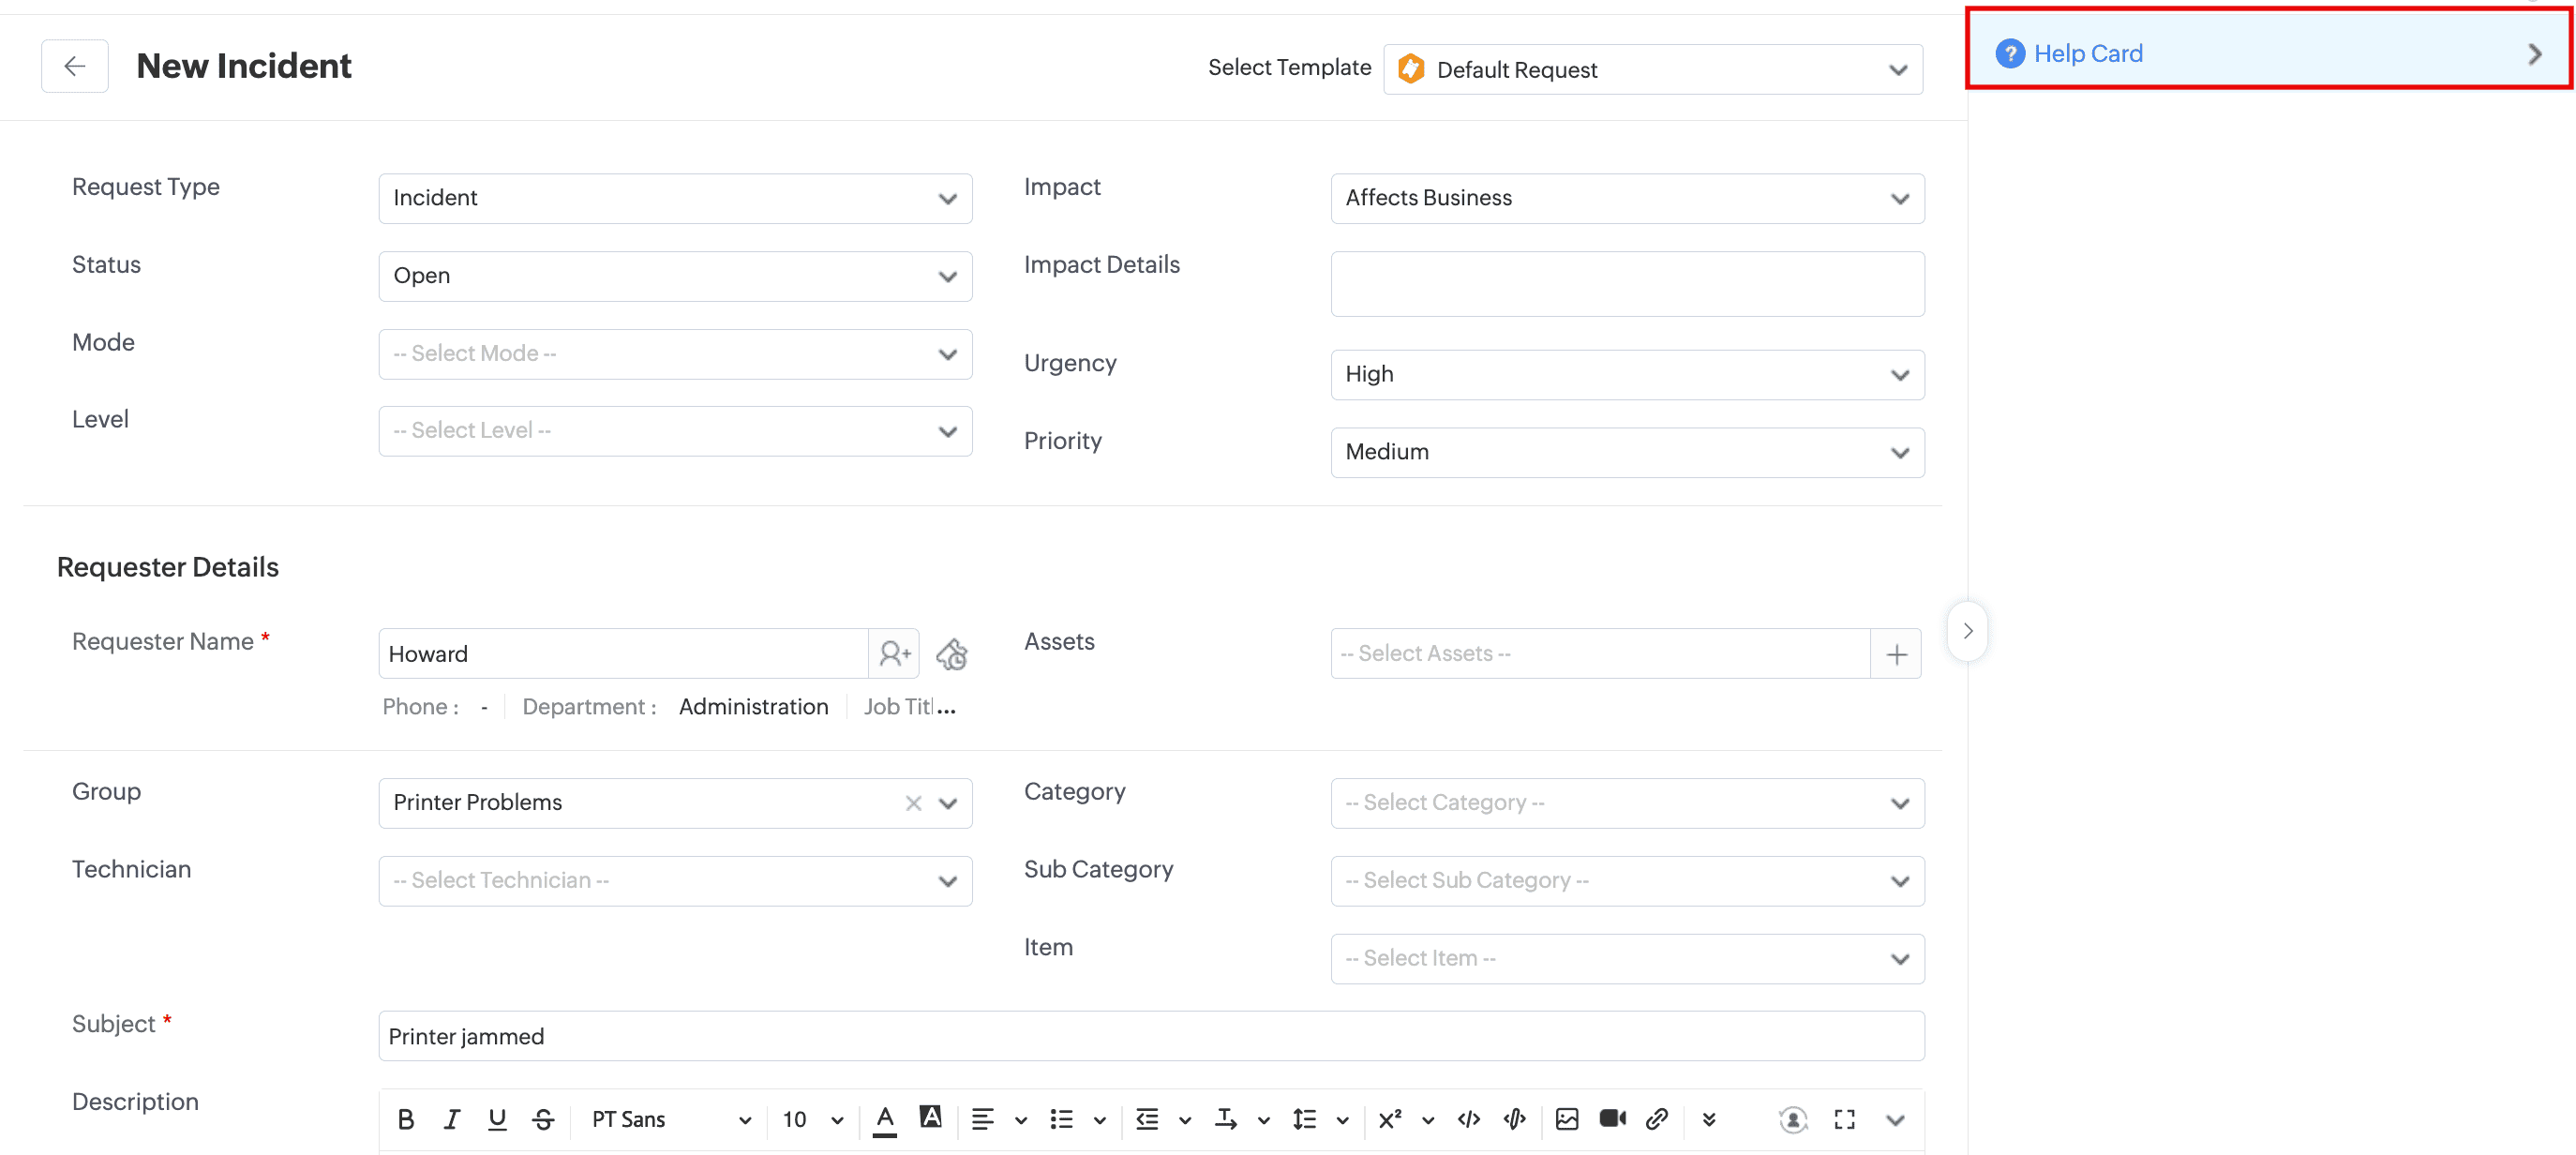
 icon.
icon.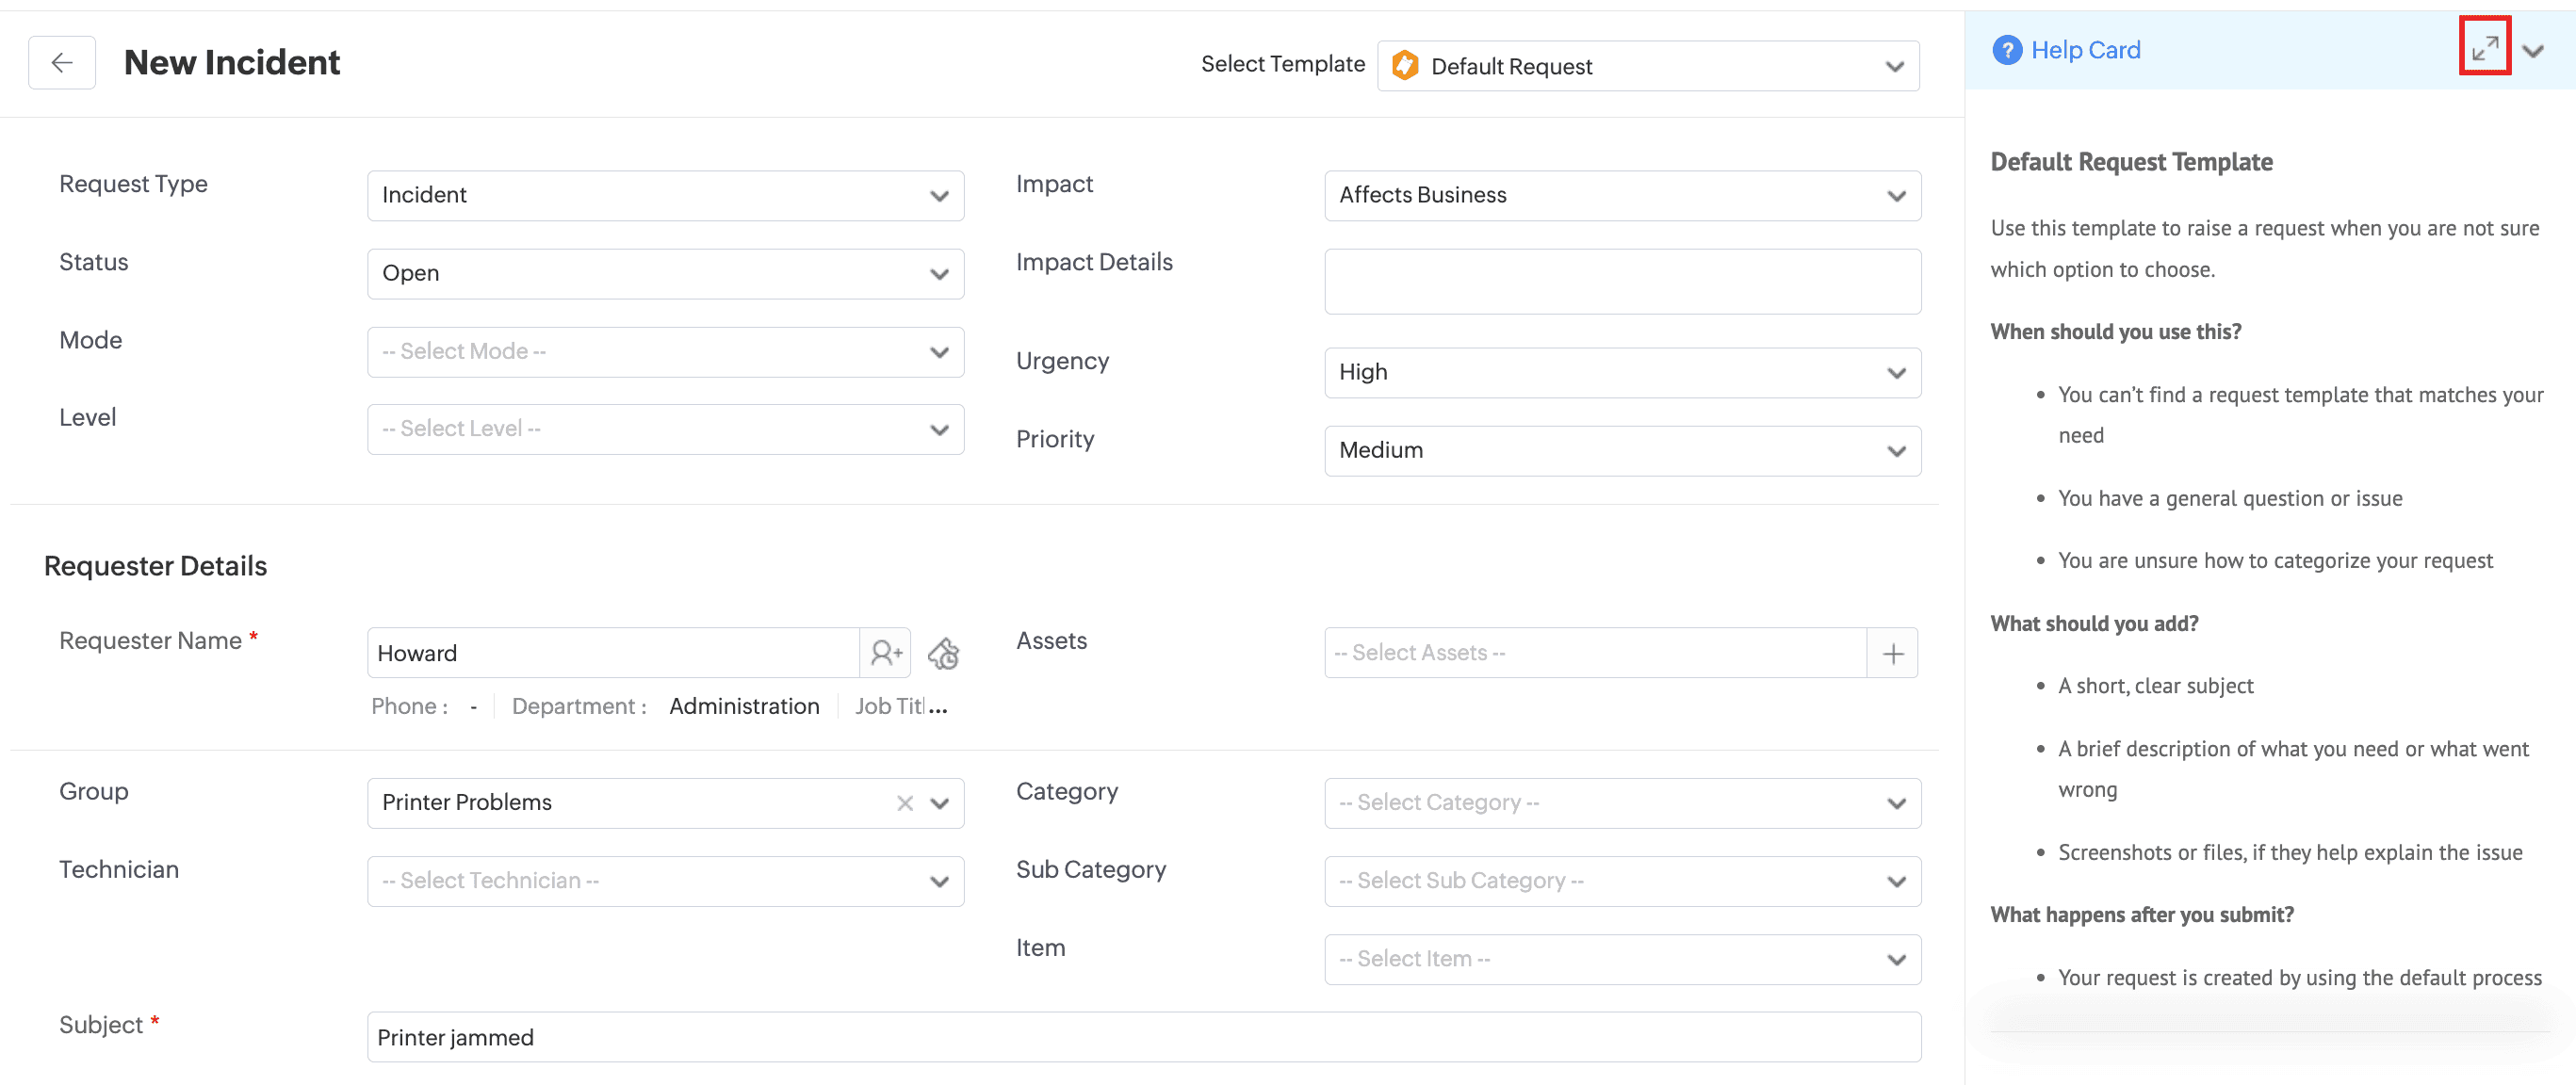
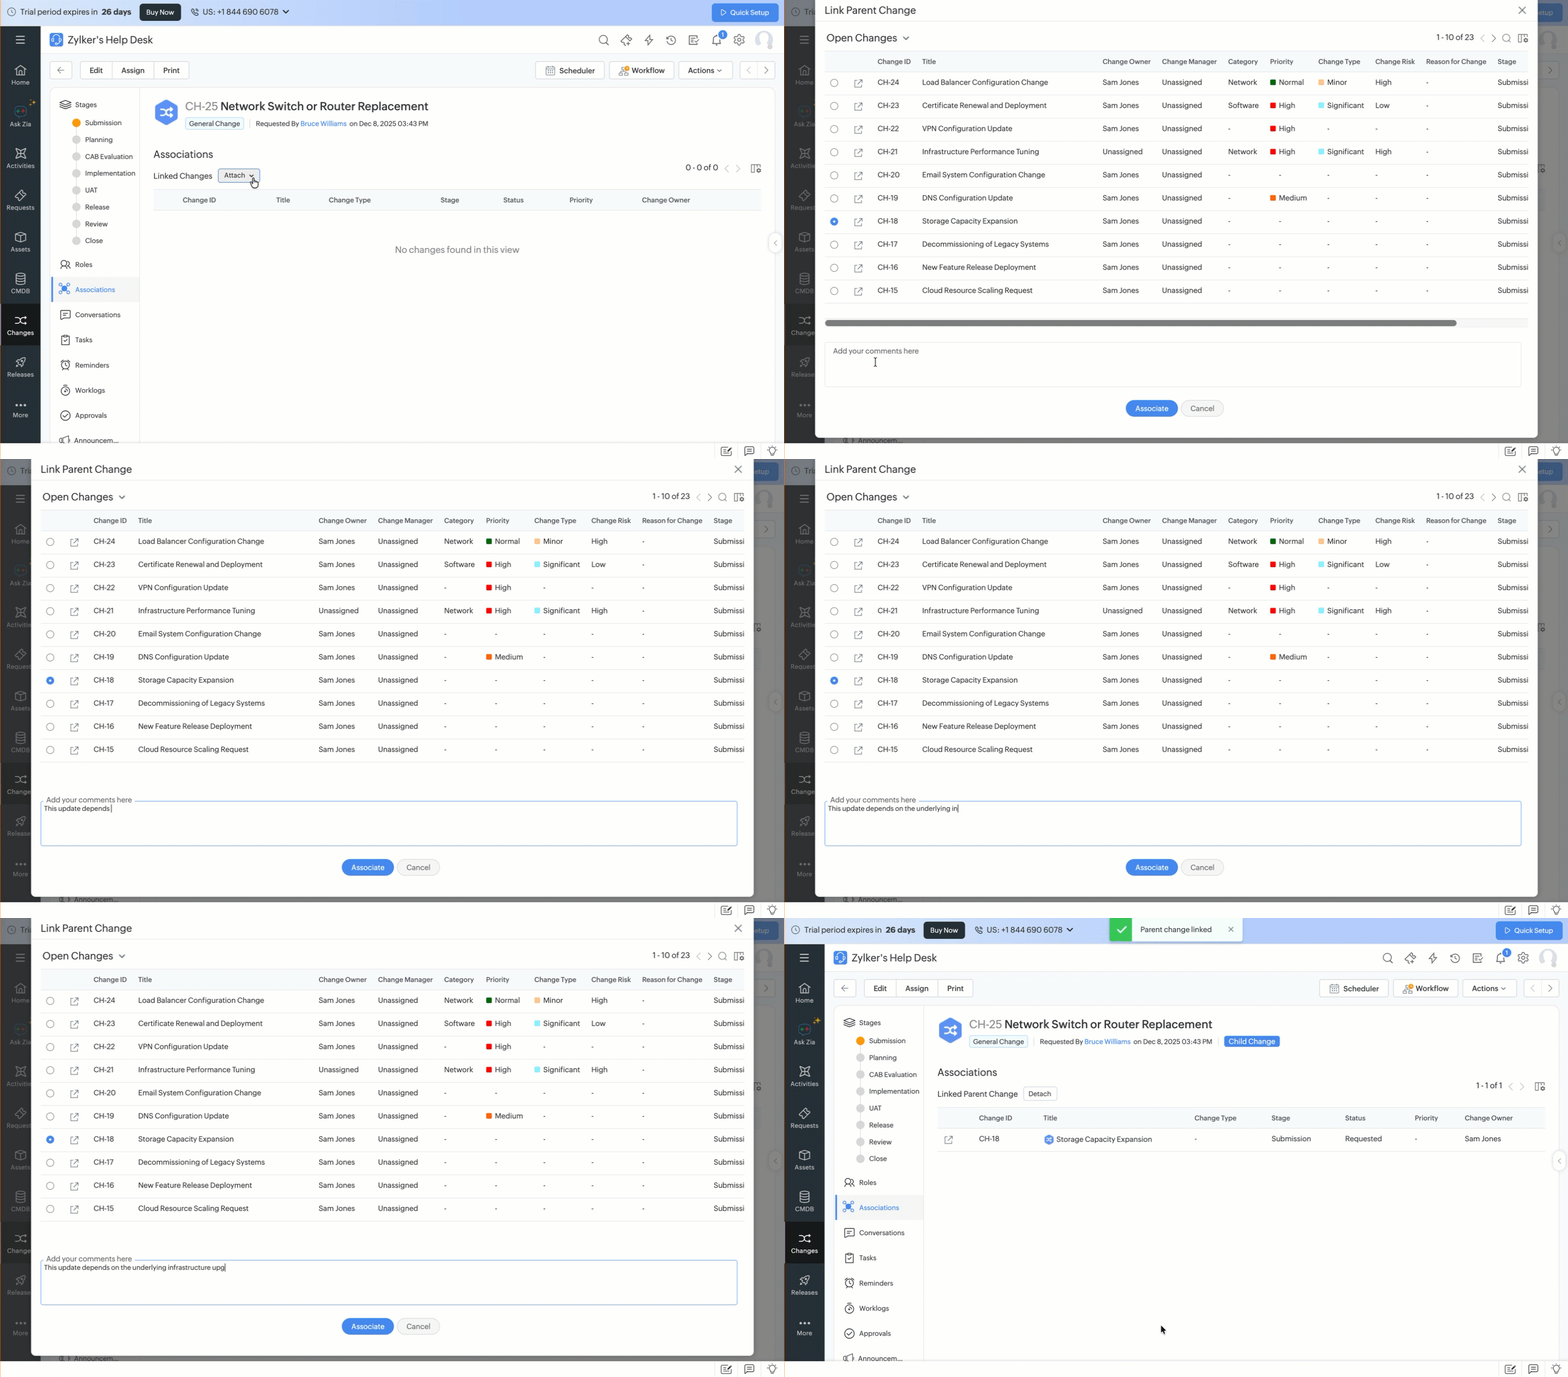
An Illustration of Linking Parent Change
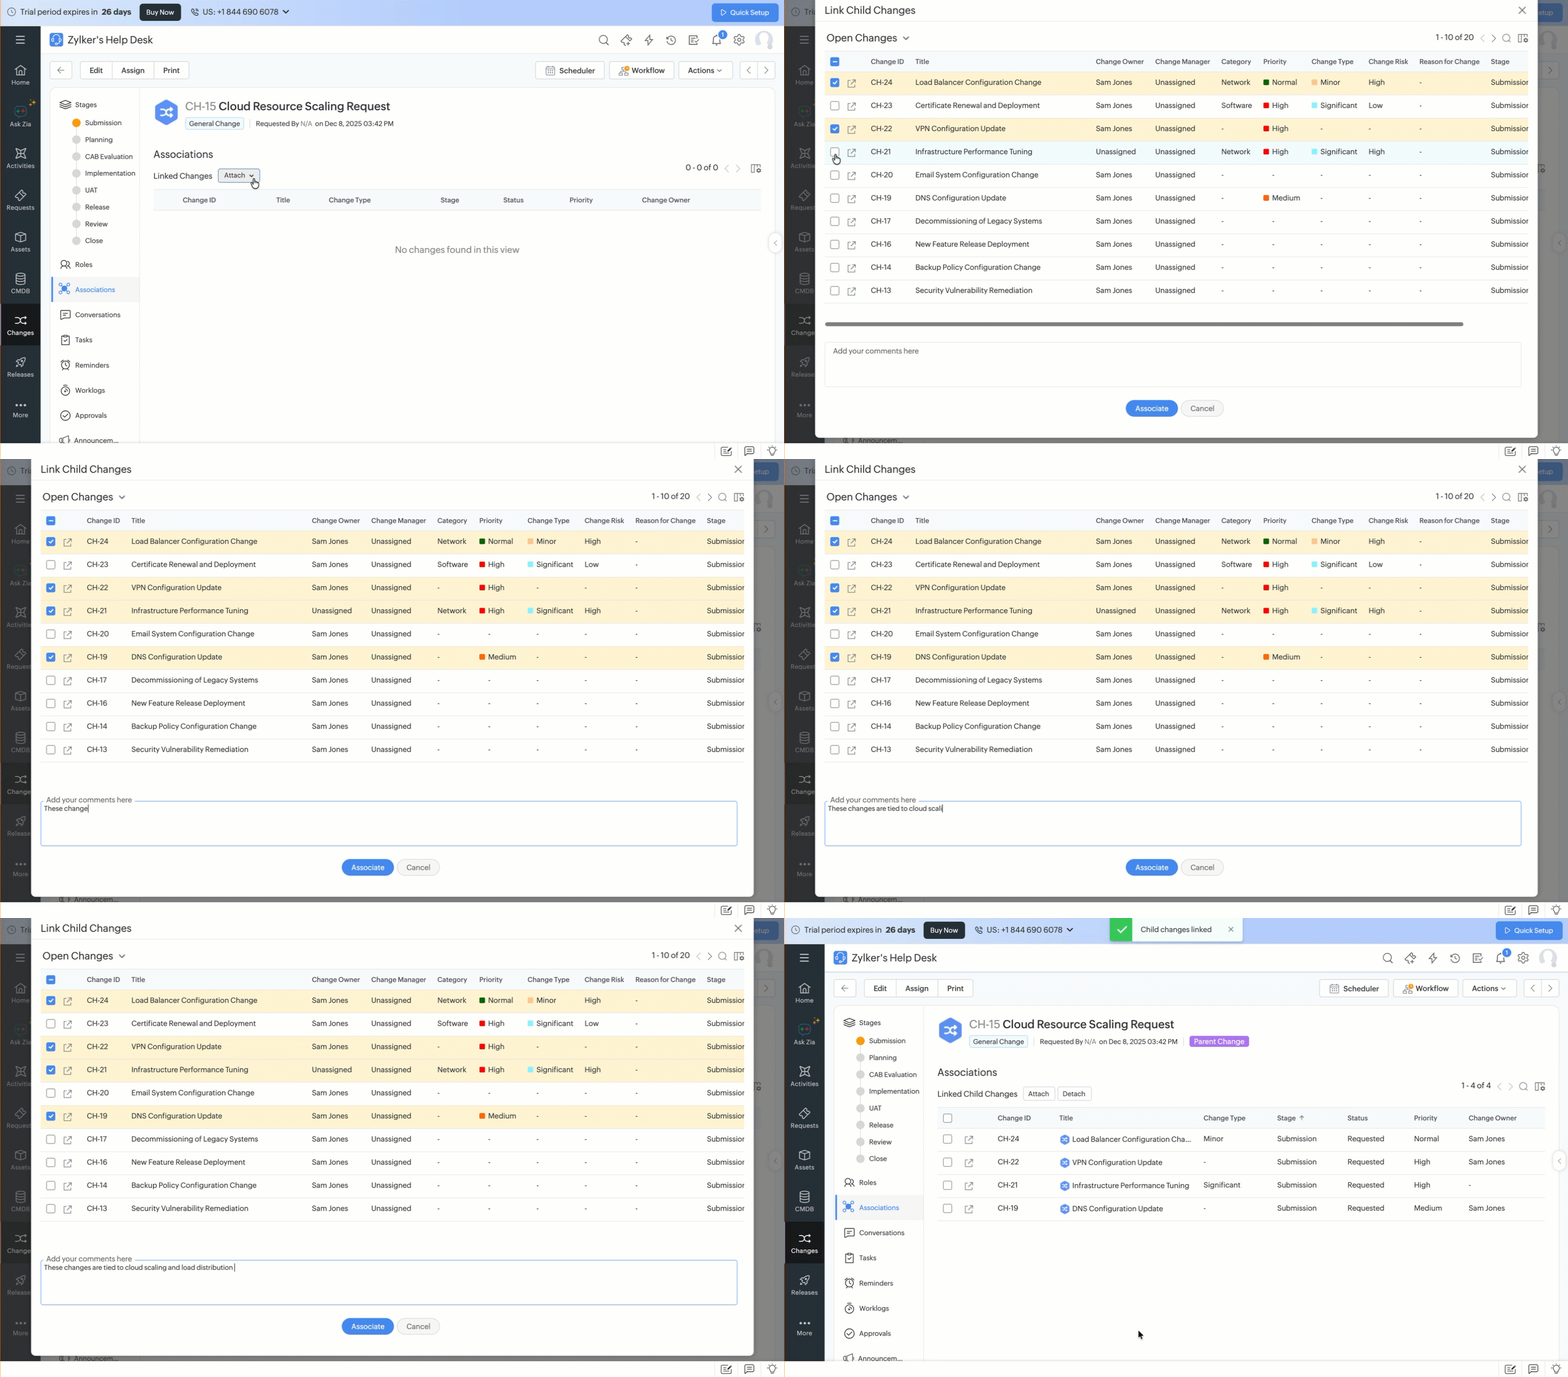
An Illustration of Linking Child Changes
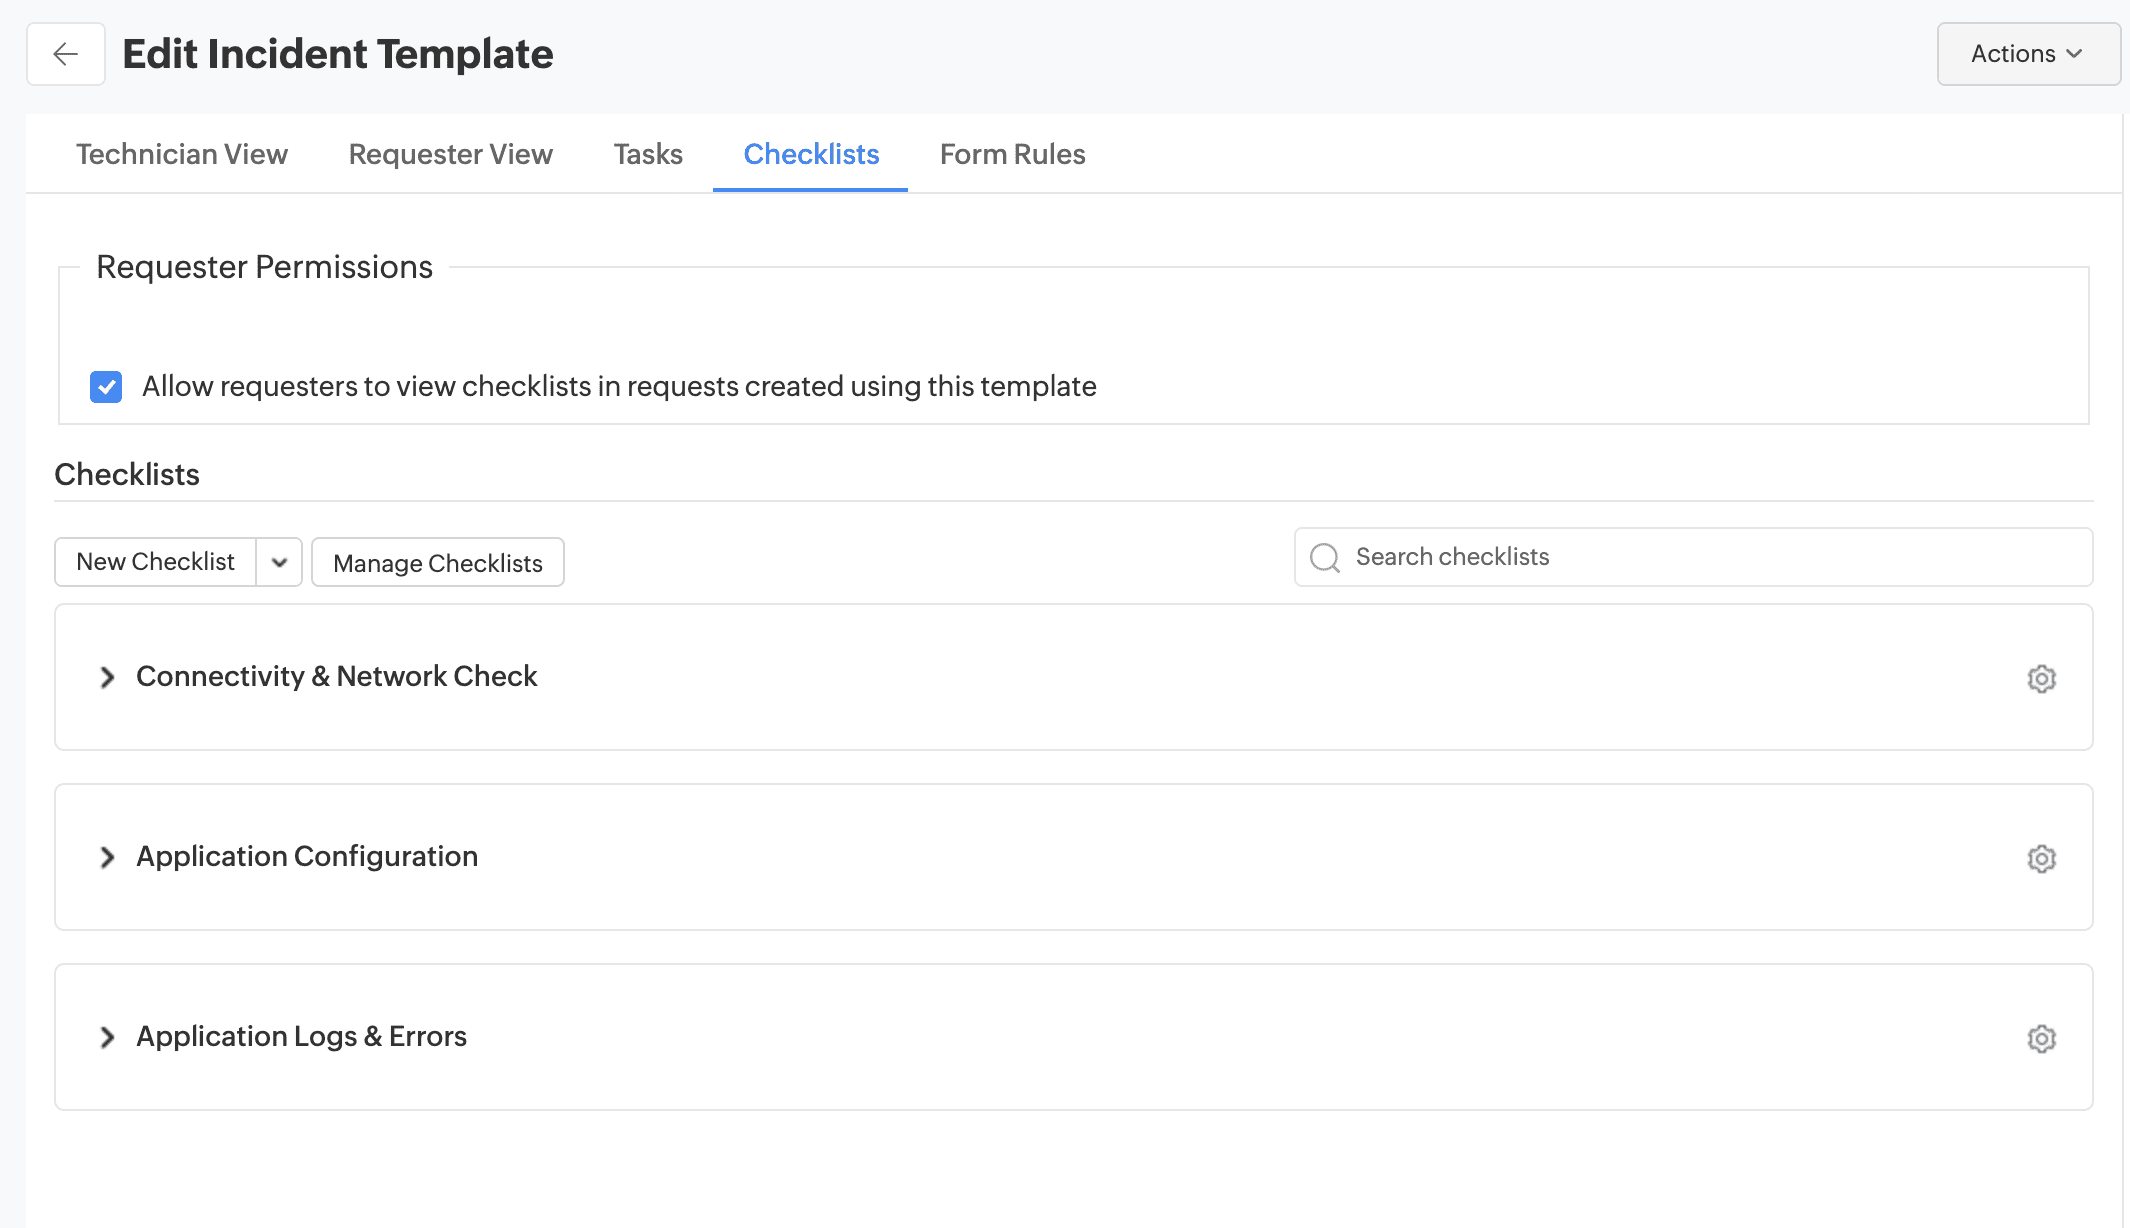
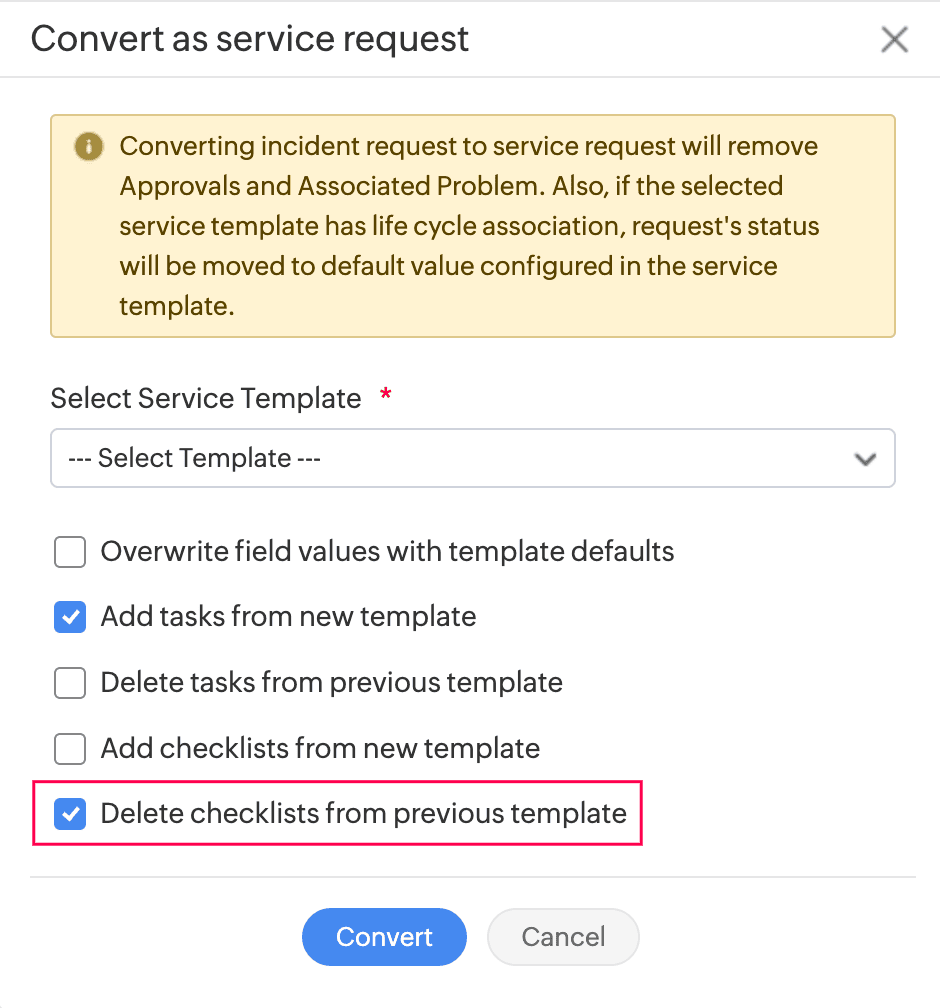
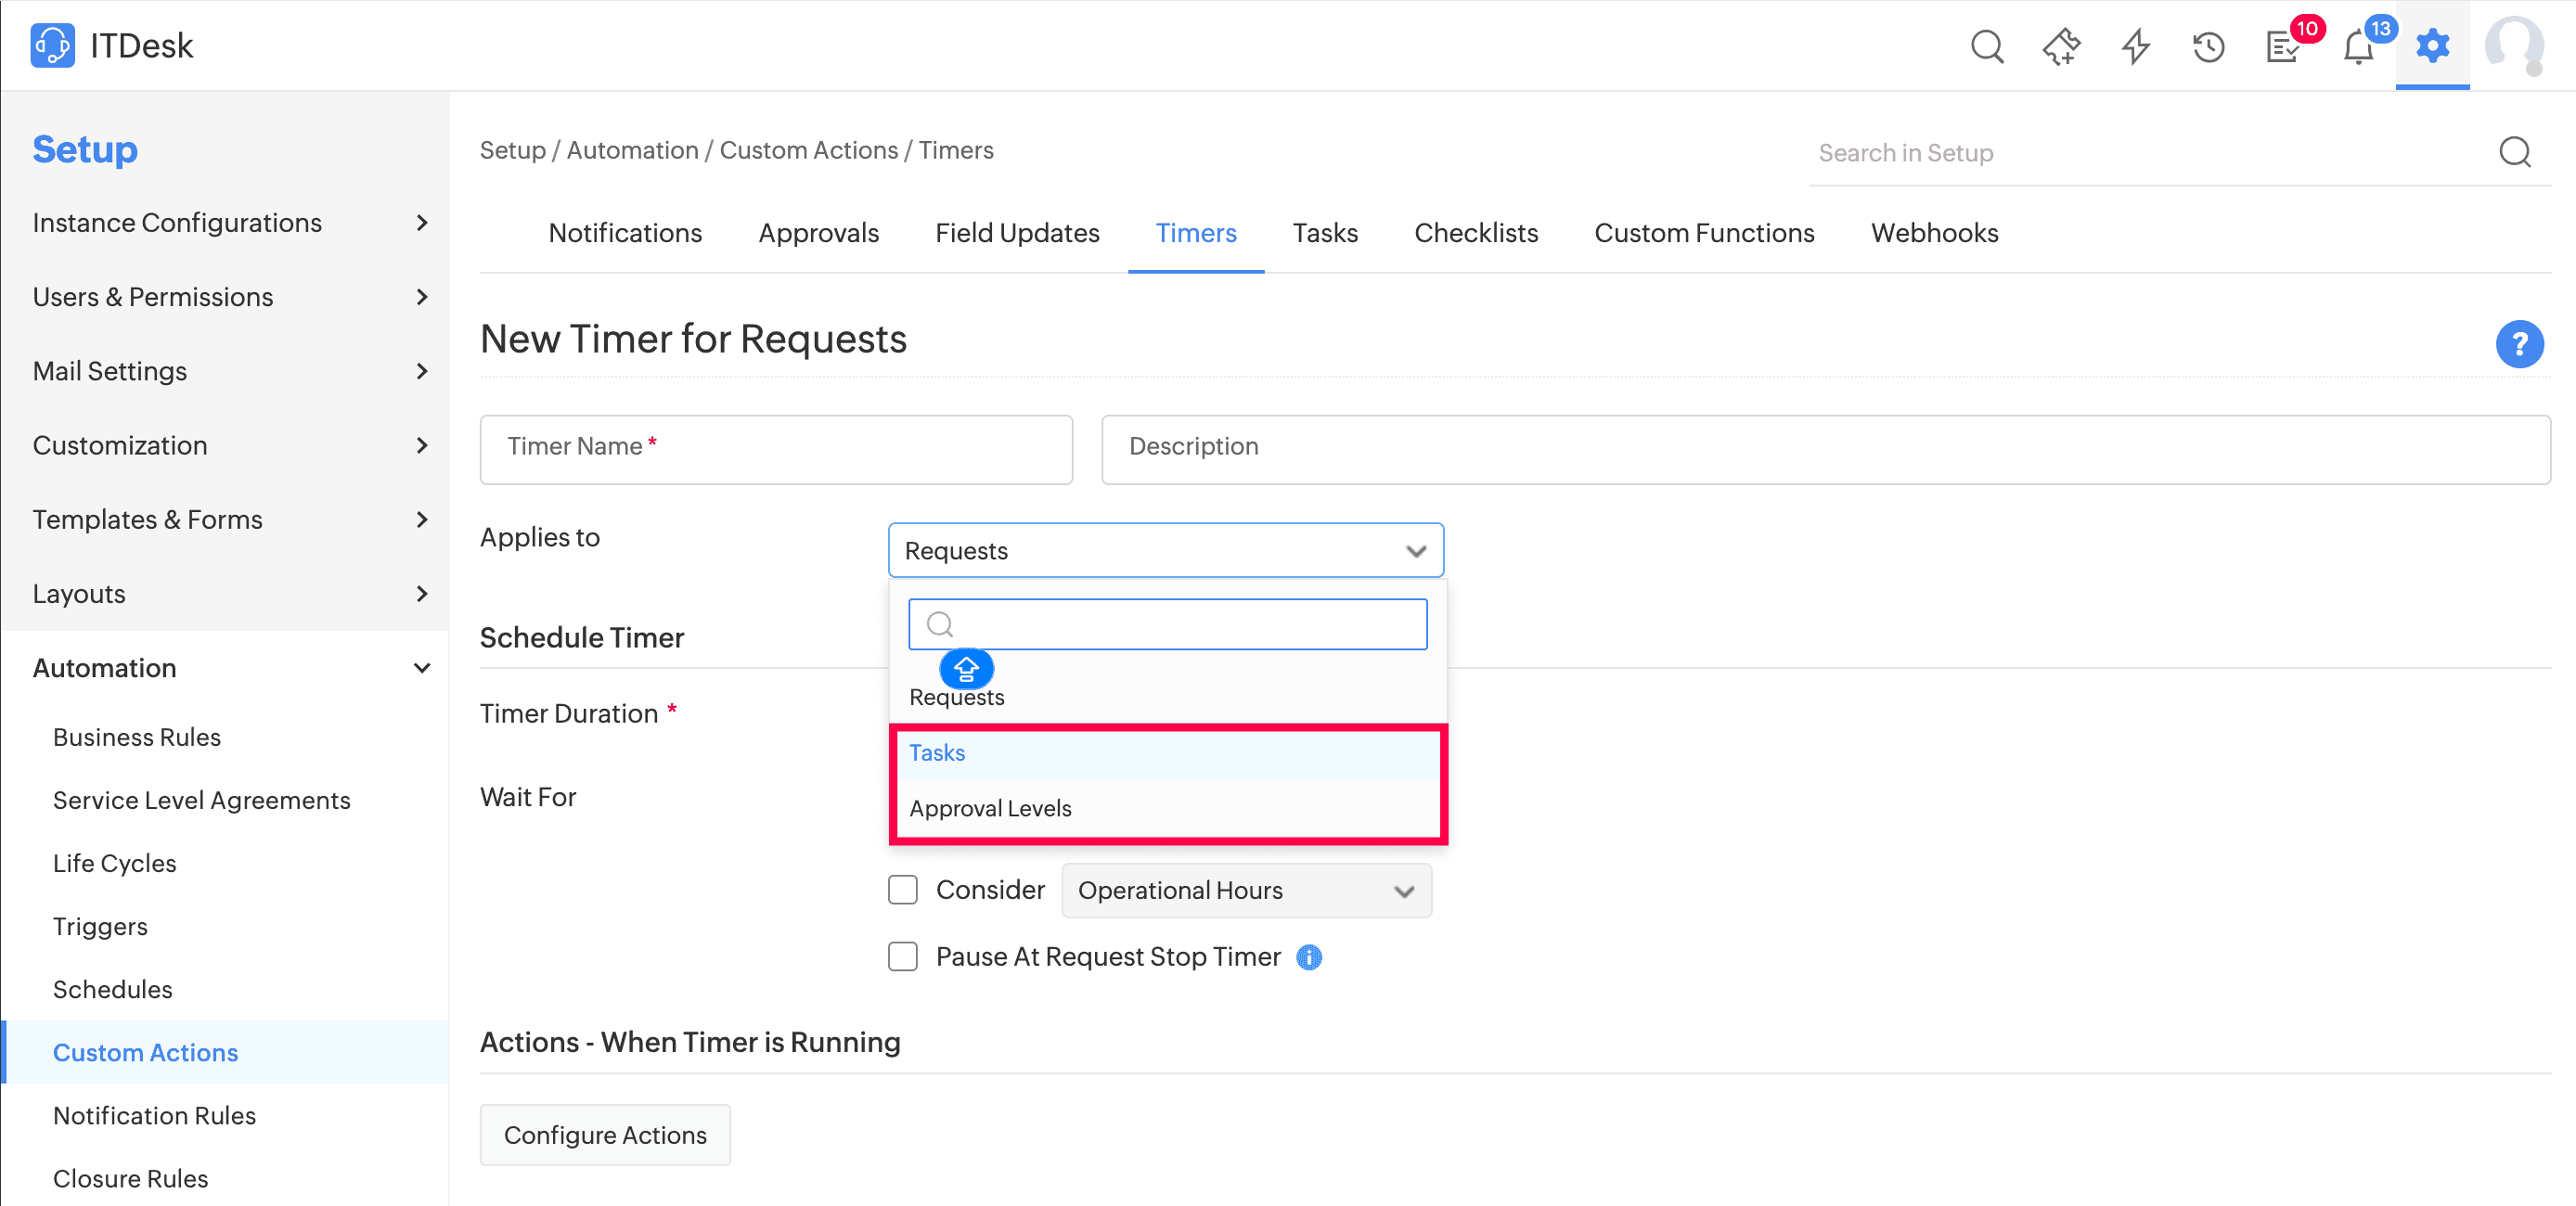
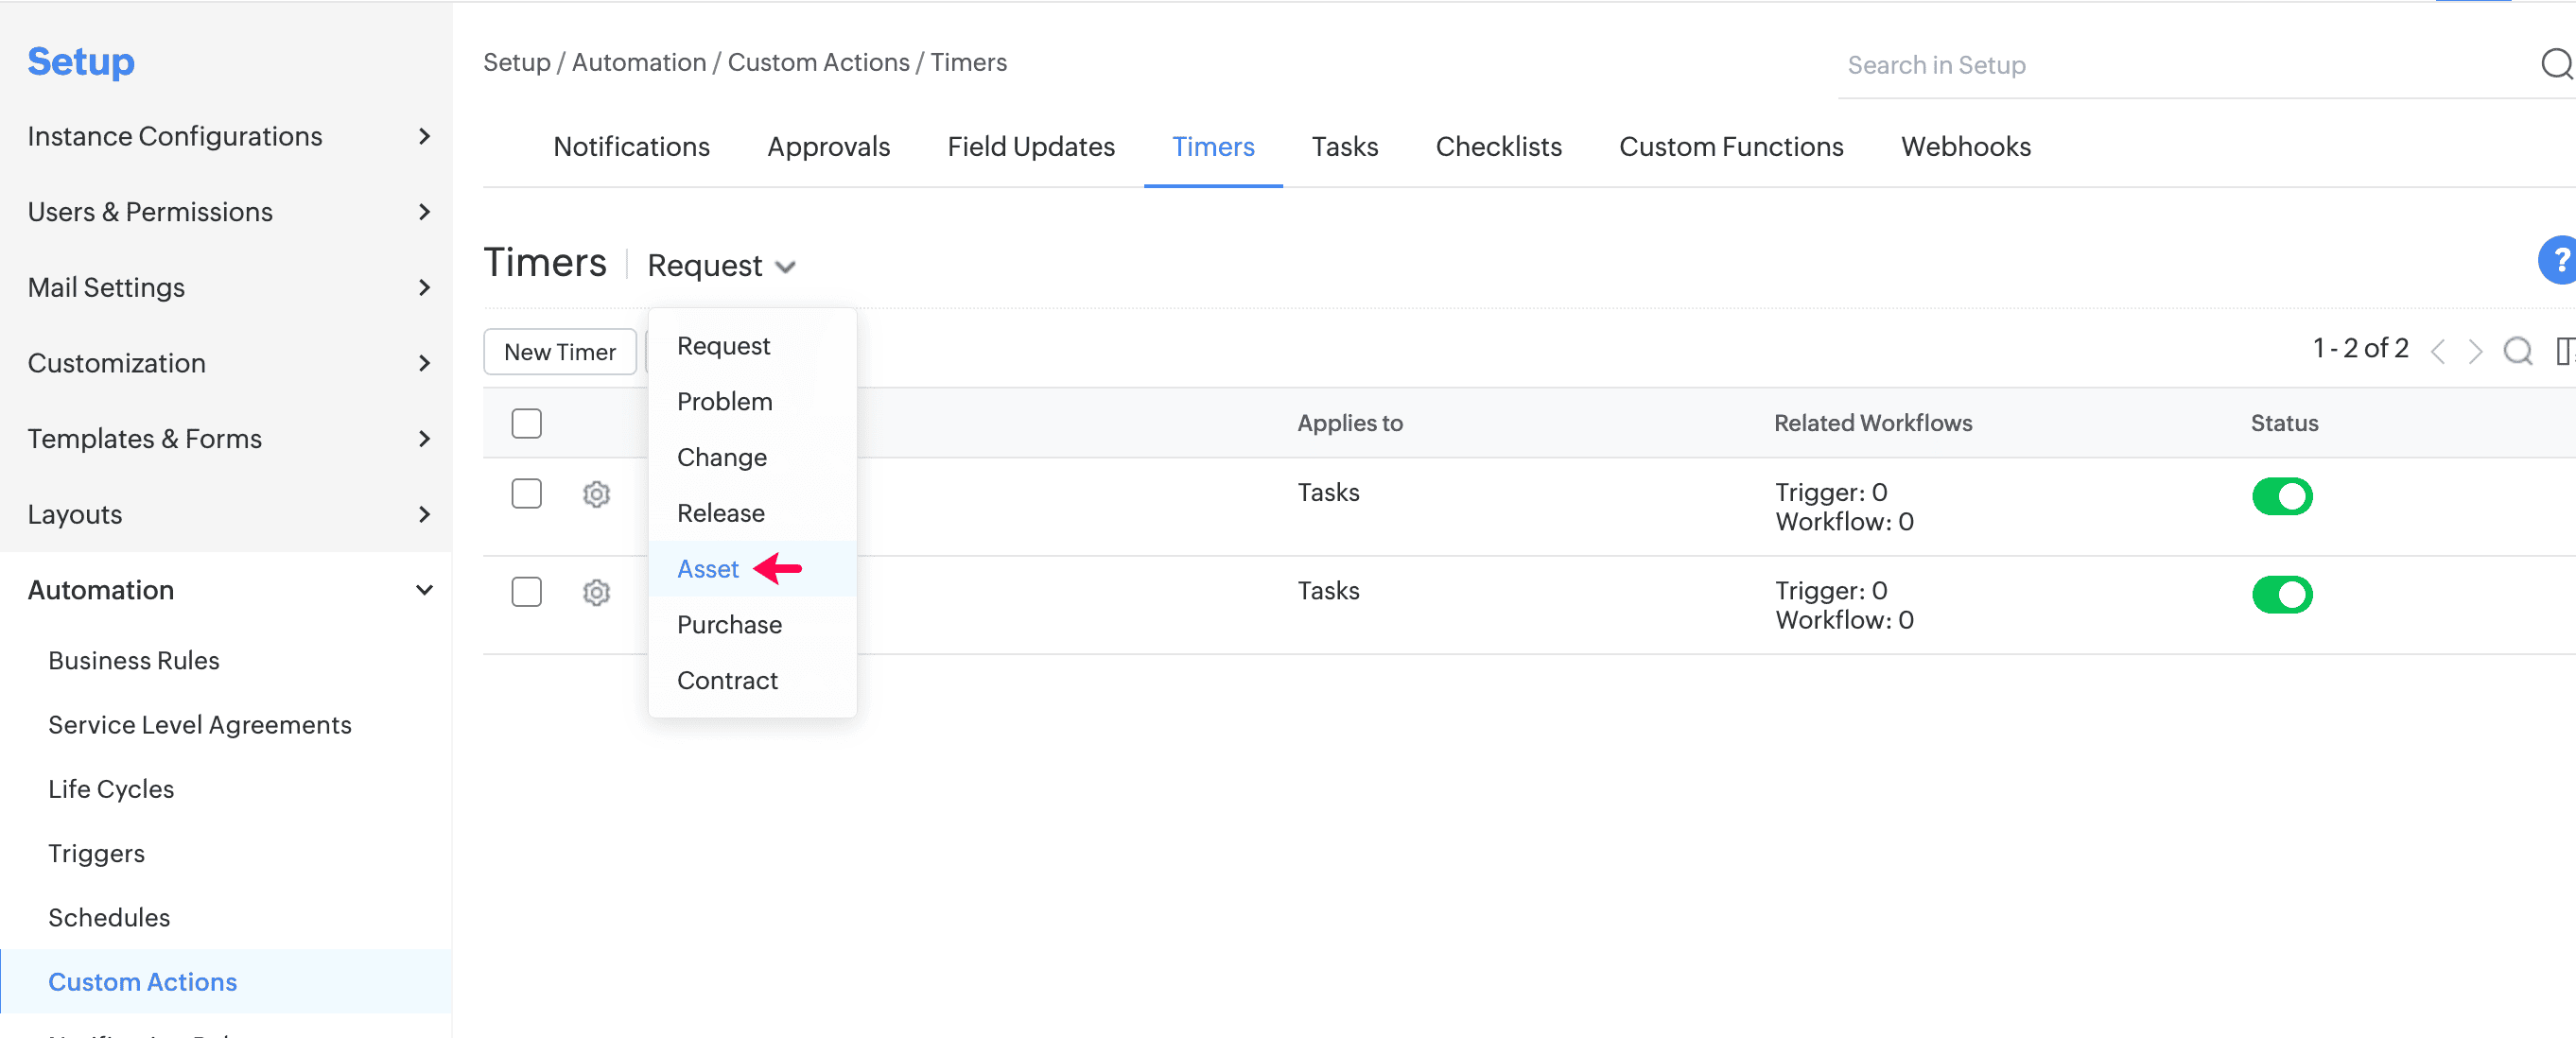
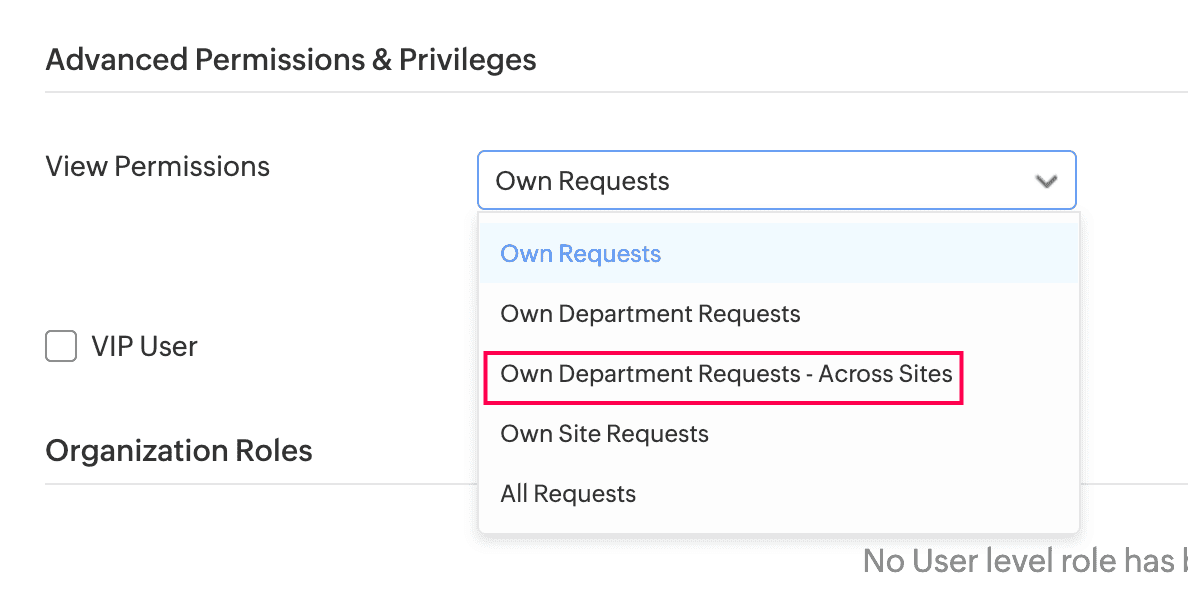
Requester Allowed To View | View Permissions |
|---|---|
| All Requests | All Requests |
| All their site requests | Own Site Requests |
| All their department requests | Own Department Requests |
| Only their own requests | Own Requests |
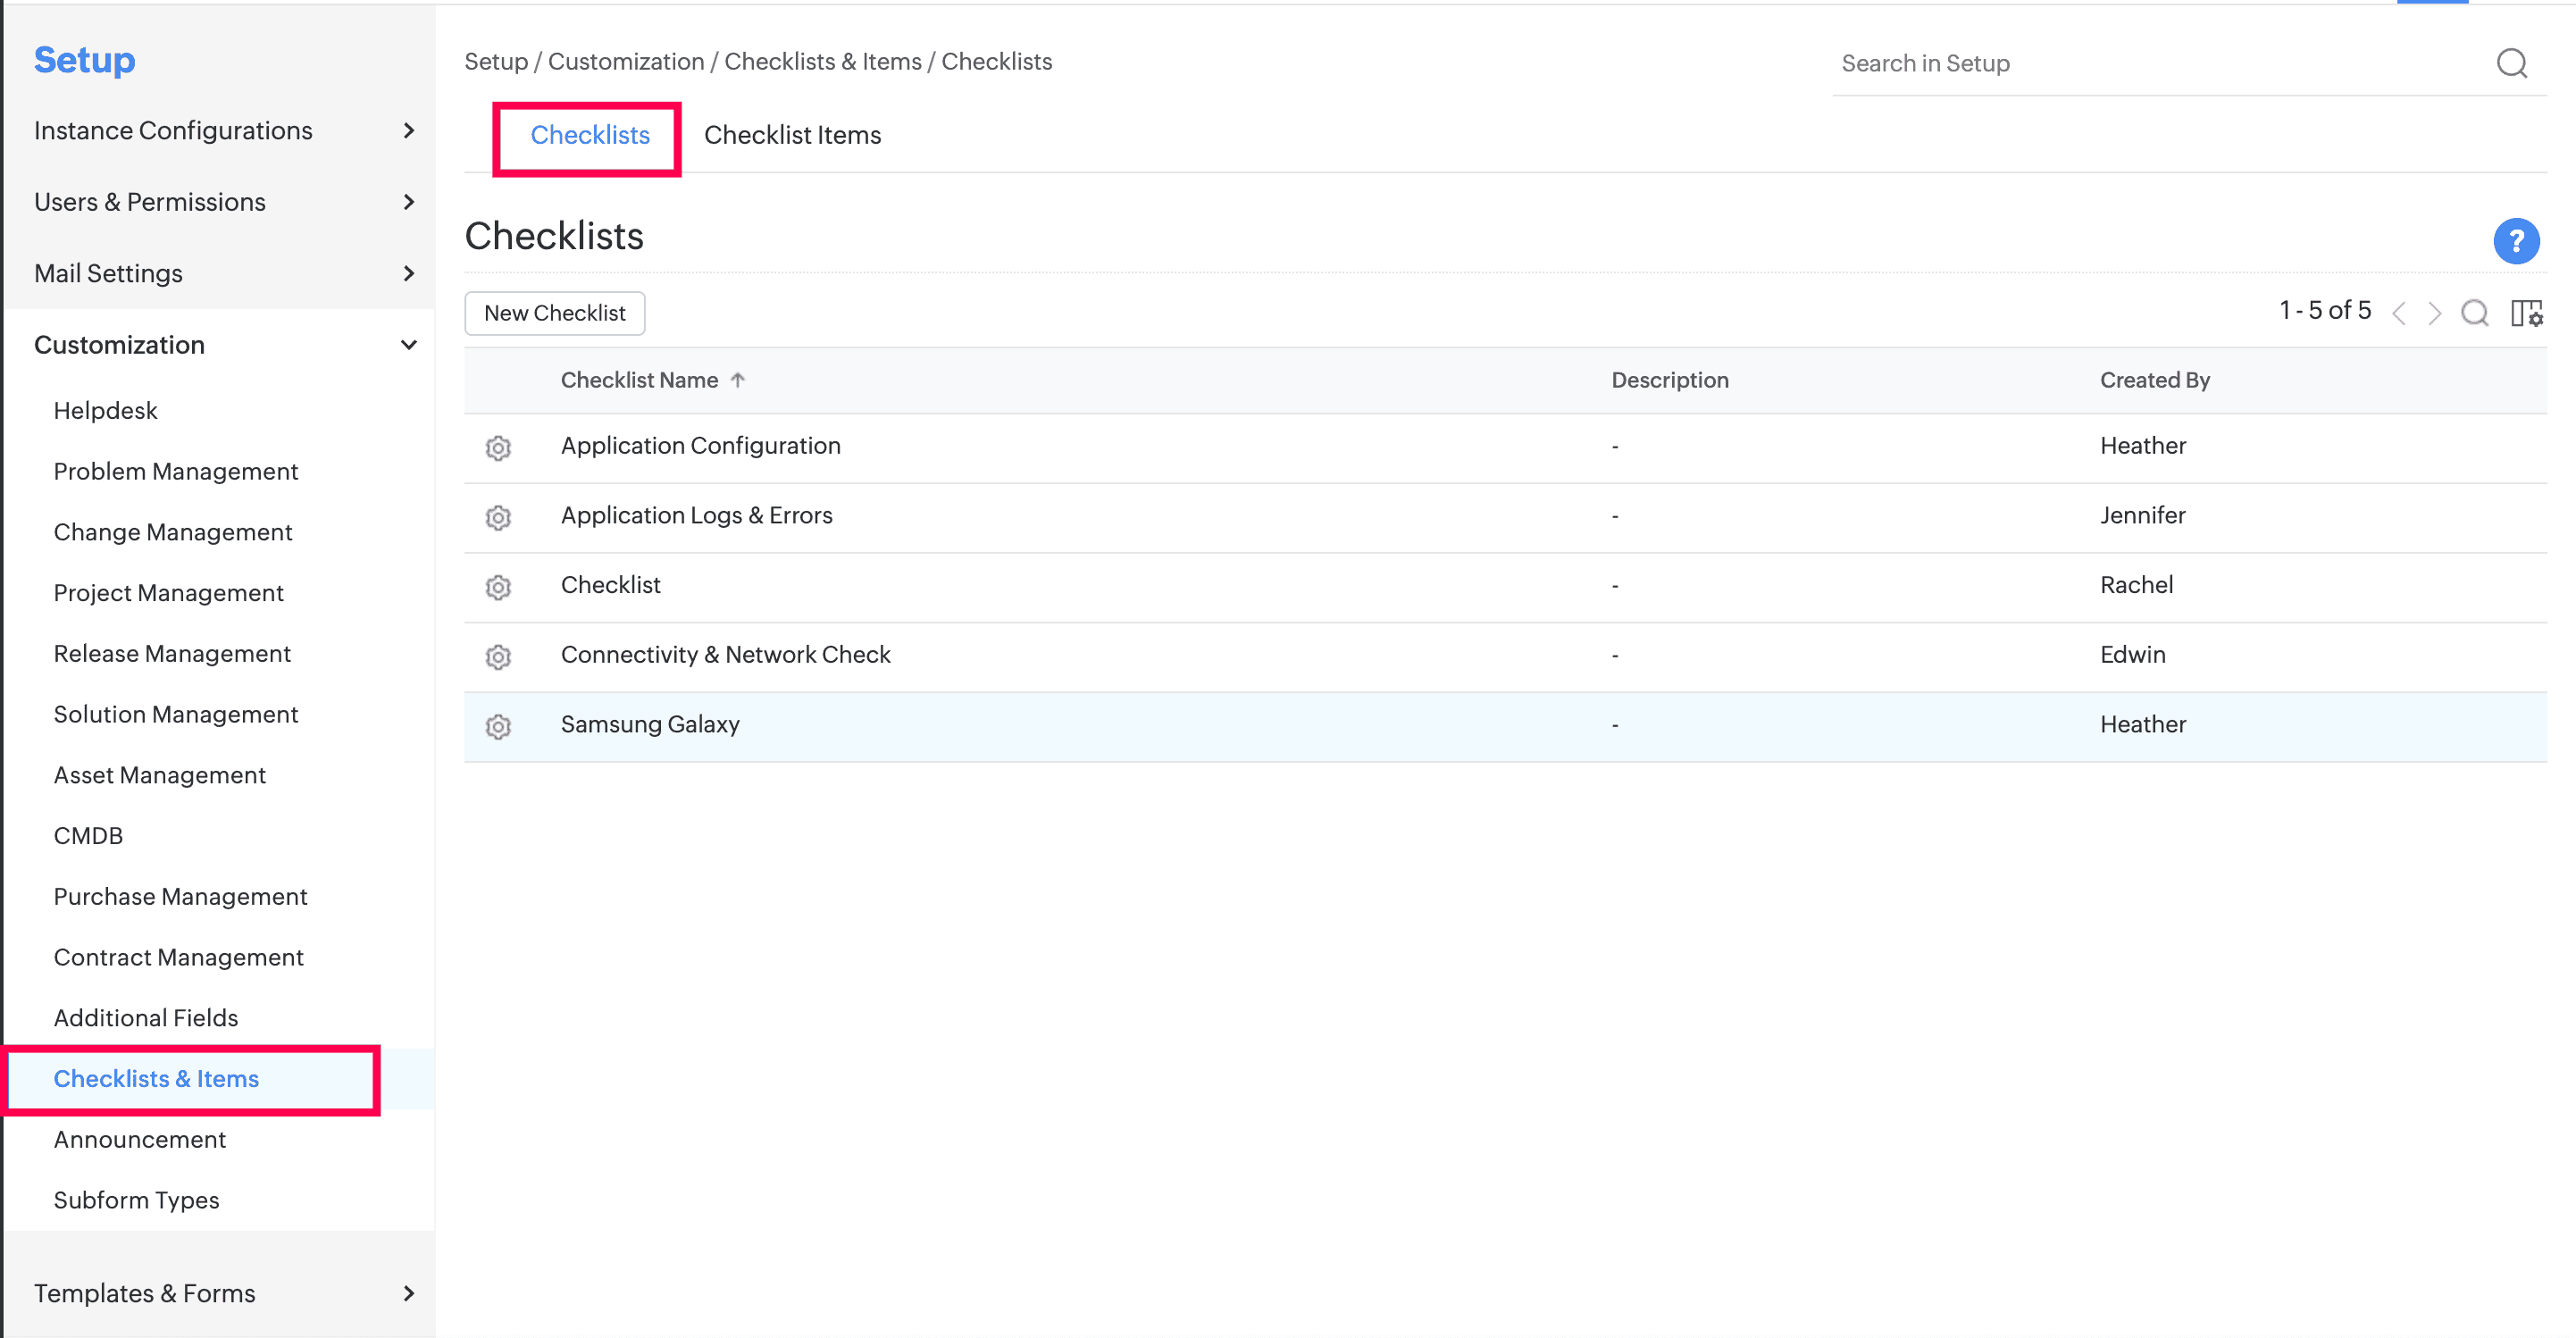
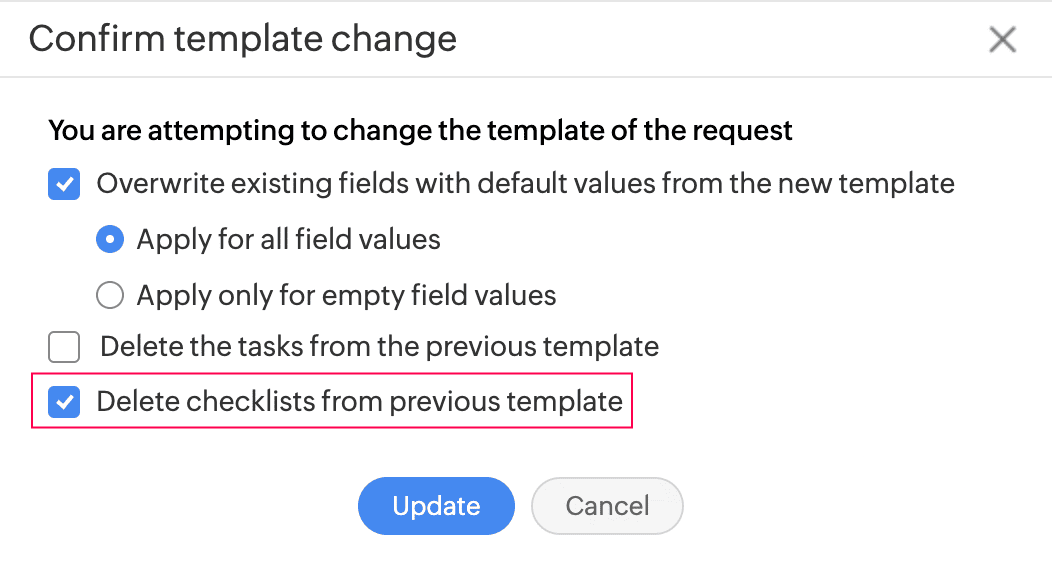
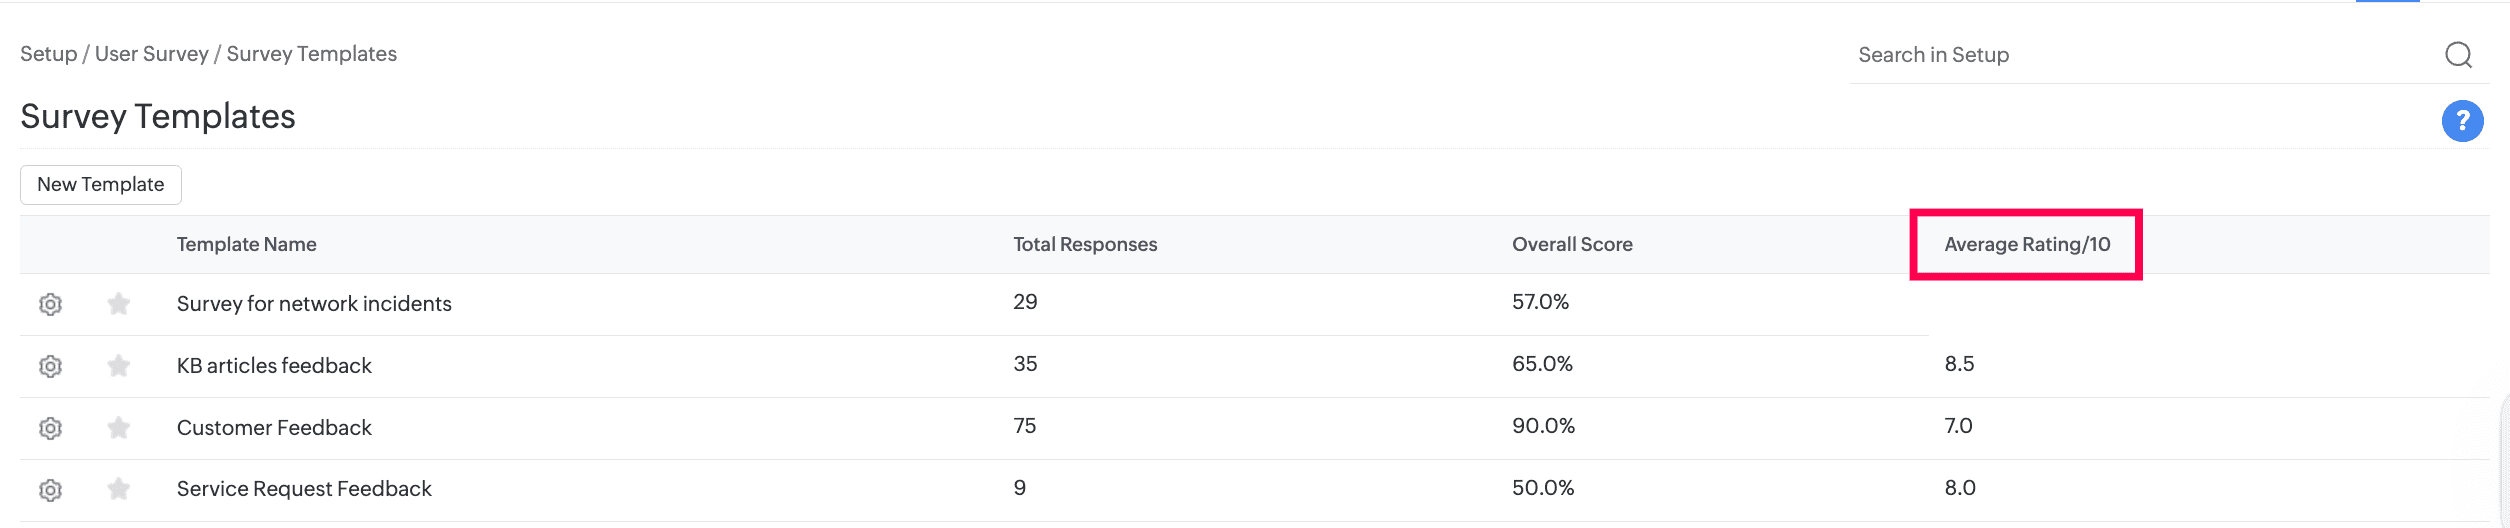
Survey reports now display data based on user roles.
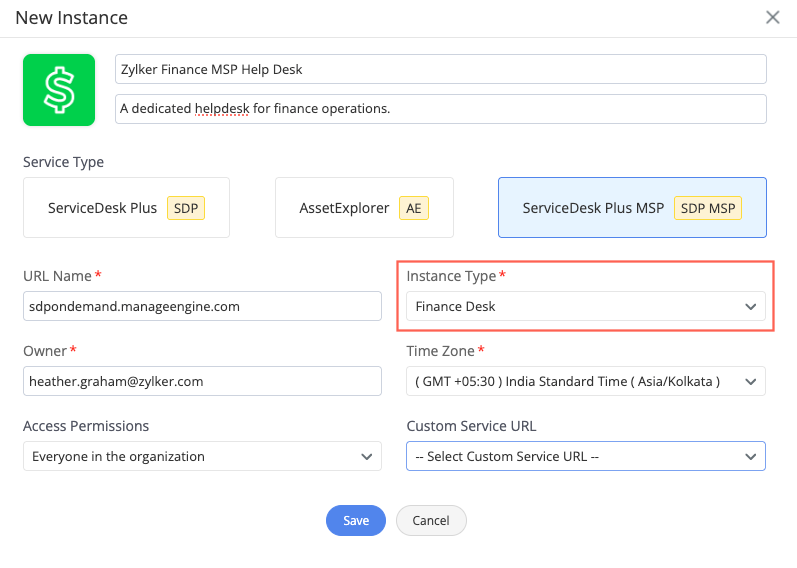
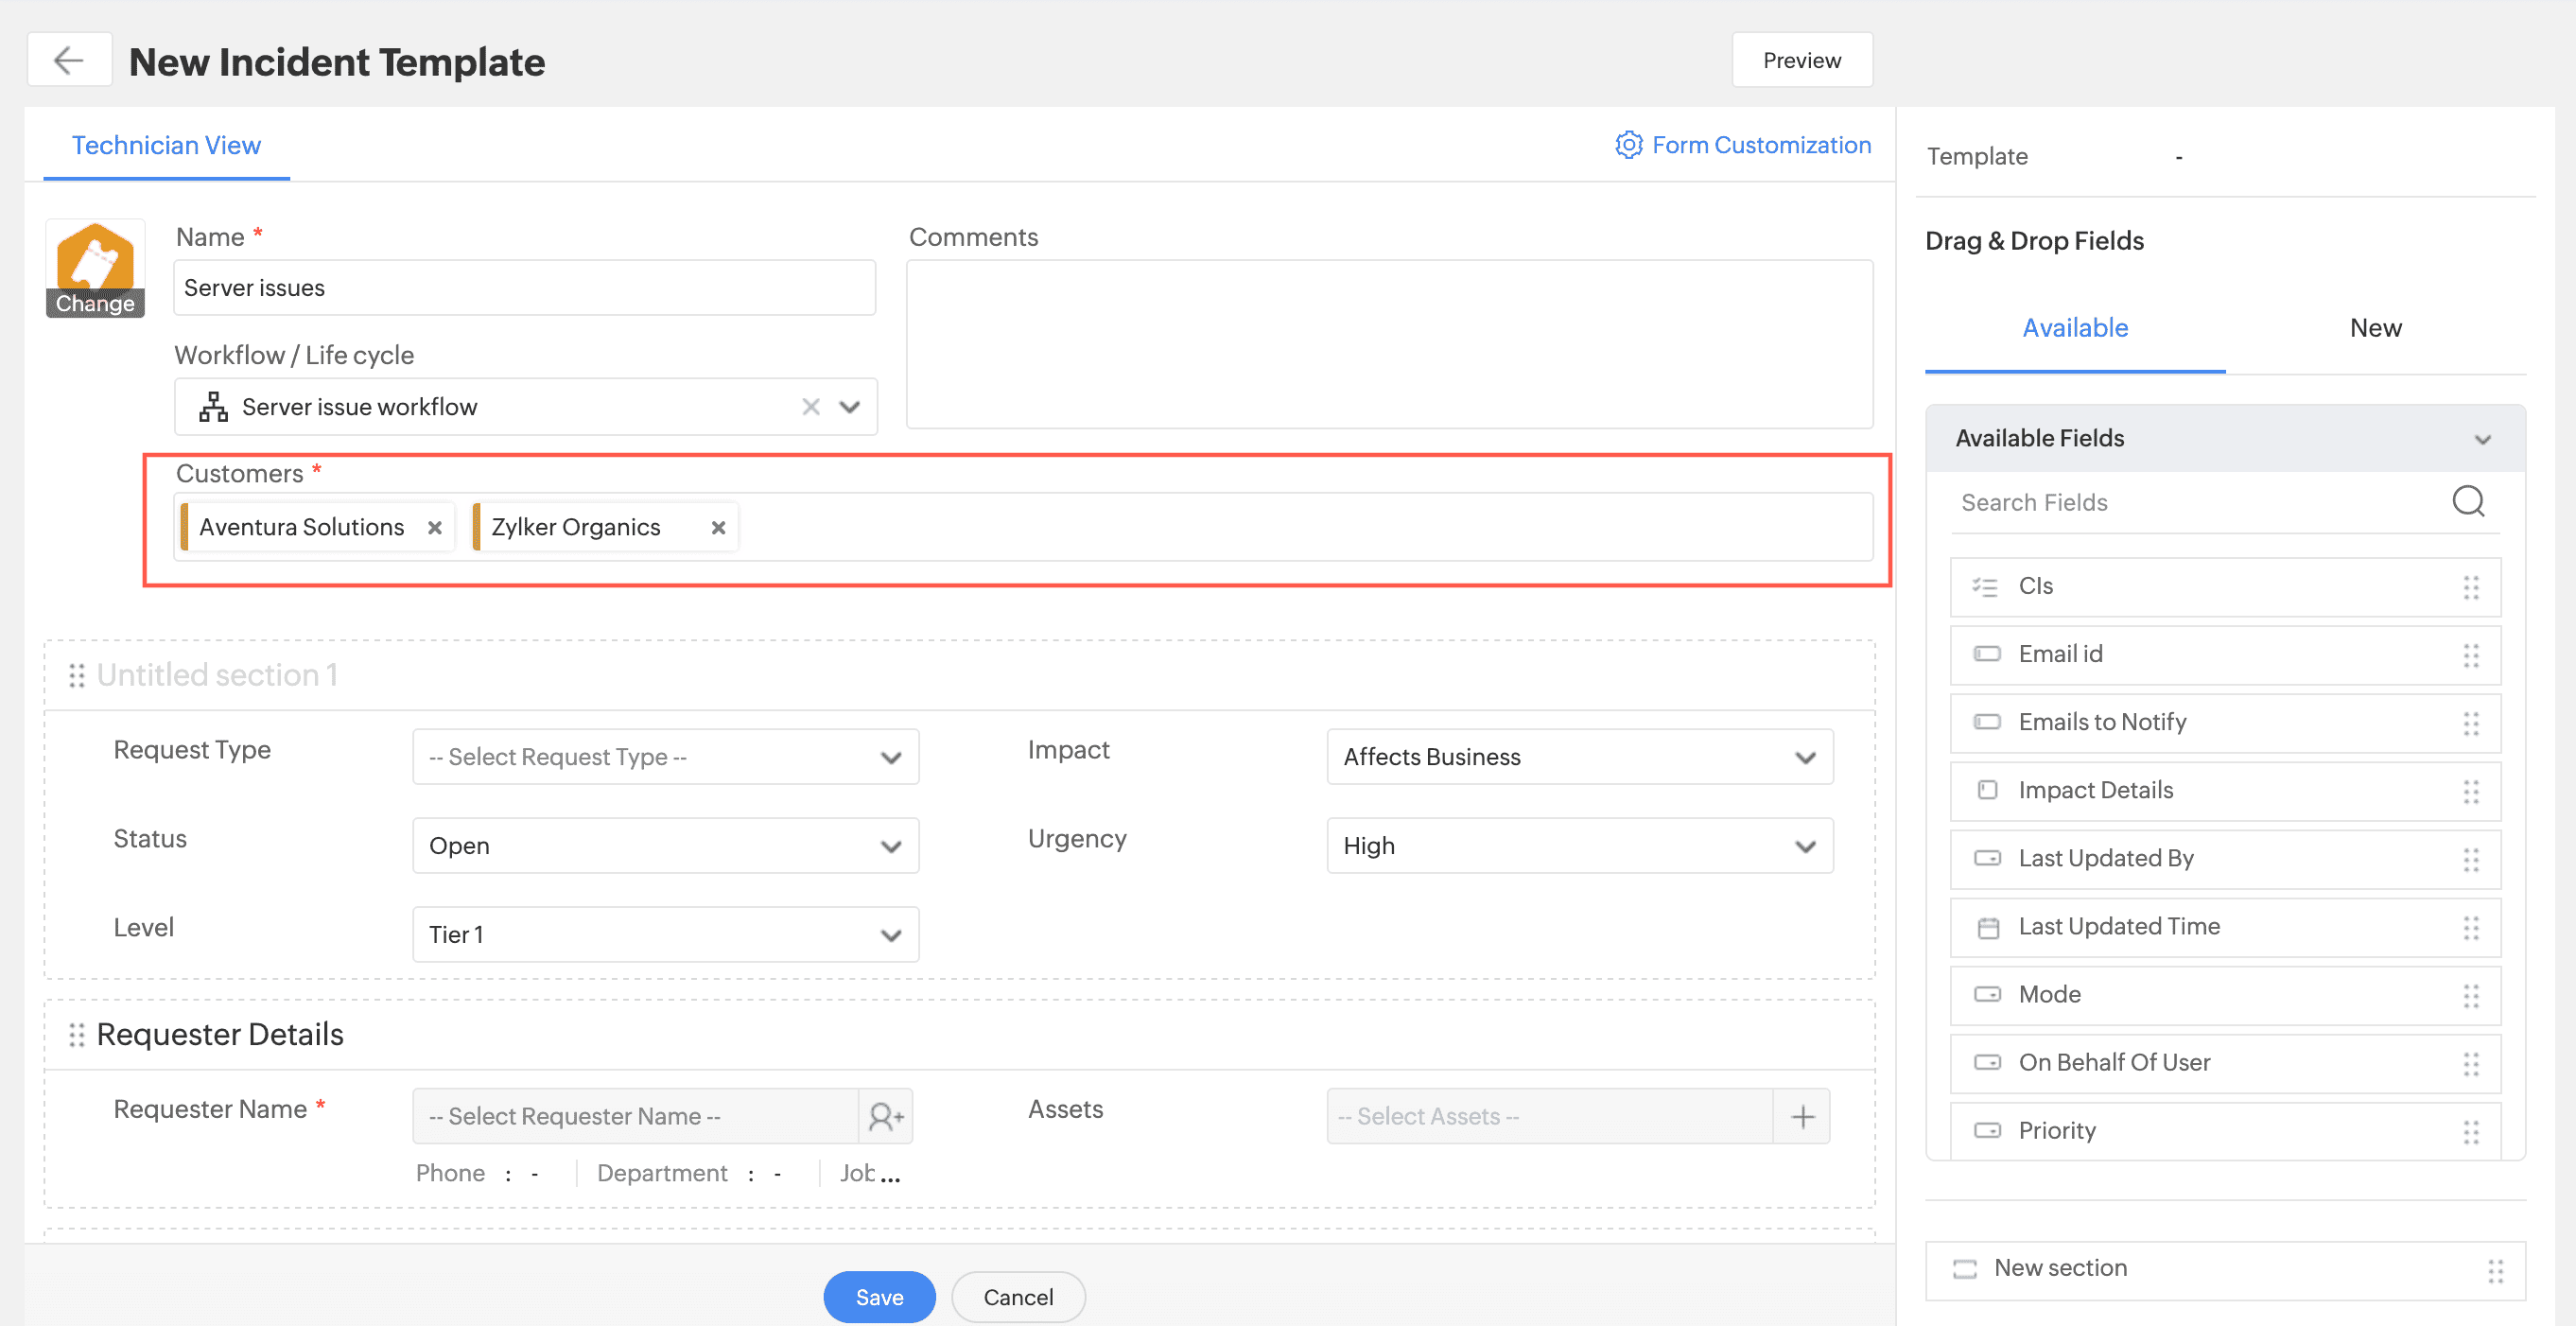
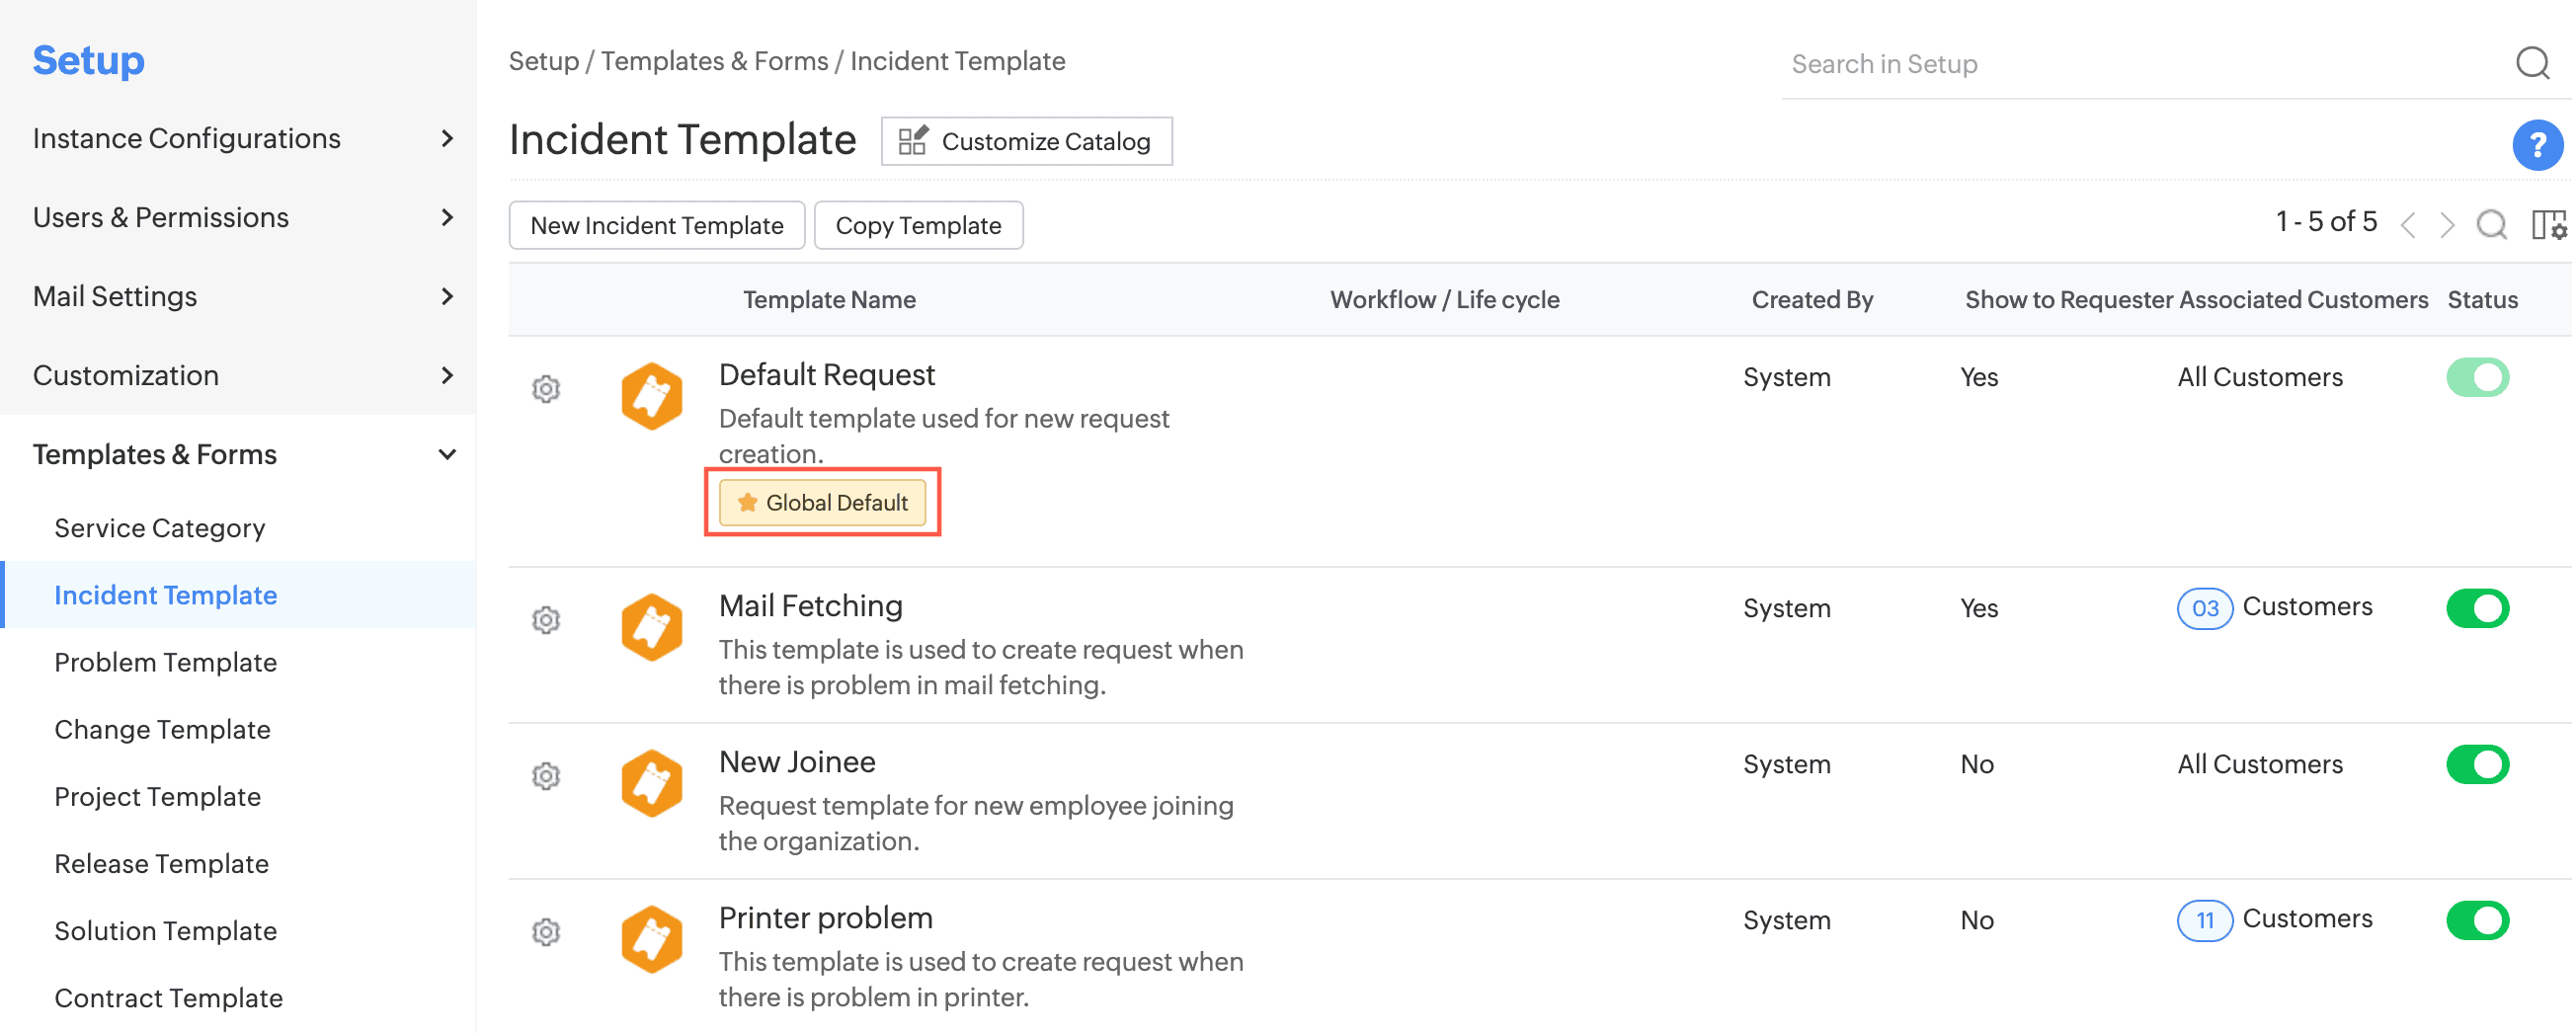
We are now introducing a dedicated Finance Desk instance designed to manage and streamline finance-related functions.
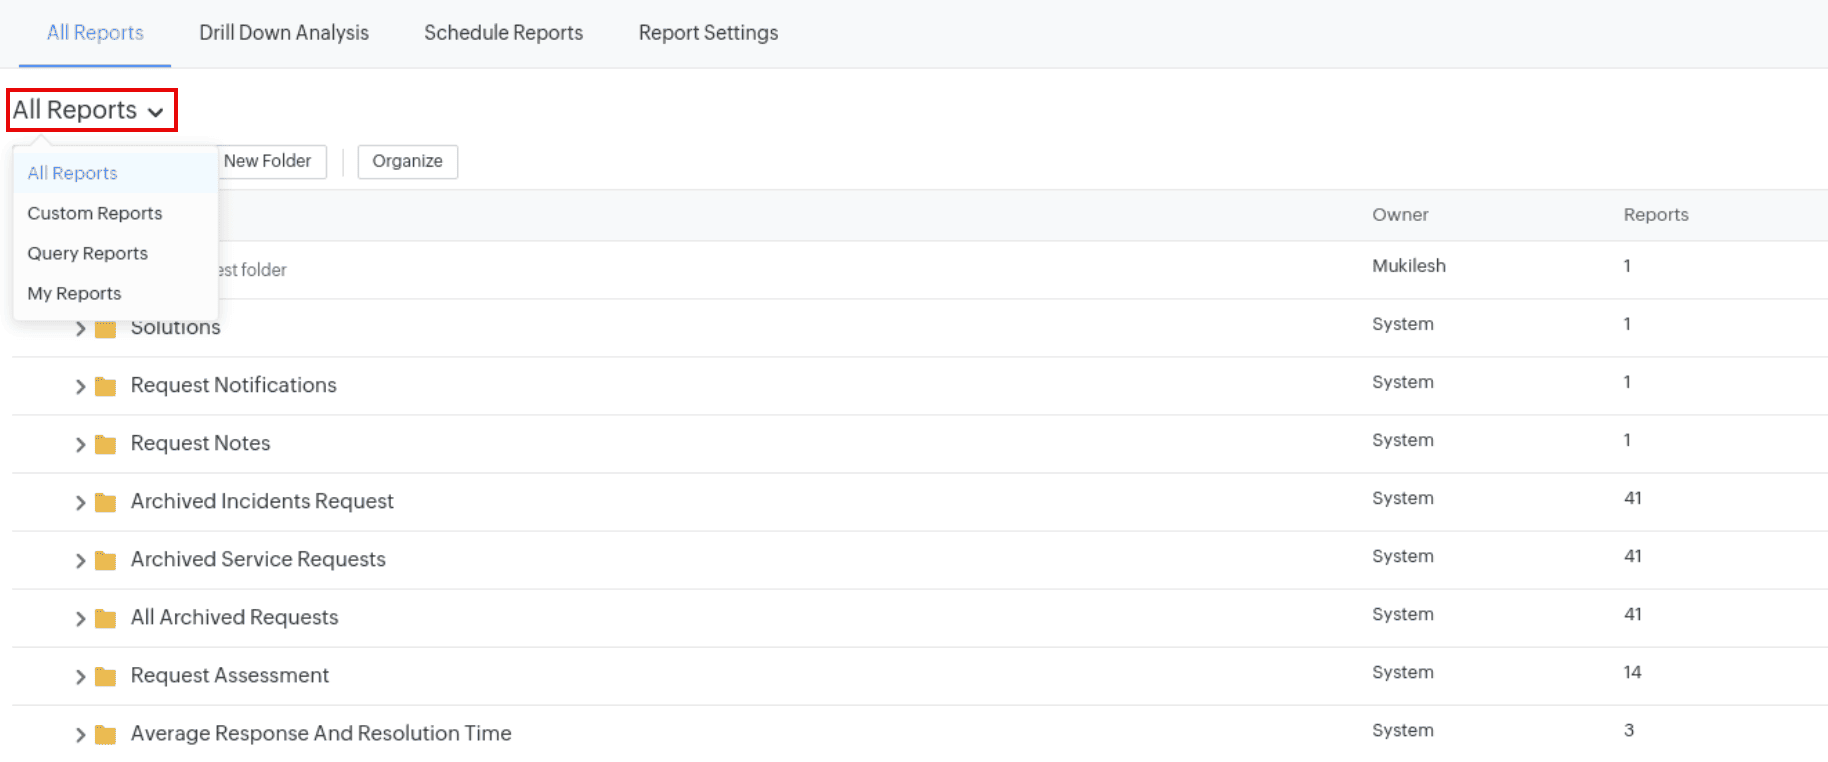
Filter | Description |
| All Reports | Displays all reports |
| Custom Reports | Displays reports generated by users |
| Query Reports | Displays reports generated through query-based configurations |
| My Reports | Displays reports created or owned by the logged-in user |
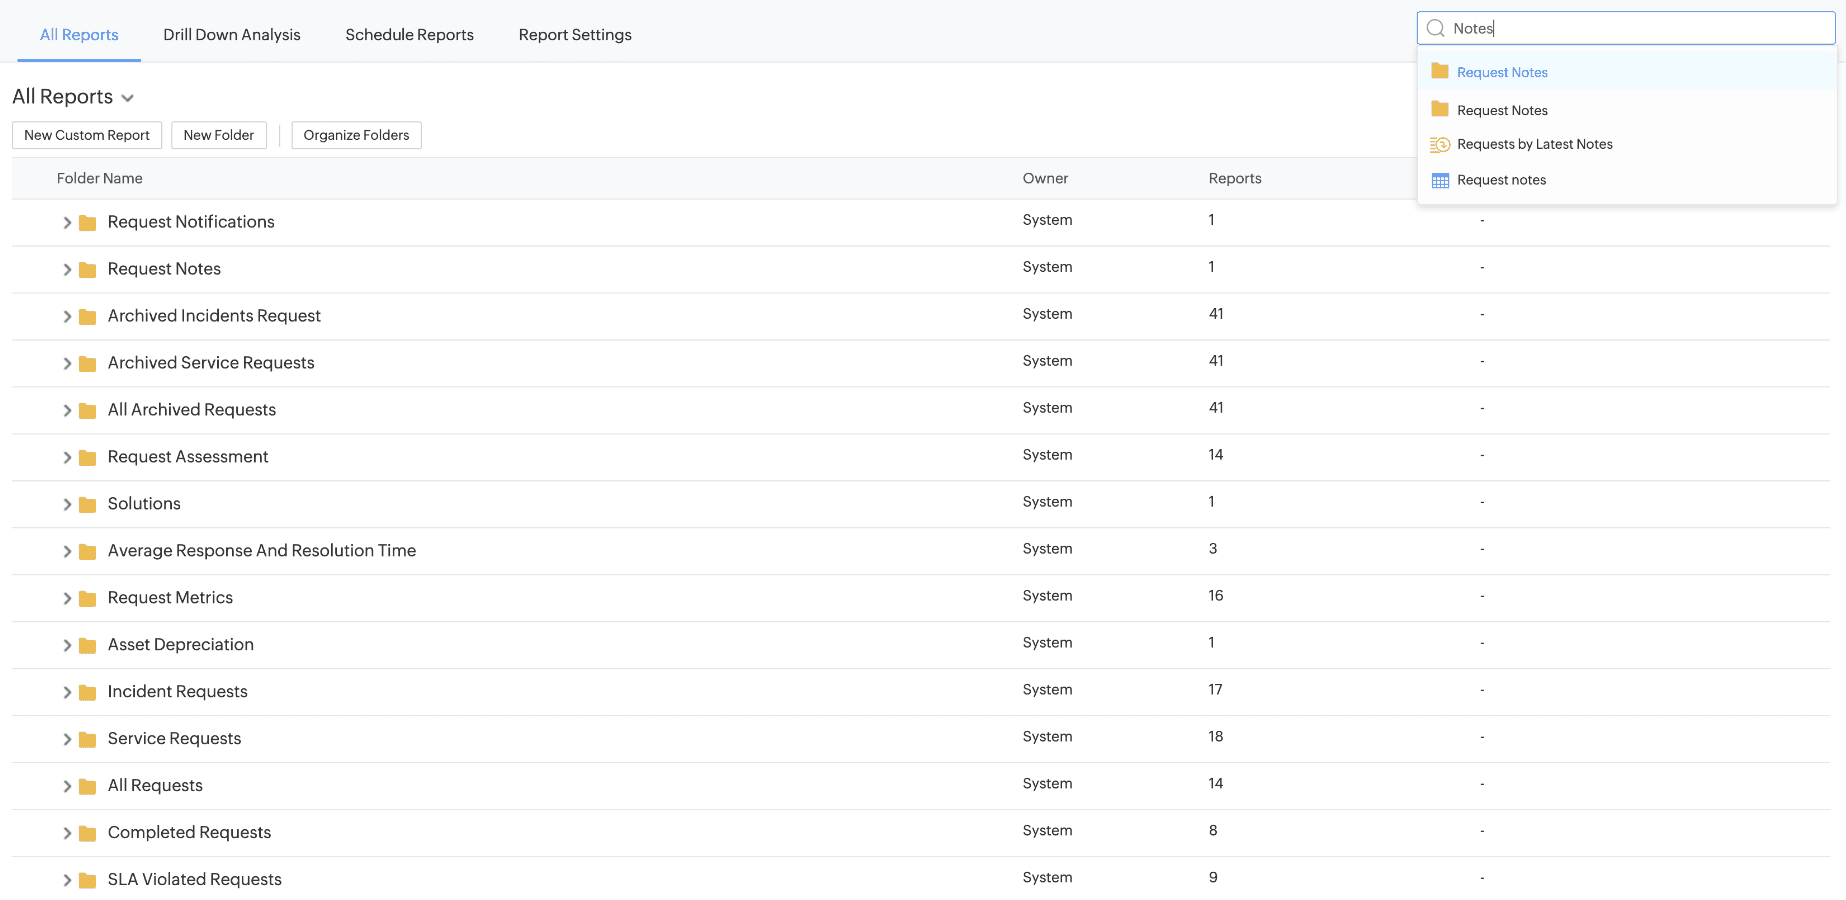
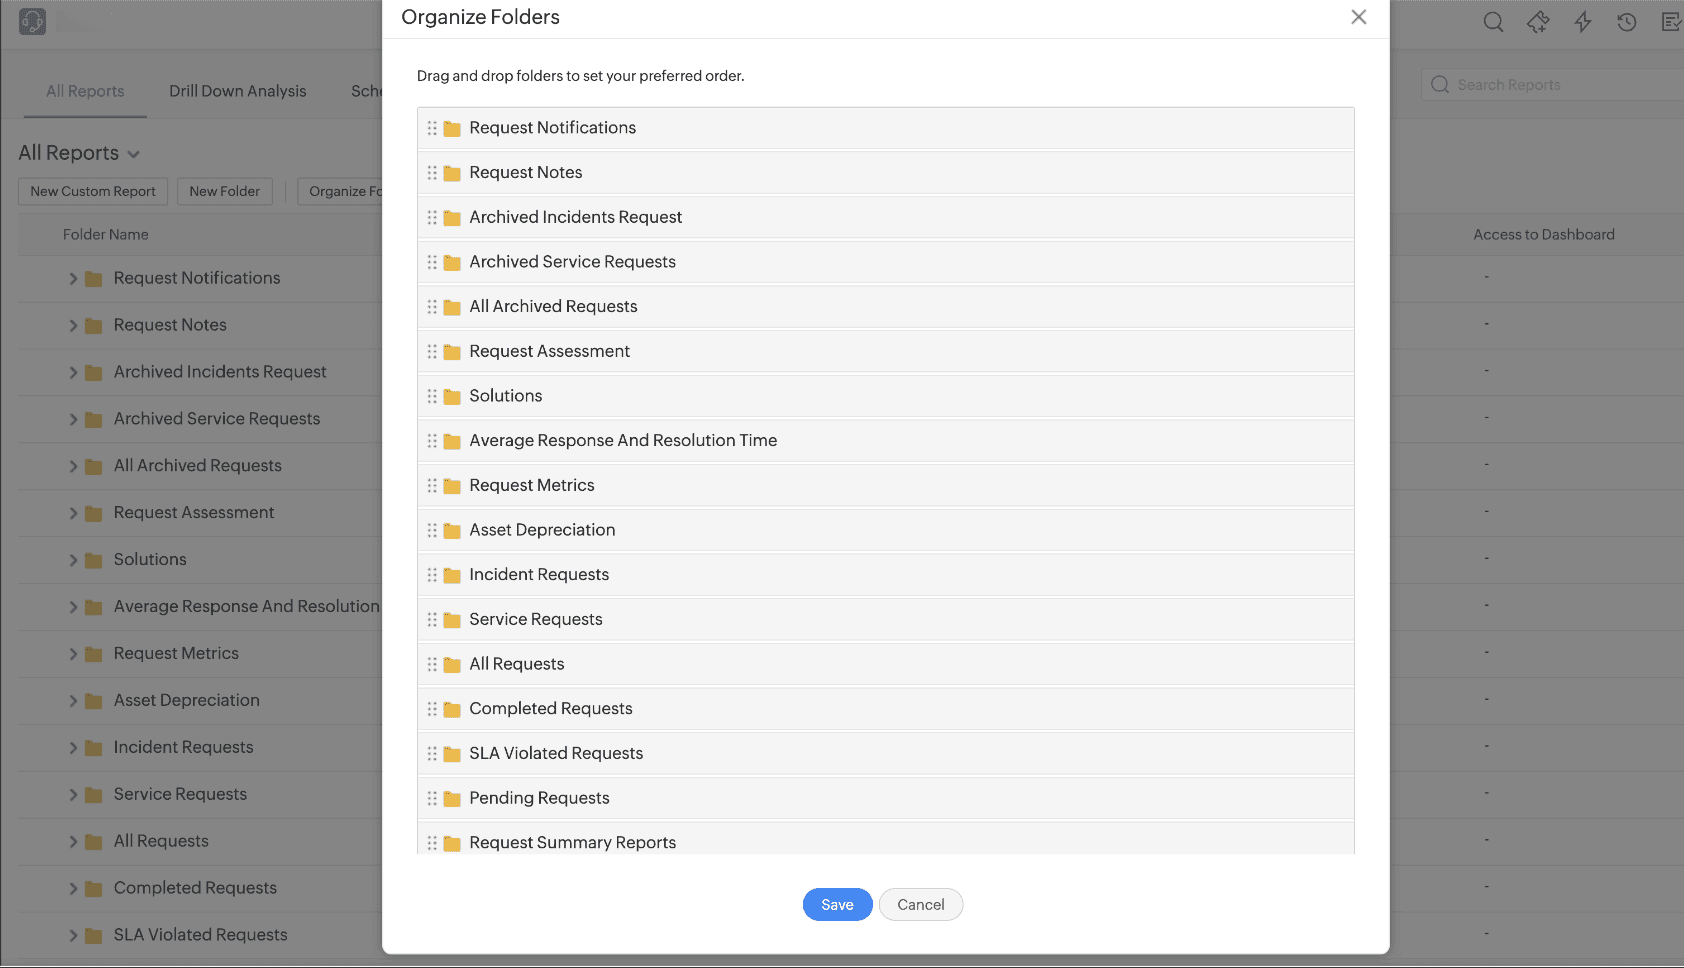
Wizard Enhancements
Field | Variables |
| Site |
|
| Group |
|
| Department |
|
| User |
|
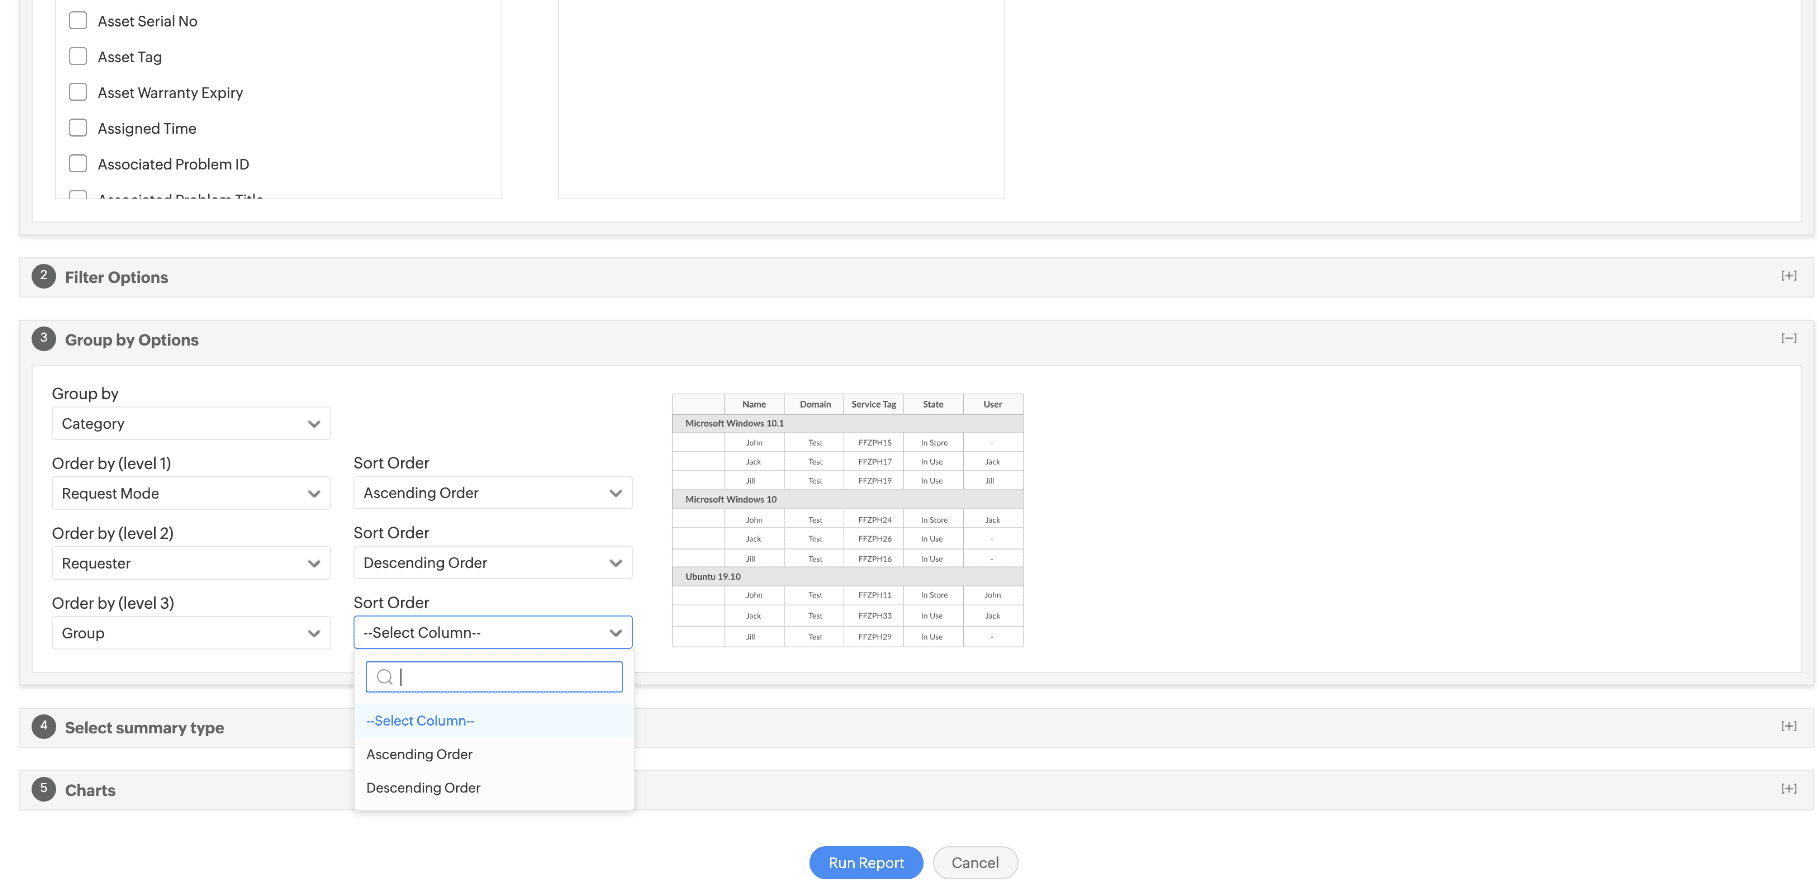

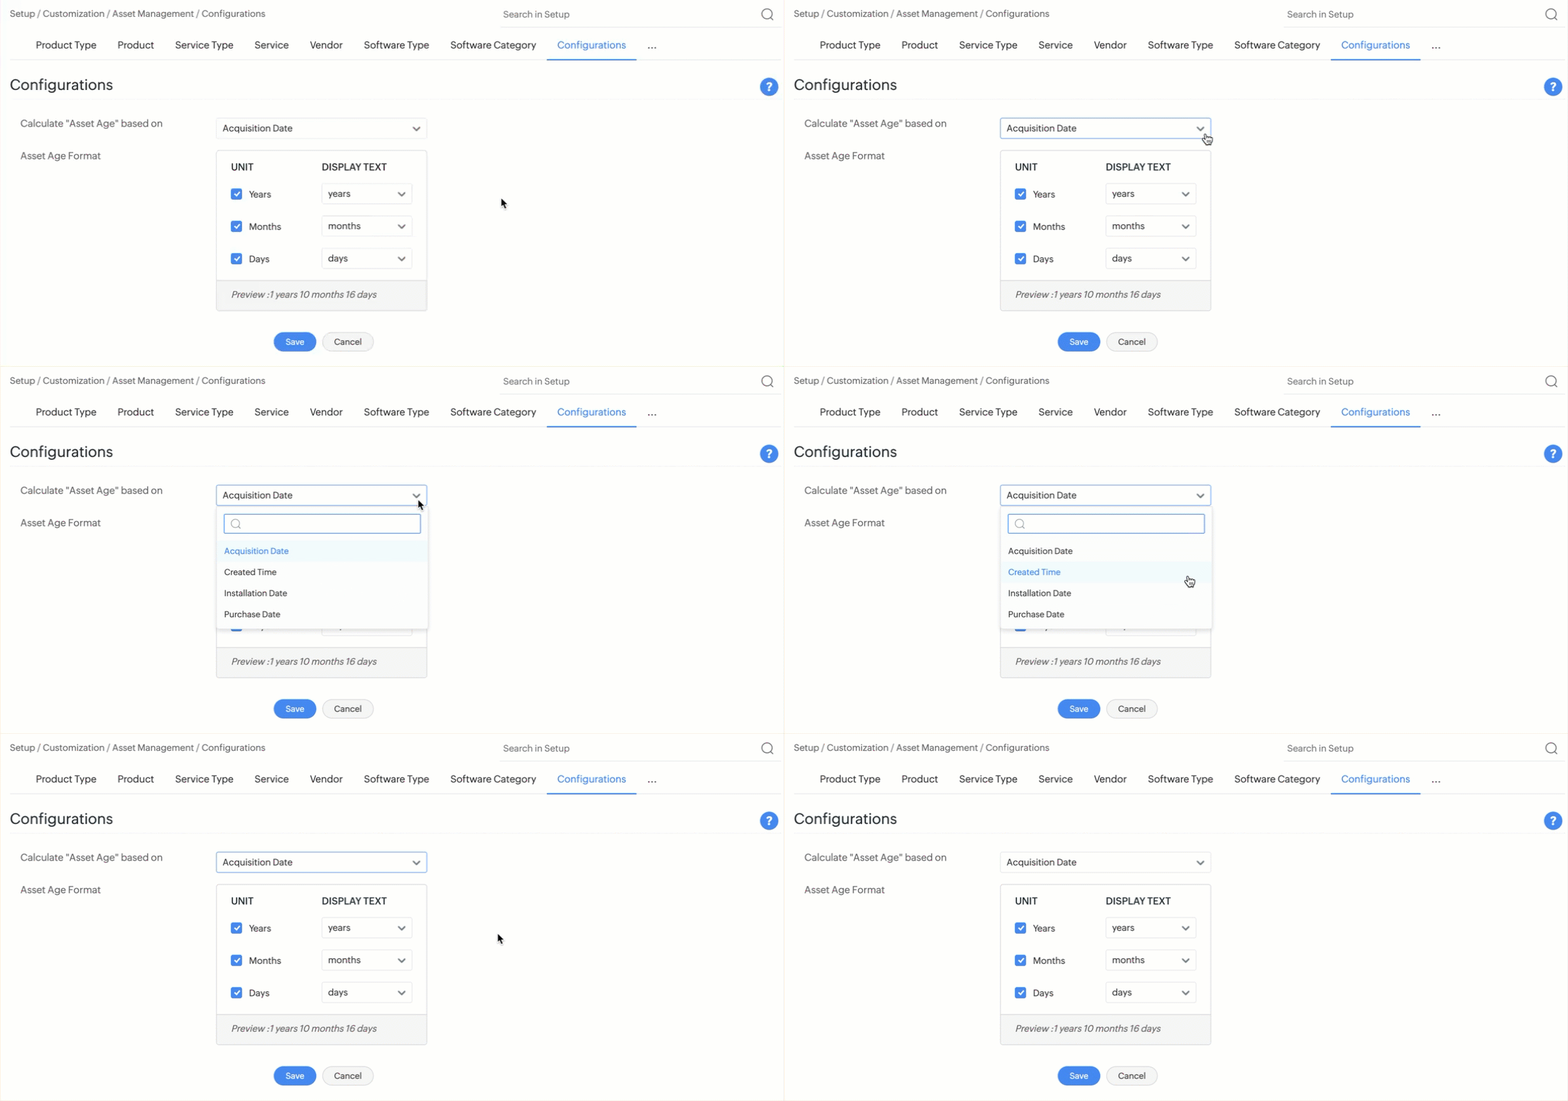
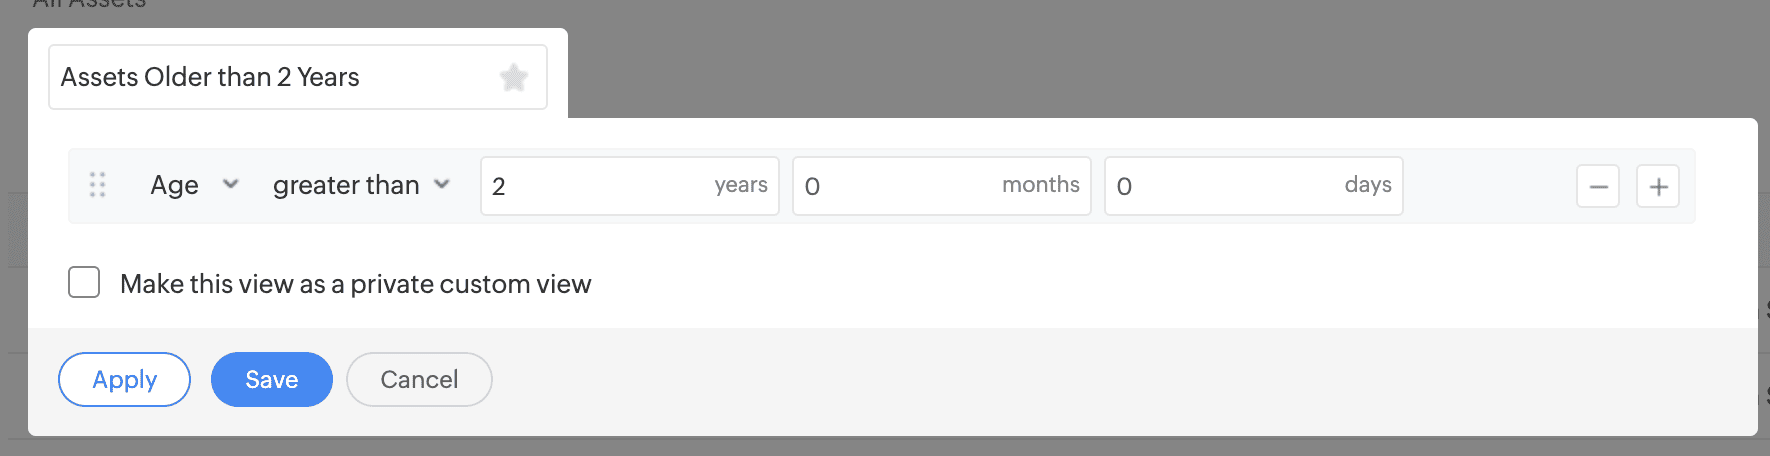
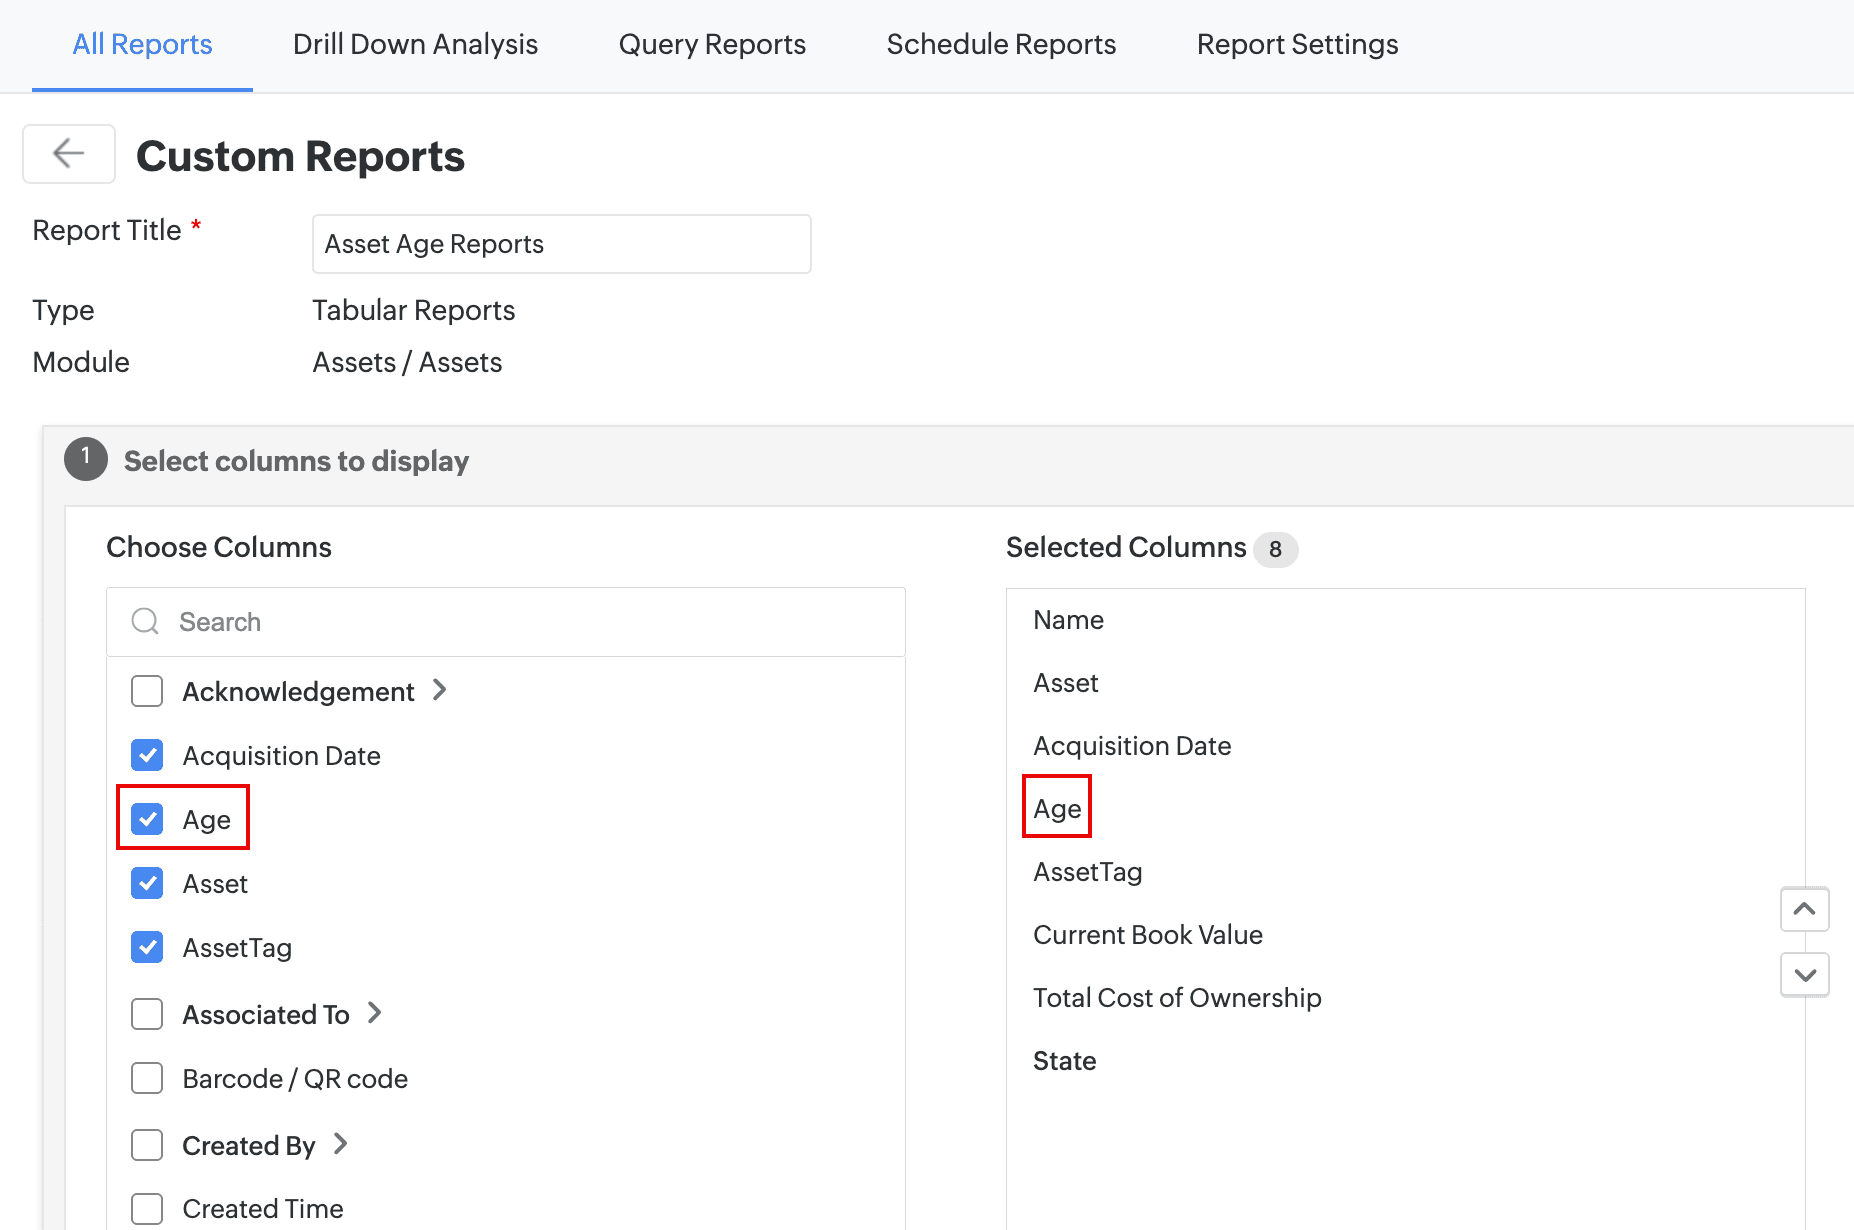
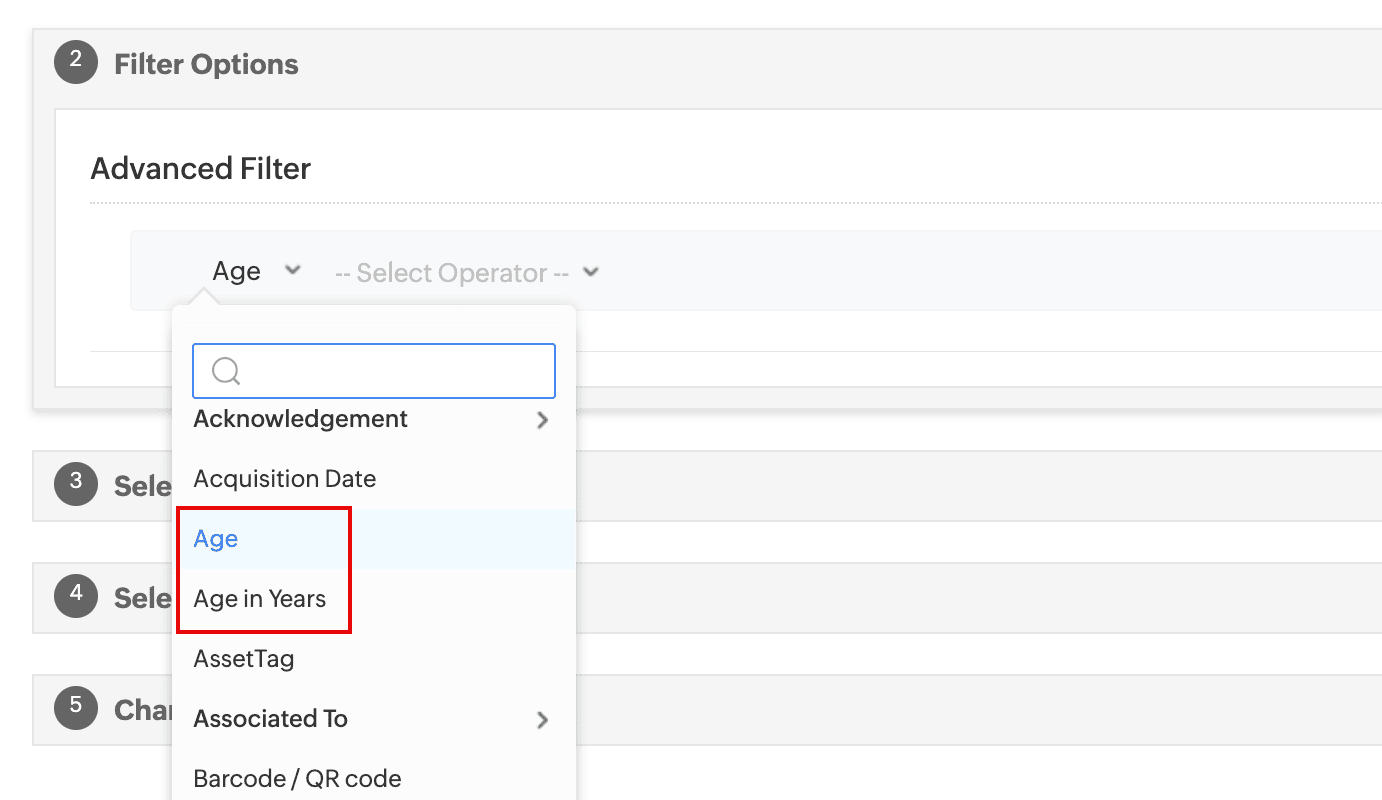
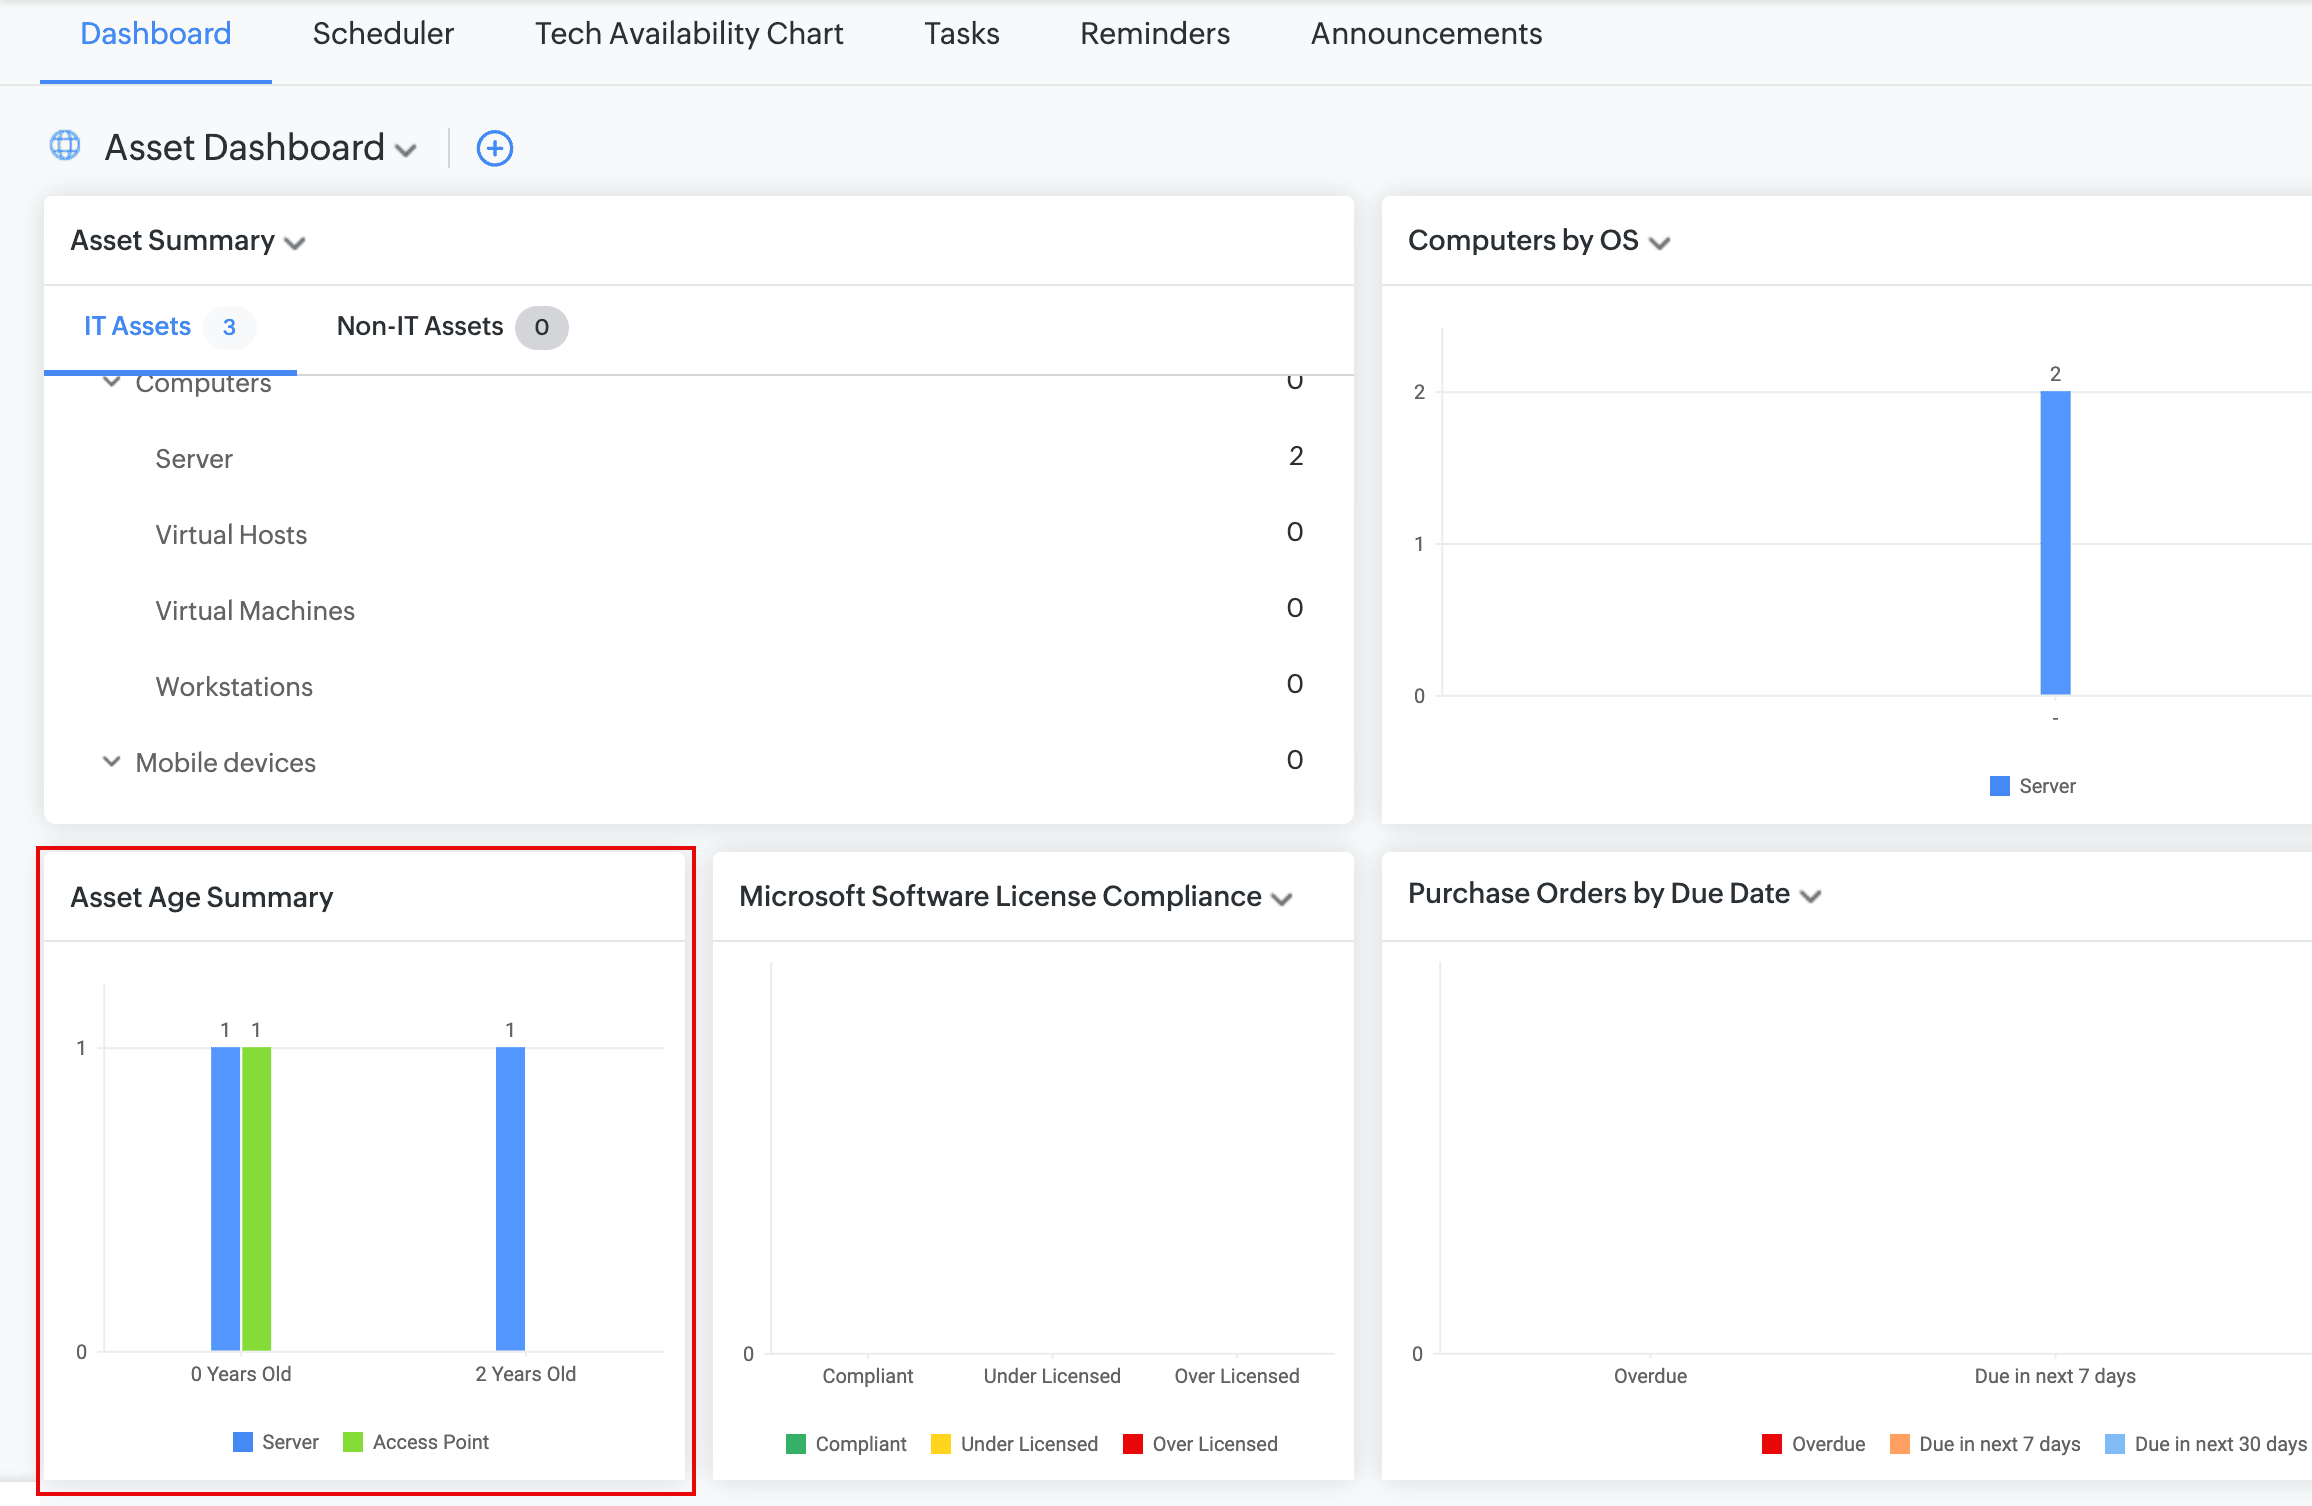
Note: You cannot add the age field to consumable templates.
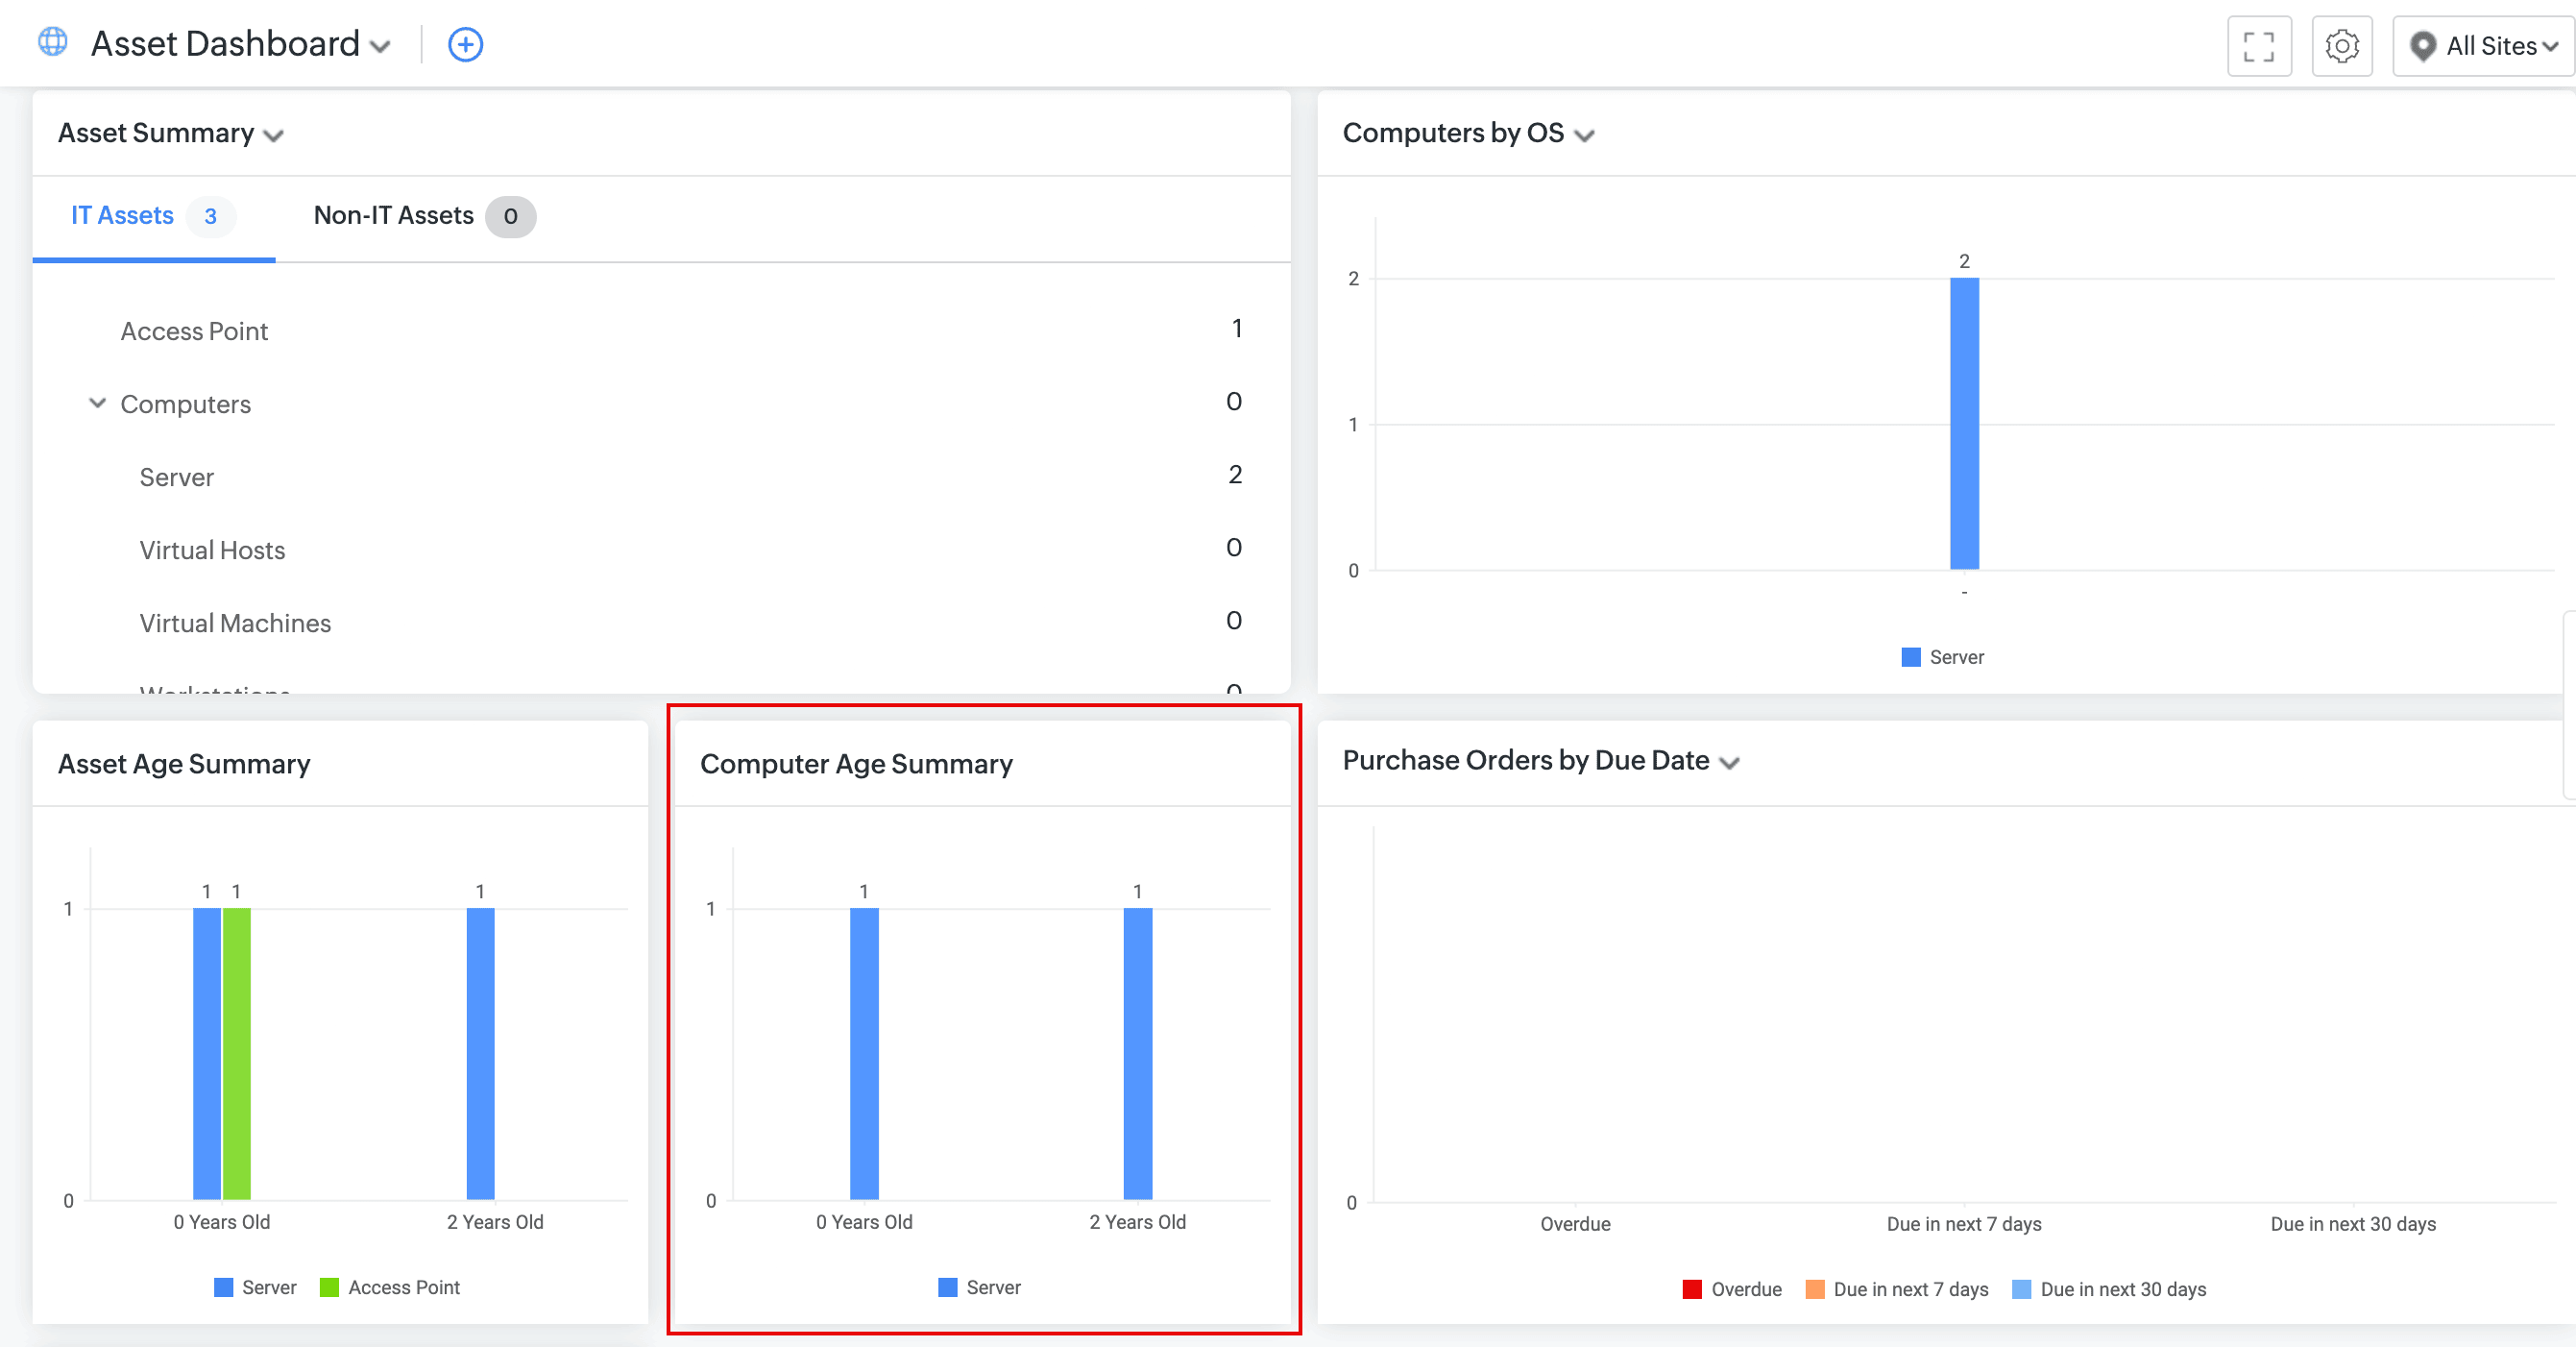
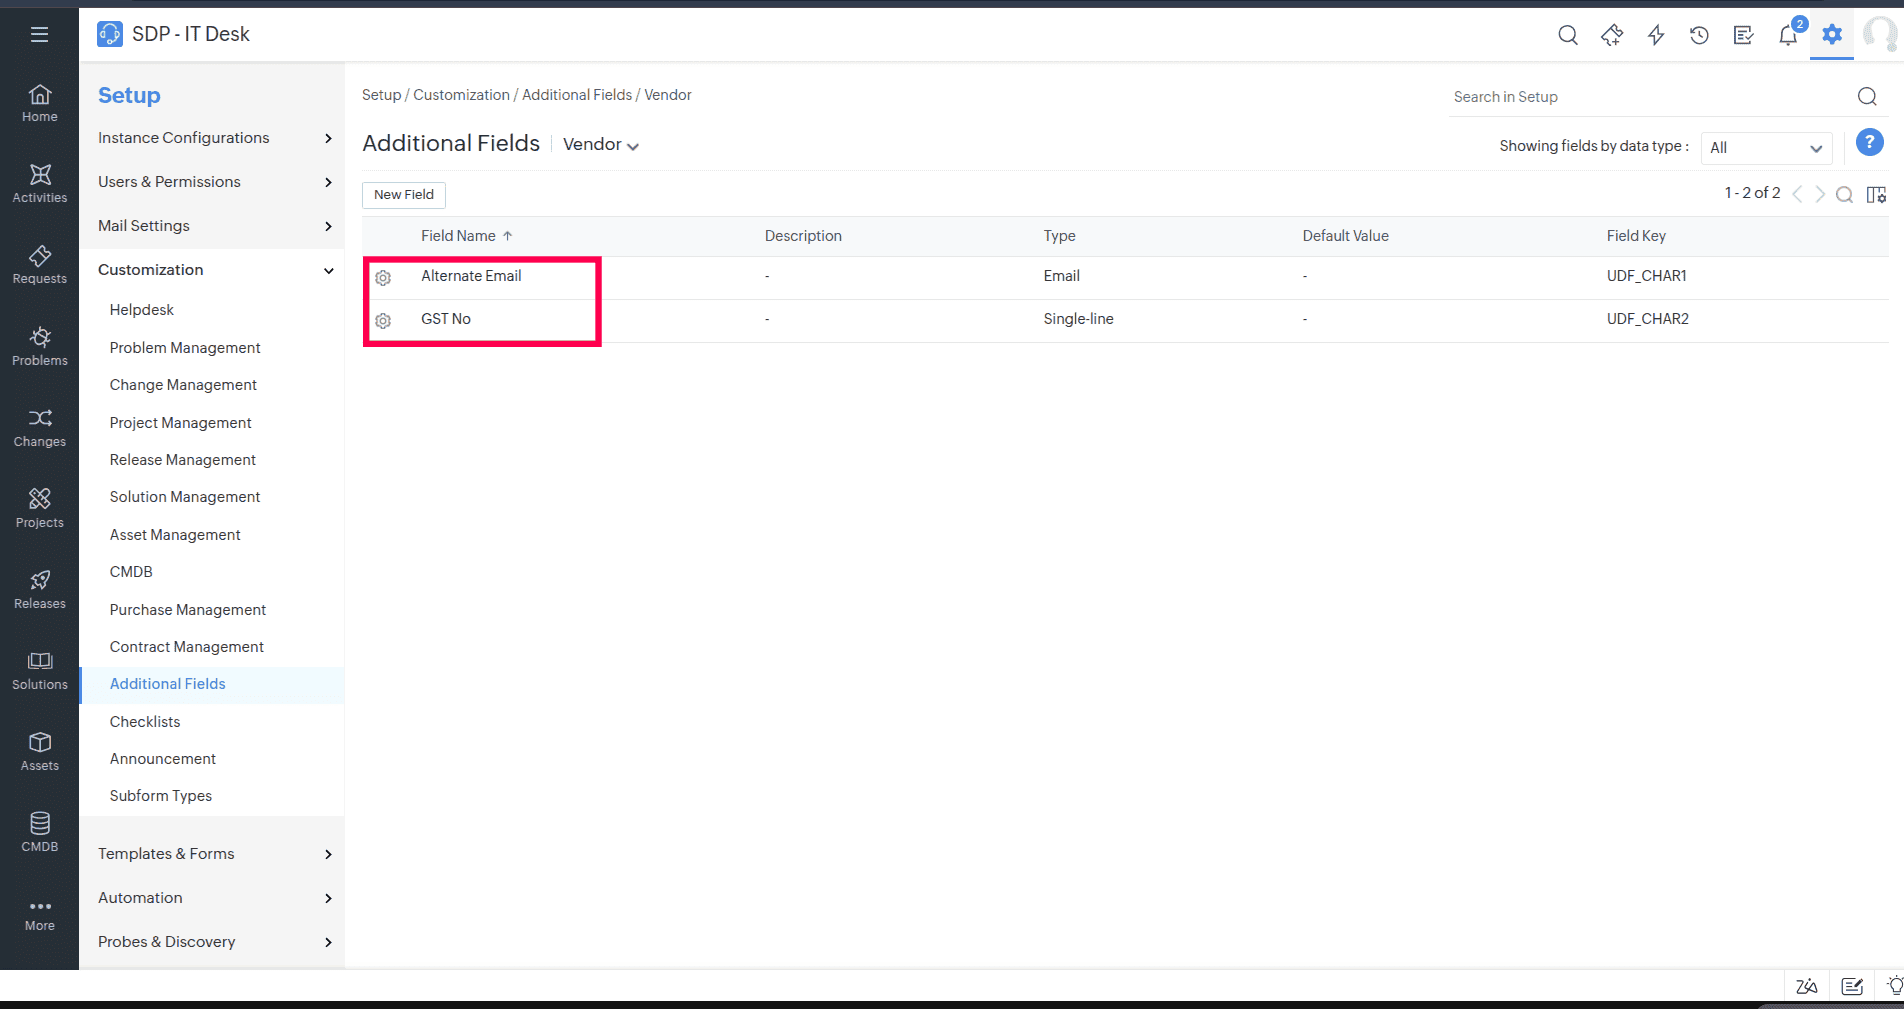
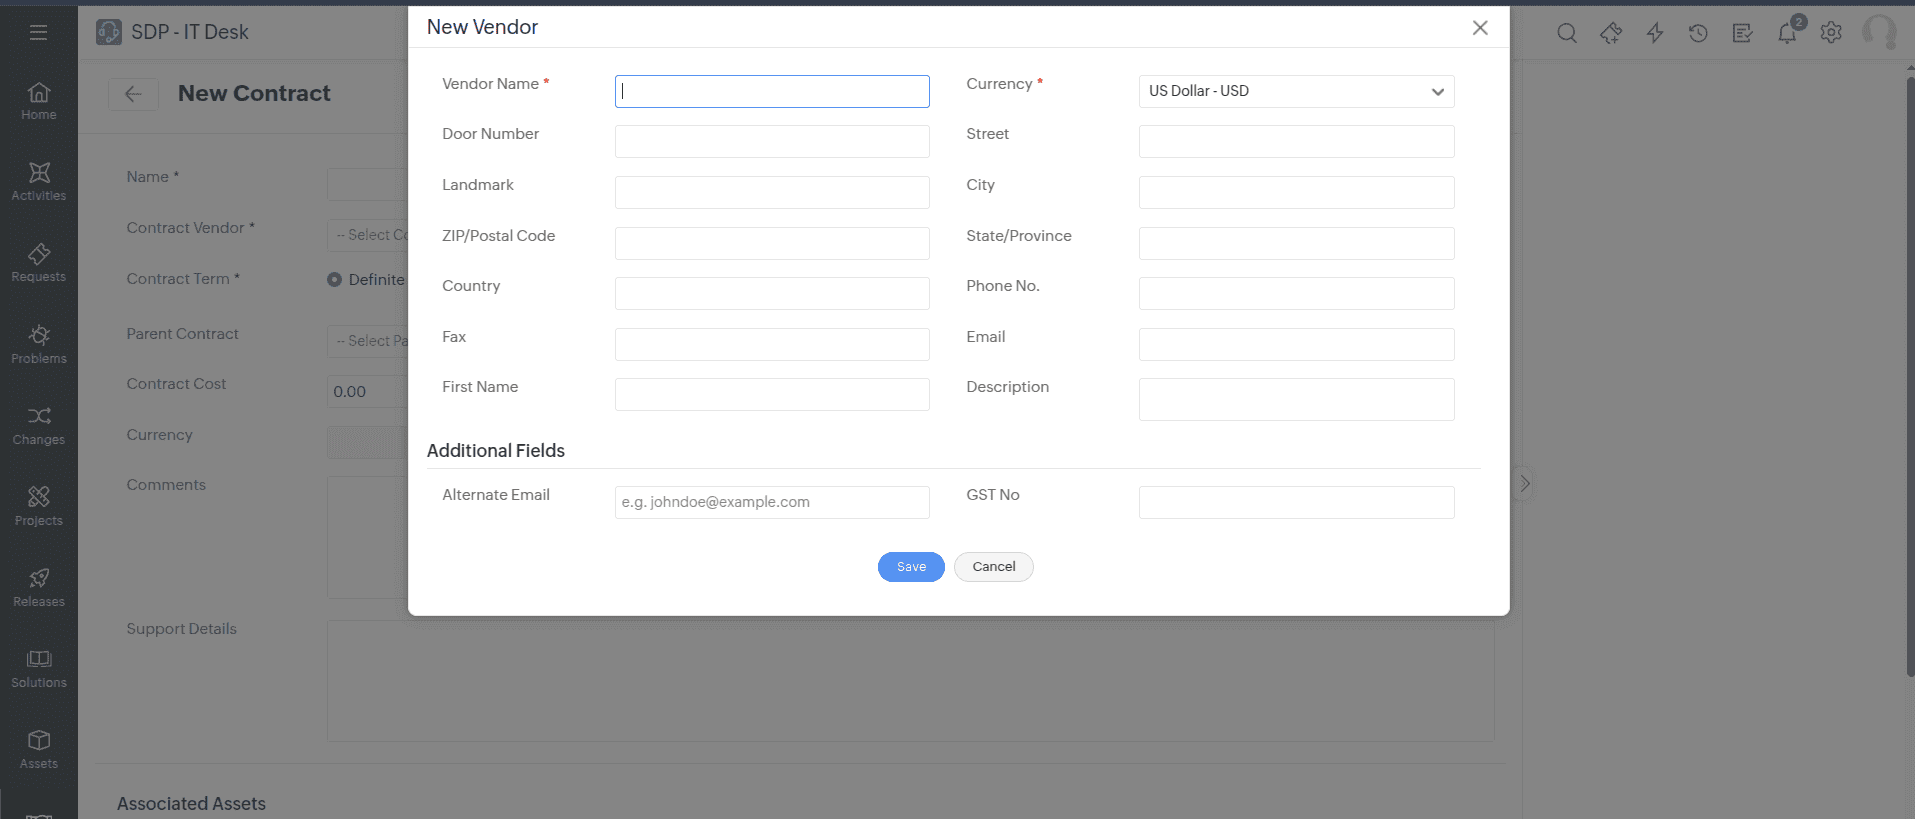
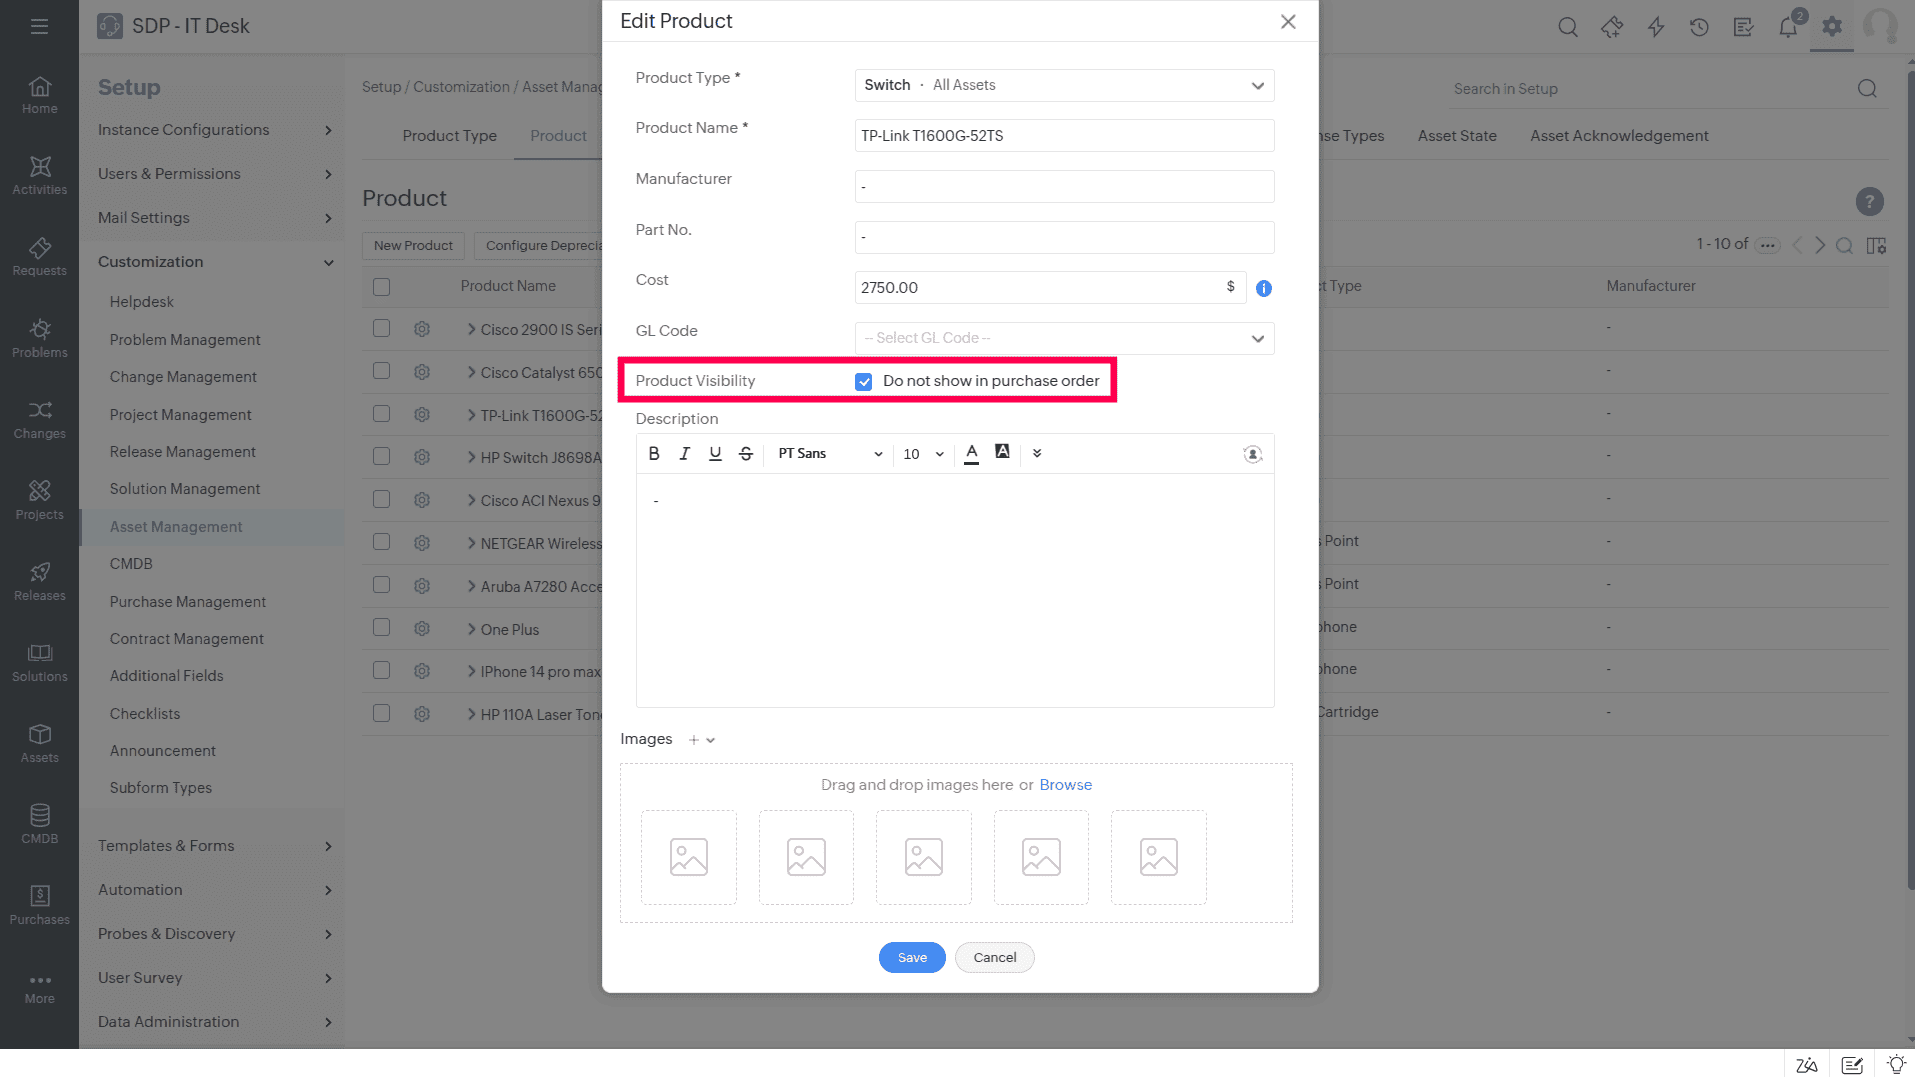
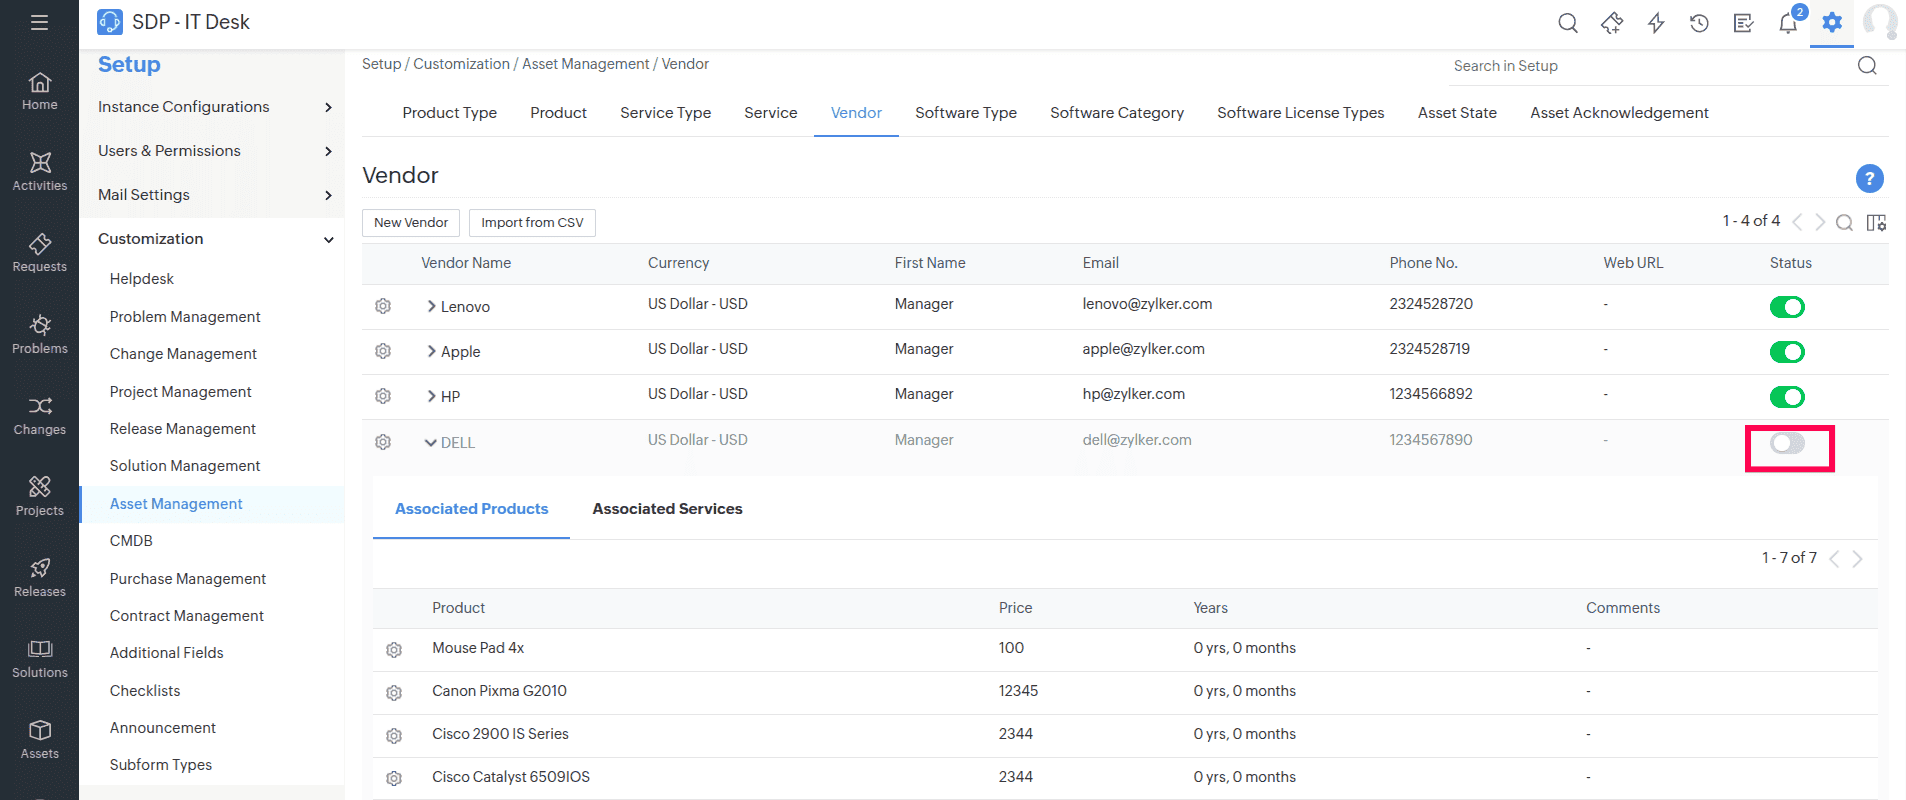
Vendor
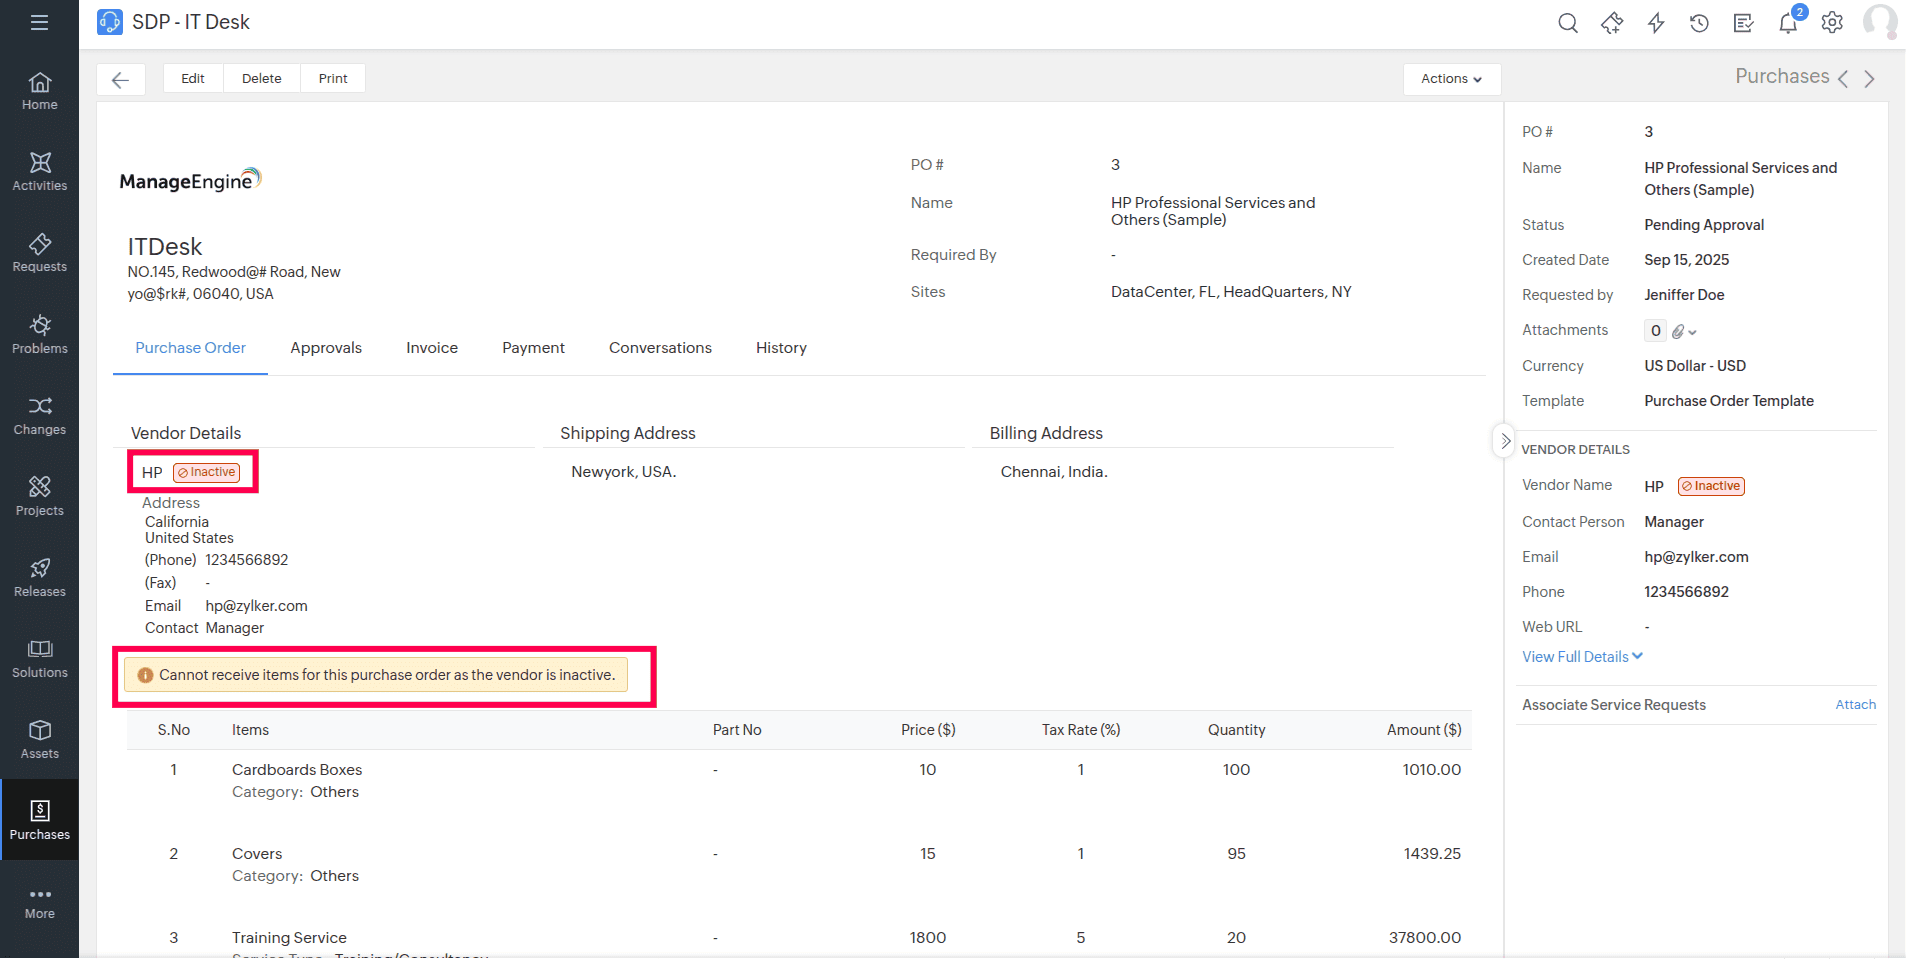
Purchases
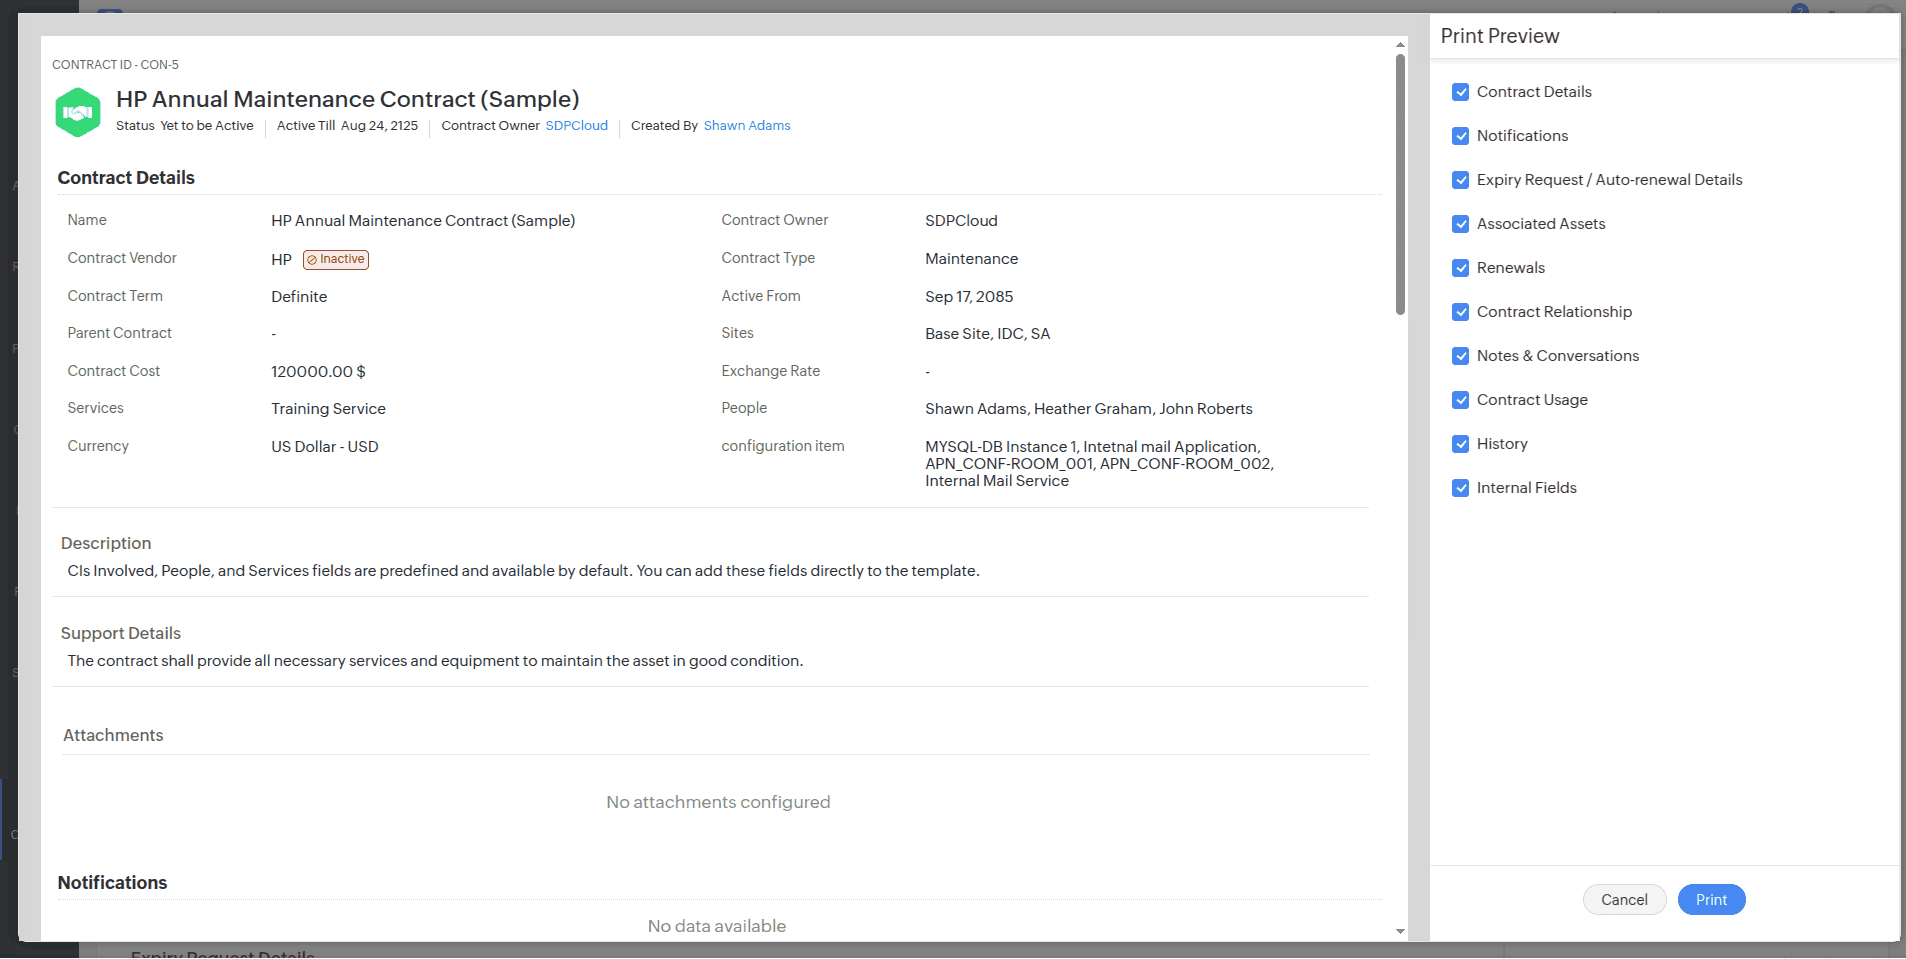
Contracts
Assets
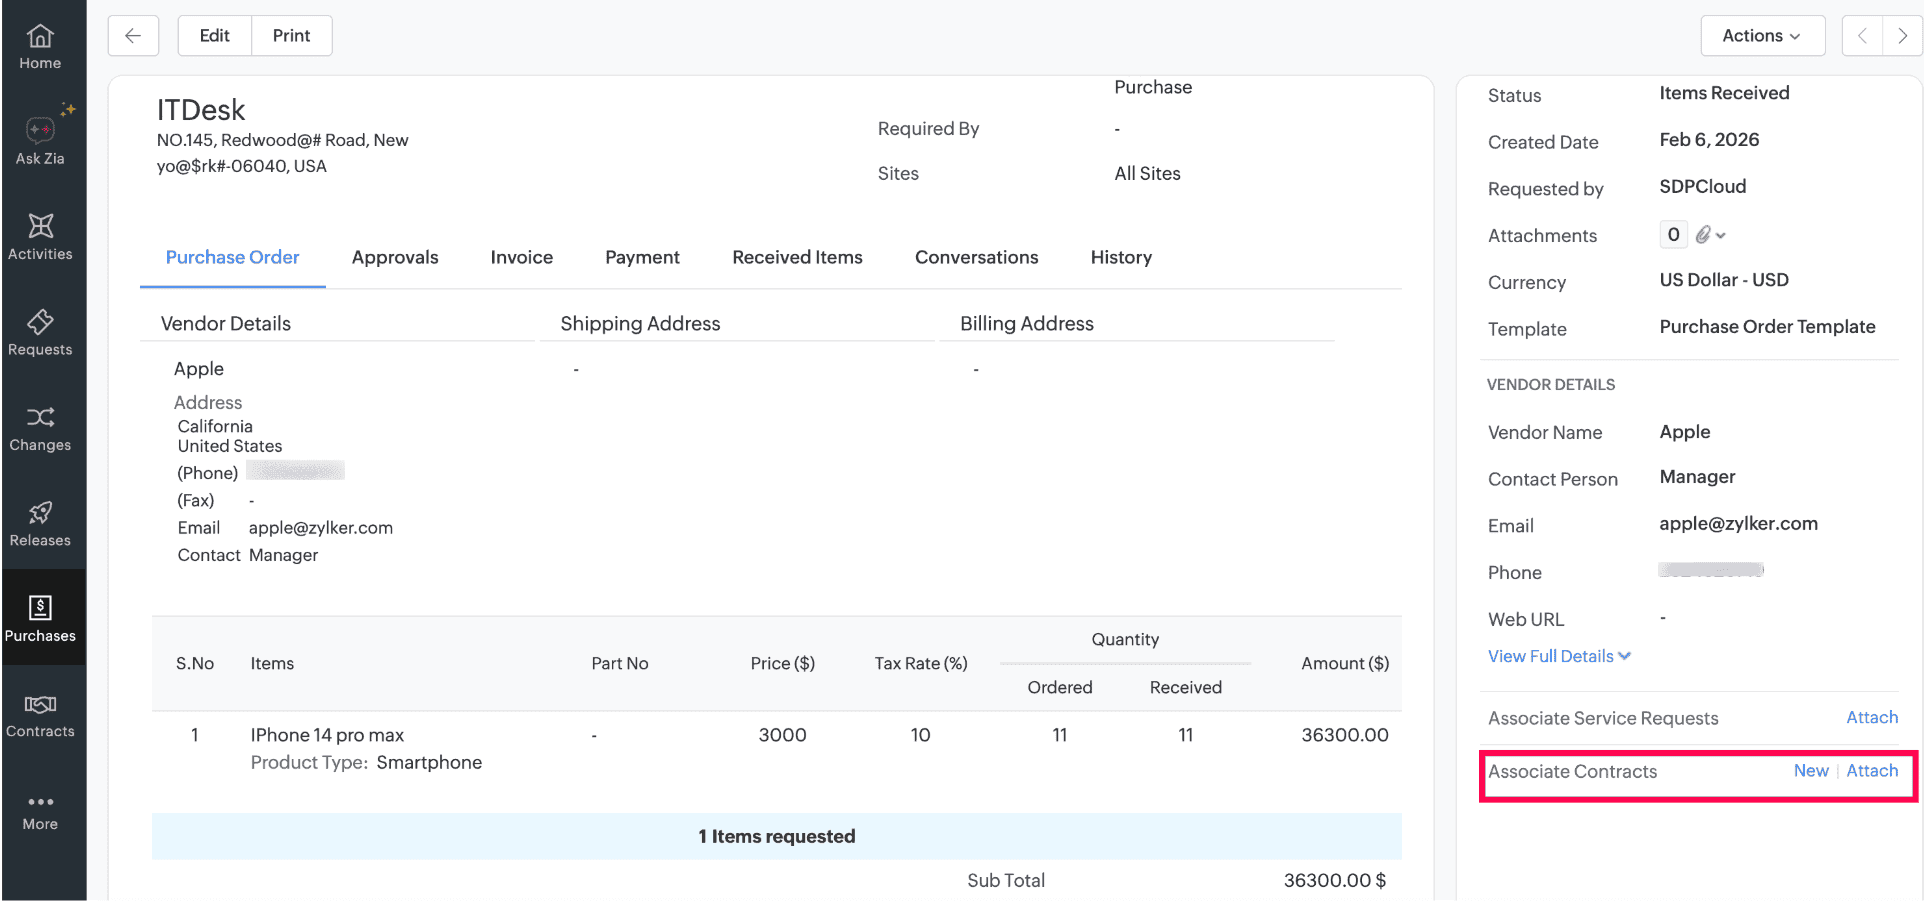
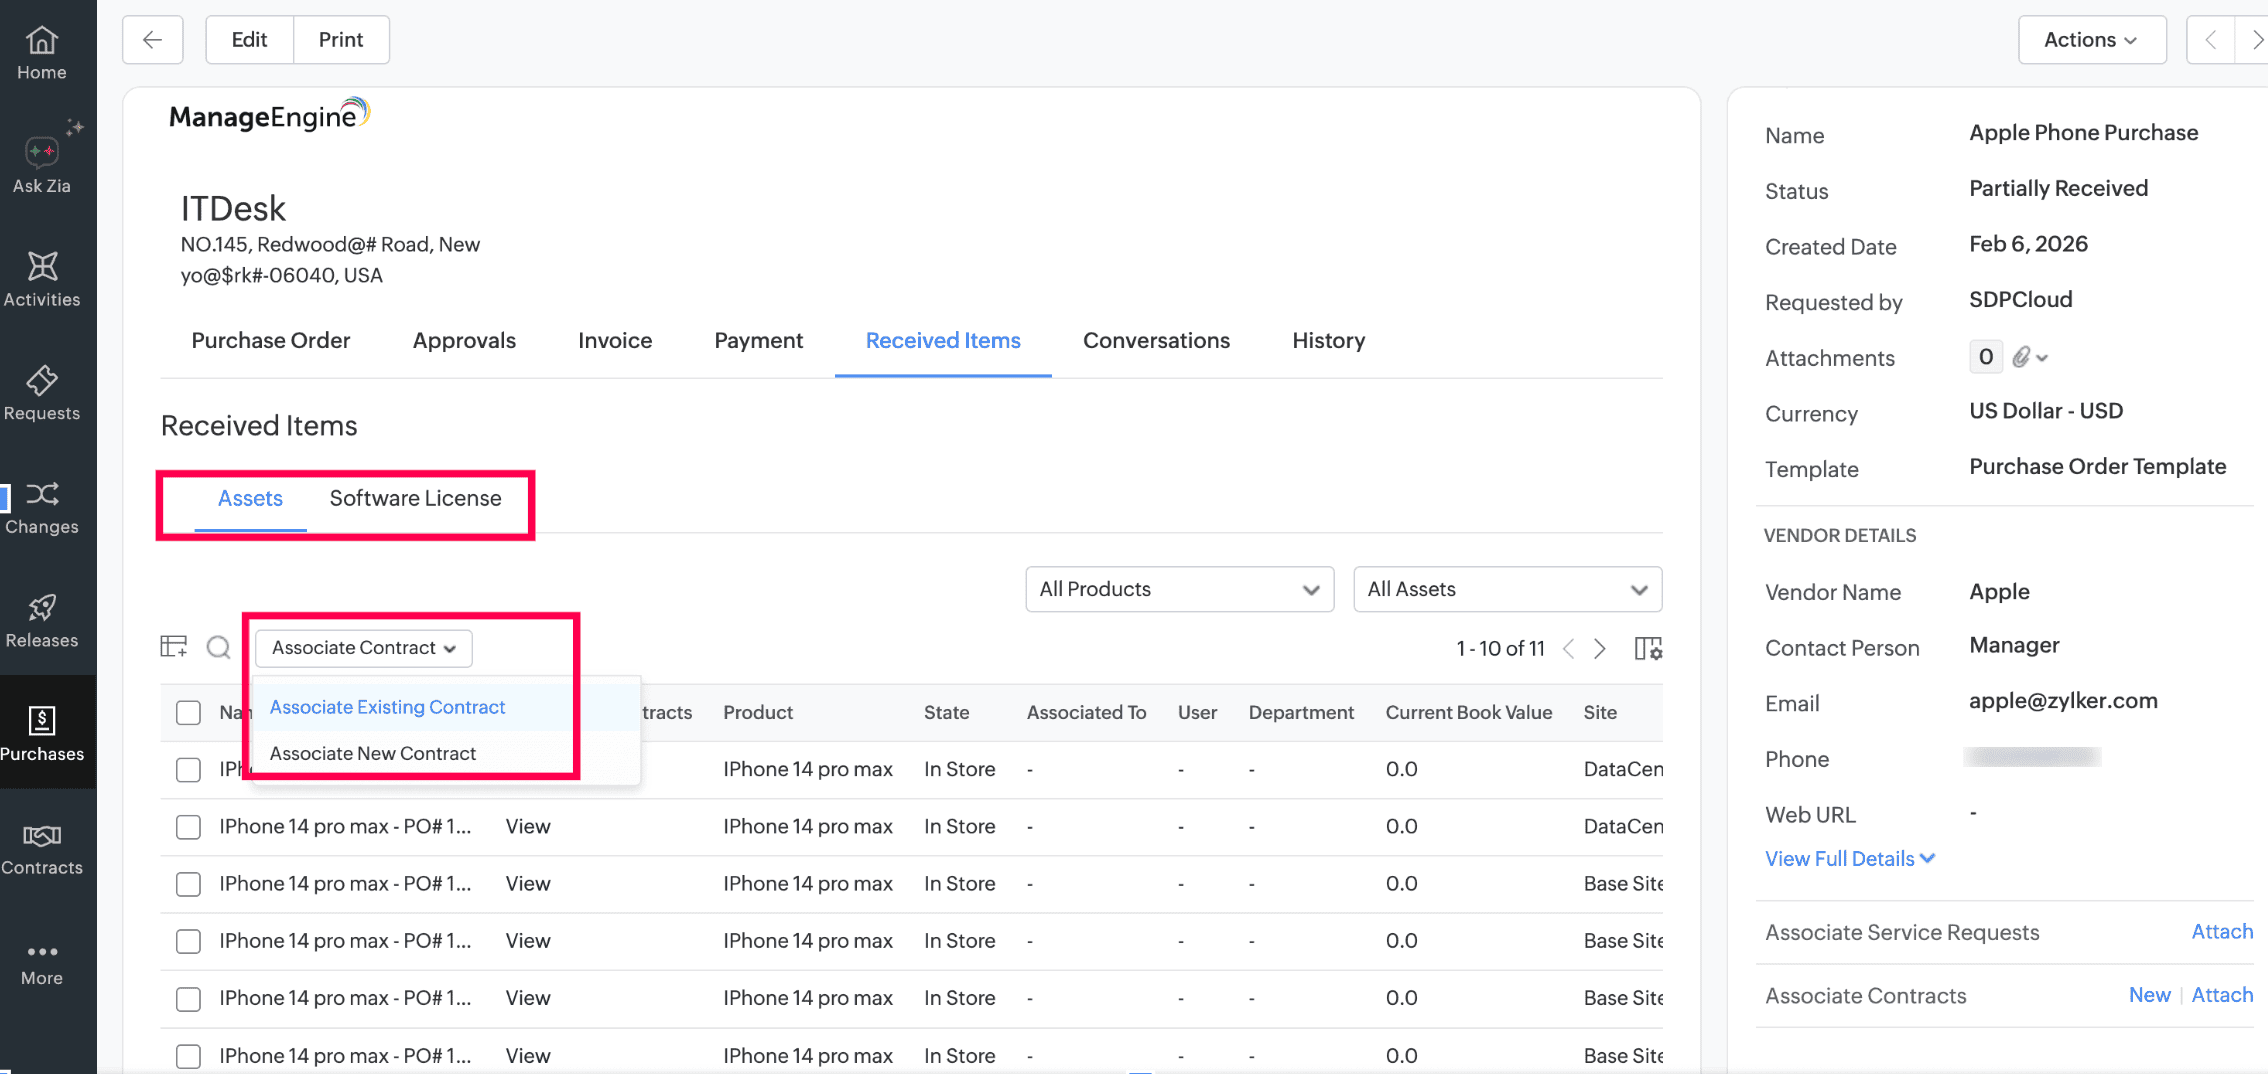
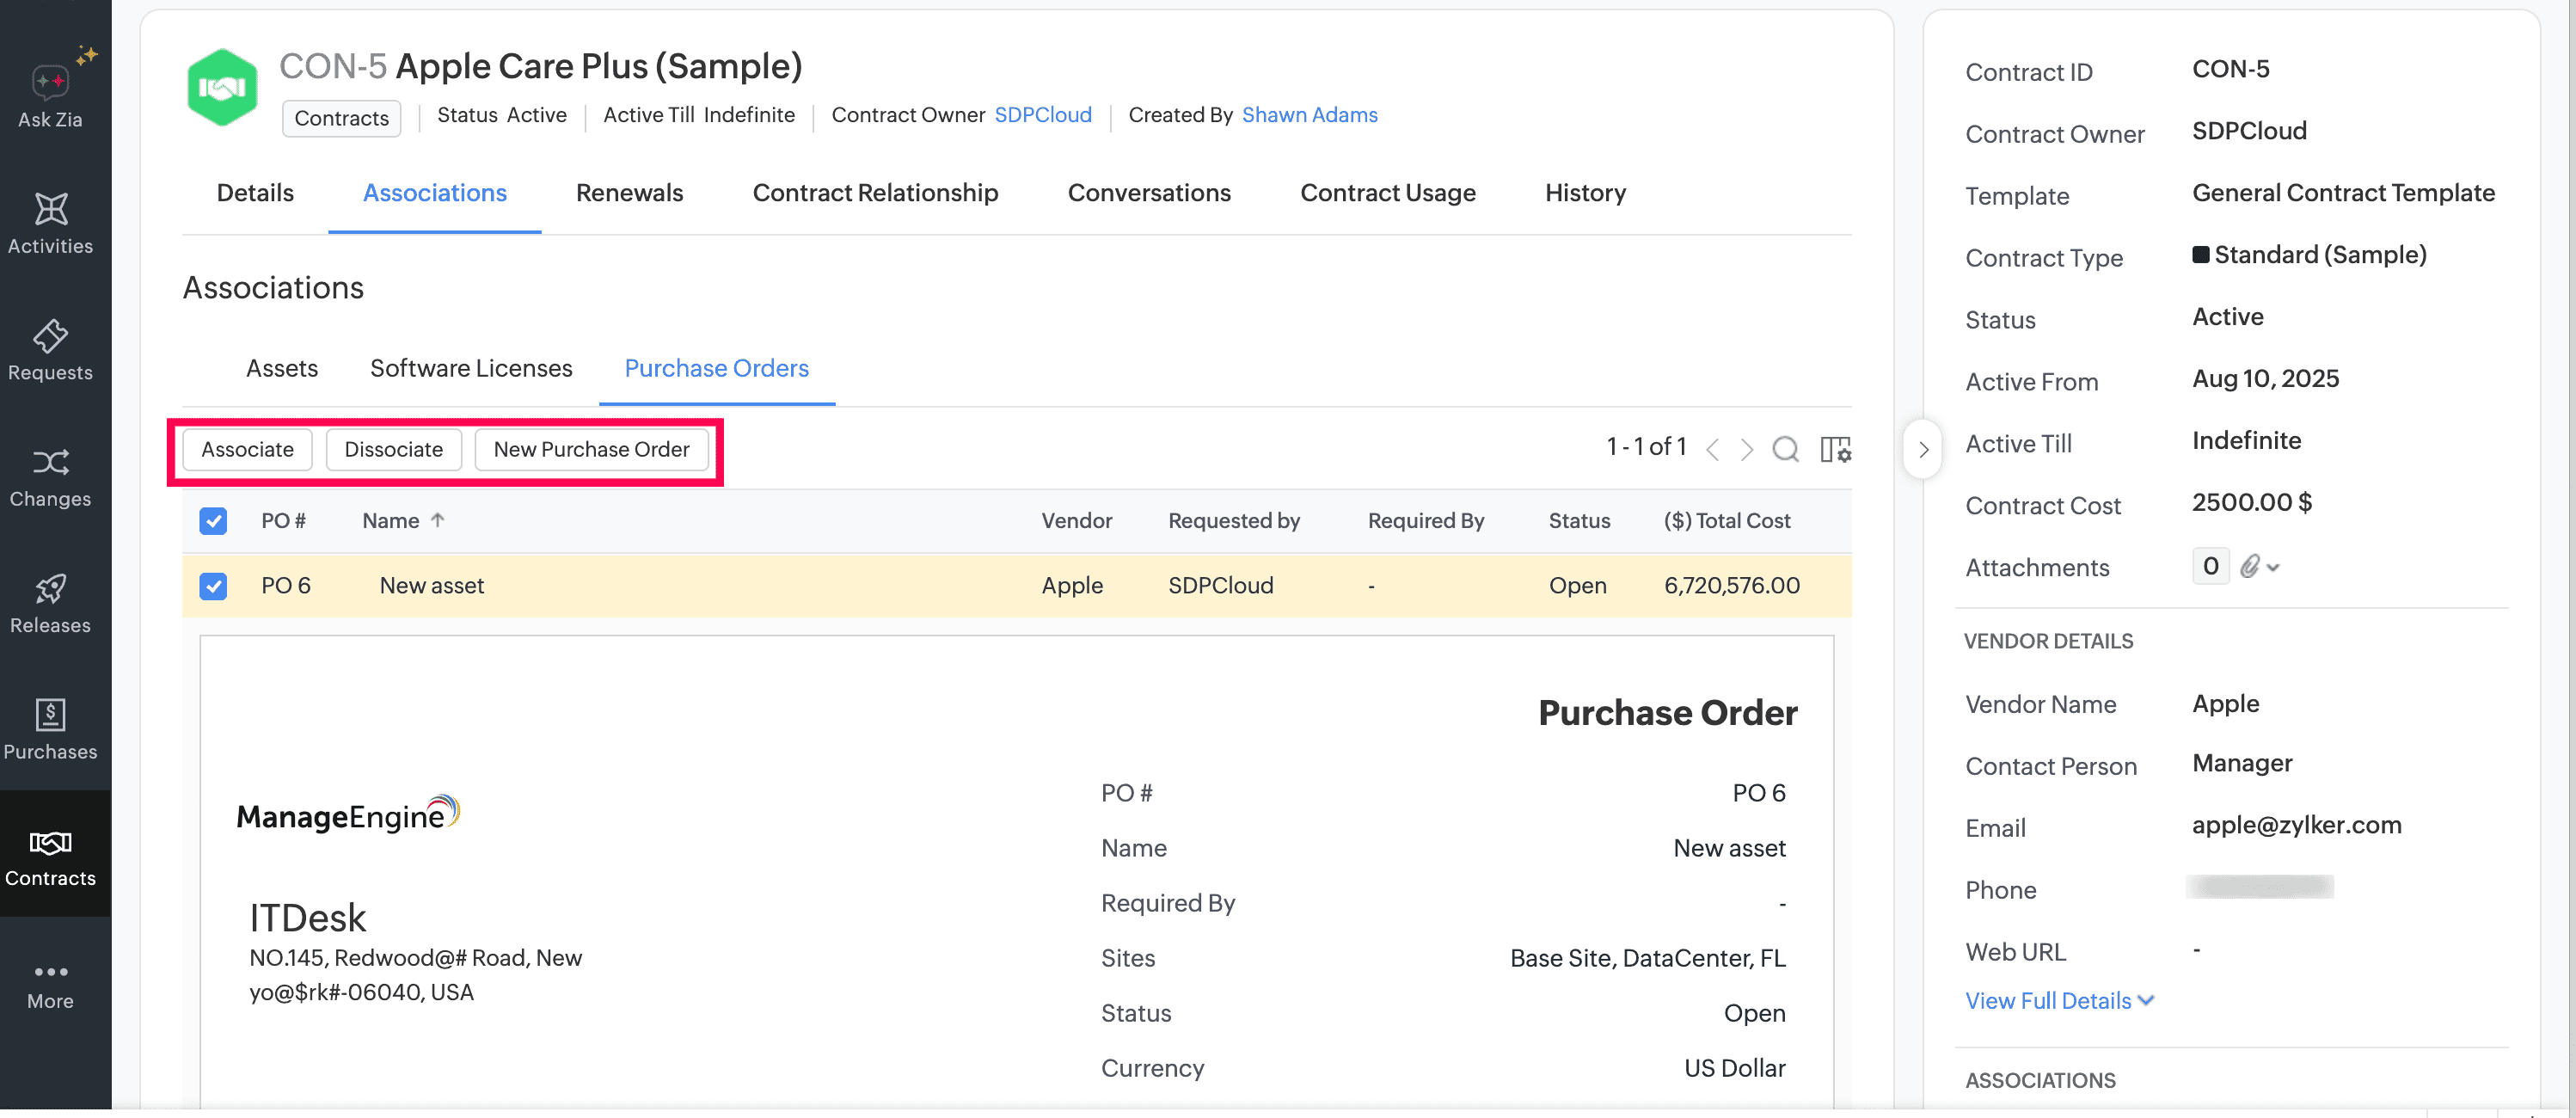
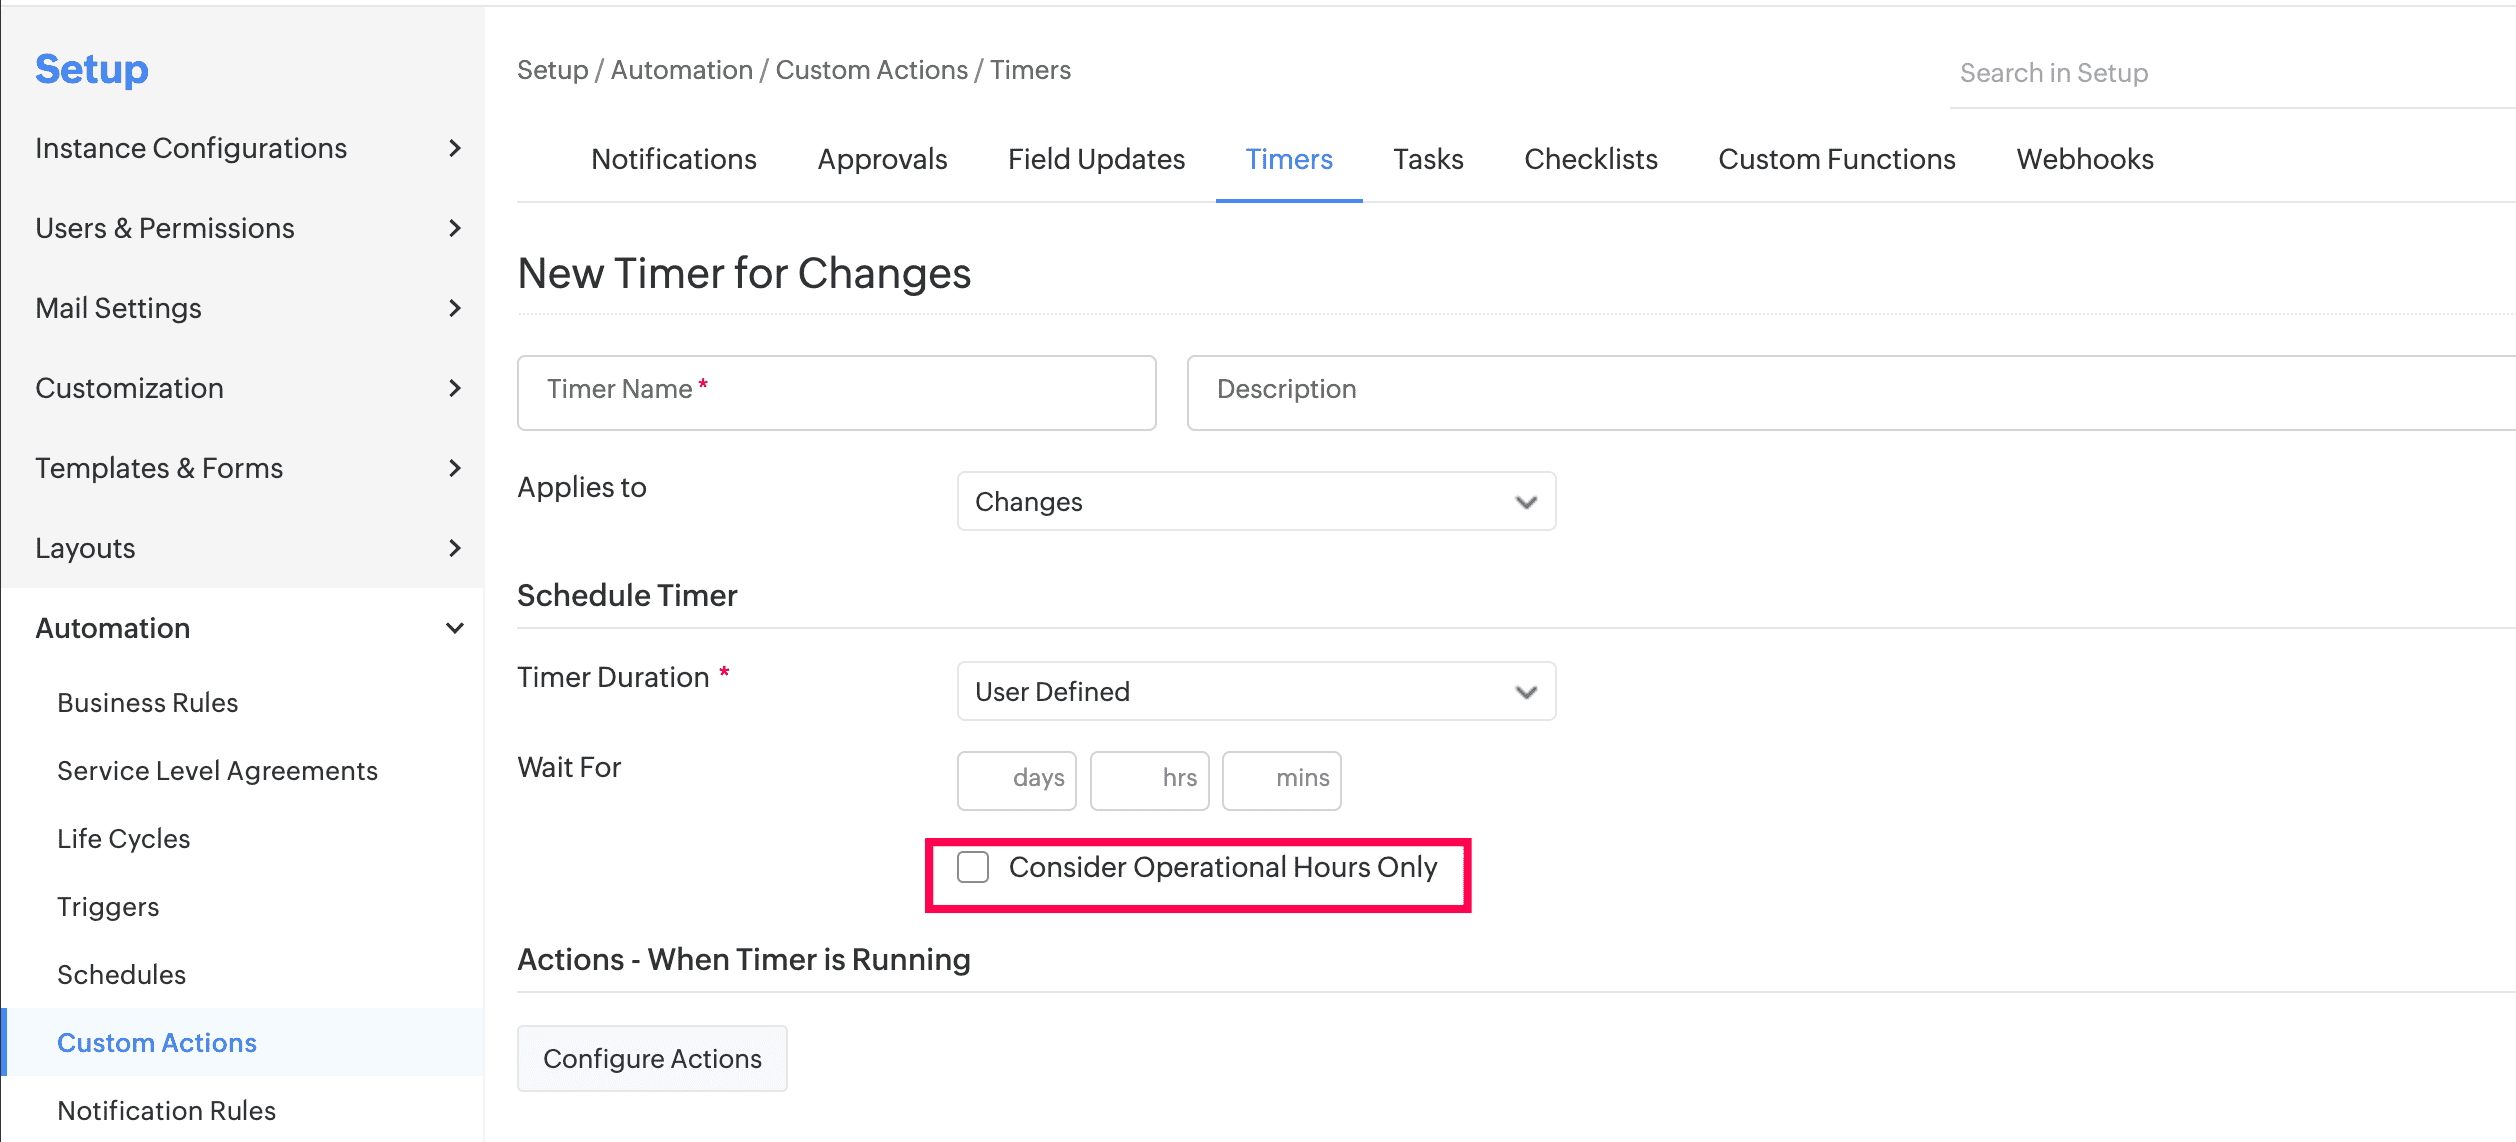
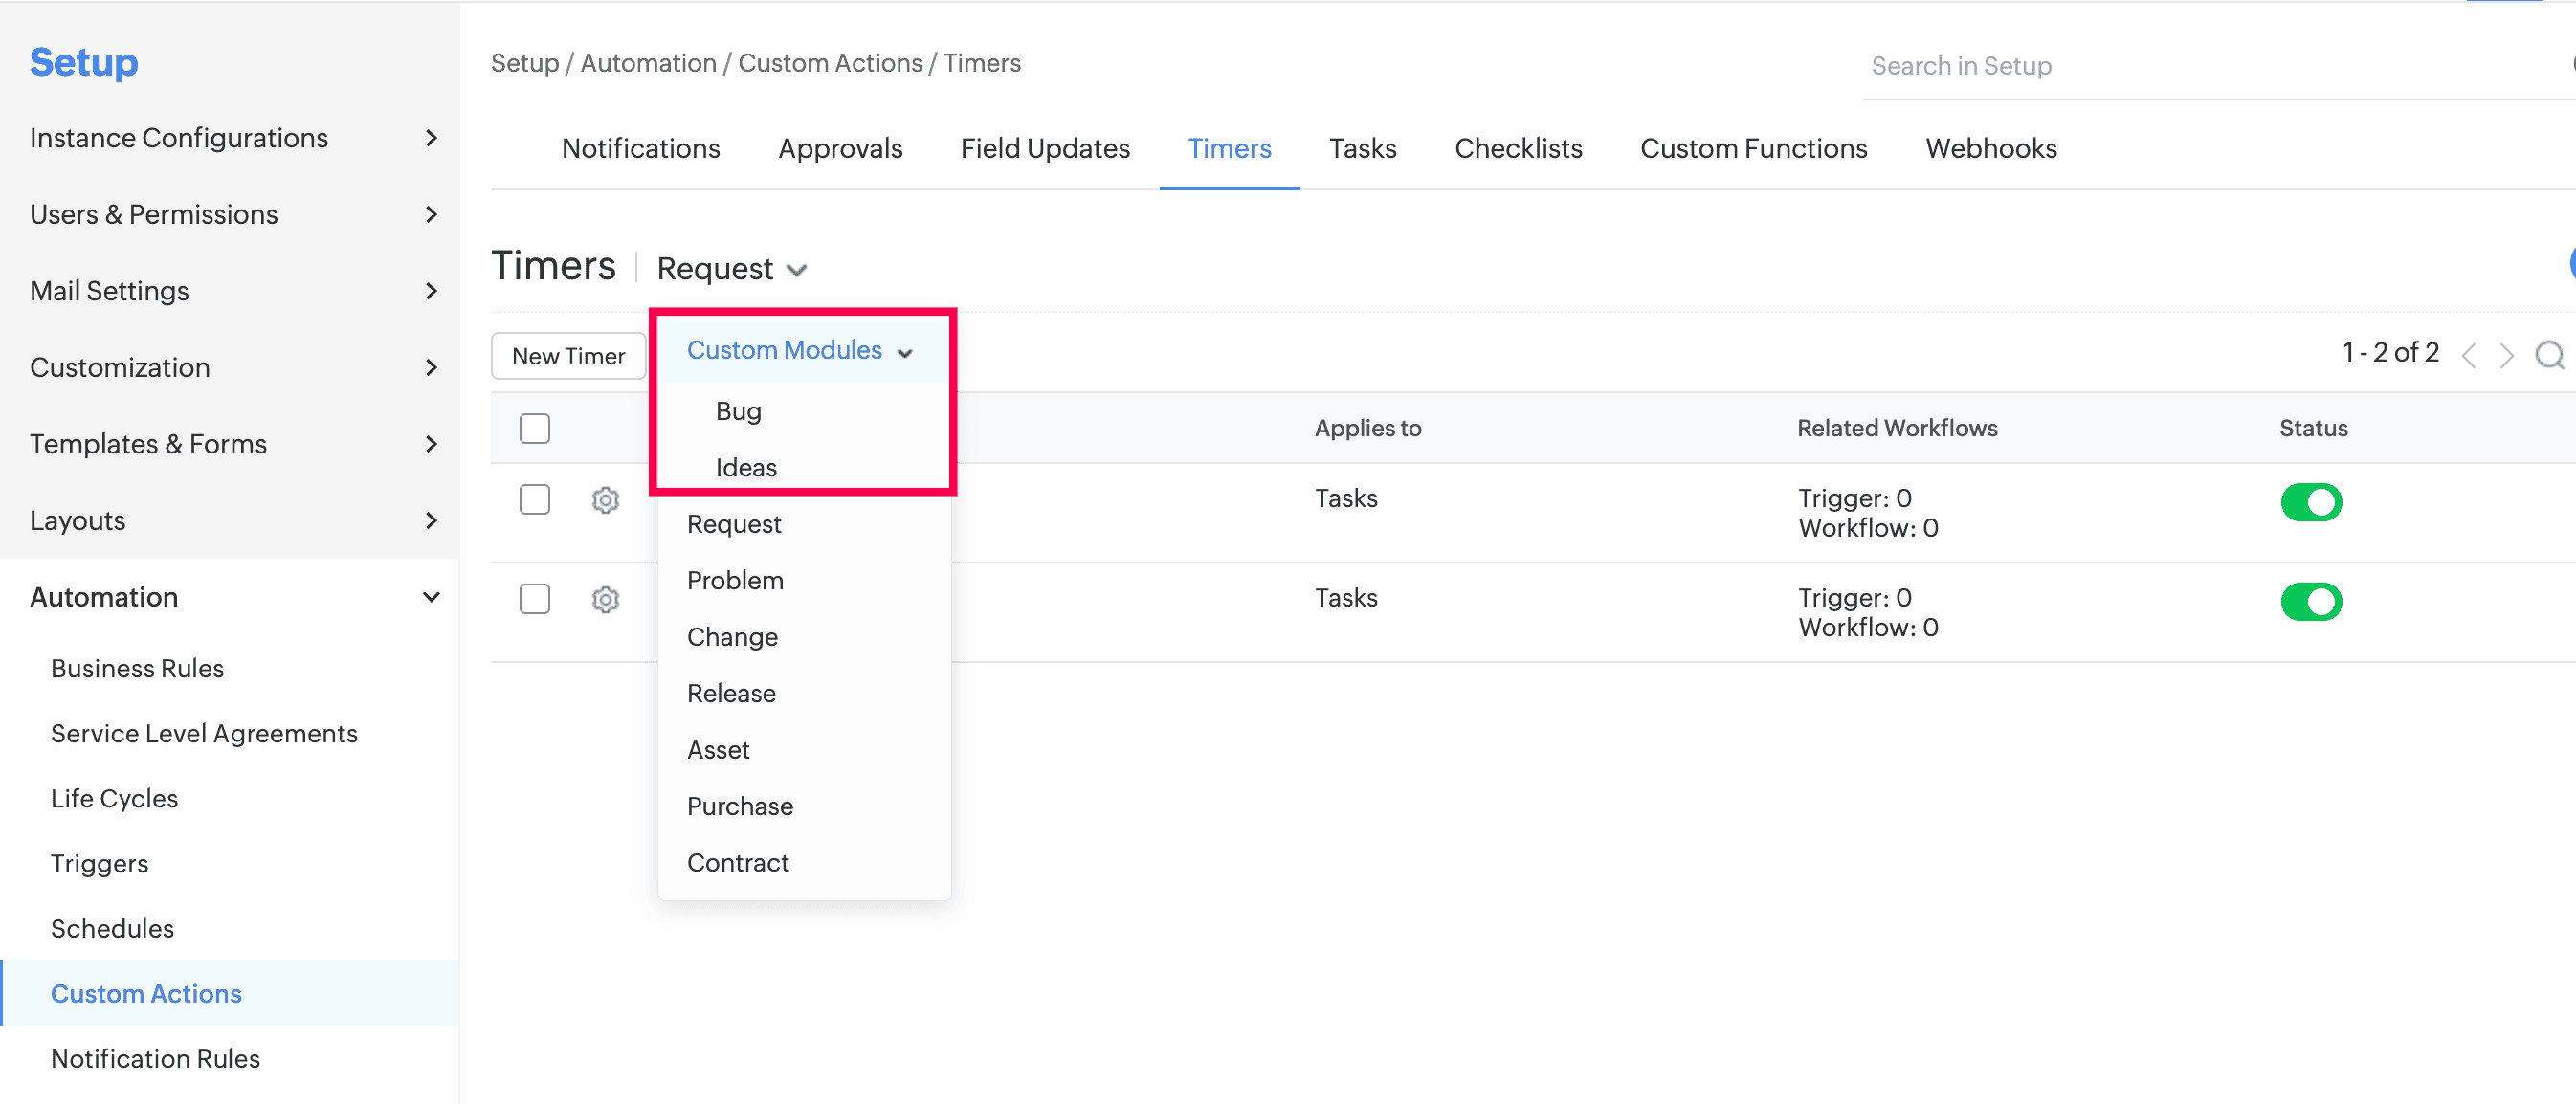
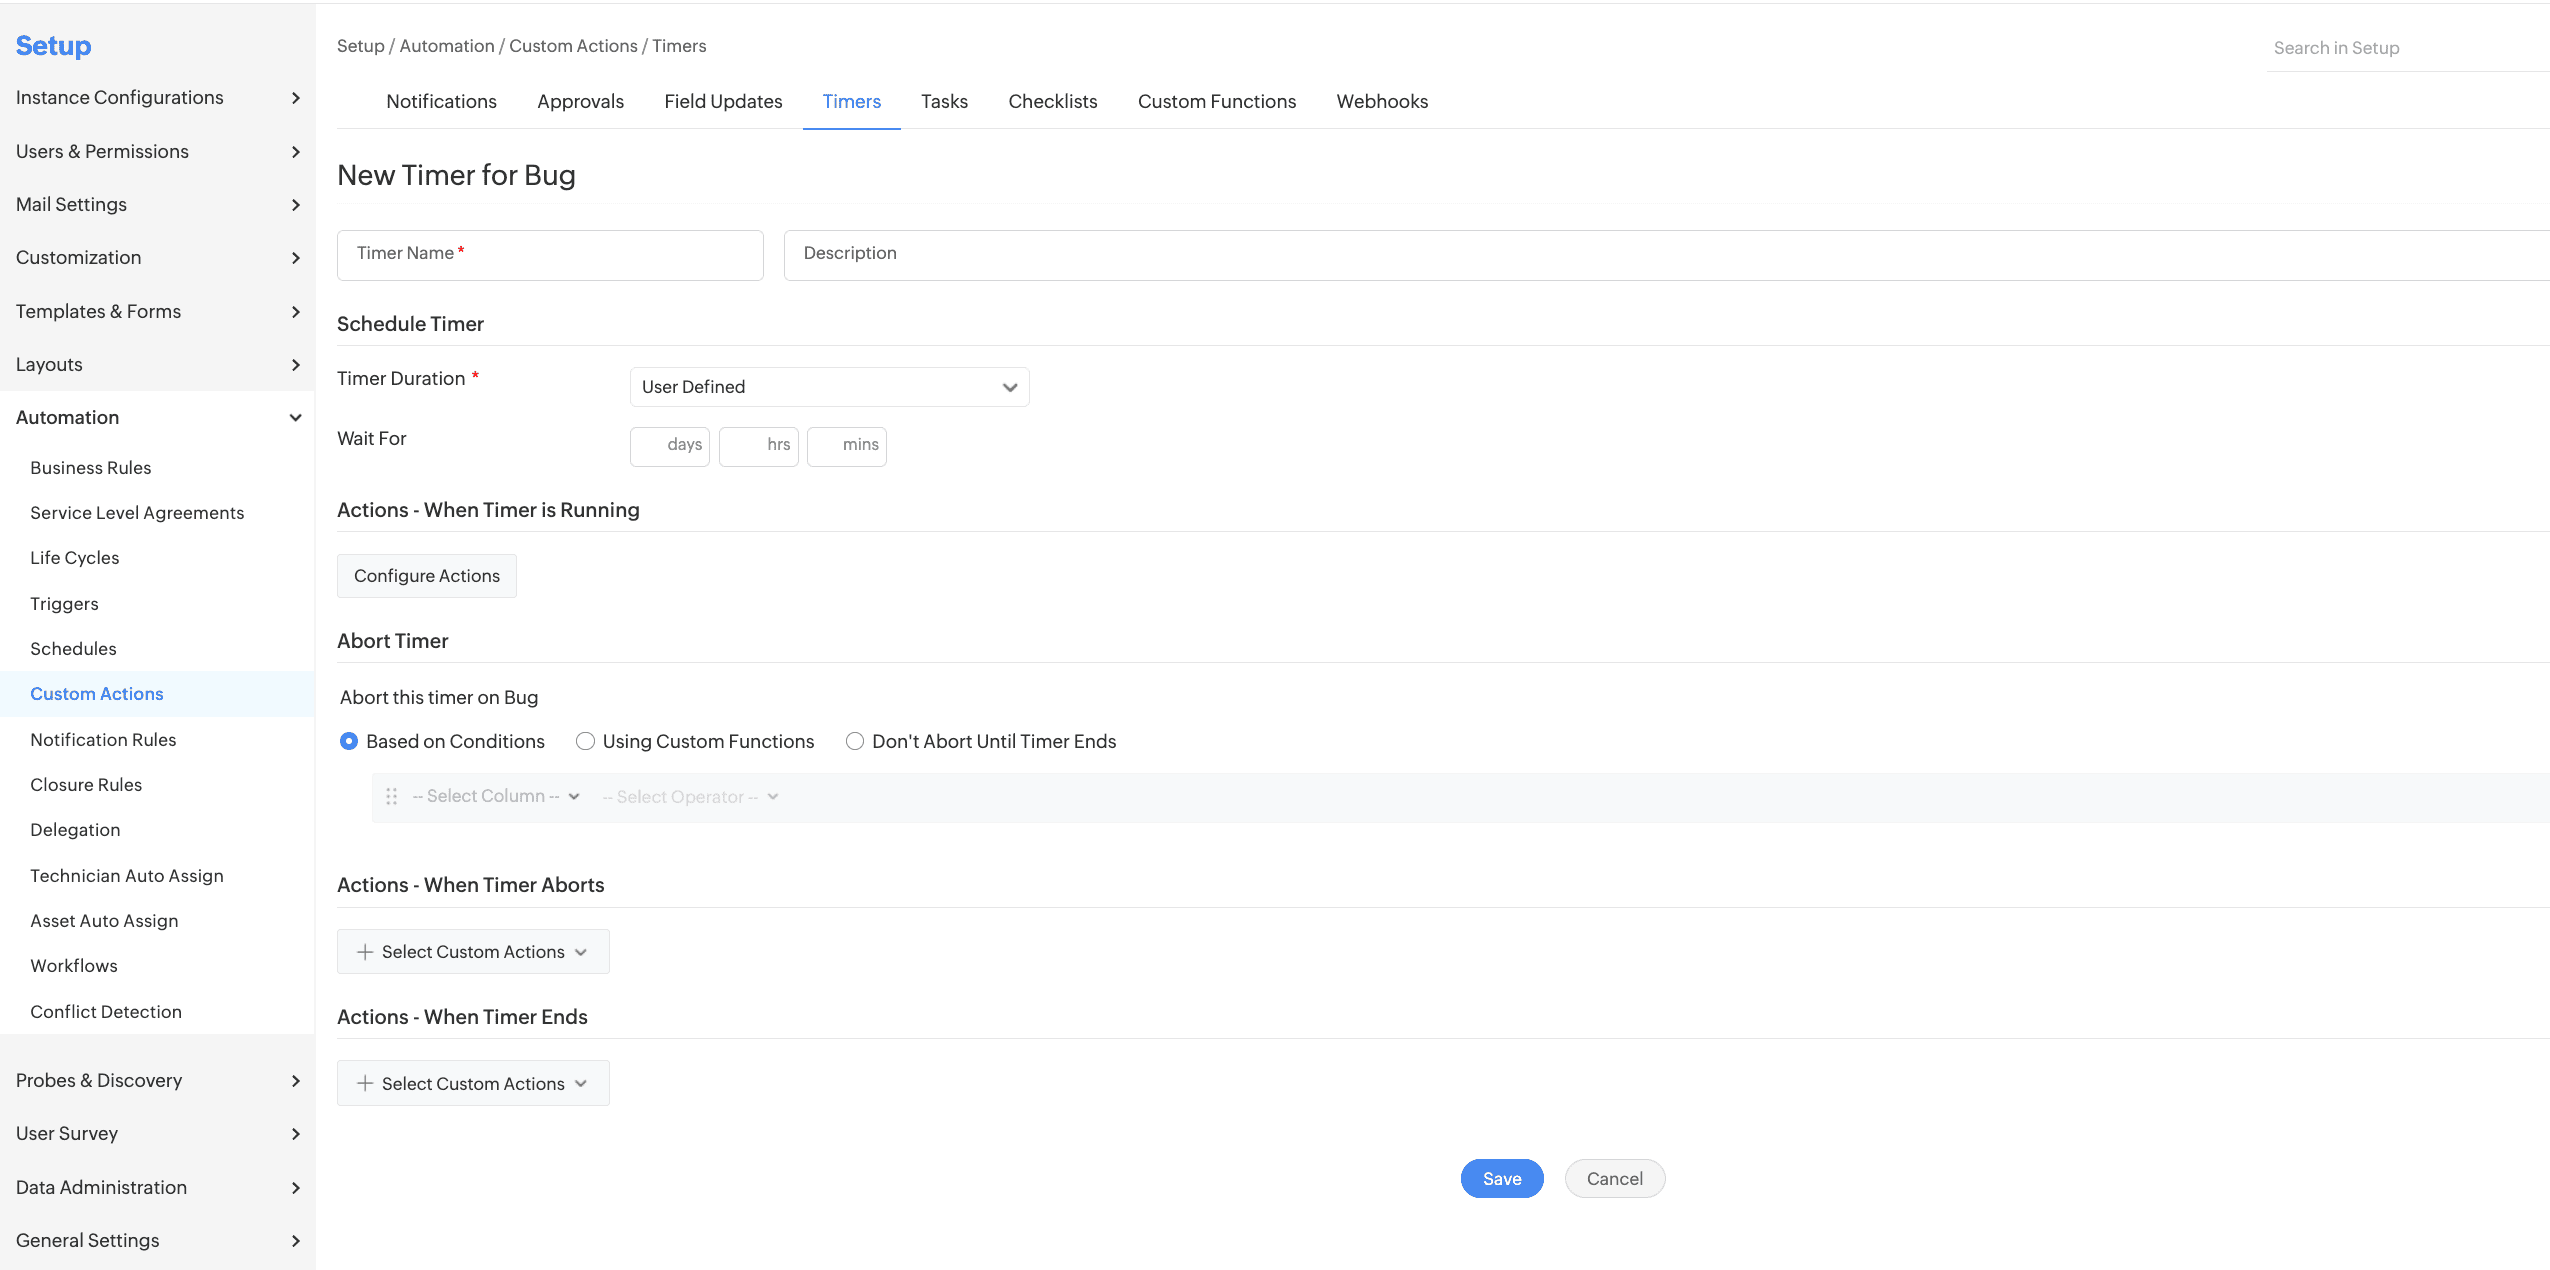
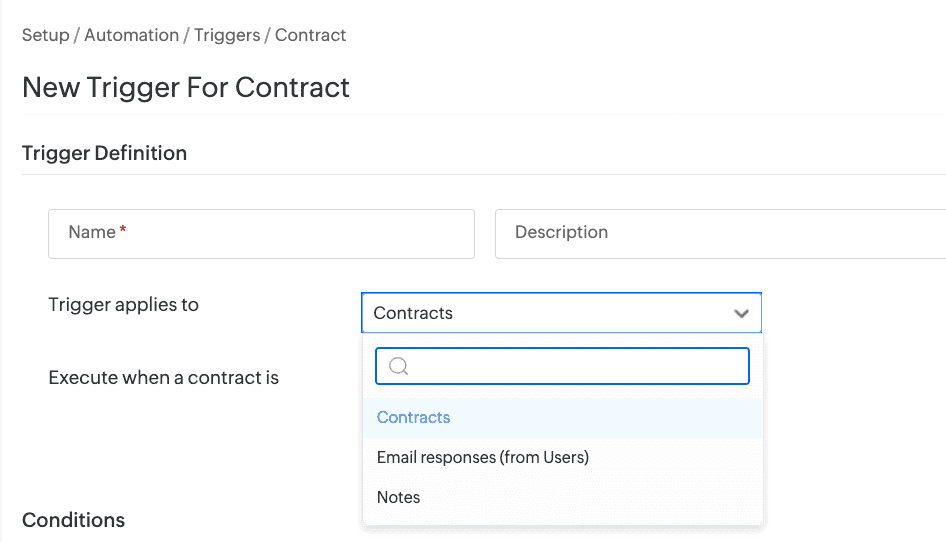
Purchase Timer Action for Trigger
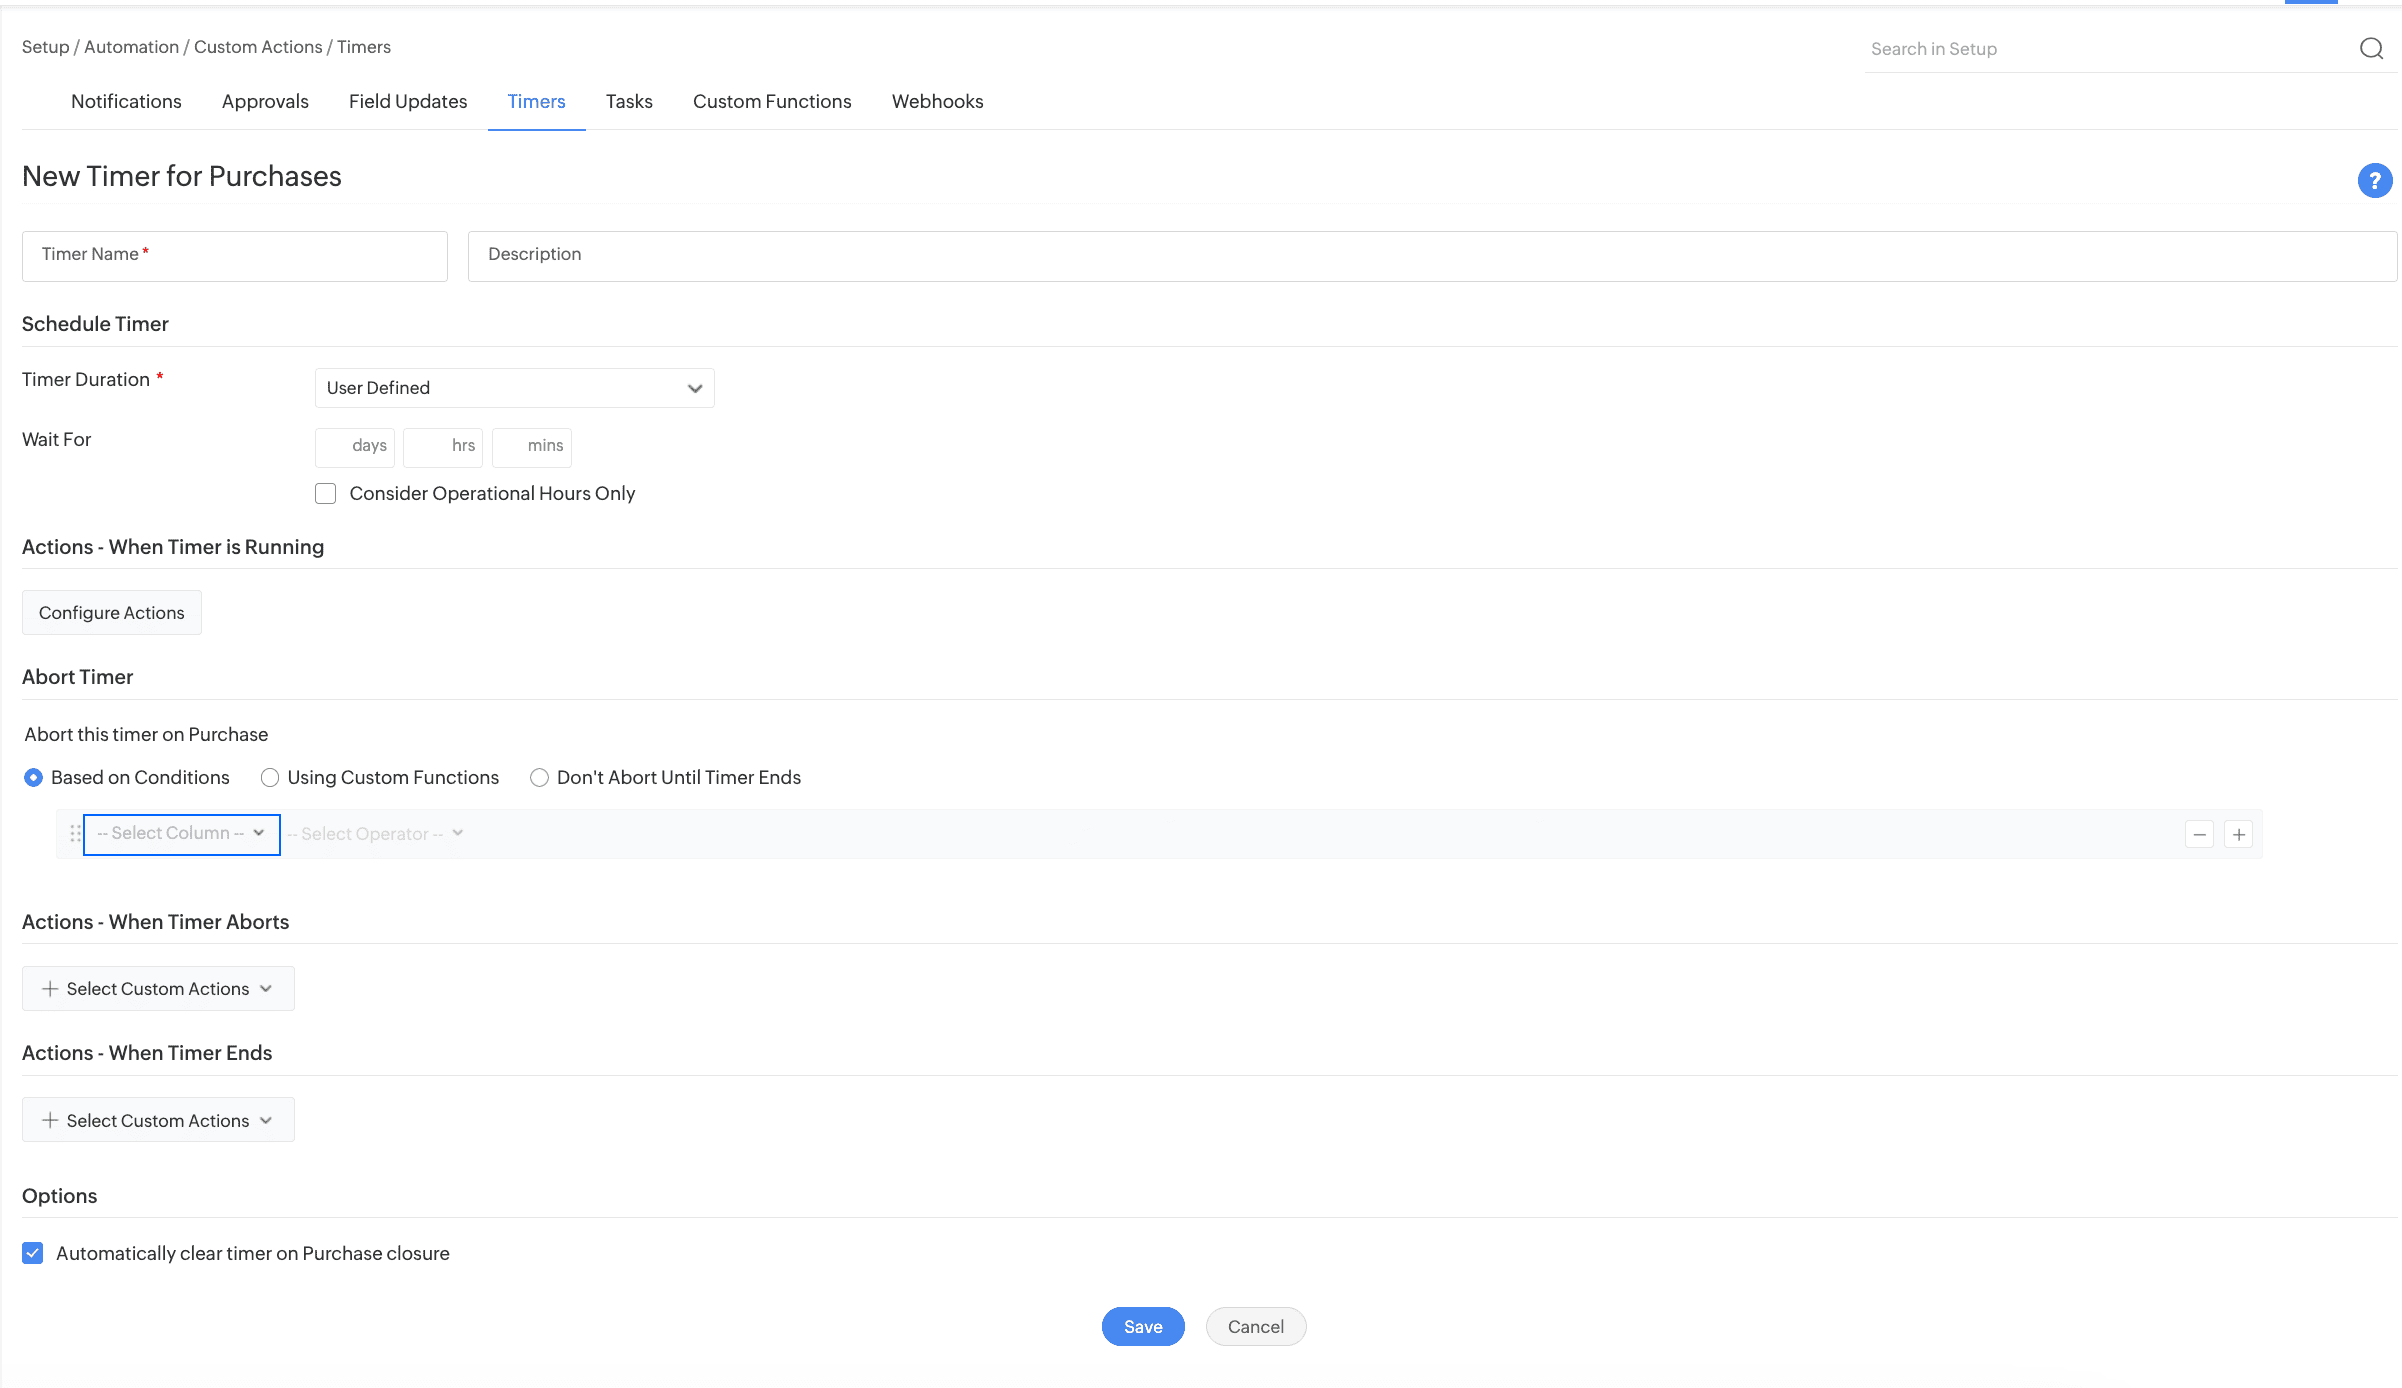
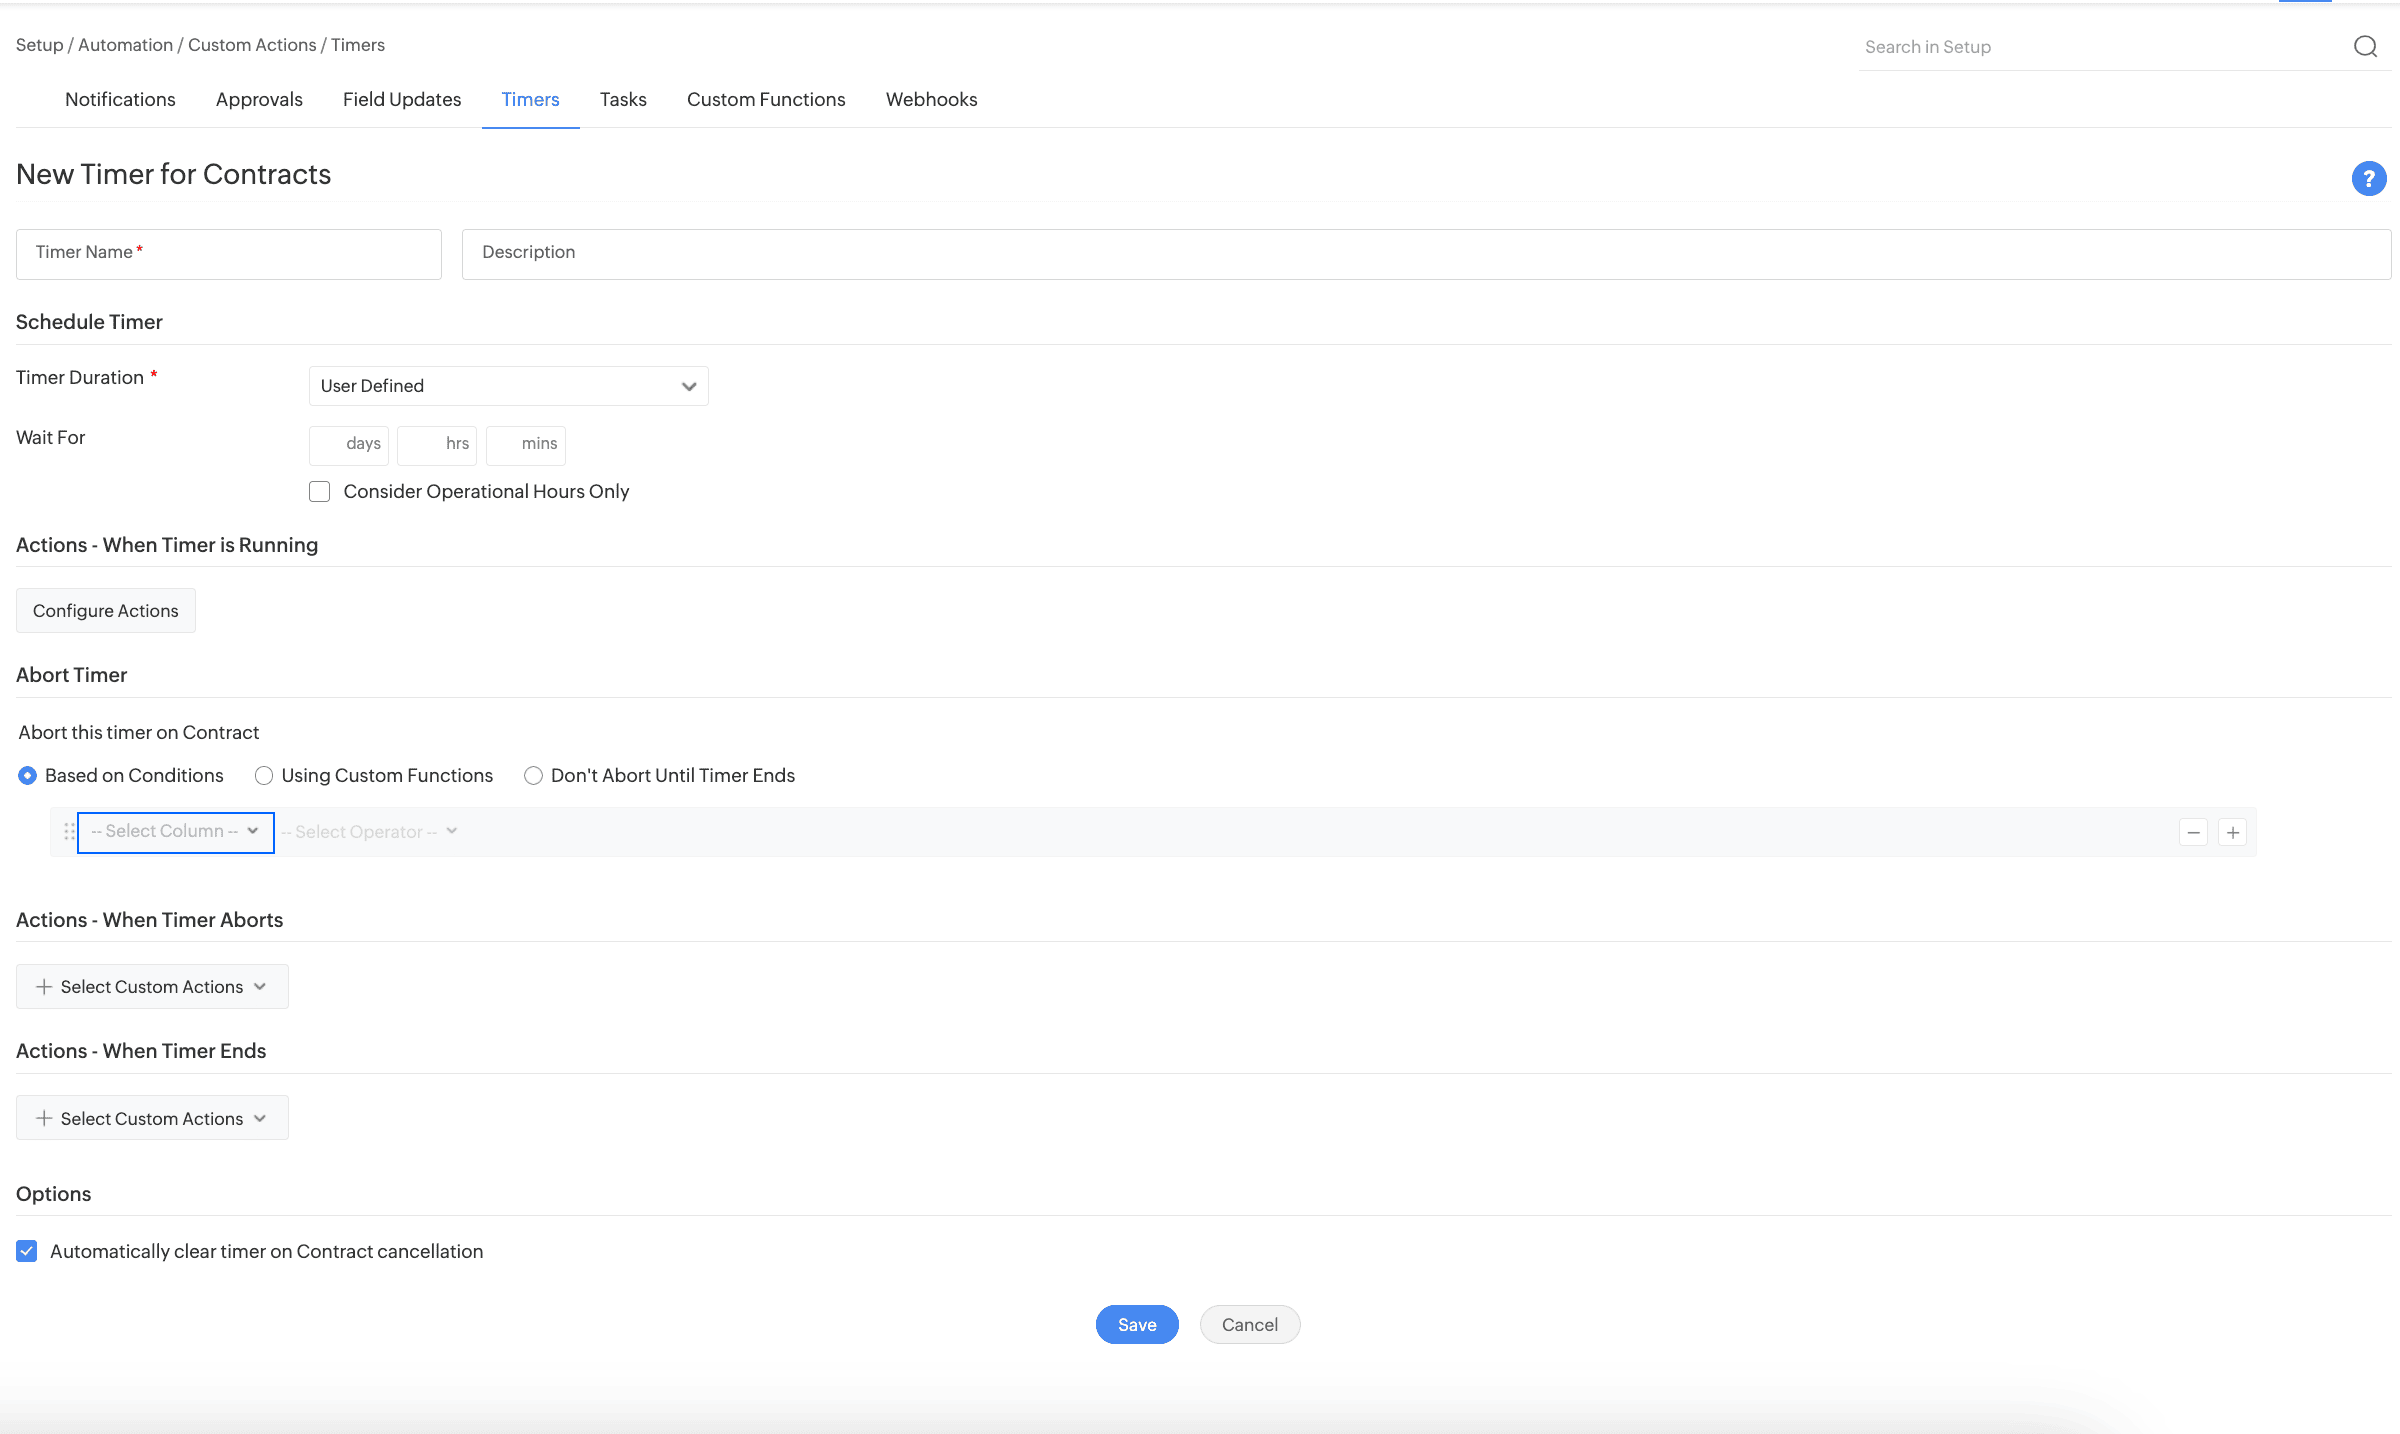
Contract Timer Action for Trigger
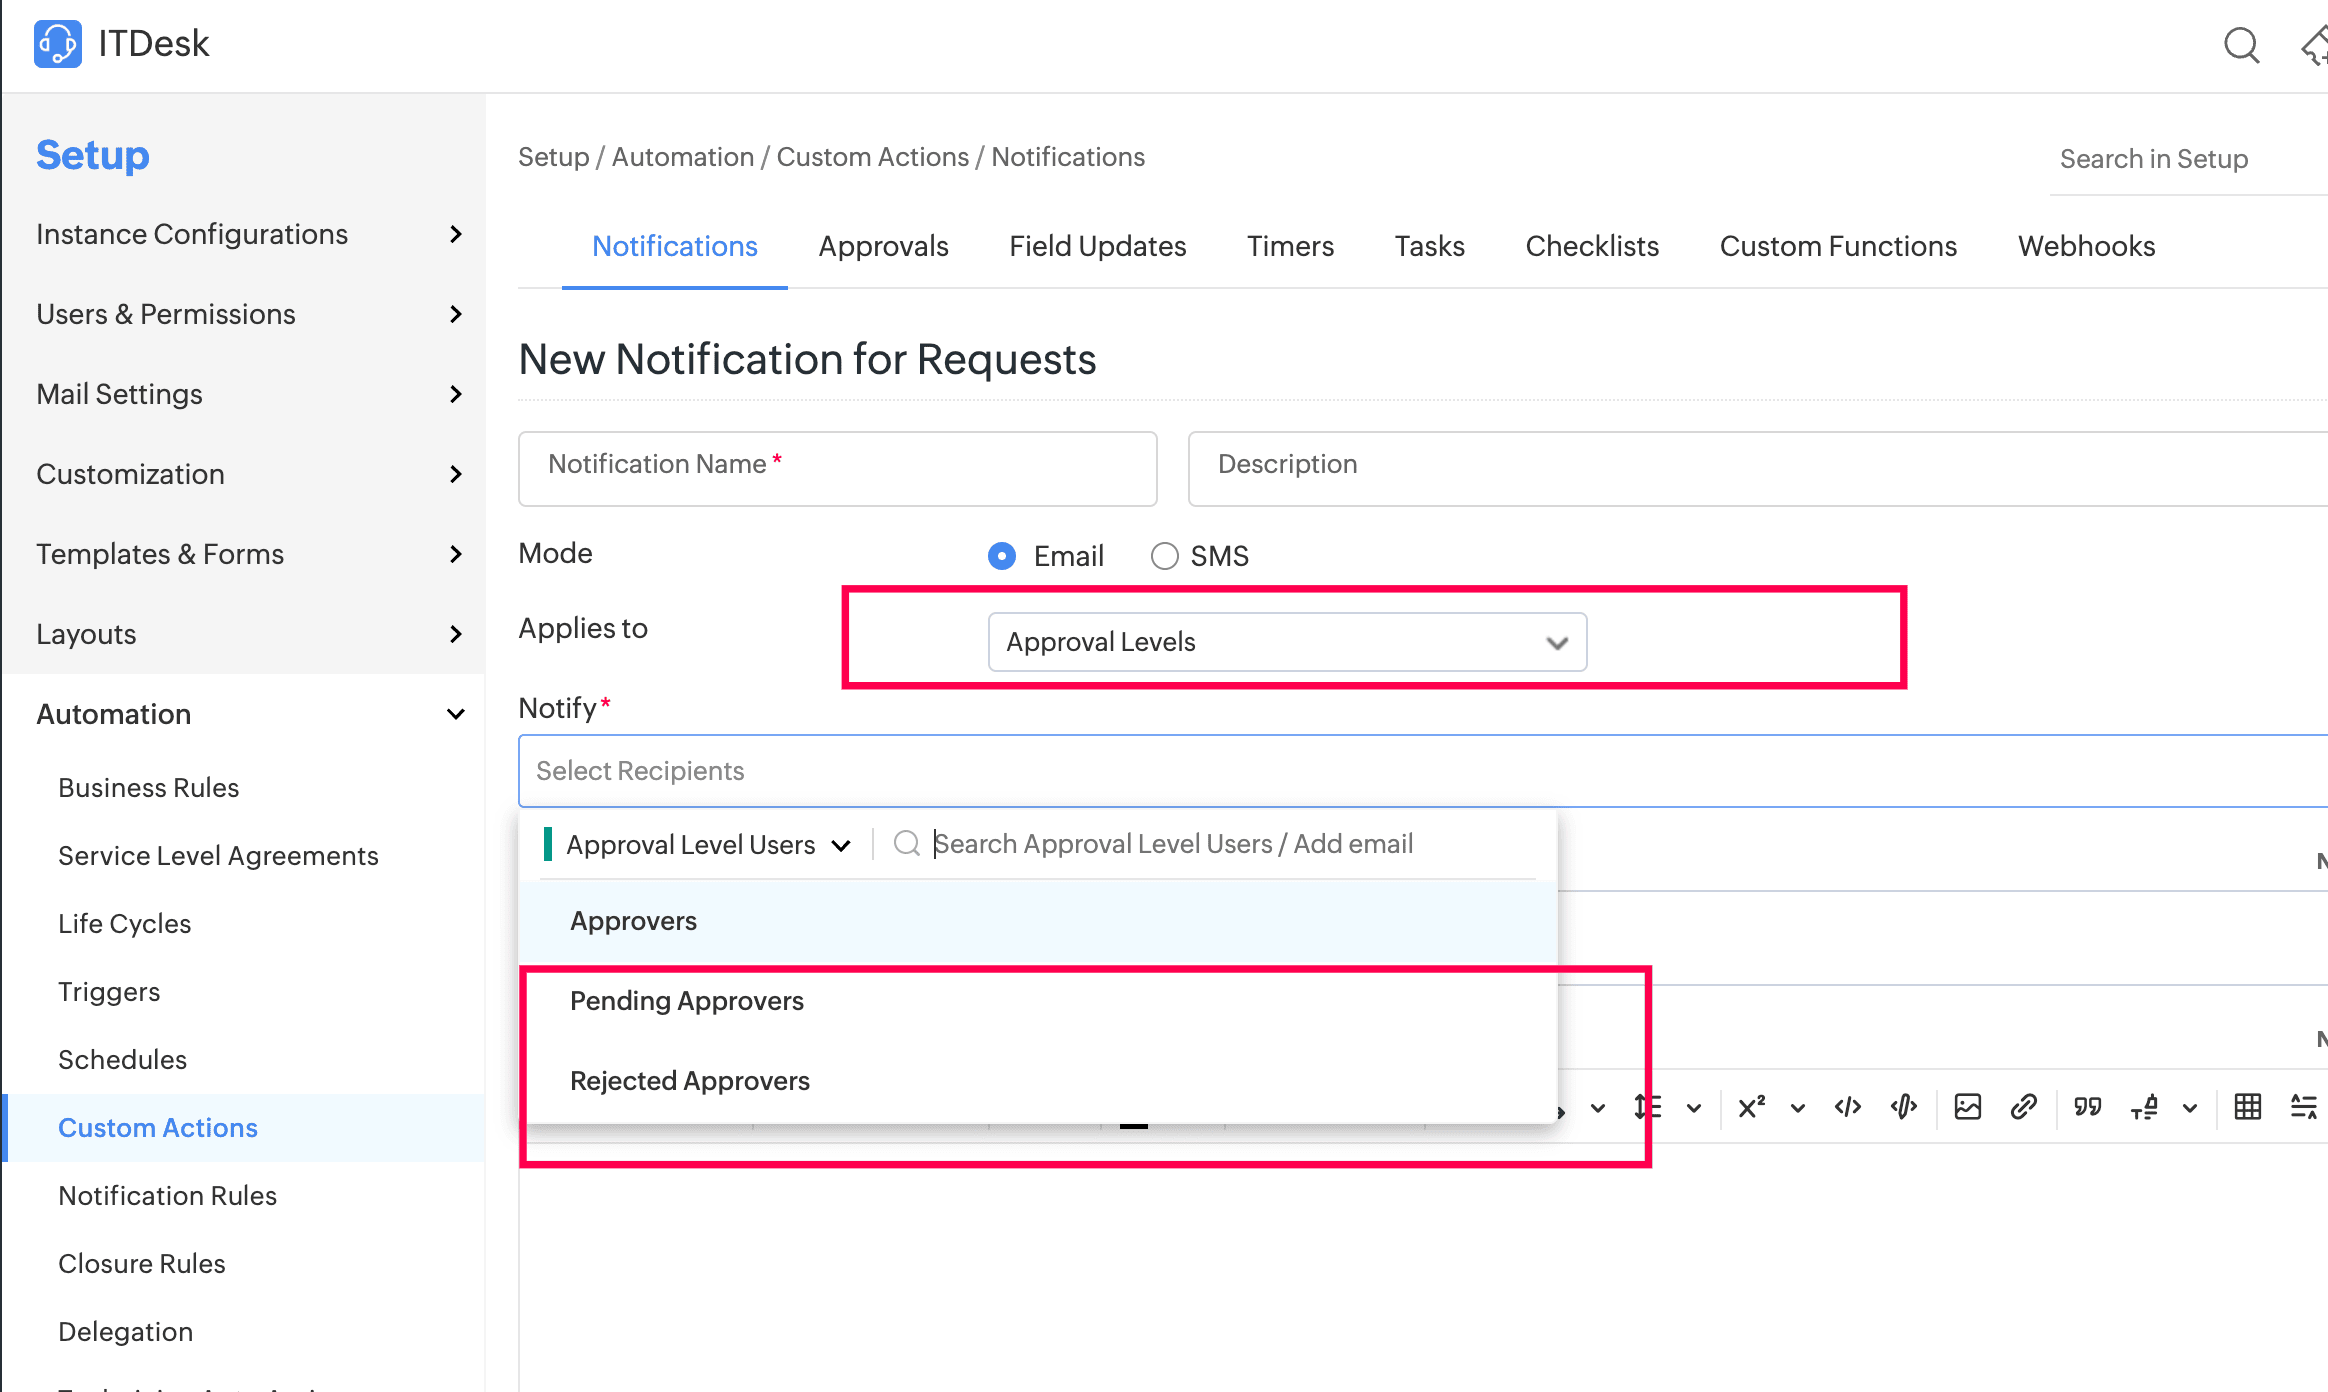
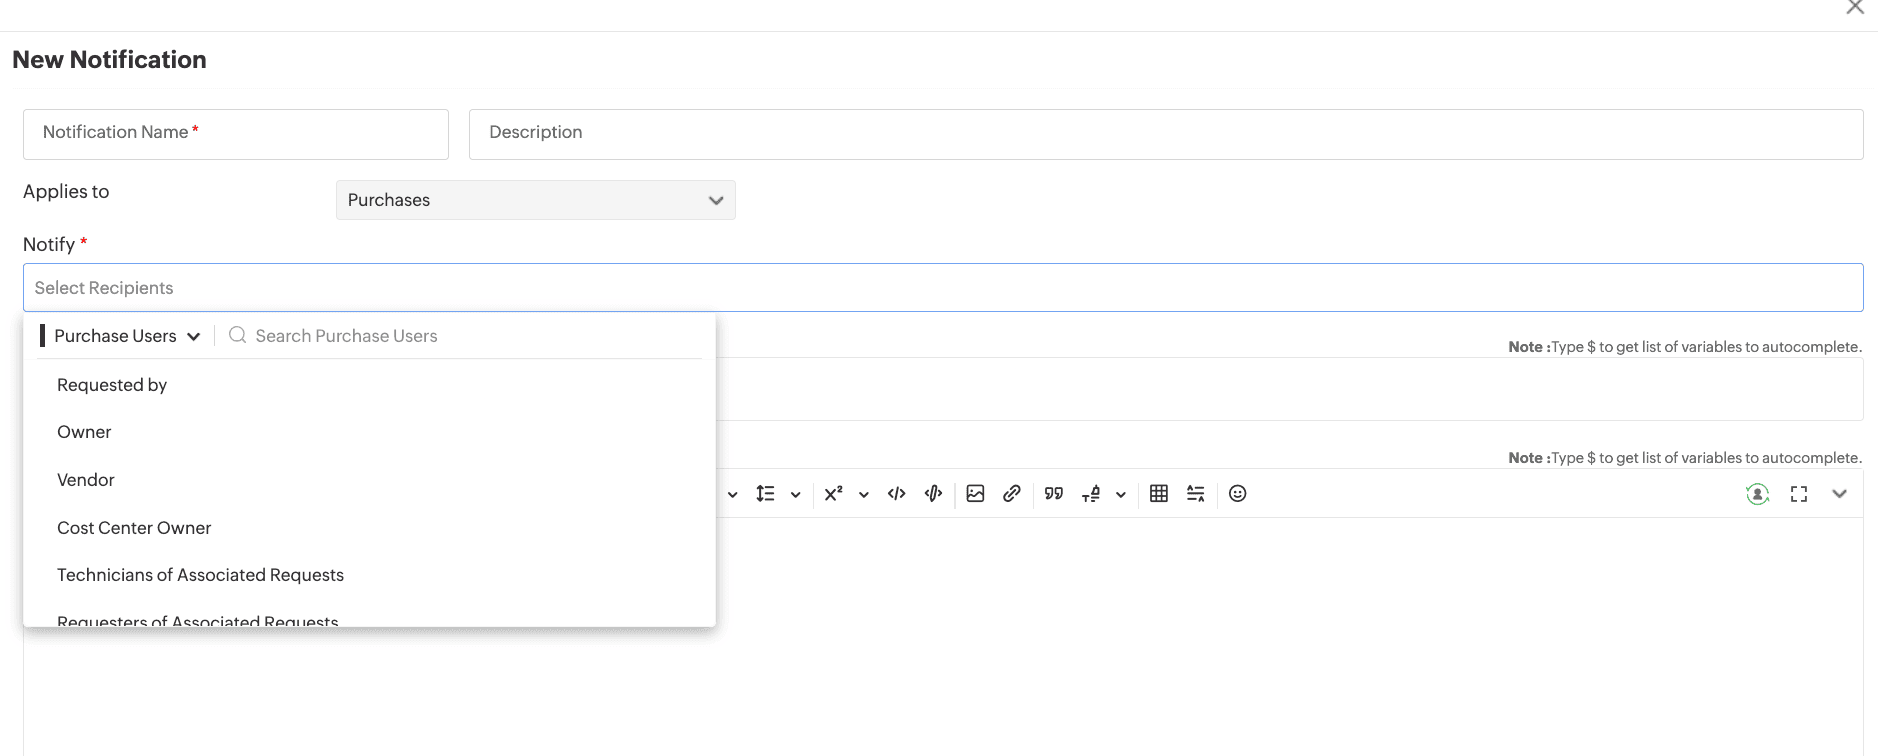
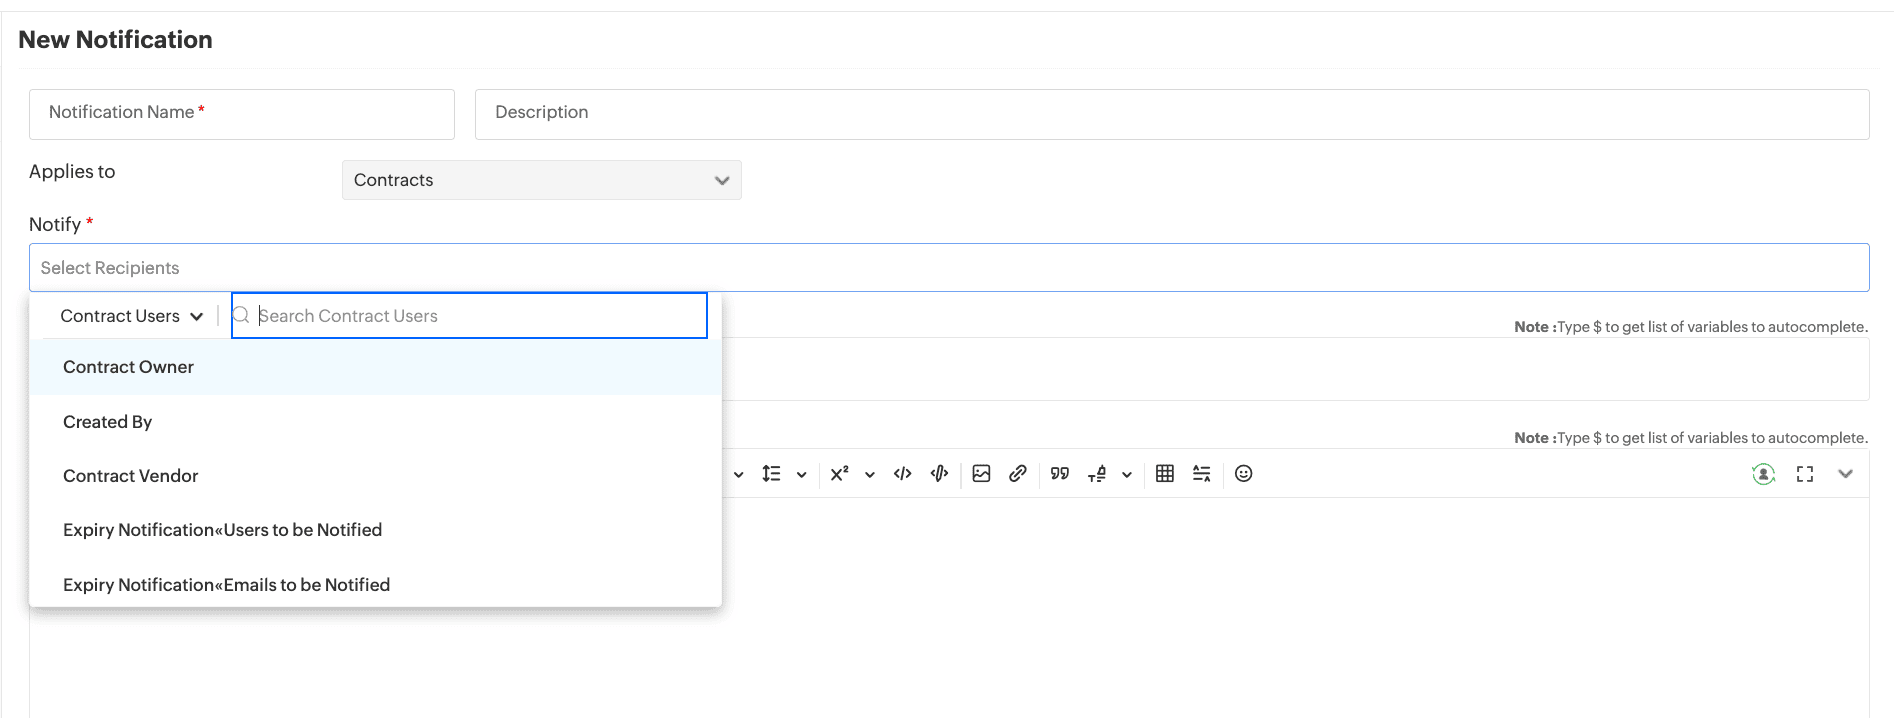
Purchase/Contract Users in Notifications
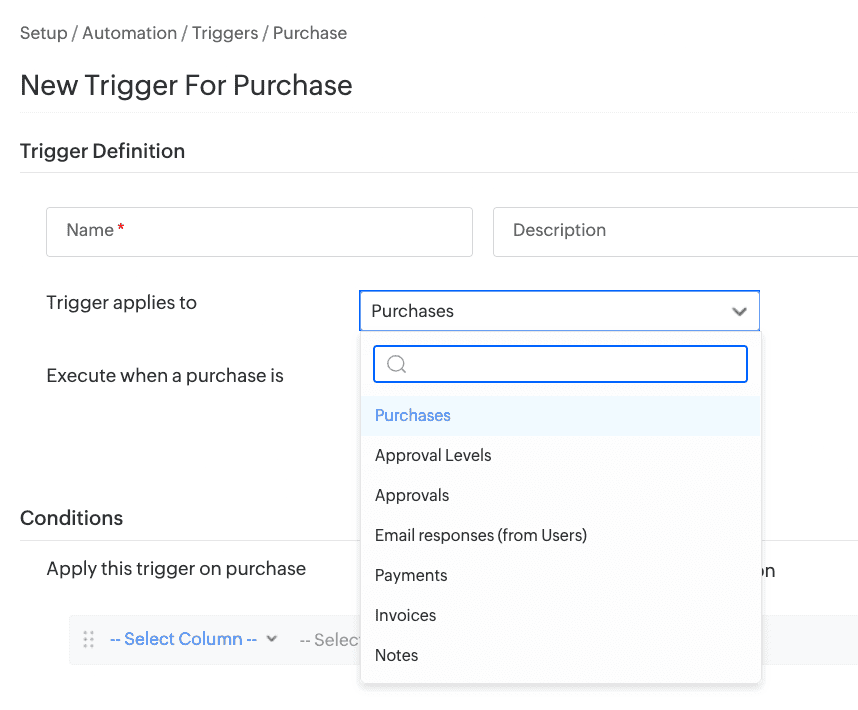
Triggers for Subentities of Purchases and Contracts
Releases
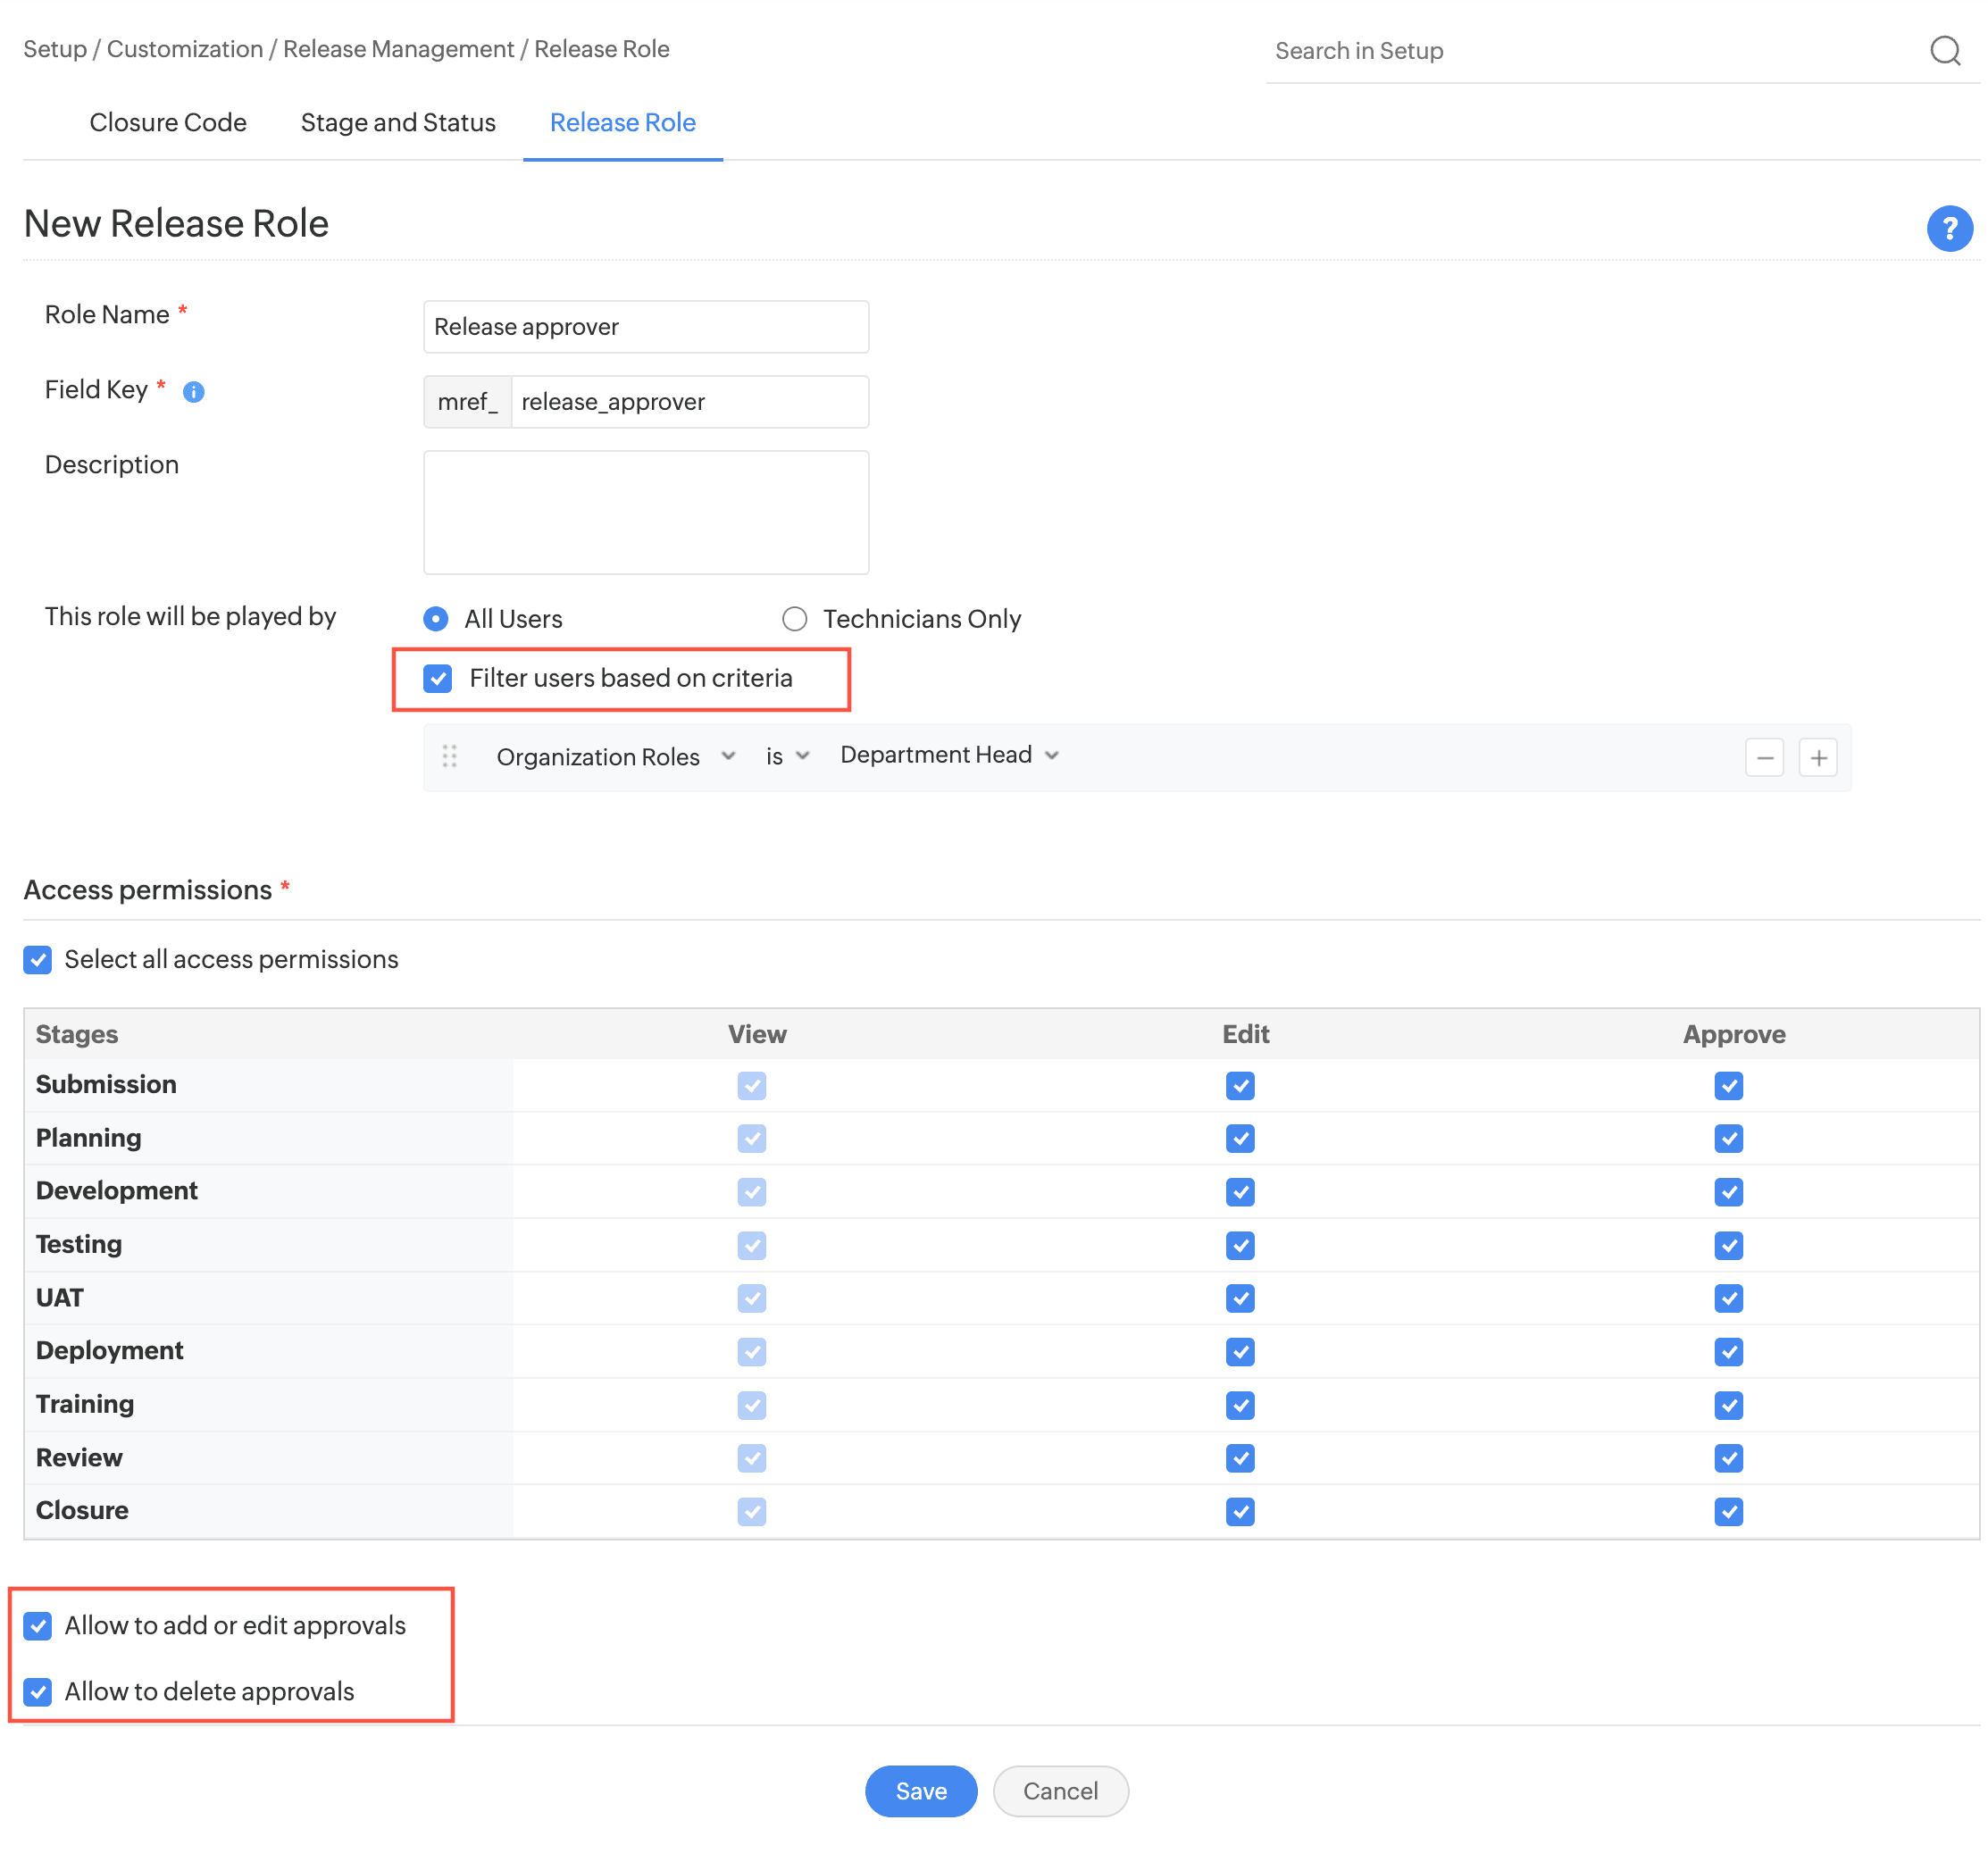
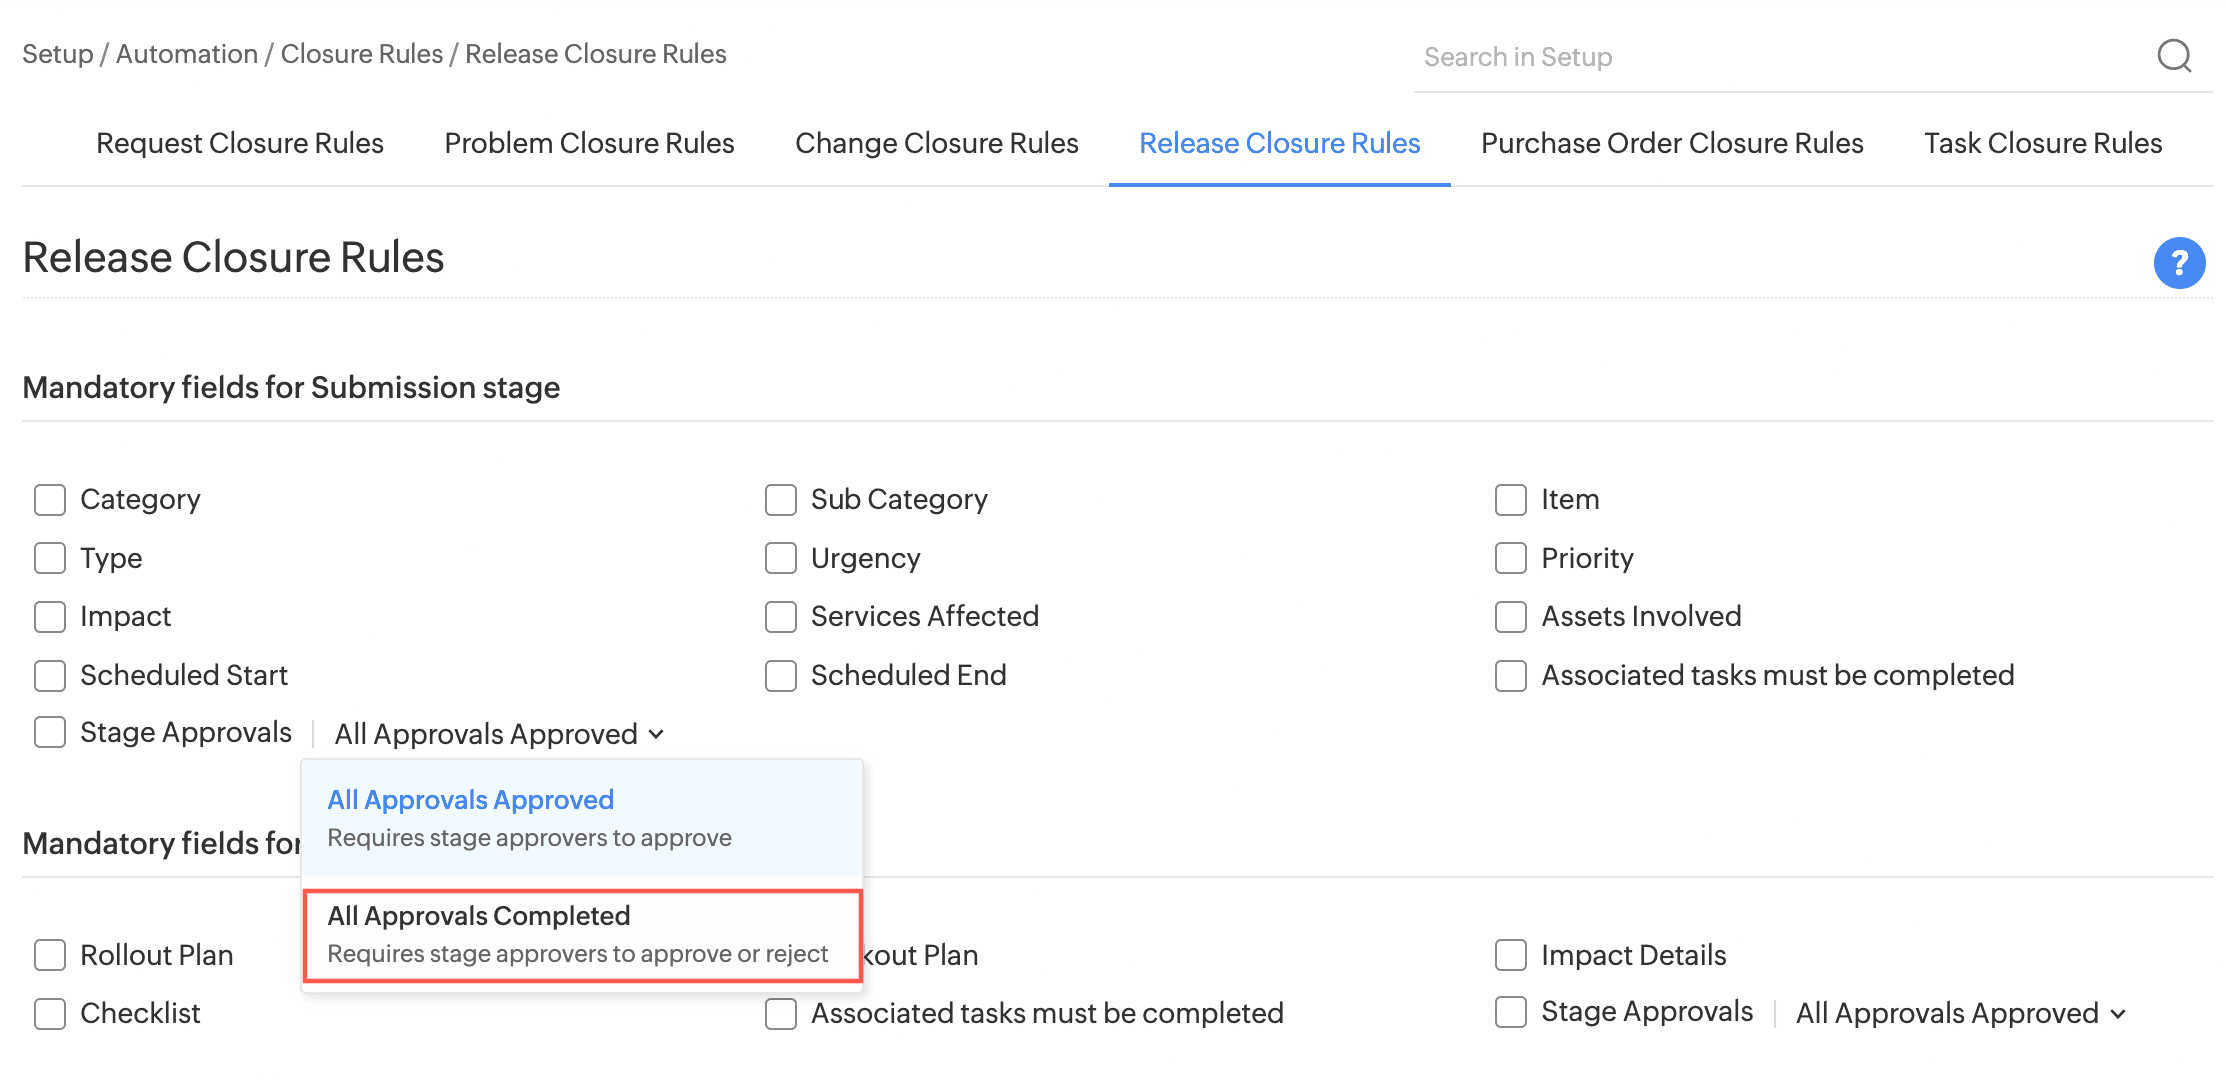
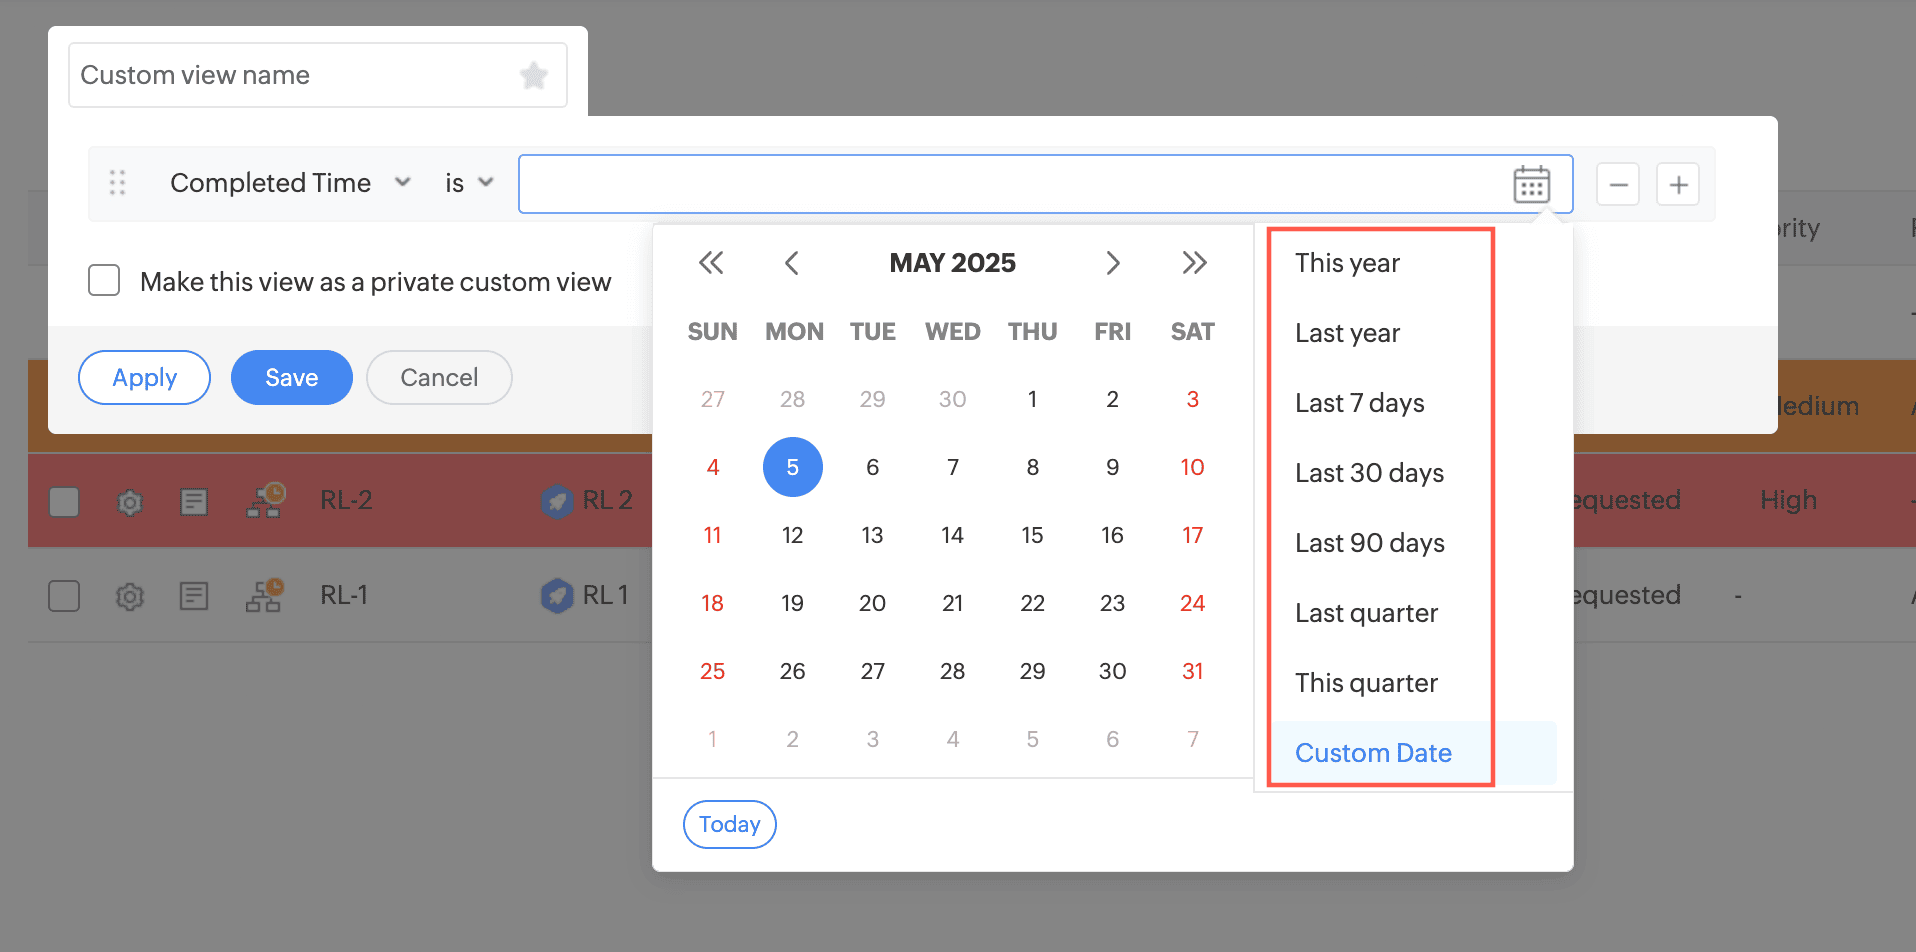
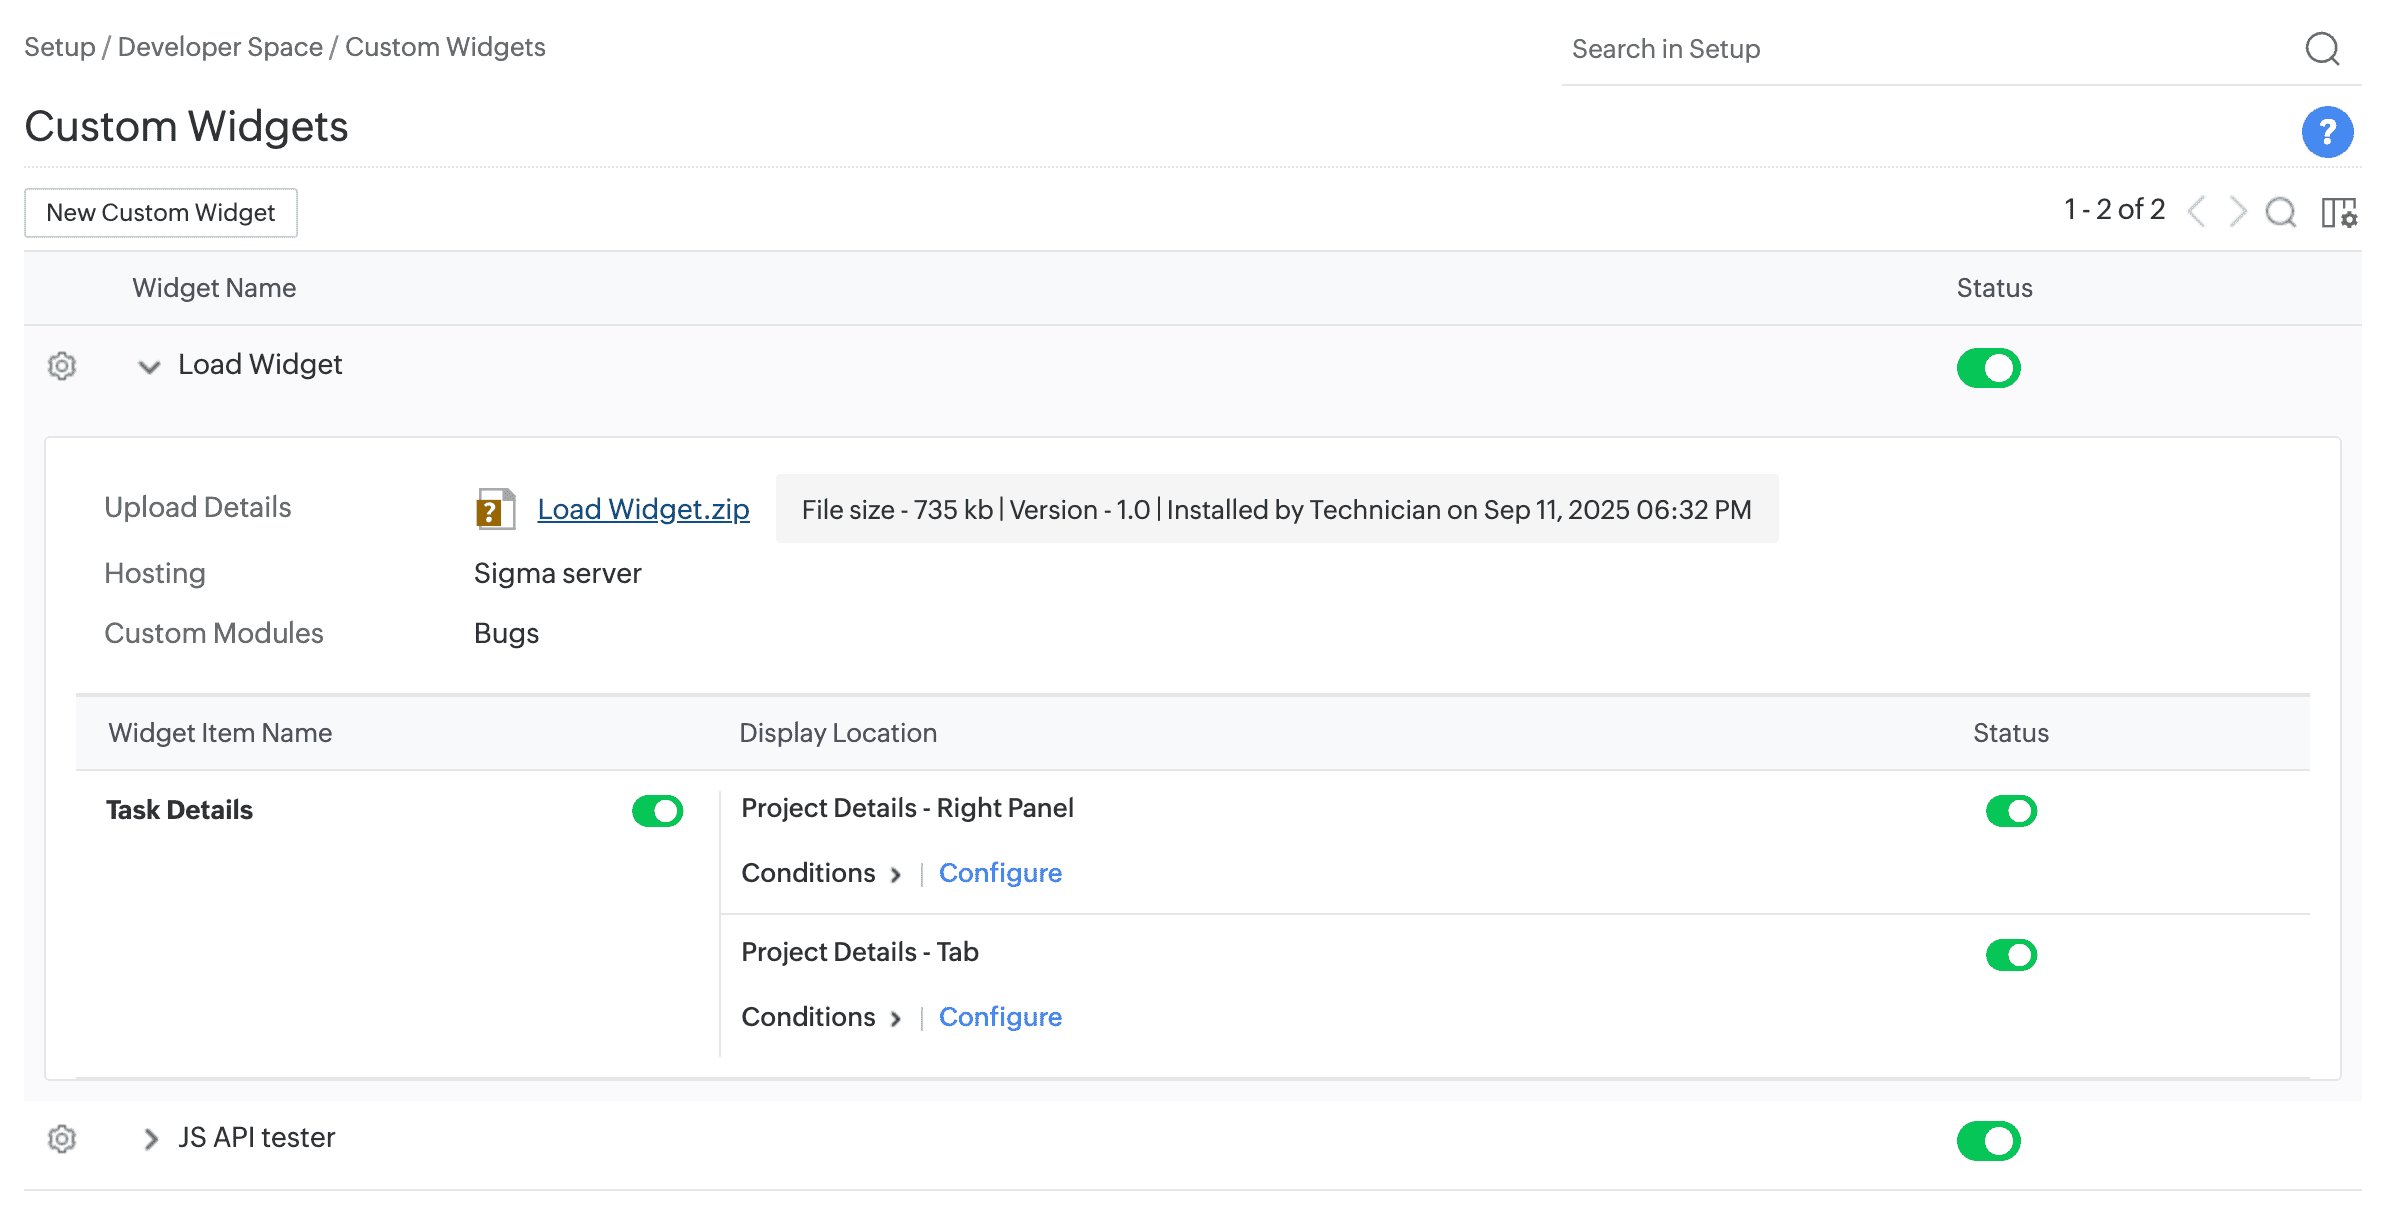
Qntrl Circuit now includes an updated user interface, which is automatically enabled for all users. All existing core functionalities remain unchanged.
This update was rolled out in phases over the past two months across data centres and is now fully deployed globally.
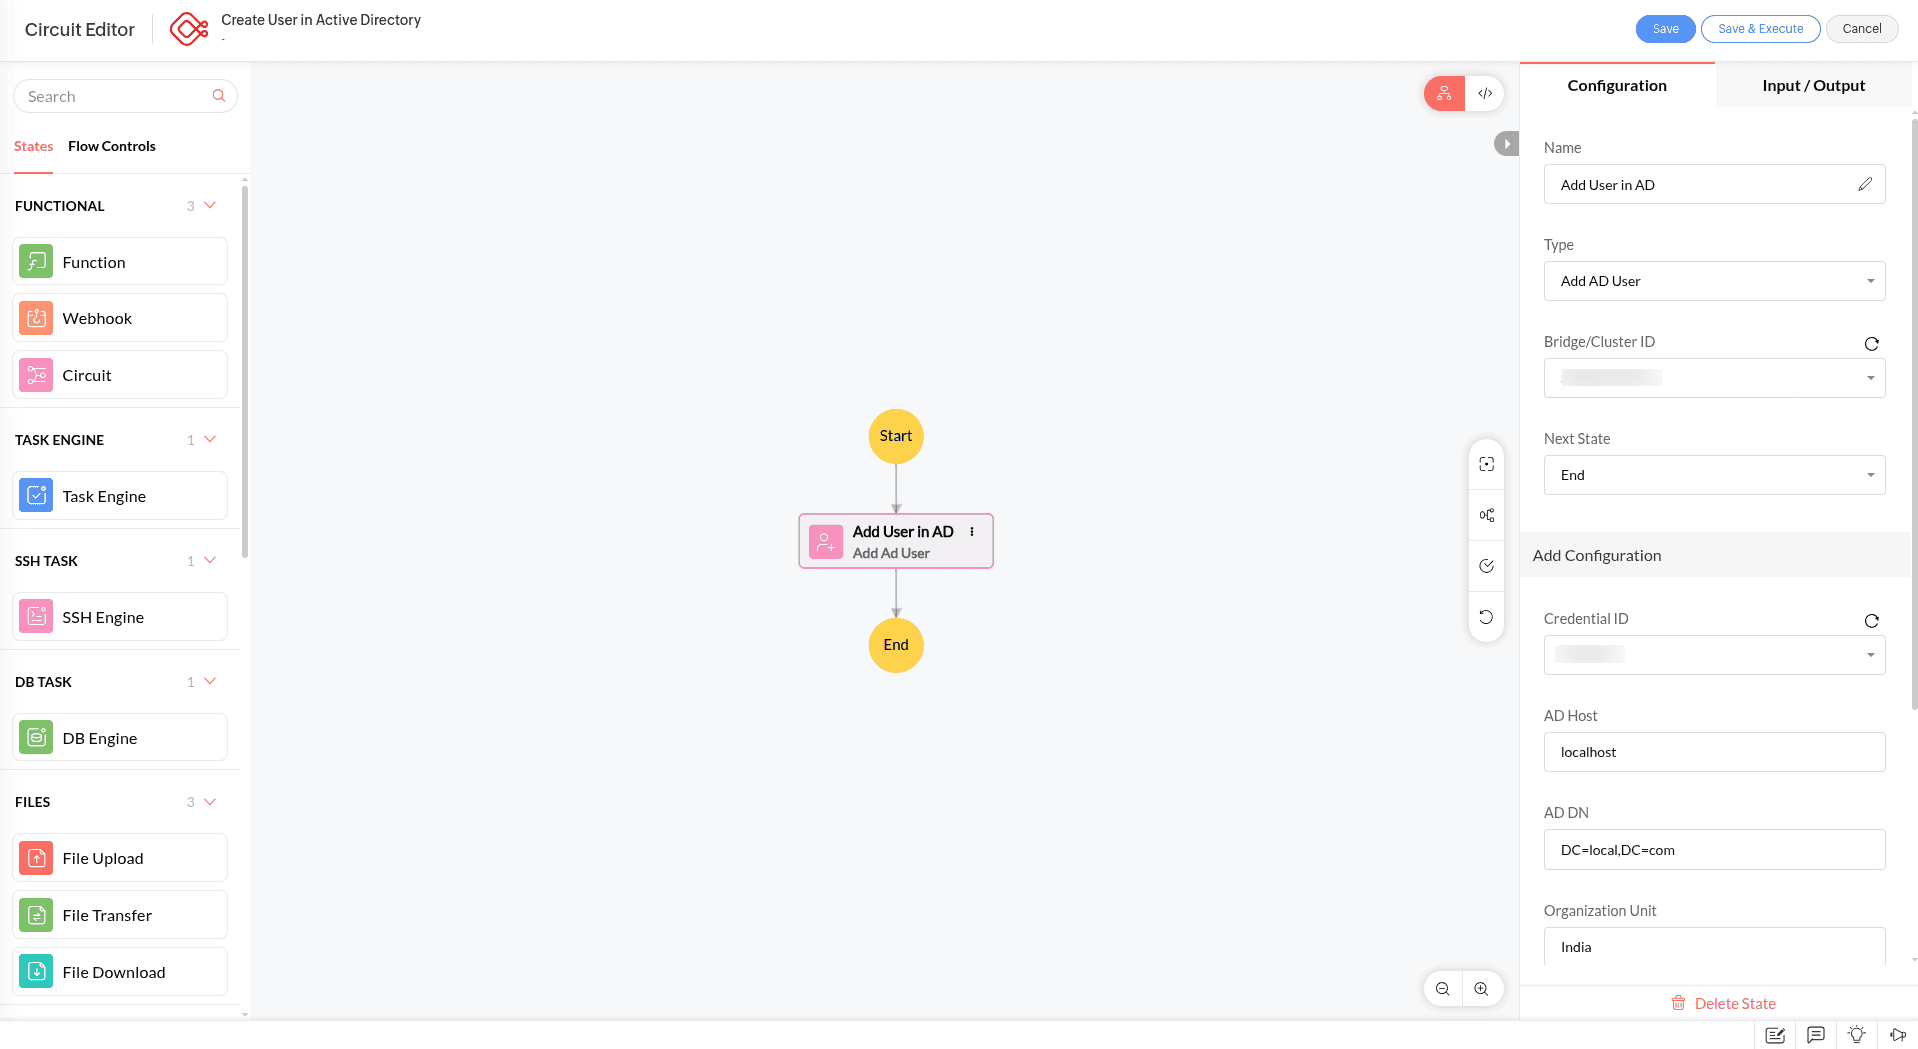
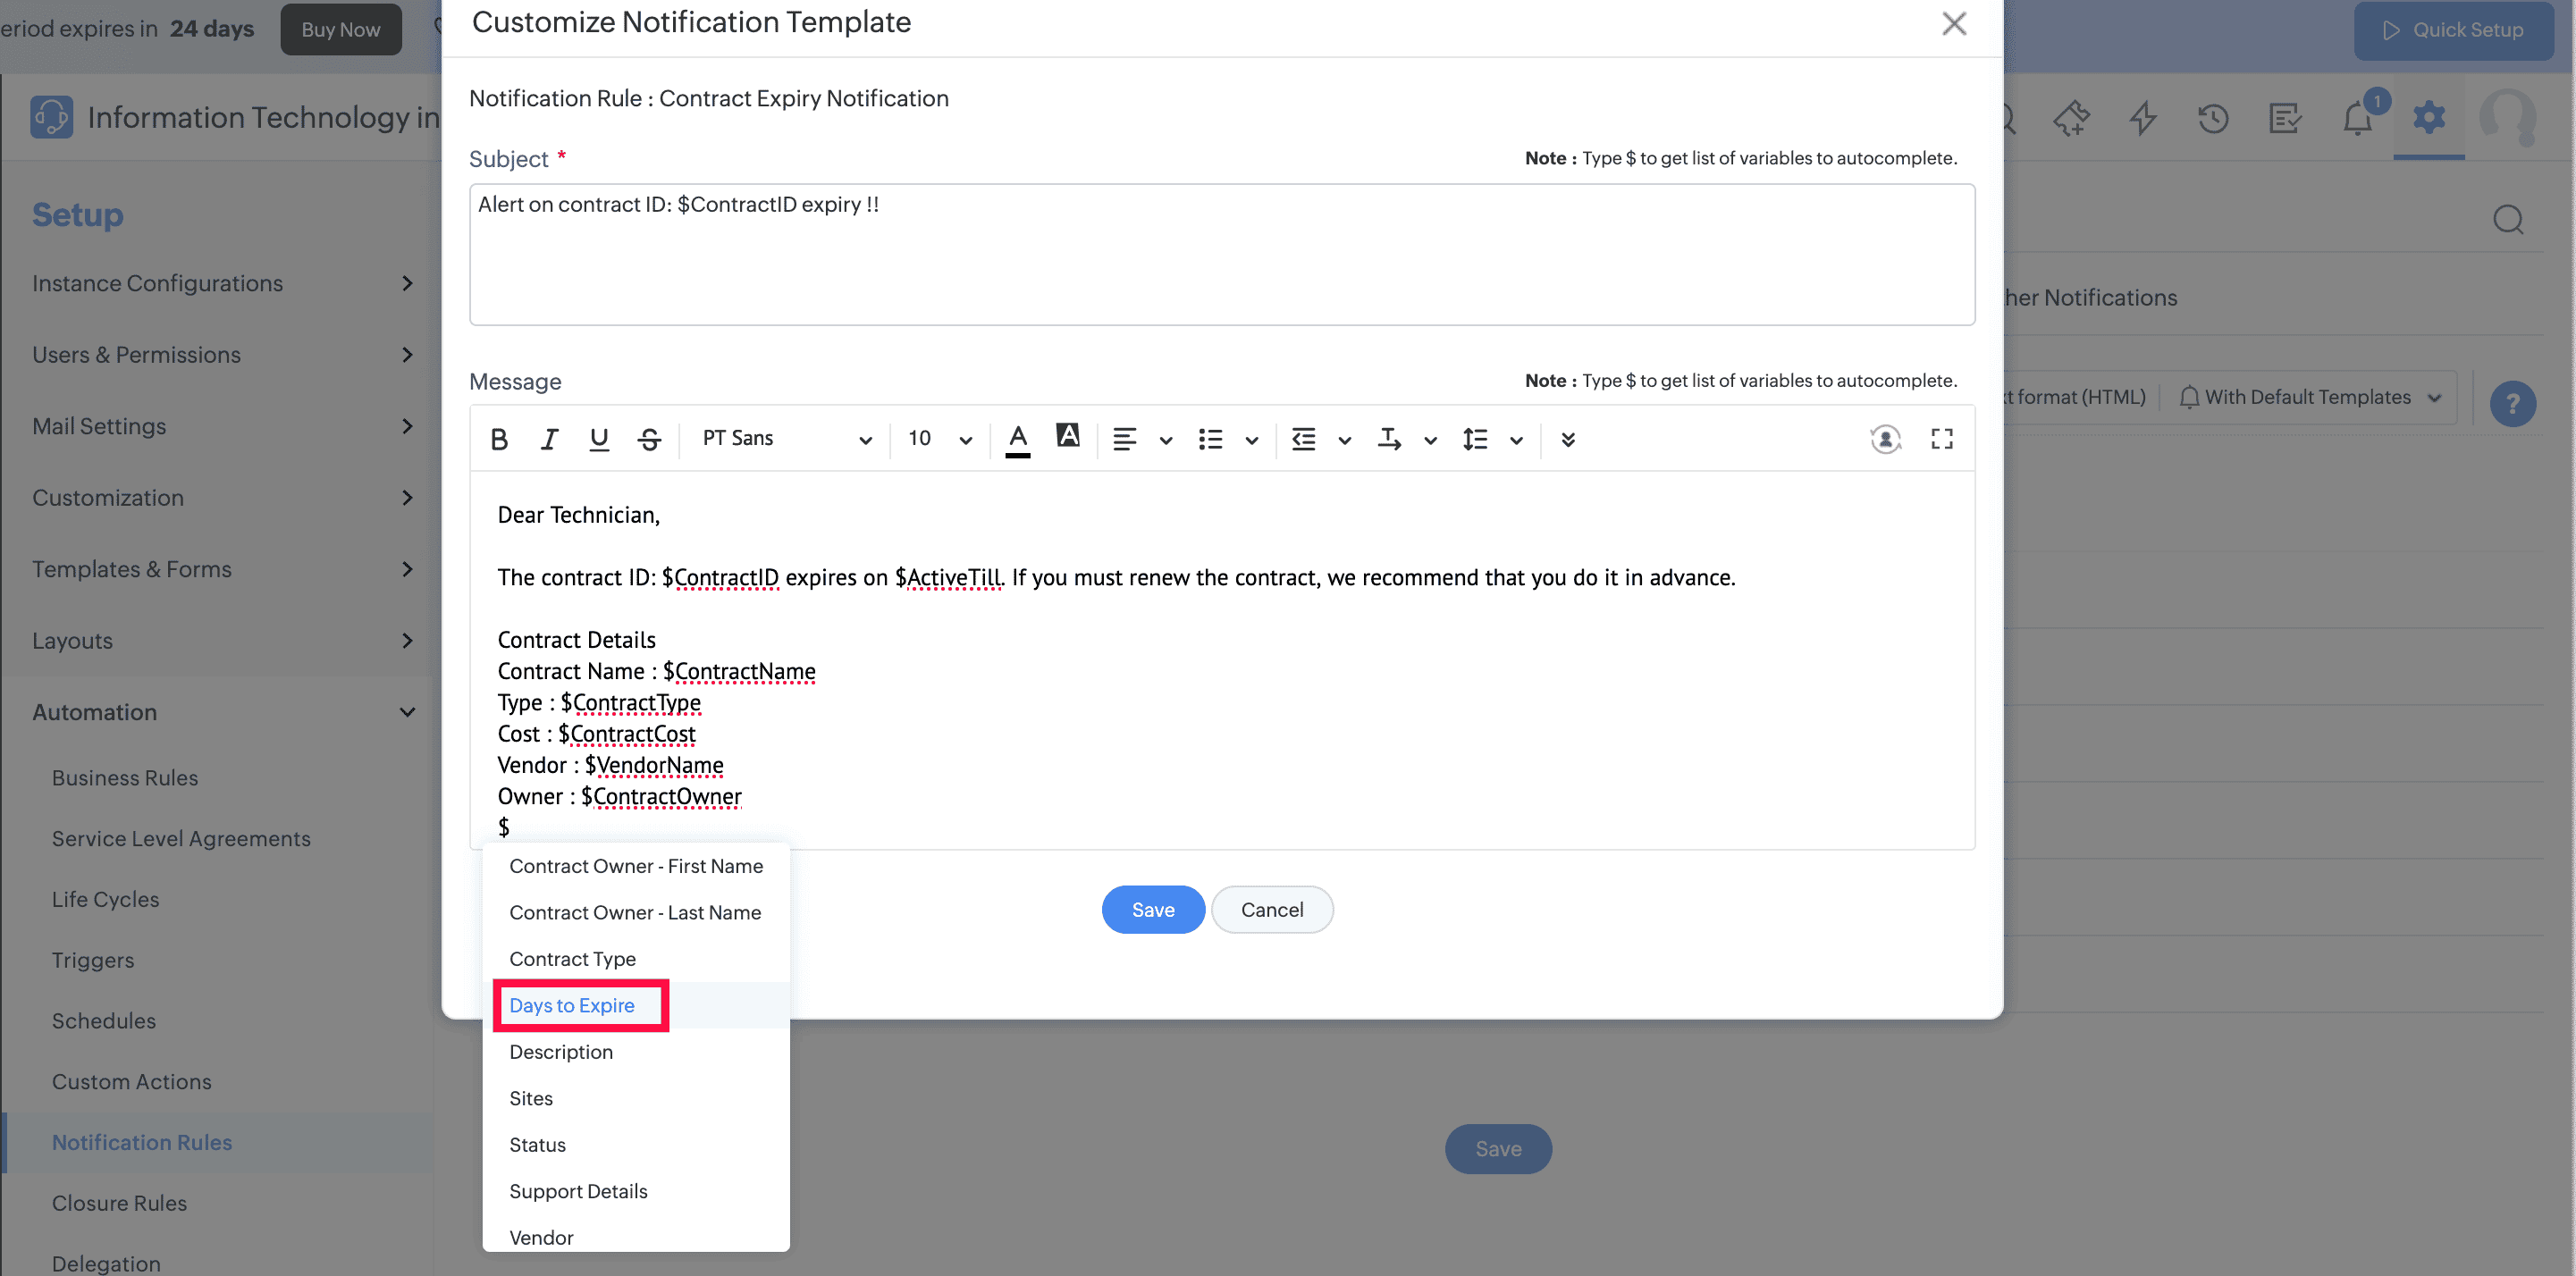
The Notify Before range in the Expiry Notification section of the Contract page has been increased from 365 days to 3,650 days, allowing for earlier contract expiry alerts.
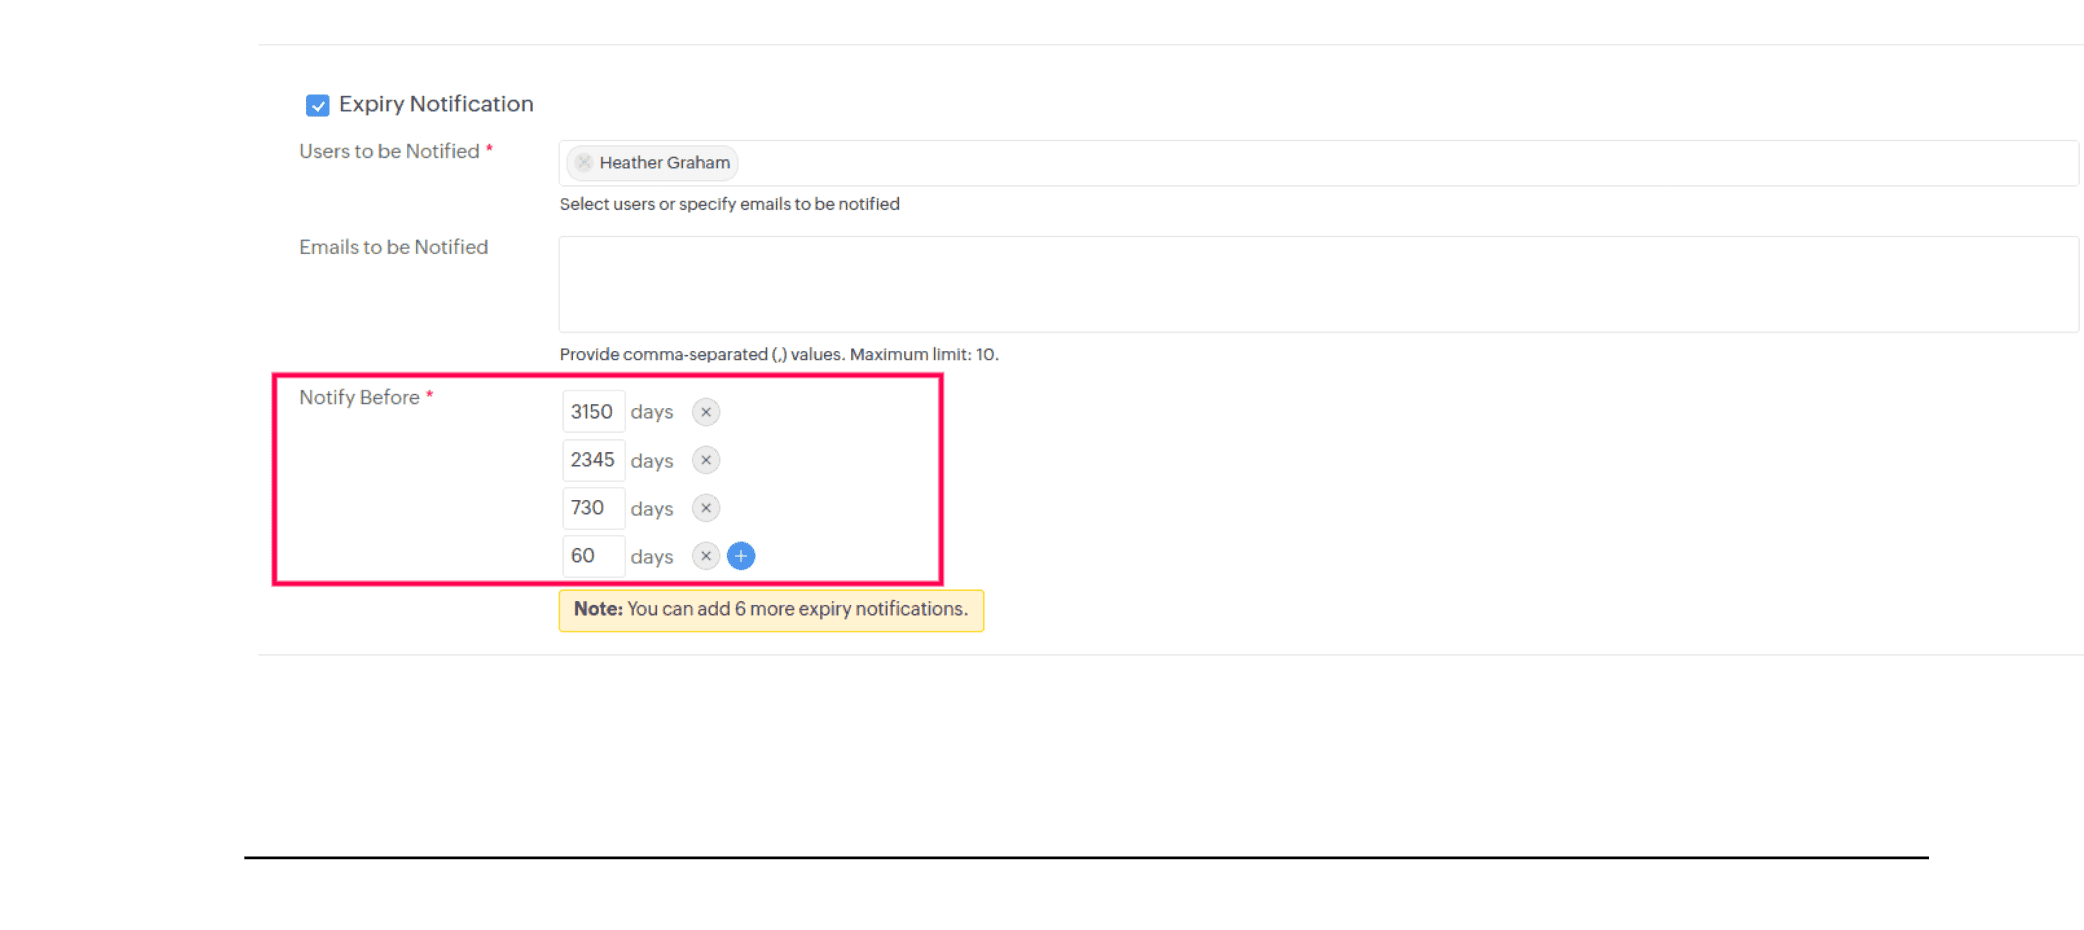
Rule | Module/Entity |
| Business rules | Request tasks, Changes, and change tasks. |
| Workflow pre-action rules | Changes |
\ character.' character.The UI text in the left pane of ESM Directory is modified for better understanding.
Existing Content | Modified Content |
| Users | User Management |
| Verified Domains | Custom Domains |
| SAML | SAML Authentication |
| Active Directory | Active Directory Settings |
| Organization URL | Custom Service URLs |
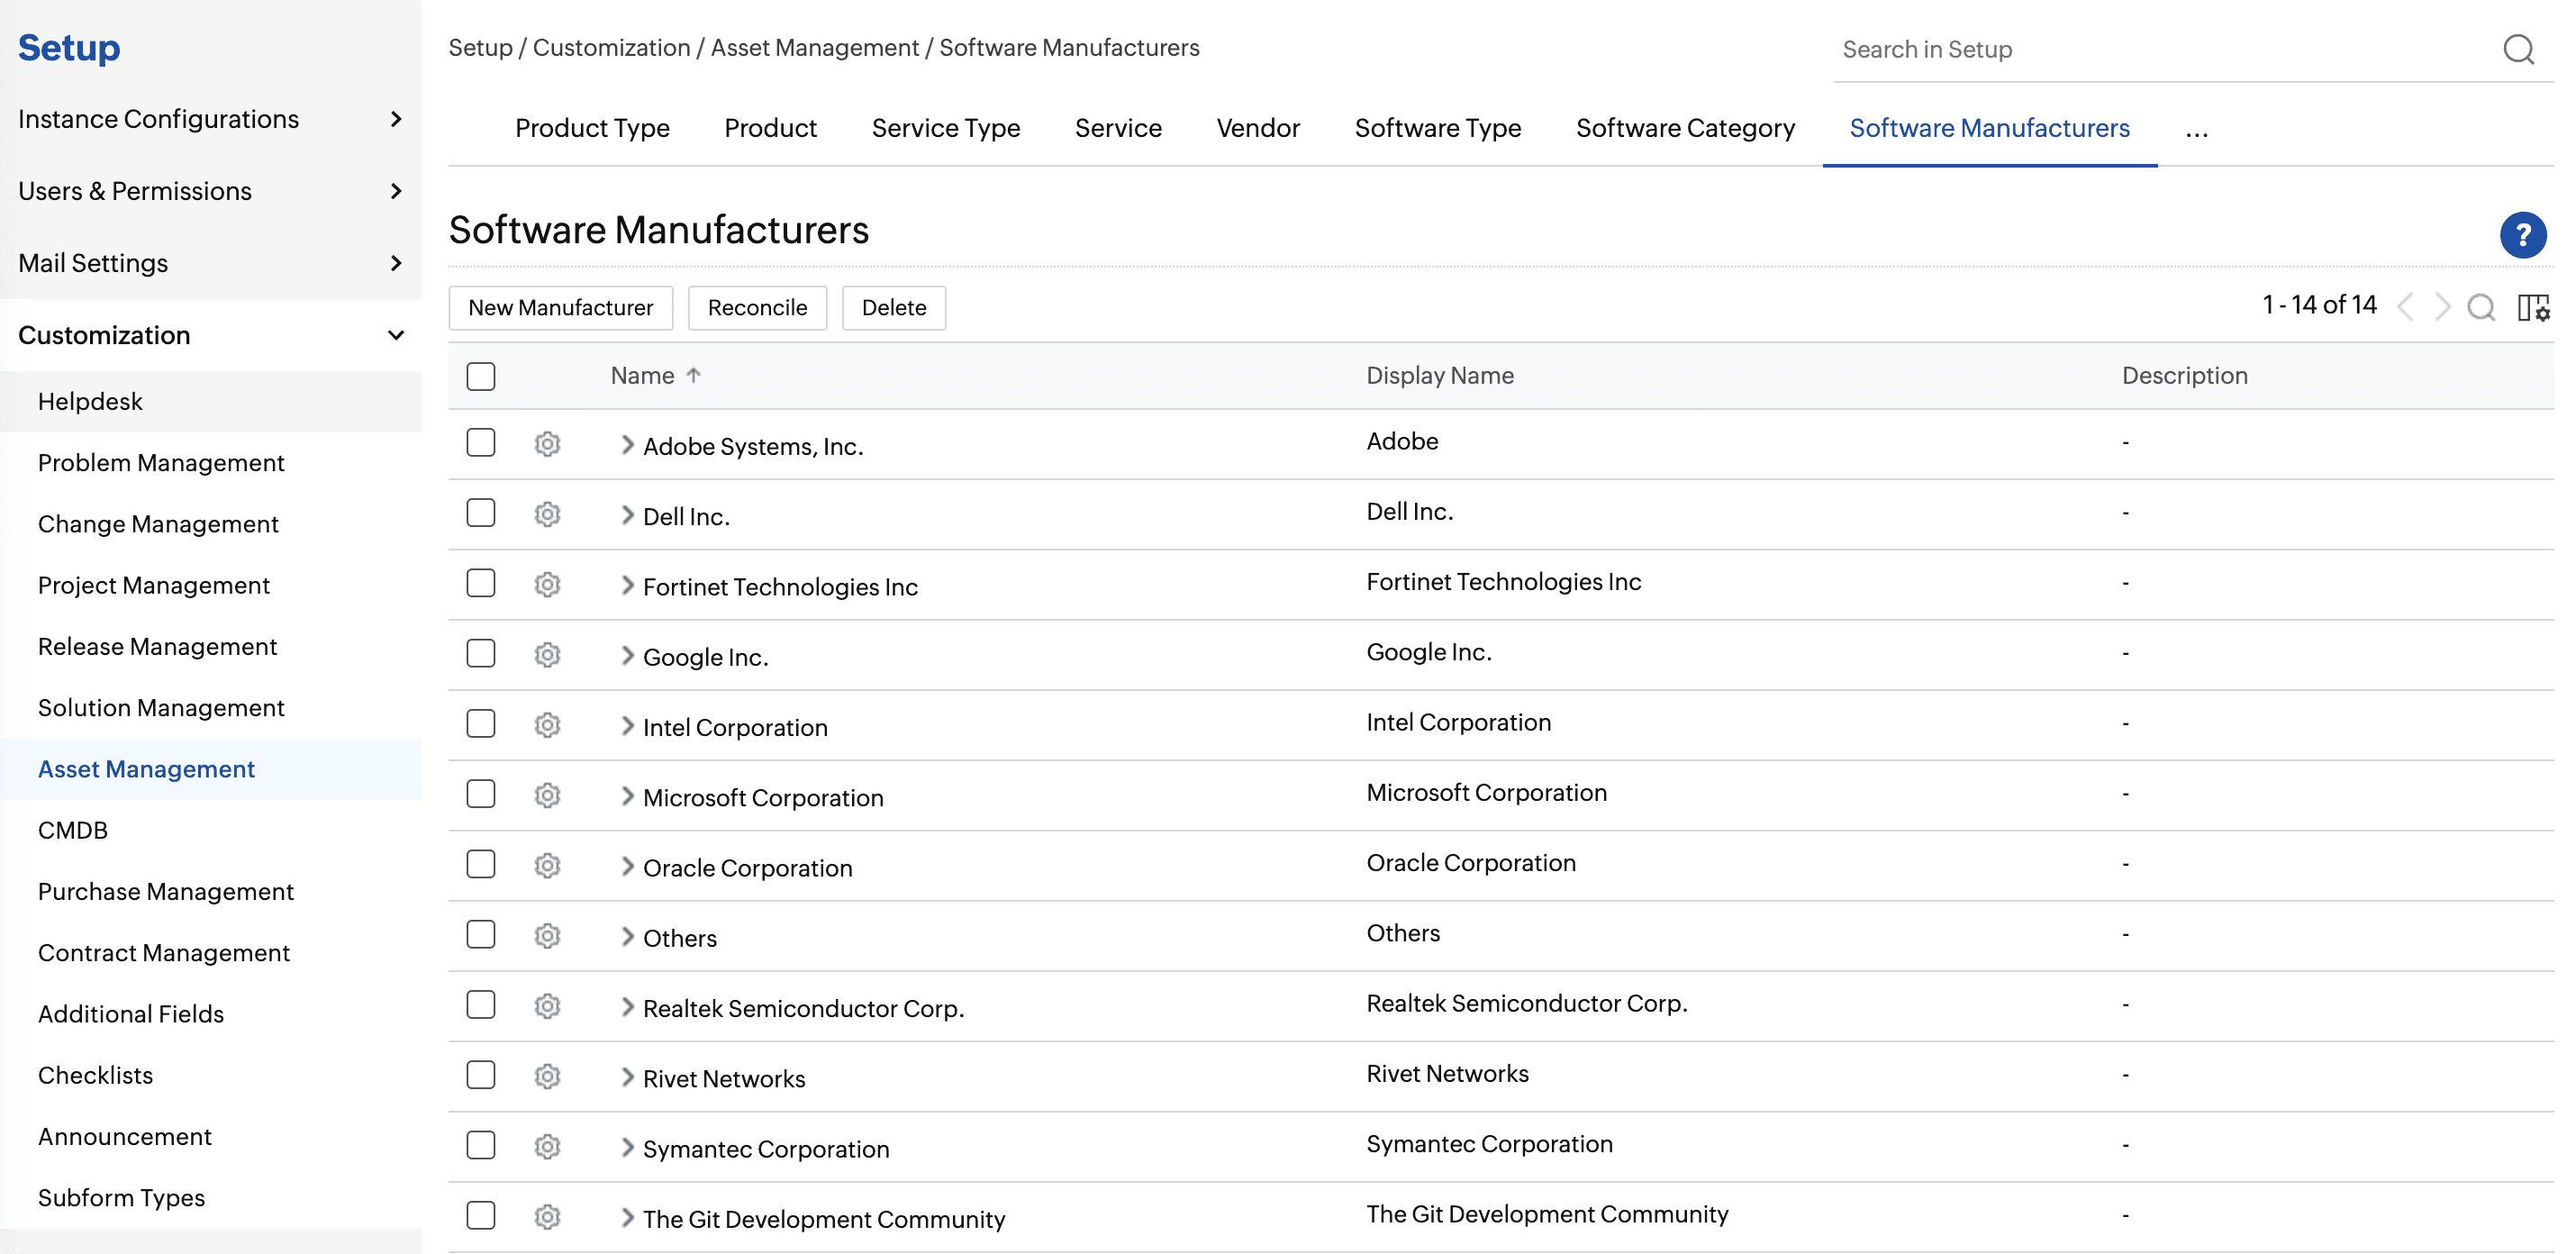
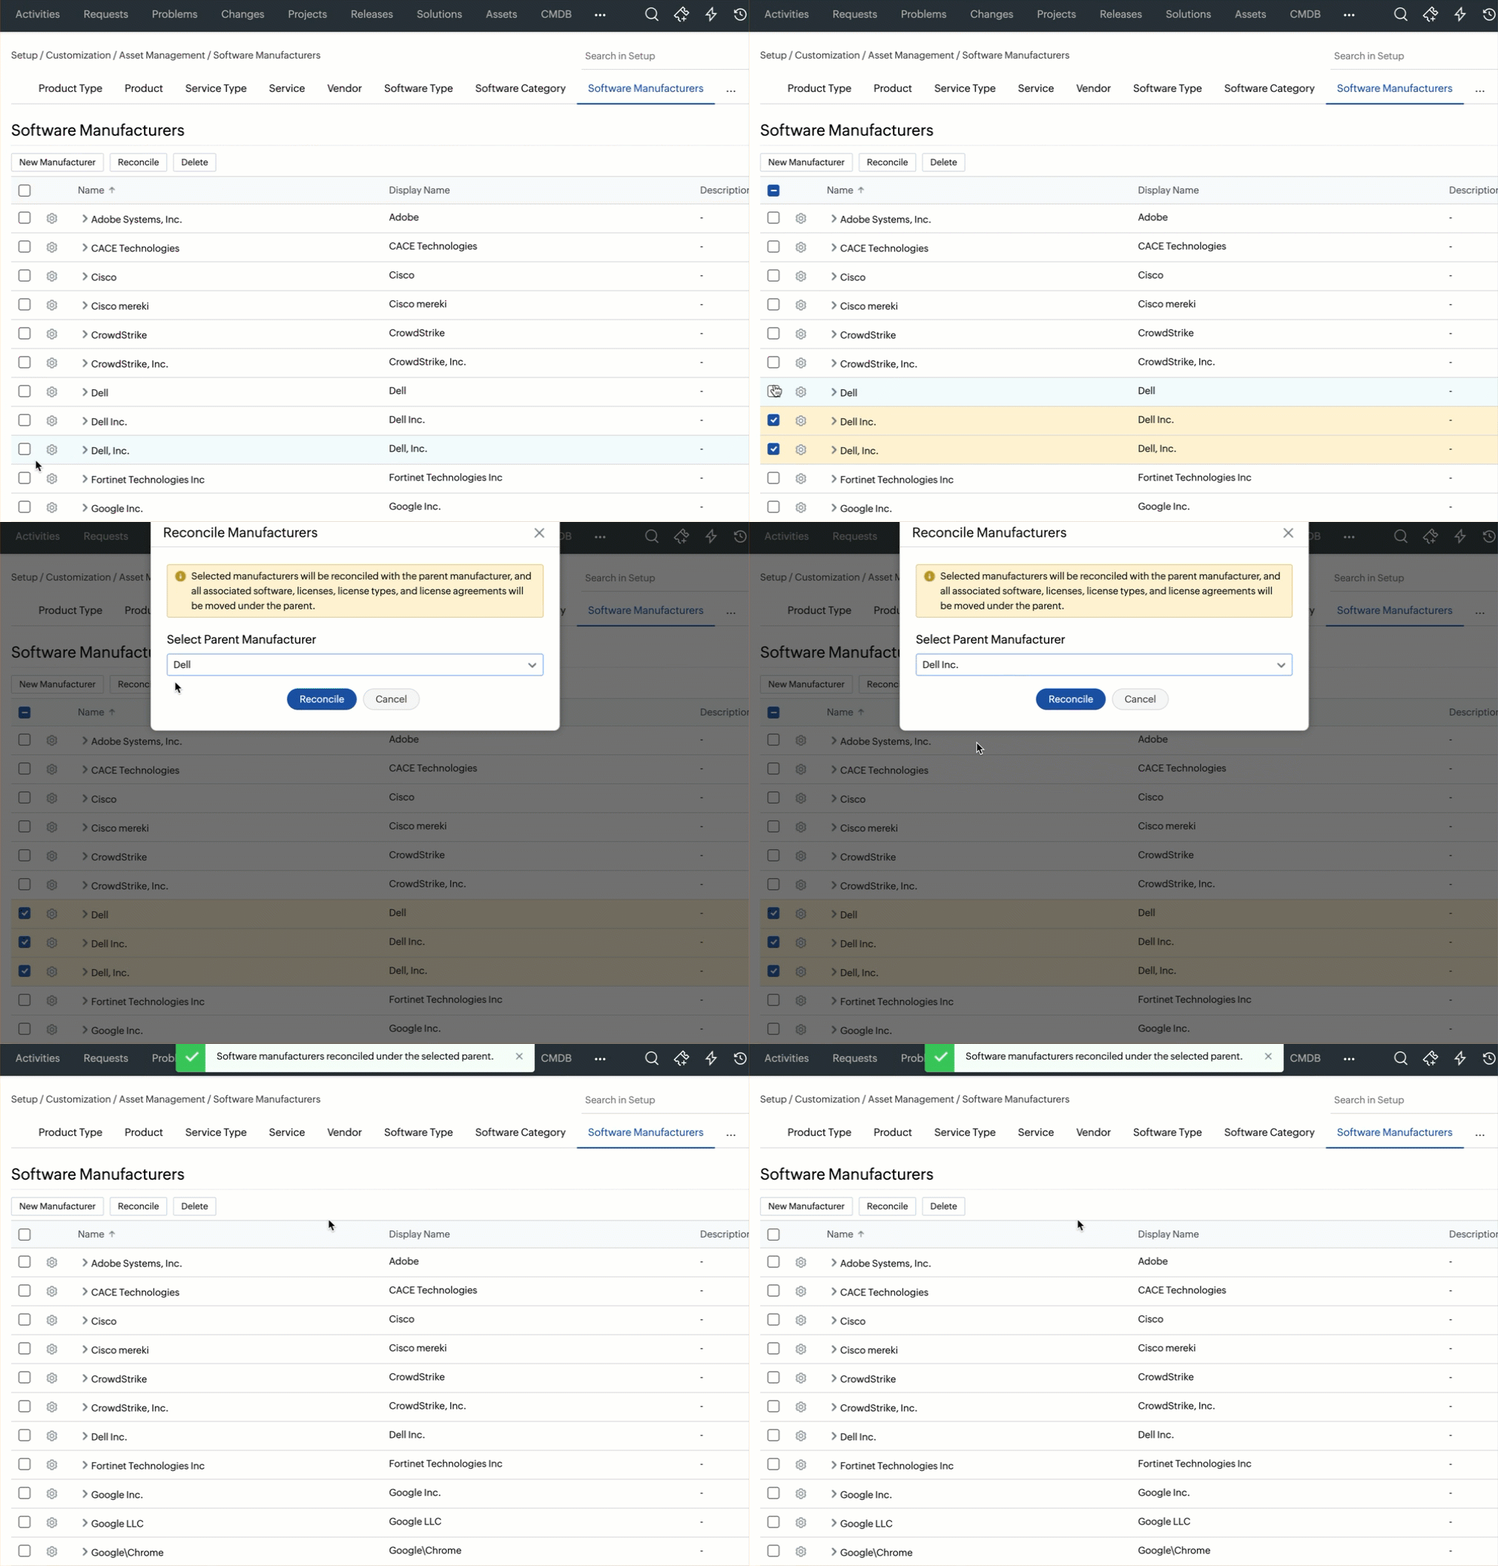
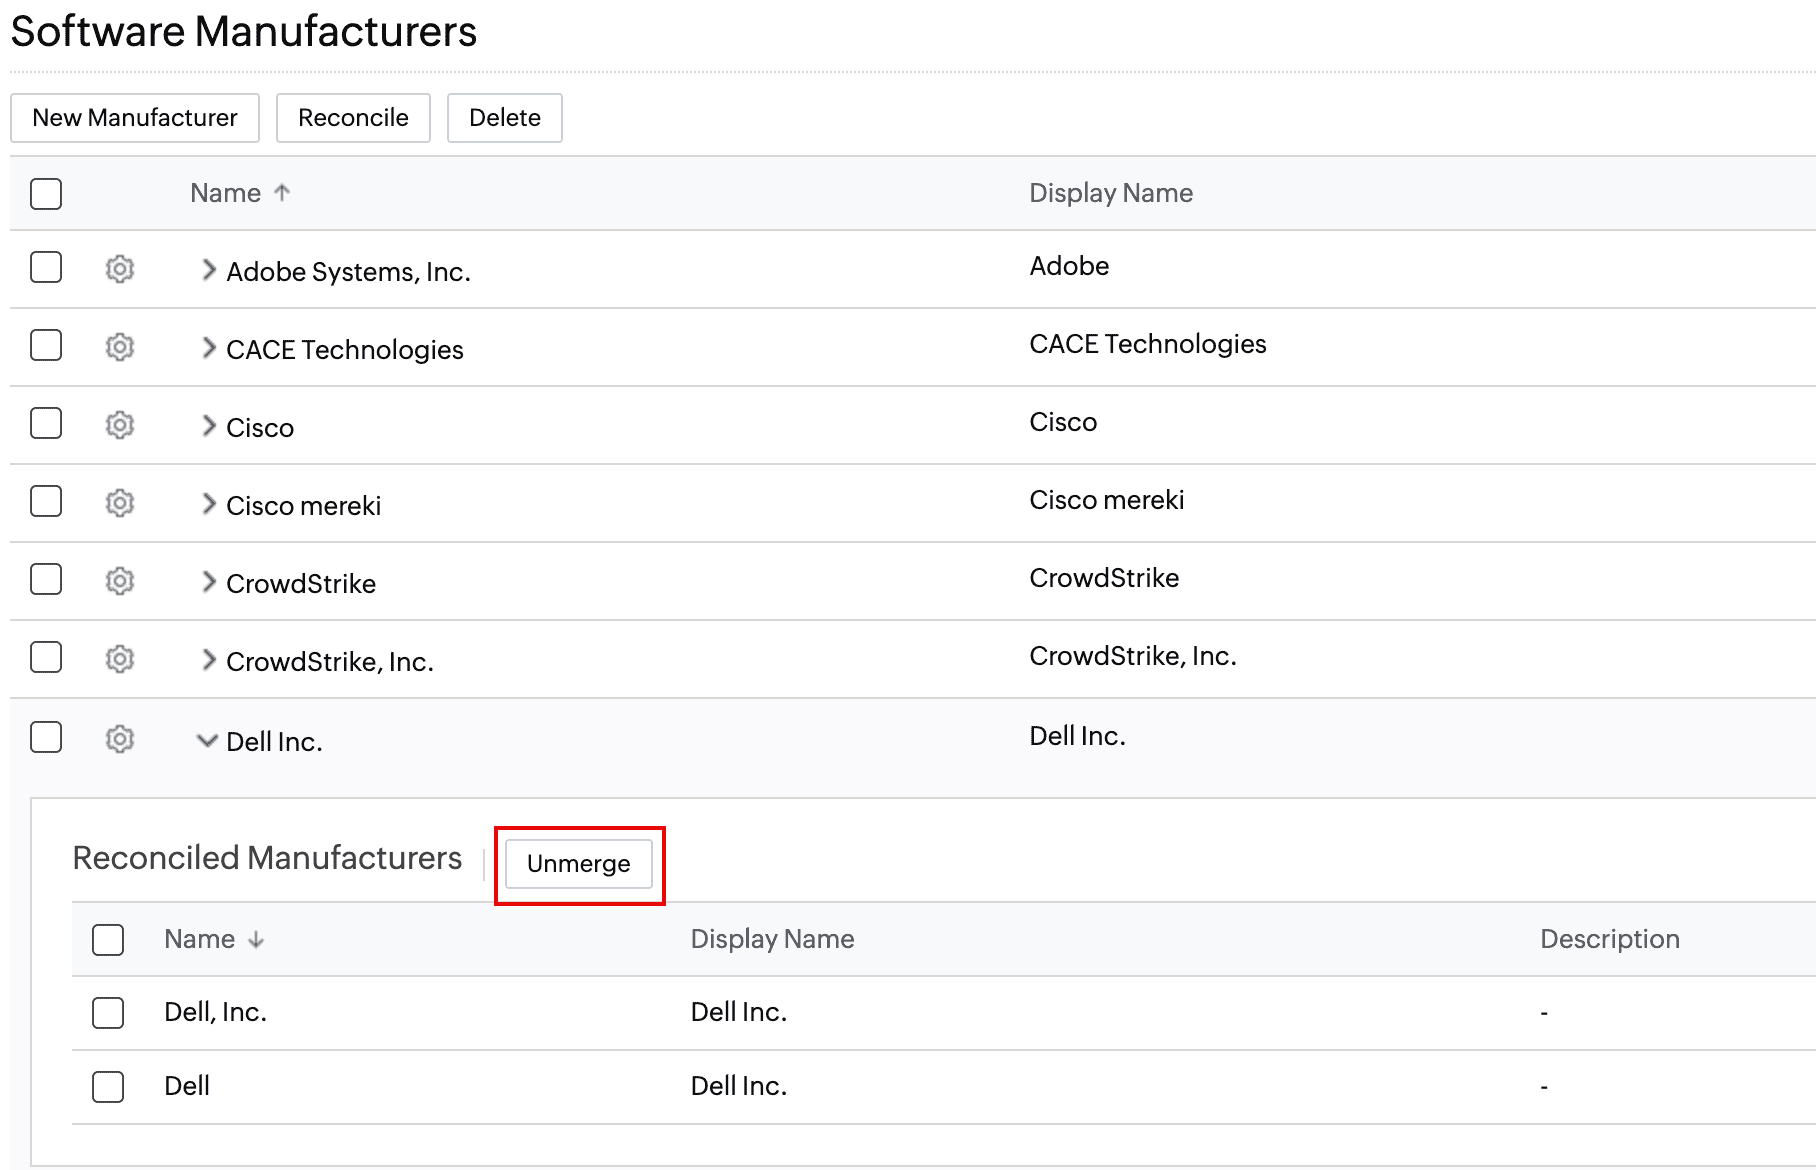
Note: After merging, all associated software, licenses, license types, and license agreements will be moved to the parent manufacturer.
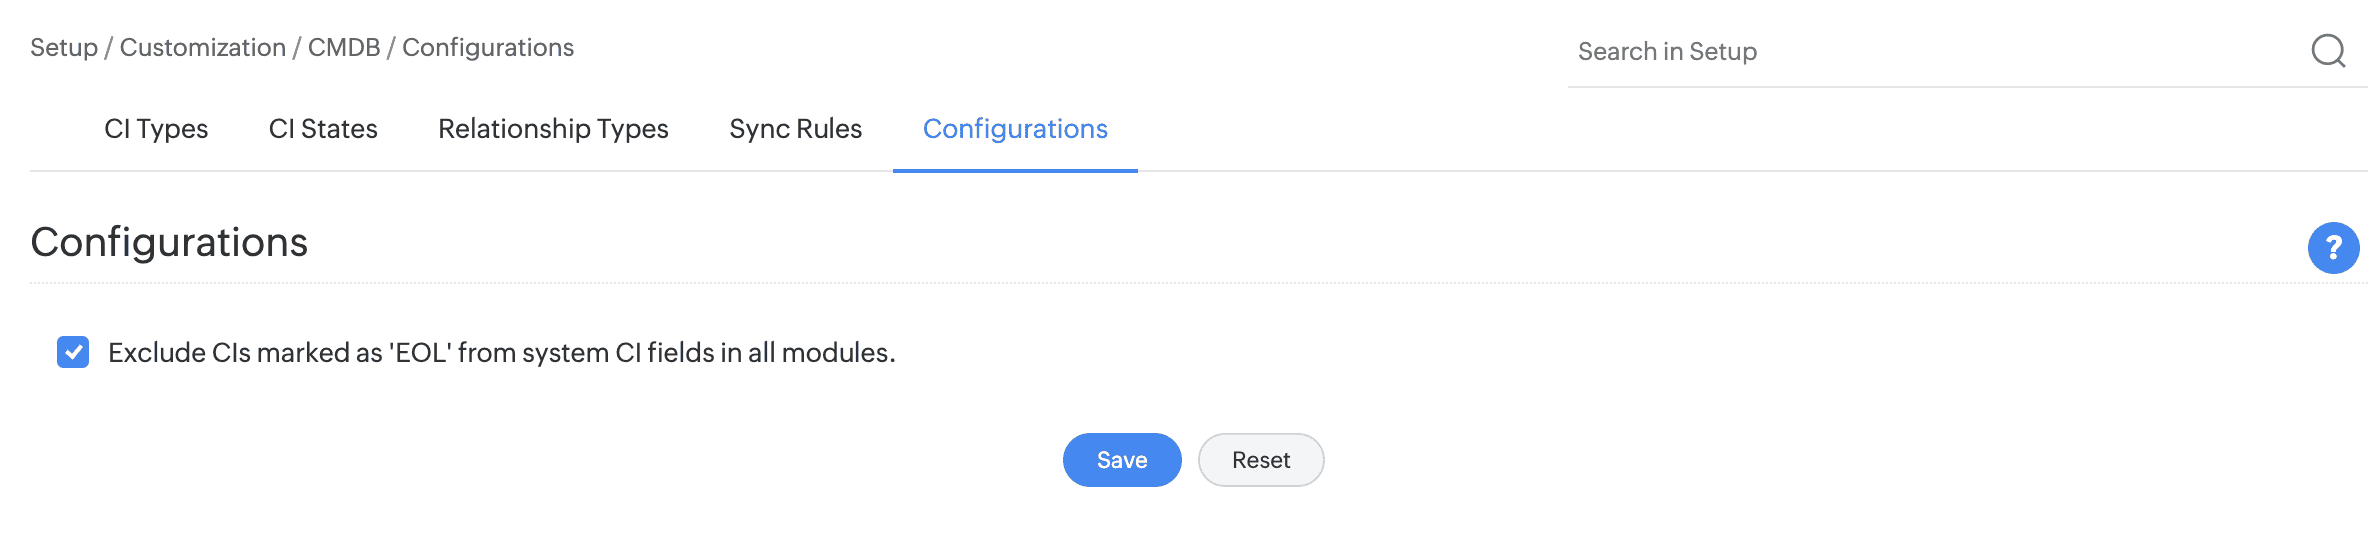
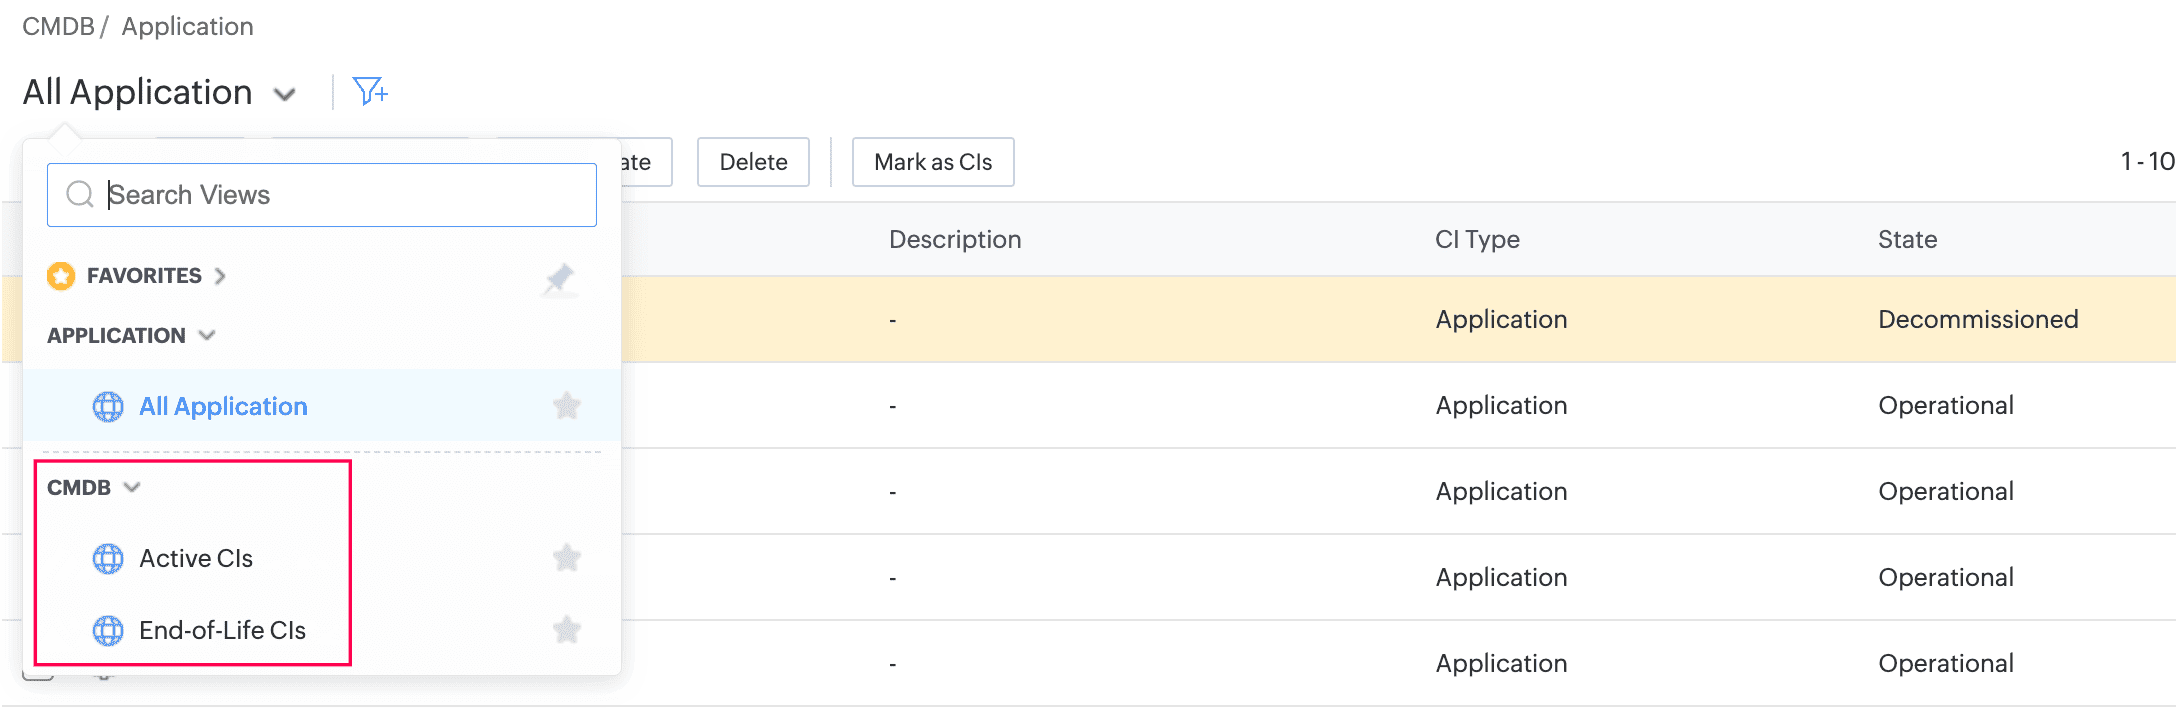
Existing Behavior | Behavior Change |
| Software | Software & Licenses |
| Scanned Software | Software |
| License Agreements | Agreements |
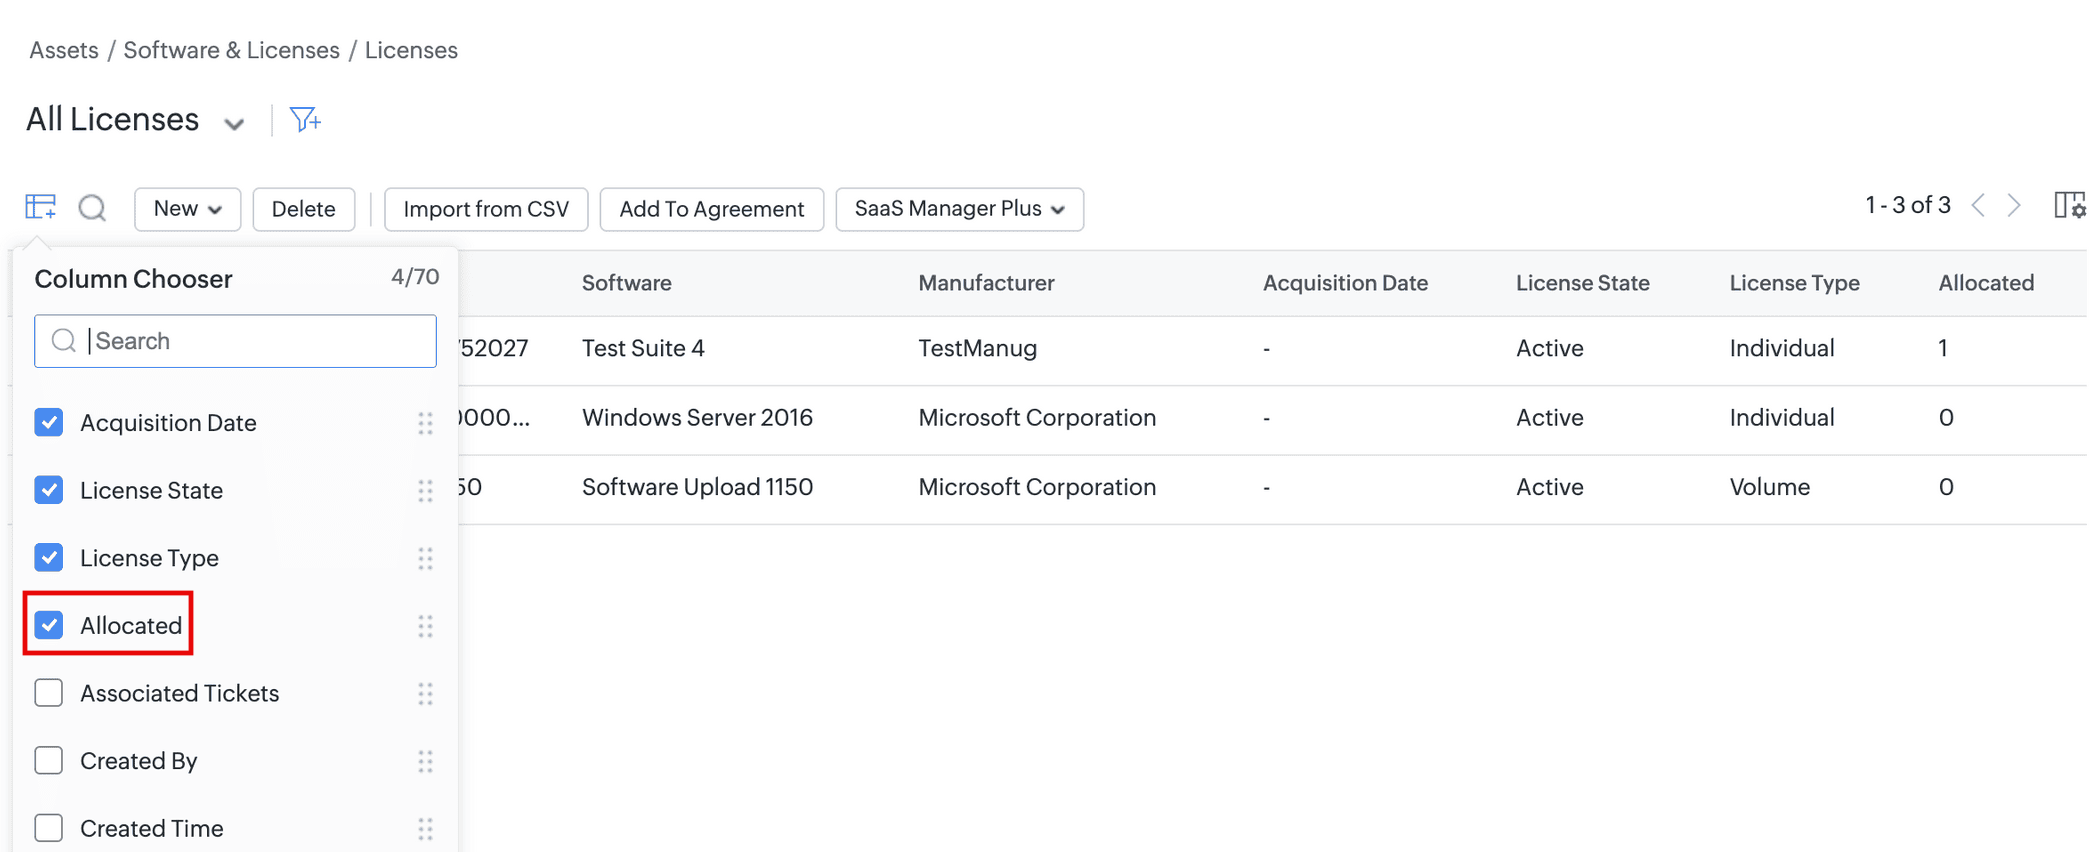
| Software Licenses | Licenses |
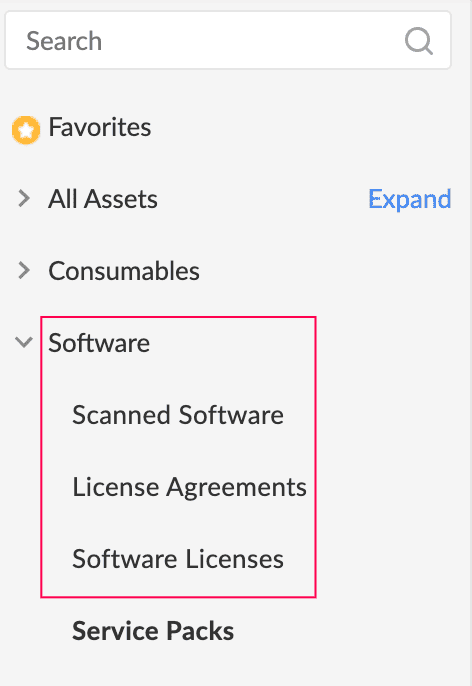 | 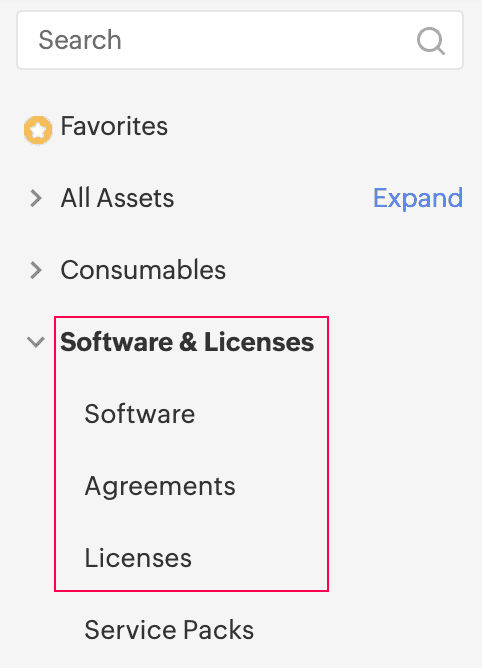 |
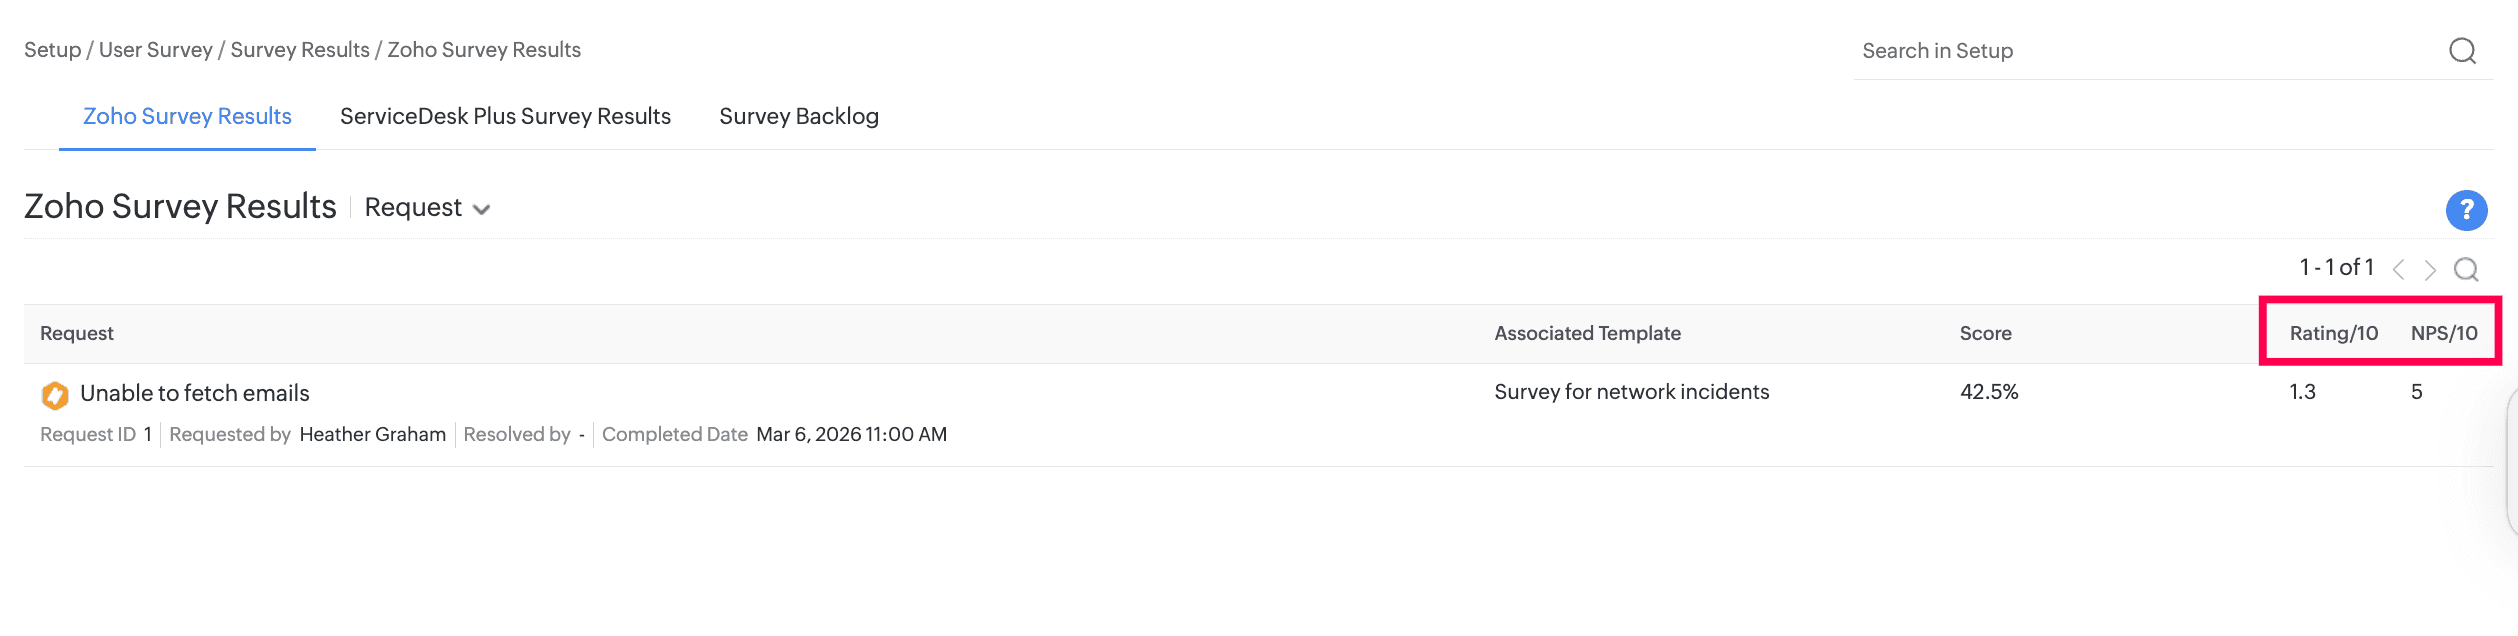
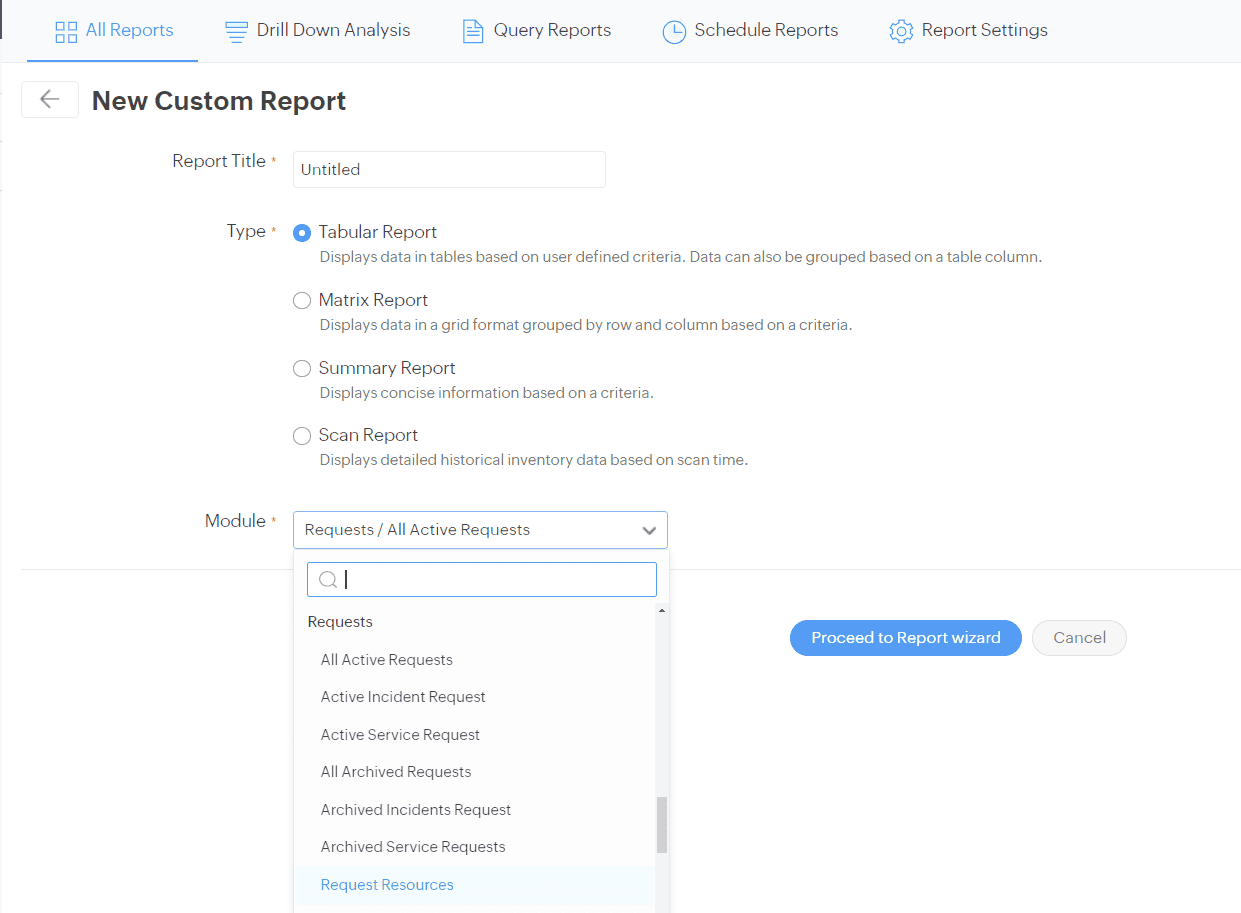
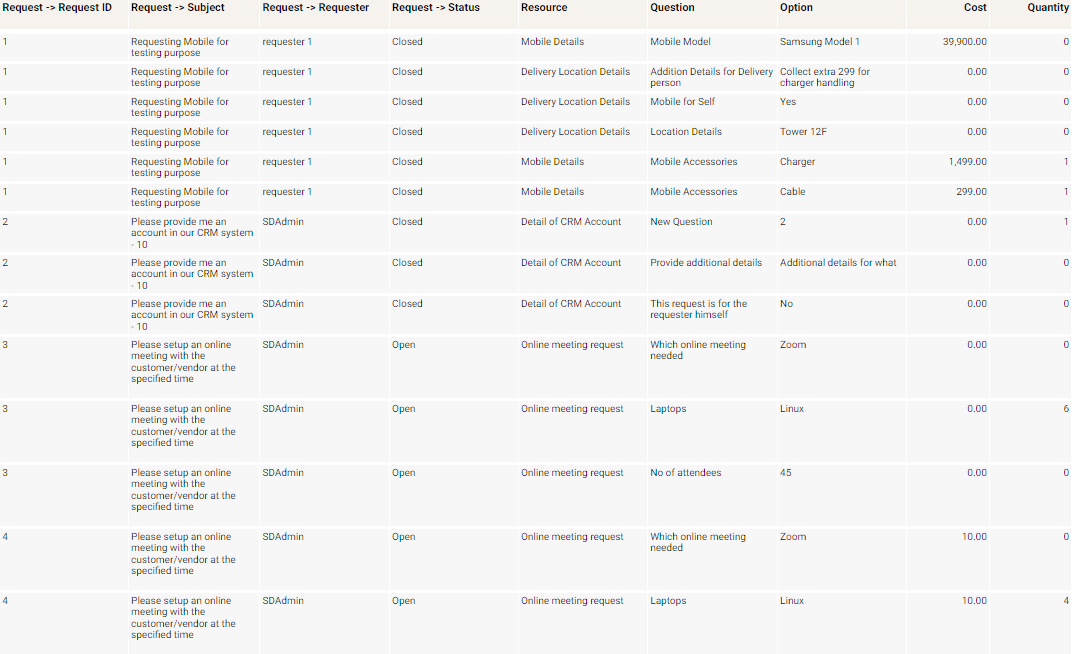
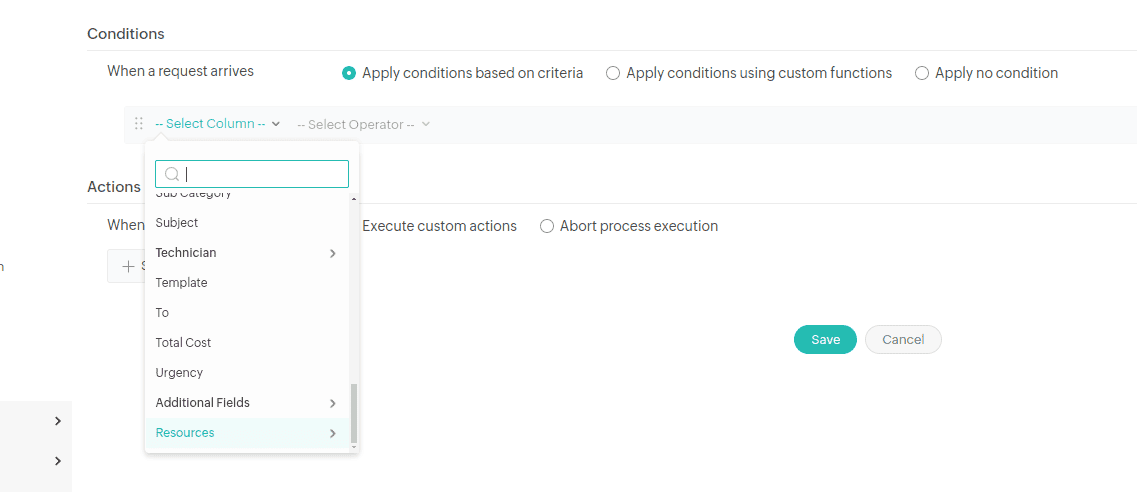
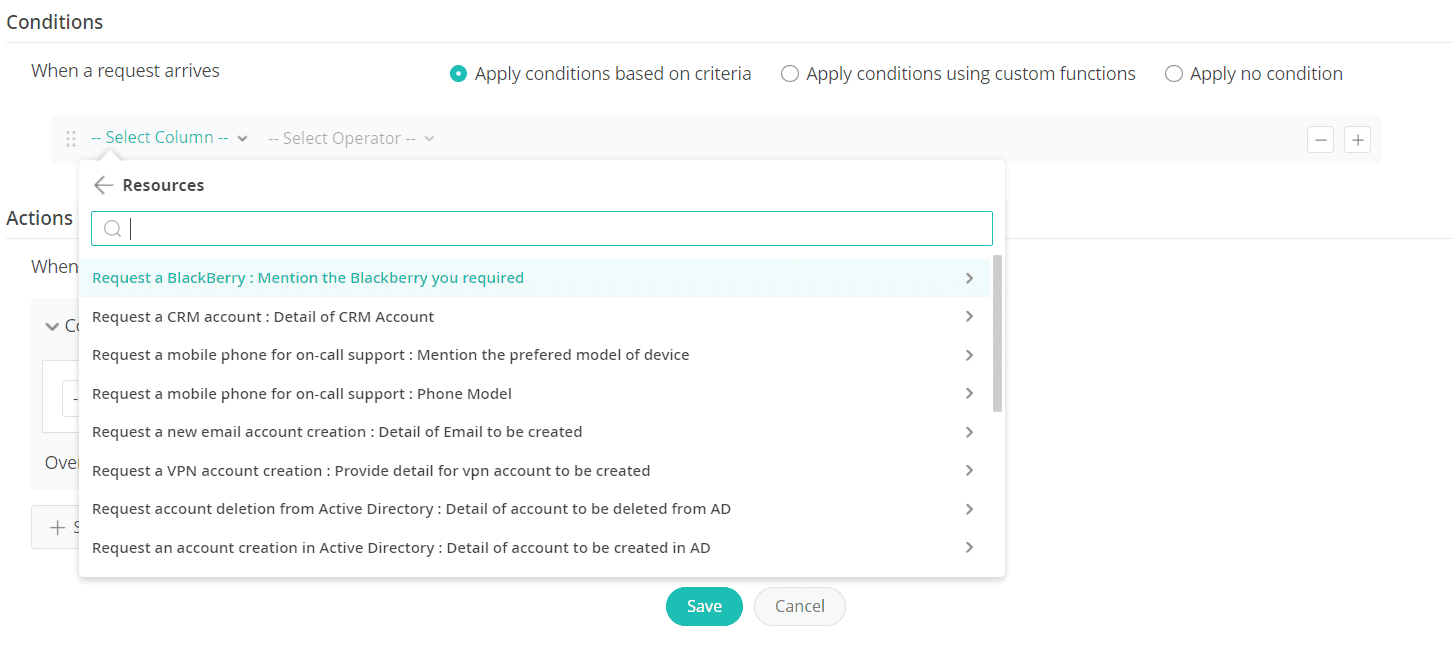
Based on request resources, you can now generate reports and Zoho Analytics, and execute automation rules such as Business Rules, Triggers, Timers, Workflows, and Service Level Agreements.
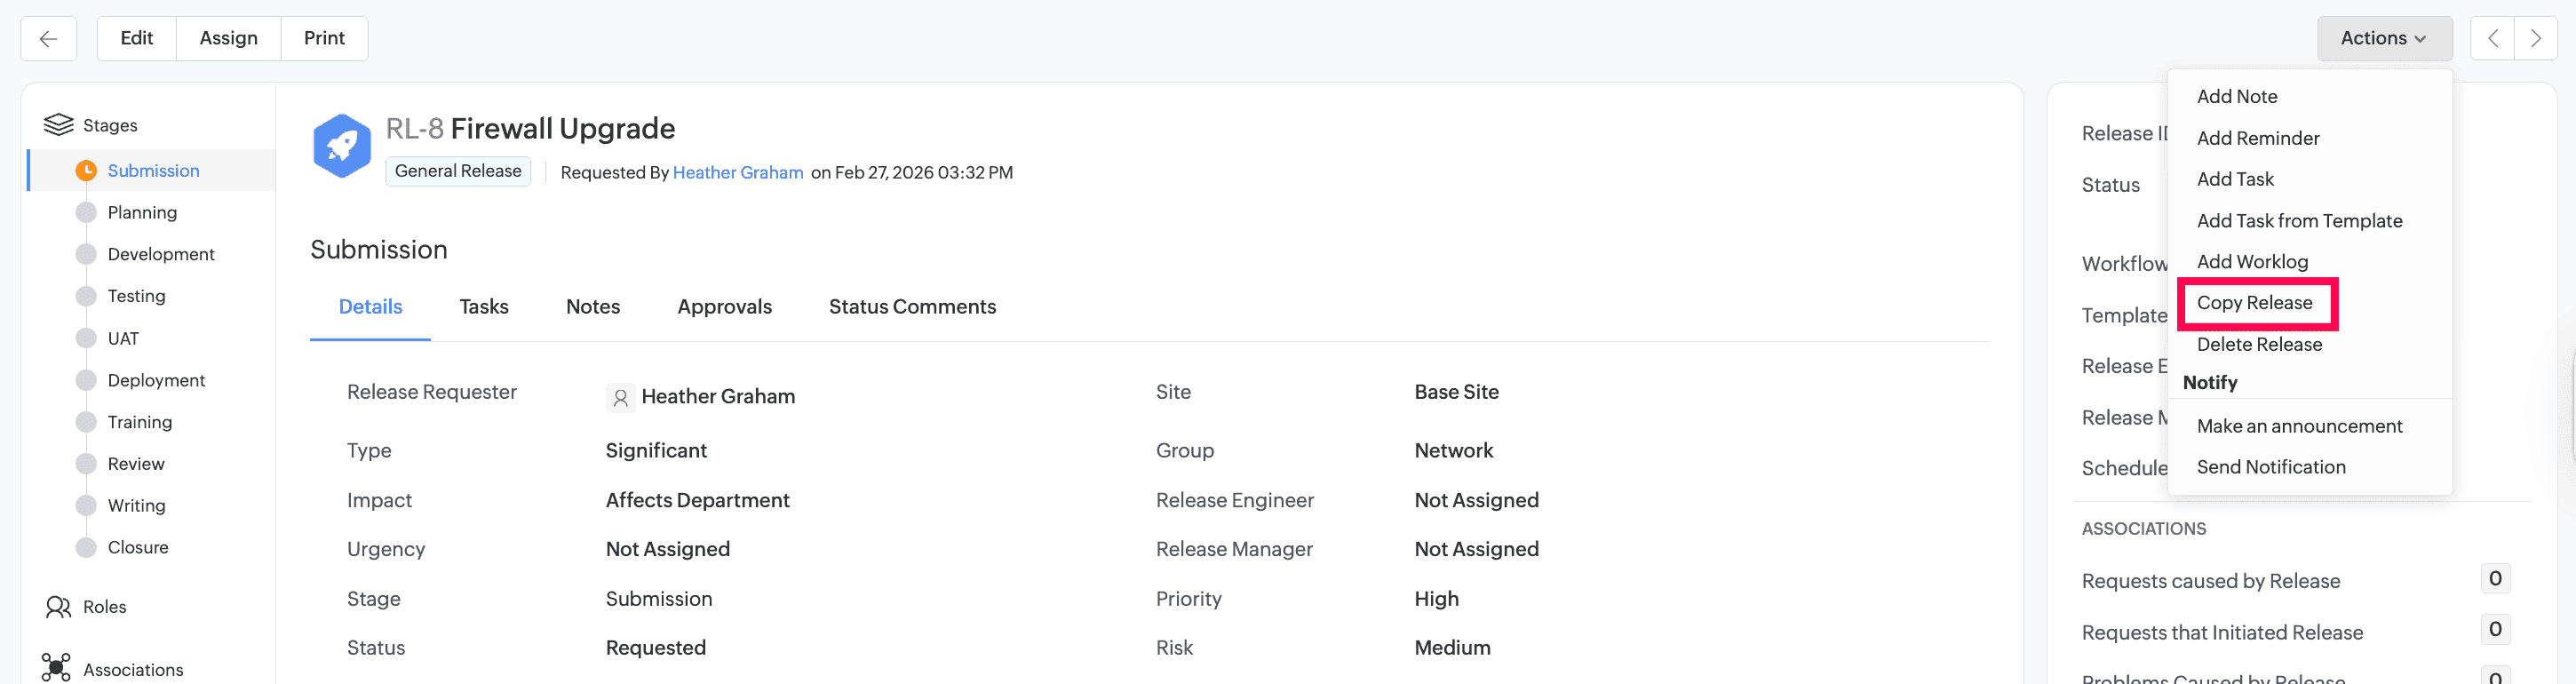
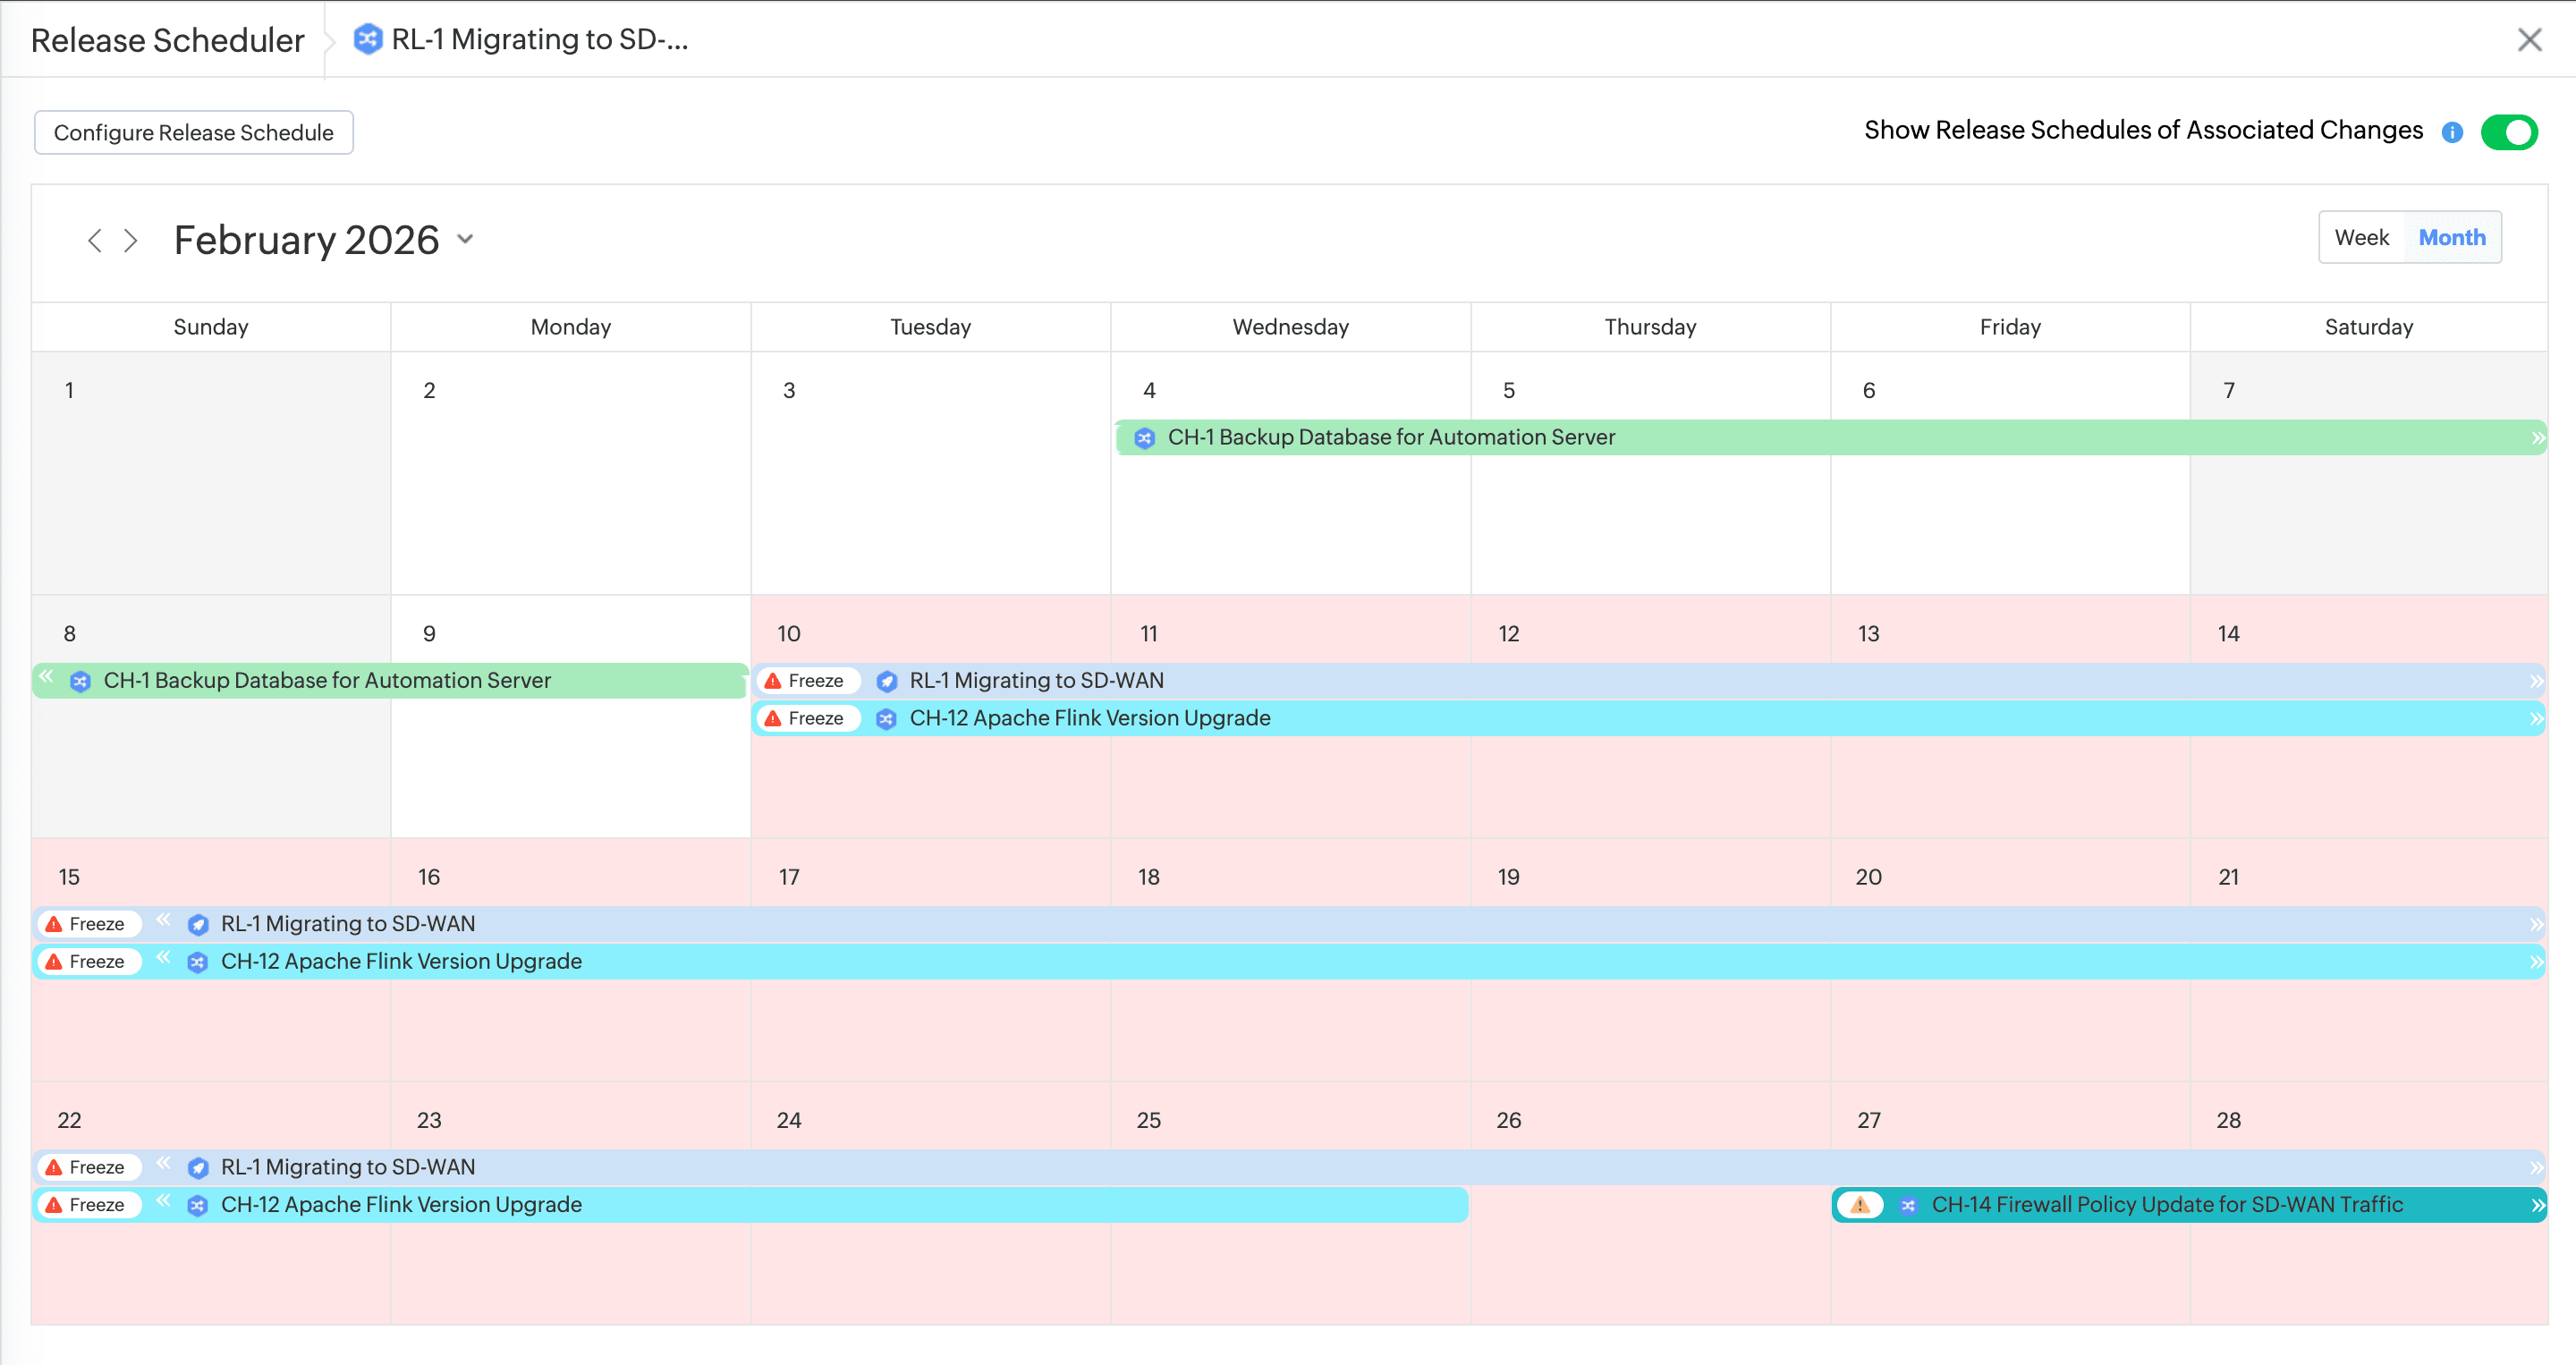
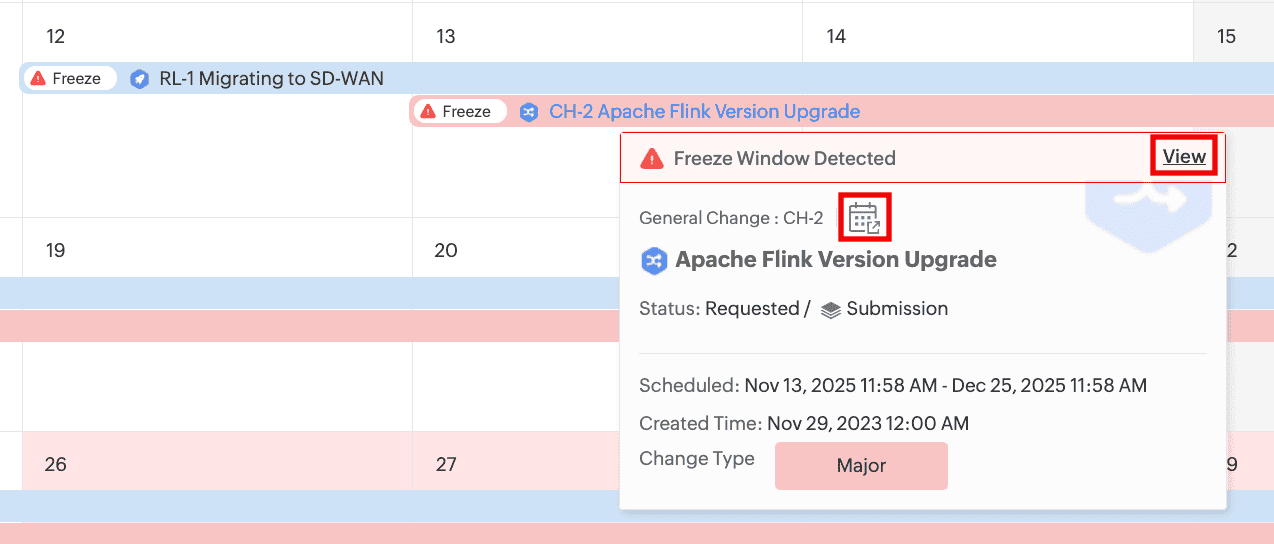
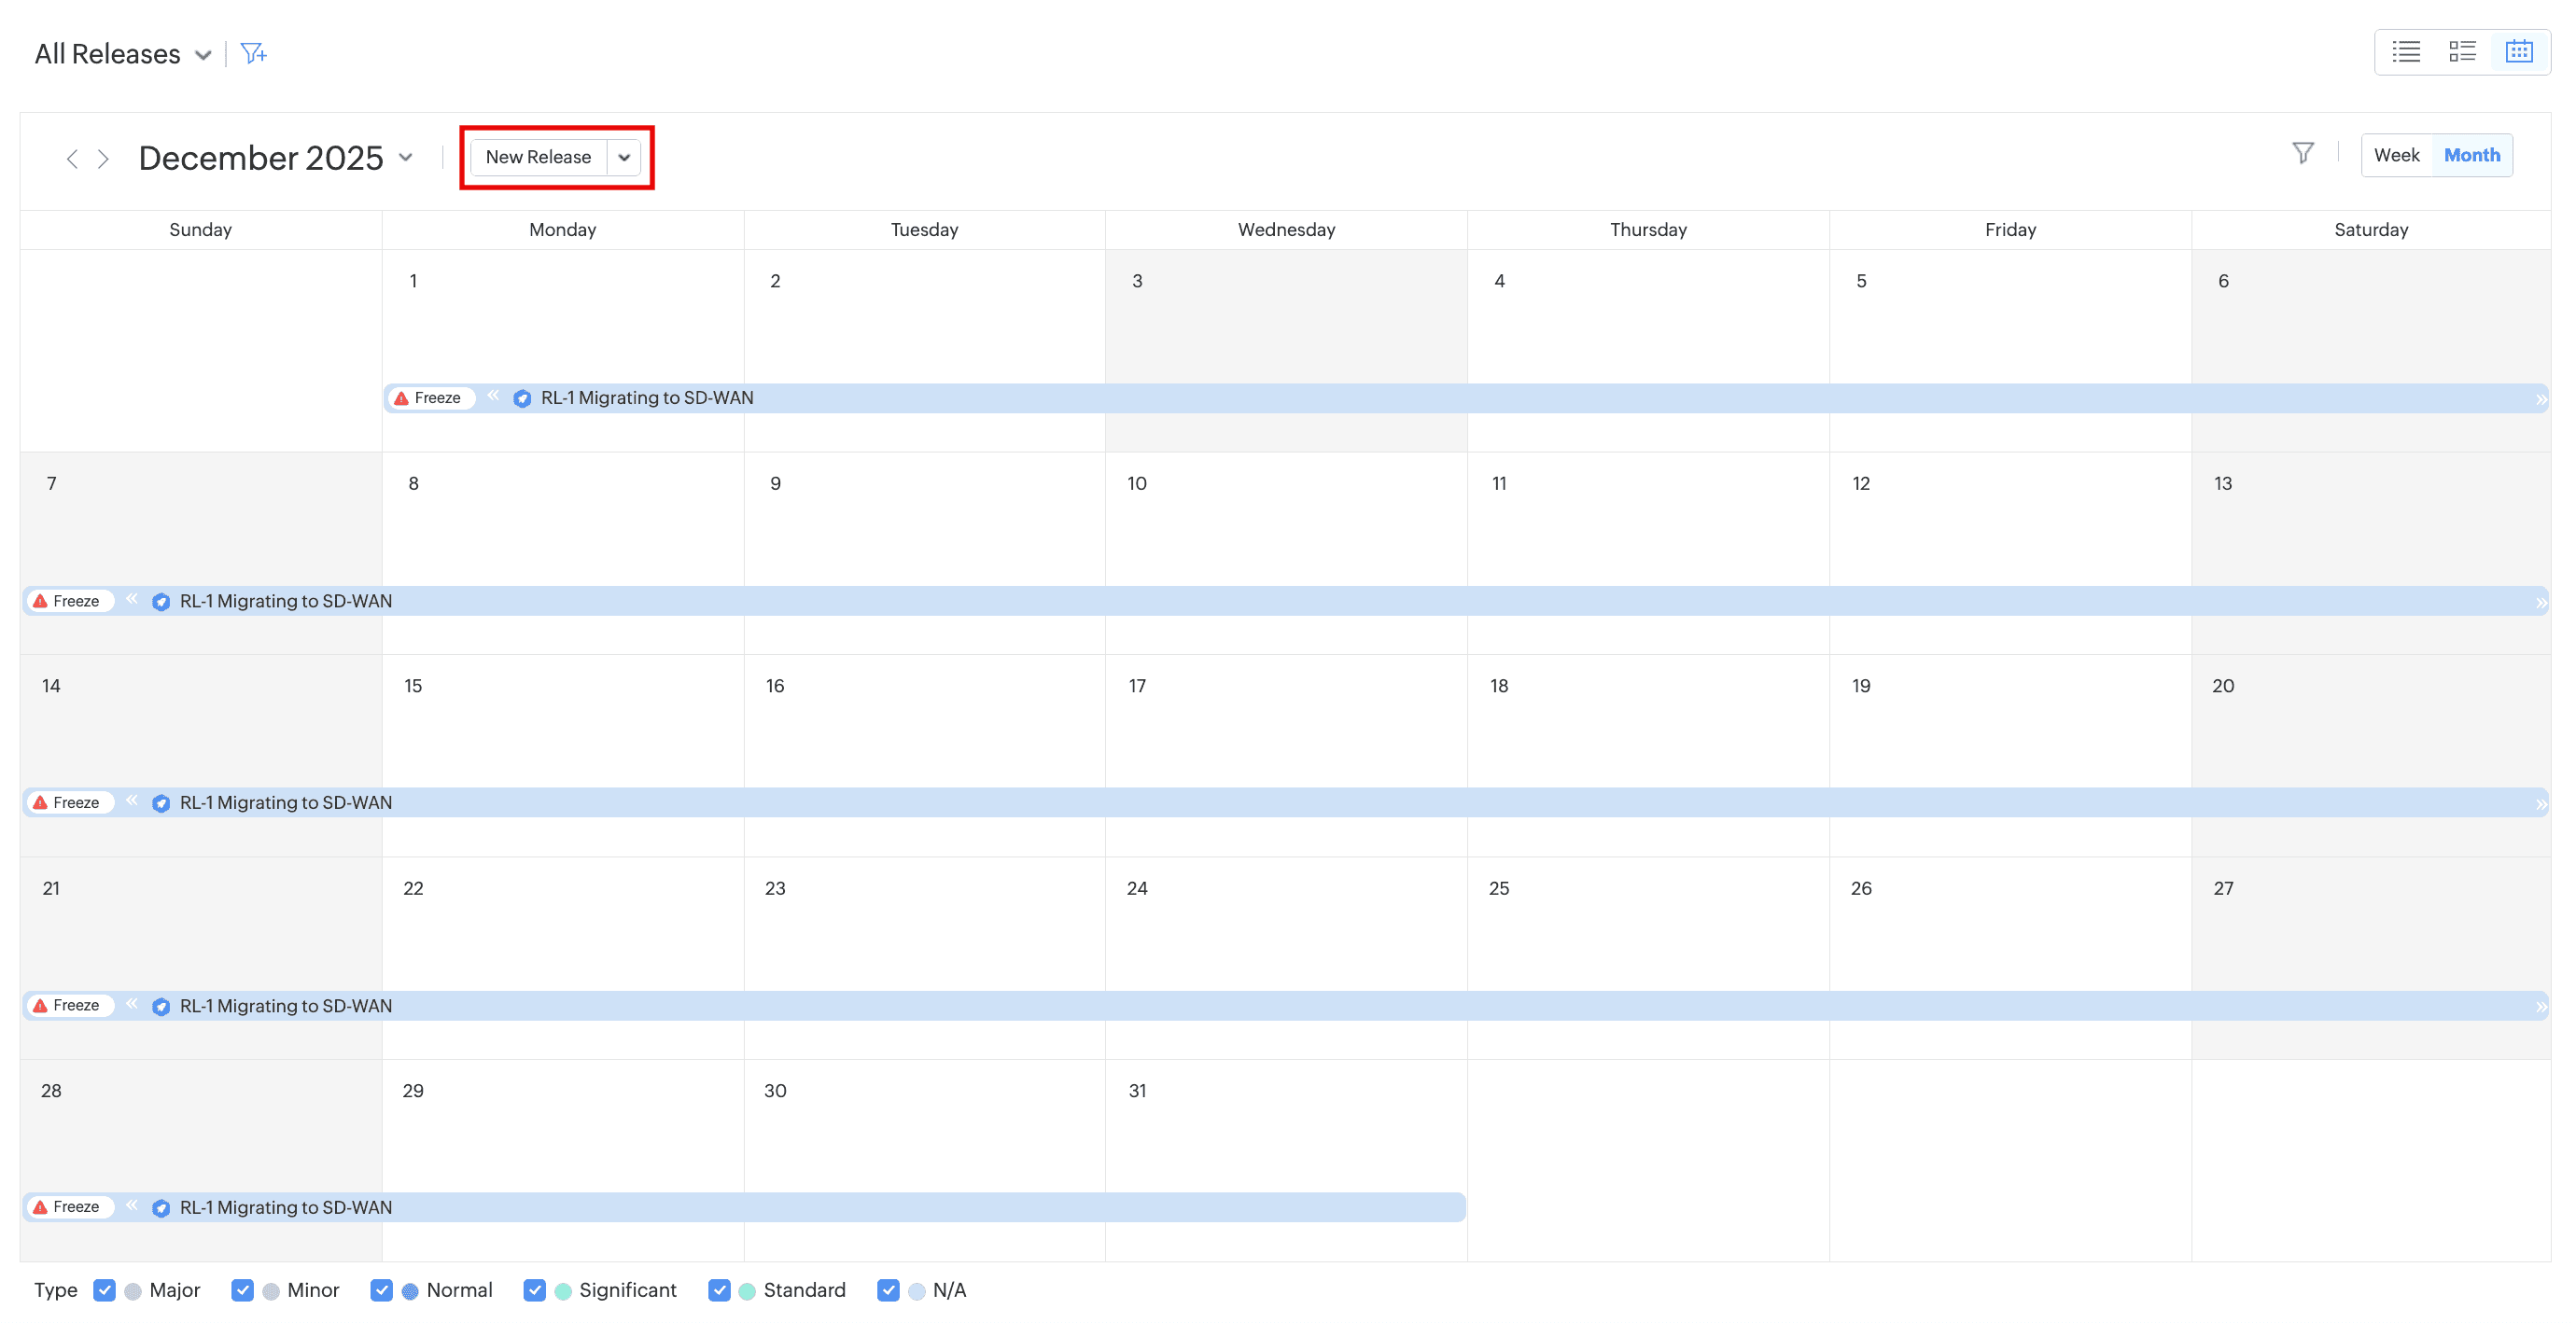
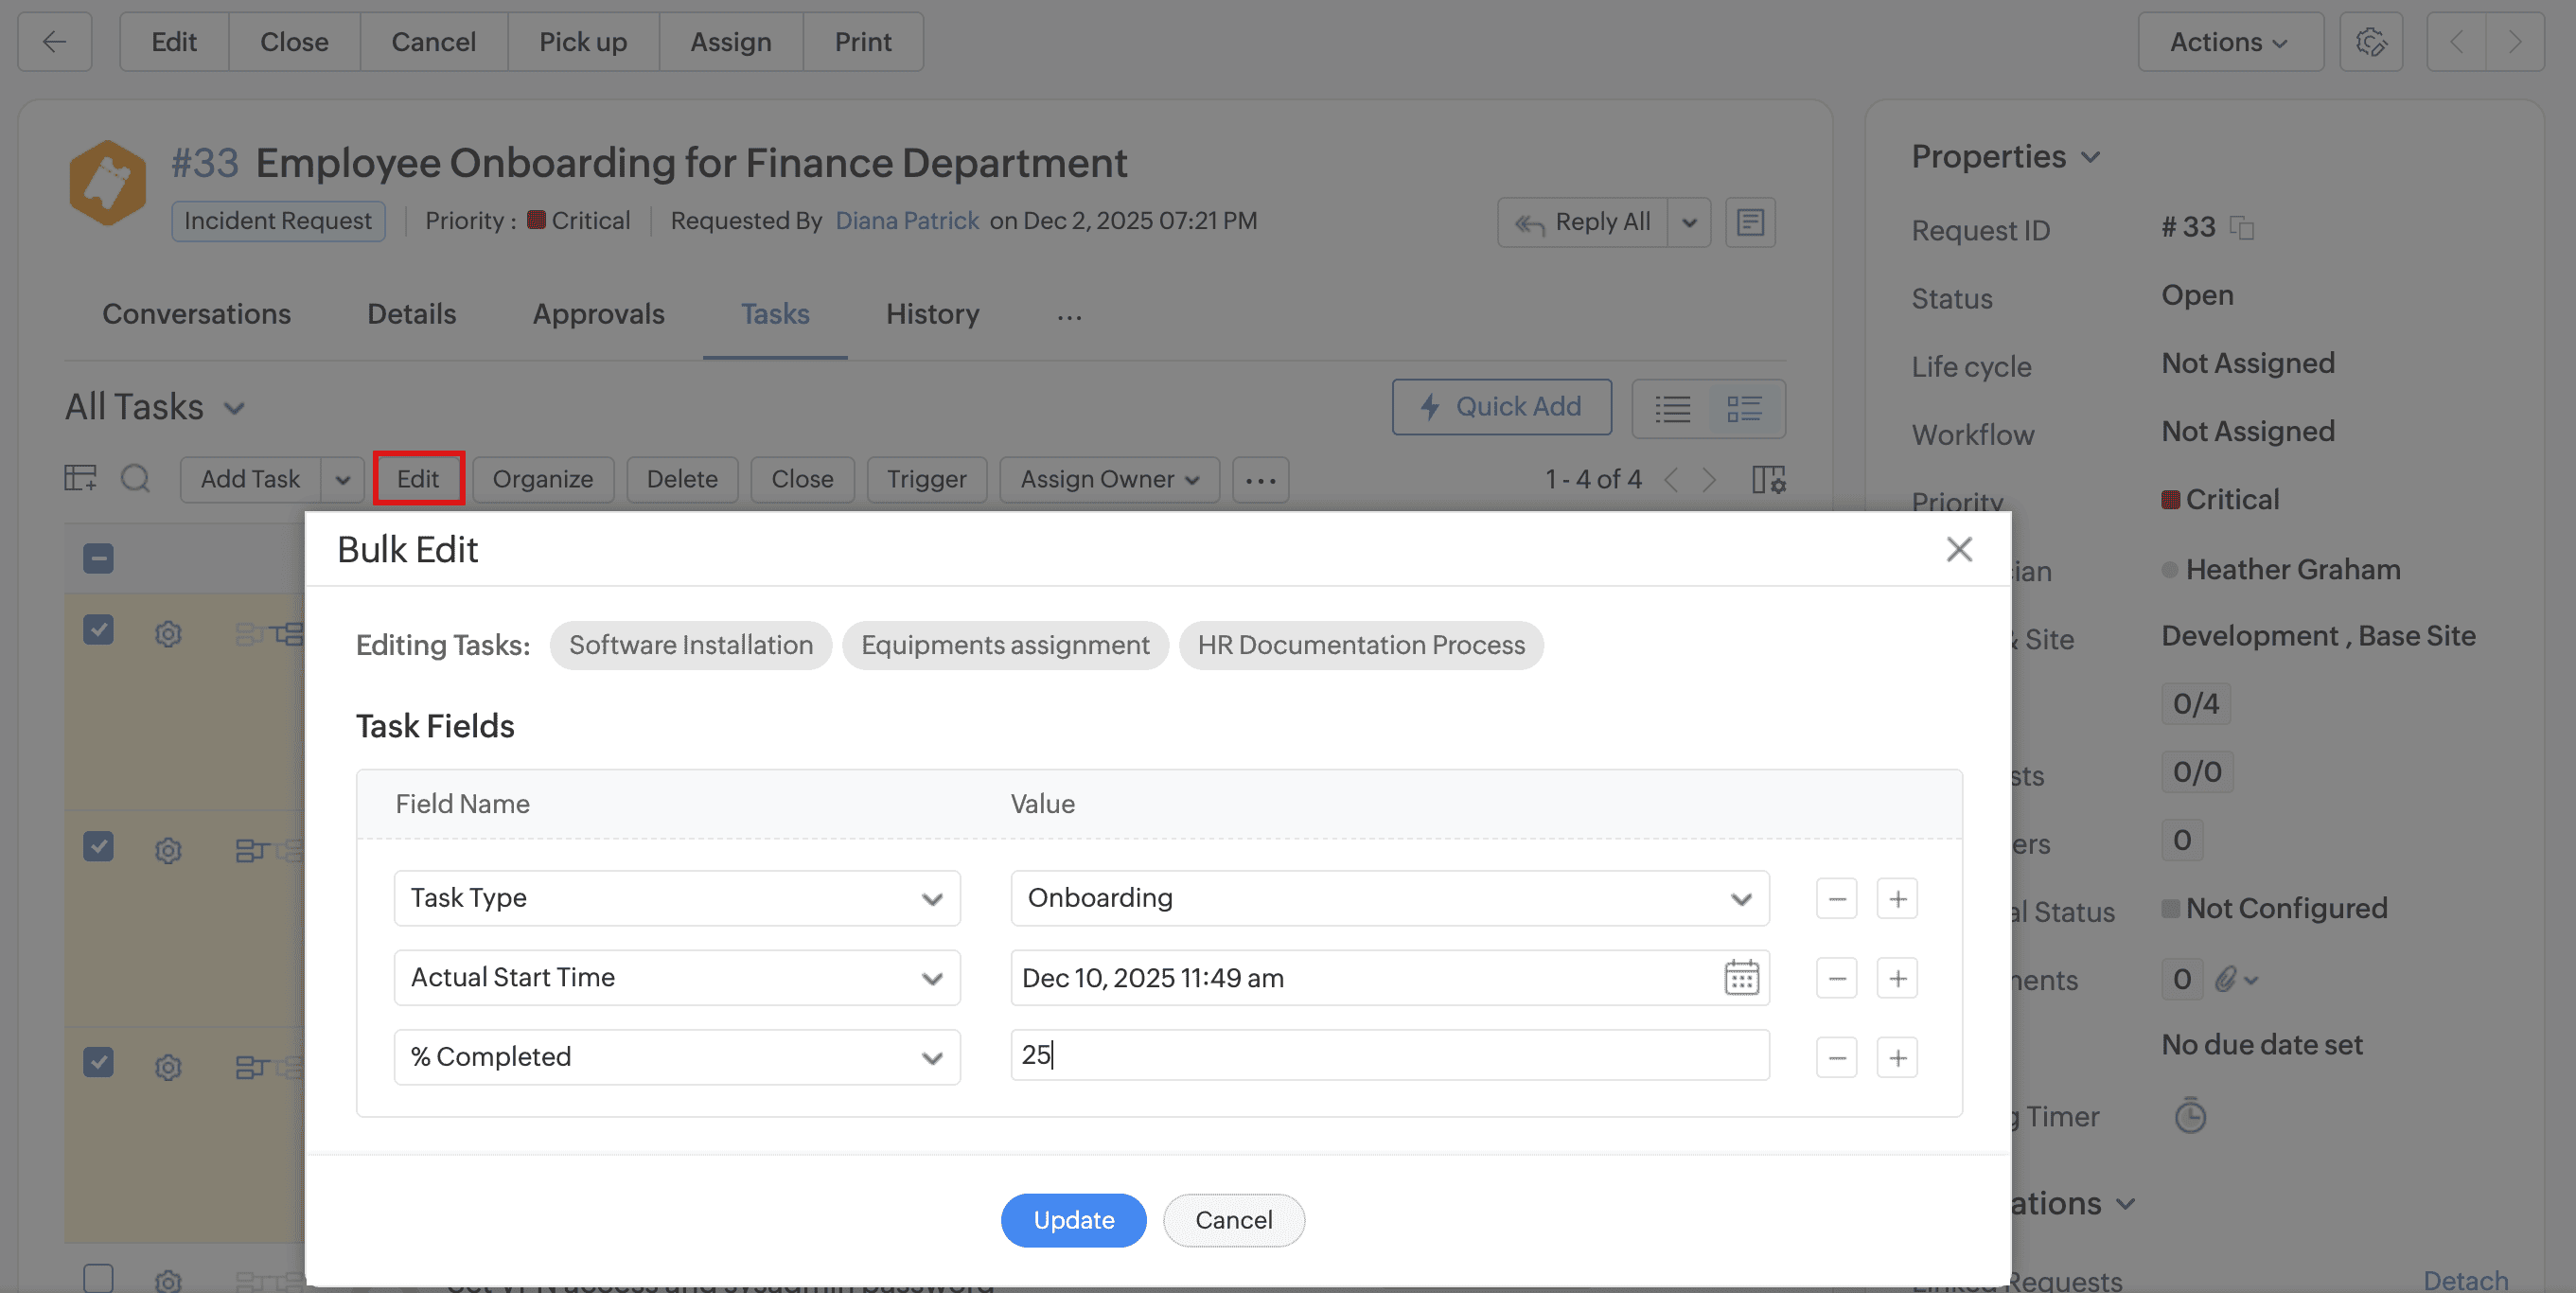
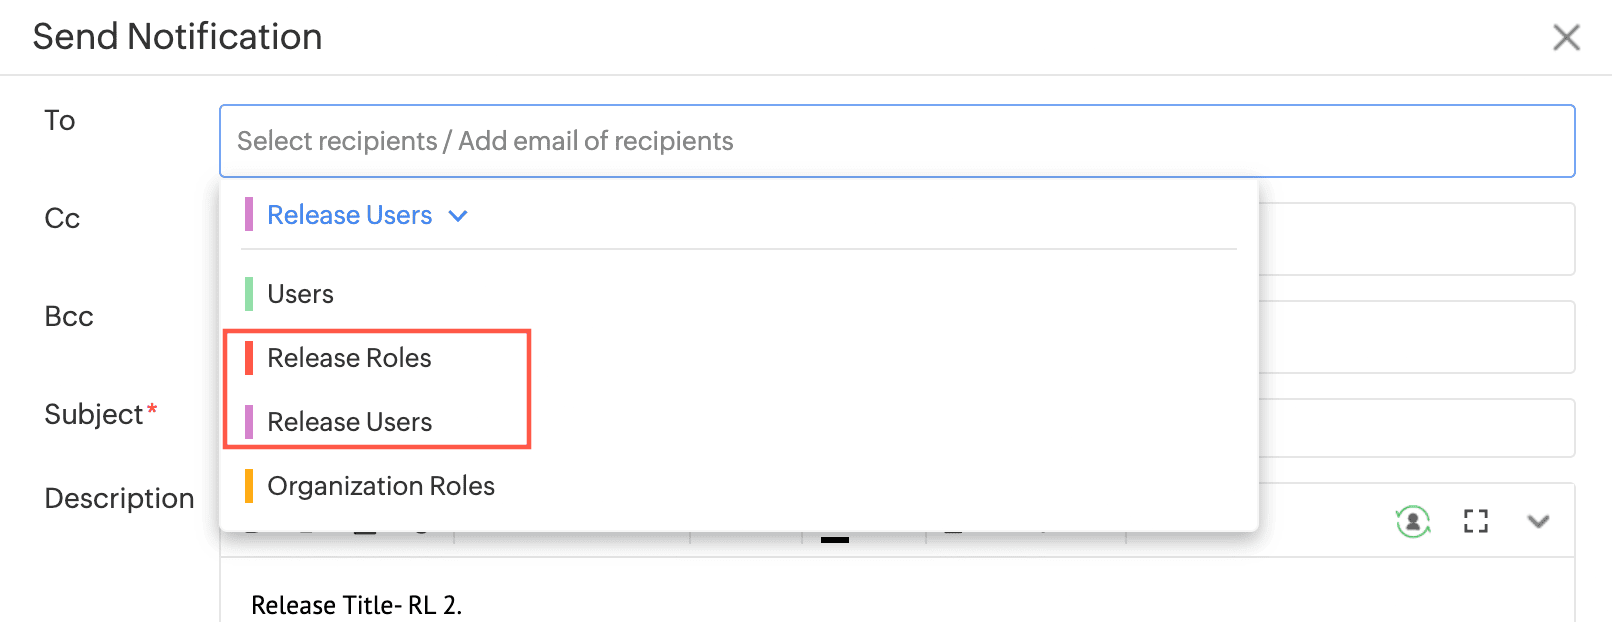
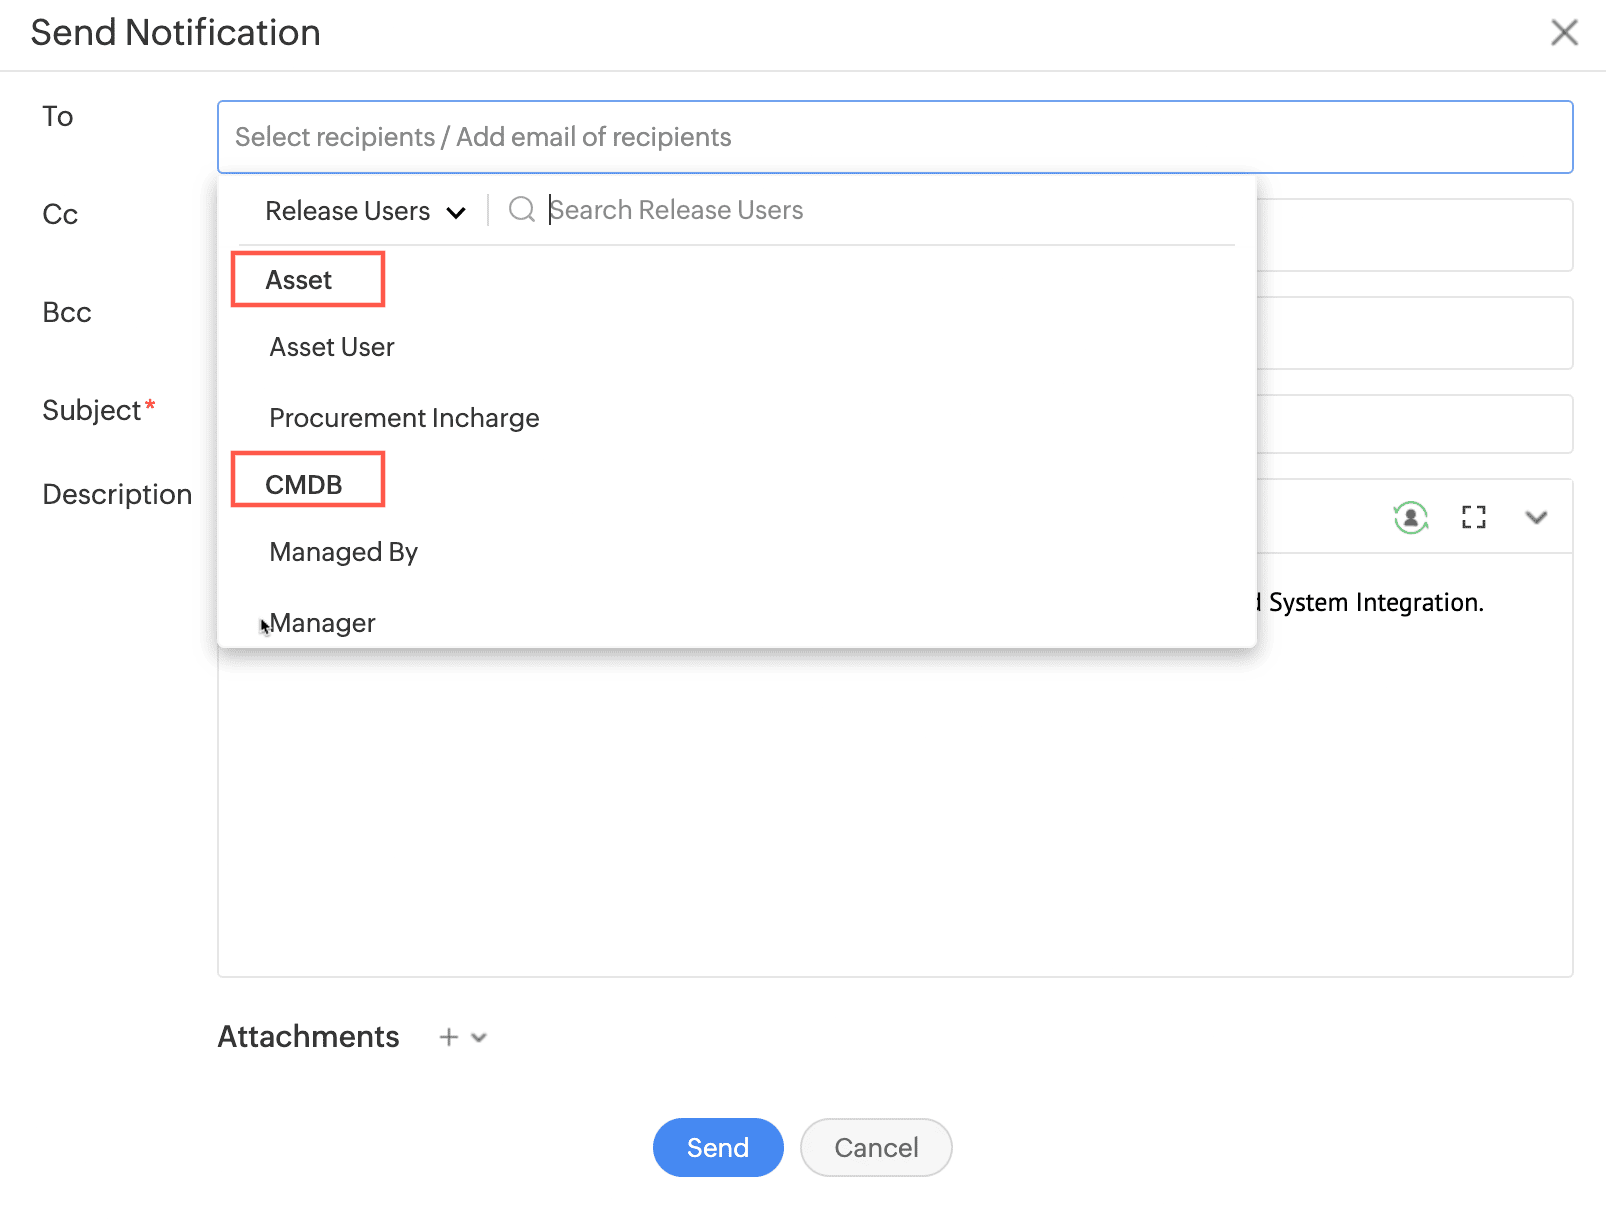
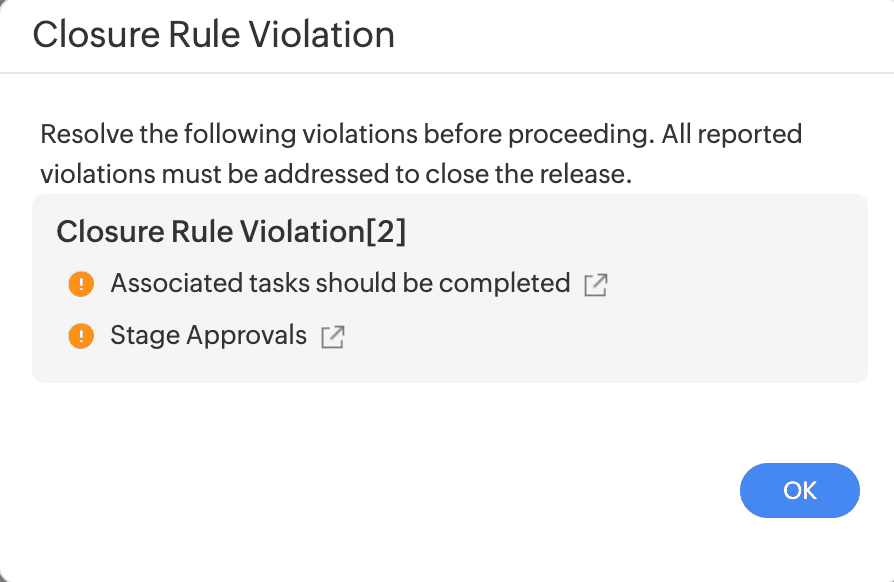
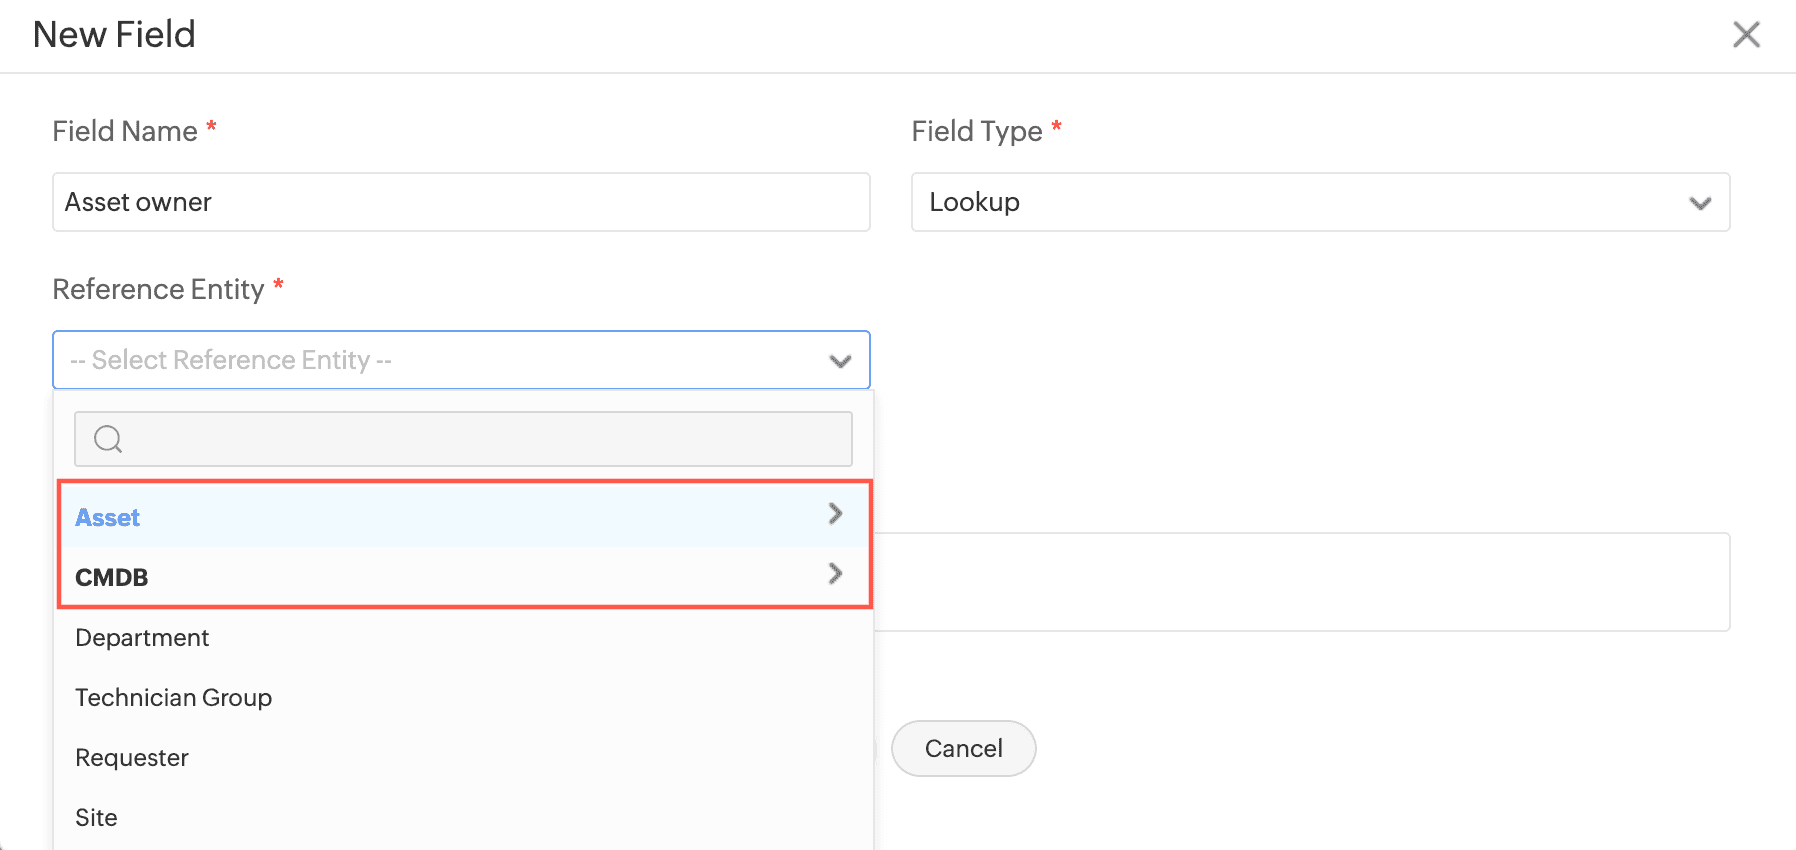
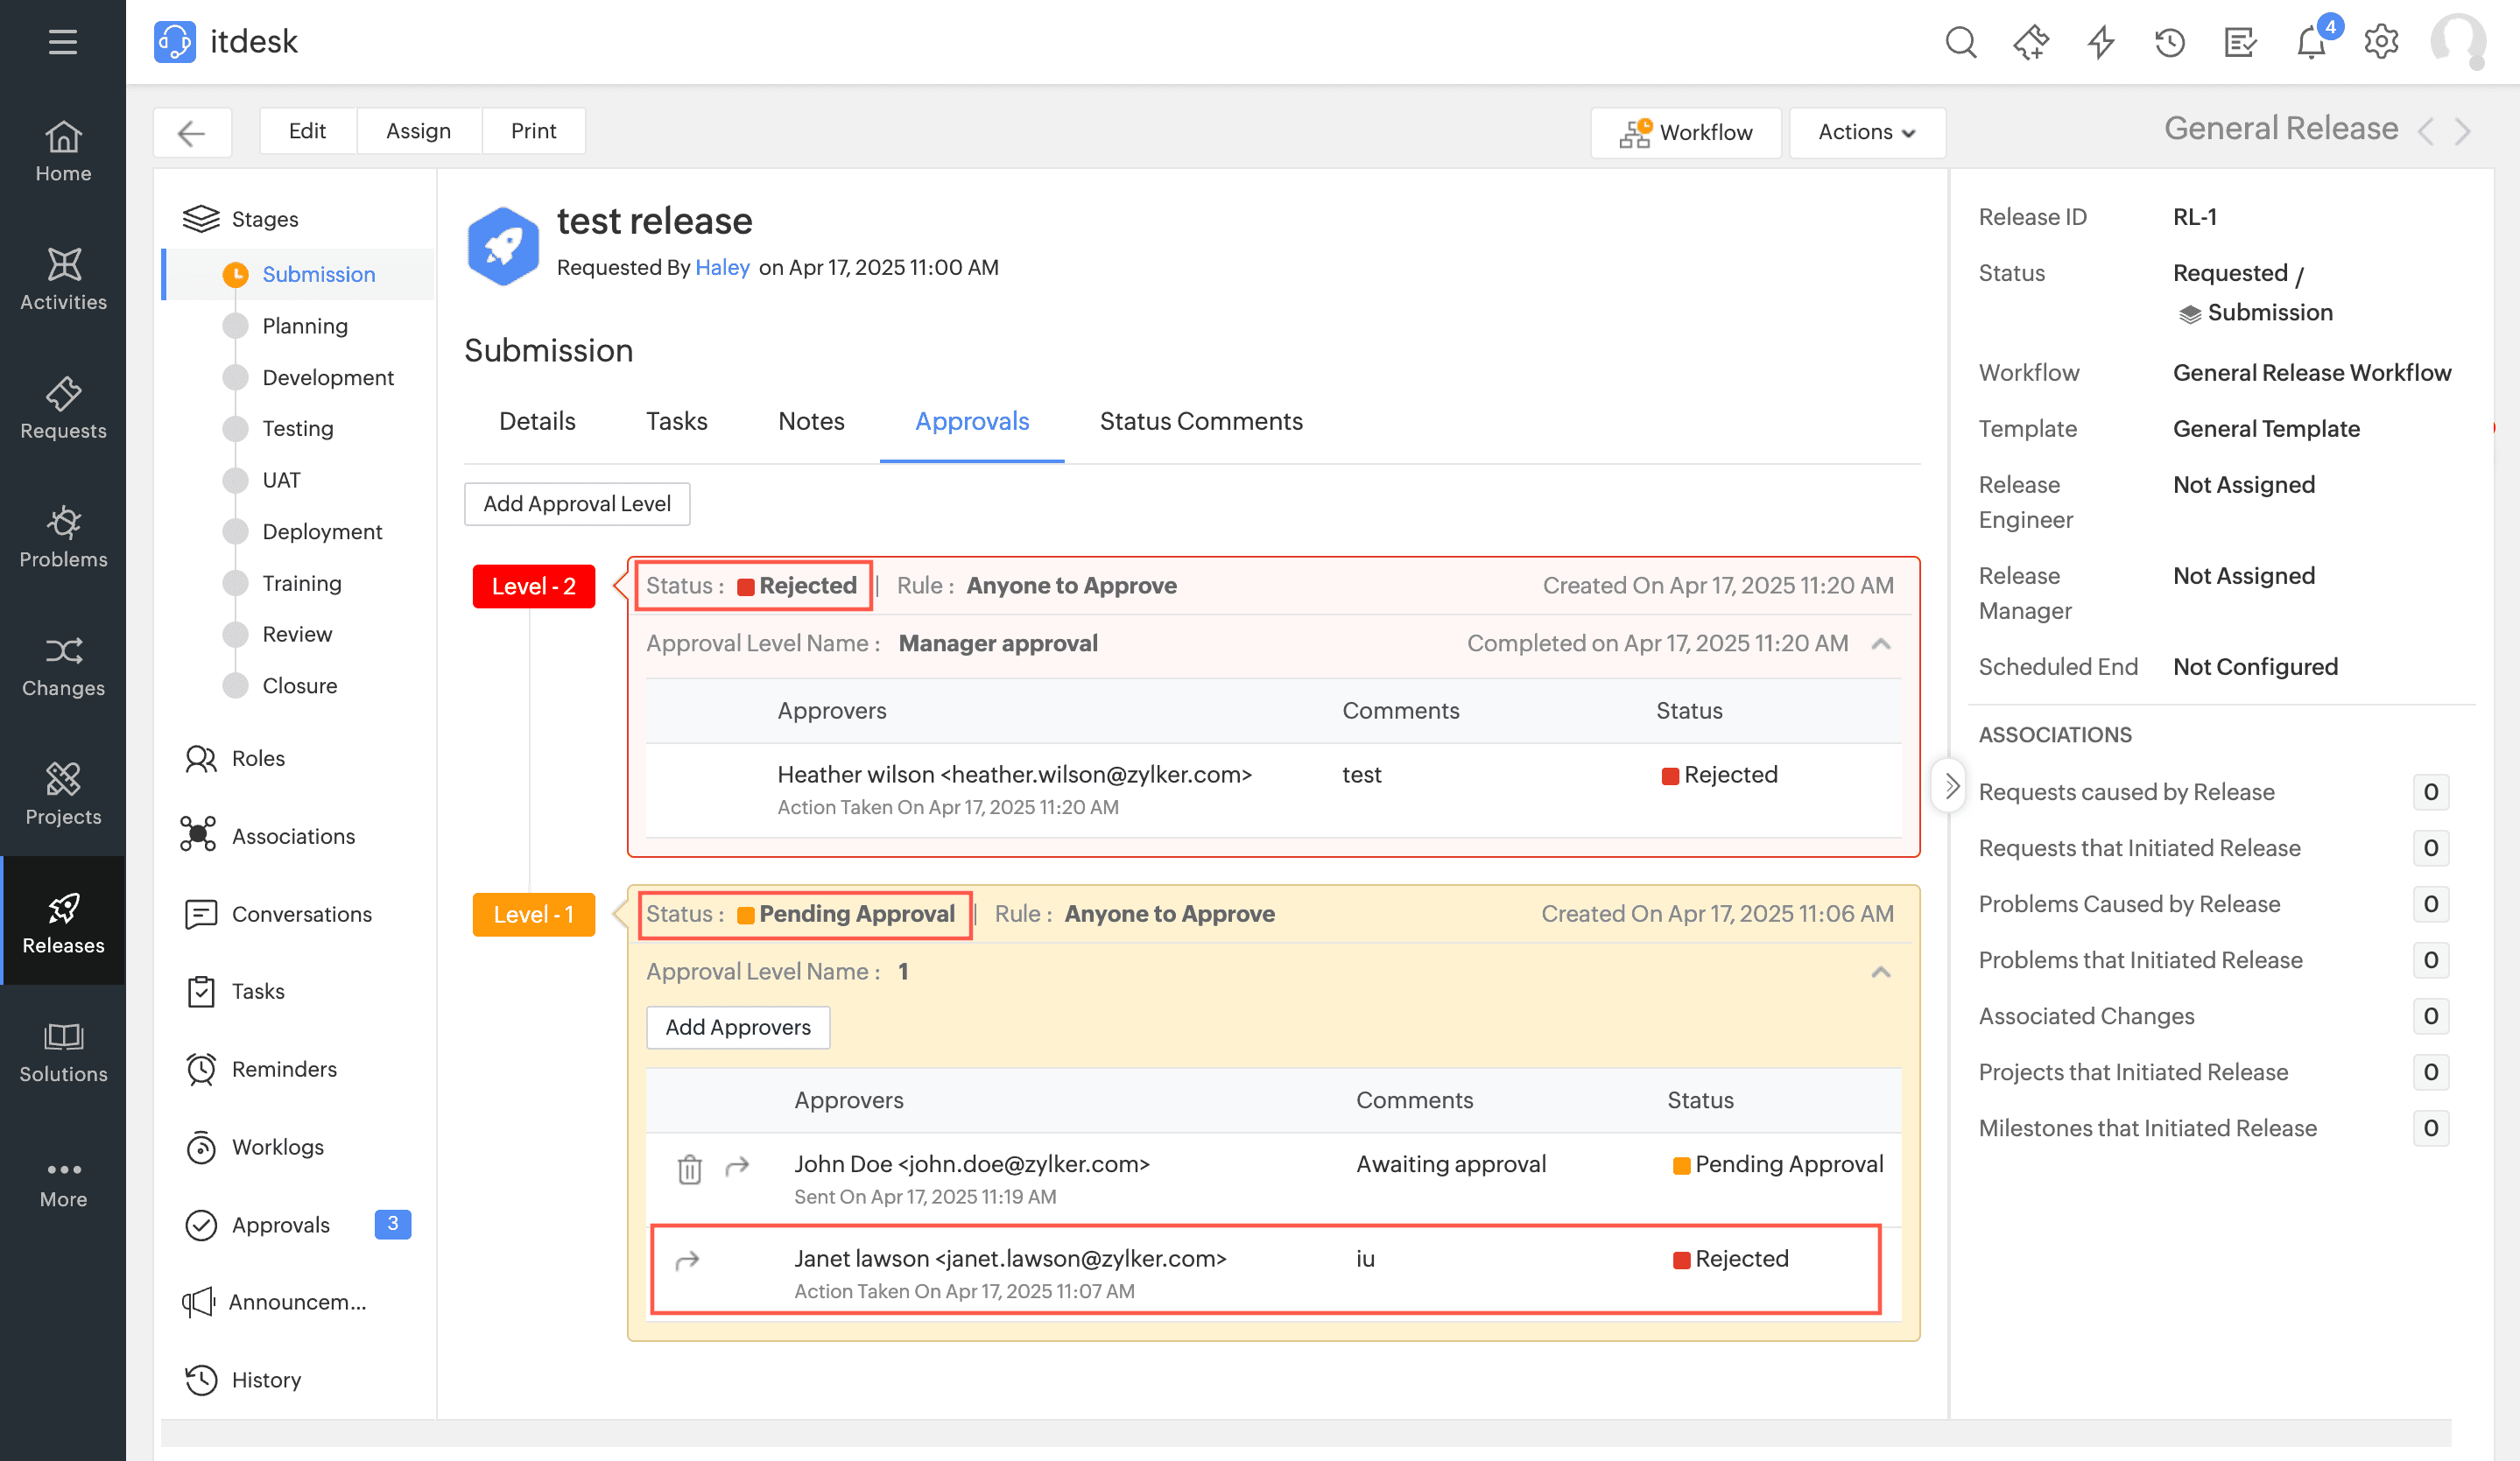
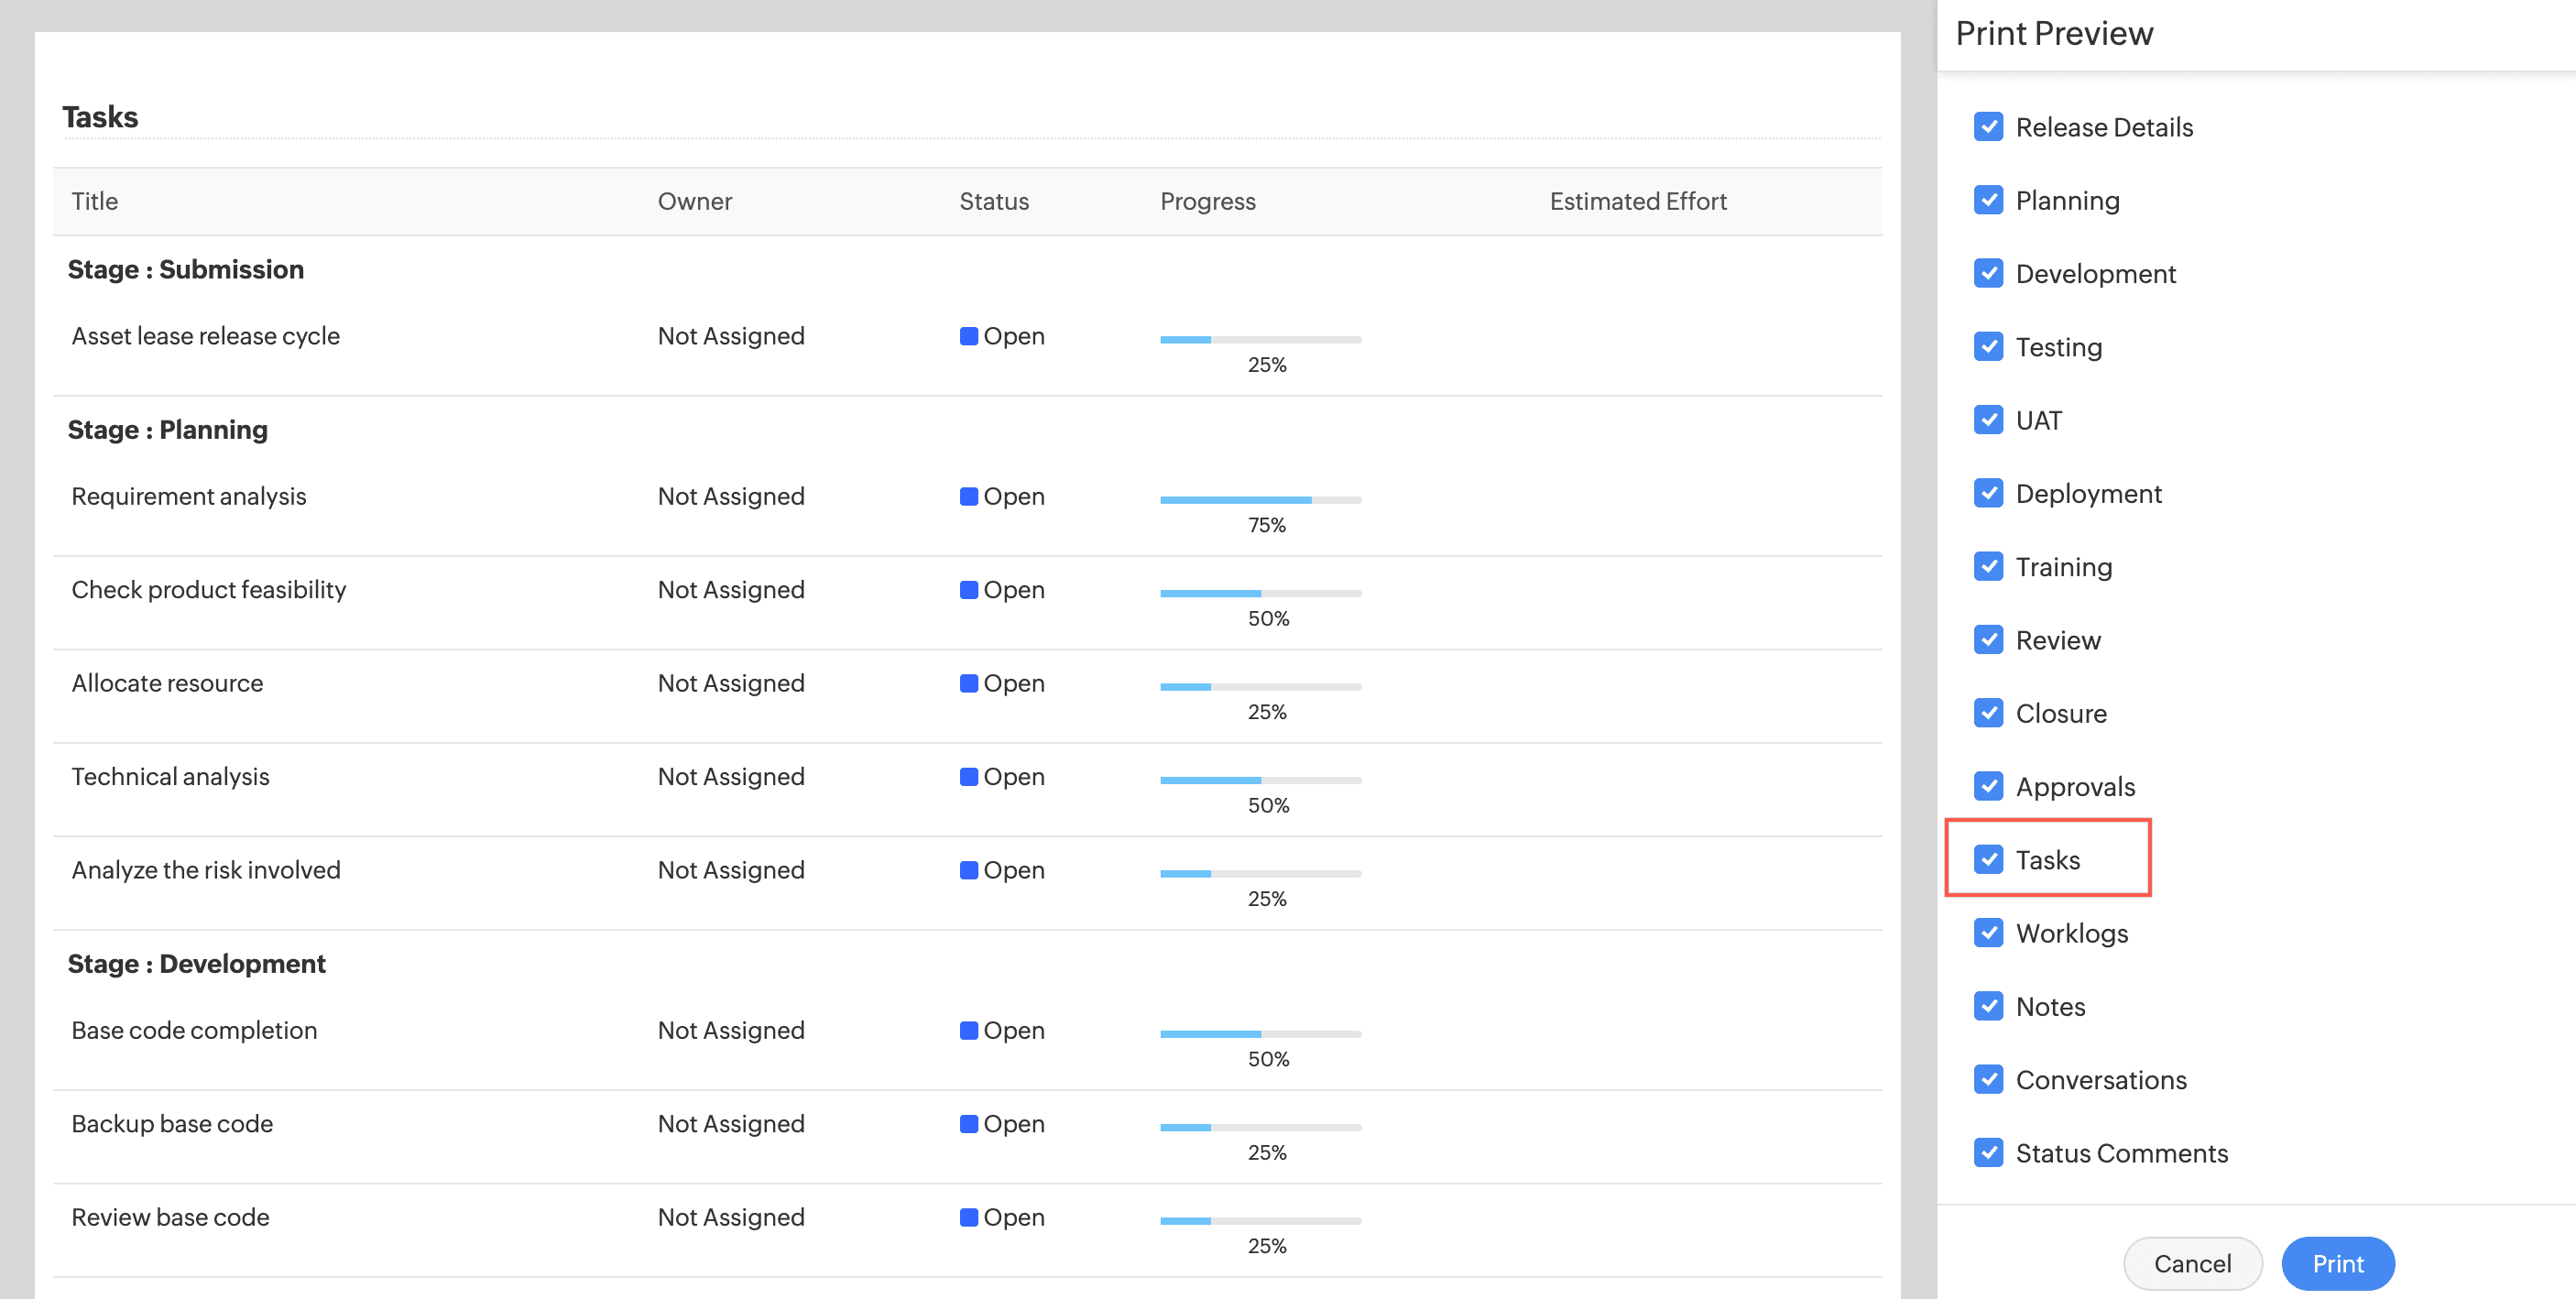
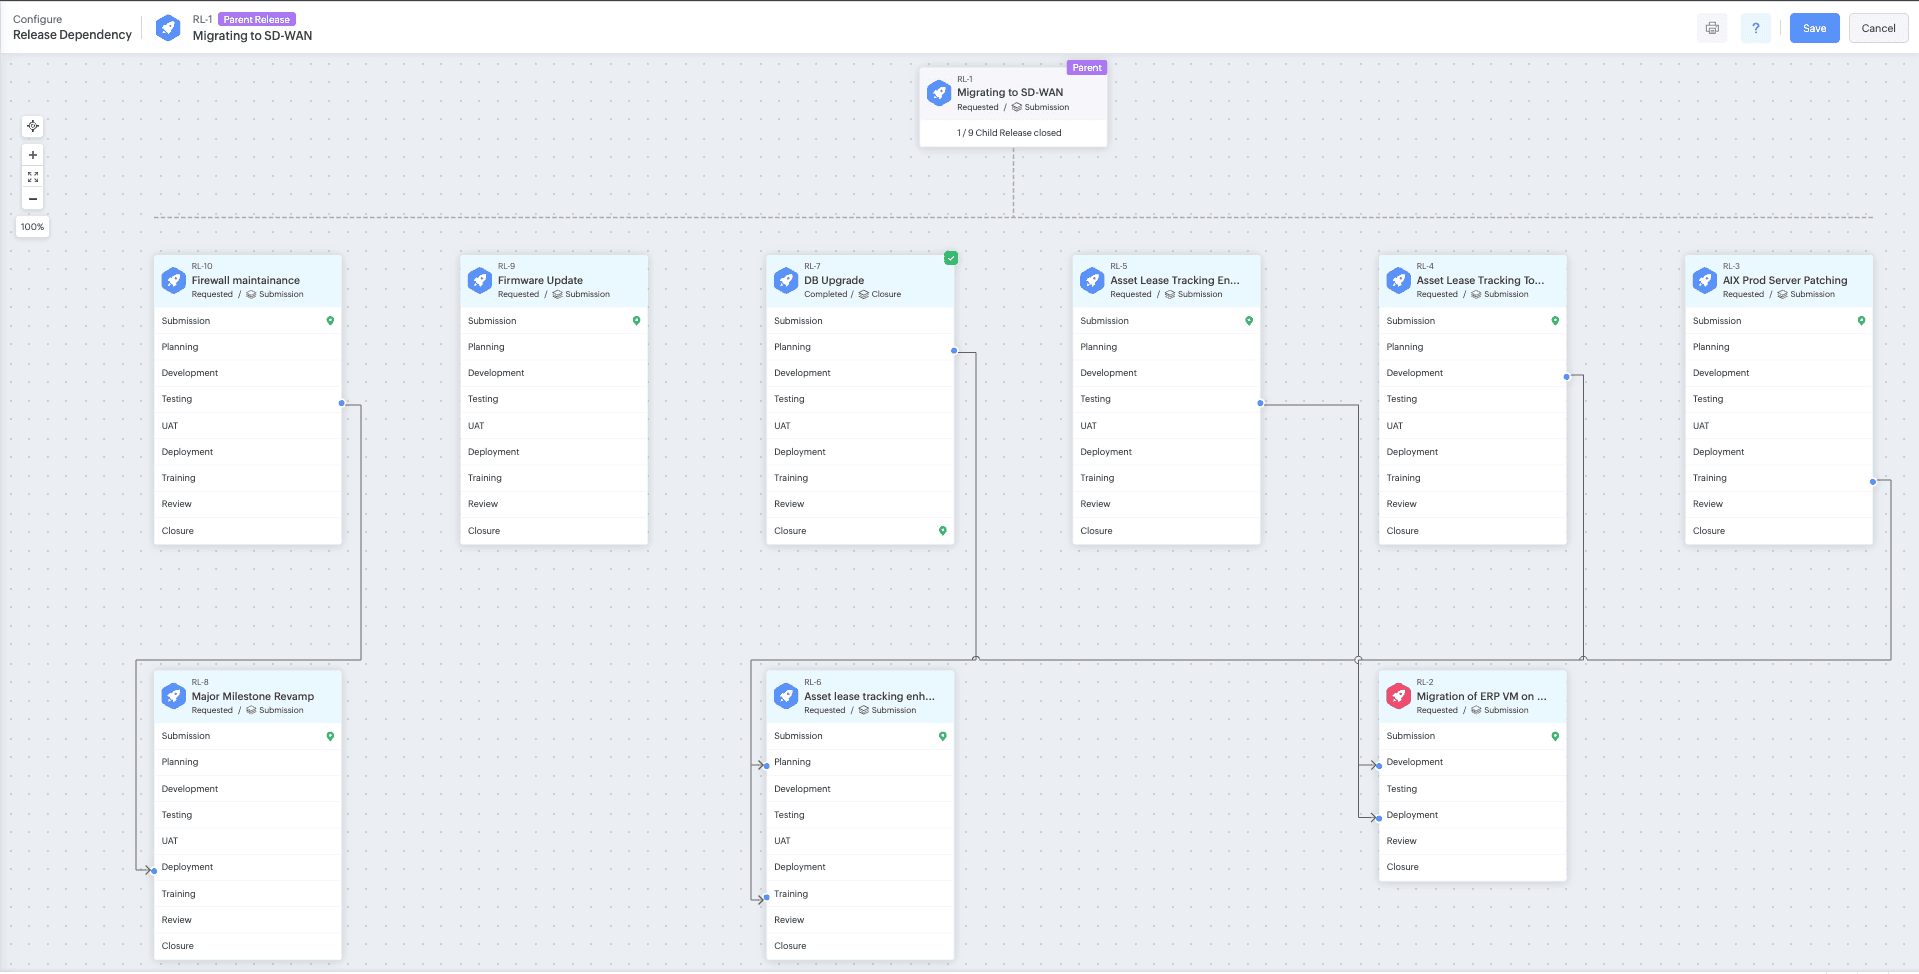
You can now link releases to organize and manage complex deployment scenarios. Additionally, you can set stage-level release dependencies with built-in checks to prevent duplicate or circular links.
Parent release & Sub-release Association: Break a large release initiative into manageable, sequential releases using the Parent - Sub release associations. To do that, in the parent release, go to the Associations tab and add related sub-releases.
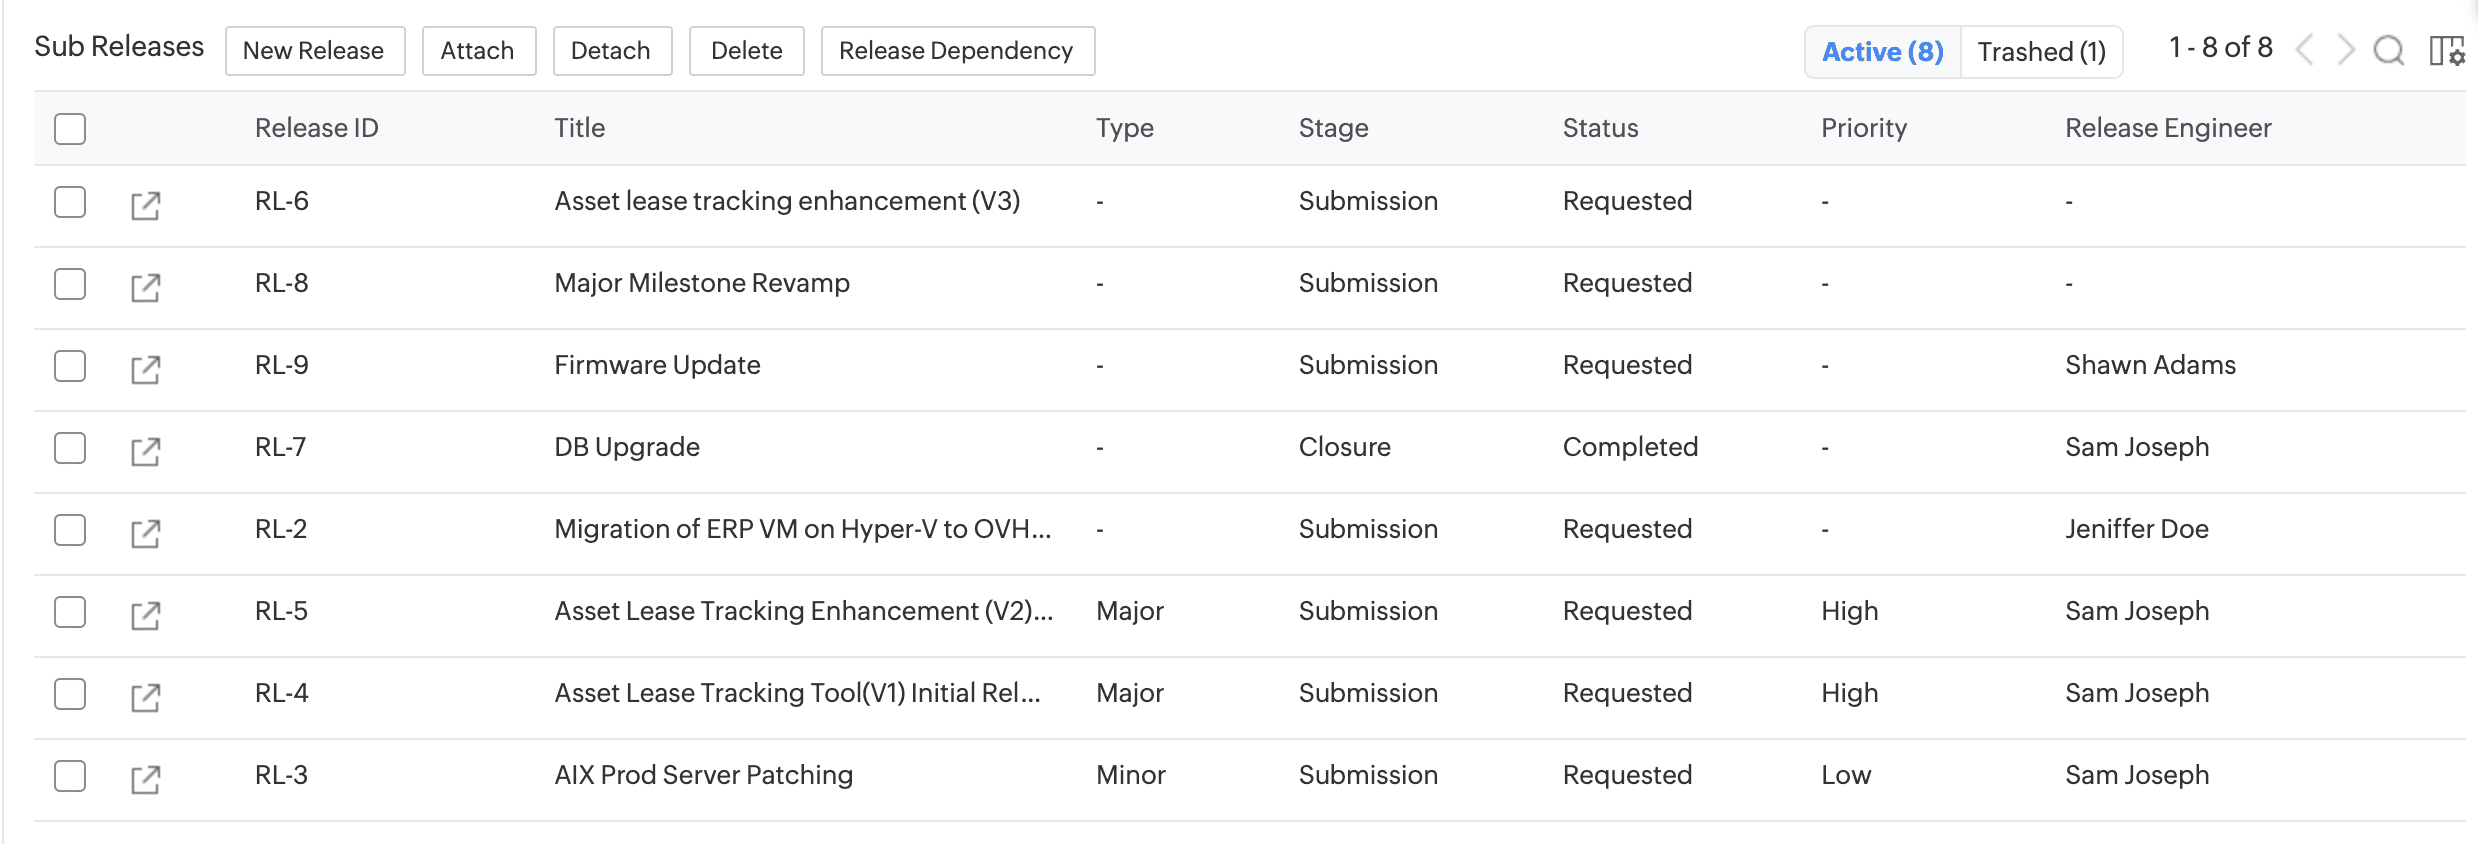
Alternatively, in a sub-release, open the Associations tab and link it to a parent release.
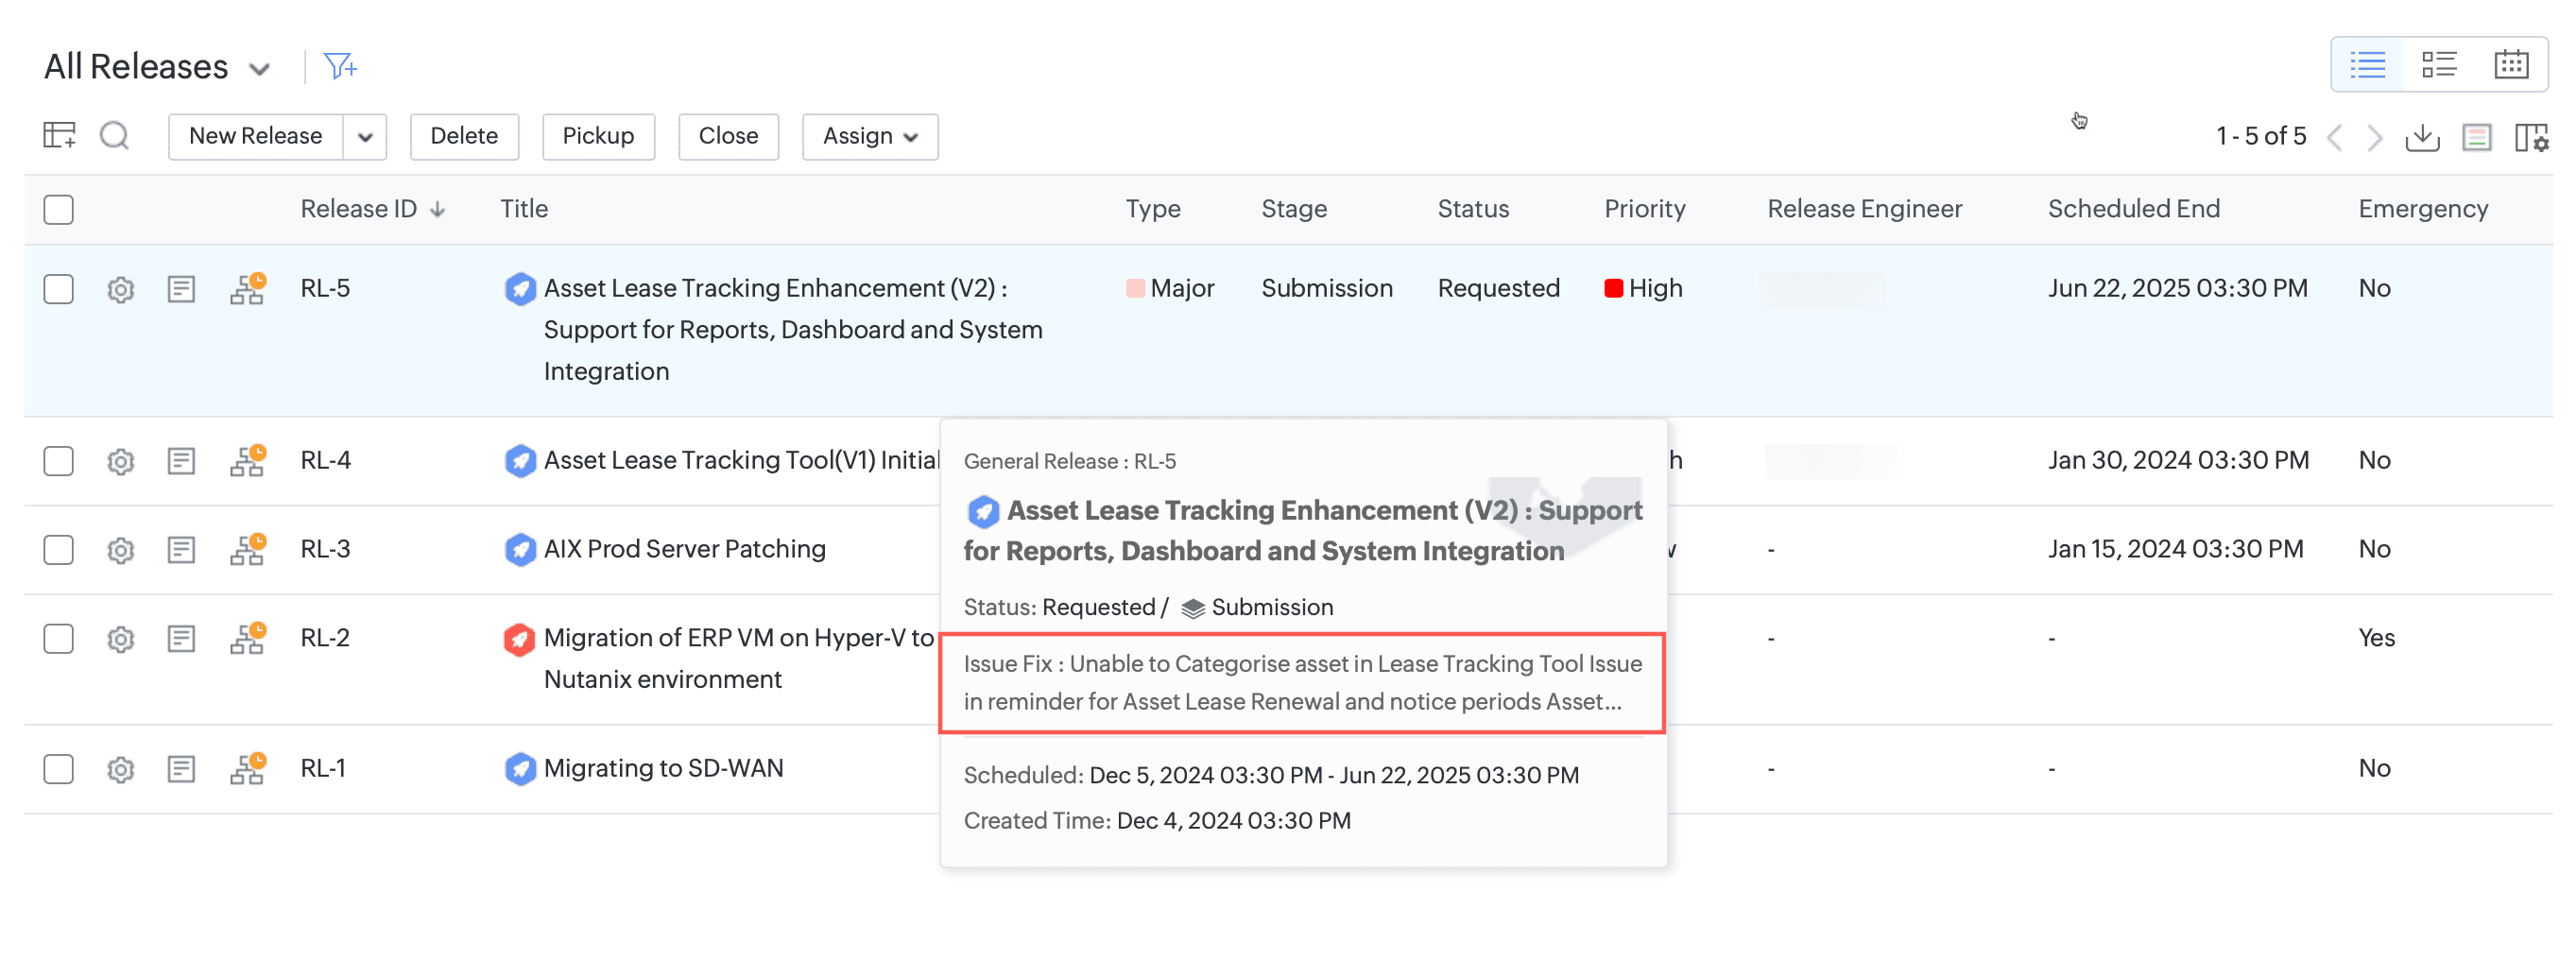
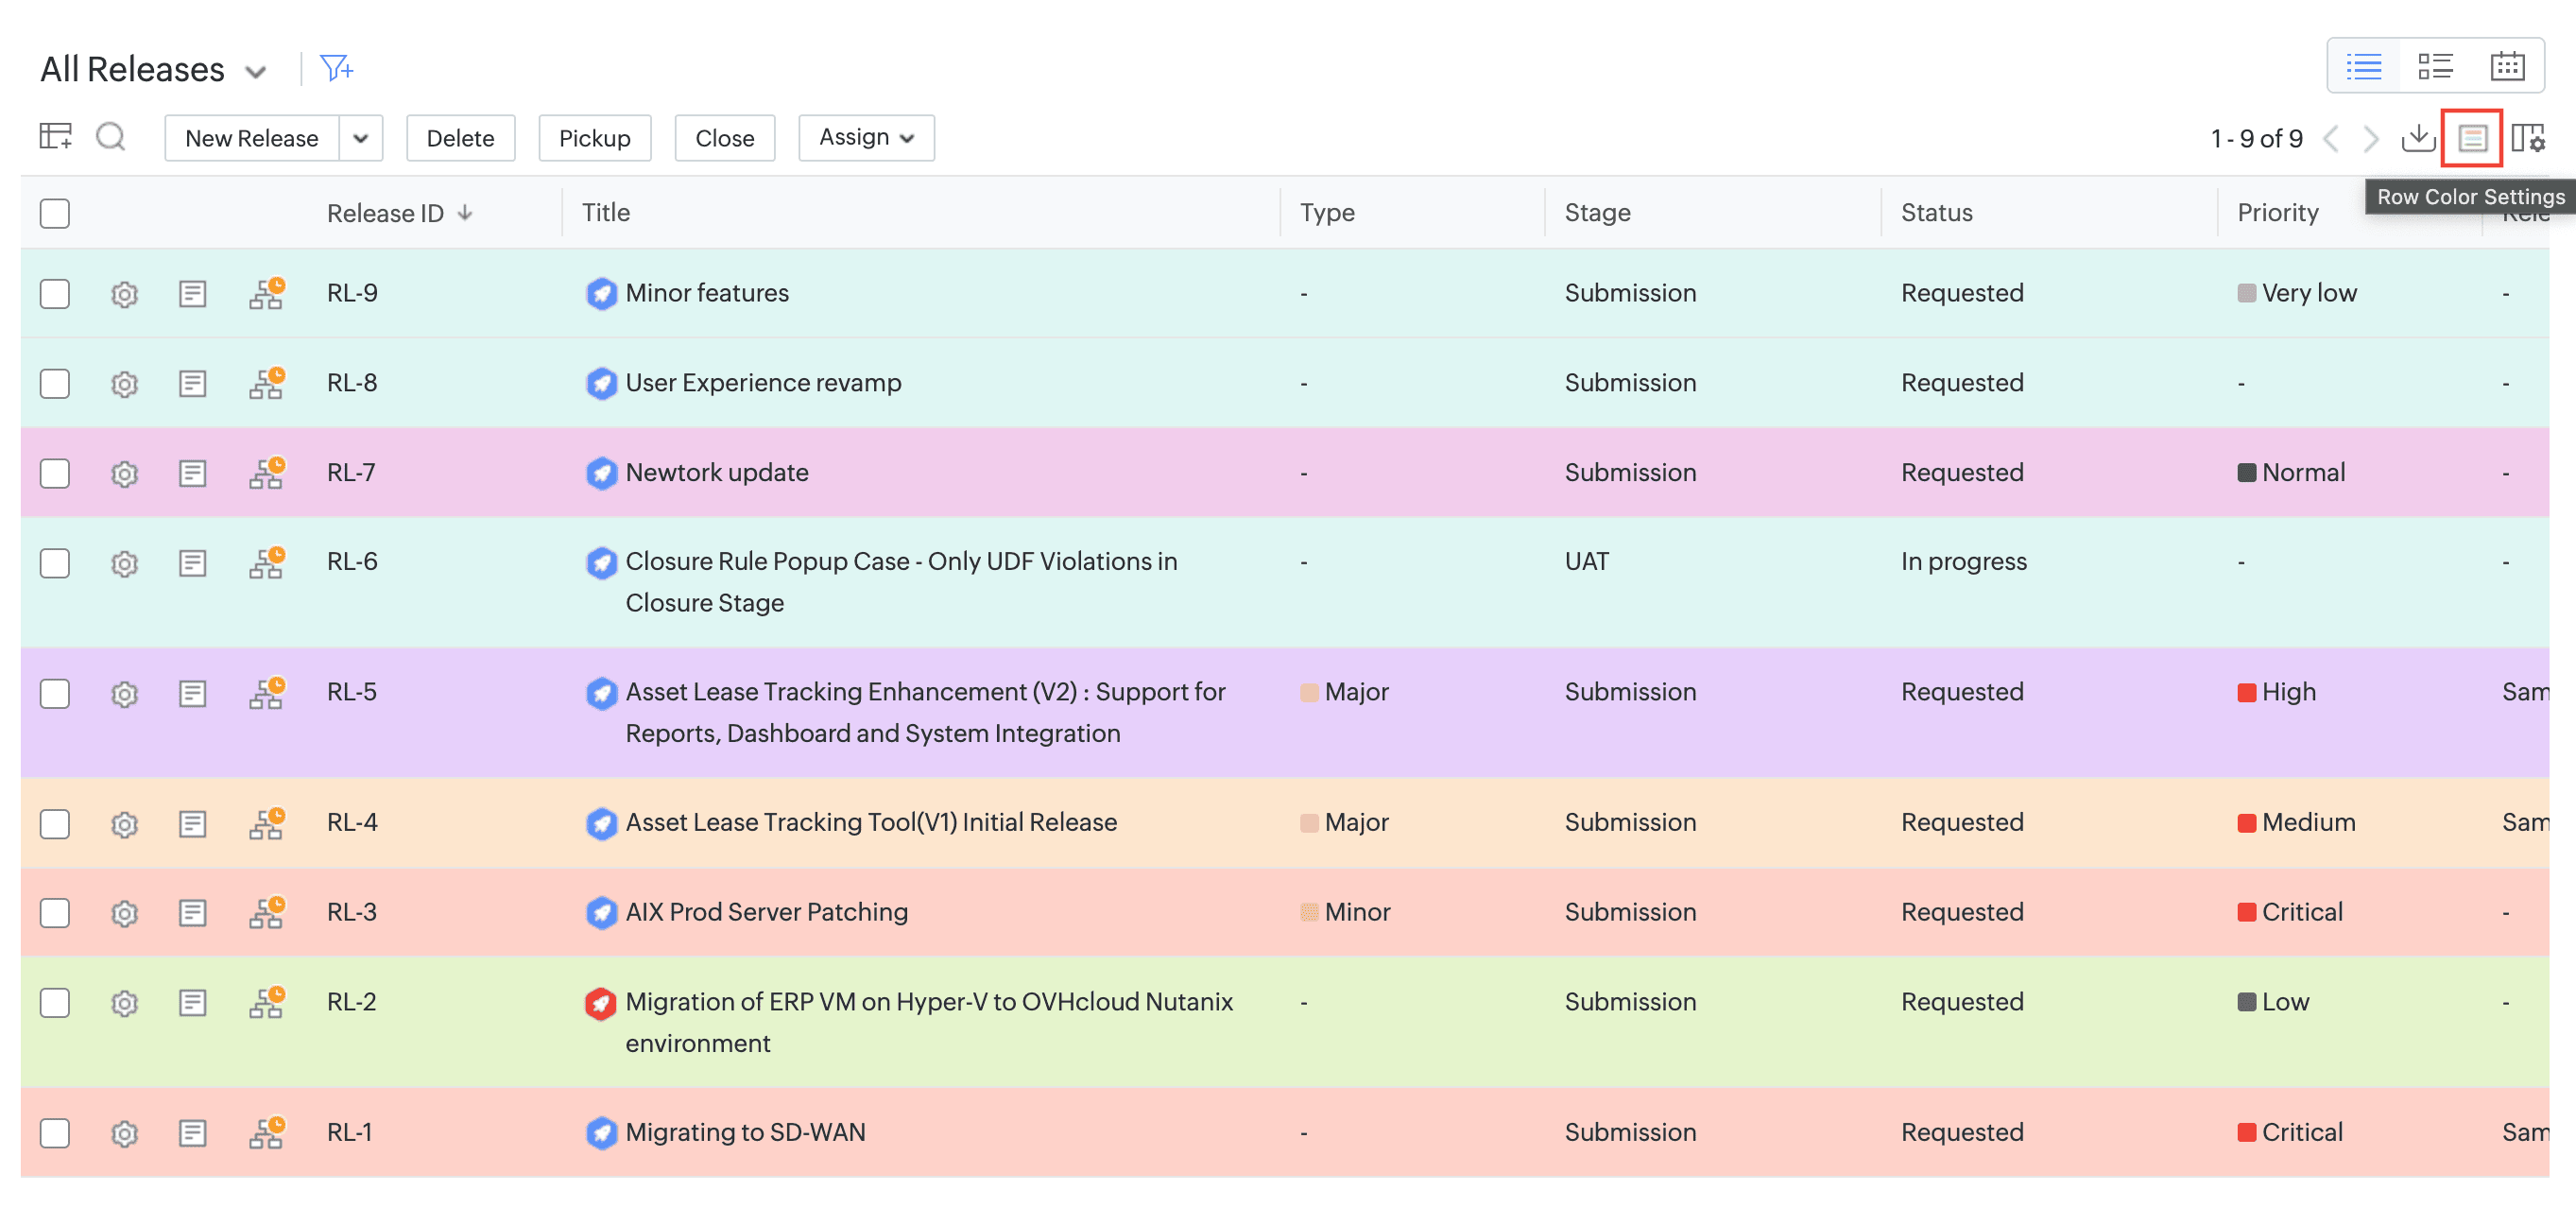
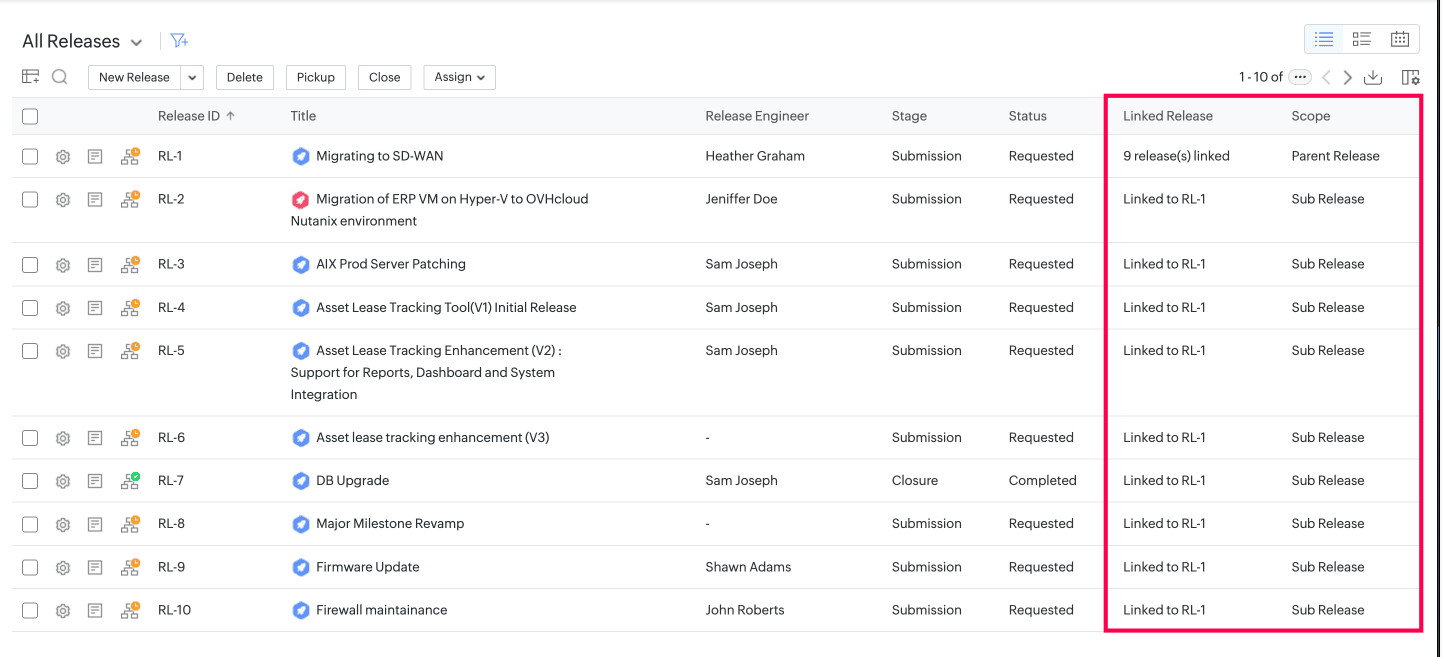
From the release list view, you can view the linked releases and their scope.
You can view the dependency between the releases using the Release Dependency option in the parent release.
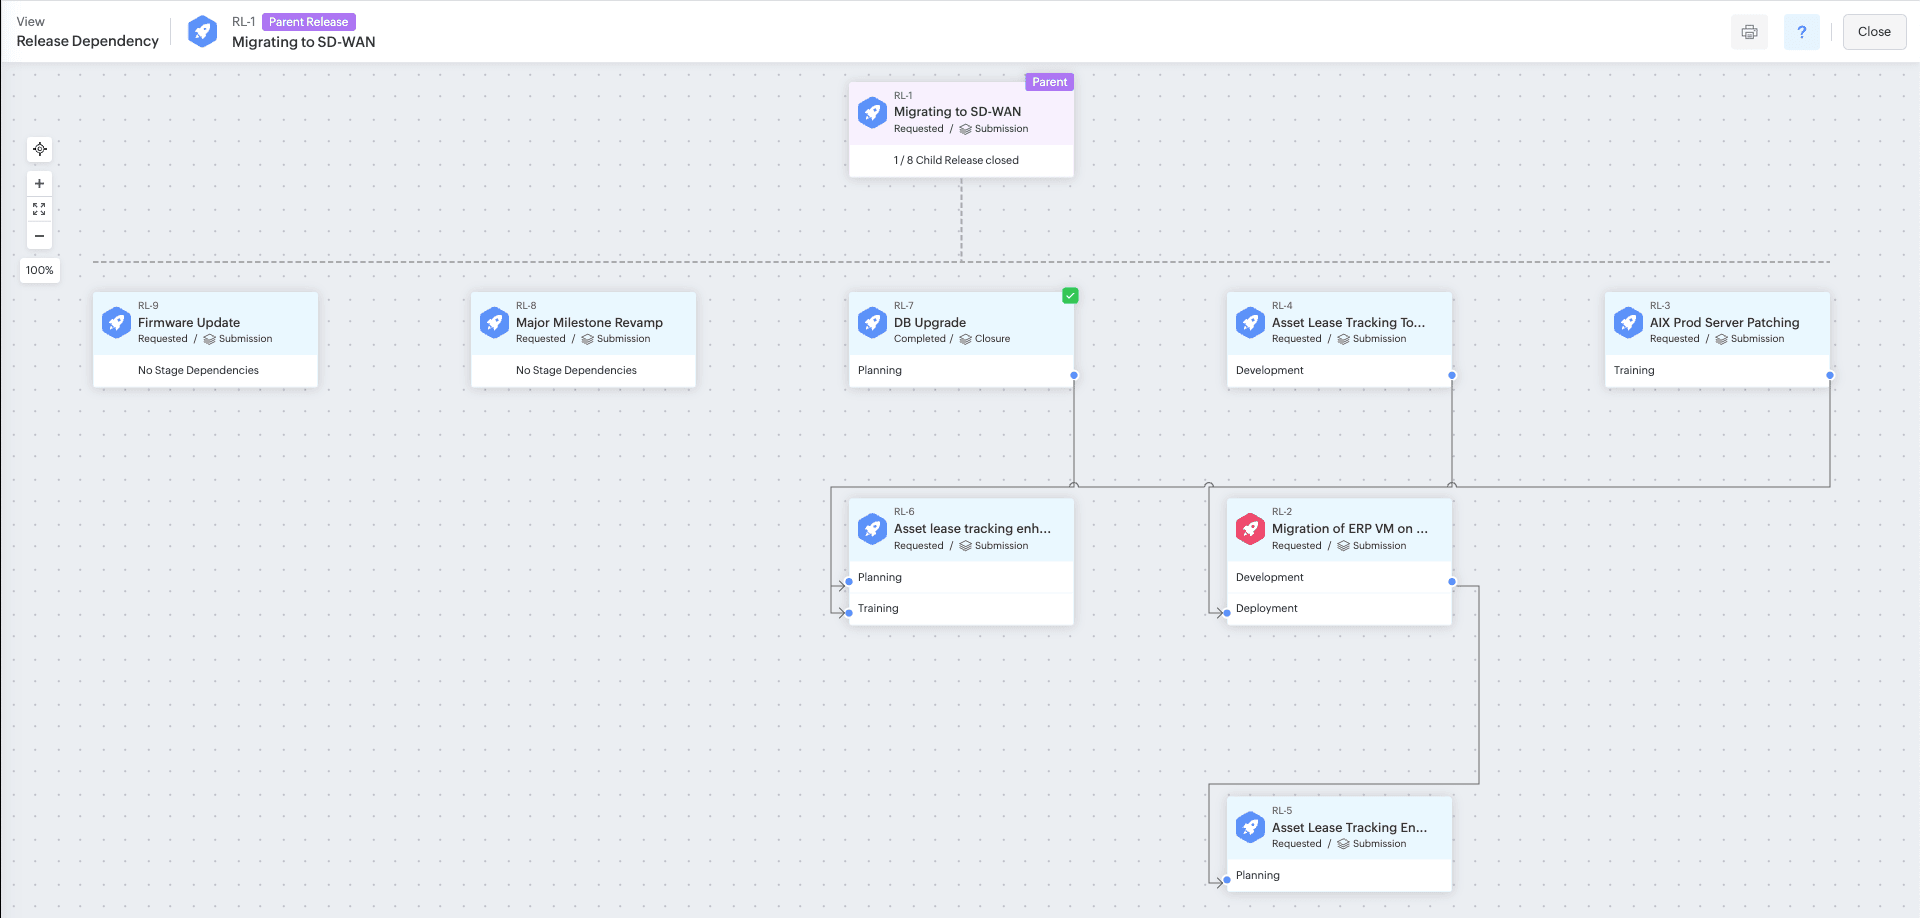
You can configure release dependency from the Associations tab of the parent release.
Administrators can now:
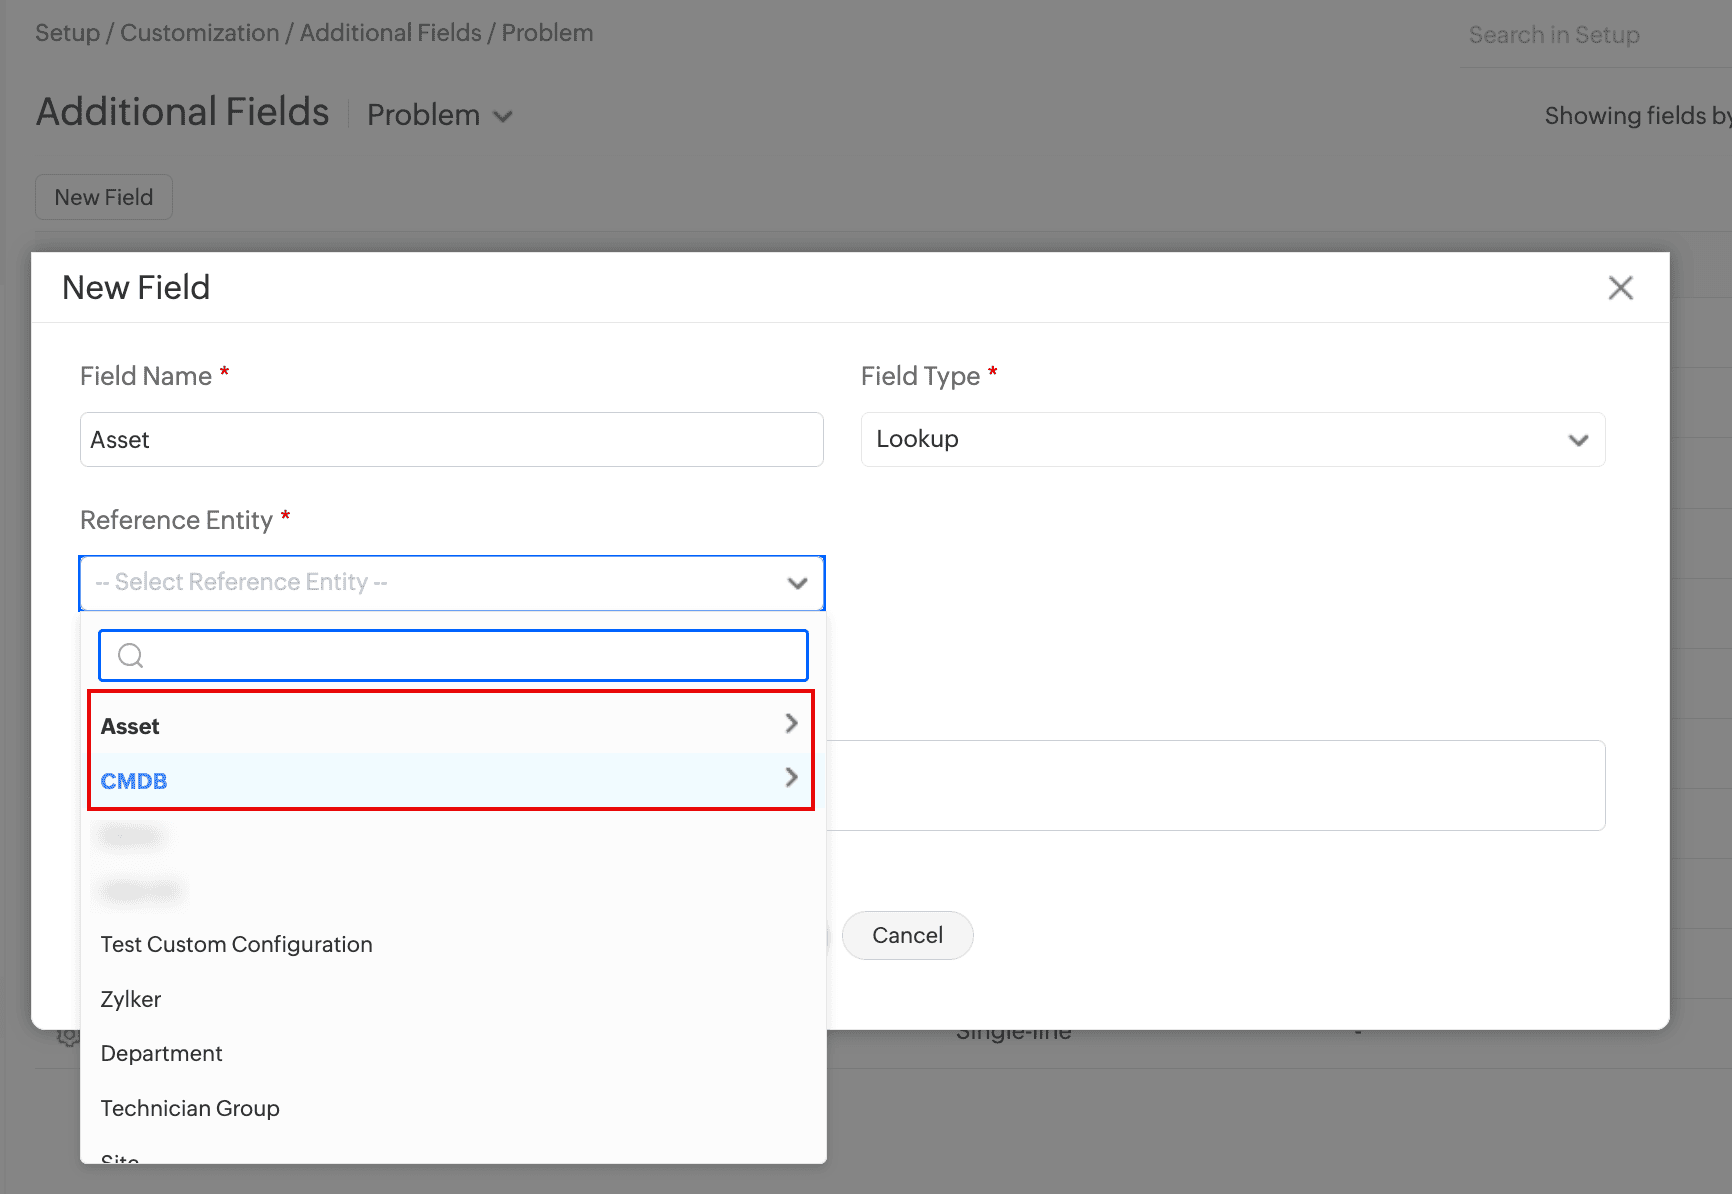
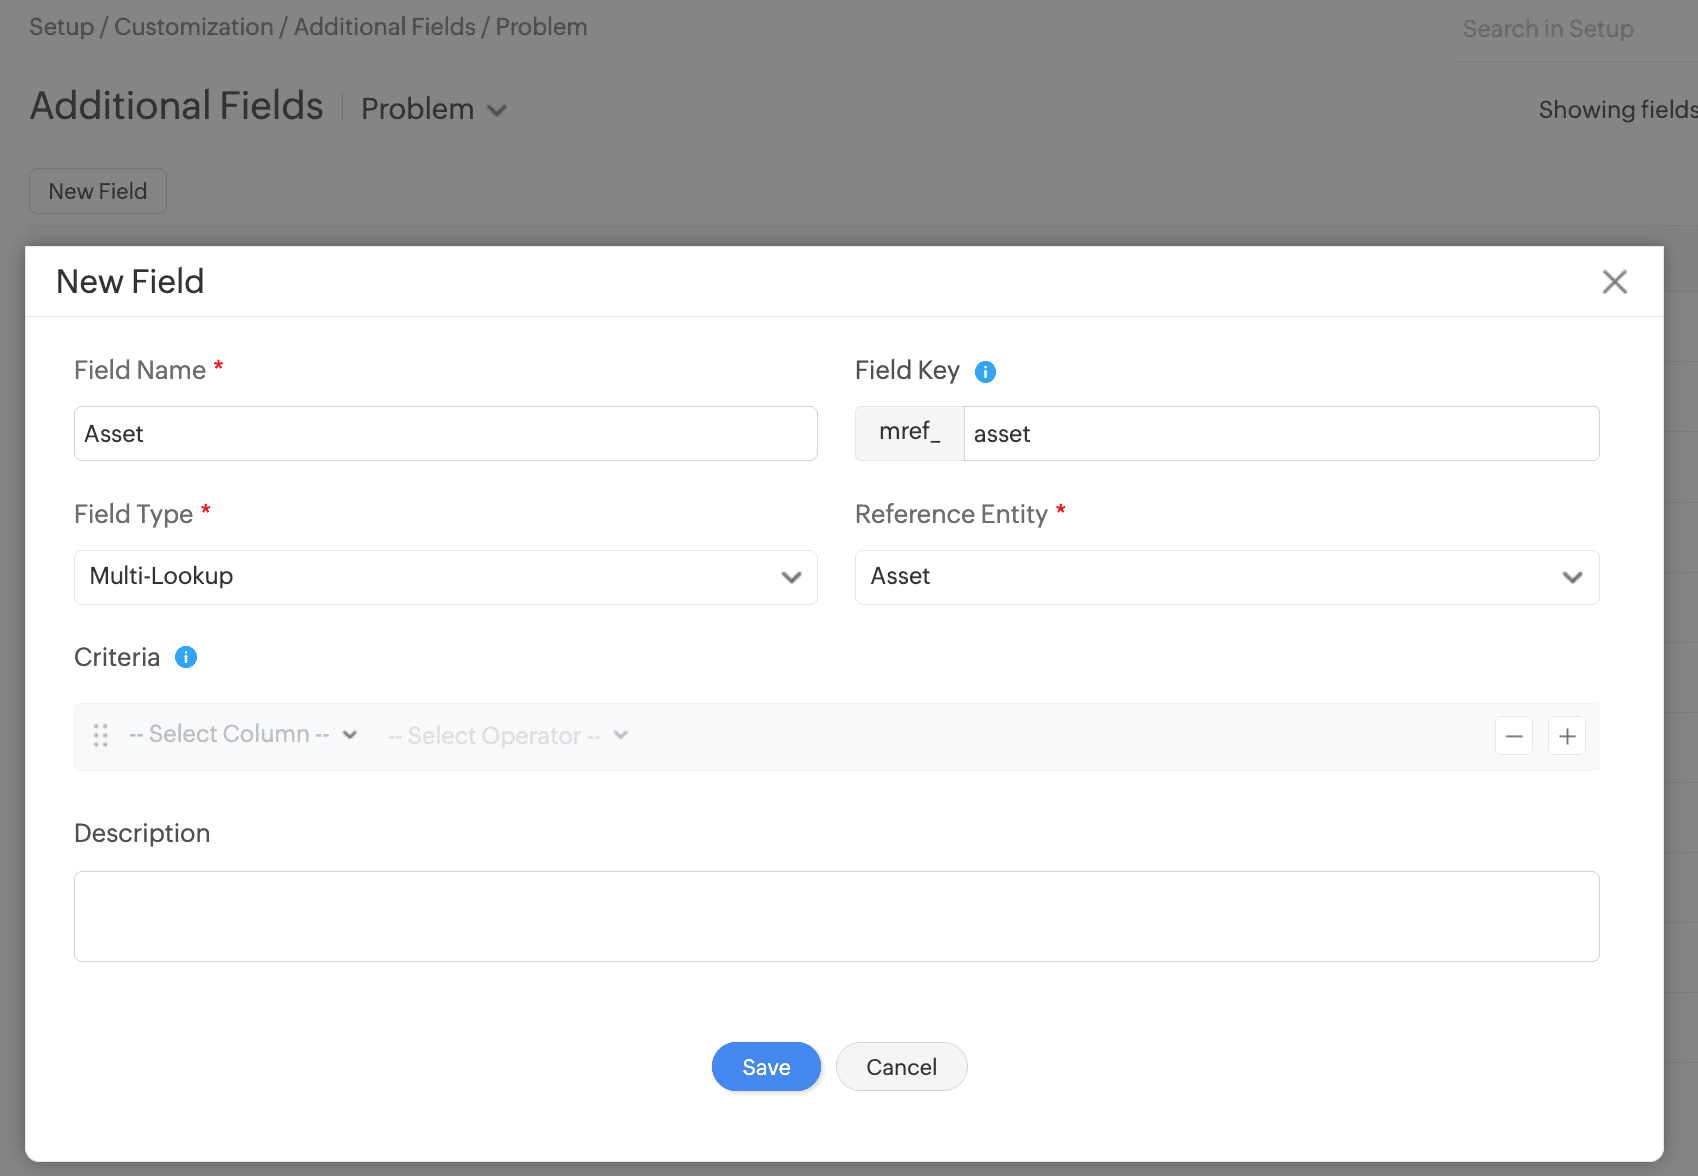
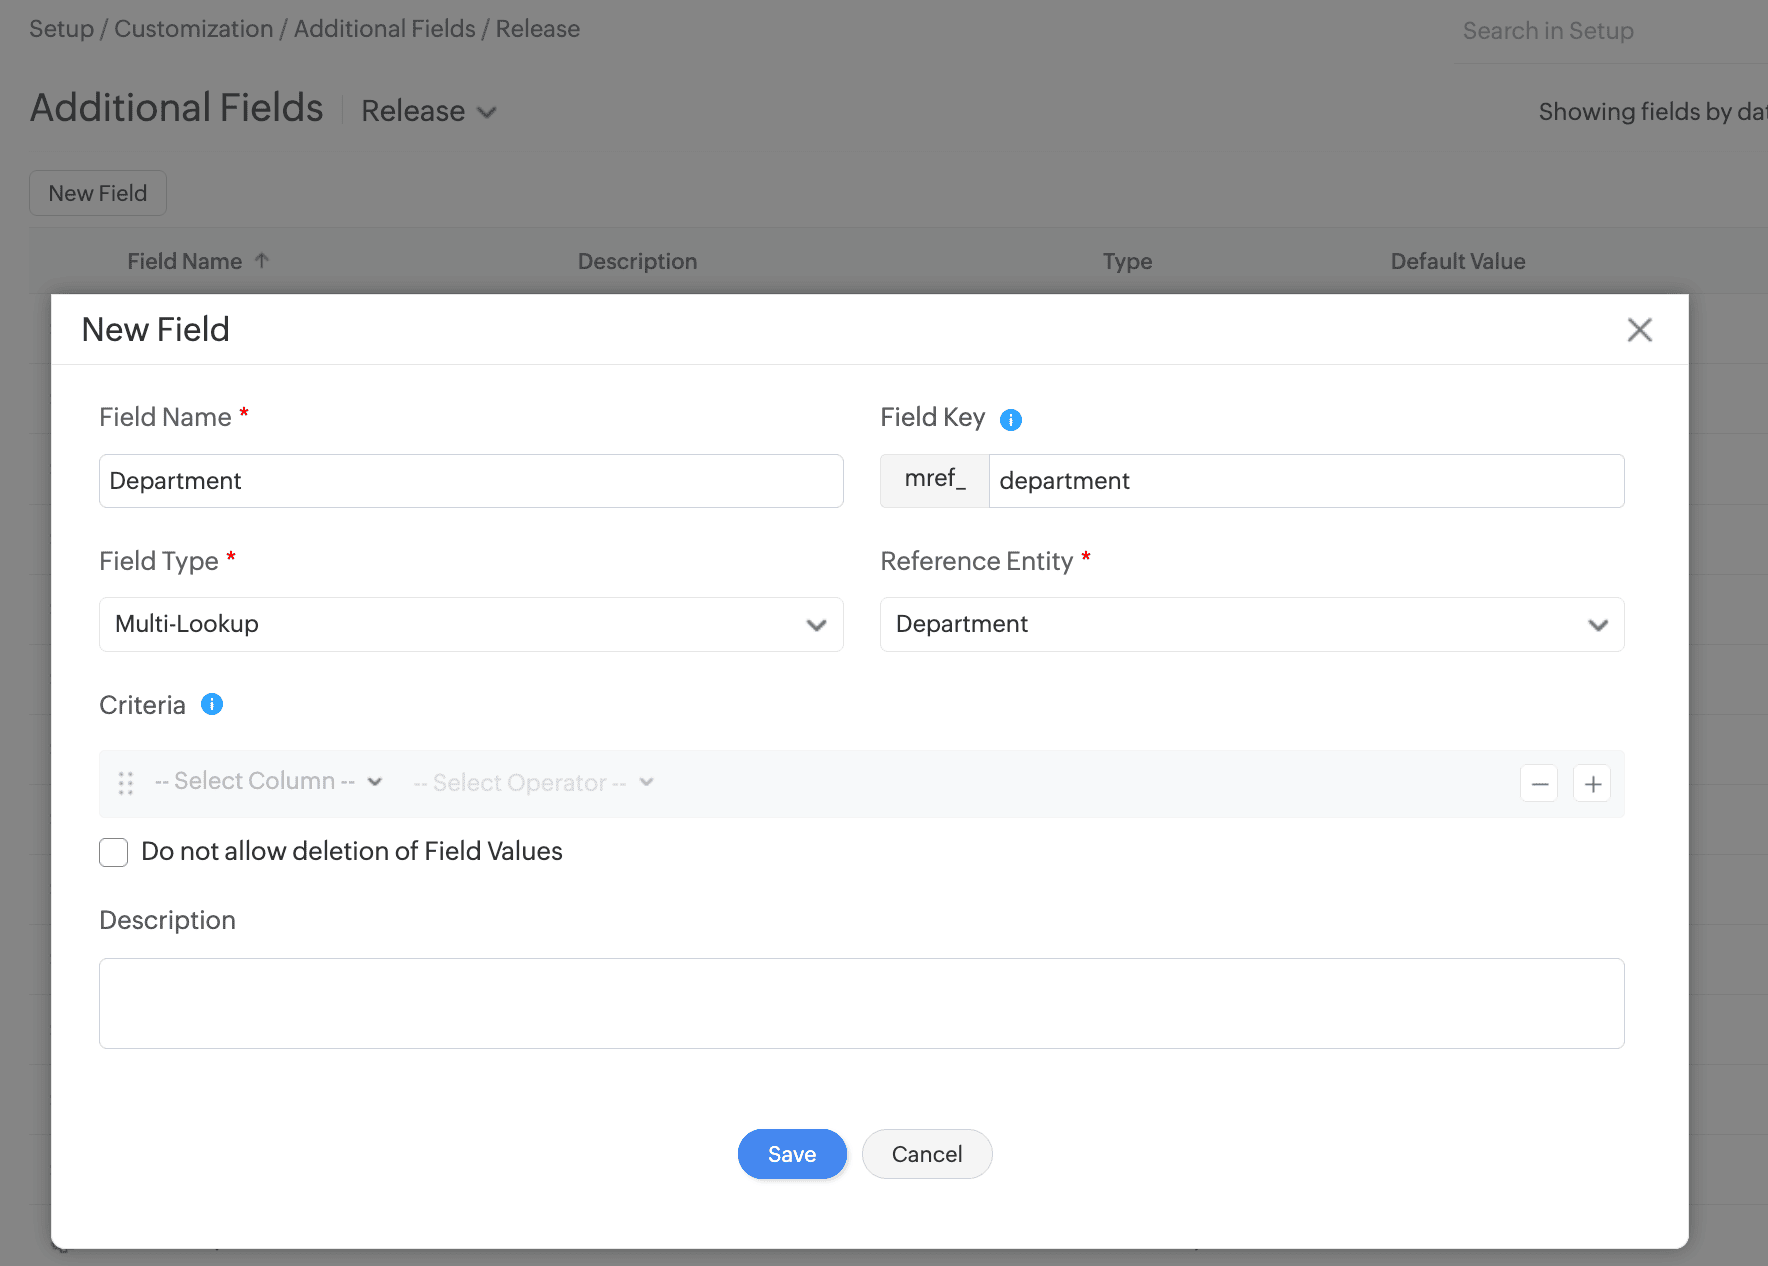
Requests
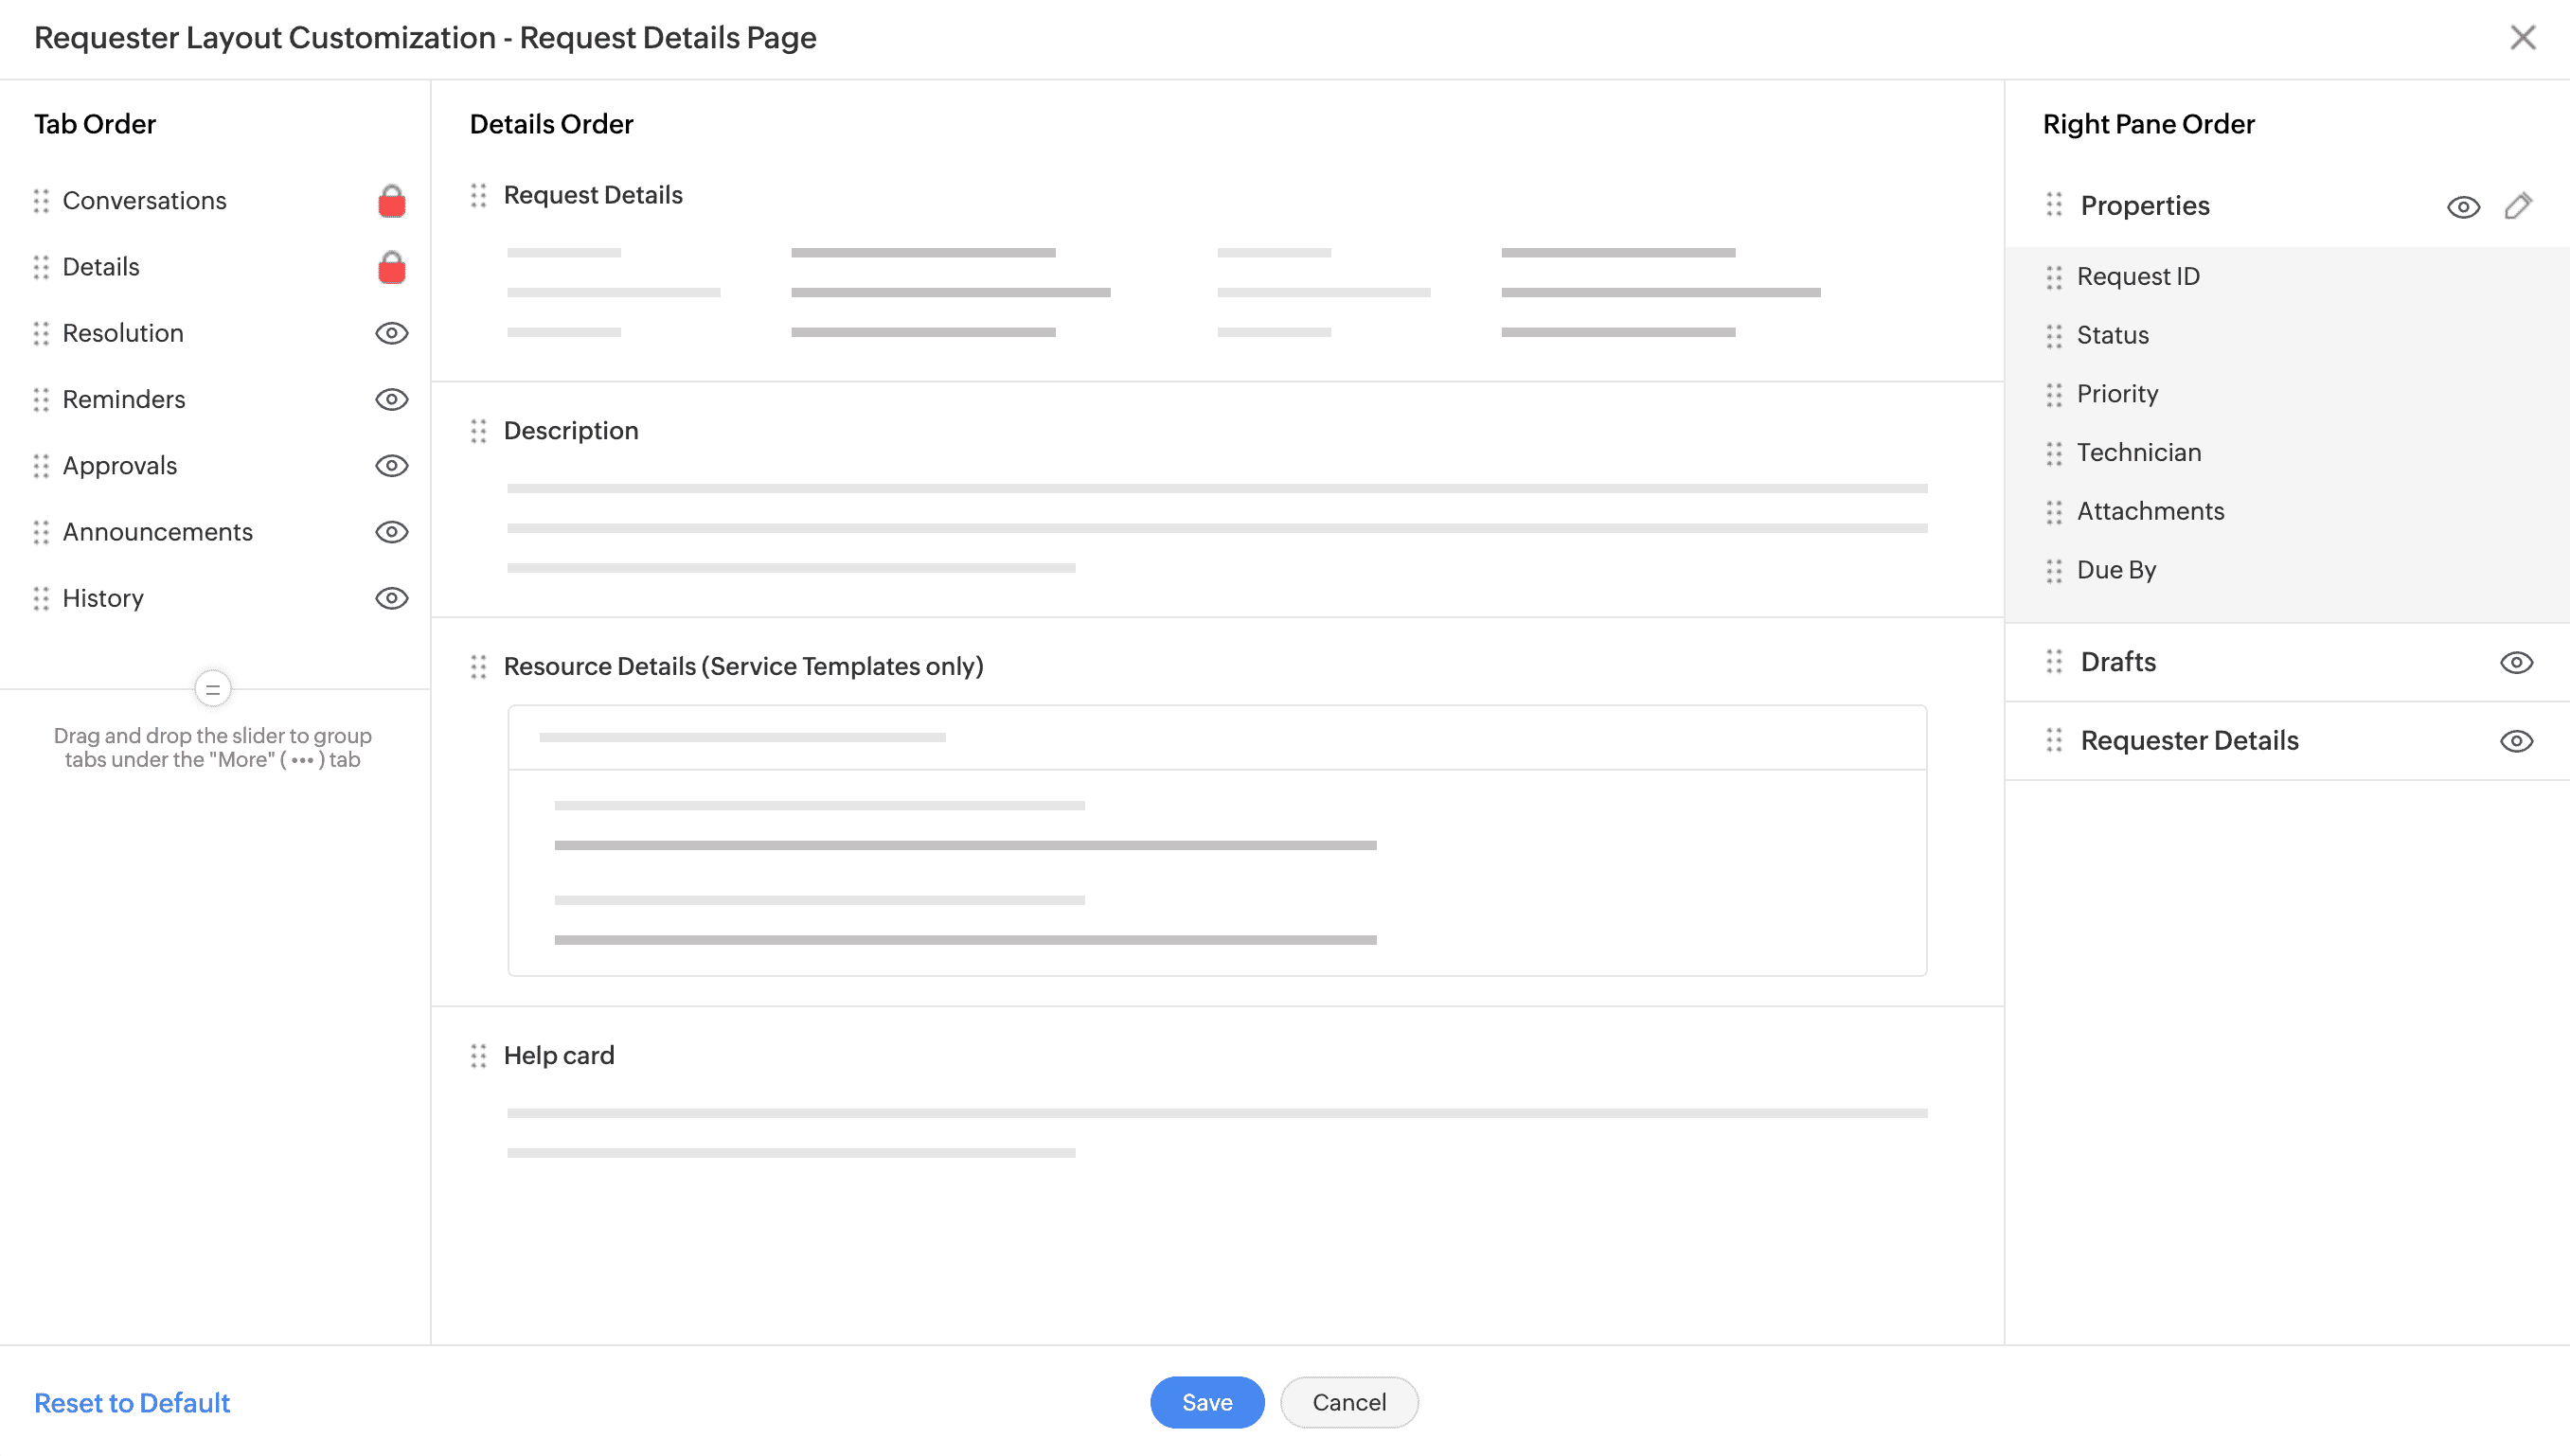
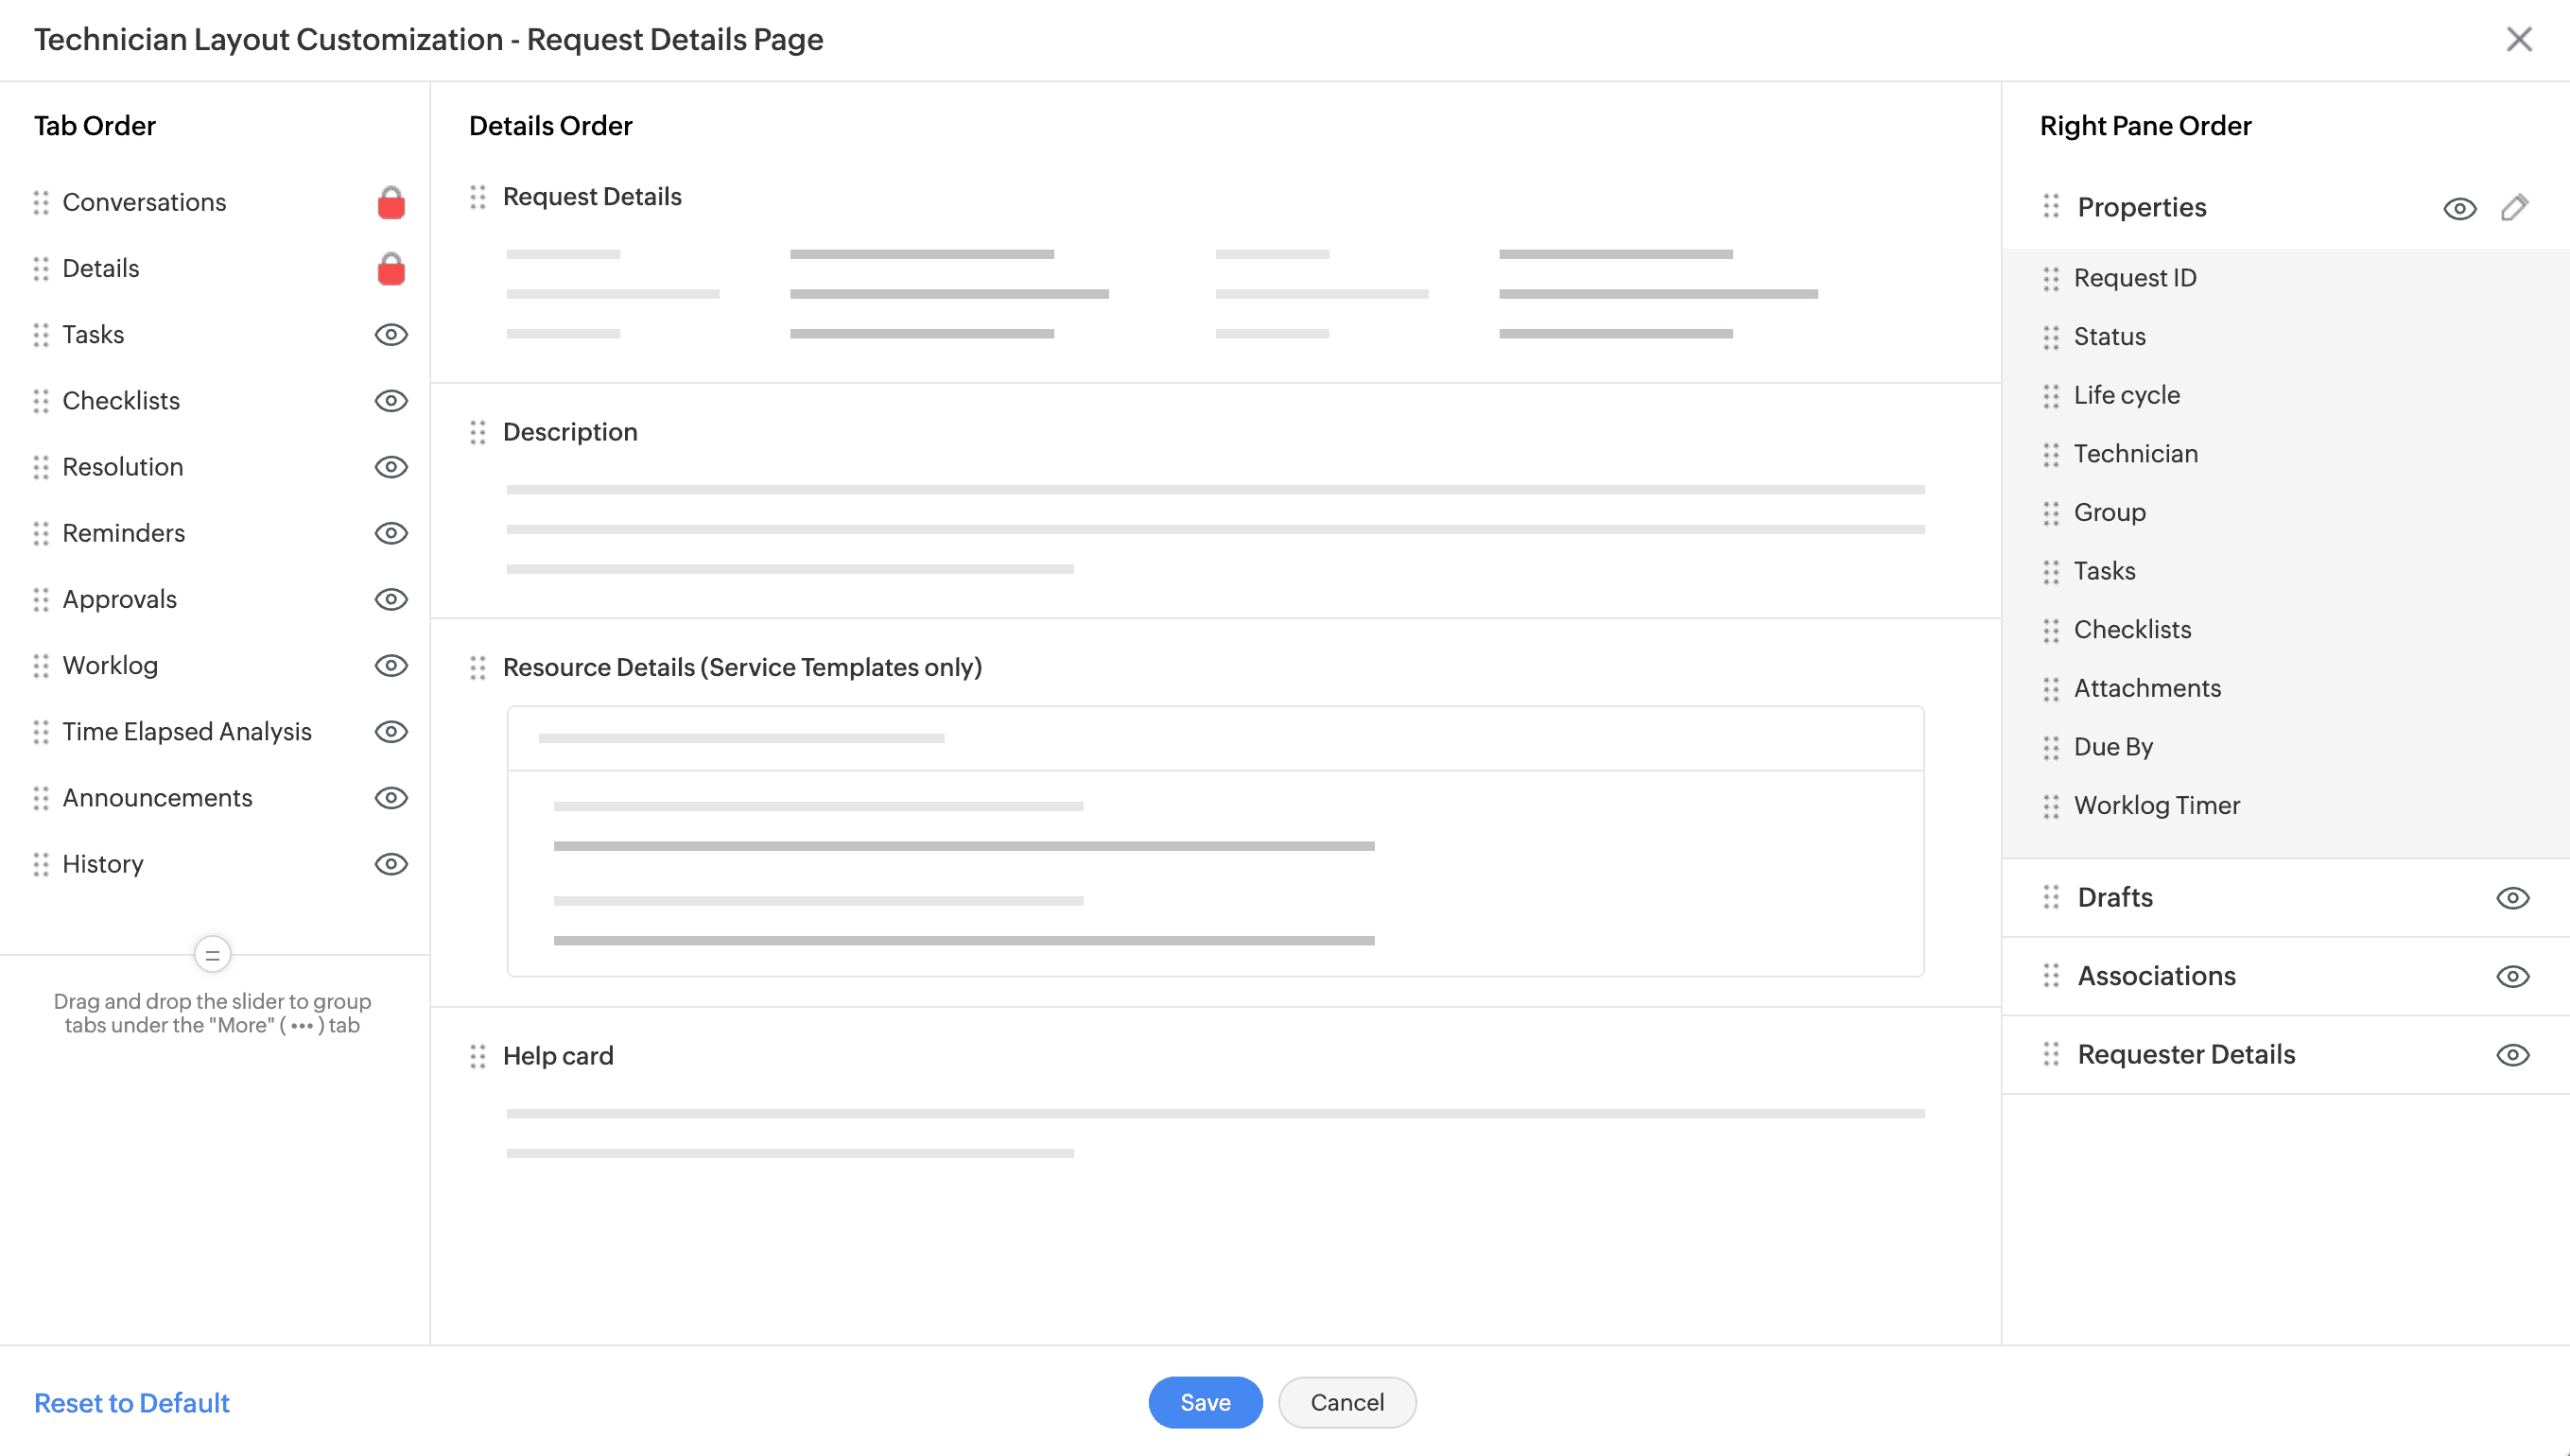
 icon and selecting My Layout.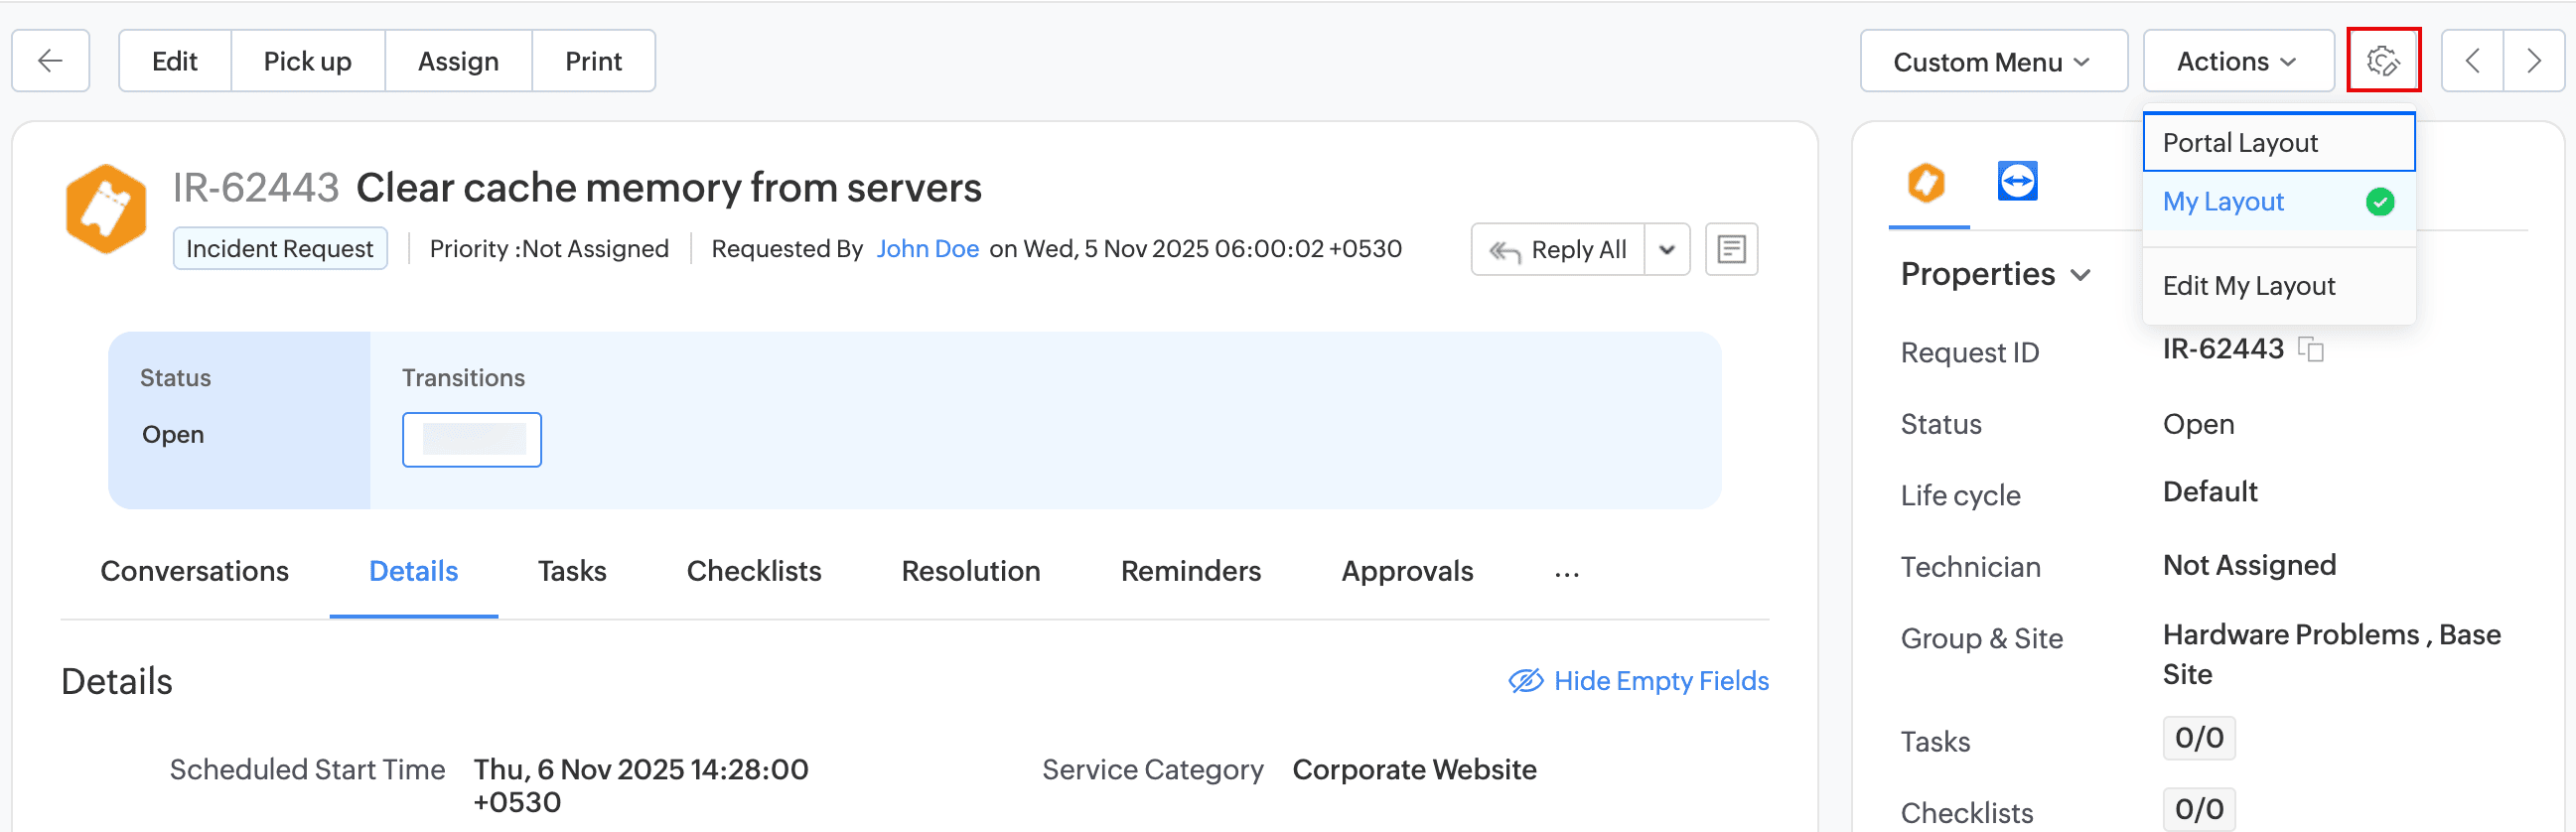
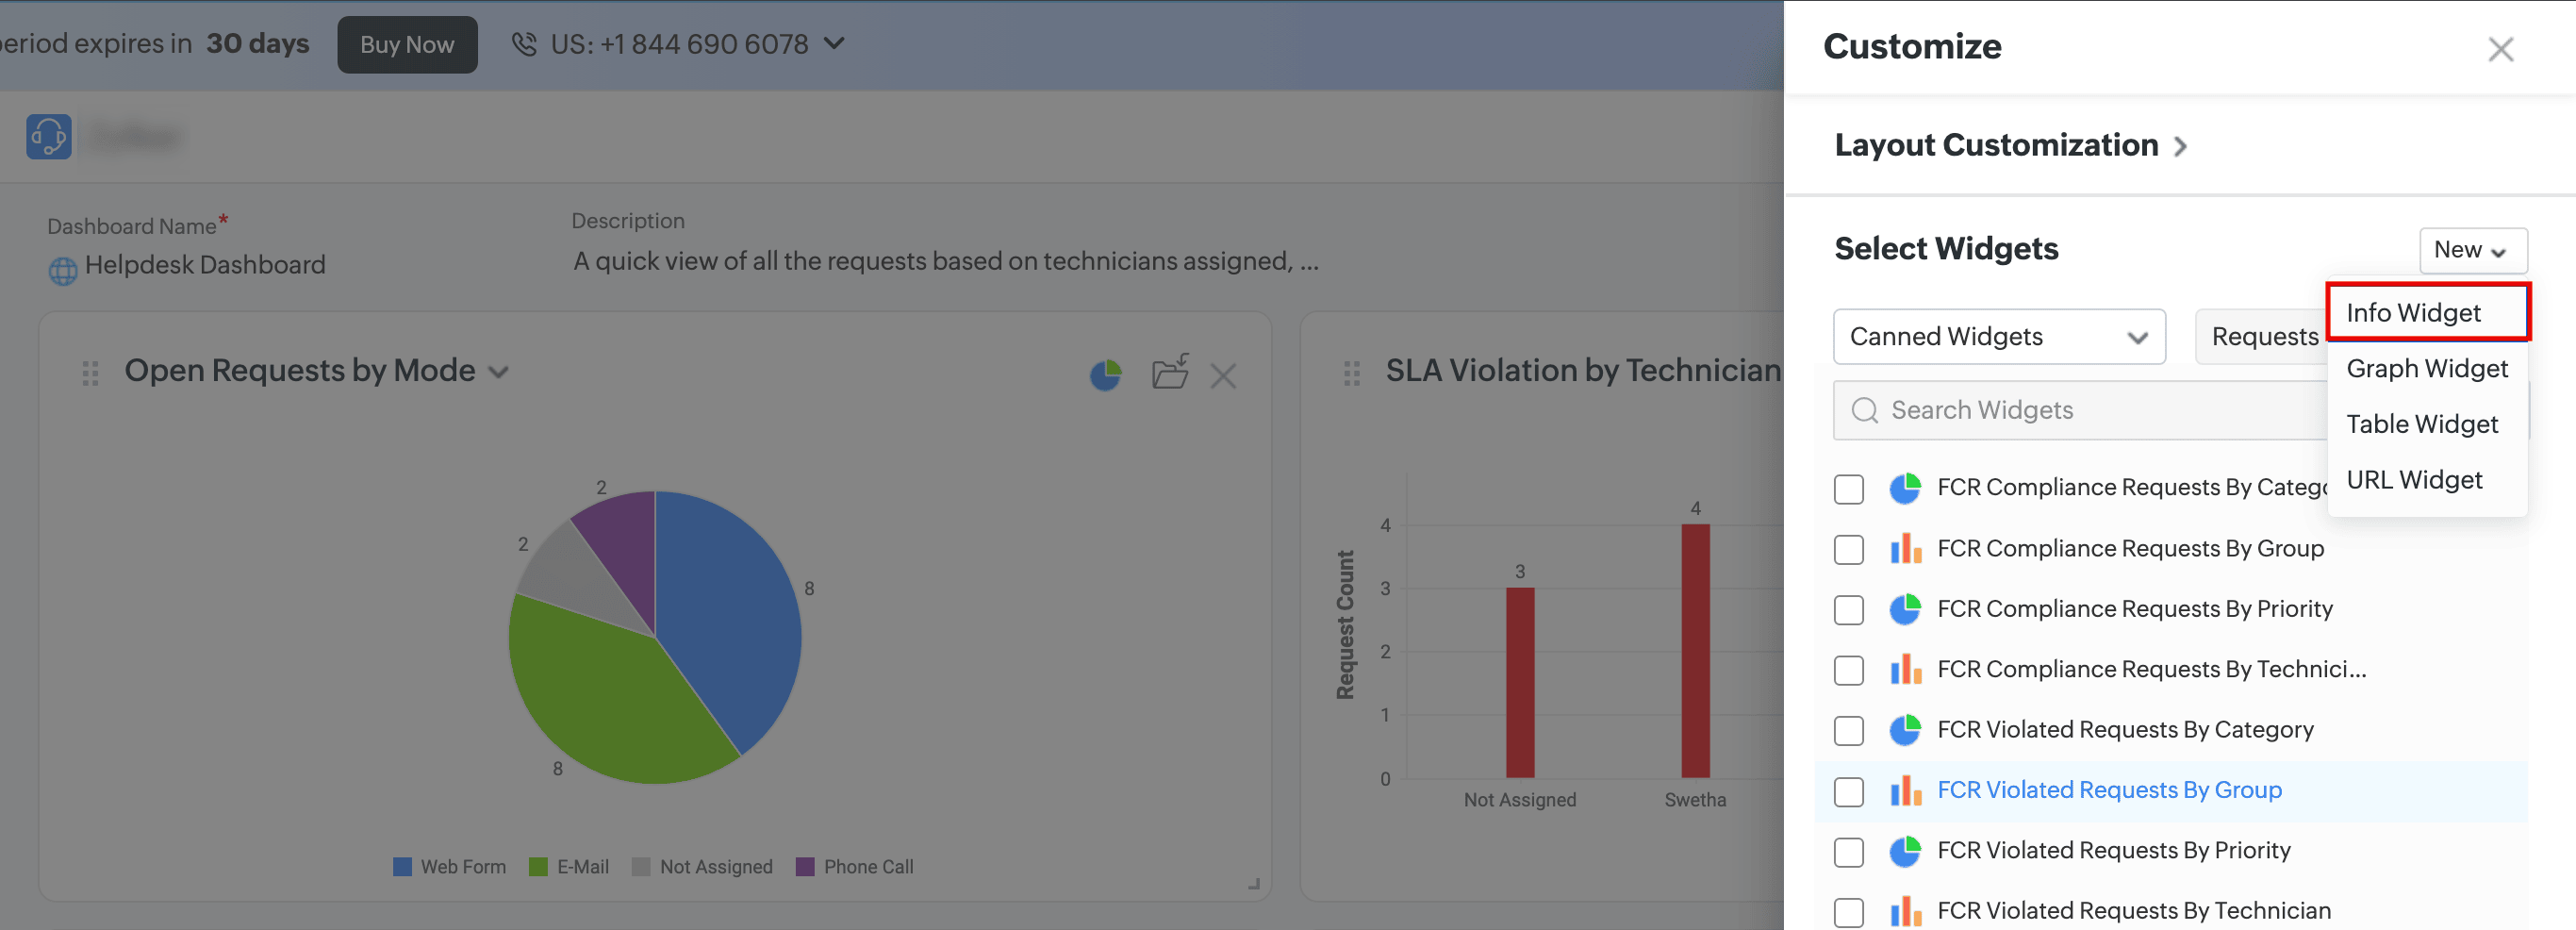
New User Variables for Custom Notifications
Filter | Variables |
| Request Users |
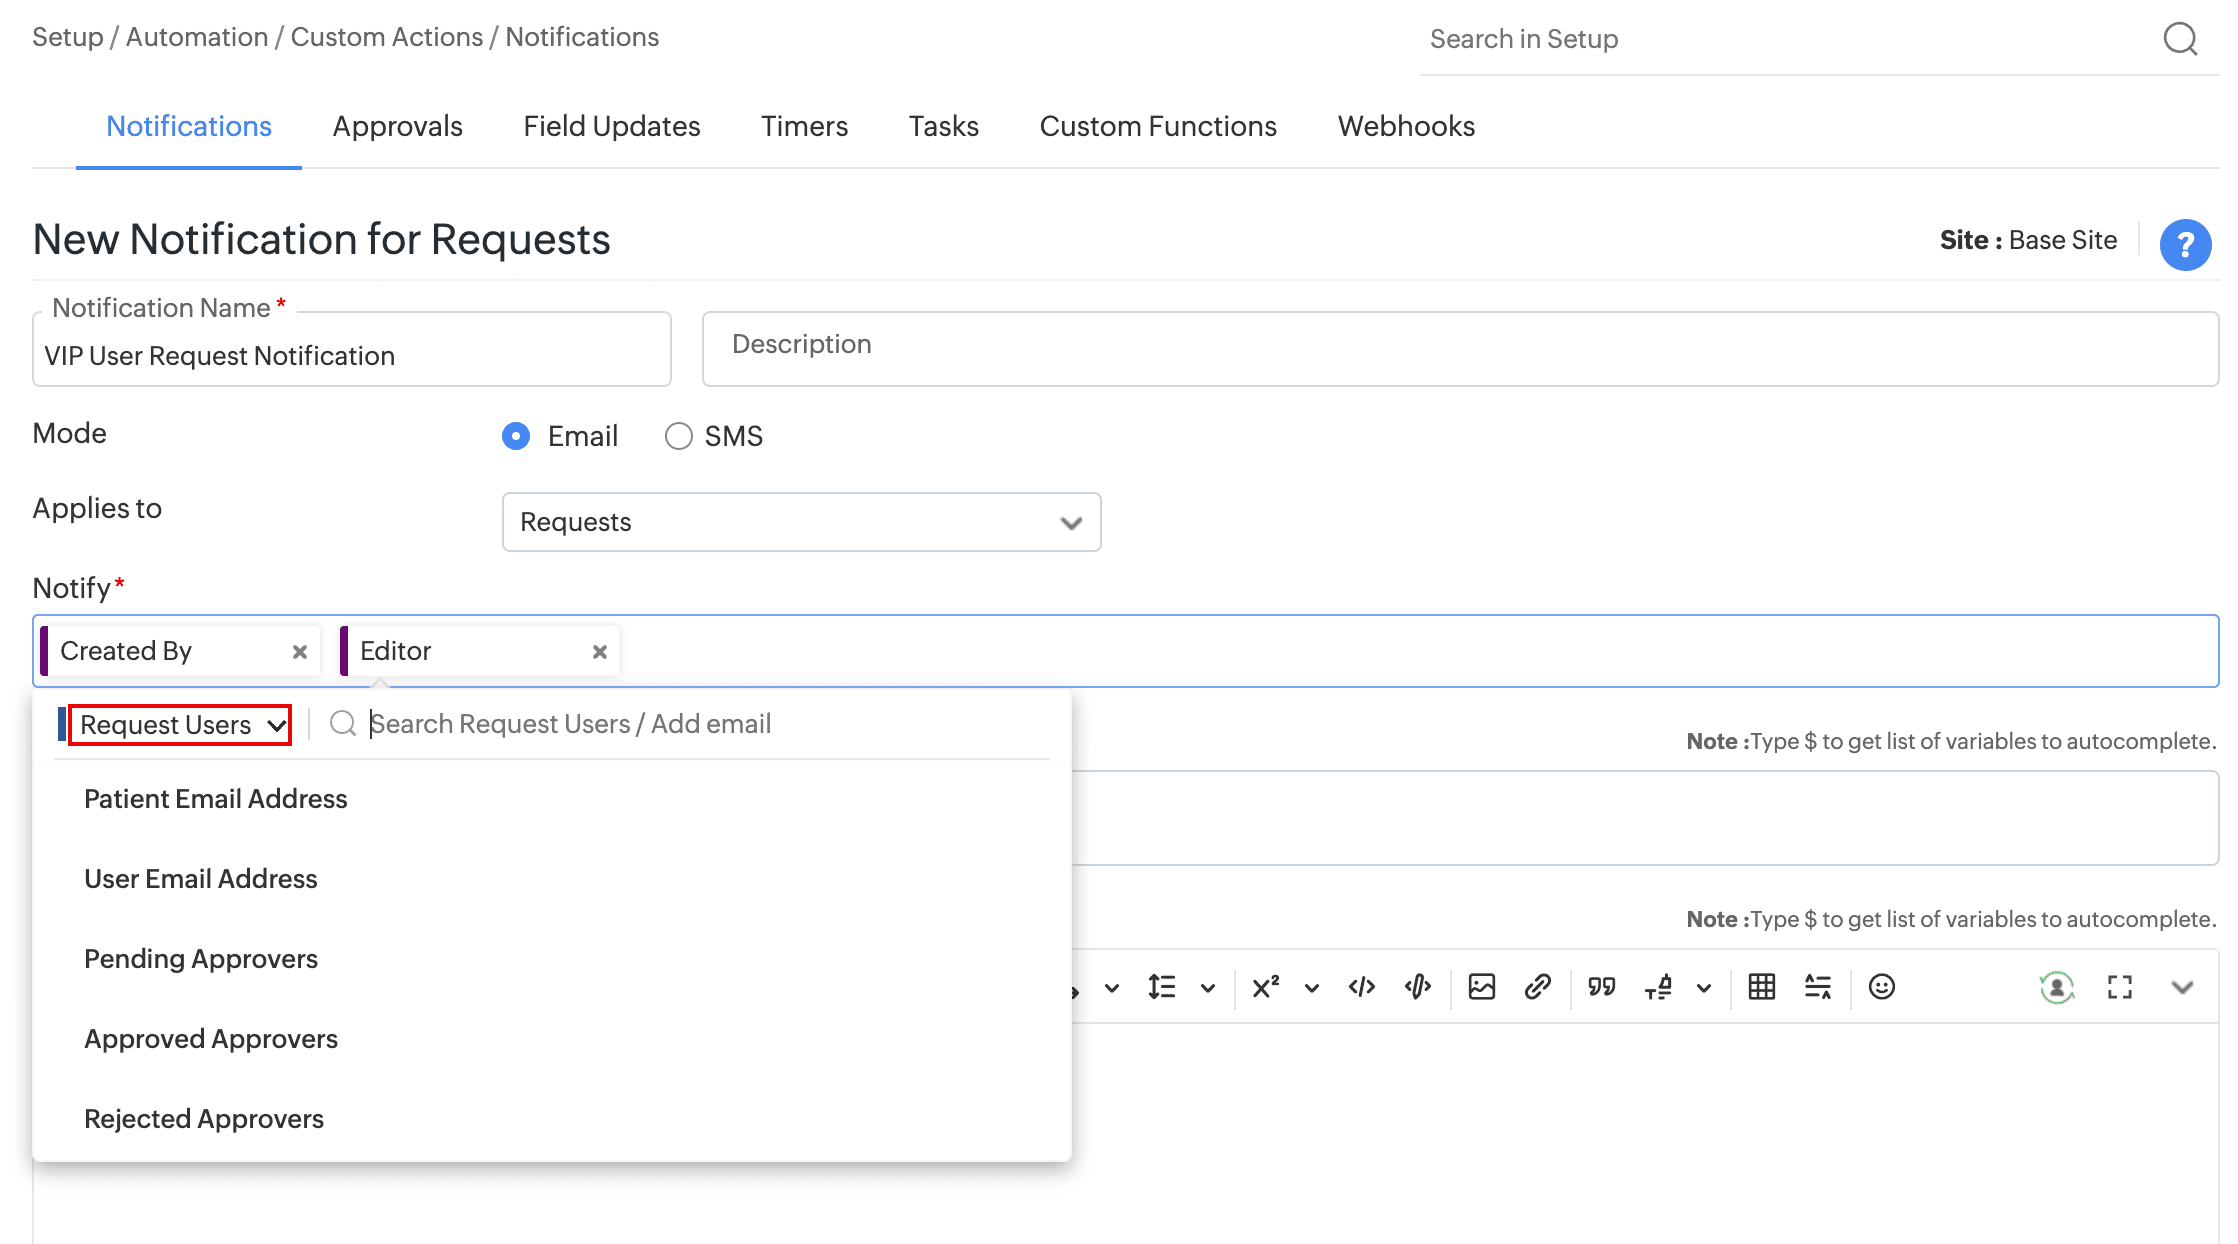 |
Notification Users (available when Applies to is set to Email responses (from Users)) |
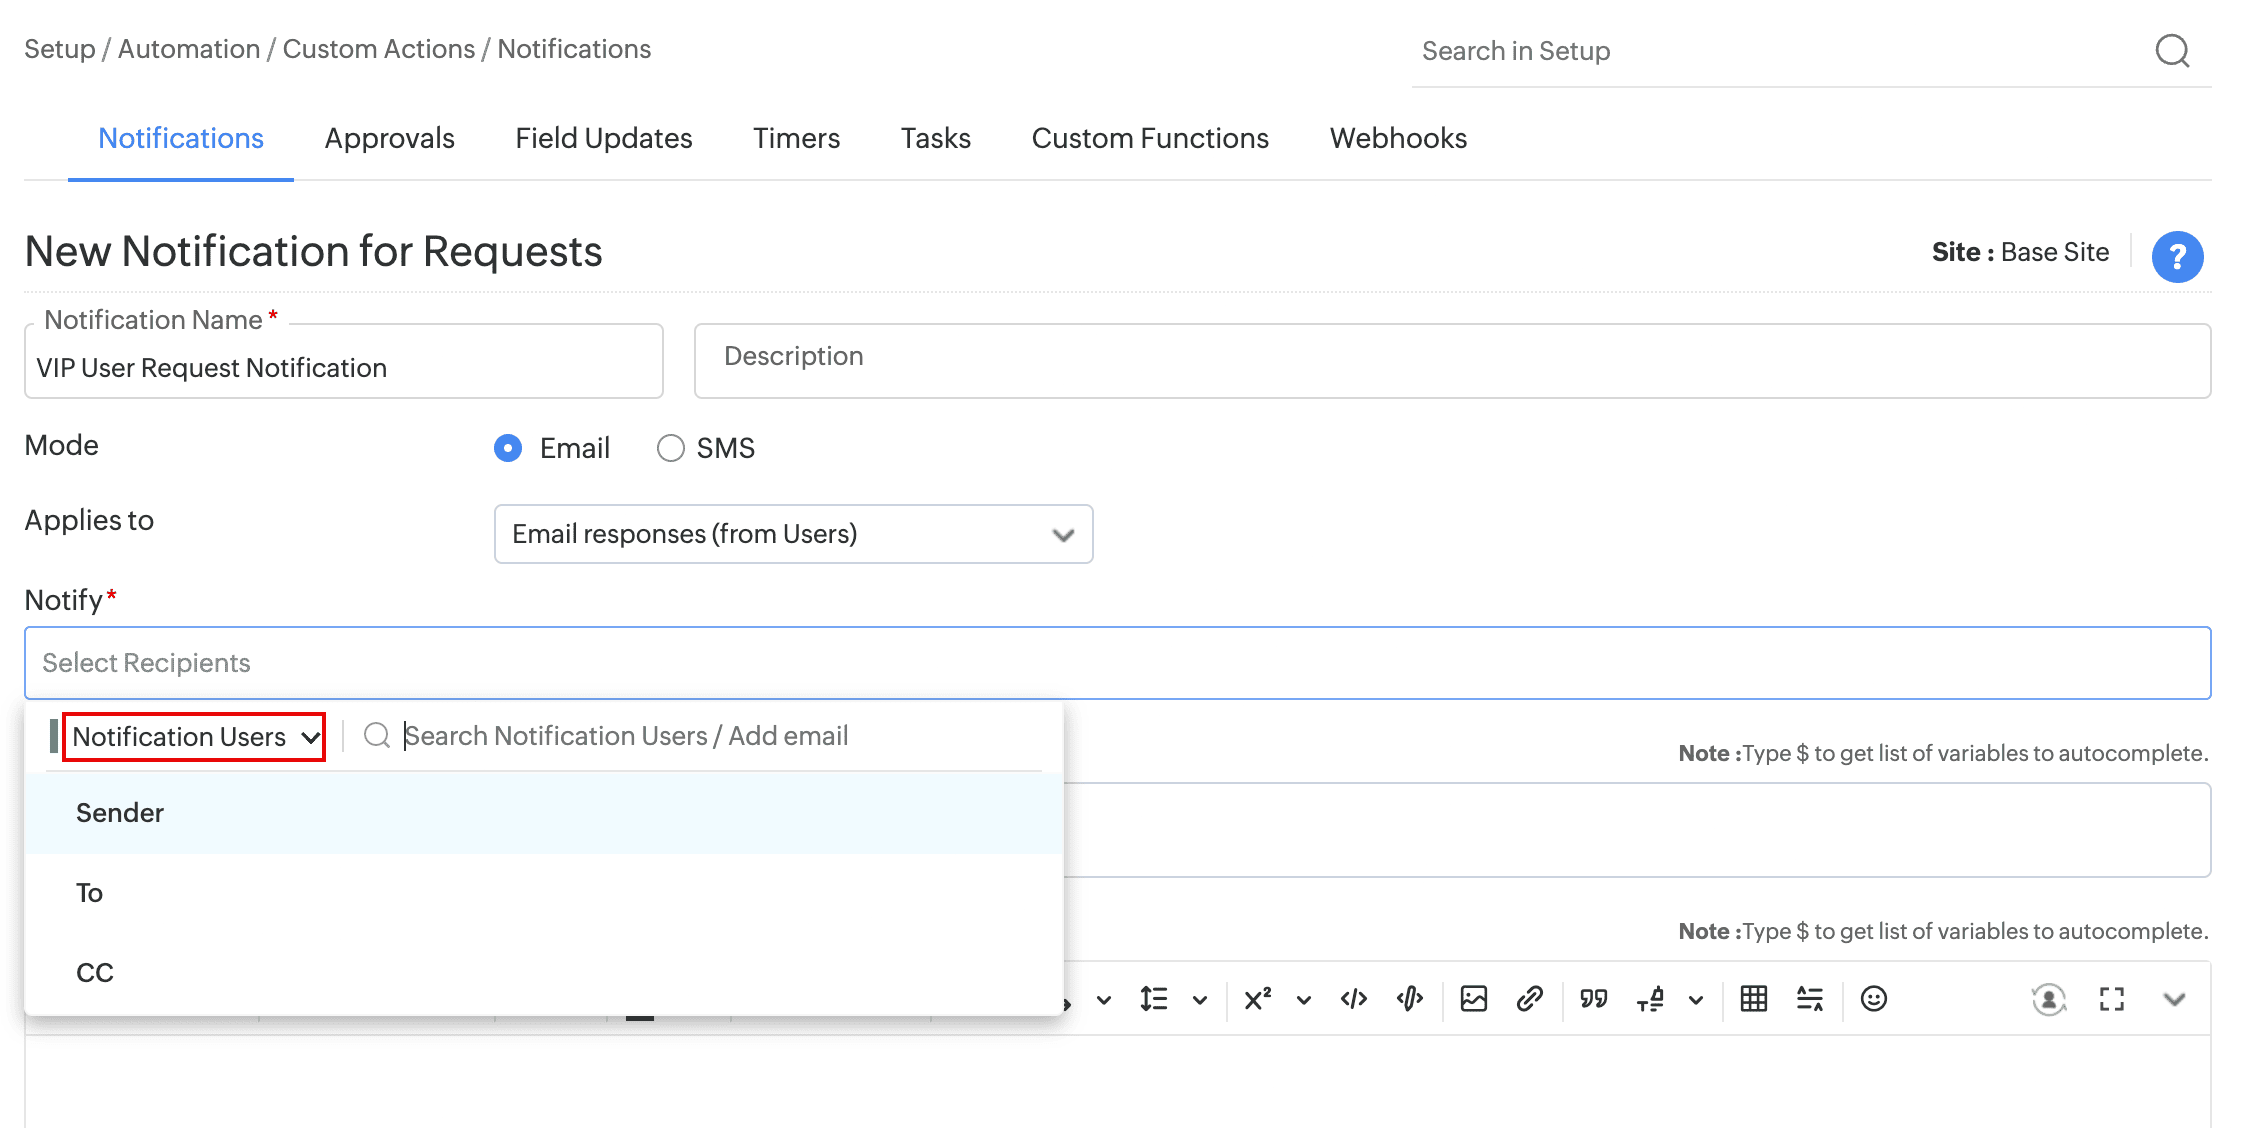 Note: This applies to change, release, and problem notification forms as well. |
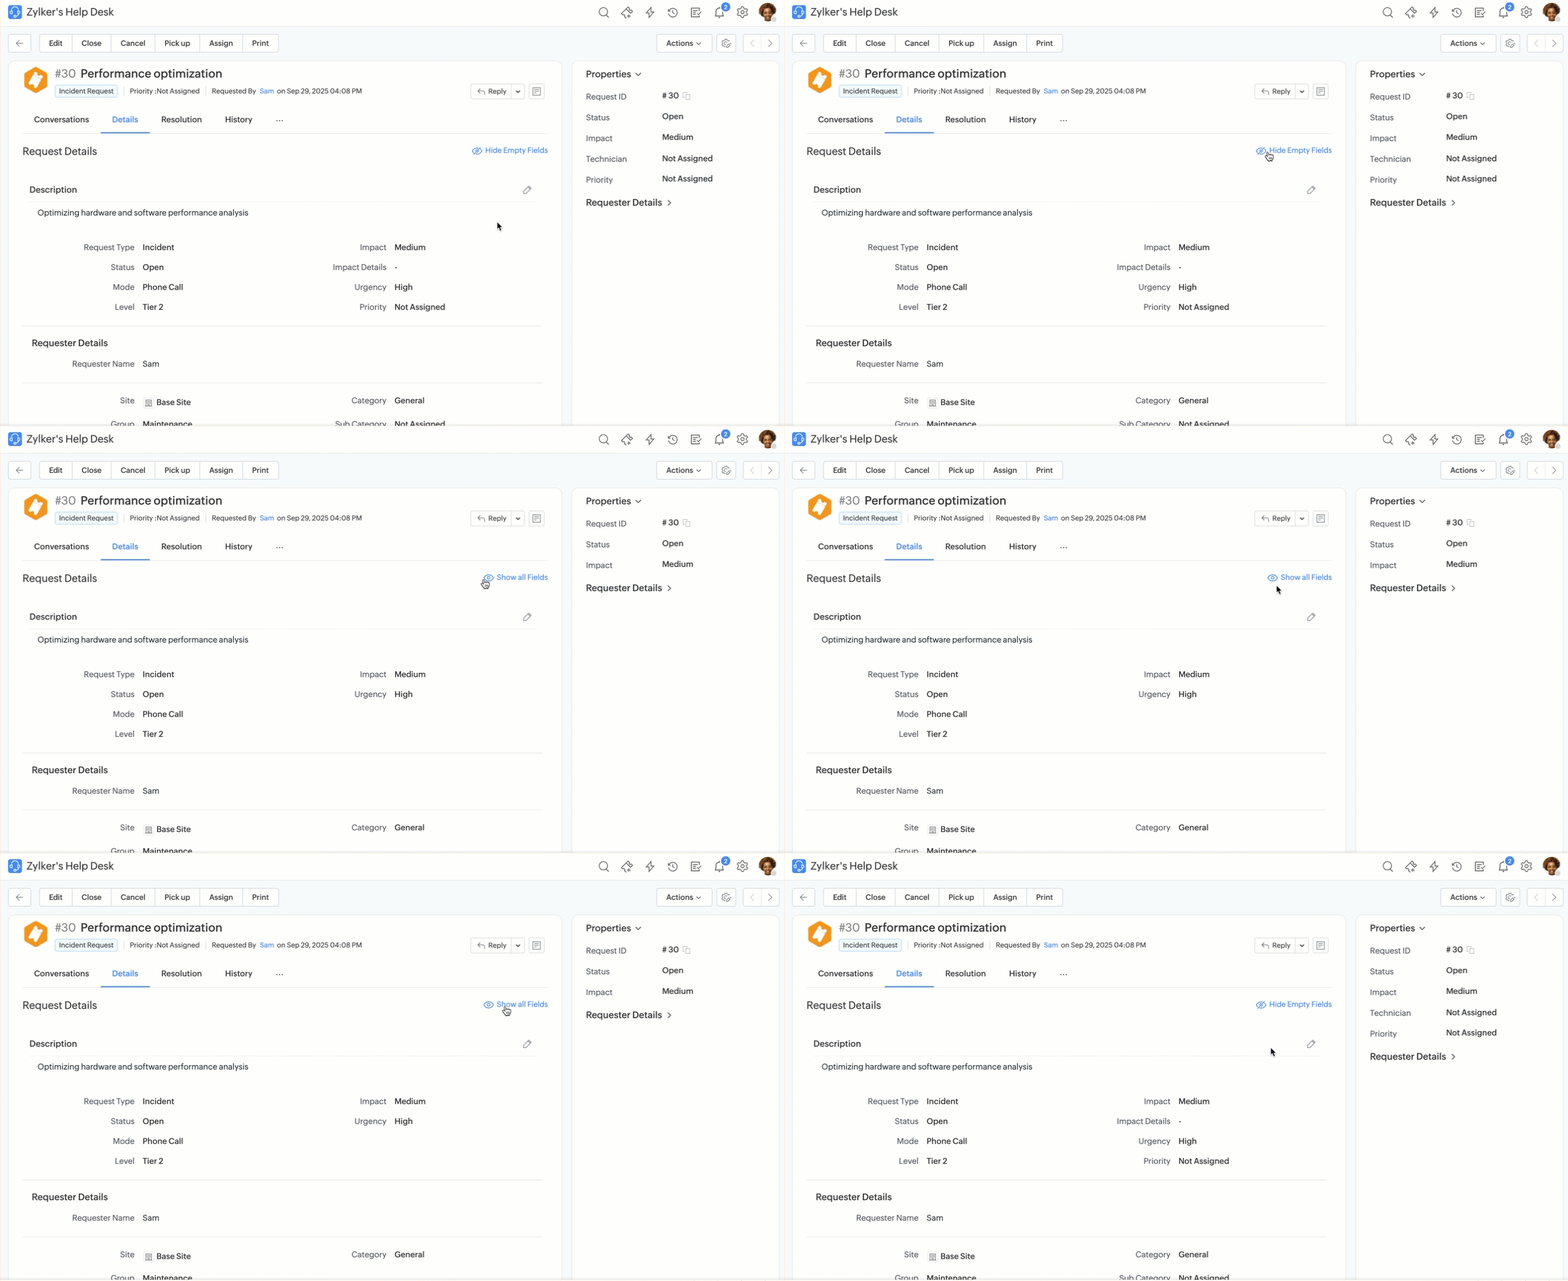
Focused Details View
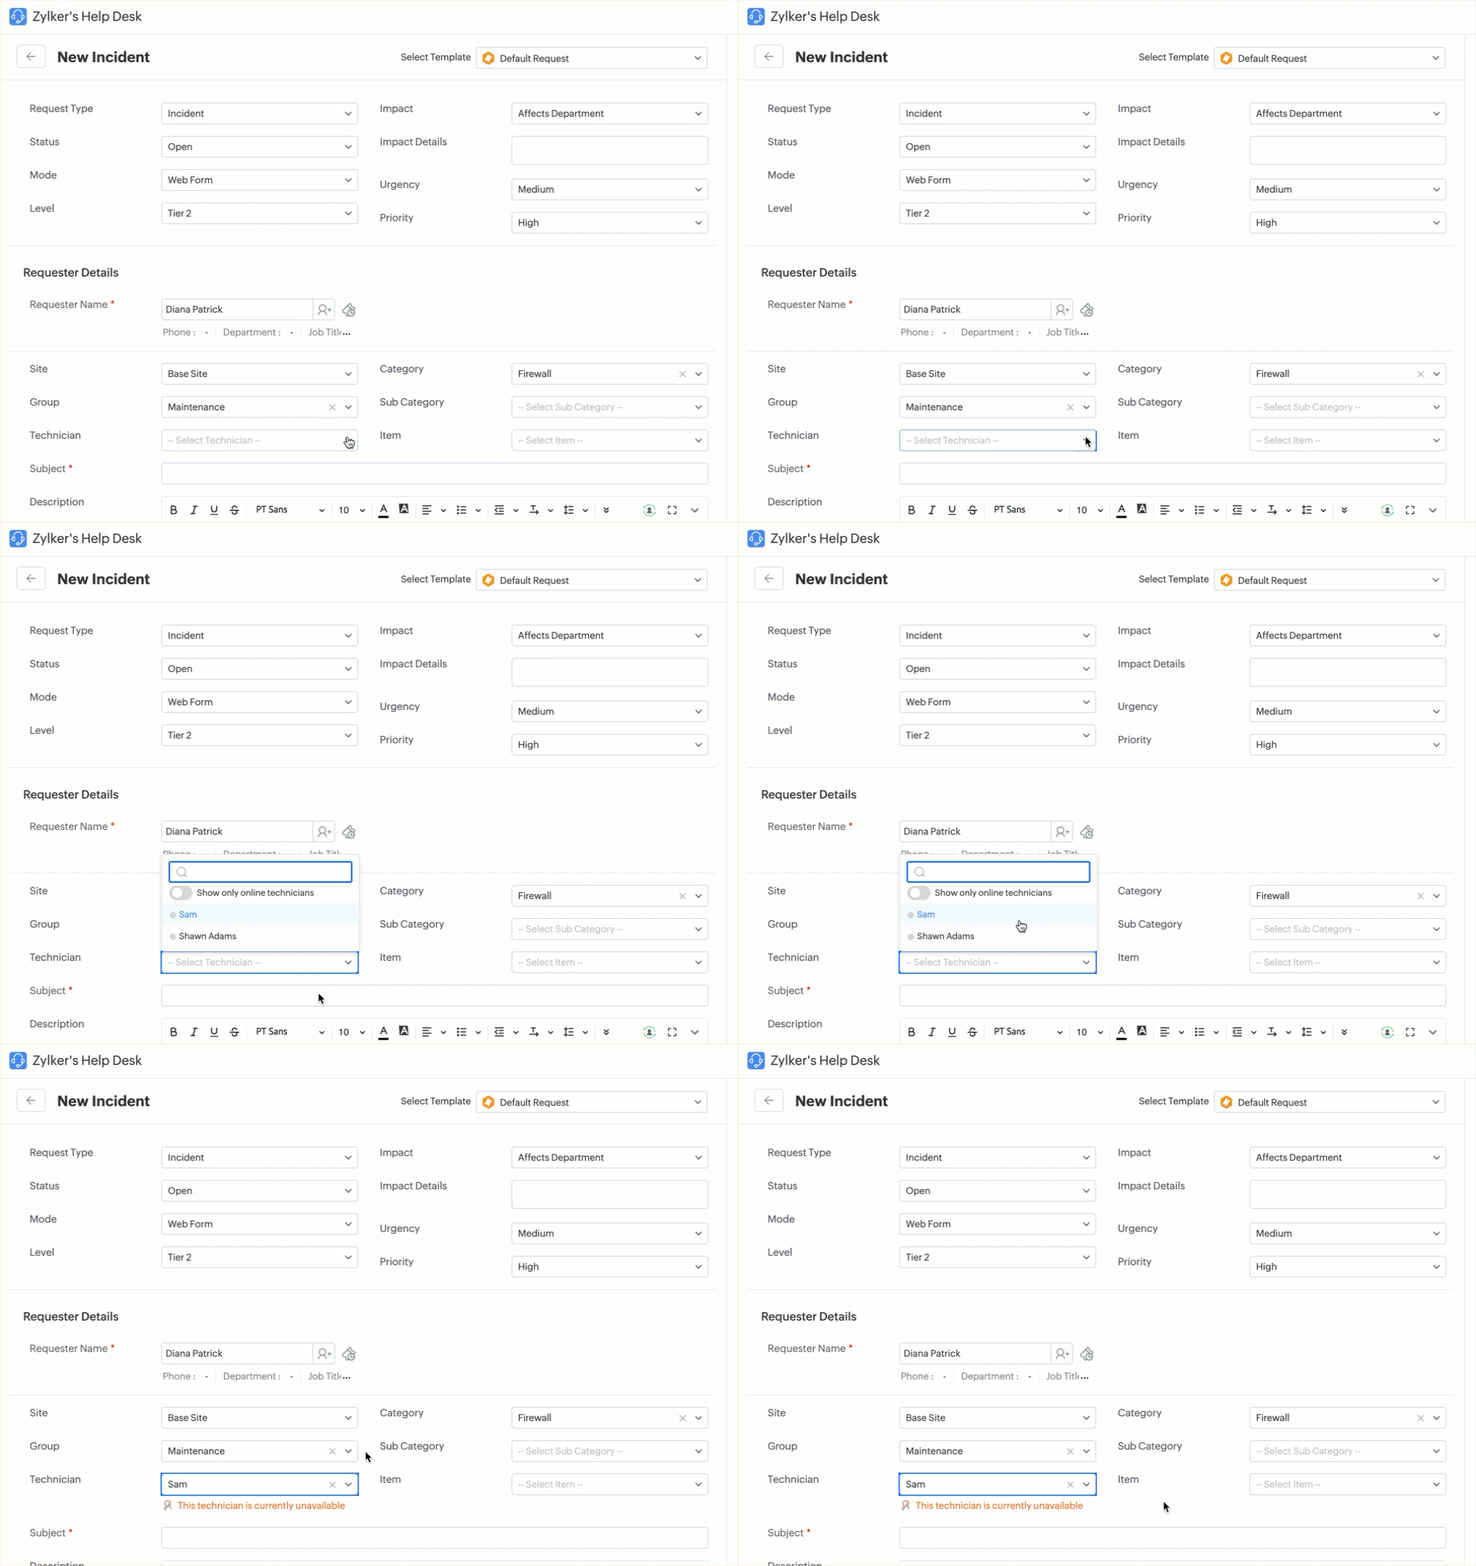
Technician Unavailability Alerts
Self-Service Portal Enhancements
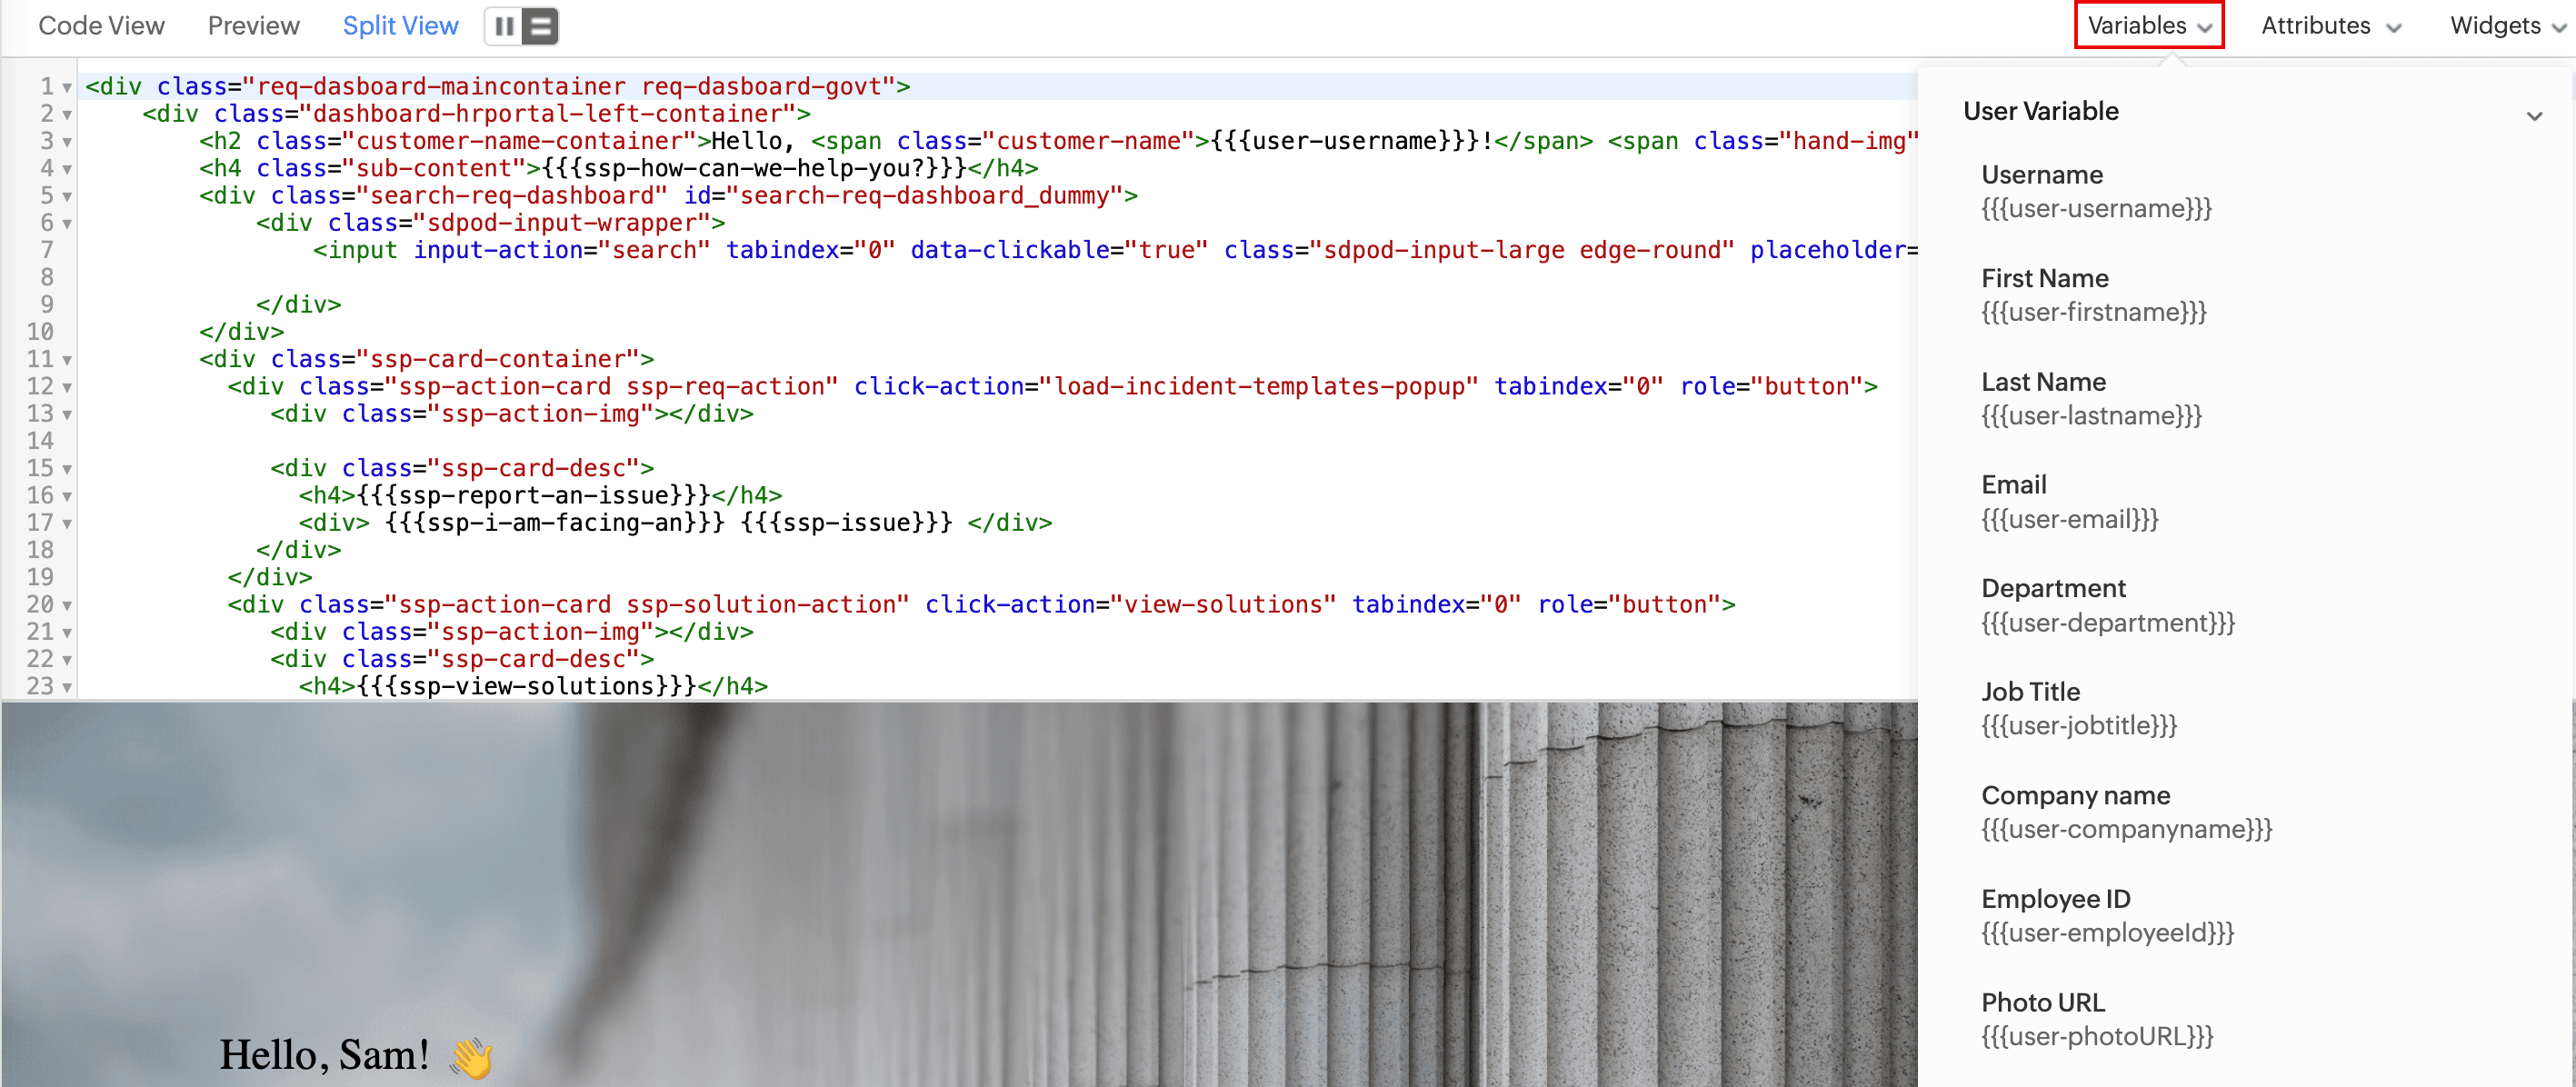
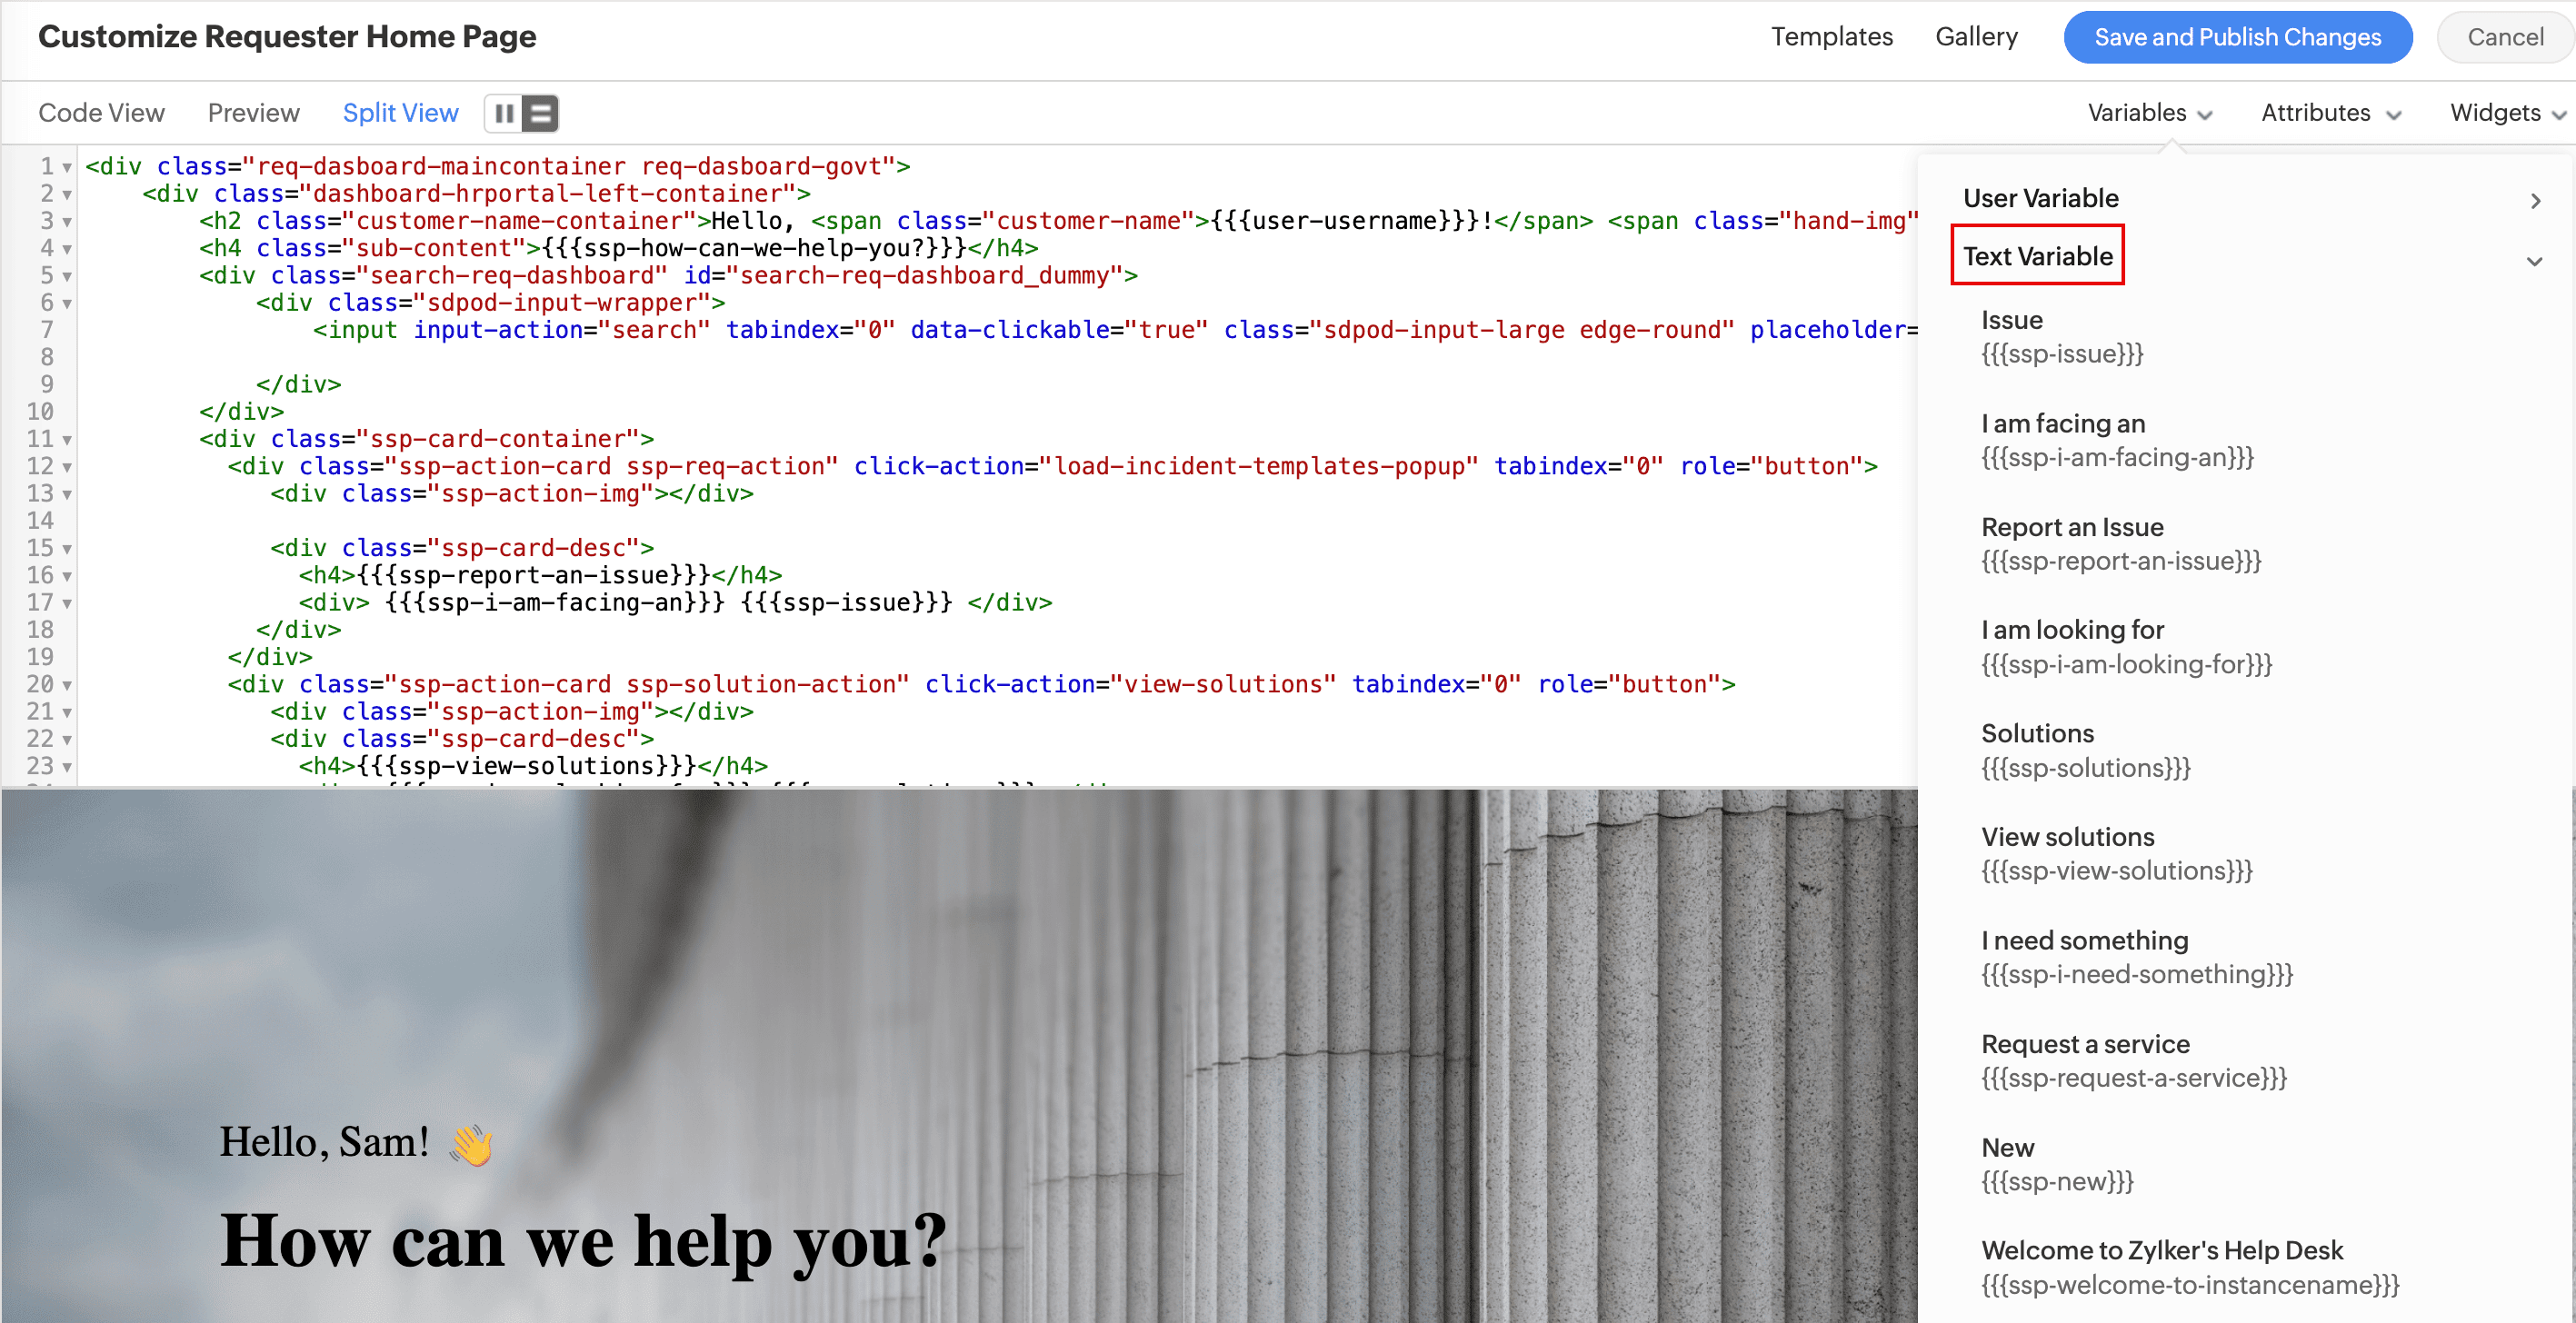
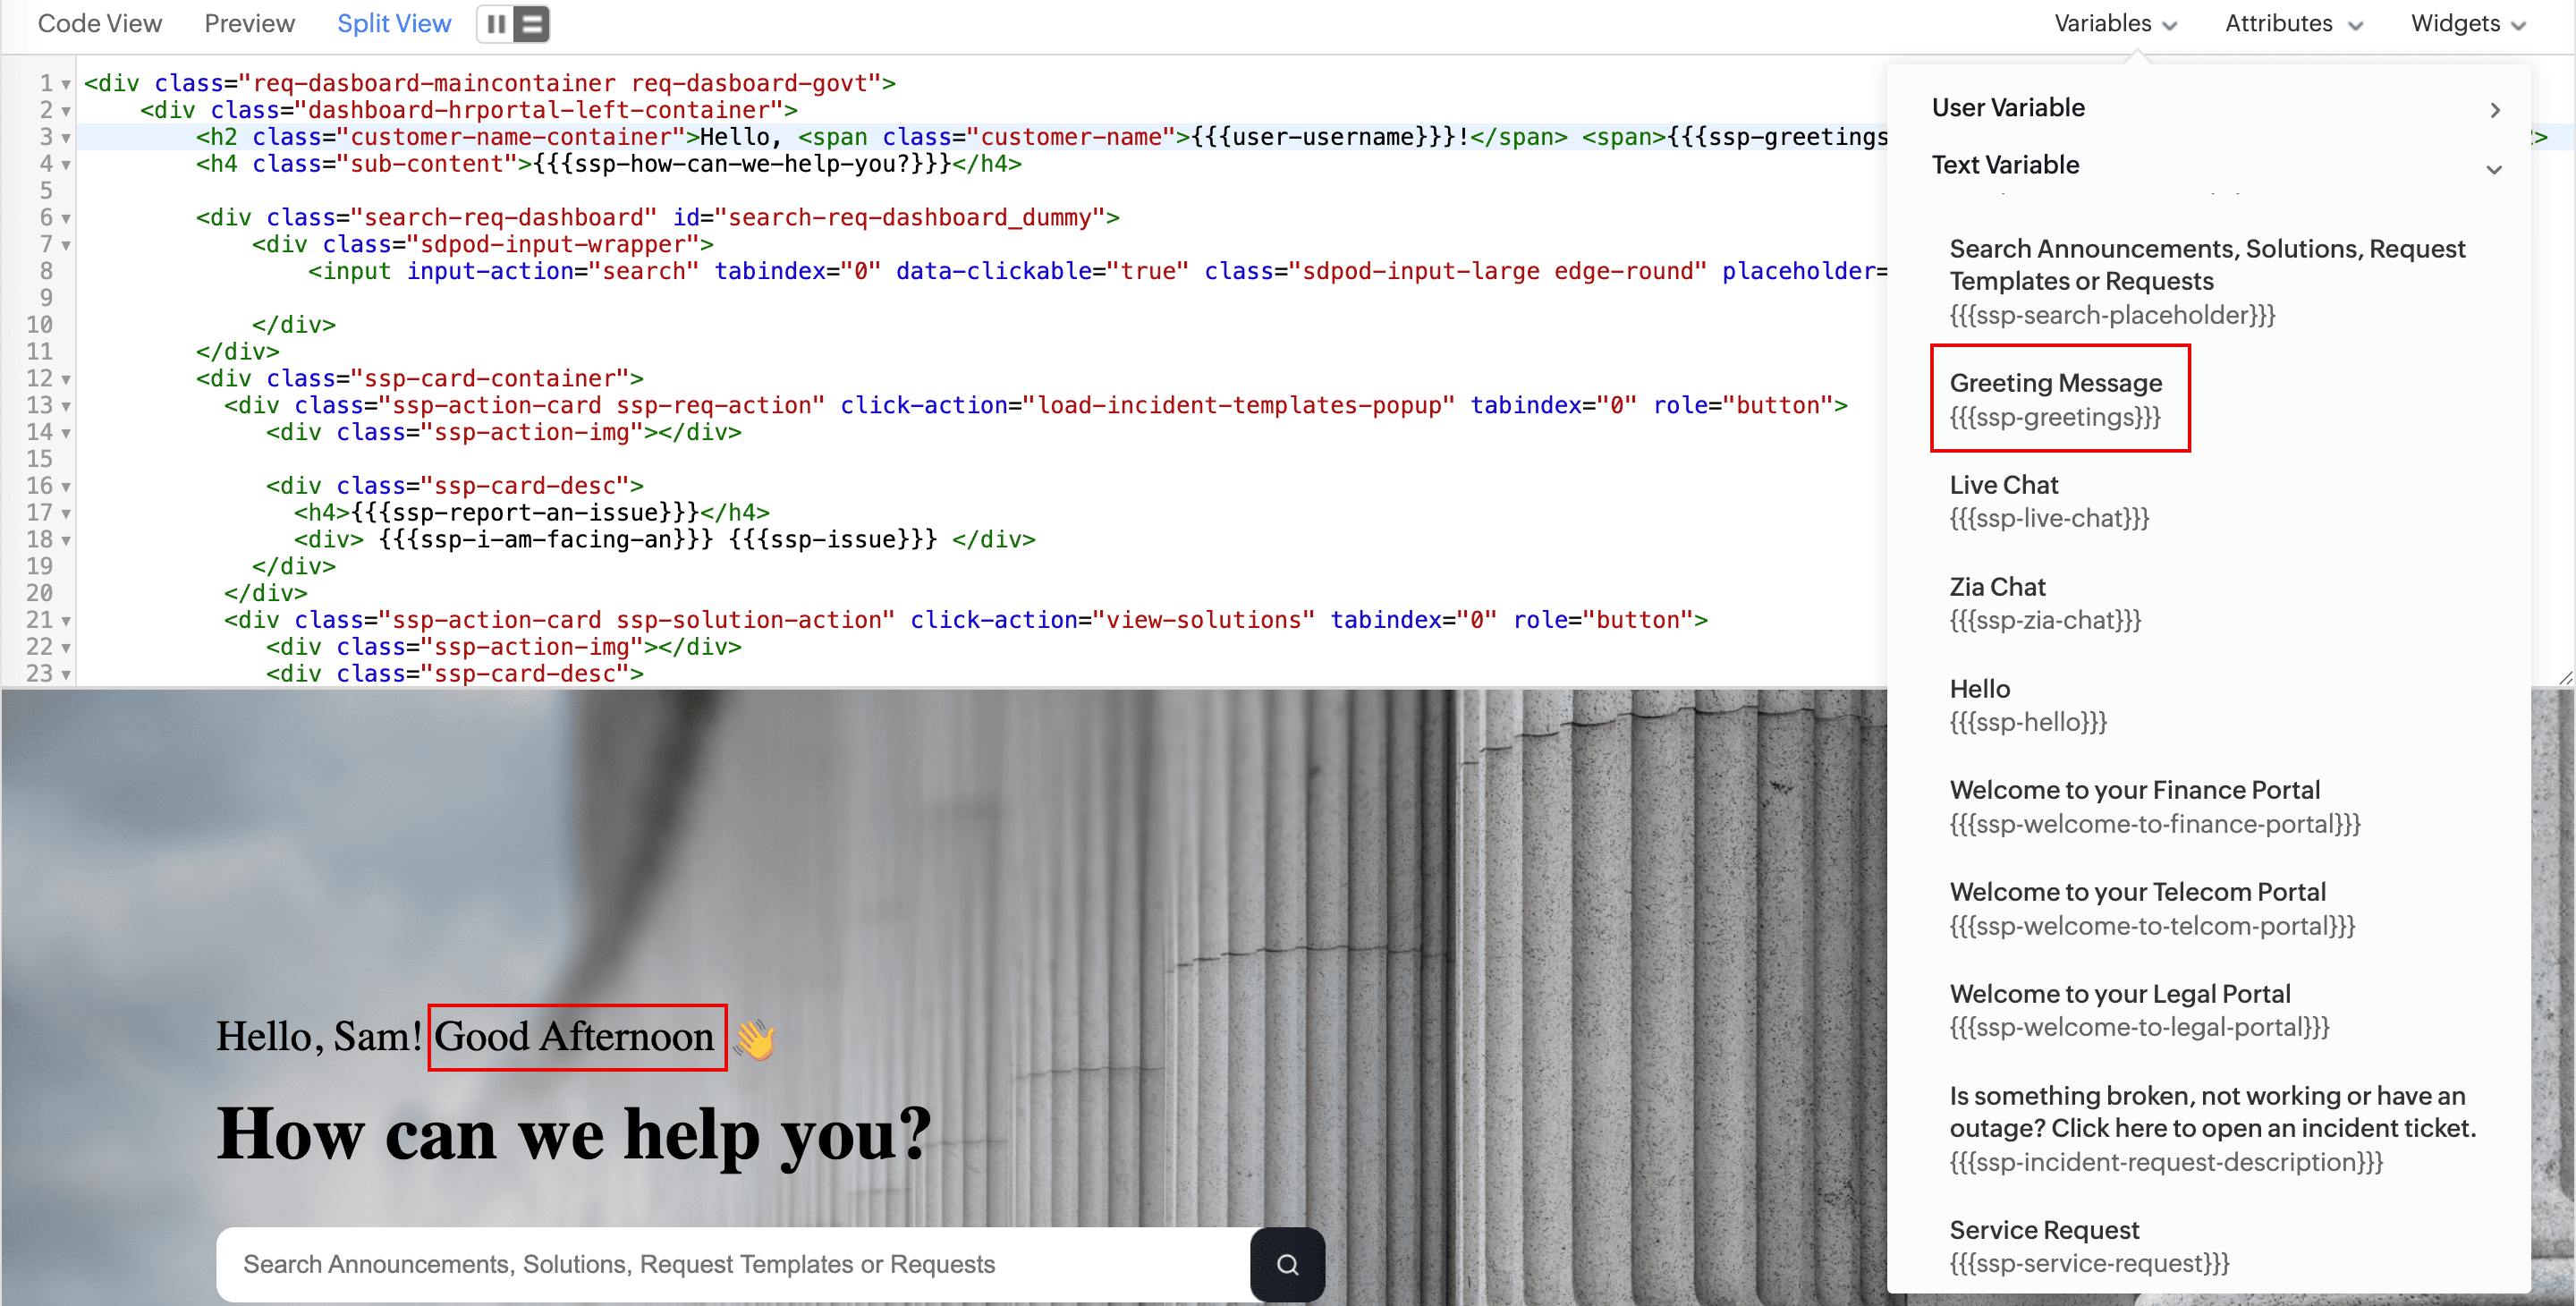
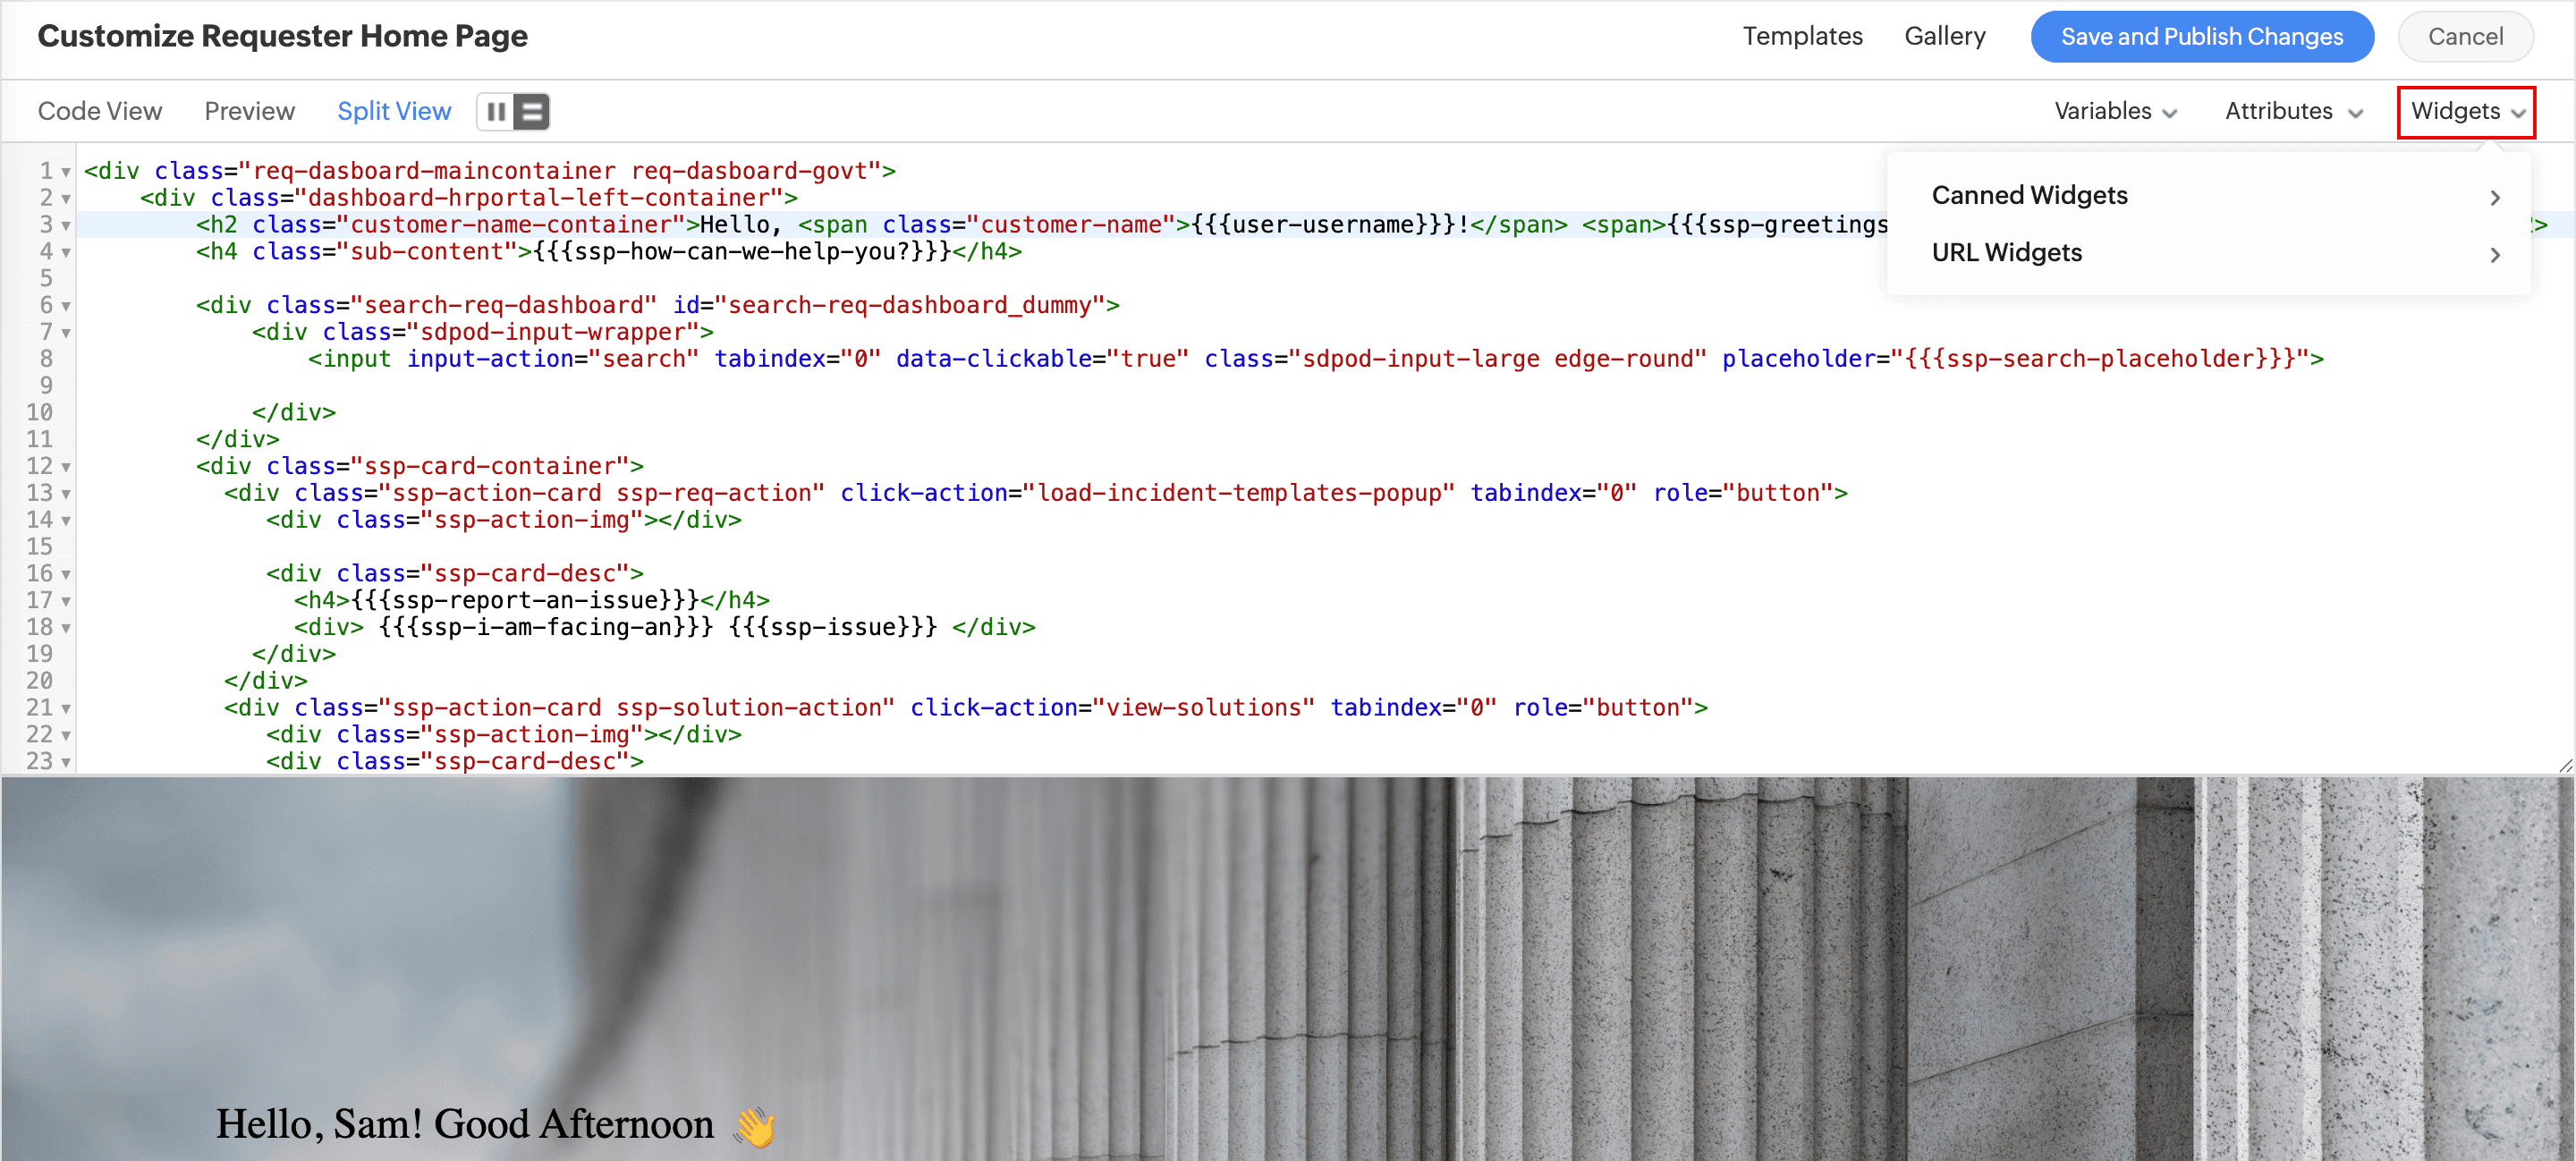
We are updating the way you sign in to our application to improve security and provide a more consistent sign-in experience. These changes include:
Requests
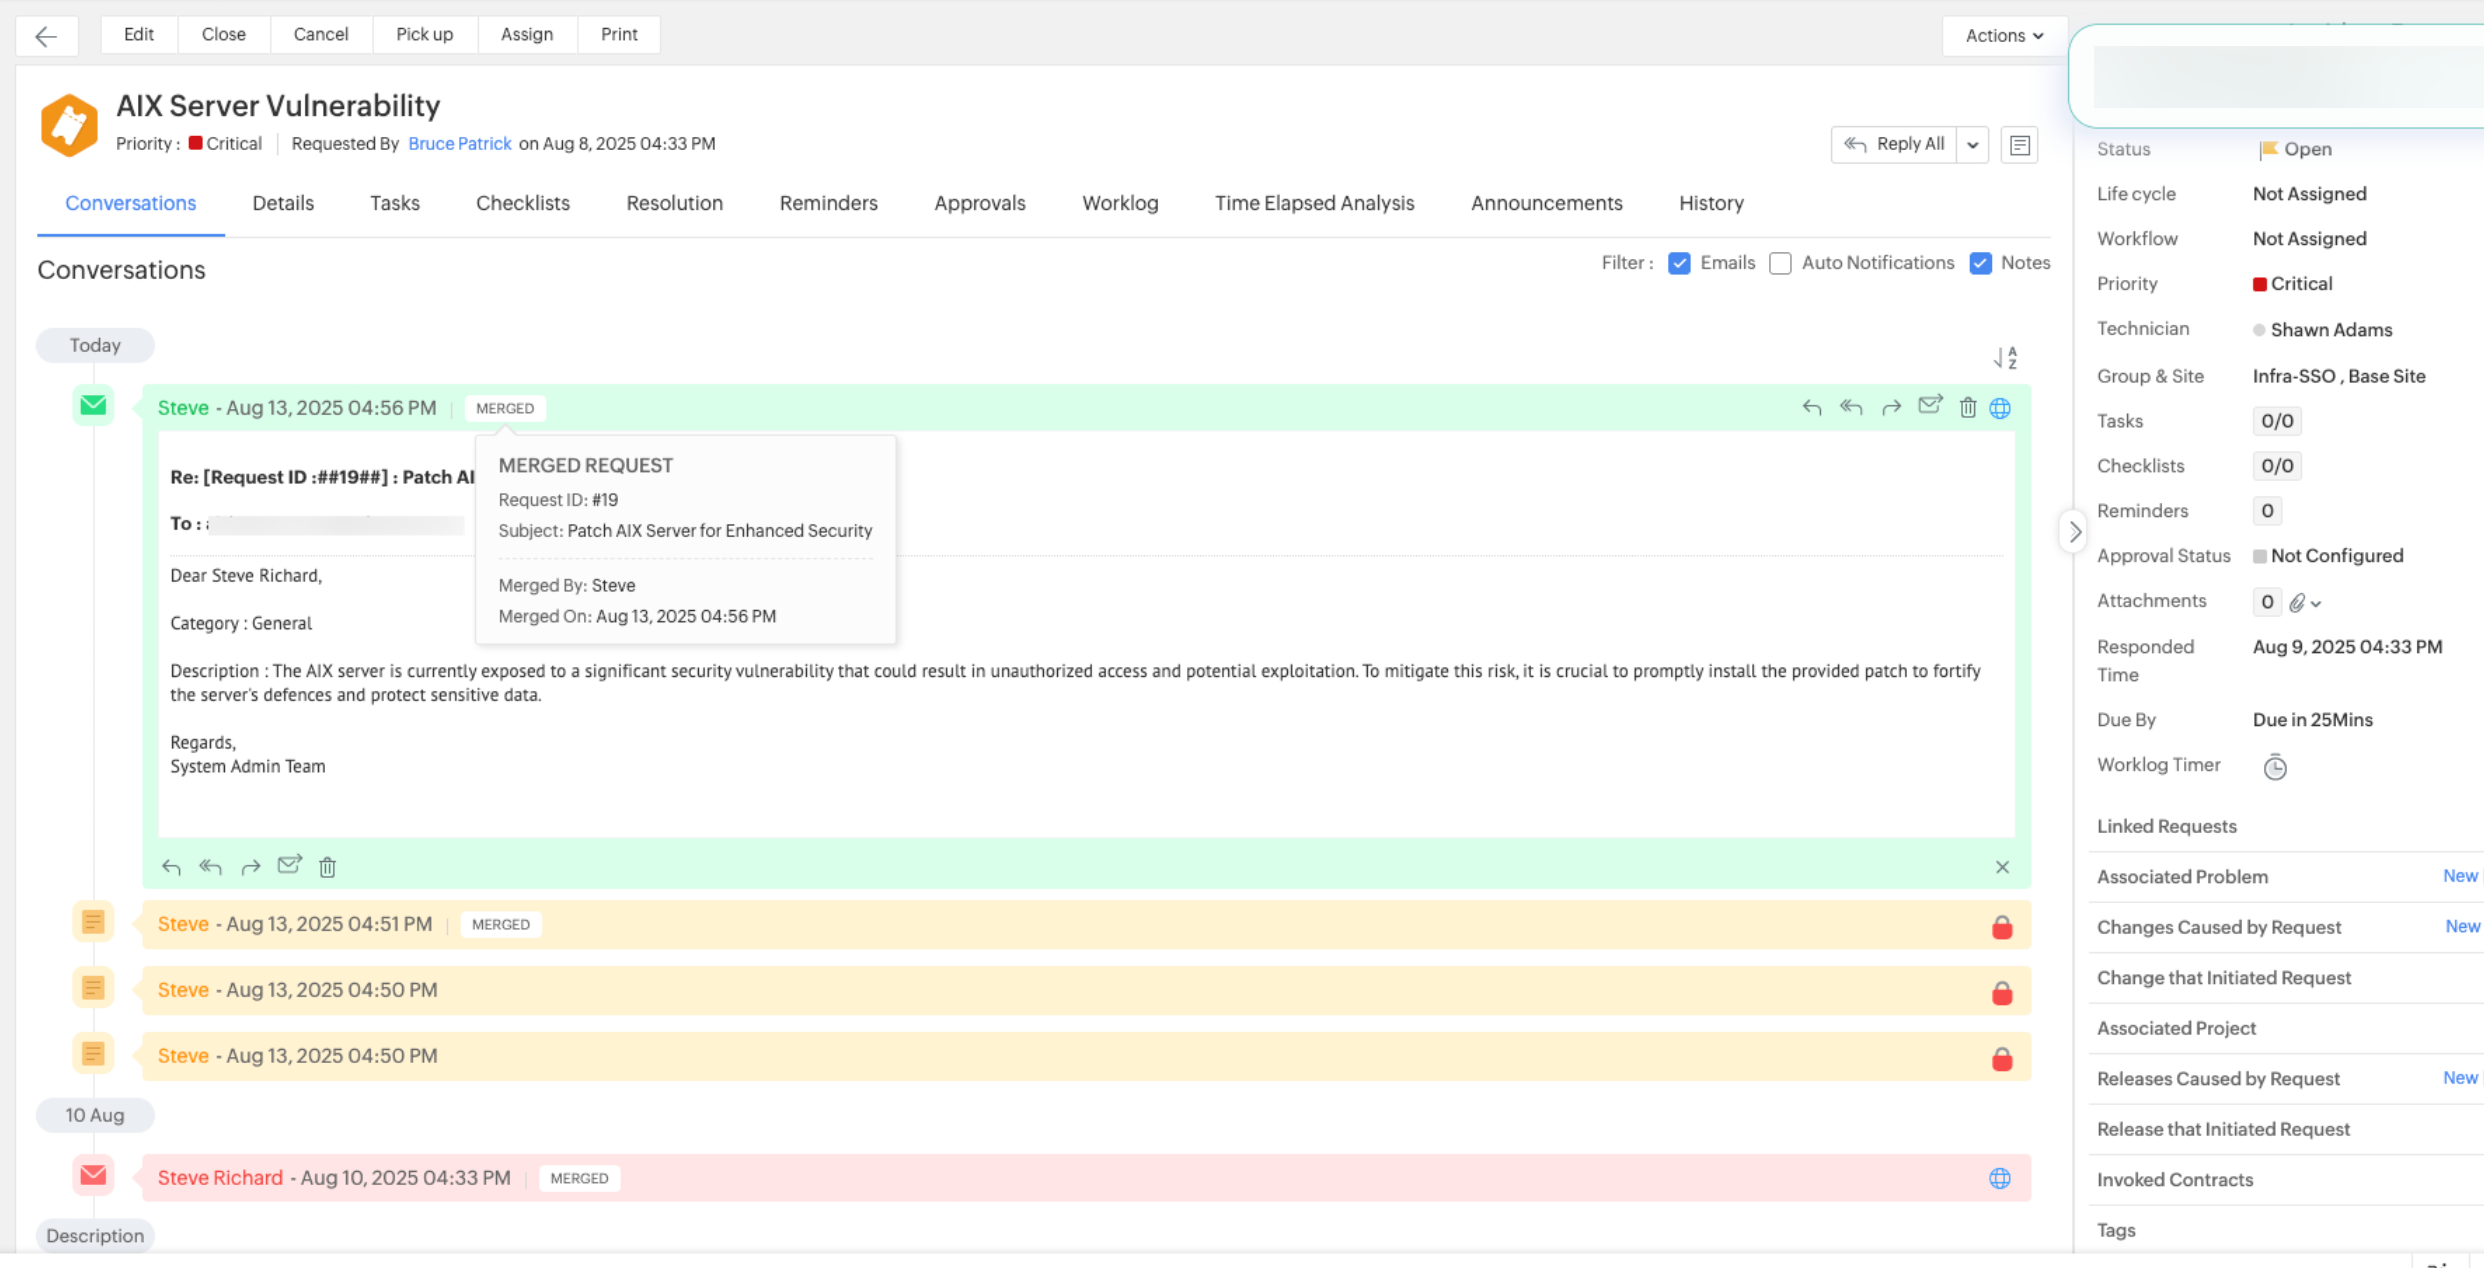
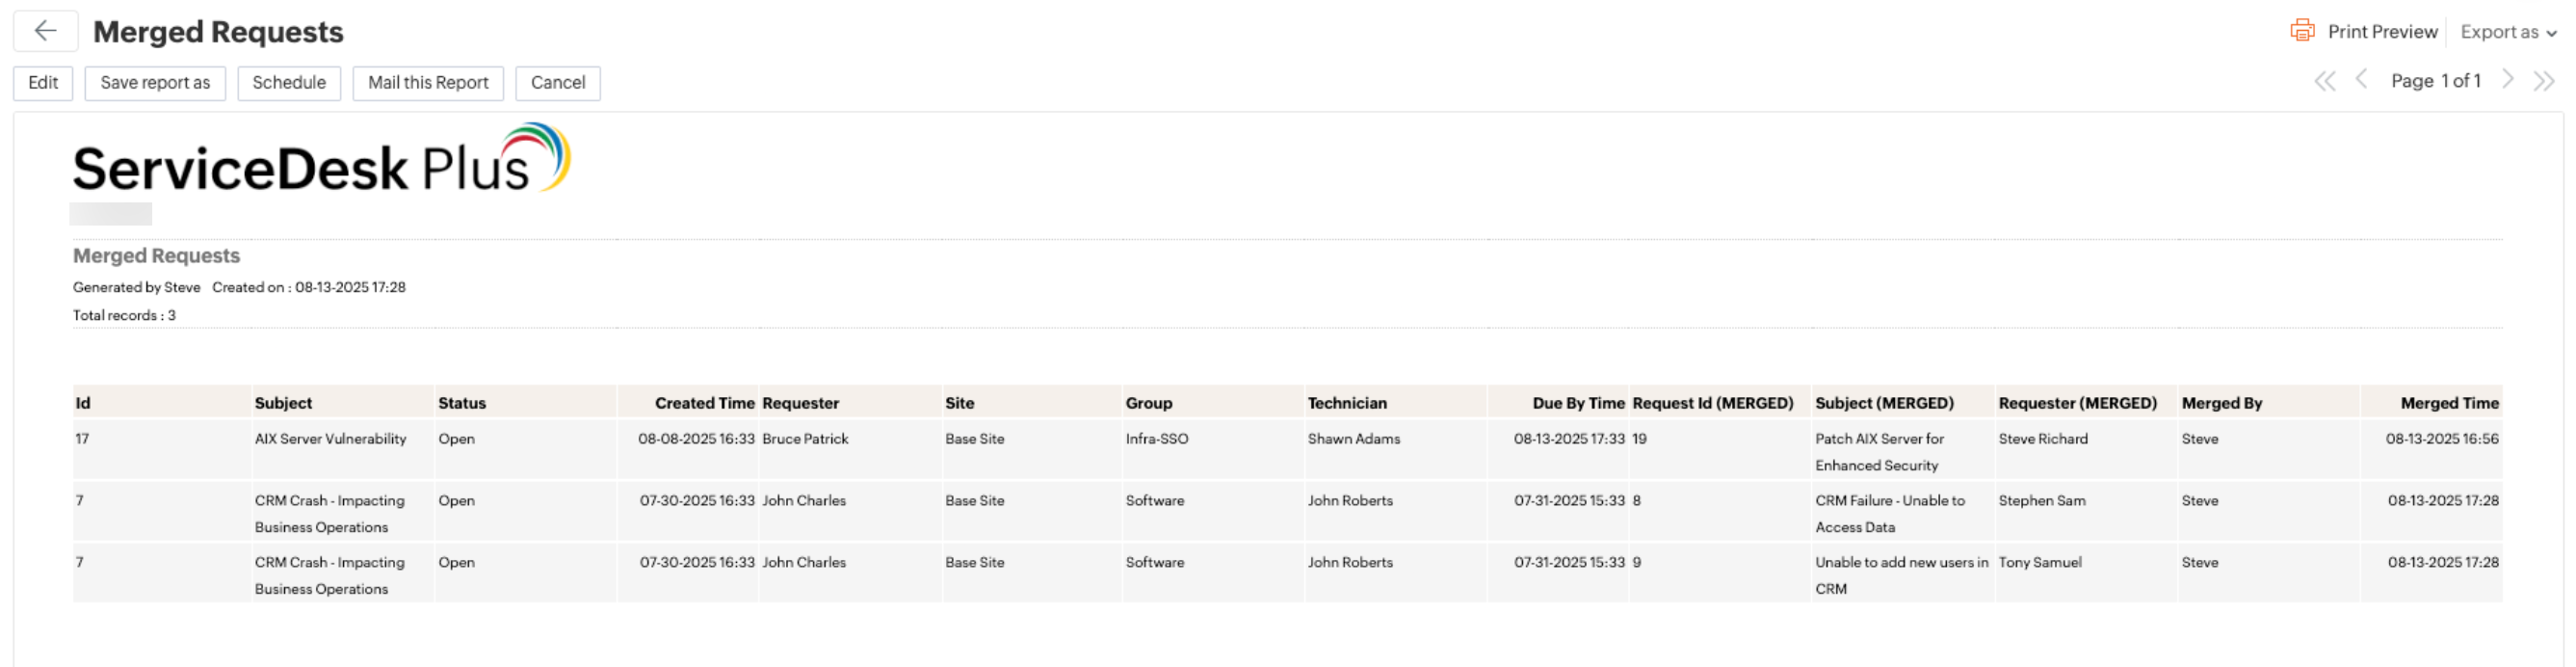
Note: This enhancement will apply only to requests merged from now.
Reports
Contracts
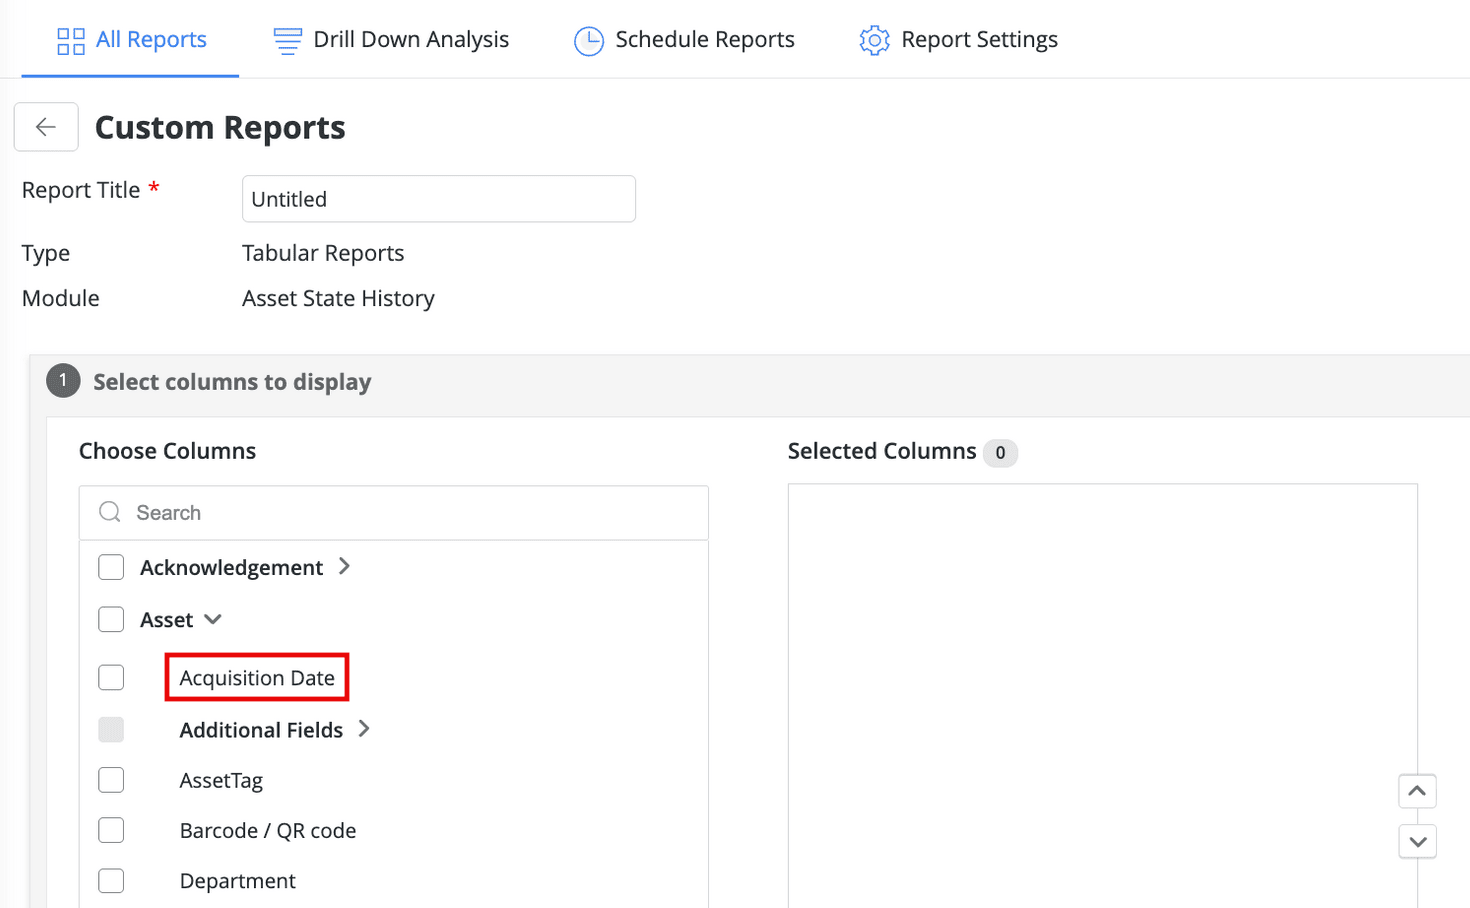
Technicians can now view Created Date in the contracts list view and in contract imports and exports.
External users can now access the ServiceDesk portal via a custom domain (e.g., helpdesk.zylker.com). The custom service URL must be mapped only to a single portal to enable this access.
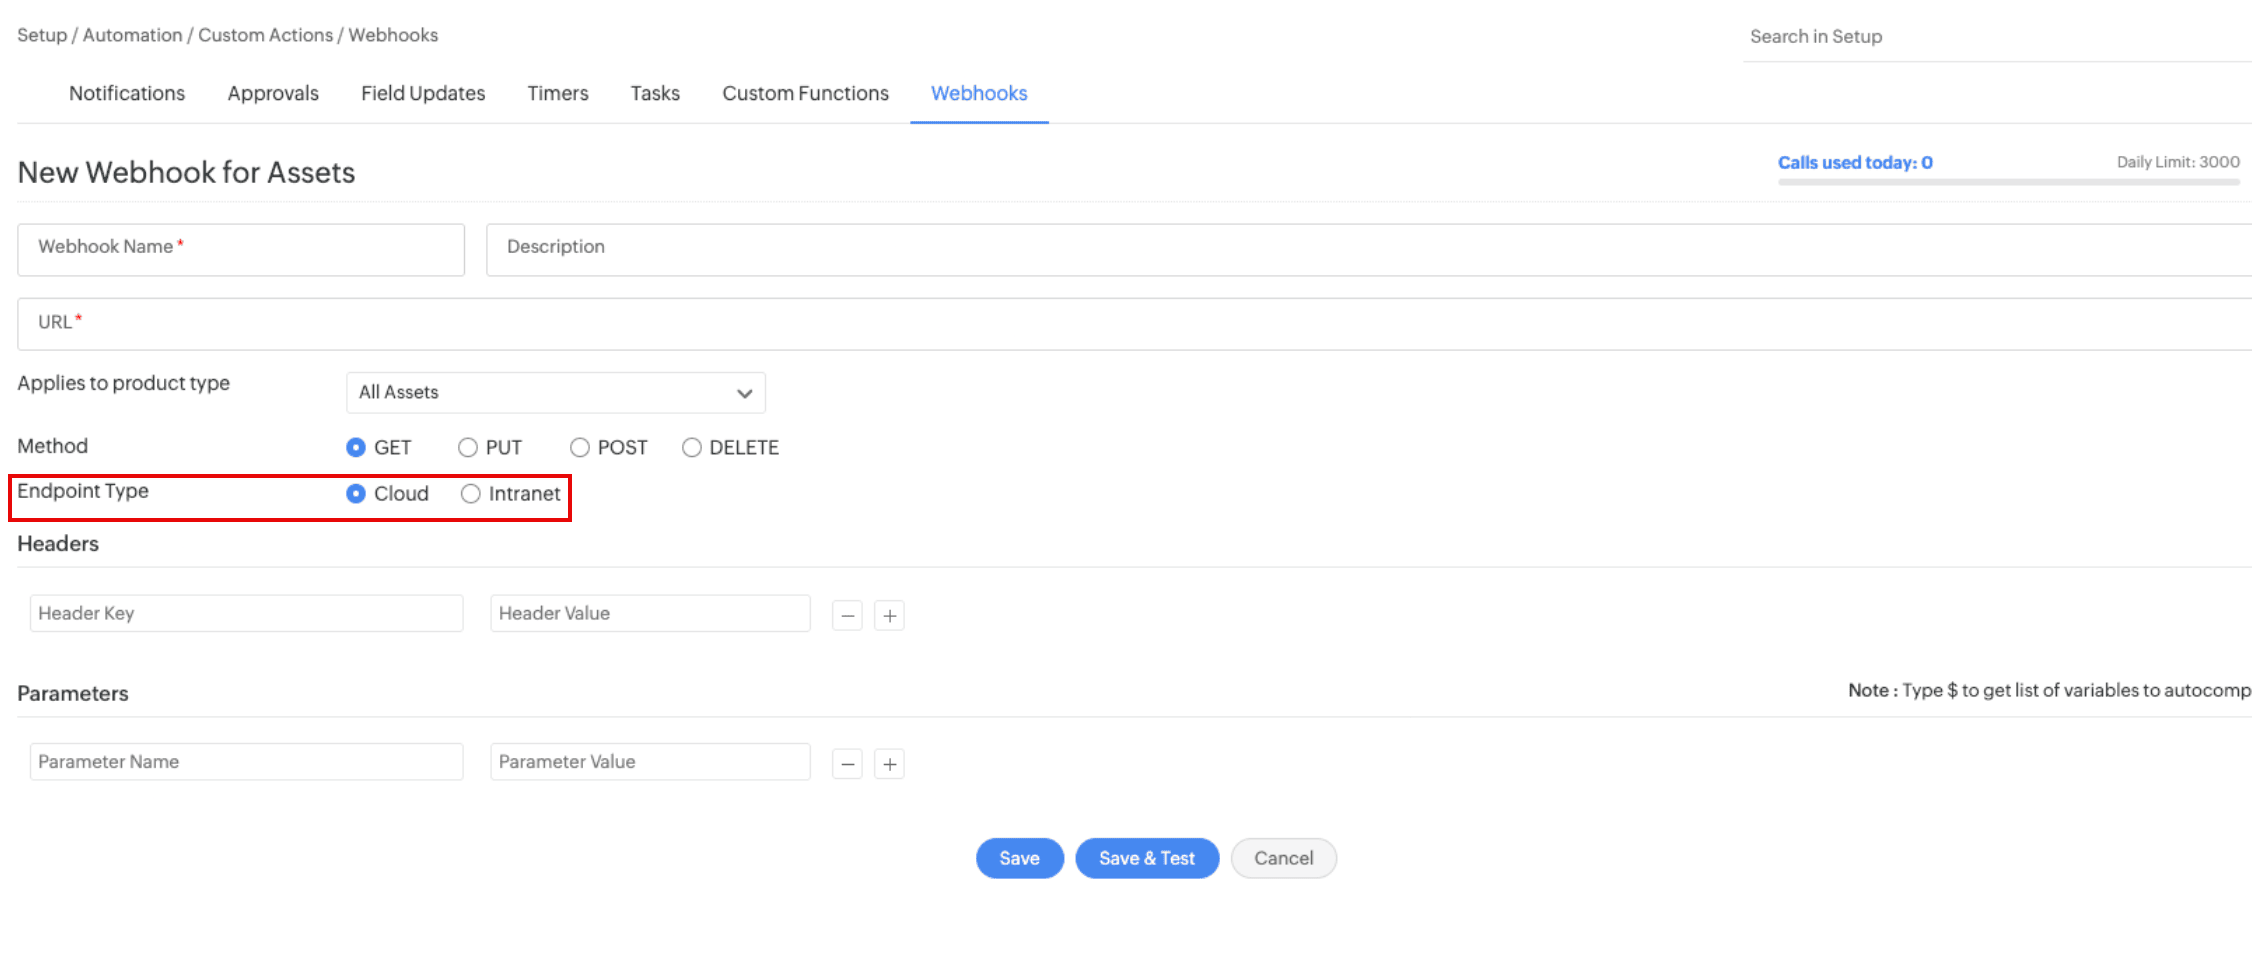
Intranet Webhook
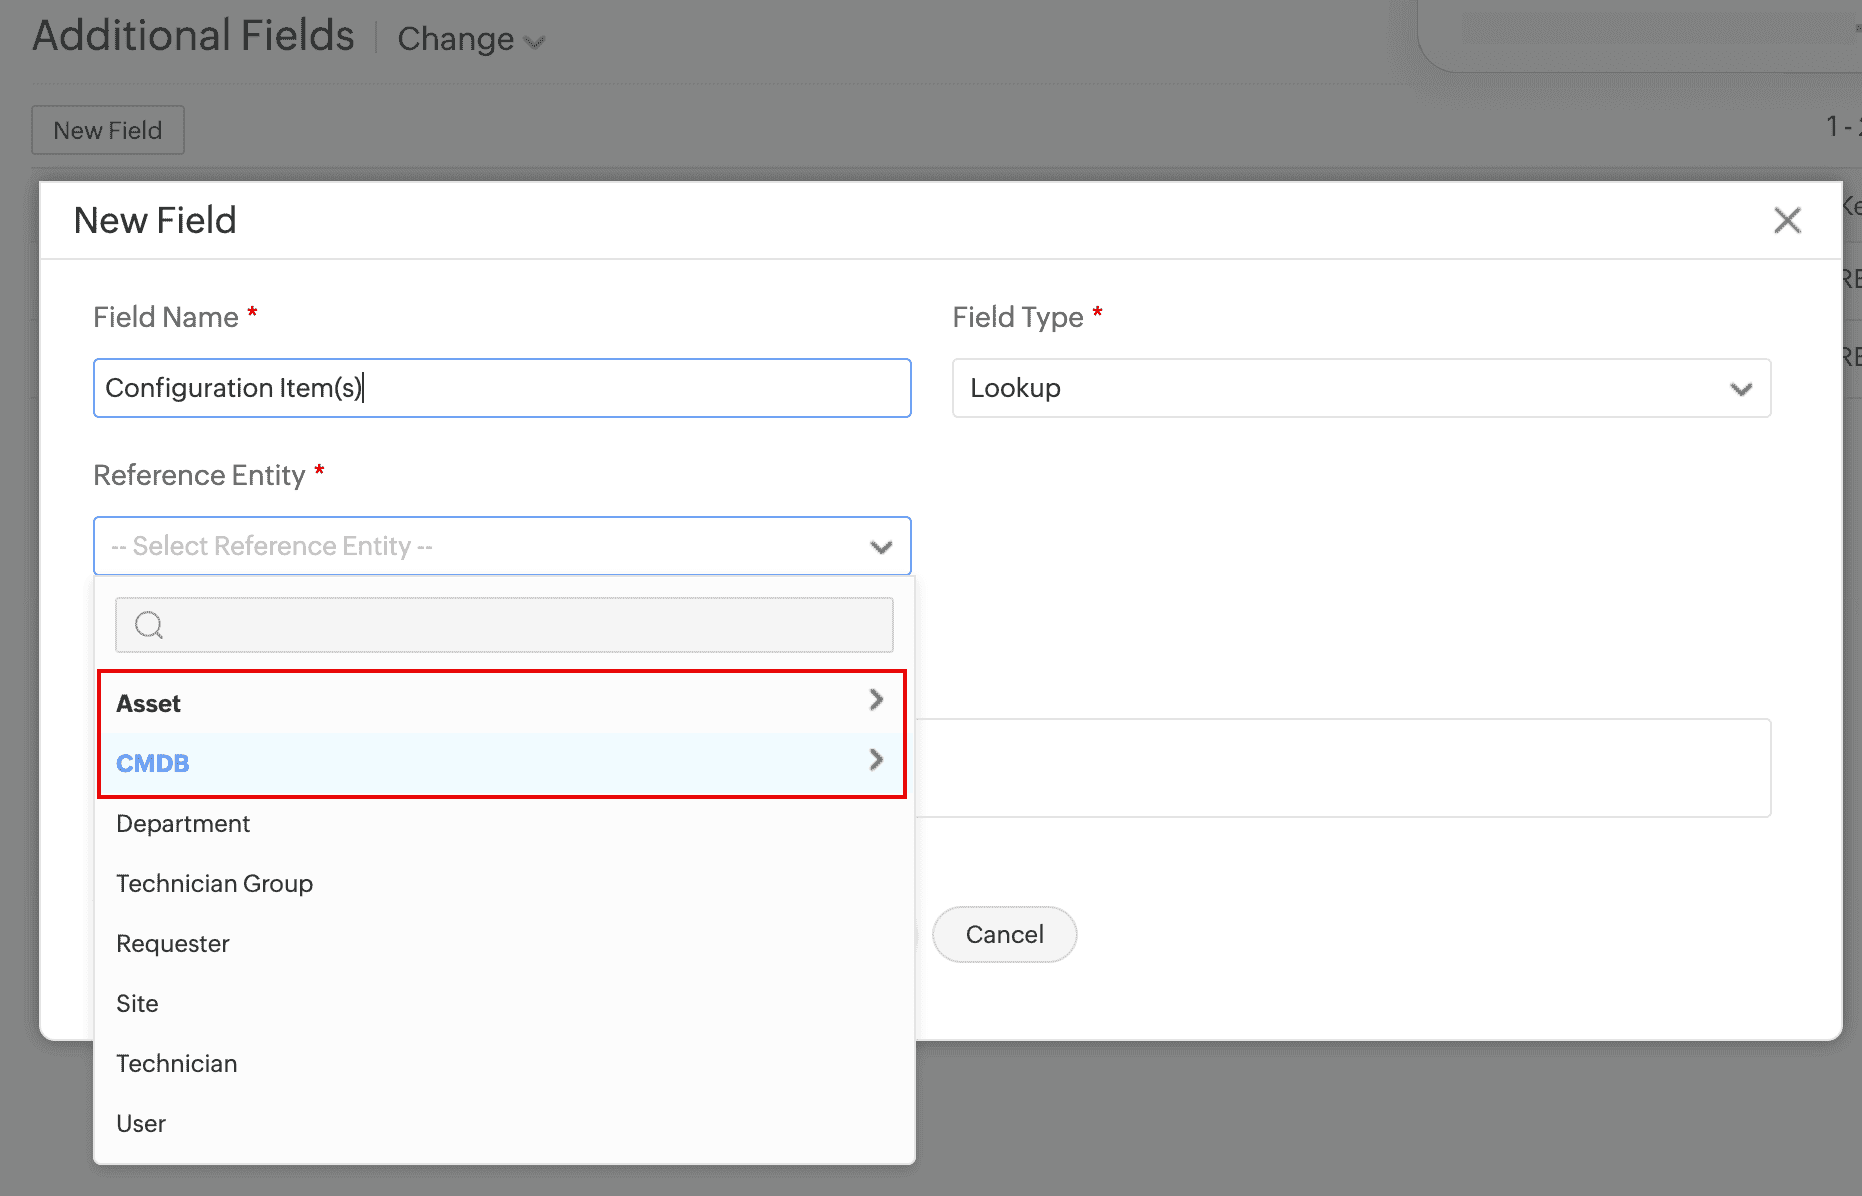
CMDB
Asset
Provisioning Tool
The list view fails to load at certain screen resolutions and zoom levels.
When the Service Templates page is zoomed in, New Service Template and Copy Template are not displayed.
The Request Details section does not display in requests accessed via approval emails.
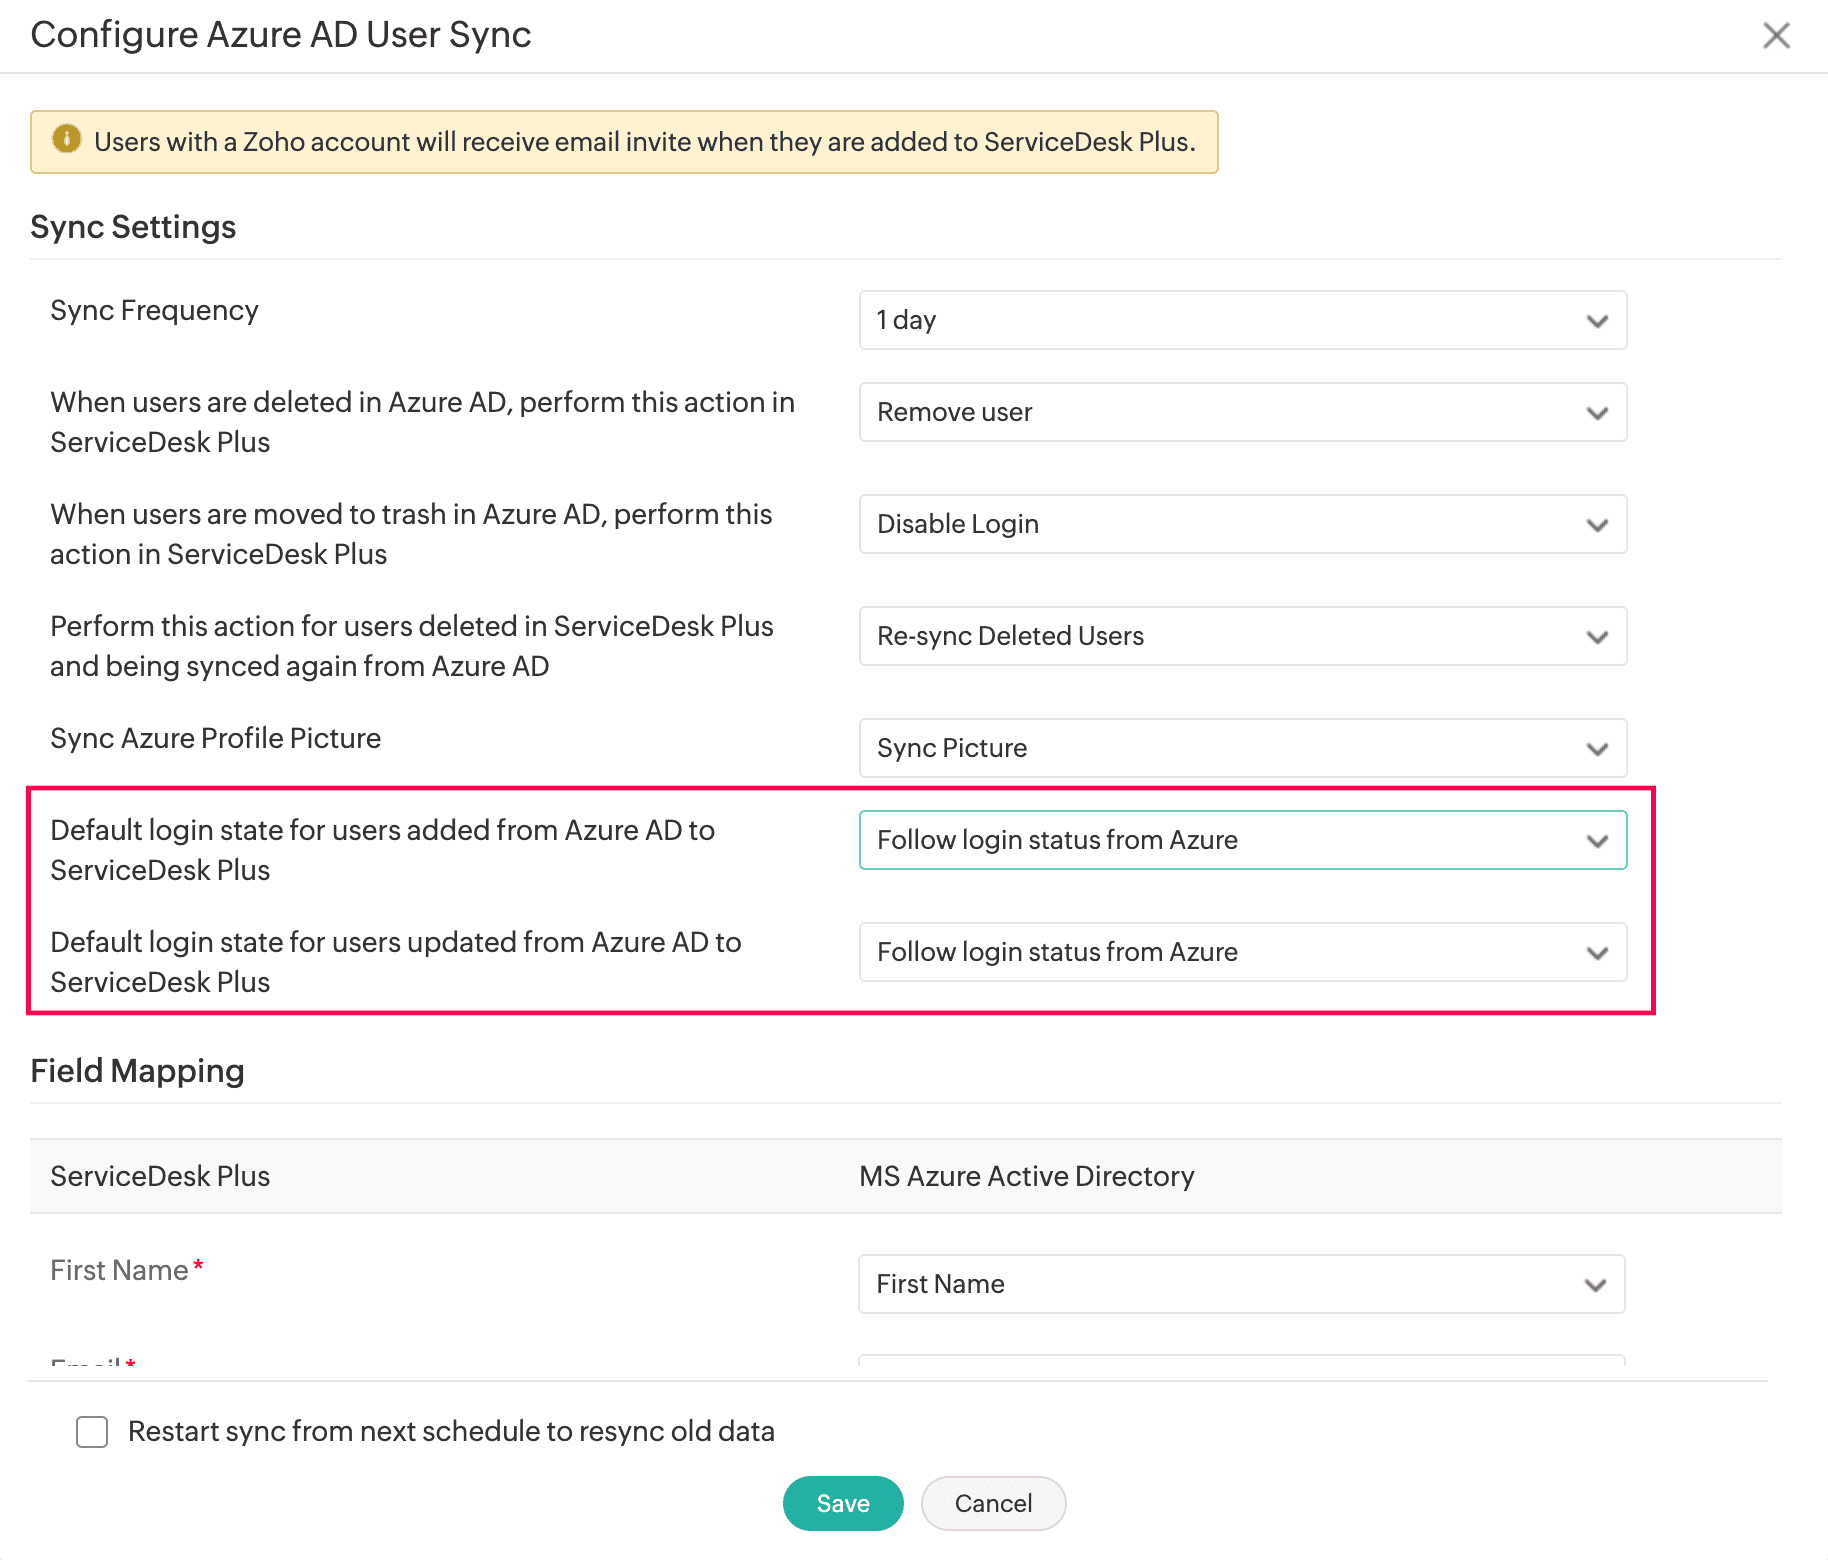
From now on, any Microsoft Azure user can integrate Azure AD User Sync to sync complete user information (beyond basic details) from Azure AD. This can be done only after the user obtains consent from the Microsoft Azure global administrator and authorizes ServiceDesk Plus MSP Cloud in Microsoft Azure.
List View Enhancement
Web View
Supported Features
Devices | Supported Features | ||||||||||||||||||||||||||
Mobile Devices |
Note:
| ||||||||||||||||||||||||||
Tablet Devices |
Note: Accessibility Control settings will not be applied. |
Supported Browsers
Preview - Smart Phones Responsive Interface
Home | |
Dashboard | Scheduler |
Focus on one widget at a time and get a bird's eye view of all your key module insights. 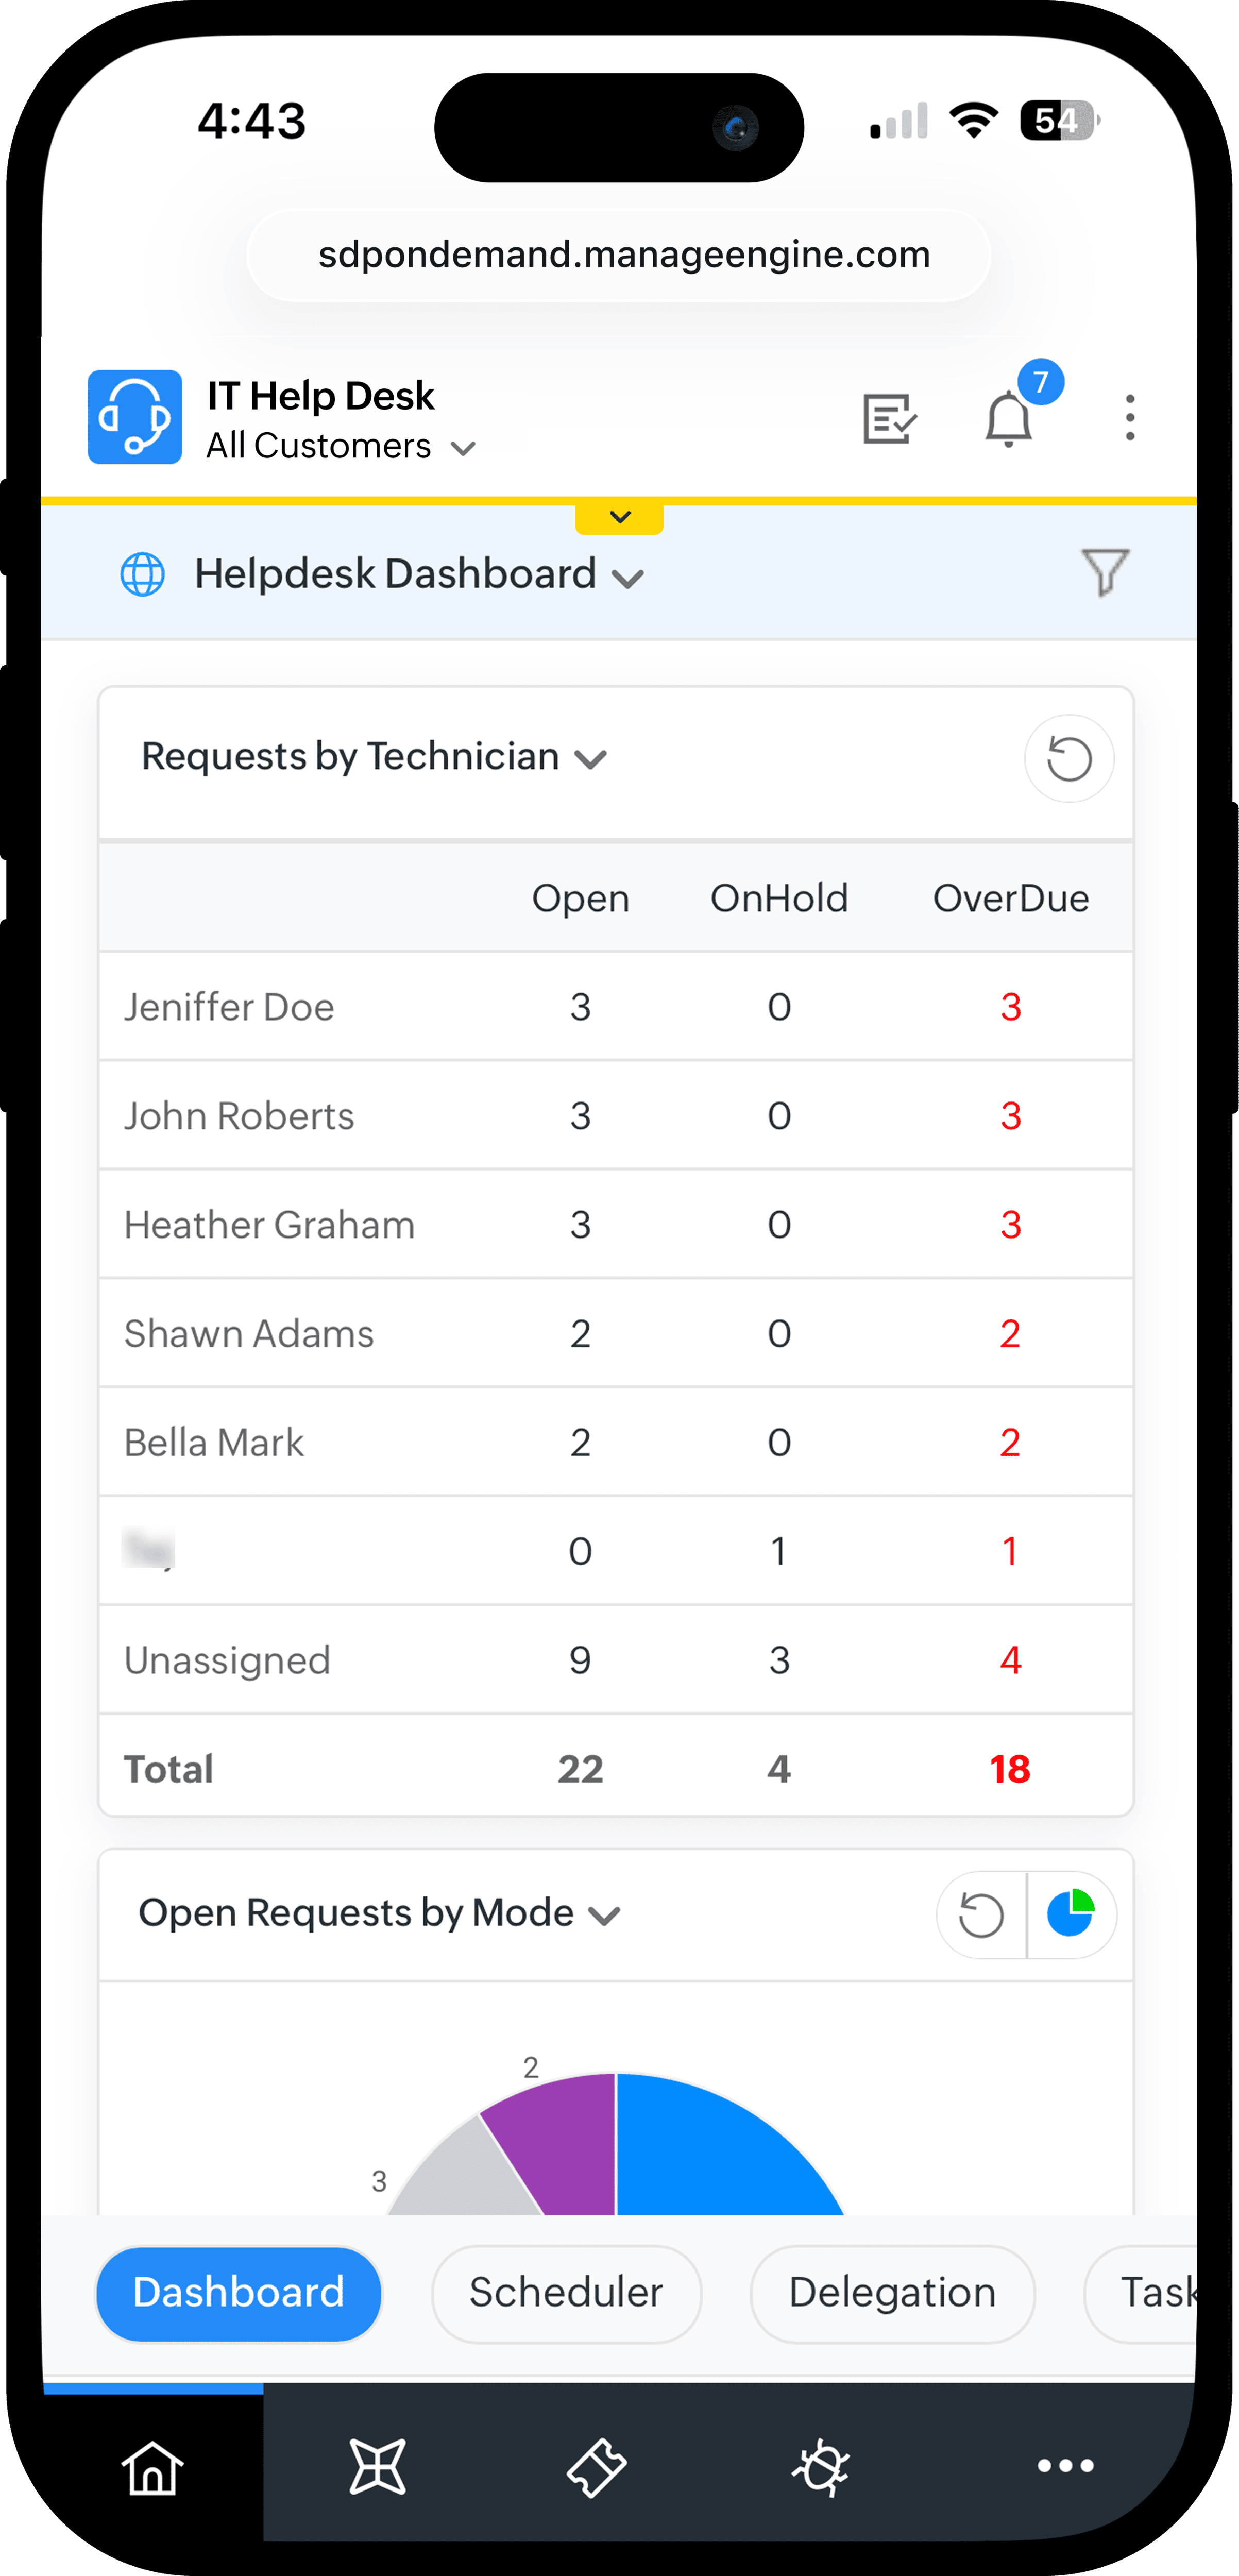 | A dynamic monthly calendar that supports the functionalities of both Technician Availability Chart and Scheduler. 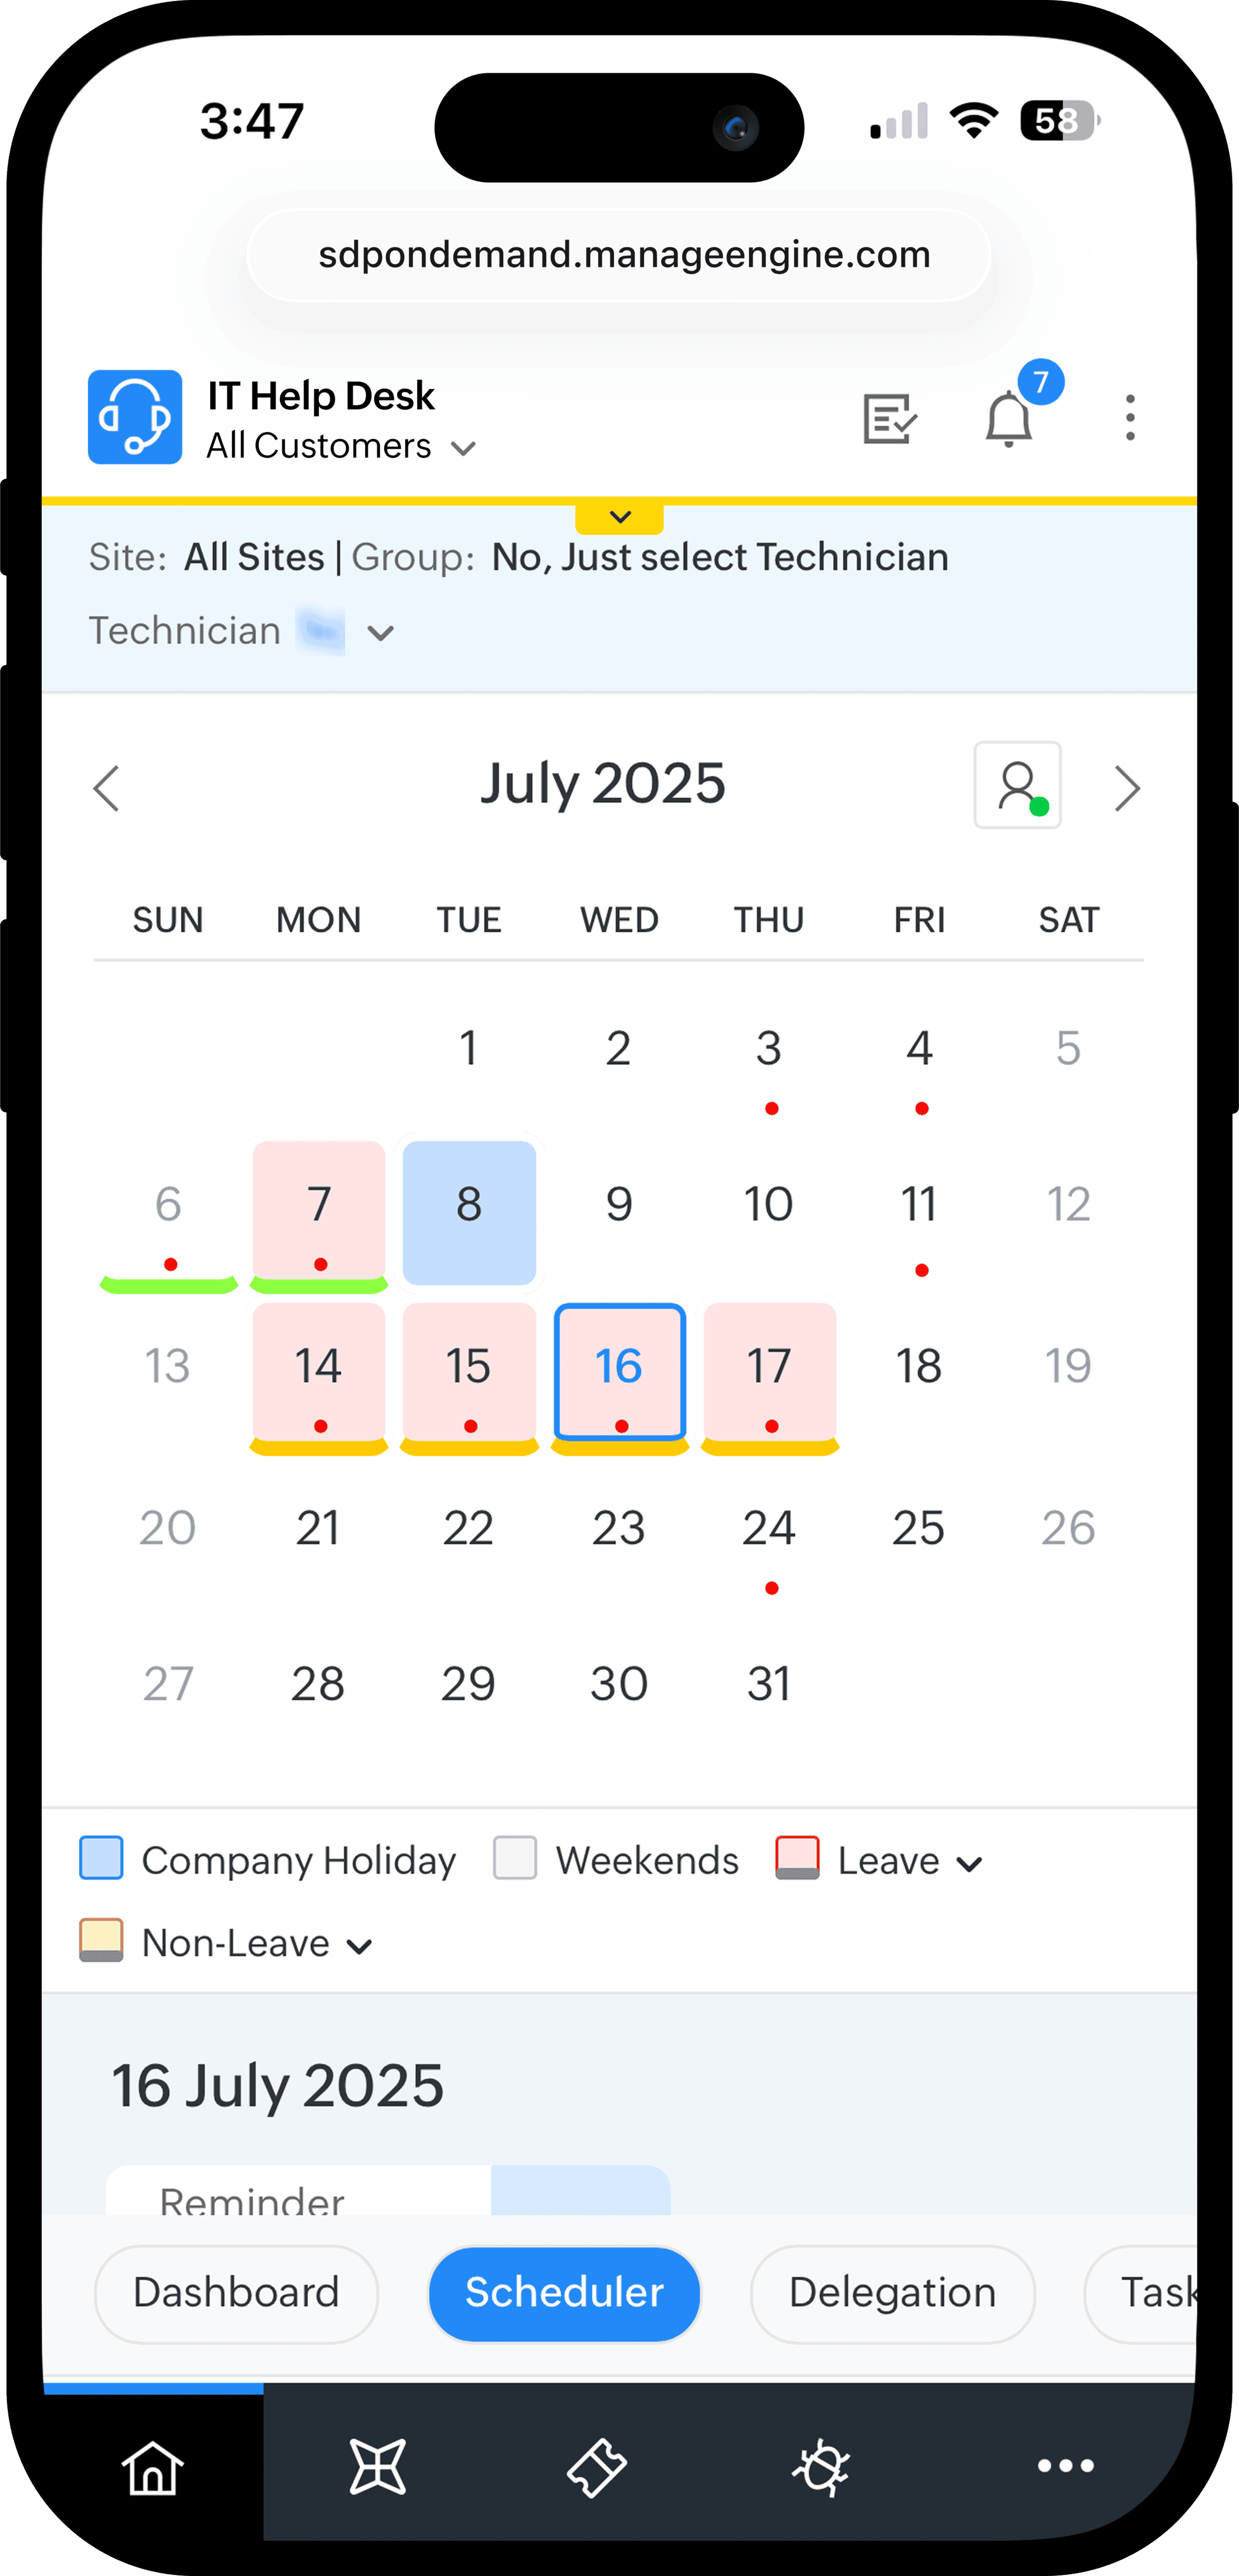 |
List View | |
List View | Actions |
Displays a list of all records across different stages, priorities, and workflows in a module. Use filters to list specific records. 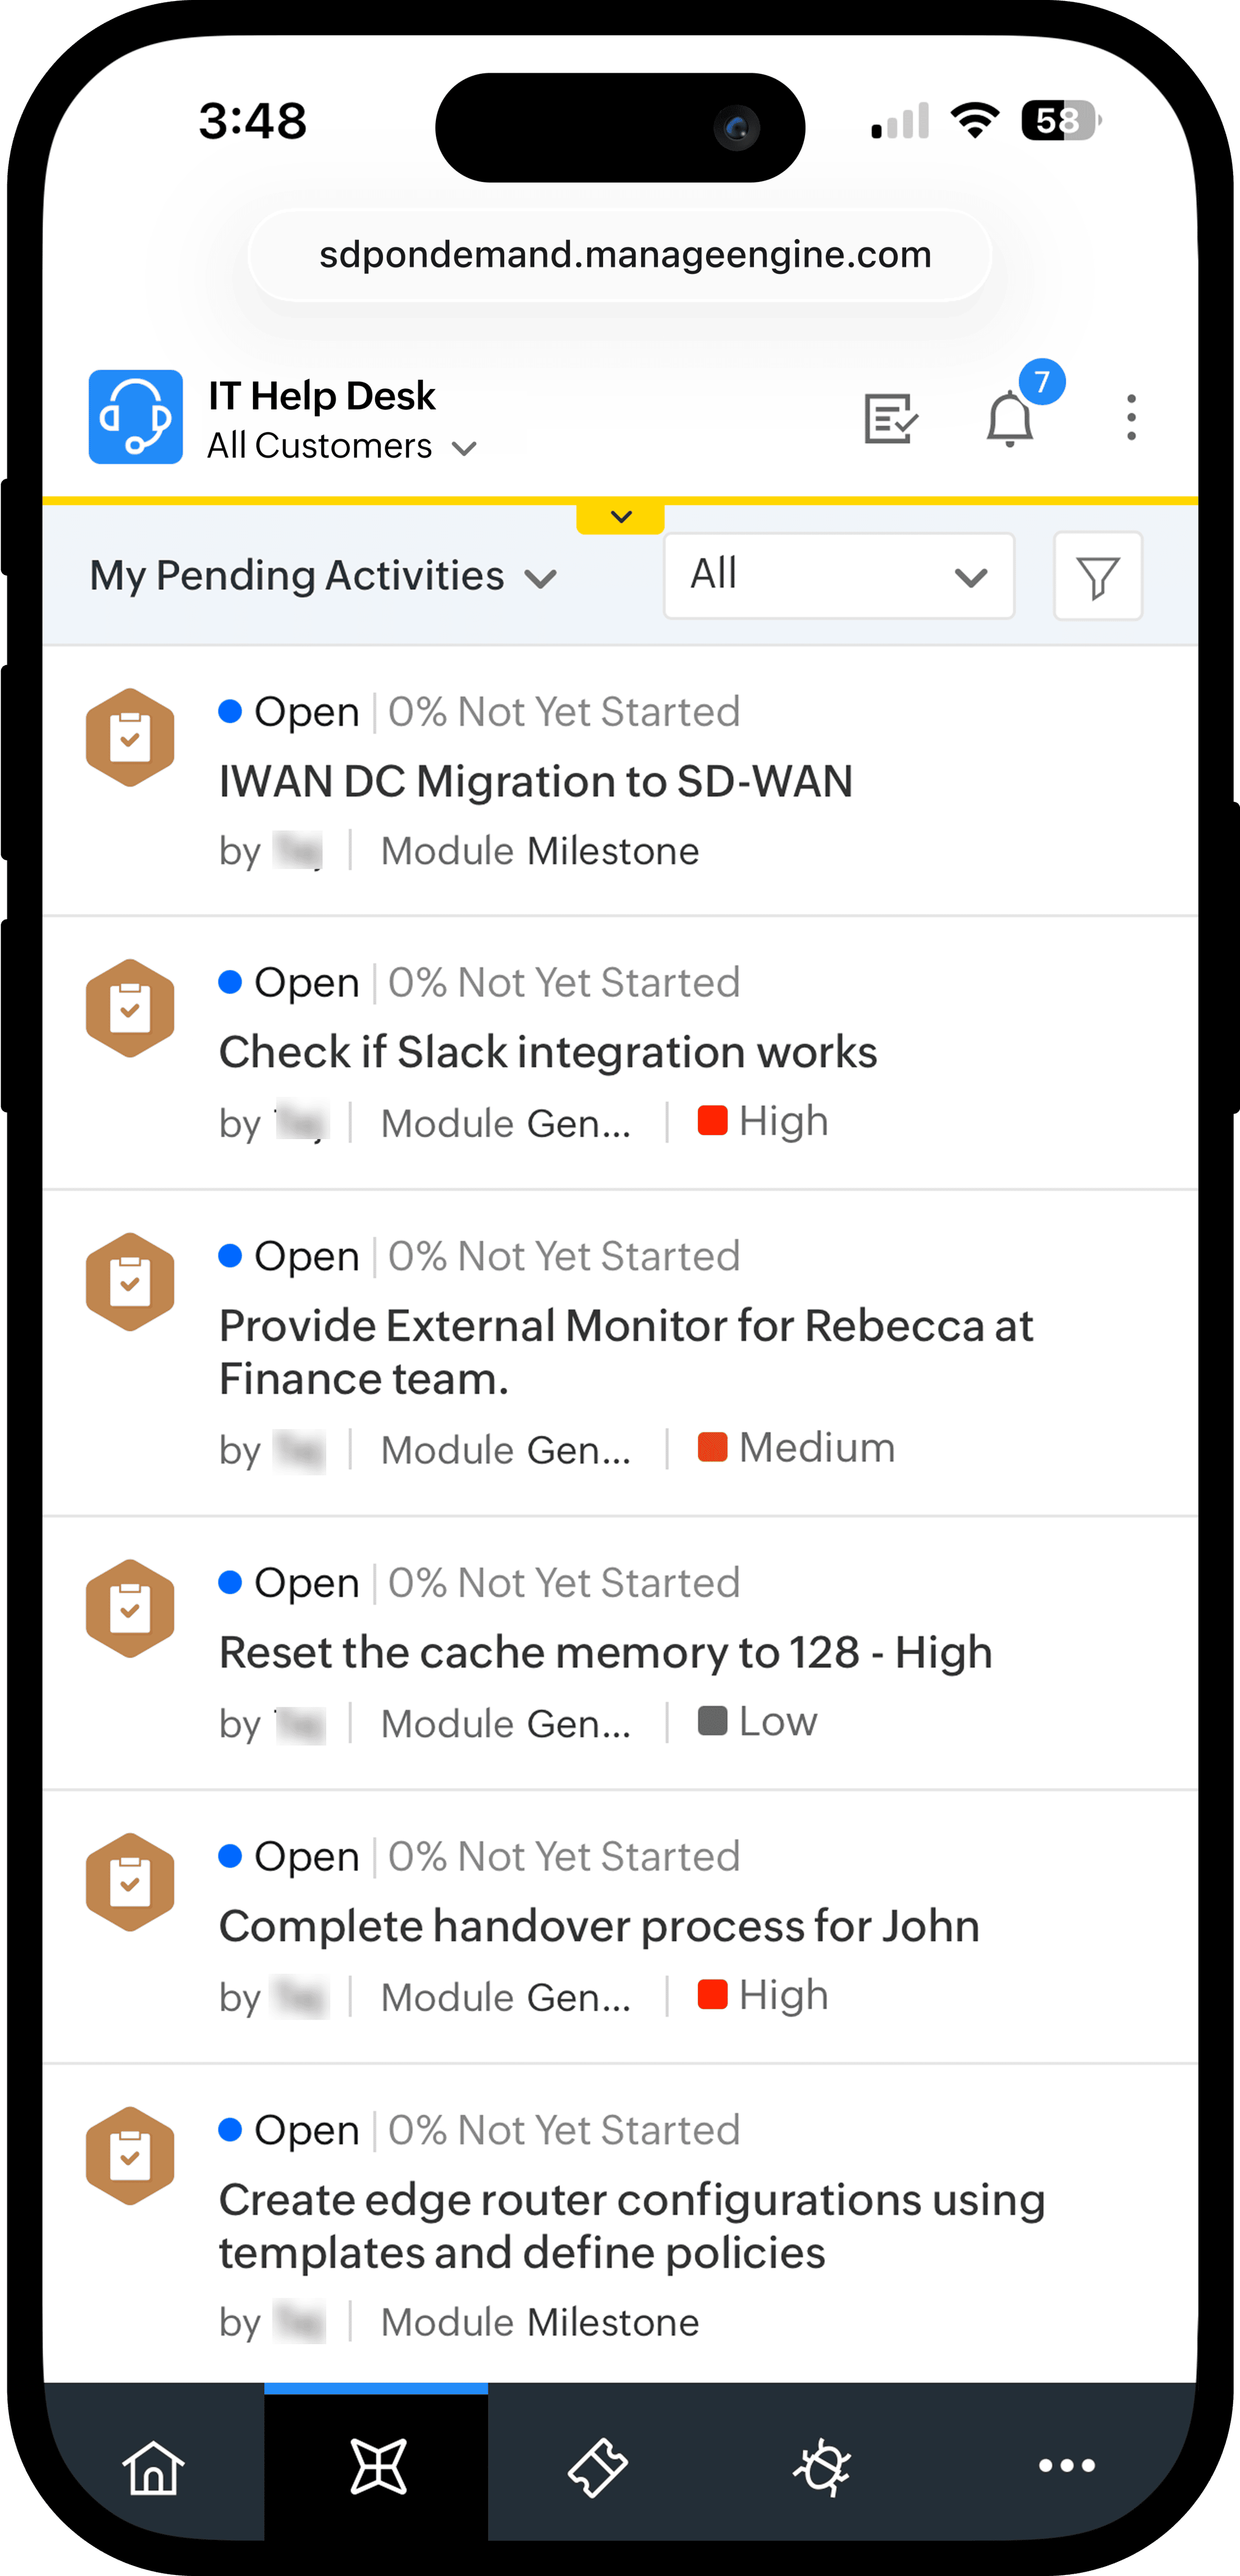 Column Chooser settings will not reflect on the mobile browser list views. | Actions, such as Edit, Merge, Pick Up, etc, are displayed dynamically based on the selected items. 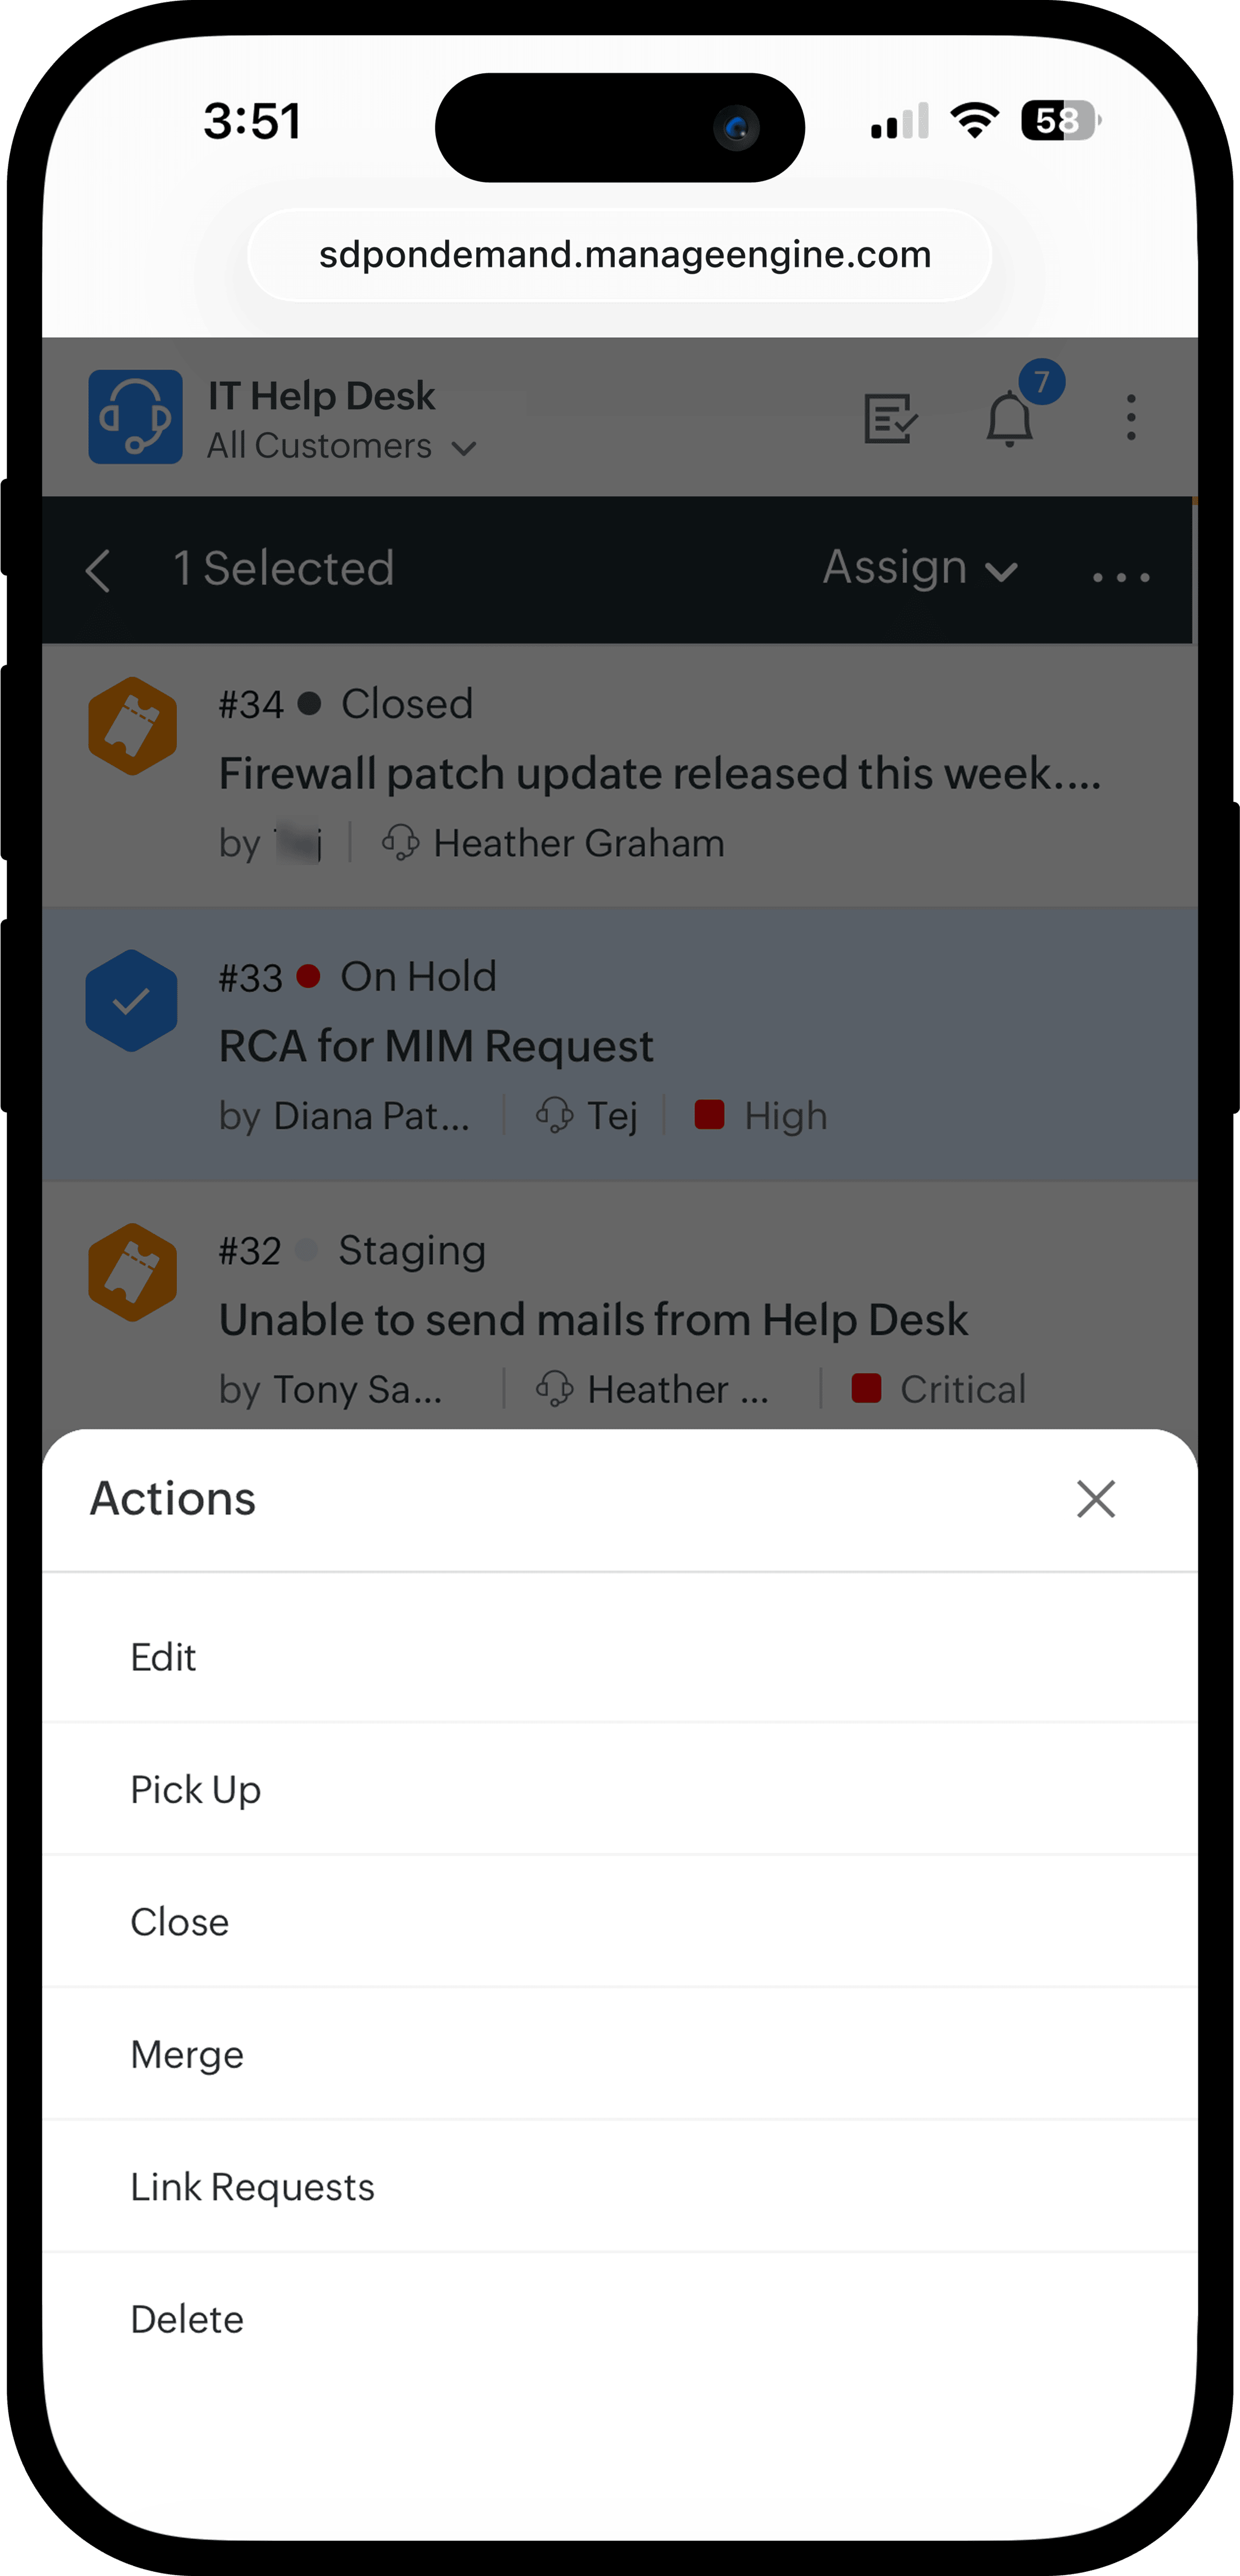 |
Details View | |
Details Page | Other Details |
View detailed insights of a record. Use floating panel to view its critical details at a glance. 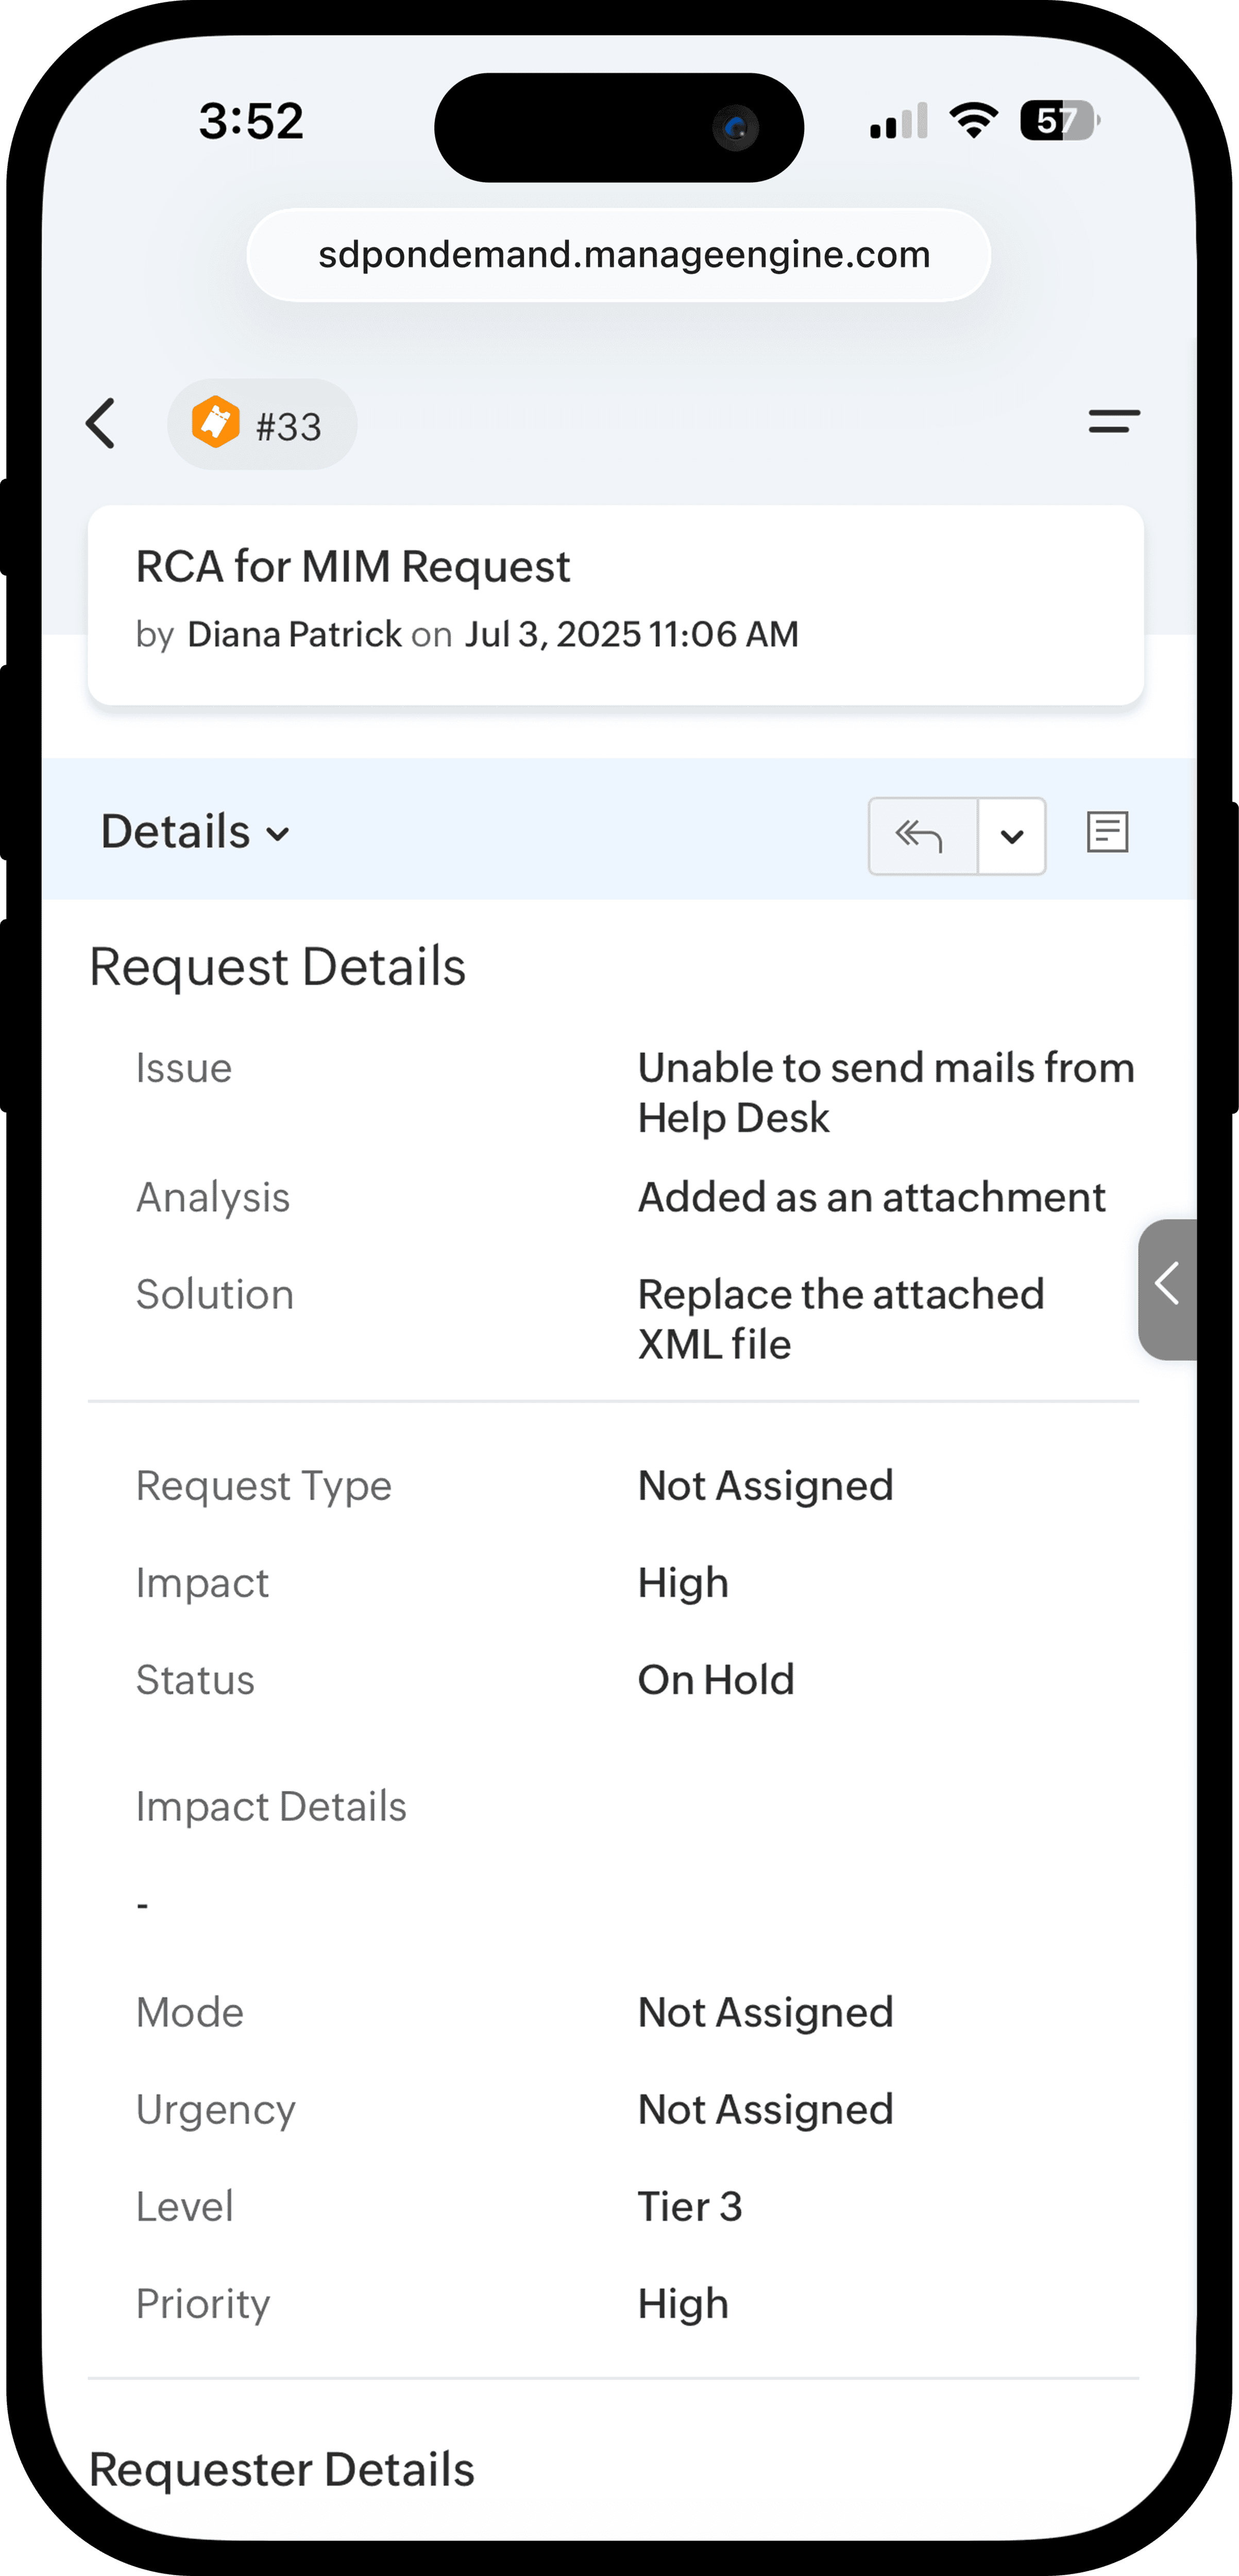 | Initiate conversations, assign tasks, create checklists, upload resolutions, and view all their details – just like web view but faster and easier from a drop-down. 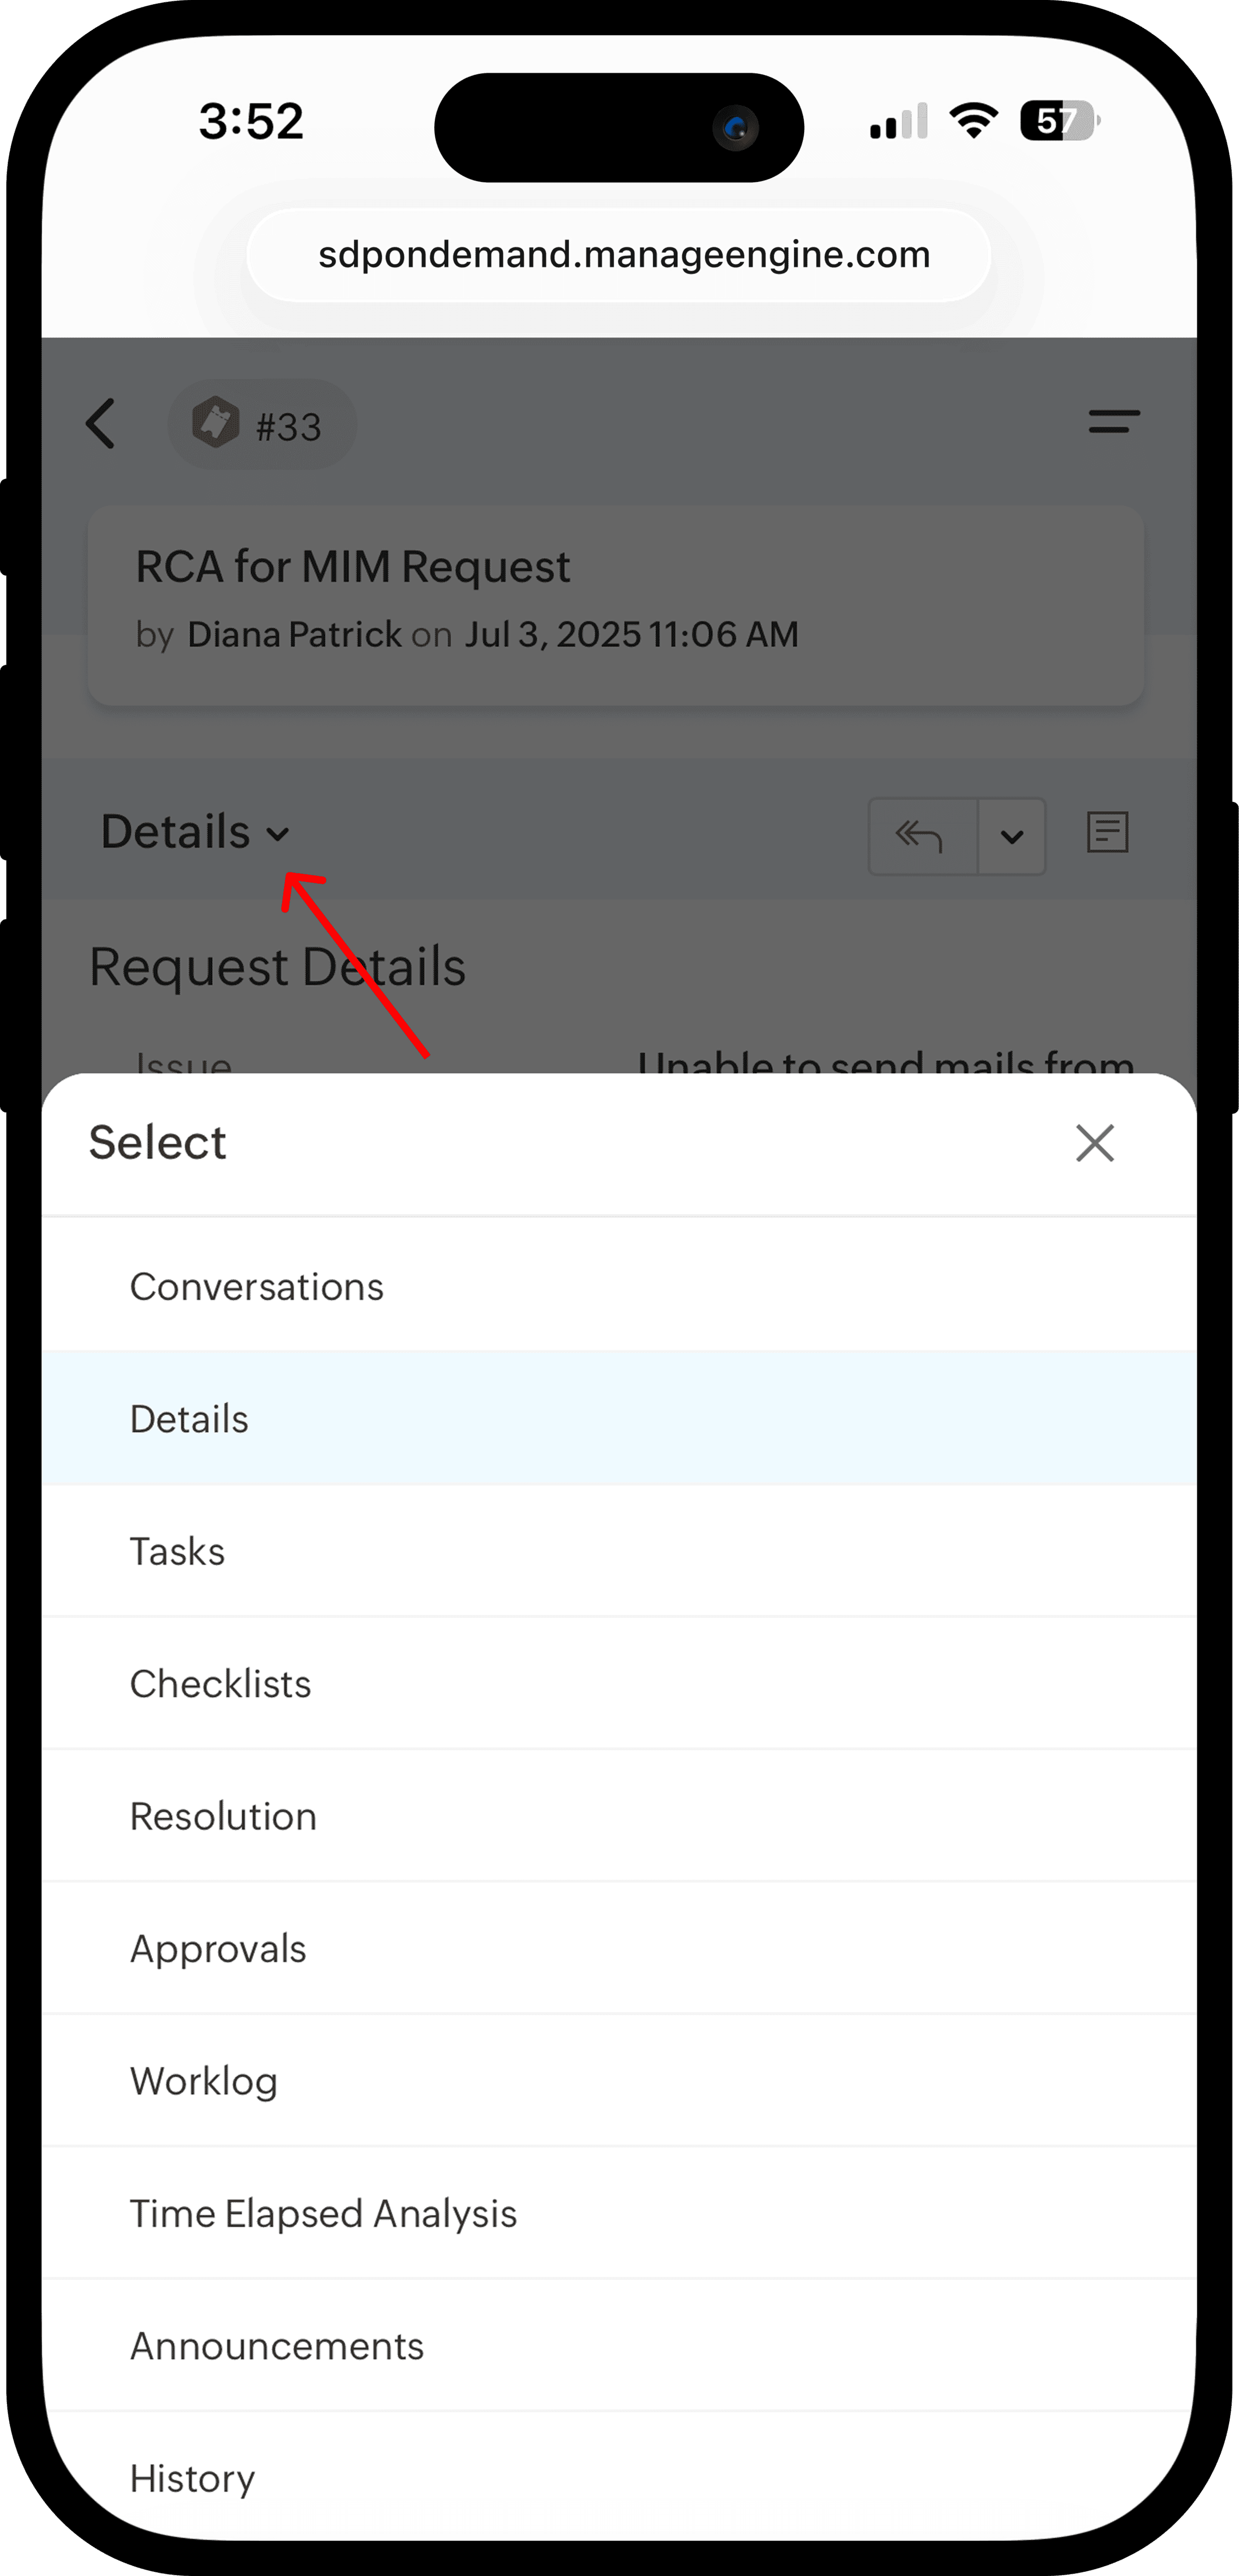 |
Floating Panel | Actions |
View critical details of a record, such as workflow, task and checklist progress, approval status, associated requests and changes, and more. 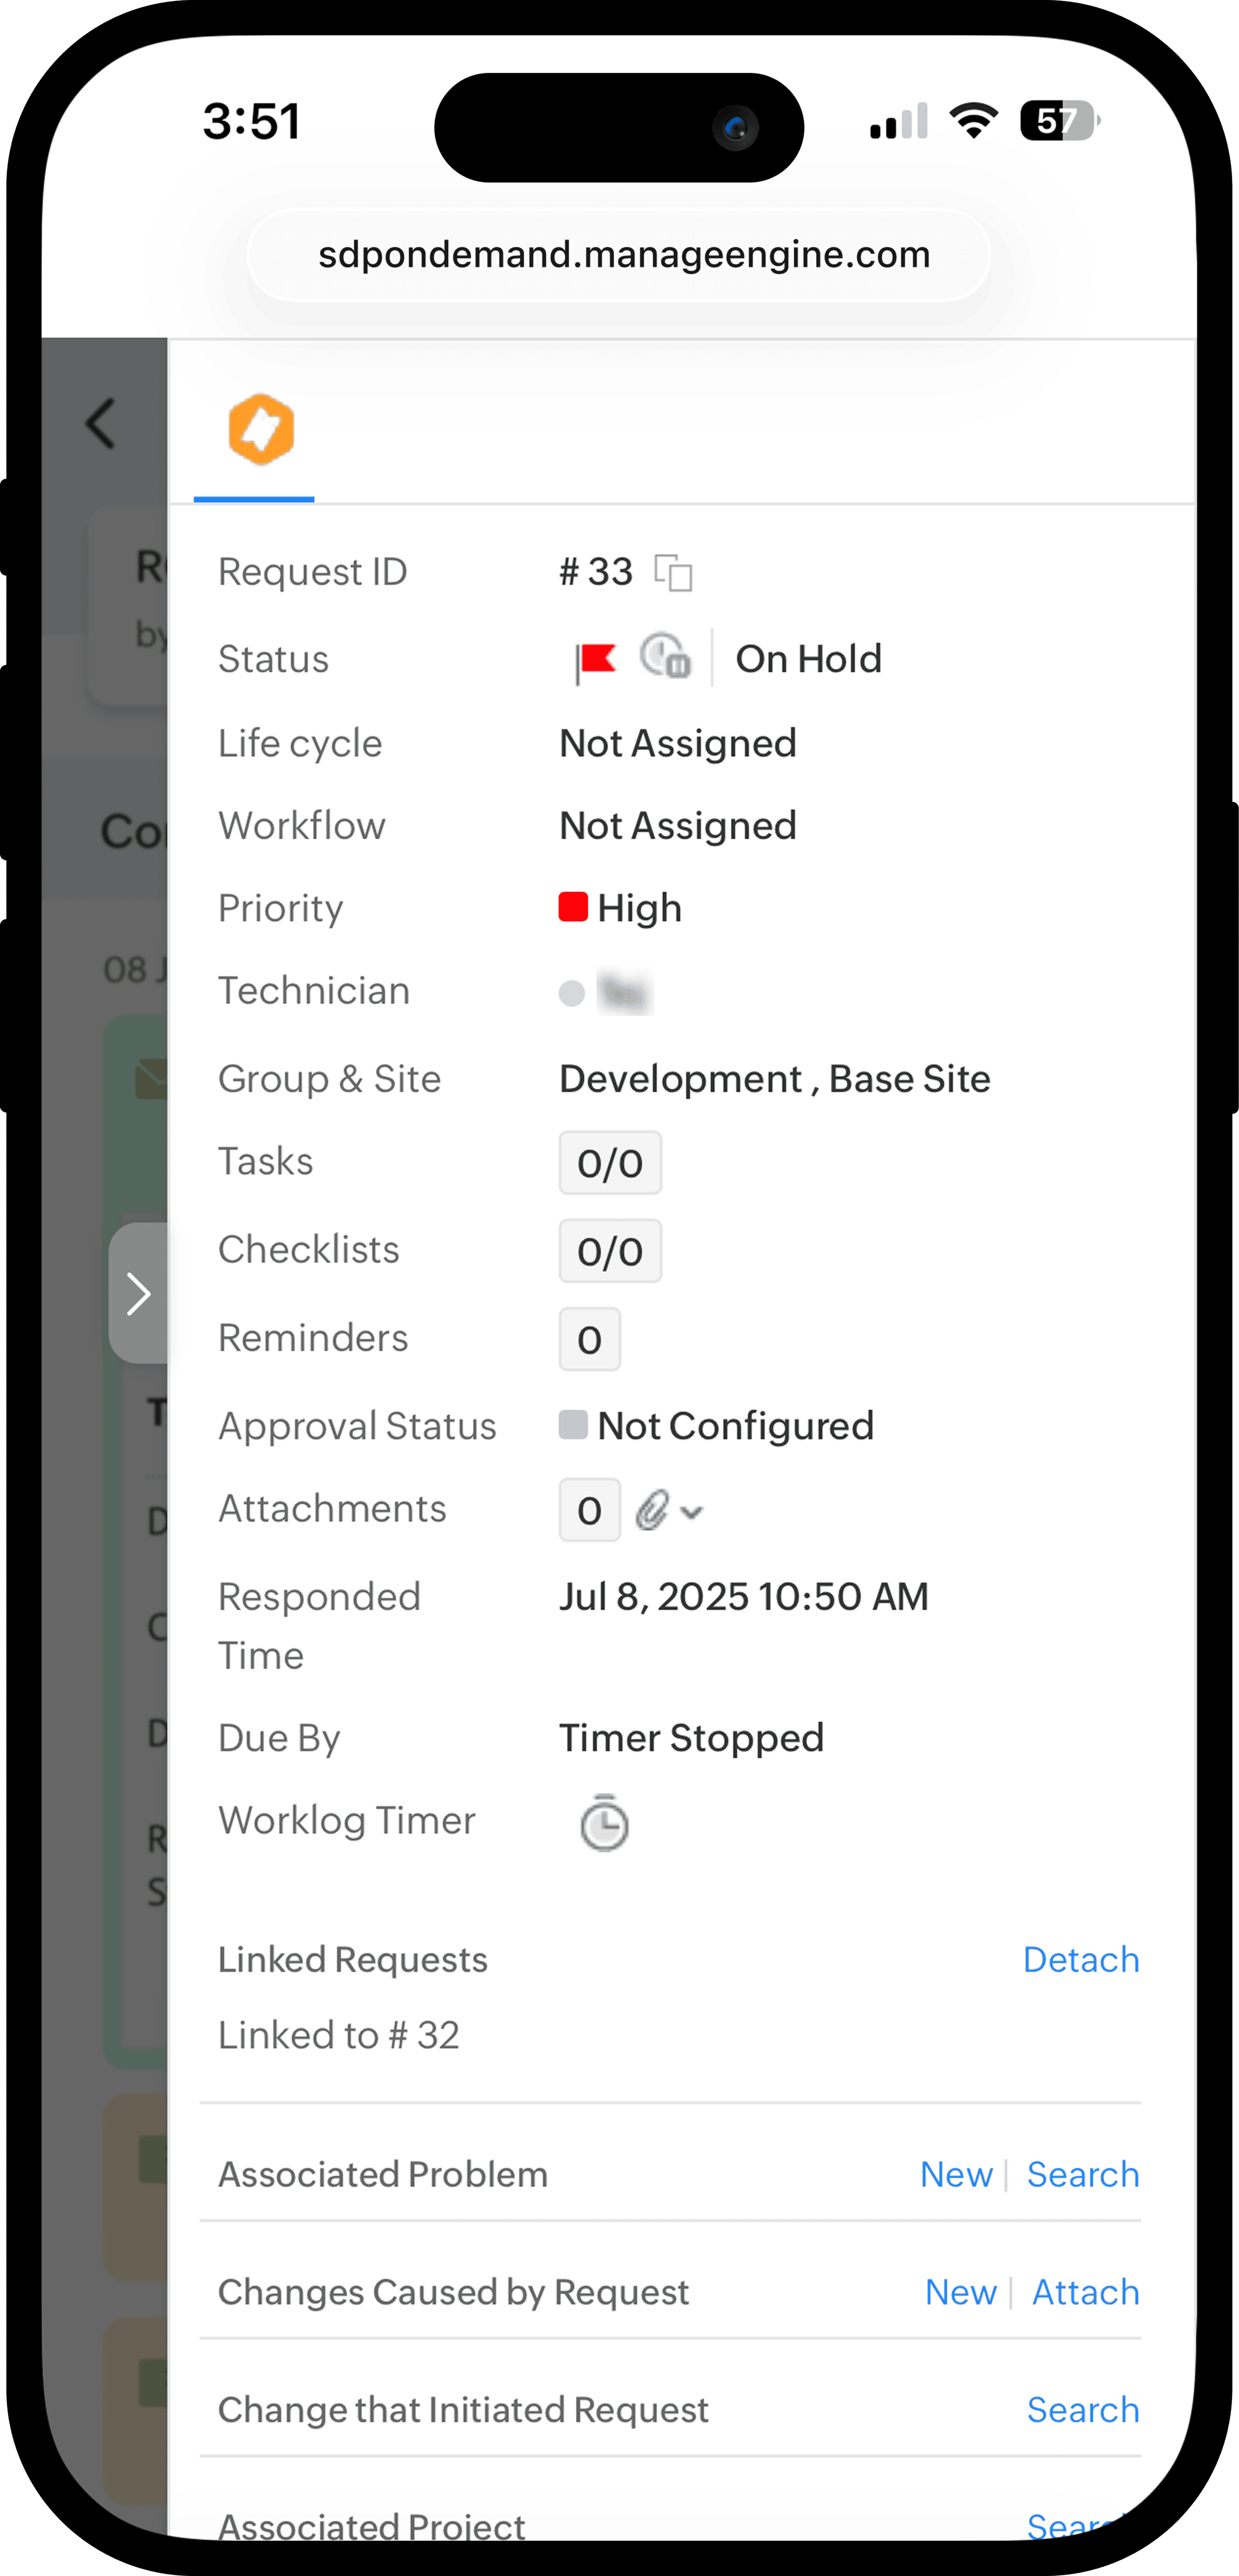 | Perform various record-specific actions such as Assign, Close, Edit, Merge, Manage Followers, Add Note and Tasks, Share, and more. 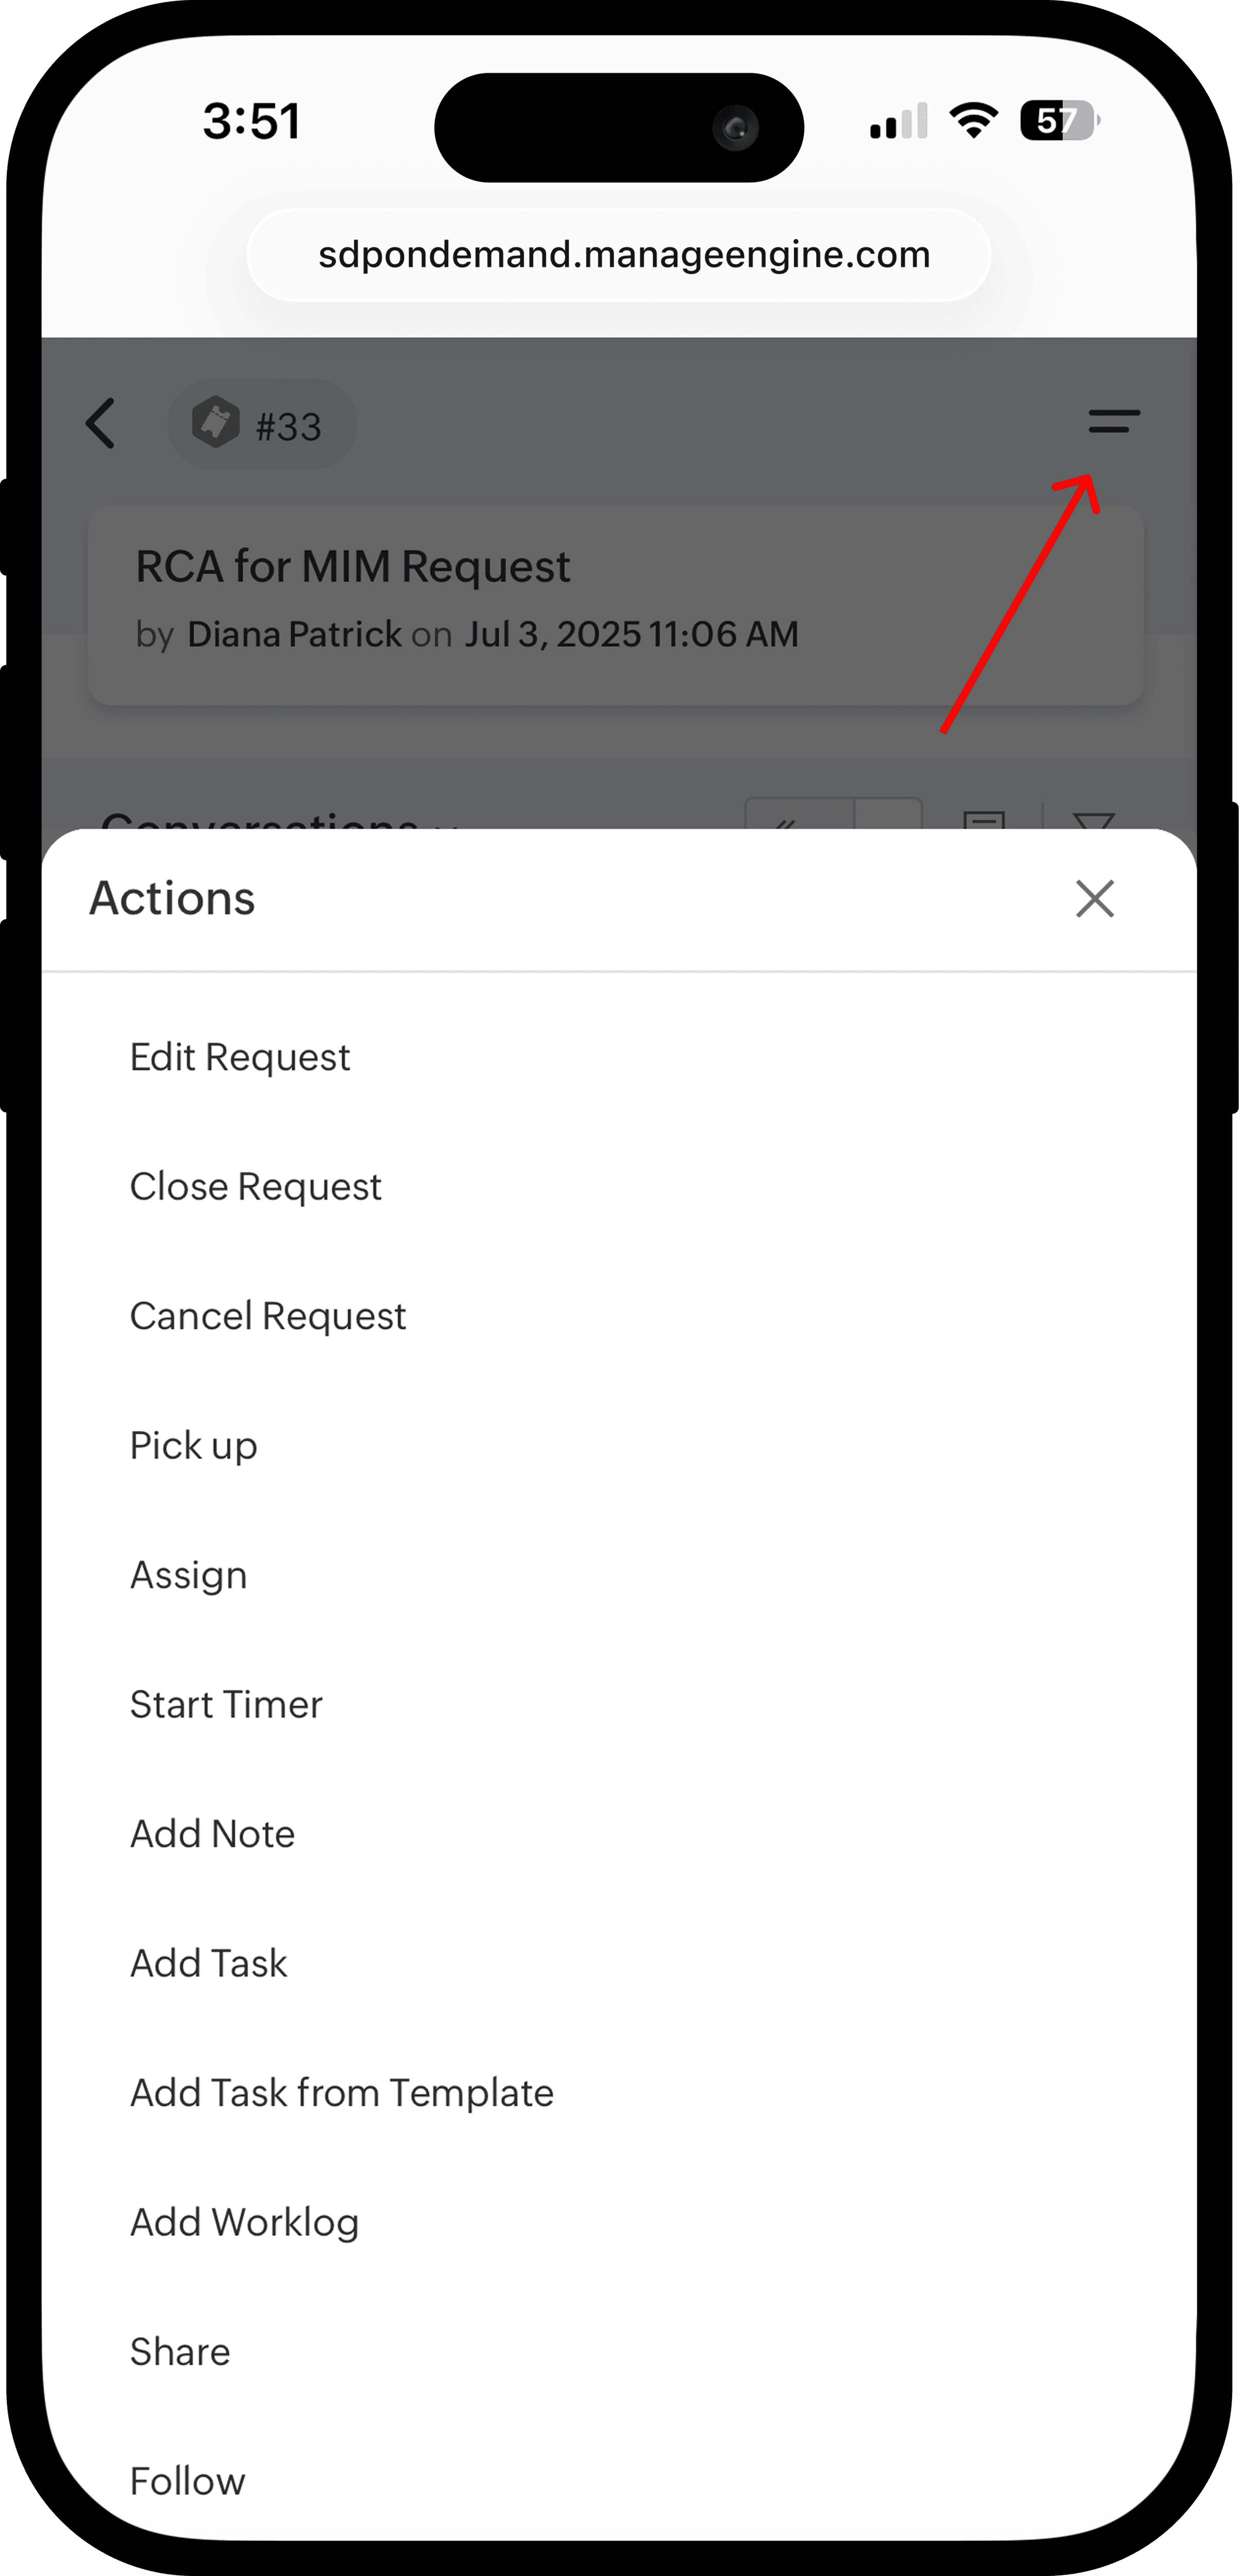 |
Custom View | |
View your personalized list that filters and displays only records matching specific criteria. 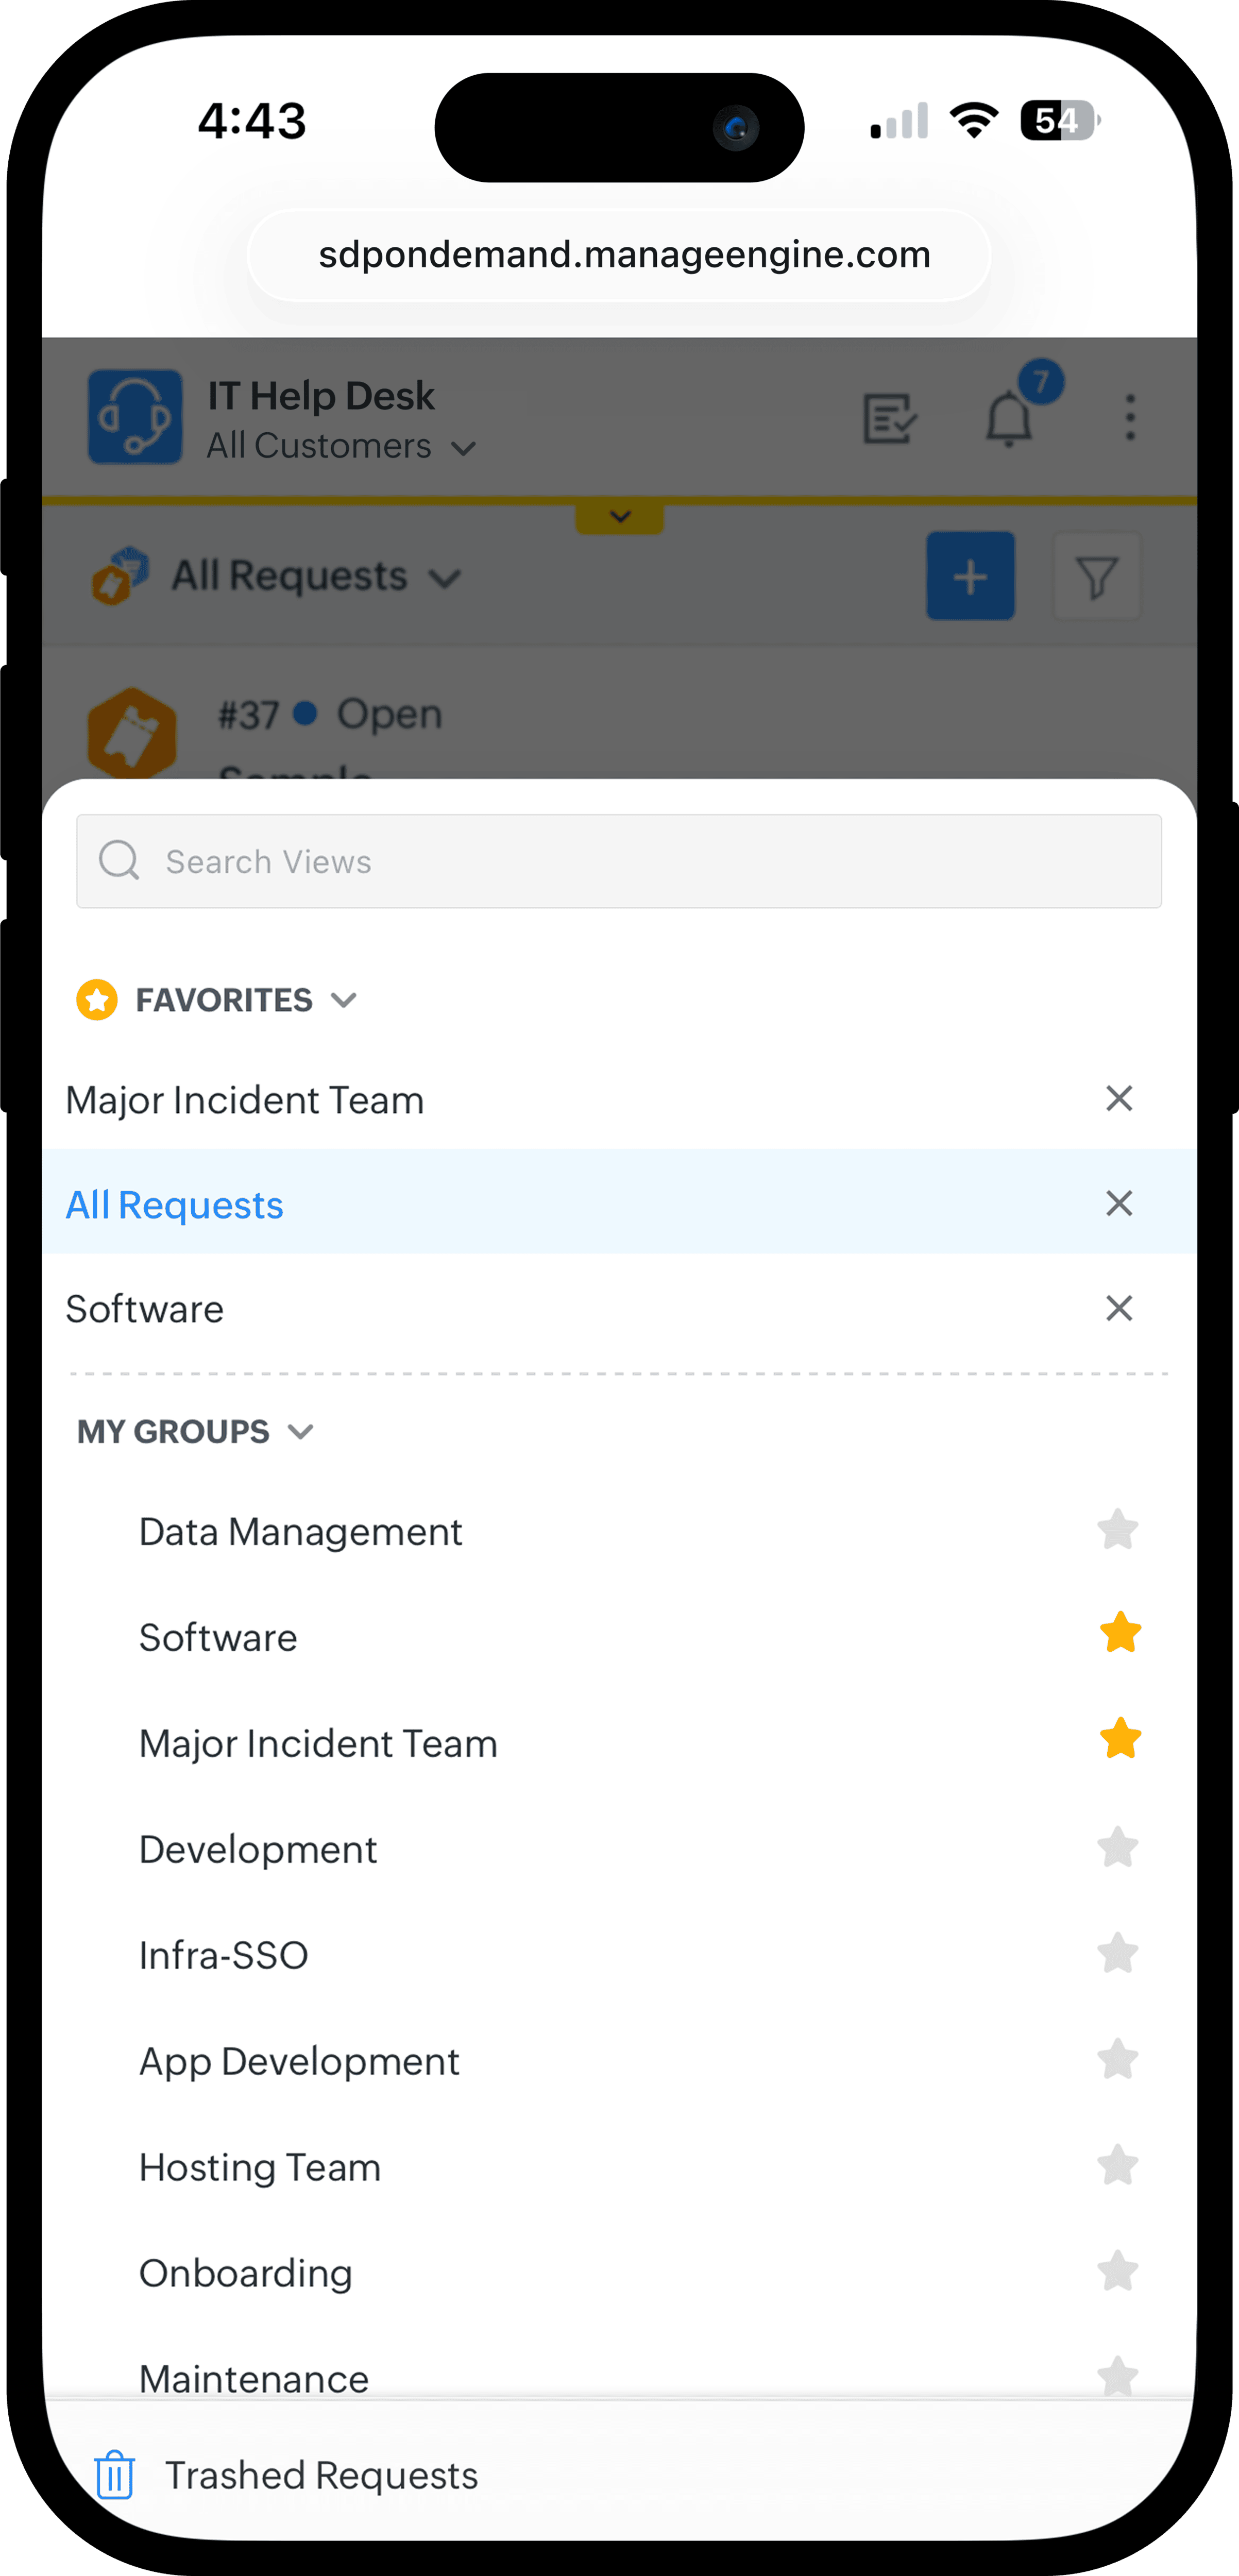 | |
An internal error occurs when a technician with a site-restricted role allocates consumables tracked by batch/lot details.
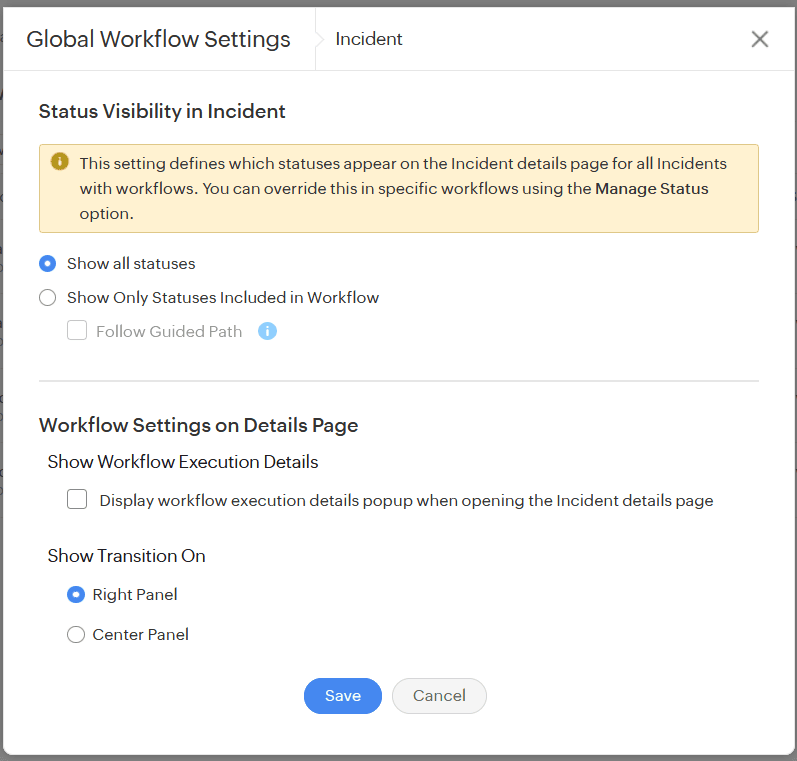
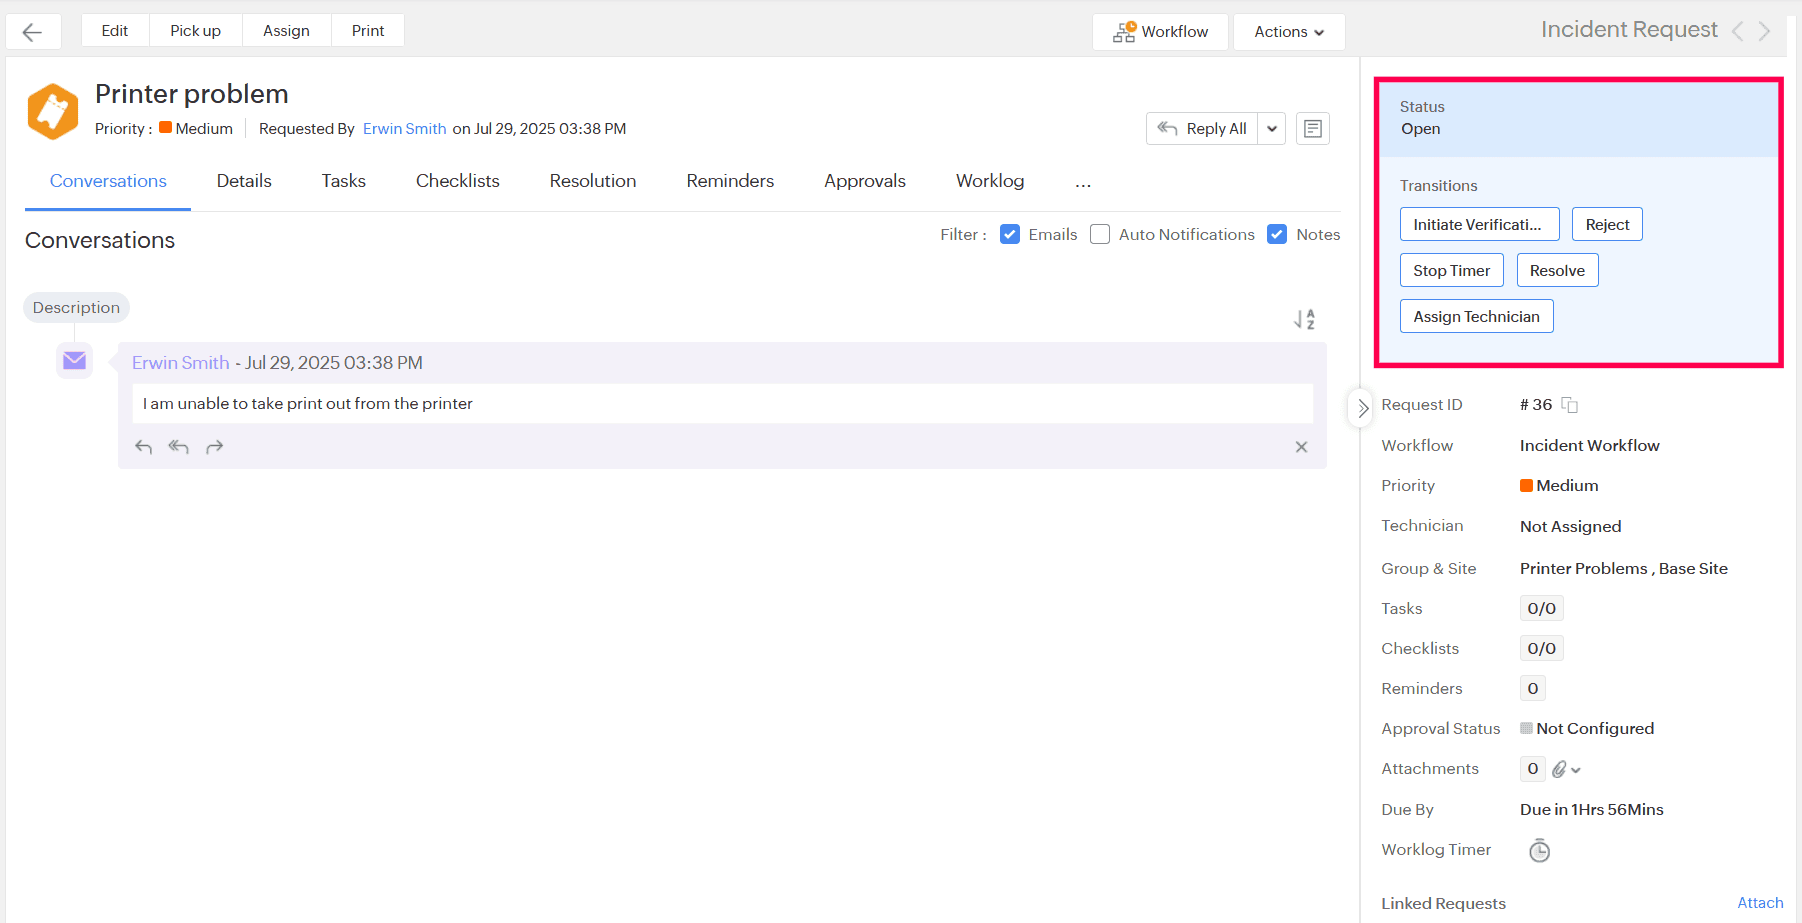
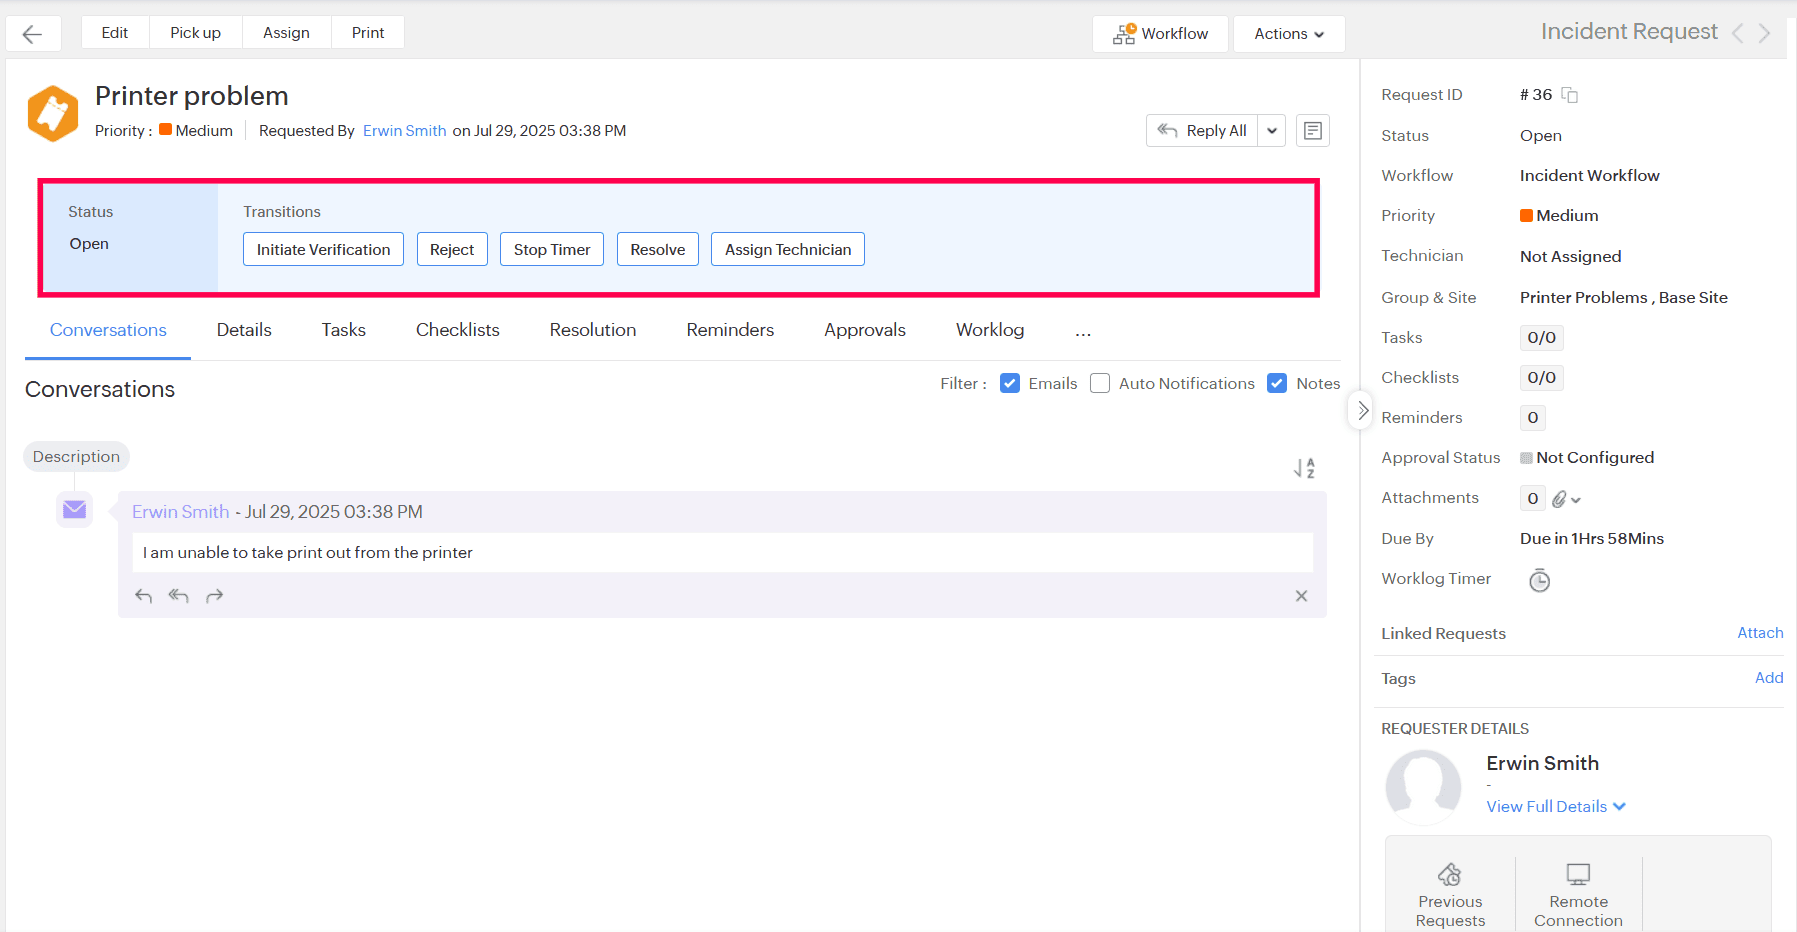
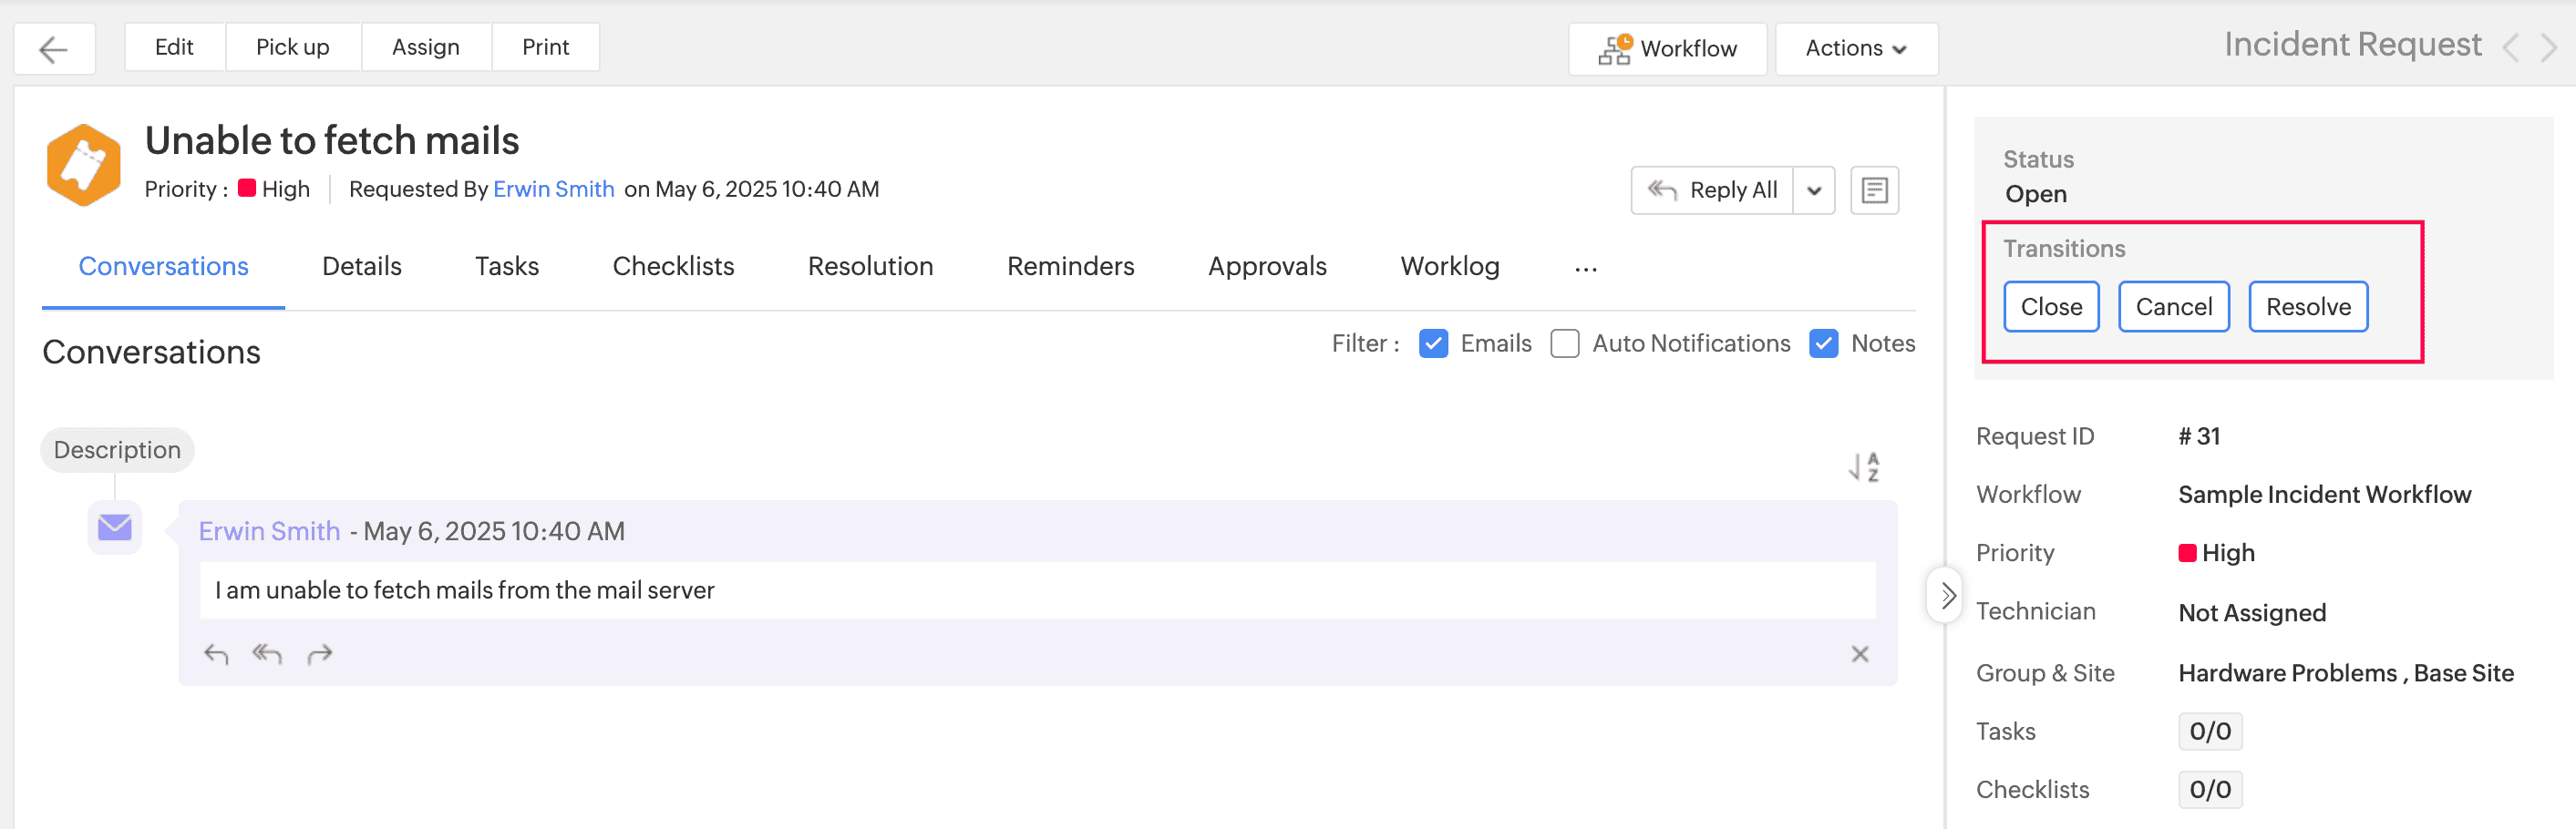
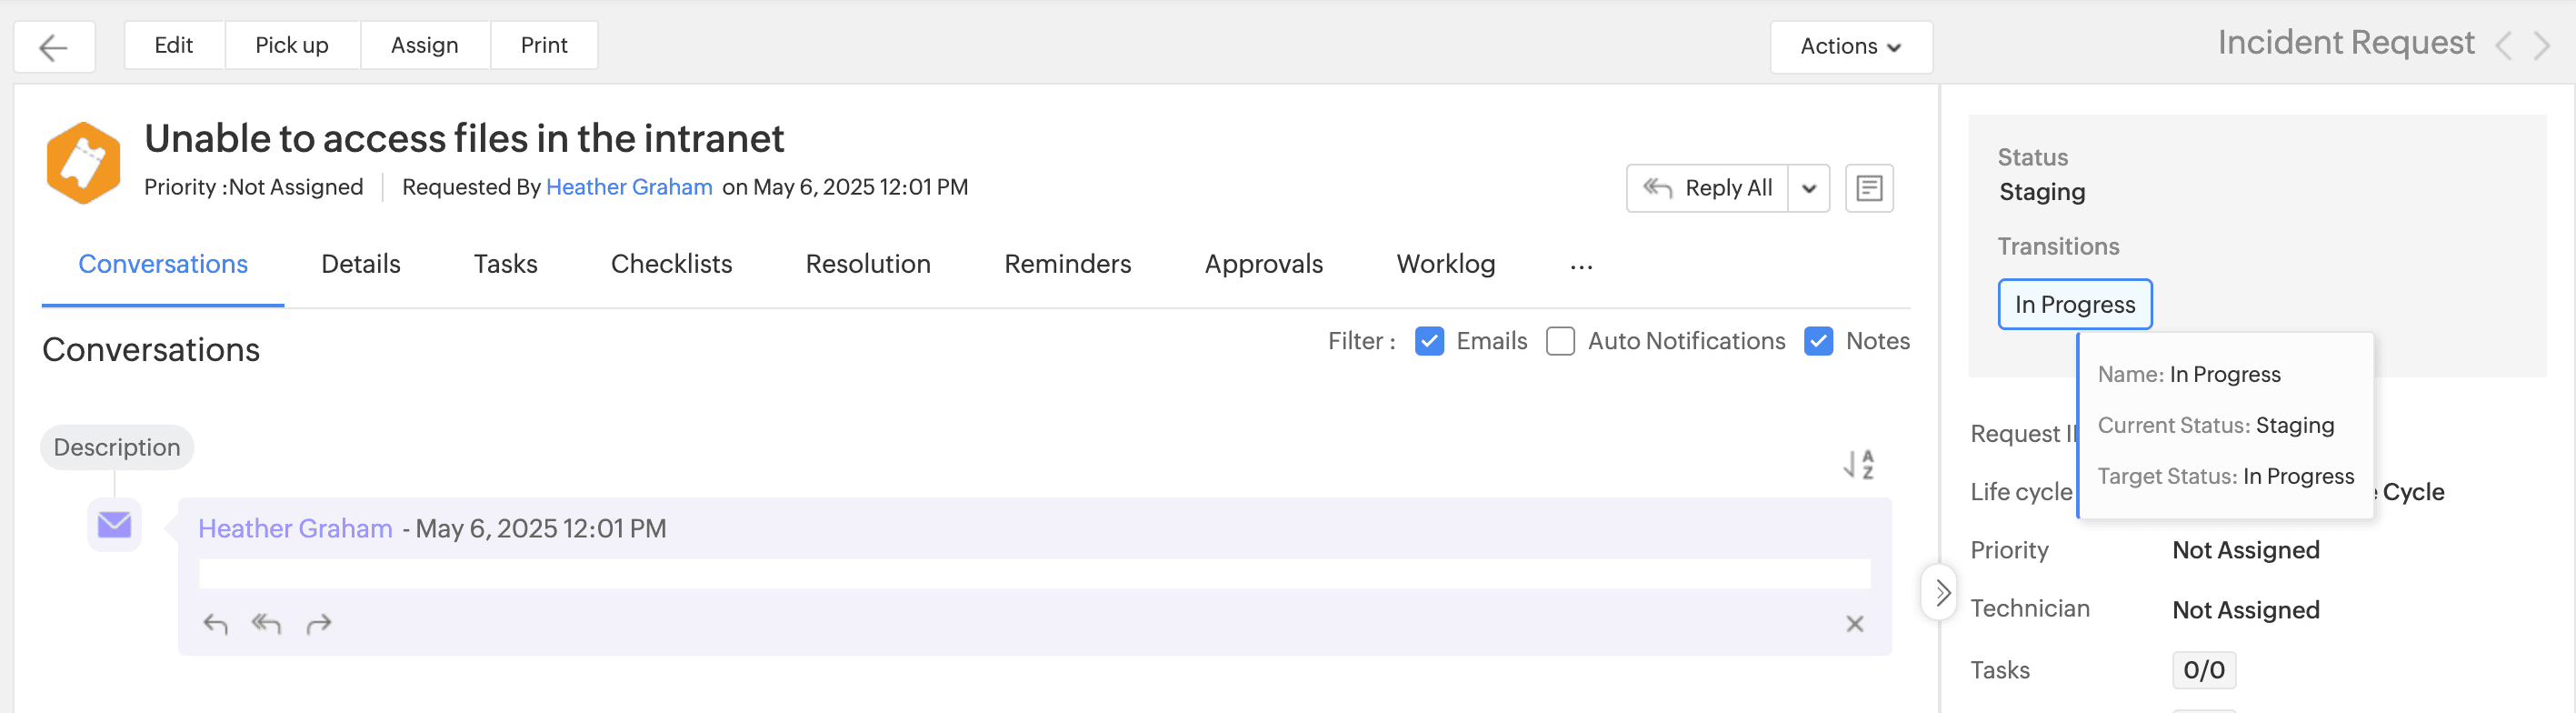
Life cycle transition buttons will now appear in the center panel of the module's details page instead of the right panel, restoring the earlier behavior.
Note: The position of life cycle transition buttons cannot be customized.
The width of life cycle and workflow transition buttons is increased for better usability.
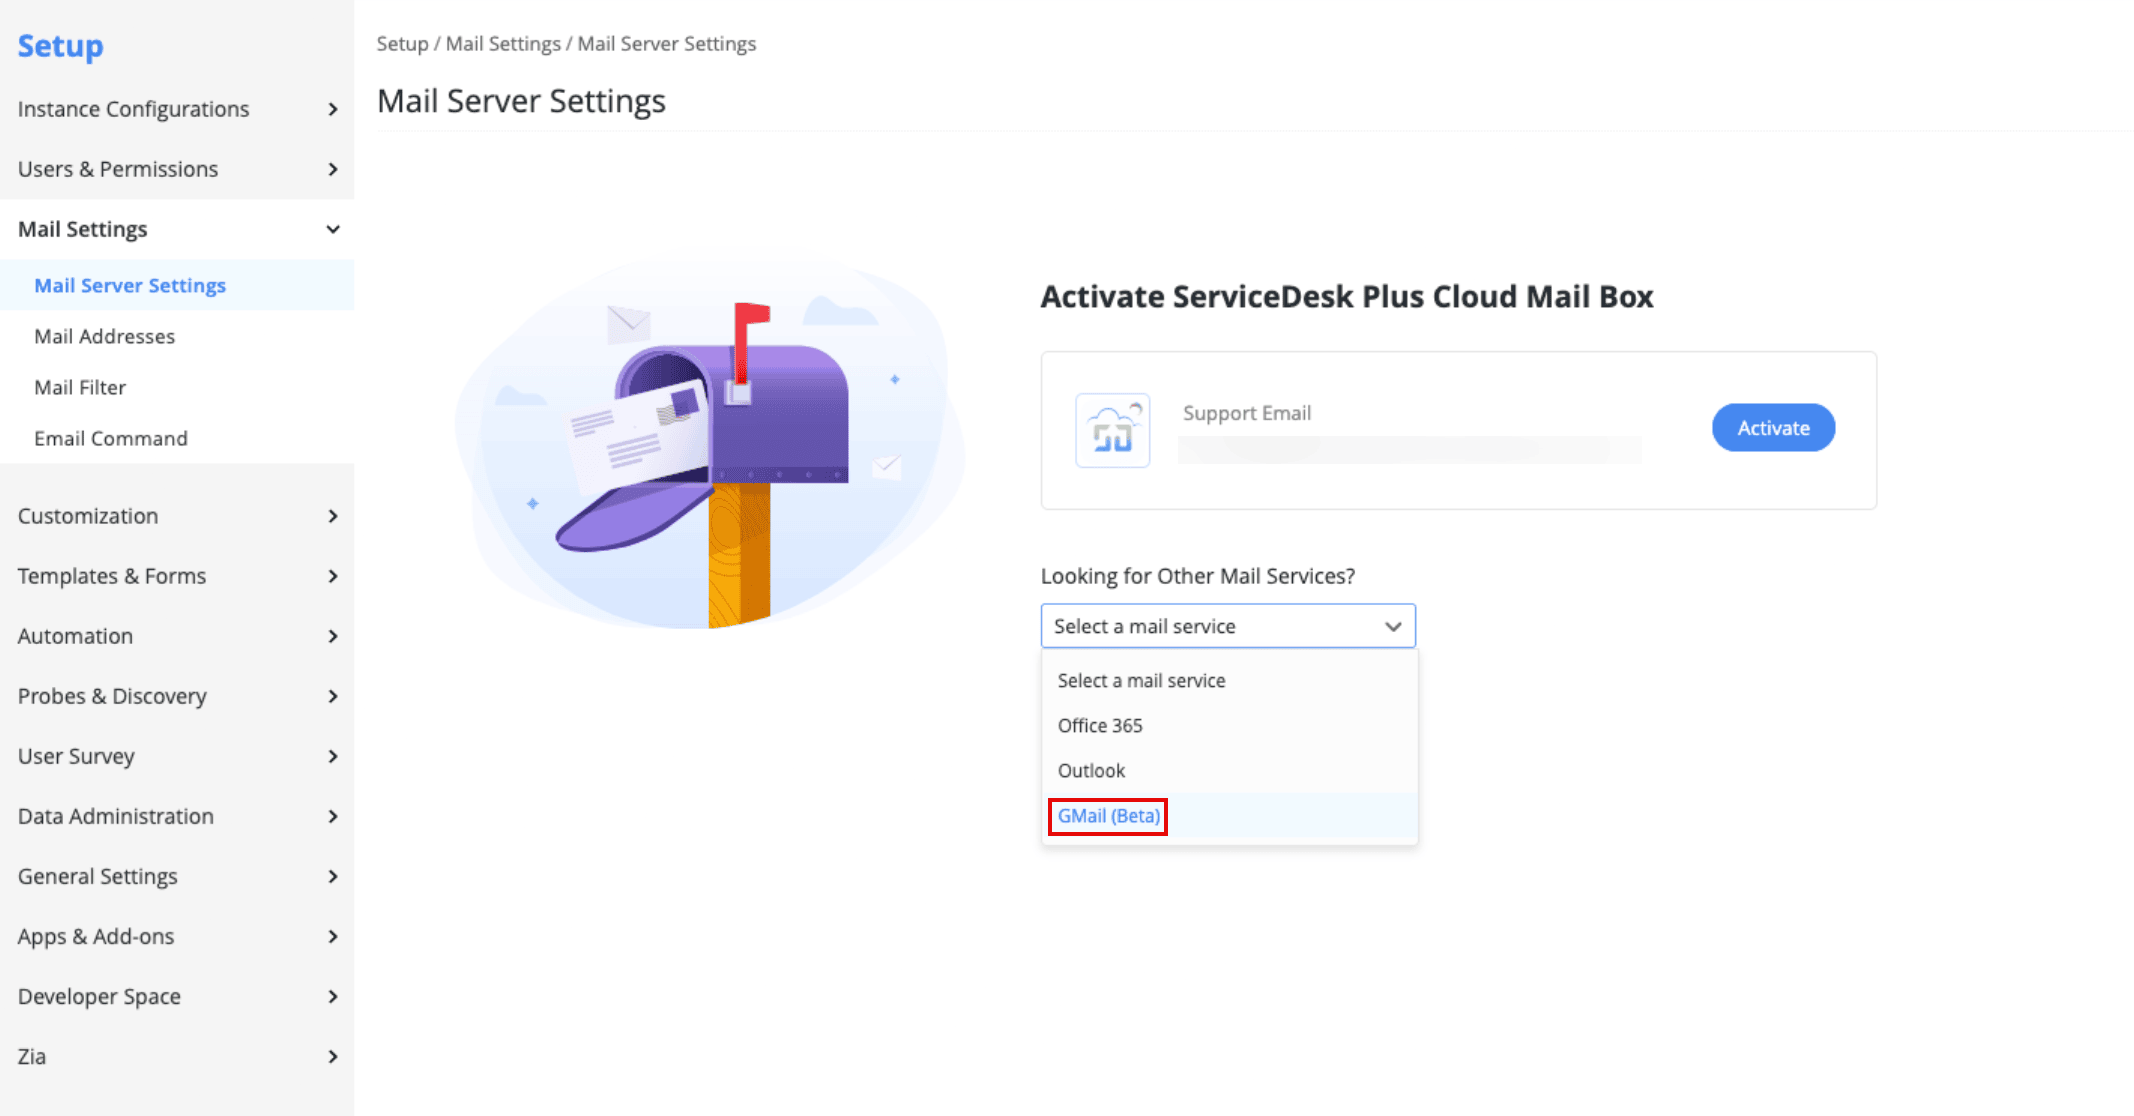
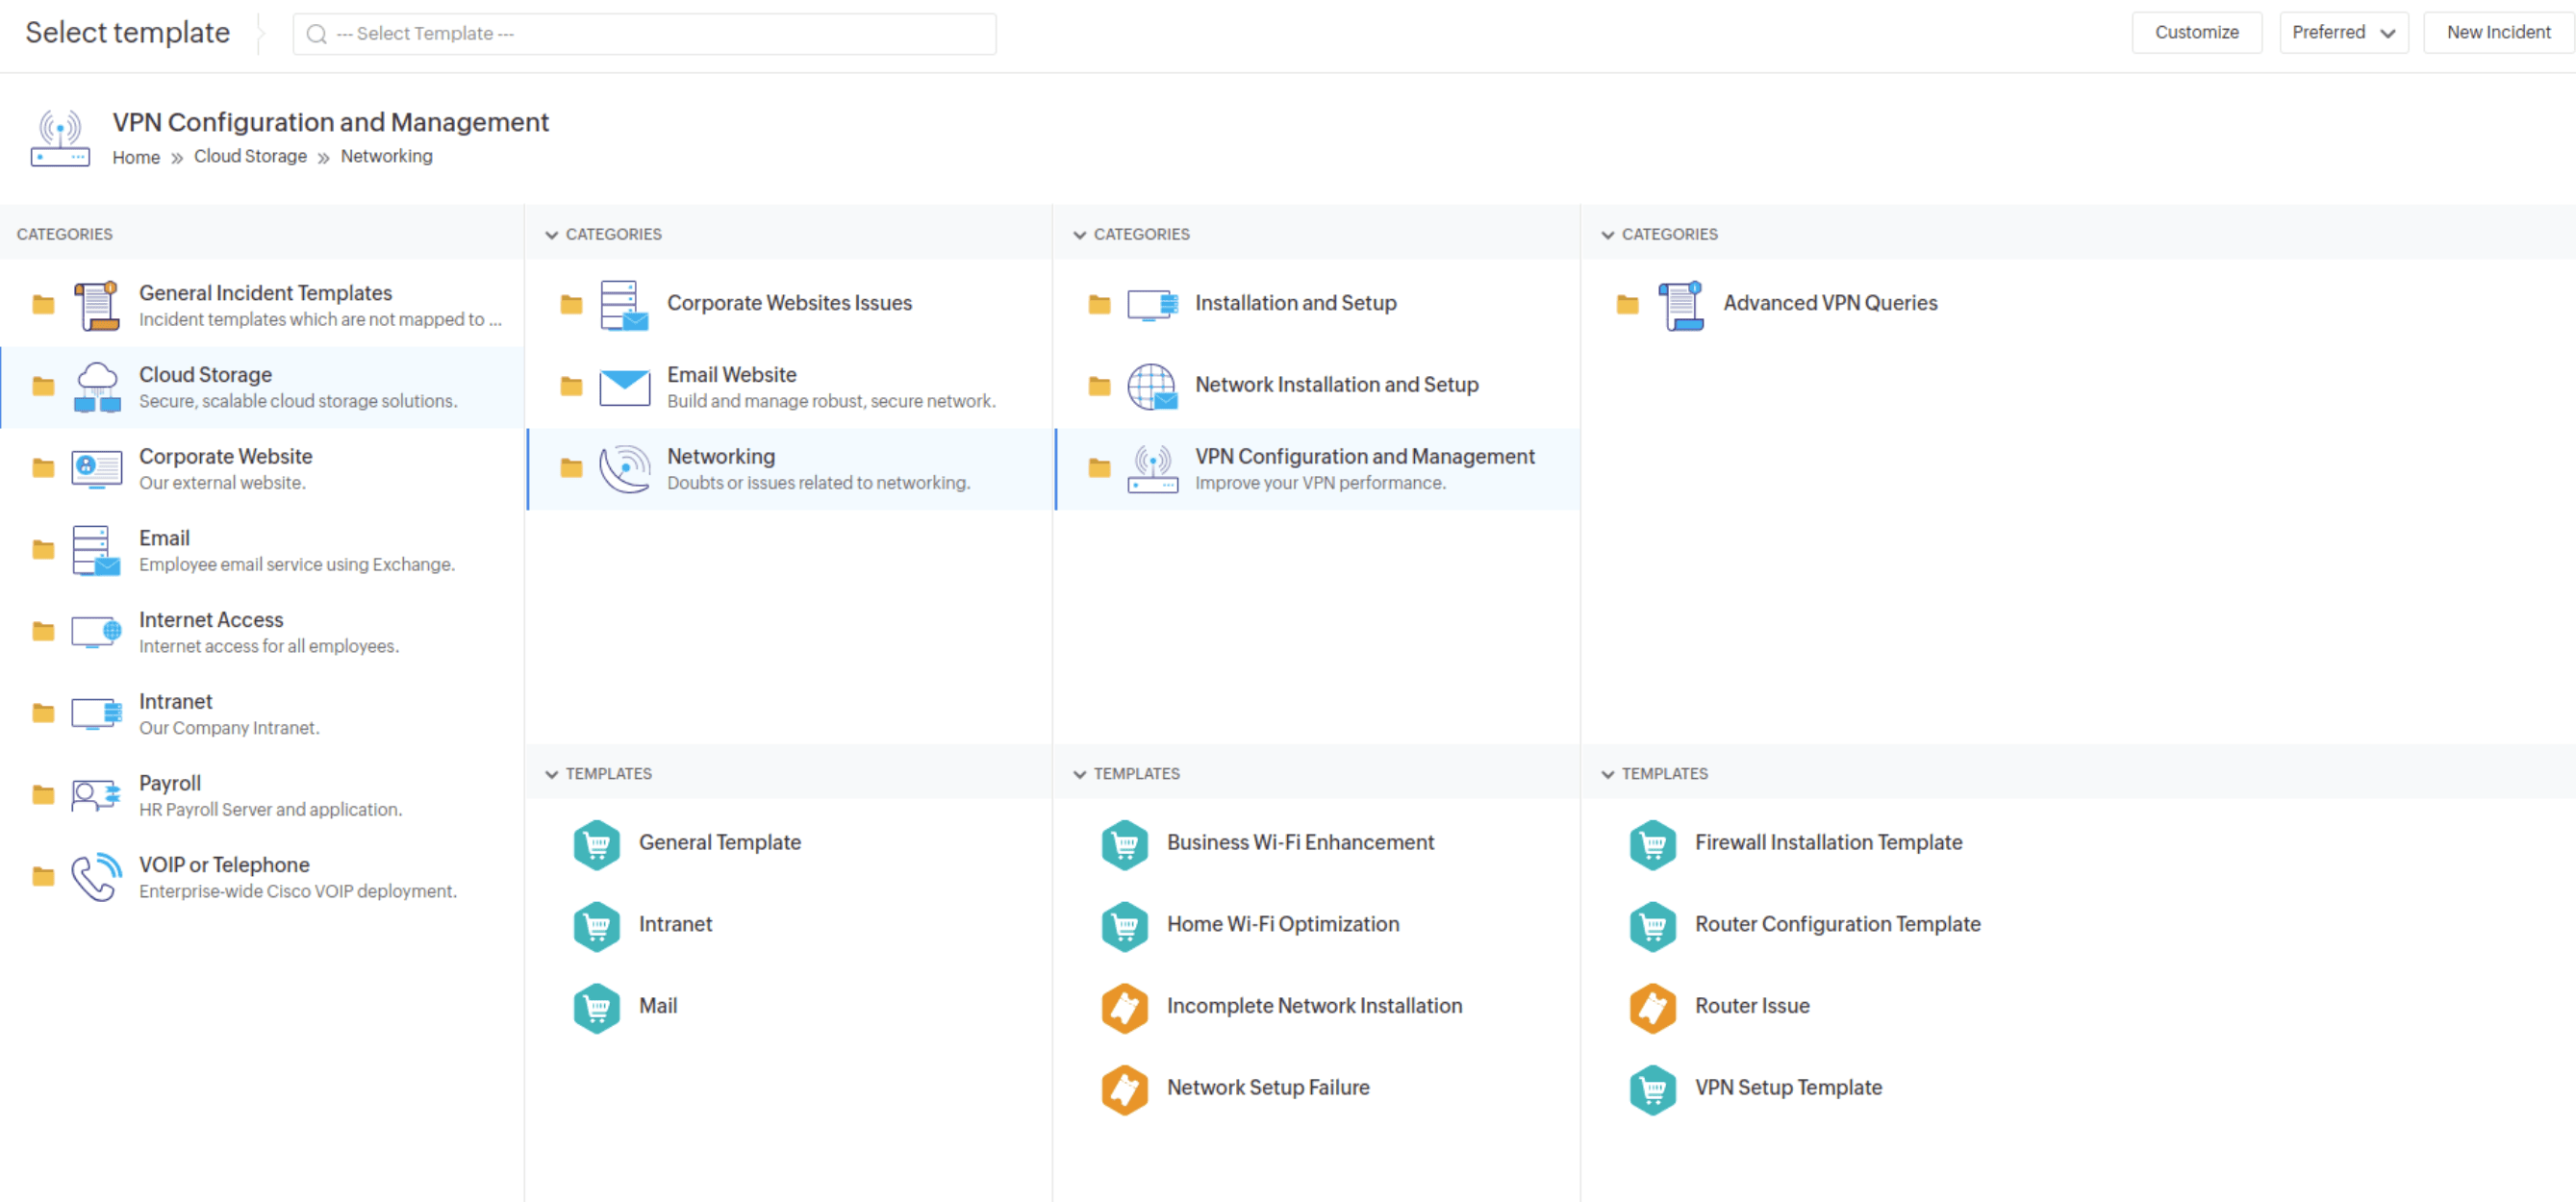
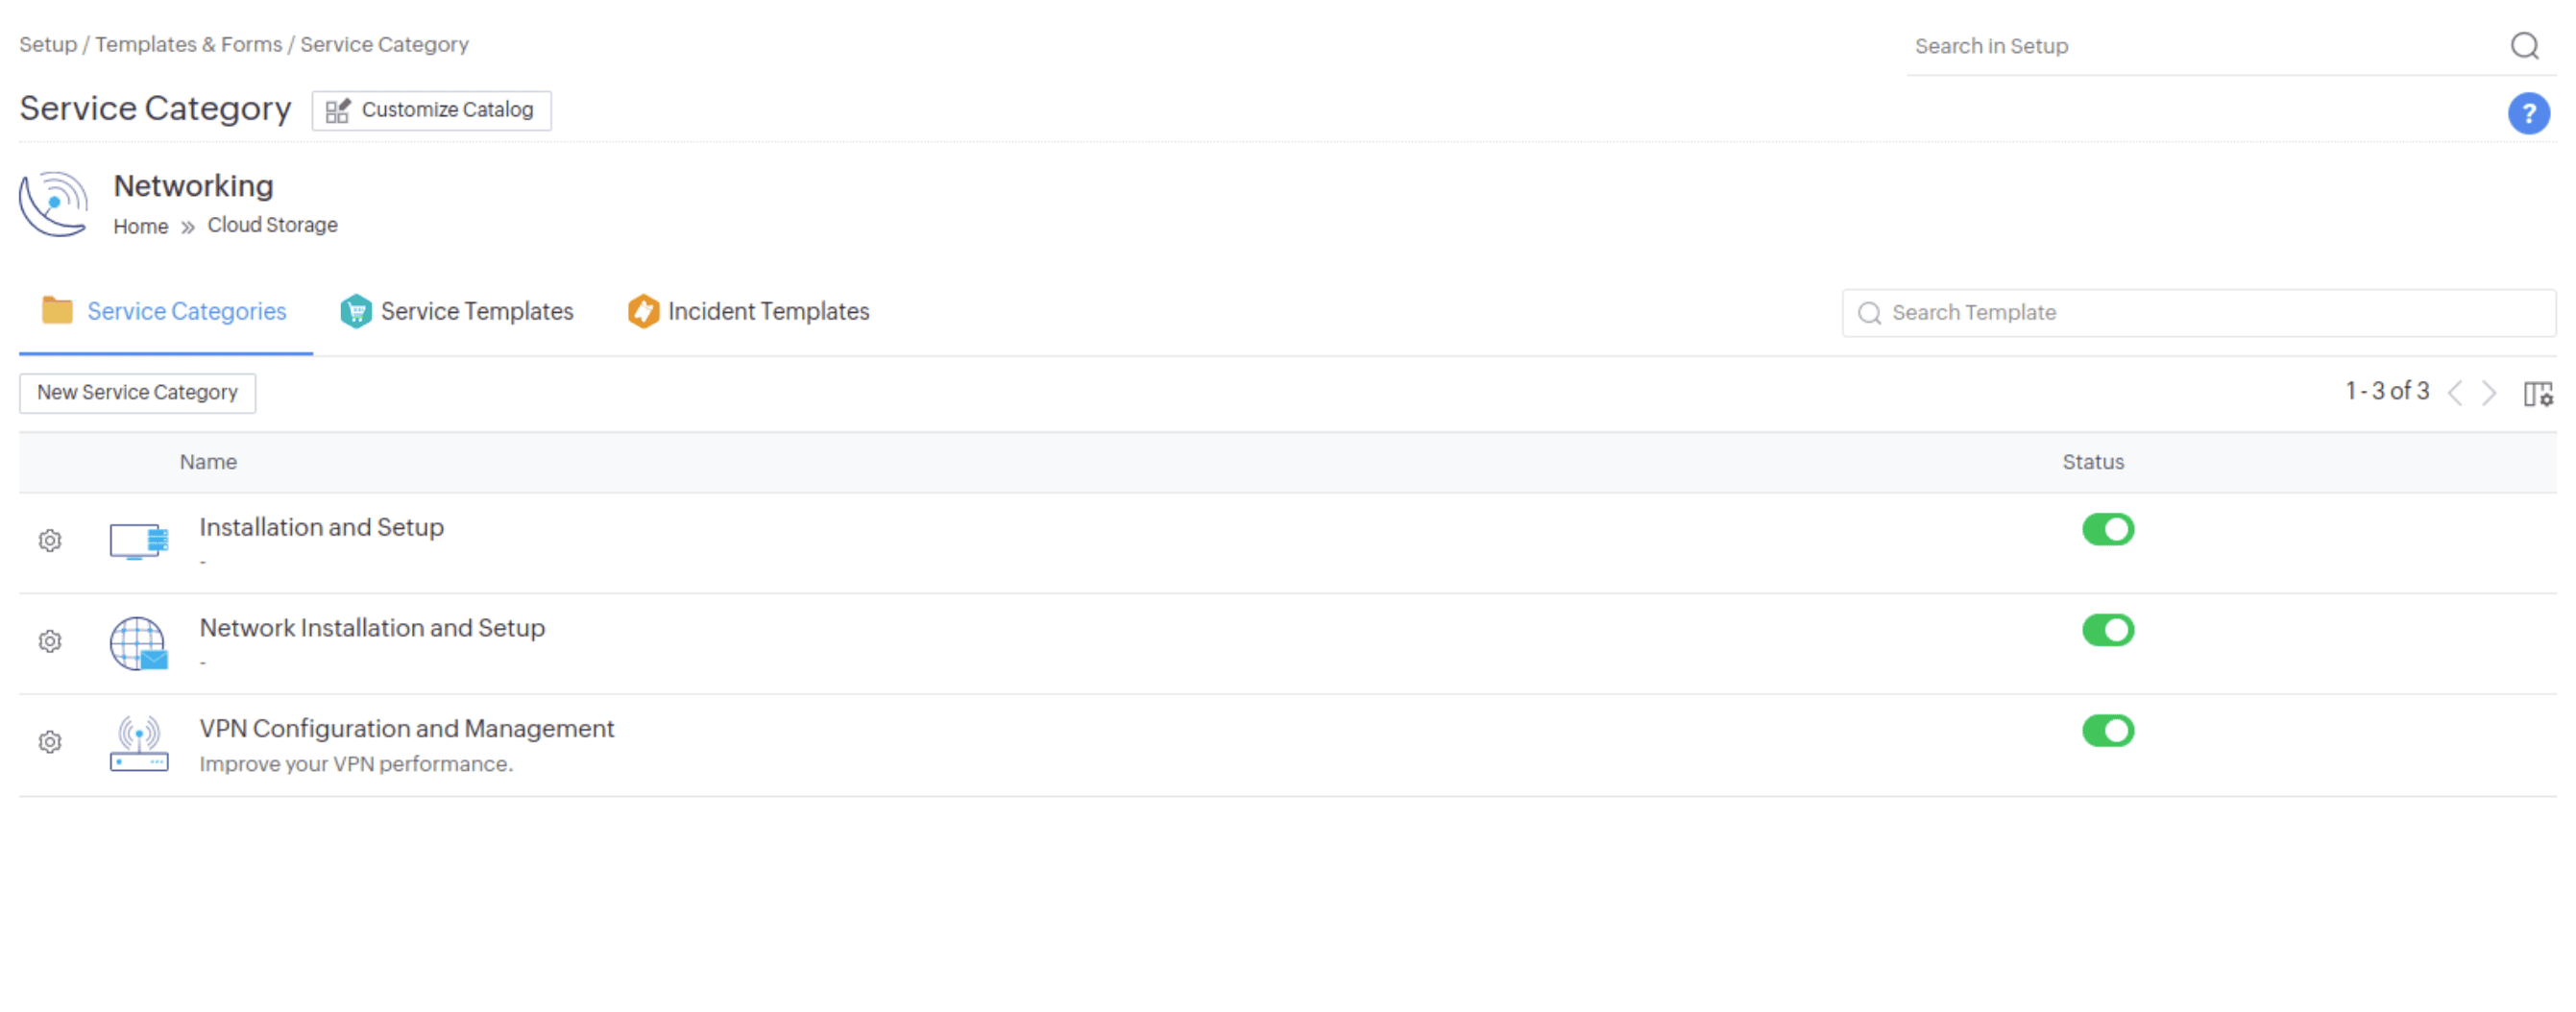
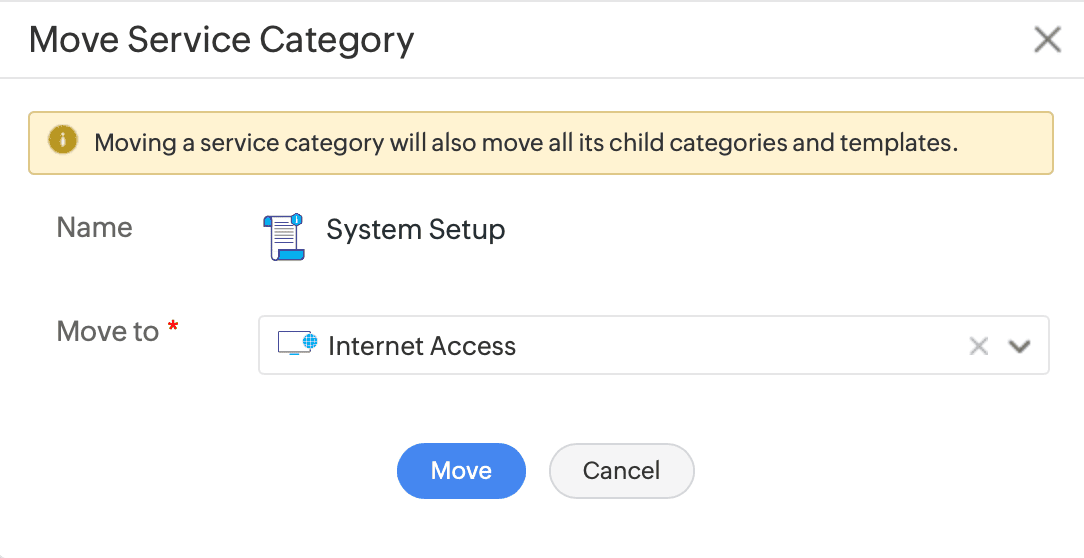
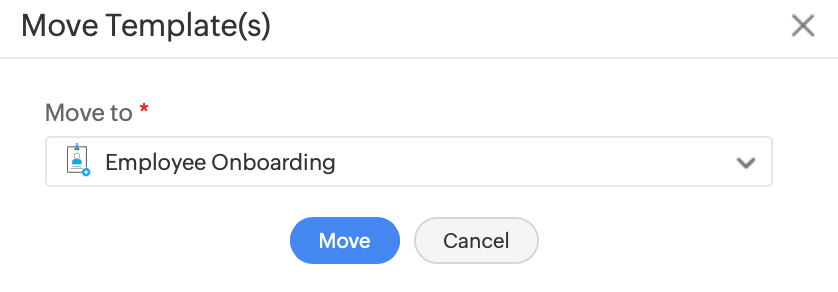
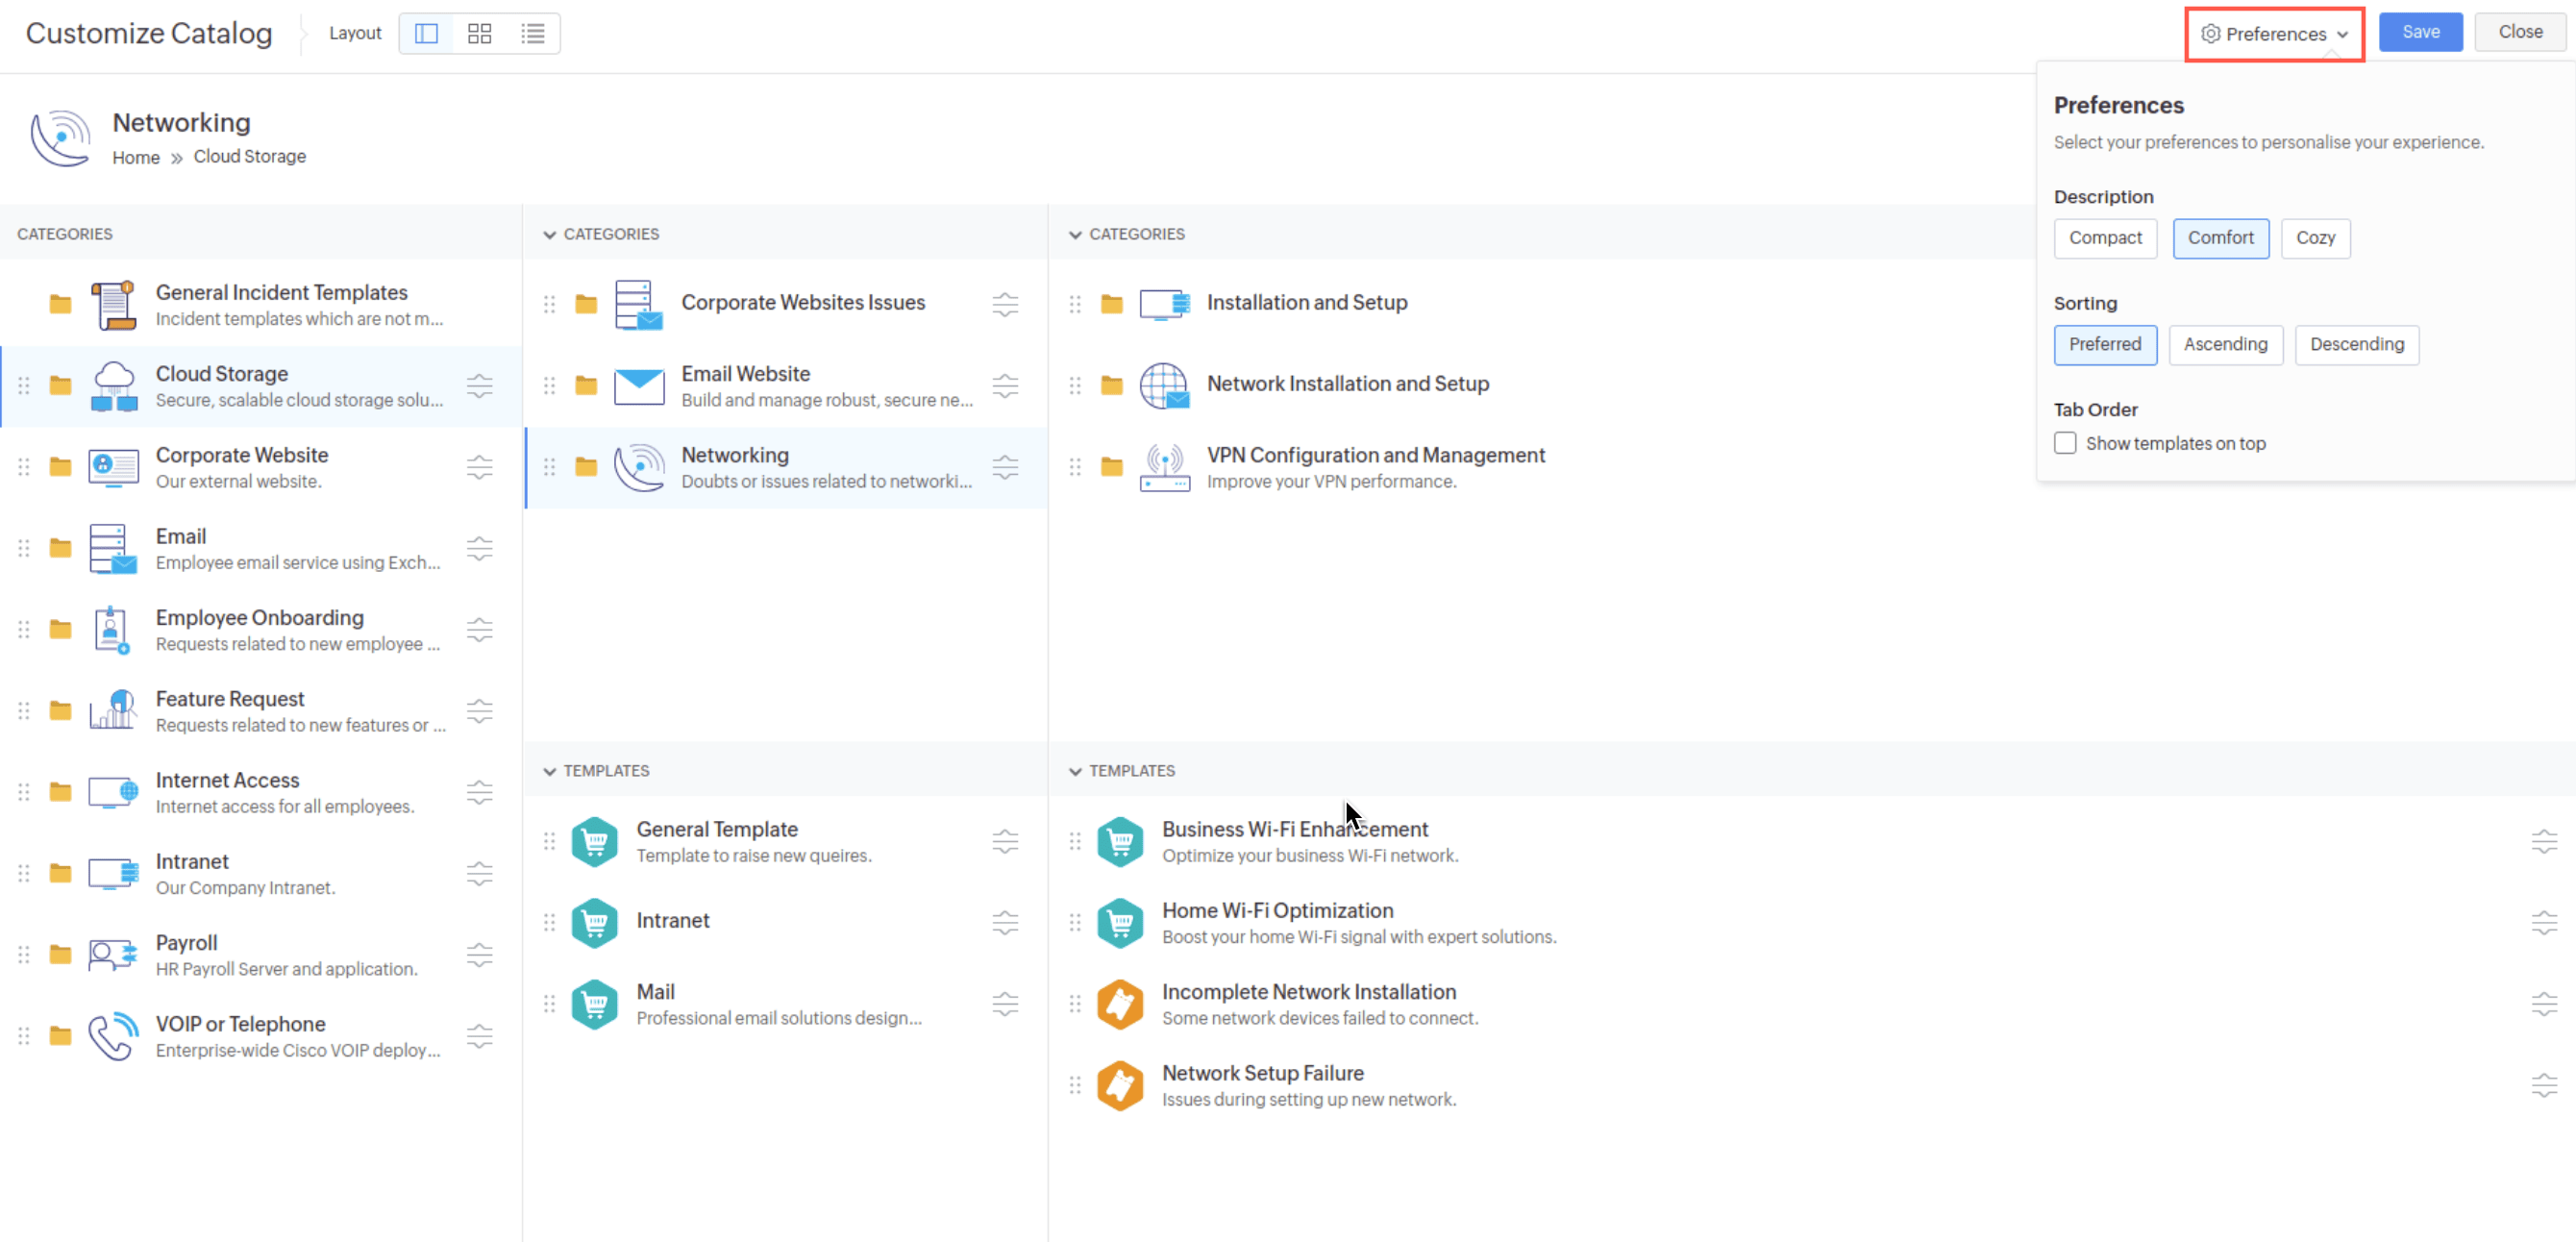

Note: Advanced permissions for Problems are now grouped into Edit permission.
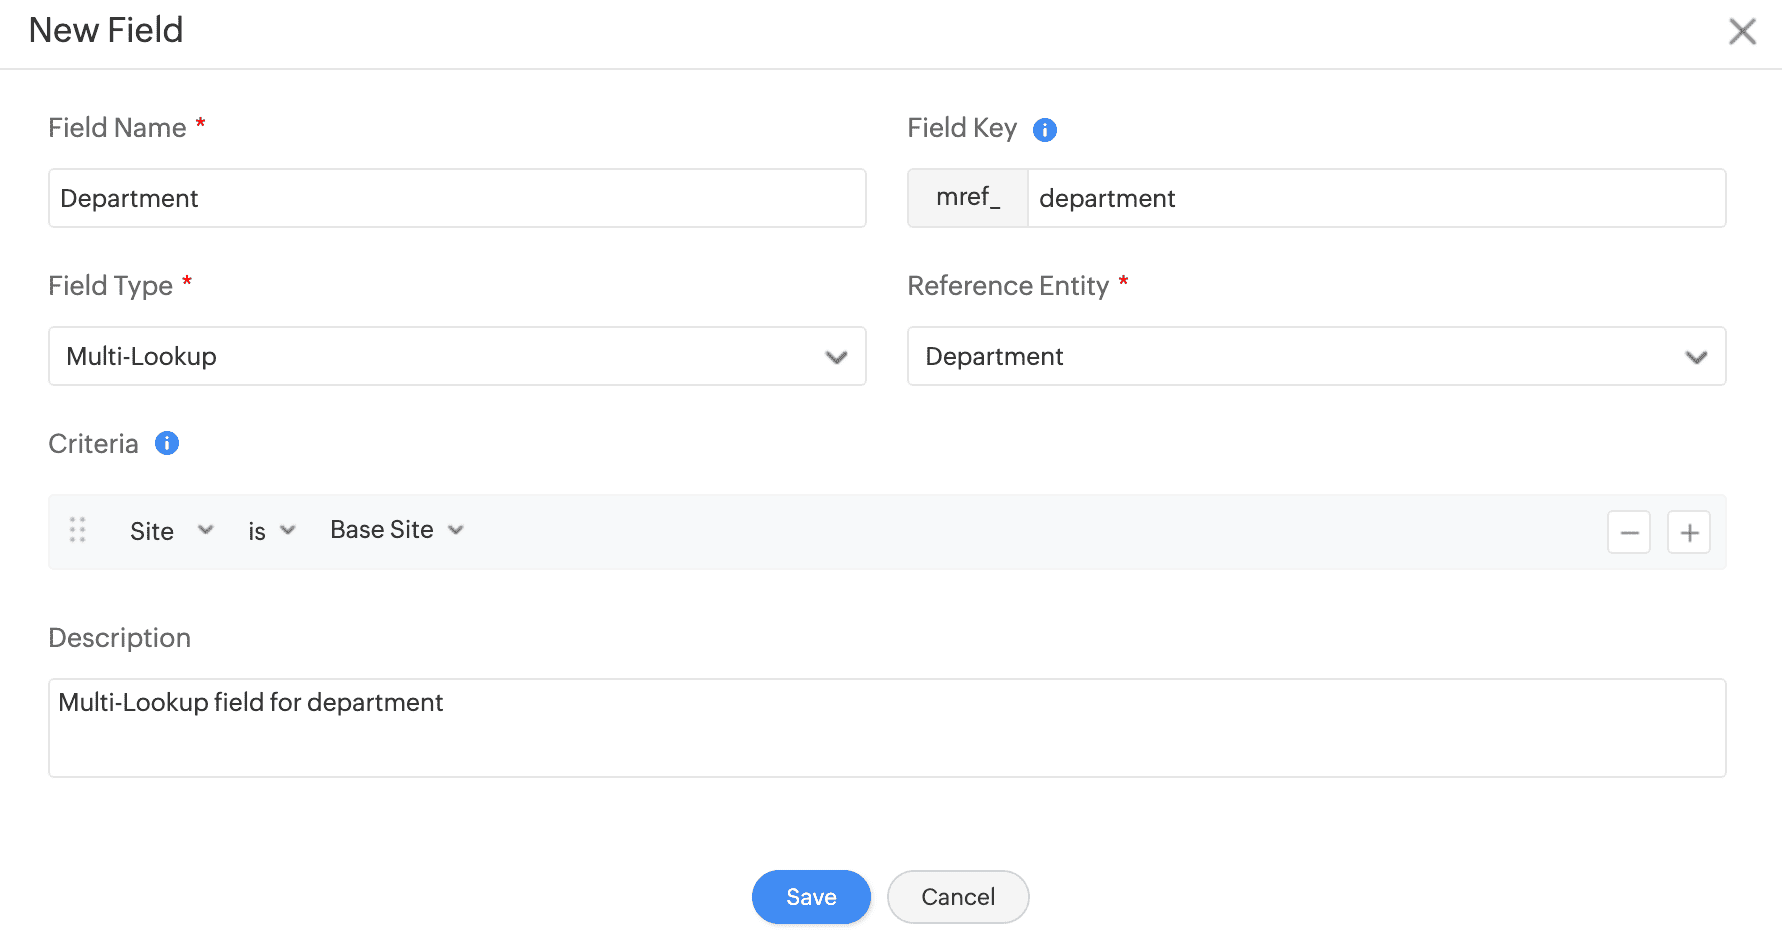
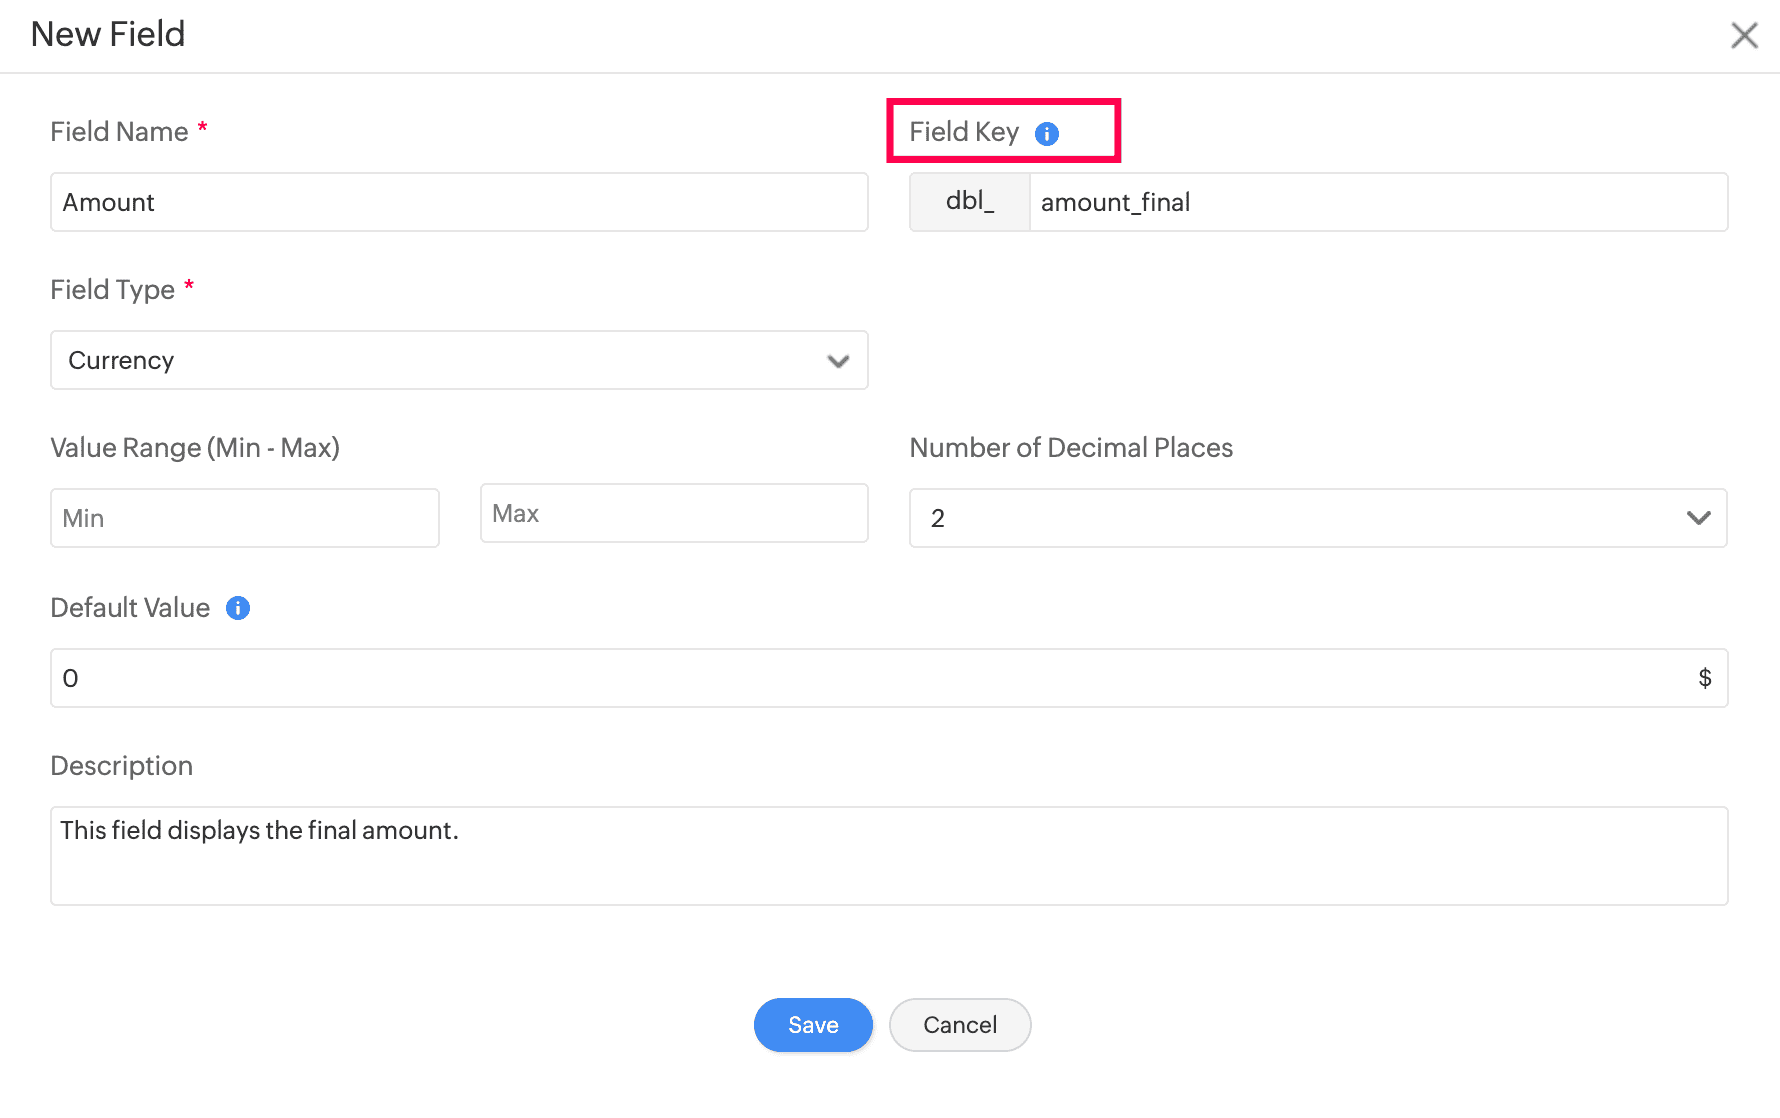
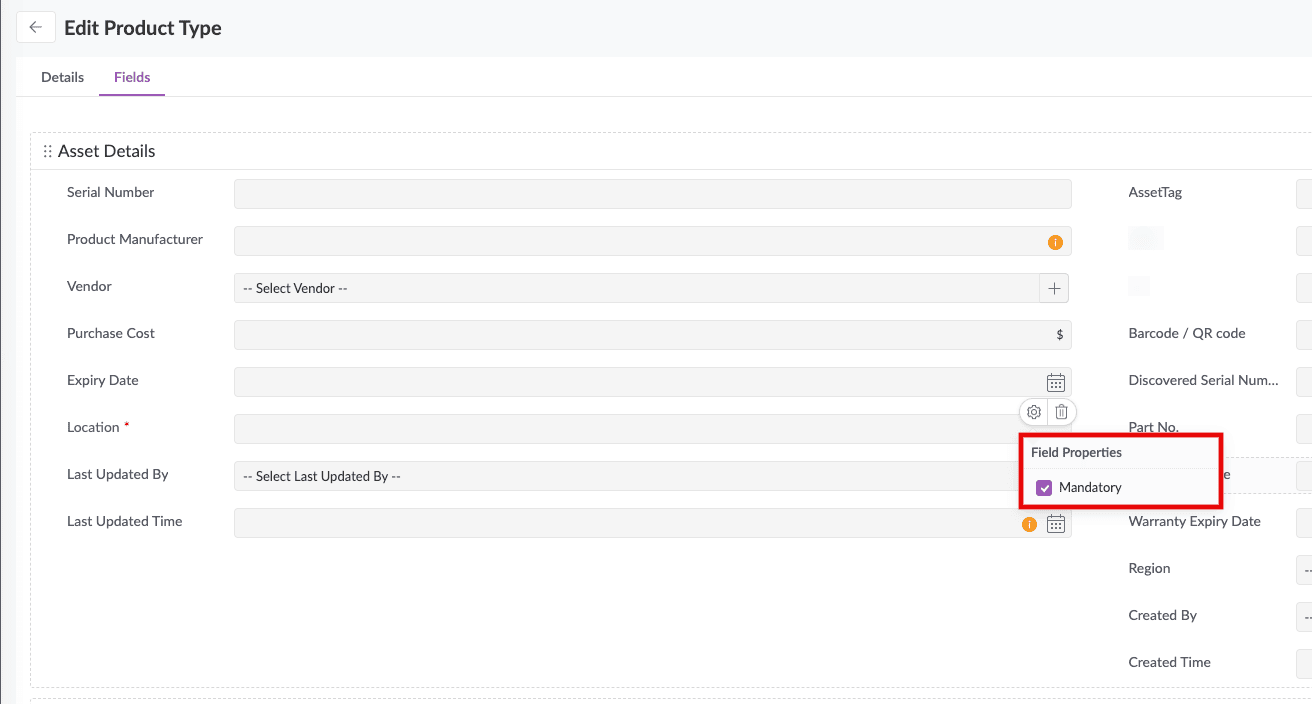
Note: The existing additional fields with system-generated Field Keys (e.g., udf_char1, udf_char2, etc.) will remain unchanged.
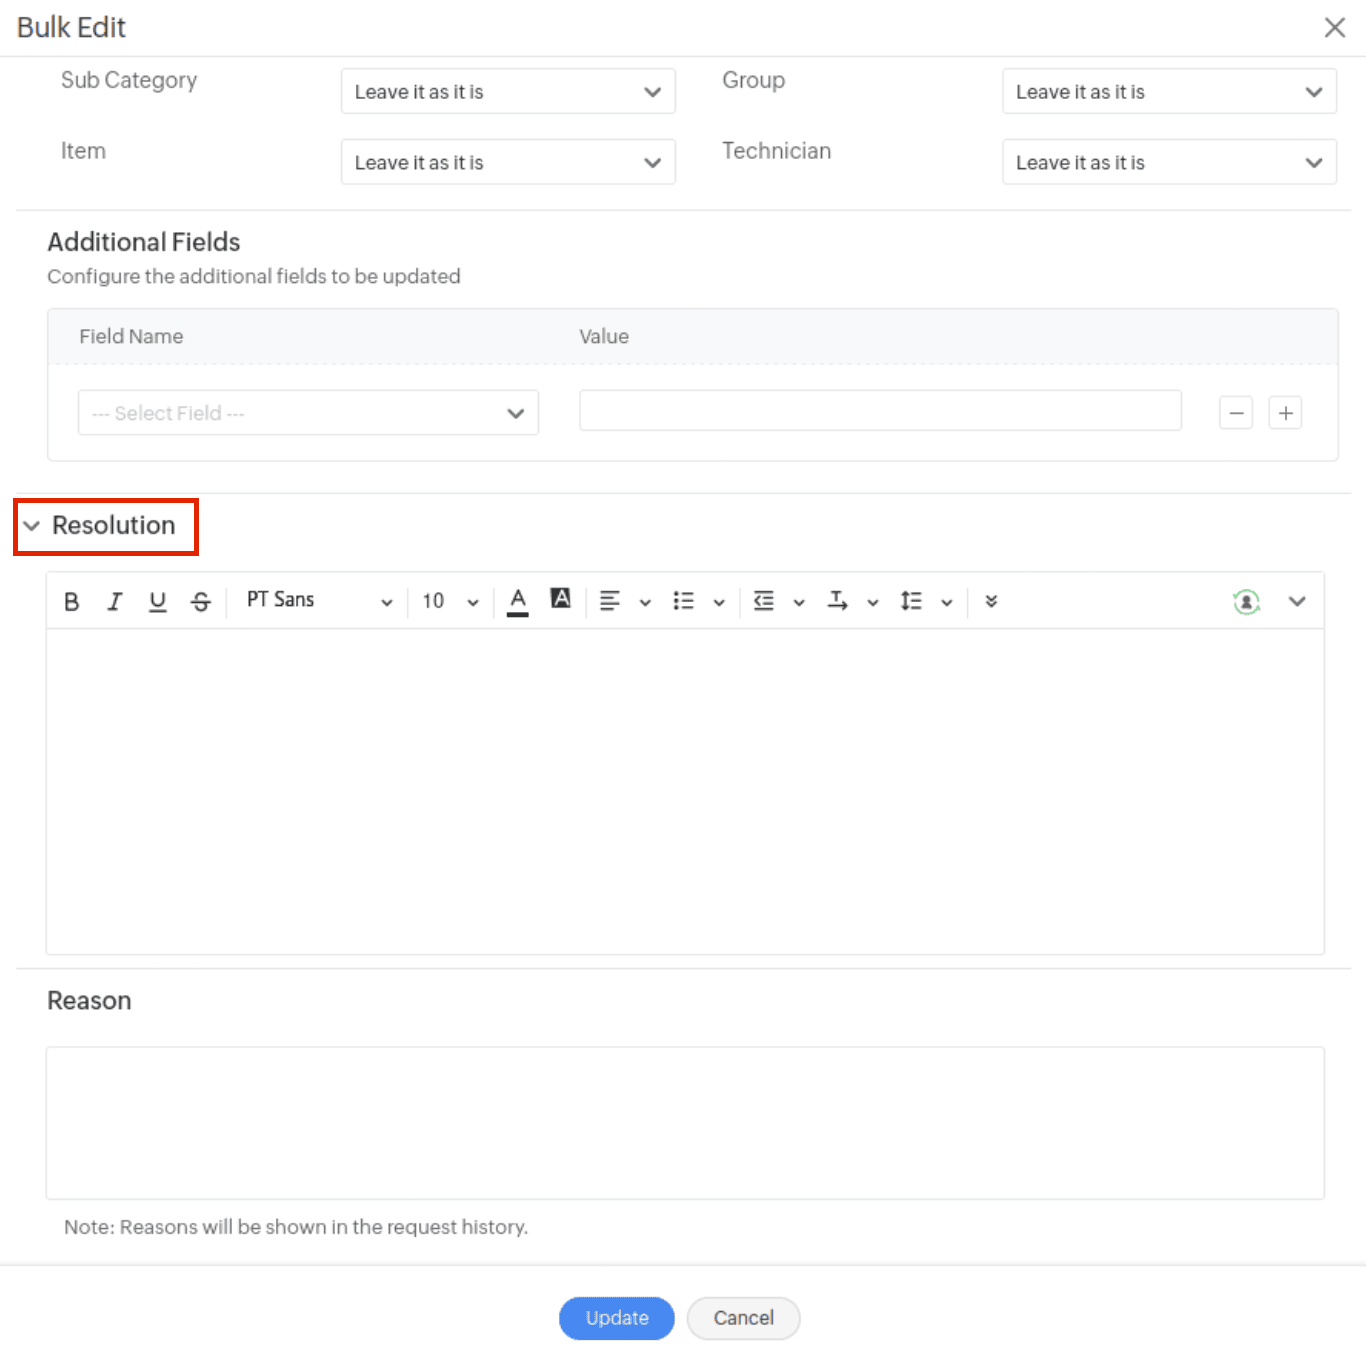
Field prediction is now supported for the following languages:
English (en), Croatian (hr), Czech (cs), Danish (da), Dutch (nl), Estonian (et), Finnish (fi), French (fr), German (de), Hungarian (hu), Icelandic (is), Indonesian (id), Polish (pl), Portuguese (pt), Spanish (es), Latvian (lv), Lithuanian (lt), Norwegian (no), Romanian (ro), Swedish (sv), Turkish (tr), Vietnamese (vi), Italian (it), and Welsh (cy).
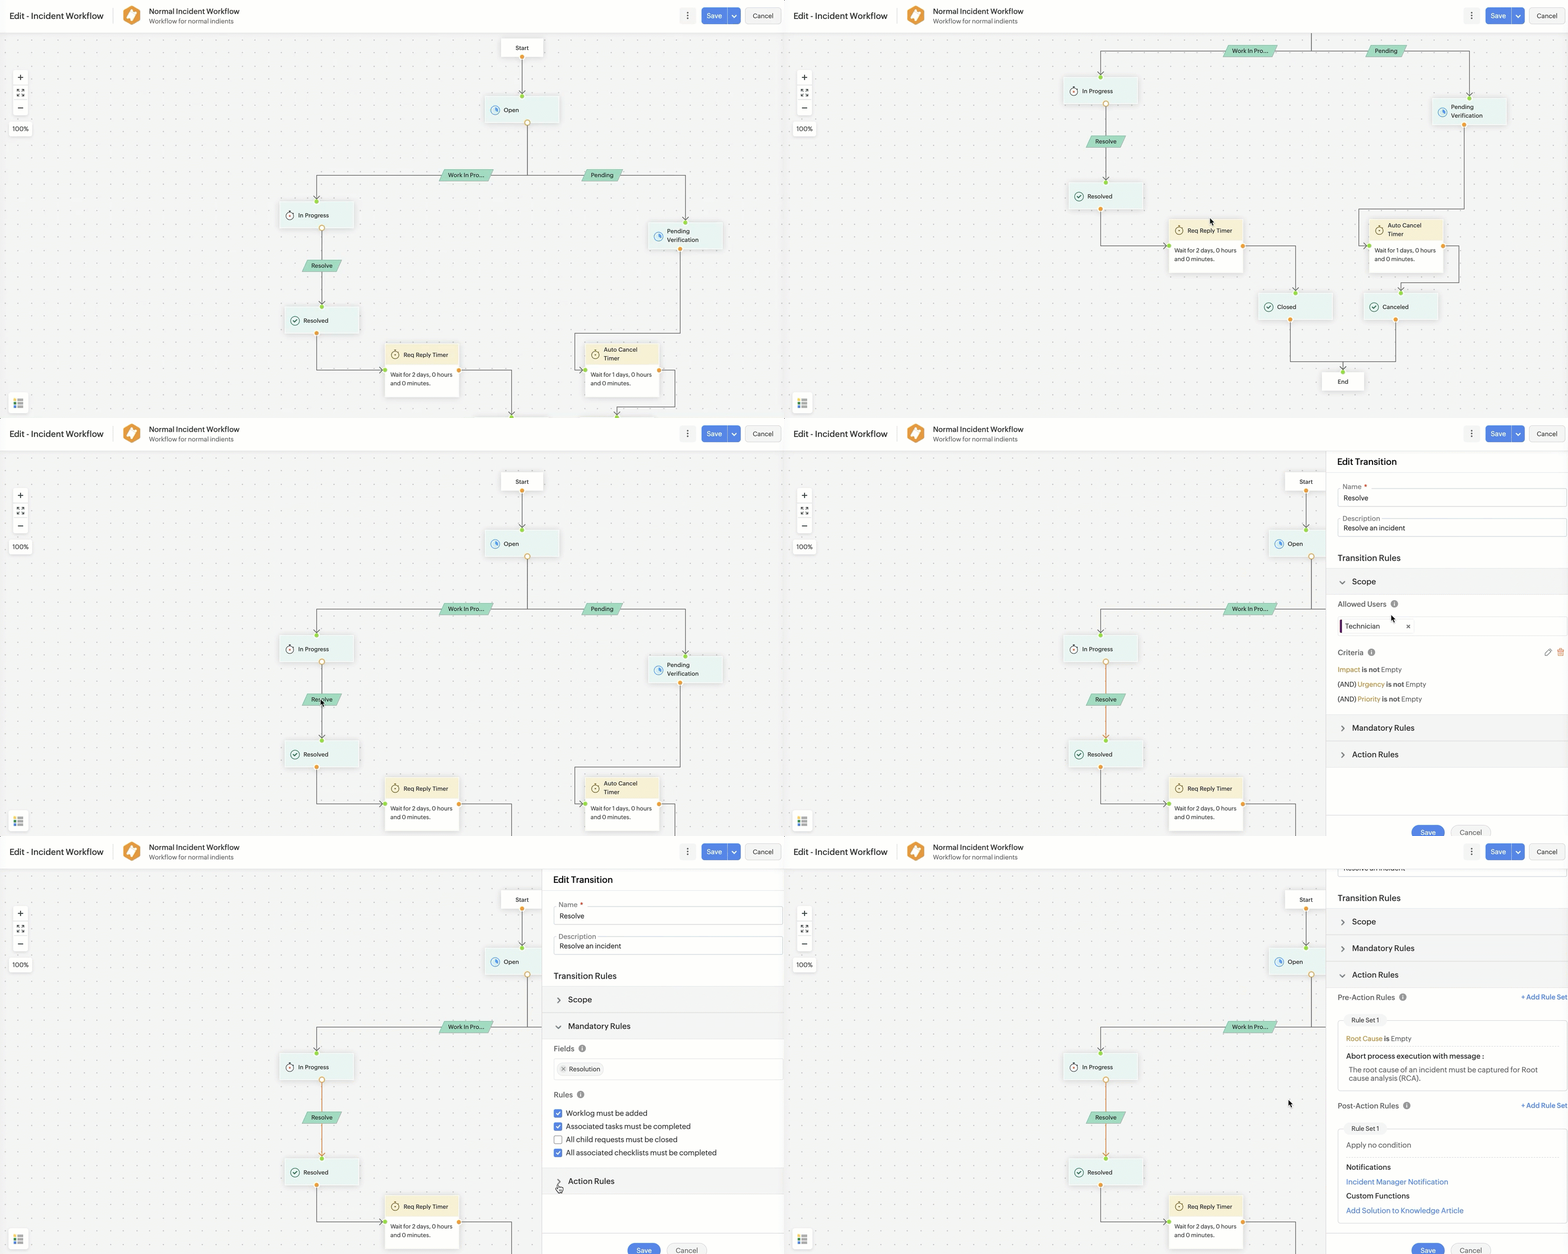
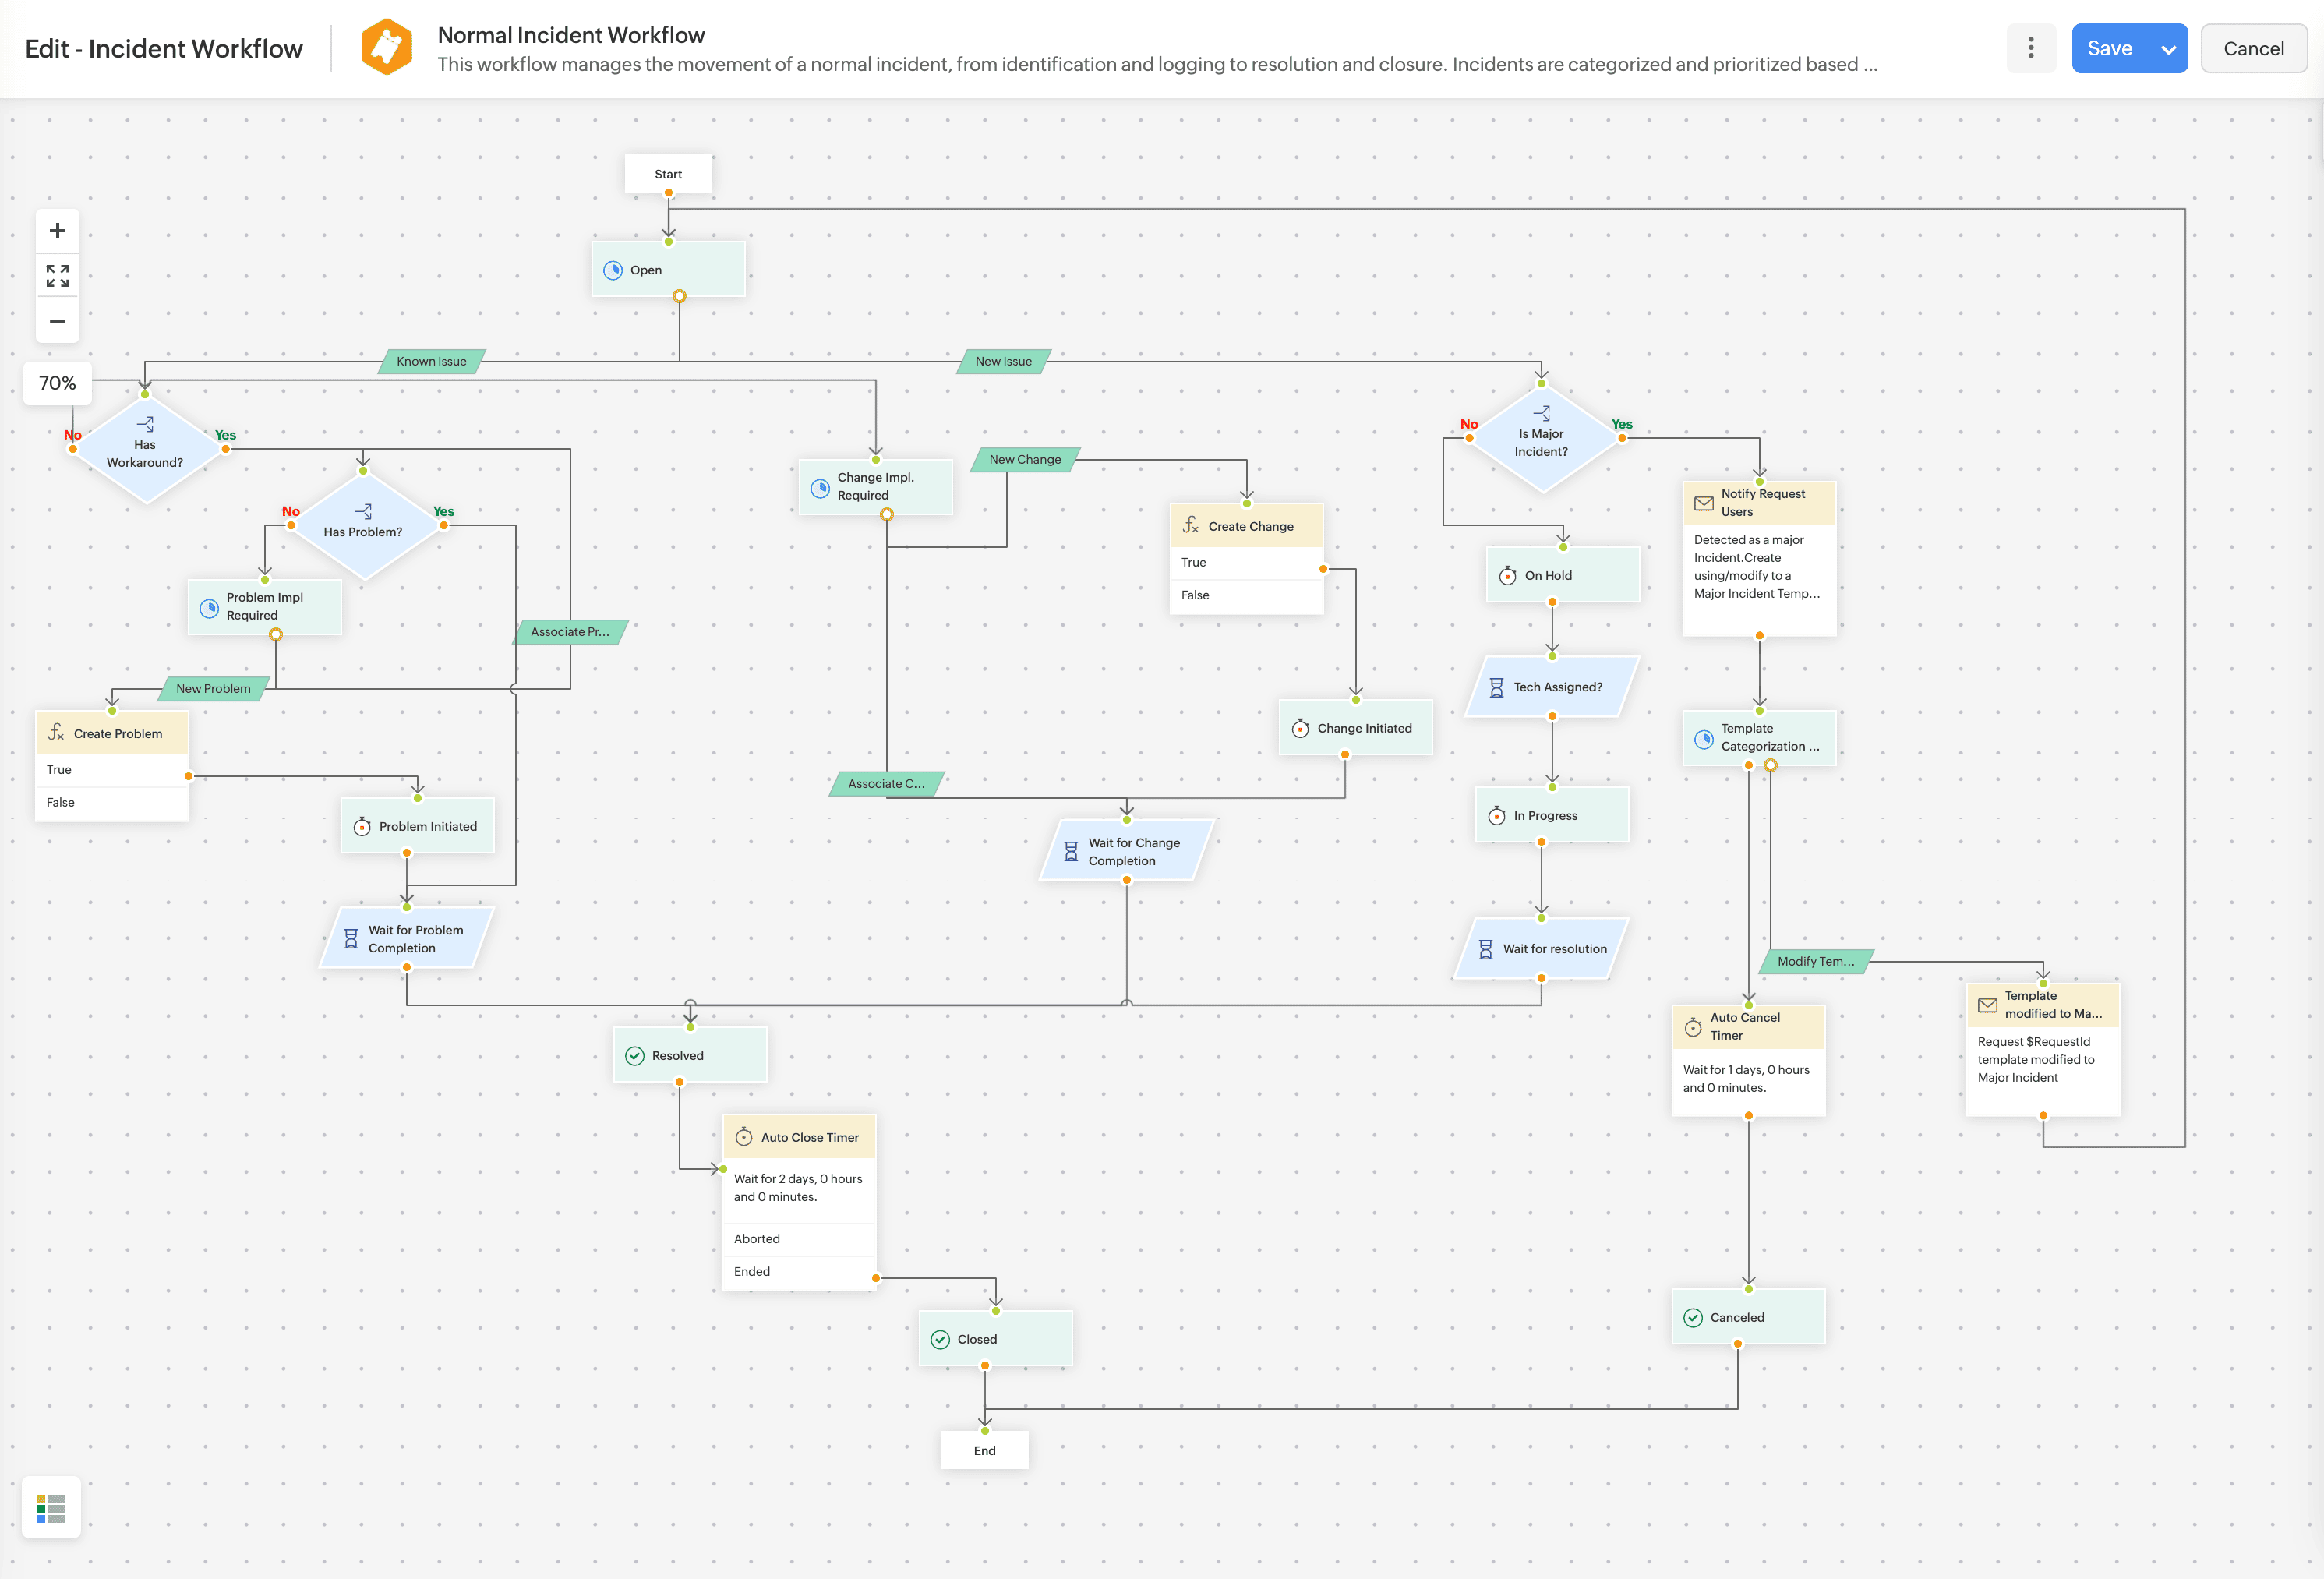
Unable to access surveys from non-login pages.
Analytics sync fails when change module items are modified since the last sync.
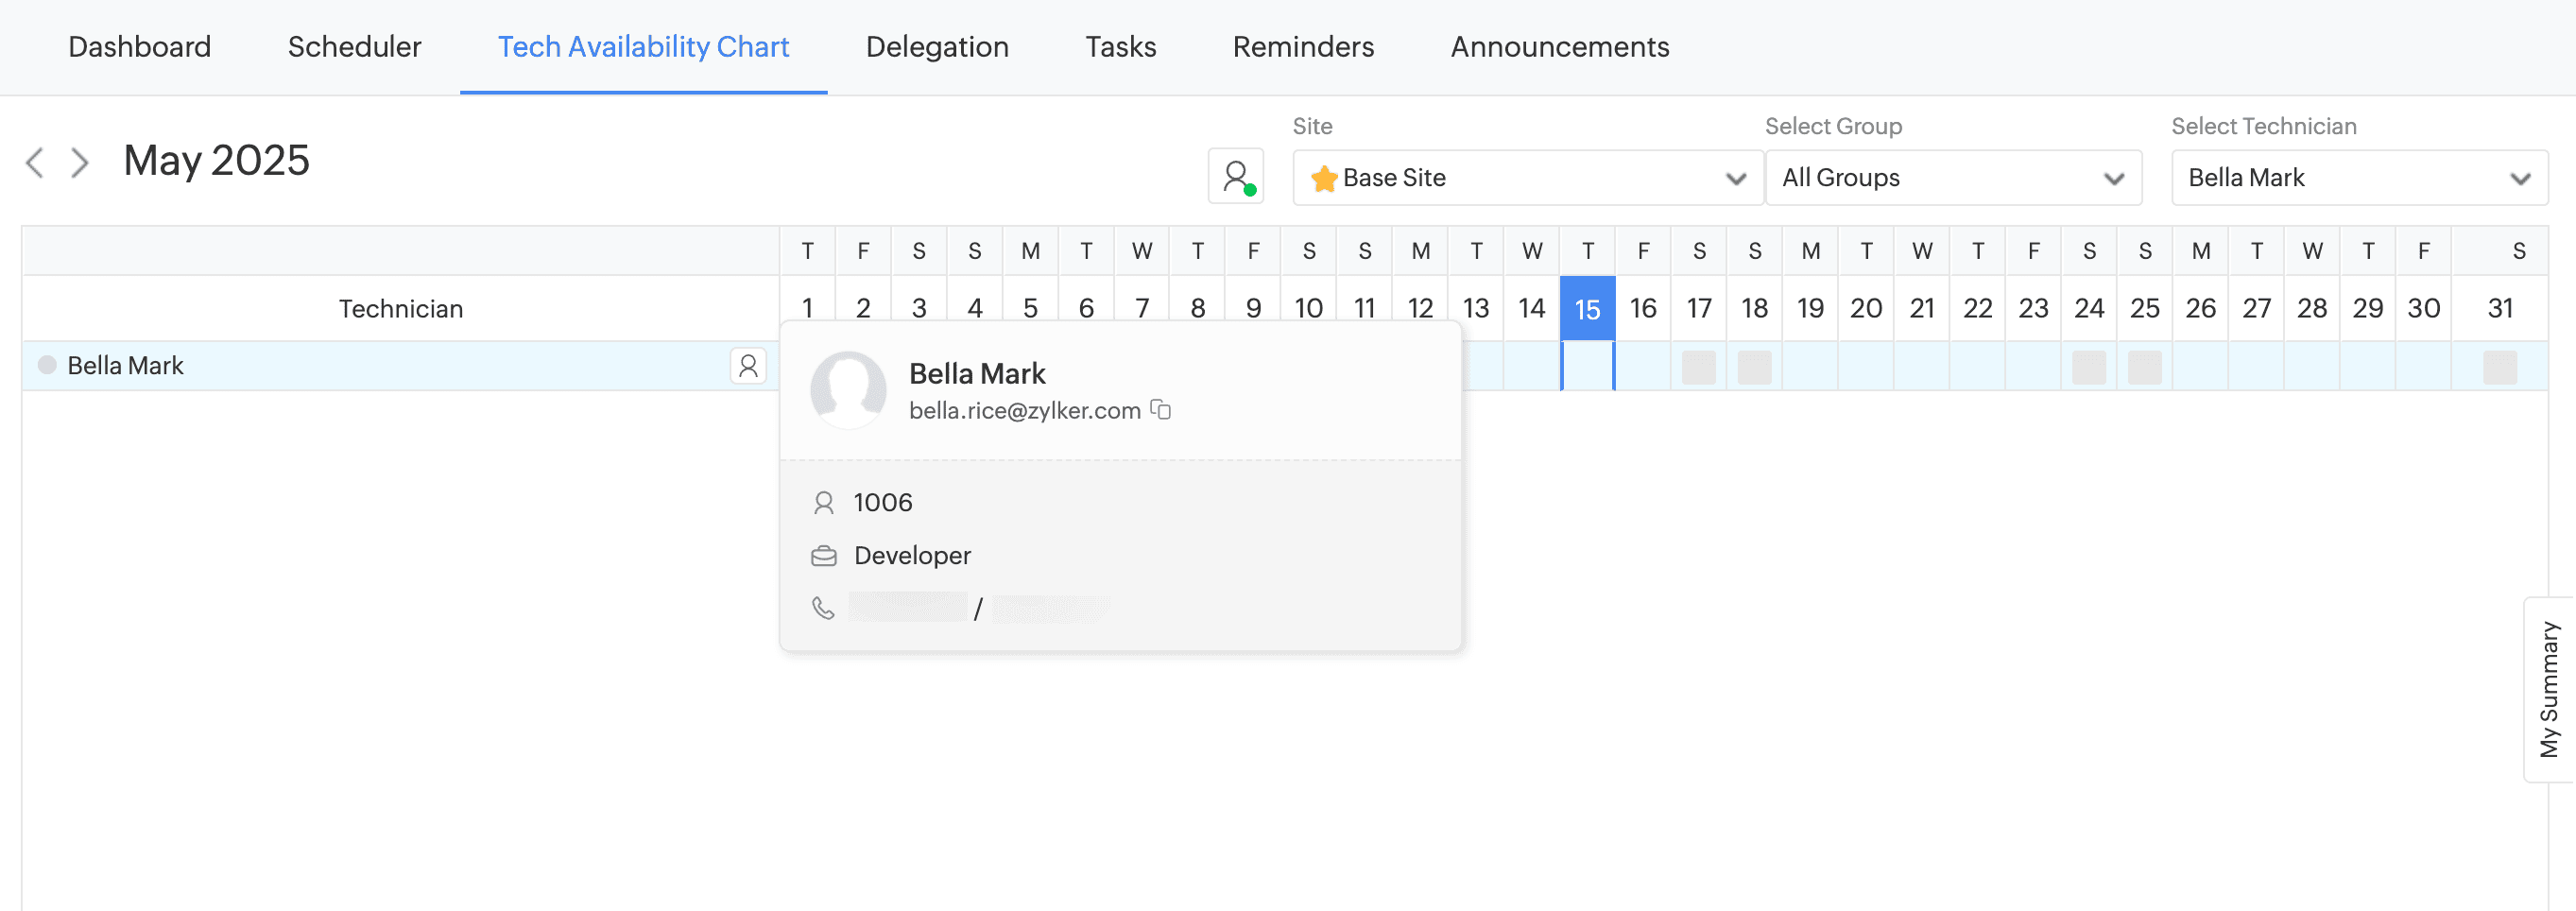
Within the Technician Availability Chart, SDAdmins, SDCoordinators, and SDSiteAdmins can now view technician details, such as user name, profile picture, email address, employee ID, job designation, and contact numbers.
Cloud Telephony Integration
ServiceDesk Plus MSP Cloud now supports integration with Cloud Telephony for MSP Customers.
With this integration, you can receive and manage customer calls directly from the application. Call details are automatically logged as requests and can be linked to existing tickets or contacts.
To set up the integration, go to Setup > Apps & Add-ons > Integrations > Cloud Telephony.
Jira and Azure DevOps Integration Enhancement
ServiceDesk Plus MSP Cloud now supports integration with Jira and Azure DevOps for all customers.
Note: For a complete list of enhancements and feature updates across all ITSM modules, click here.
Introducing Billings, a centralized module for generating customer invoices based on technicians' work log entries across modules.
Introducing Business Dashboard, a centralized interface that provides a consolidated view of key business and operational metrics across customers.
Supported modules: Requests and Request Tasks, Changes and Change Tasks, Releases and Releases Tasks, Problems and Problem Tasks, Project Tasks, and General Tasks.
Introducing ServiceDesk Plus MSP Cloud, a secure and scalable platform designed for modern MSPs. Simplify client management, automate service delivery, and stay compliant with global data security standards without the complexity of traditional on-premise setups.
Analytics Plus Integration
ServiceDesk Plus MSP Cloud now integrates with Analytics Plus, enabling advanced data analysis and visualization.
This integration allows you to:
To configure the integration, contact support servicedeskplus-support@manageengine.com
Worklog Timer
Work log timer will start automatically when technicians view their assigned requests. This behavior is enabled by default via the Auto-start worklog timer when the owner views the request.
To configure this settings, go to Setup > Advanced Portal Settings > Worklog Settings.
Problem Closure Rules now support mandatory fields and enhanced validation during problem closure.
SDAdmin and SDAccountAdmin can now use Home Realm Discovery (HRD) to provide a unified pre-login experience for users across domains.
New Field | Field Mapping Support | Criteria Support |
|---|---|---|
| aboutMe | Yes | No |
| imAddresses | Yes | No |
| interests | Yes | No |
| isResourceAccount | Yes | Yes |
| mailNickname | Yes | Yes |
| mySite | Yes | No |
| pastProjects | Yes | No |
| preferredDataLocation | Yes | Yes |
| preferredLanguage | Yes | Yes |
| preferredName | Yes | Yes |
| responsibilities | Yes | No |
| schools | Yes | No |
| securityIdentifier | Yes | No |
| showInAddressList | Yes | No |
| skills | Yes | No |
Create and customize self-service portals tailored to the needs of different customers and user groups, providing each with a personalized experience. Go to Setup > General Settings > Requester Portal > Requester Portal Customization.
Use the customer selector on the Requester Portal Customization list view to select a customer. You can create a new portal page for the selected customer or filter and manage pages associated with that customer or their mapped user groups.
Set customer access level When publishing a page, set the access level to Customers to target the page to specific customers, or User Groups to target specific user groups.
Organize the sequence of portals If a user is part of several groups or a customer is associated with multiple home pages, use the Organize feature to define the display sequence. Choose Use Global Page Order to apply a consistent page order across all customers, or Customize for [Customer Name] to set a page order specific to that customer. The first active page in the order will be displayed to the user.
Note: Pages can be organized only when the access level is set to User Groups or Customers.
An illustration of Integration Mapping in custom list view criteria
An Illustration of Comparing a CI from its Details Page
Introducing the CMDB dashboard, a centralized interface that provides a comprehensive view of all configuration items (CIs). You can track CI counts by status and monitor key data quality metrics such as completeness, orphan, and staleness and view associations of CI with other modules.
Customers can now use multiple email domains.
To add a domain:
Help Card in Request Form
icon.An Illustration of Linking Parent Change
An Illustration of Linking Child Changes
Requester Allowed To View | View Permissions |
|---|---|
| All Requests | All Requests |
| All their site requests | Own Site Requests |
| All their department requests | Own Department Requests |
| Only their own requests | Own Requests |
Survey reports now display data based on user roles.
We are now introducing a dedicated Finance Desk instance designed to manage and streamline finance-related functions.
Filter | Description |
| All Reports | Displays all reports |
| Custom Reports | Displays reports generated by users |
| Query Reports | Displays reports generated through query-based configurations |
| My Reports | Displays reports created or owned by the logged-in user |
Wizard Enhancements
Field | Variables |
| Site |
|
| Group |
|
| Department |
|
| User |
|
Note: You cannot add the age field to consumable templates.
Vendor
Purchases
Contracts
Assets
Purchase Timer Action for Trigger
Contract Timer Action for Trigger
Purchase/Contract Users in Notifications
Triggers for Subentities of Purchases and Contracts
Releases
Qntrl Circuit now includes an updated user interface, which is automatically enabled for all users. All existing core functionalities remain unchanged.
This update was rolled out in phases over the past two months across data centres and is now fully deployed globally.
The Notify Before range in the Expiry Notification section of the Contract page has been increased from 365 days to 3,650 days, allowing for earlier contract expiry alerts.
Rule | Module/Entity |
| Business rules | Request tasks, Changes, and change tasks. |
| Workflow pre-action rules | Changes |
\ character.' character.The UI text in the left pane of ESM Directory is modified for better understanding.
Existing Content | Modified Content |
| Users | User Management |
| Verified Domains | Custom Domains |
| SAML | SAML Authentication |
| Active Directory | Active Directory Settings |
| Organization URL | Custom Service URLs |
Note: After merging, all associated software, licenses, license types, and license agreements will be moved to the parent manufacturer.
Existing Behavior | Behavior Change |
| Software | Software & Licenses |
| Scanned Software | Software |
| License Agreements | Agreements |
| Software Licenses | Licenses |
| |
Based on request resources, you can now generate reports and Zoho Analytics, and execute automation rules such as Business Rules, Triggers, Timers, Workflows, and Service Level Agreements.
You can now link releases to organize and manage complex deployment scenarios. Additionally, you can set stage-level release dependencies with built-in checks to prevent duplicate or circular links.
Parent release & Sub-release Association: Break a large release initiative into manageable, sequential releases using the Parent - Sub release associations. To do that, in the parent release, go to the Associations tab and add related sub-releases.
Alternatively, in a sub-release, open the Associations tab and link it to a parent release.
From the release list view, you can view the linked releases and their scope.
You can view the dependency between the releases using the Release Dependency option in the parent release.
You can configure release dependency from the Associations tab of the parent release.
Administrators can now:
Requests
icon and selecting My Layout.New User Variables for Custom Notifications
Filter | Variables |
| Request Users |
|
Notification Users (available when Applies to is set to Email responses (from Users)) |
Note: This applies to change, release, and problem notification forms as well. |
Focused Details View
Technician Unavailability Alerts
Self-Service Portal Enhancements
We are updating the way you sign in to our application to improve security and provide a more consistent sign-in experience. These changes include:
Requests
Note: This enhancement will apply only to requests merged from now.
Reports
Contracts
Technicians can now view Created Date in the contracts list view and in contract imports and exports.
External users can now access the ServiceDesk portal via a custom domain (e.g., helpdesk.zylker.com). The custom service URL must be mapped only to a single portal to enable this access.
Intranet Webhook
CMDB
Asset
Provisioning Tool
The list view fails to load at certain screen resolutions and zoom levels.
When the Service Templates page is zoomed in, New Service Template and Copy Template are not displayed.
The Request Details section does not display in requests accessed via approval emails.
From now on, any Microsoft Azure user can integrate Azure AD User Sync to sync complete user information (beyond basic details) from Azure AD. This can be done only after the user obtains consent from the Microsoft Azure global administrator and authorizes ServiceDesk Plus MSP Cloud in Microsoft Azure.
List View Enhancement
Web View
Supported Features
Devices | Supported Features | ||||||||||||||||||||||||||
Mobile Devices |
Note:
| ||||||||||||||||||||||||||
Tablet Devices |
Note: Accessibility Control settings will not be applied. |
Supported Browsers
Preview - Smart Phones Responsive Interface
Home | |
Dashboard | Scheduler |
Focus on one widget at a time and get a bird's eye view of all your key module insights. | A dynamic monthly calendar that supports the functionalities of both Technician Availability Chart and Scheduler. |
List View | |
List View | Actions |
Displays a list of all records across different stages, priorities, and workflows in a module. Use filters to list specific records. Column Chooser settings will not reflect on the mobile browser list views. | Actions, such as Edit, Merge, Pick Up, etc, are displayed dynamically based on the selected items. |
Details View | |
Details Page | Other Details |
View detailed insights of a record. Use floating panel to view its critical details at a glance. | Initiate conversations, assign tasks, create checklists, upload resolutions, and view all their details – just like web view but faster and easier from a drop-down. |
Floating Panel | Actions |
View critical details of a record, such as workflow, task and checklist progress, approval status, associated requests and changes, and more. | Perform various record-specific actions such as Assign, Close, Edit, Merge, Manage Followers, Add Note and Tasks, Share, and more. |
Custom View | |
View your personalized list that filters and displays only records matching specific criteria. | |
An internal error occurs when a technician with a site-restricted role allocates consumables tracked by batch/lot details.
Life cycle transition buttons will now appear in the center panel of the module's details page instead of the right panel, restoring the earlier behavior.
Note: The position of life cycle transition buttons cannot be customized.
The width of life cycle and workflow transition buttons is increased for better usability.
Note: Advanced permissions for Problems are now grouped into Edit permission.
Note: The existing additional fields with system-generated Field Keys (e.g., udf_char1, udf_char2, etc.) will remain unchanged.
Field prediction is now supported for the following languages:
English (en), Croatian (hr), Czech (cs), Danish (da), Dutch (nl), Estonian (et), Finnish (fi), French (fr), German (de), Hungarian (hu), Icelandic (is), Indonesian (id), Polish (pl), Portuguese (pt), Spanish (es), Latvian (lv), Lithuanian (lt), Norwegian (no), Romanian (ro), Swedish (sv), Turkish (tr), Vietnamese (vi), Italian (it), and Welsh (cy).
Unable to access surveys from non-login pages.
Analytics sync fails when change module items are modified since the last sync.
Within the Technician Availability Chart, SDAdmins, SDCoordinators, and SDSiteAdmins can now view technician details, such as user name, profile picture, email address, employee ID, job designation, and contact numbers.
Cloud Telephony Integration
ServiceDesk Plus MSP Cloud now supports integration with Cloud Telephony for MSP Customers.
With this integration, you can receive and manage customer calls directly from the application. Call details are automatically logged as requests and can be linked to existing tickets or contacts.
To set up the integration, go to Setup > Apps & Add-ons > Integrations > Cloud Telephony.
Jira and Azure DevOps Integration Enhancement
ServiceDesk Plus MSP Cloud now supports integration with Jira and Azure DevOps for all customers.
Note: For a complete list of enhancements and feature updates across all ITSM modules, click here.
Introducing Billings, a centralized module for generating customer invoices based on technicians' work log entries across modules.
Introducing Business Dashboard, a centralized interface that provides a consolidated view of key business and operational metrics across customers.
Supported modules: Requests and Request Tasks, Changes and Change Tasks, Releases and Releases Tasks, Problems and Problem Tasks, Project Tasks, and General Tasks.
Introducing ServiceDesk Plus MSP Cloud, a secure and scalable platform designed for modern MSPs. Simplify client management, automate service delivery, and stay compliant with global data security standards without the complexity of traditional on-premise setups.
Analytics Plus Integration
ServiceDesk Plus MSP Cloud now integrates with Analytics Plus, enabling advanced data analysis and visualization.
This integration allows you to:
To configure the integration, contact support servicedeskplus-support@manageengine.com
Worklog Timer
Work log timer will start automatically when technicians view their assigned requests. This behavior is enabled by default via the Auto-start worklog timer when the owner views the request.
To configure this settings, go to Setup > Advanced Portal Settings > Worklog Settings.