Change SLA
Service Level Agreements define the time within which a Change Request needs to be resolved. SLAs are applied automatically during 'Add/Update' of Change Requests based on certain criteria defined. Change SLA will be executed based on the 'Scheduled Start' and' Scheduled End' time of the Change Request.
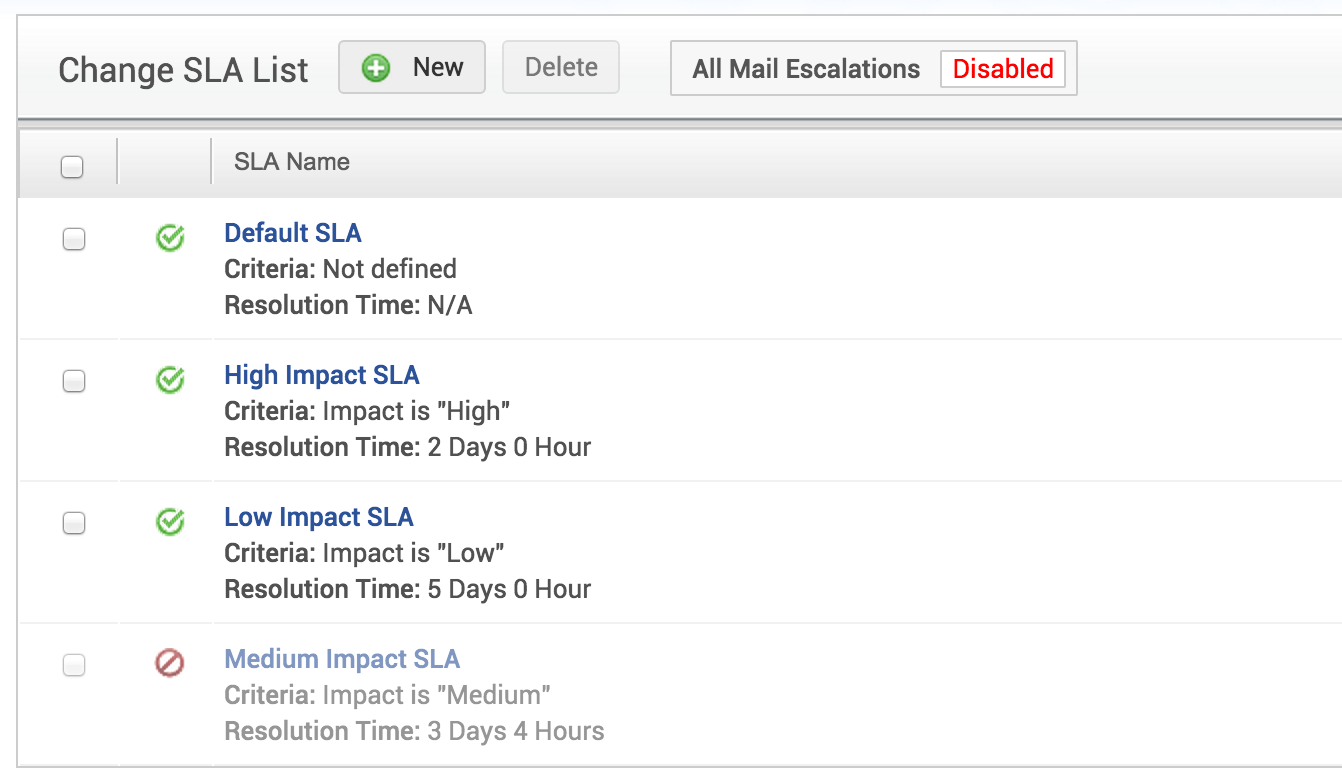
1.To create a new change SLA , click Admin>>Change SLA>>New

2.In Change SLA List view, choose 'Enabled/Disabled' in 'All Mail Escalations', if all mail escalations are to be enabled/disabled .
3.On clicking 'New', the 'Create Change SLA' window appears. Enter an unique name for the SLA and provide a description about the SLA, if required.
4.Select 'Operational hours' radio button,if the change is to be resolved with respect to the working hours. Select 'Calendar hours' radio button if the Change is to be resolved irrespective of the working hours.

5.In 'Match All/Any of the following criteria' , select the required column field and the corresponding condition as listed. More than one criteria can be set or removed by clicking on '+/-'.

6.Define the resolution time by choosing 'Yes' in the switch button. Select the number of operational hours and days within which the 'Change' has to be resolved. Select 'No' if resolution time is not required.

7. If Yes is chosen for ‘Do you want to define the resolution time?’, then the escalations are defined by ‘Before/After’ the ‘Scheduled End’ time. Enter the days/hours and the 'Change Roles' to whom the escalation is to be sent.

8. If No is chosen for ‘Do you want to define the Resolution Time?’ then the escalations are defined by the percentage of time span between ’Scheduled Start’ and ‘Scheduled End’ time. Choose the percentage (Say, 75%) at which the change request has to be escalated and the 'Change Roles' to whom the escalation notification is to be sent.

9.In Change SLA list, click on the 'Enable/Disable' option in order to enable/disable the SLA. If you want to delete some of the SLAs, select the required SLAs and click 'Delete'.
Click the 'Save' button to save the SLA and return to the list view. Click the 'Save and Add New' button to save the SLA and add another SLA.
NOTE:
A change SLA can be deleted by selecting the required SLAs and clicking 'Delete' .If that particular SLA is already in use ,ie.,if the SLA has been matched with a 'Change', then that SLA appears with![]() . On opening such SLA's, a checkbox 'Not for further usage' can be seen. Enabling the checkbox will prevent further usage of the SLA. Disabling the checkbox will bring back the SLA into place.
. On opening such SLA's, a checkbox 'Not for further usage' can be seen. Enabling the checkbox will prevent further usage of the SLA. Disabling the checkbox will bring back the SLA into place.

