Import CI Relationships from XLS file
CI Relationships
CI Relationships are the relationships between CIs that differentiate CMDB from Asset database, thus constituting a major part of your CMDB. A CMDB without relationships constitutes a bunch of CIs in a single database, fetched through scan, or import process, or by manual addition. The relationships on the other hand, allow the users accessing the CMDB, to understand the inter-dependencies between the CIs. So, in case of a failure, the impact caused on another CI can be easily identified.
The XLS File
The CI relationships can be imported from a XLS file to add relationship between the CIs. The CI relationships are specified in a XLS file and then uploaded. Once the CIs relationships are recorded in a XLS file, then you can import the same using "CI Relationships from XLS" option.
XLS File format:
The XLS file is read line-by-line and the relationships given are added to the database.
| Name of CI1 | Relationship | Name of CI2 |
Example:
| Server1 | Connected | Printer1 |
| Router1 | Used by | Server1 |
| Server1 | Runs | MySql |
Steps to Import CI Relationships from XLS file
-
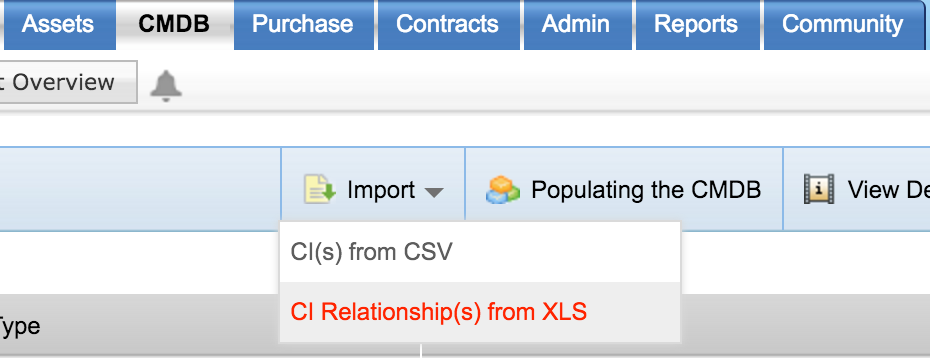
Click CMDB tab in the header pane. By default, the CIs under Business Service are displayed.
-
Click "Import -> Import CI Relationship(s) from XLS".

3. The Import CI Relationships from XLS wizard is displayed.
Step #1: Locate XLS file
-
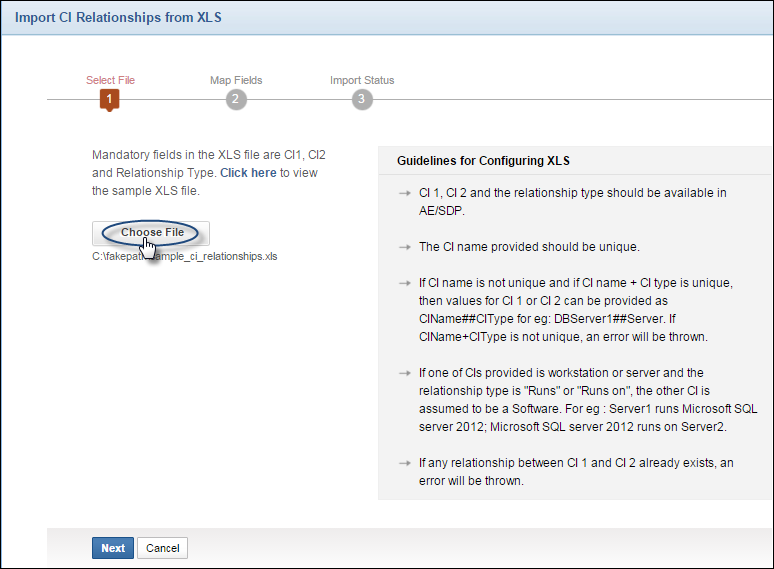
From the Import CI Relationships from XLS wizard, click the Choose File button to select the XLS file.
-
Locate the XLS file by using the file chooser window and click Open. The path to the file appears automatically below the Choose File button.
-
Click Next.
Note: You can view the sample XLS file by clicking the Click Here link. The guidelines for configuring the XLS file are listed beside the Choose File button.
Step #2: Map Fields
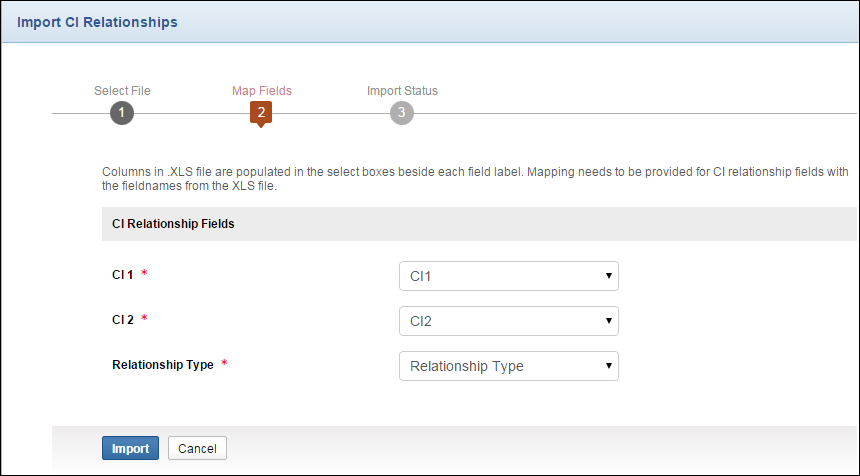
The columns in XLS file are populated in the select boxes beside each field label. Mapping needs to be provided for CI relationship fields with the fieldnames from the XLS file. Map the CI Relationship Fields.
-
Choose values for CI1, CI2 and Relationship Type.
-
Click Import. The details of the CI relationships are imported from the XLS file.

Step #3: Import Status
-
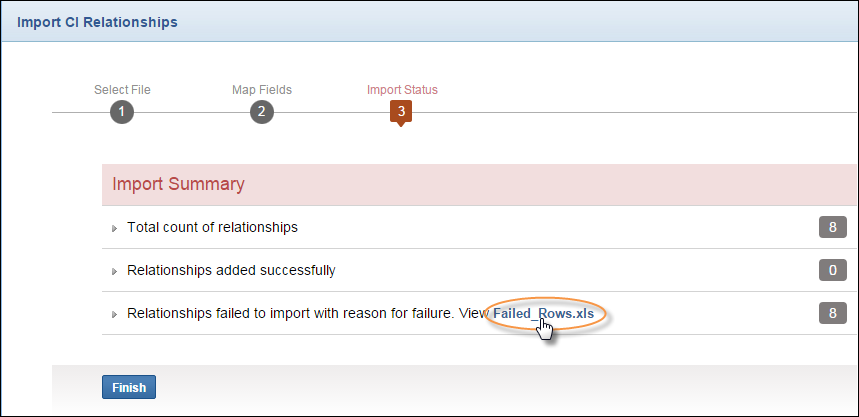
On clicking the Import button in the previous wizard, the Import Summary is displayed along with the details shown in the below screenshot.
-
Click the Failed_Rows.xls link to view the list of CI relationships that have failed to import. The relevant error descriptions, i.e., the reasons for the failure, are also listed in the XLS file.
-
Click Finish.

Error XLS Description:
If an entry fails, error is reported to the user and all the other entries are processed. Is is assumed that all the CIs in the XLS already exist. In the case of IT assets, the user can specify the CI name as a simple Host name and FQDN is not required. Only the first sheet in the xls file is considered. The errors are generated in XLS format as given below:
| Name of CI1 | Relationship | Name of CI2 | Description of the error |
The File name will be Failed_Rows.xls. The file is stored in '/bin/Attachments/CMDB/<user_id>/'. Only the latest files uploaded are stored and the older files are deleted, whenever new files are uploaded.
While importing the CI relationships for the first time, the header fields are asked from the user and stored in database, so that user doesn't have to give the header fields on the subsequent imports.
Once the import is done, an entry is made in the system log, titled Import CI Relationships that contains the count of success and failed imports.


