Computer Telephony Integration (CTI)
Computer Telephony Integration simplifies user communication, thus enabling seamless service of your organization help desk. Upon integrating ServiceDesk Plus MSP application with your organization's telephone server, technicians can accept/initiate calls from their computer screen without picking the telephone receiver.
Note: Telephony Integration is available in the Enterprise Edition only.
Salient Features
-
Pop-ups to display detailed caller information including the user's account, requests, and assets (for existing users)
-
Add unknown callers as new requesters in the application
-
Associate the call details to an existing request
-
Raise a new request with the call details at the end of the call
-
Initiate an outgoing call to the requester from the request details page
Configuring Computer Telephony Integration
Pre-requisites
Technicians must have a valid extension and SIP user ID updated in their ServiceDesk Plus MSP account.
Note: SIP User value is applicable only to Asterisk users. For other telephony services, the SIP User value is the same as the Extension value.
Recommended Asterisk Version: Asterisk 18
To configure Computer Telephony Integration,
-
Go to Admin
 > MSP Details > Telephony.
 -
In the displayed page, configure the telephony integration using the following pointers:
-
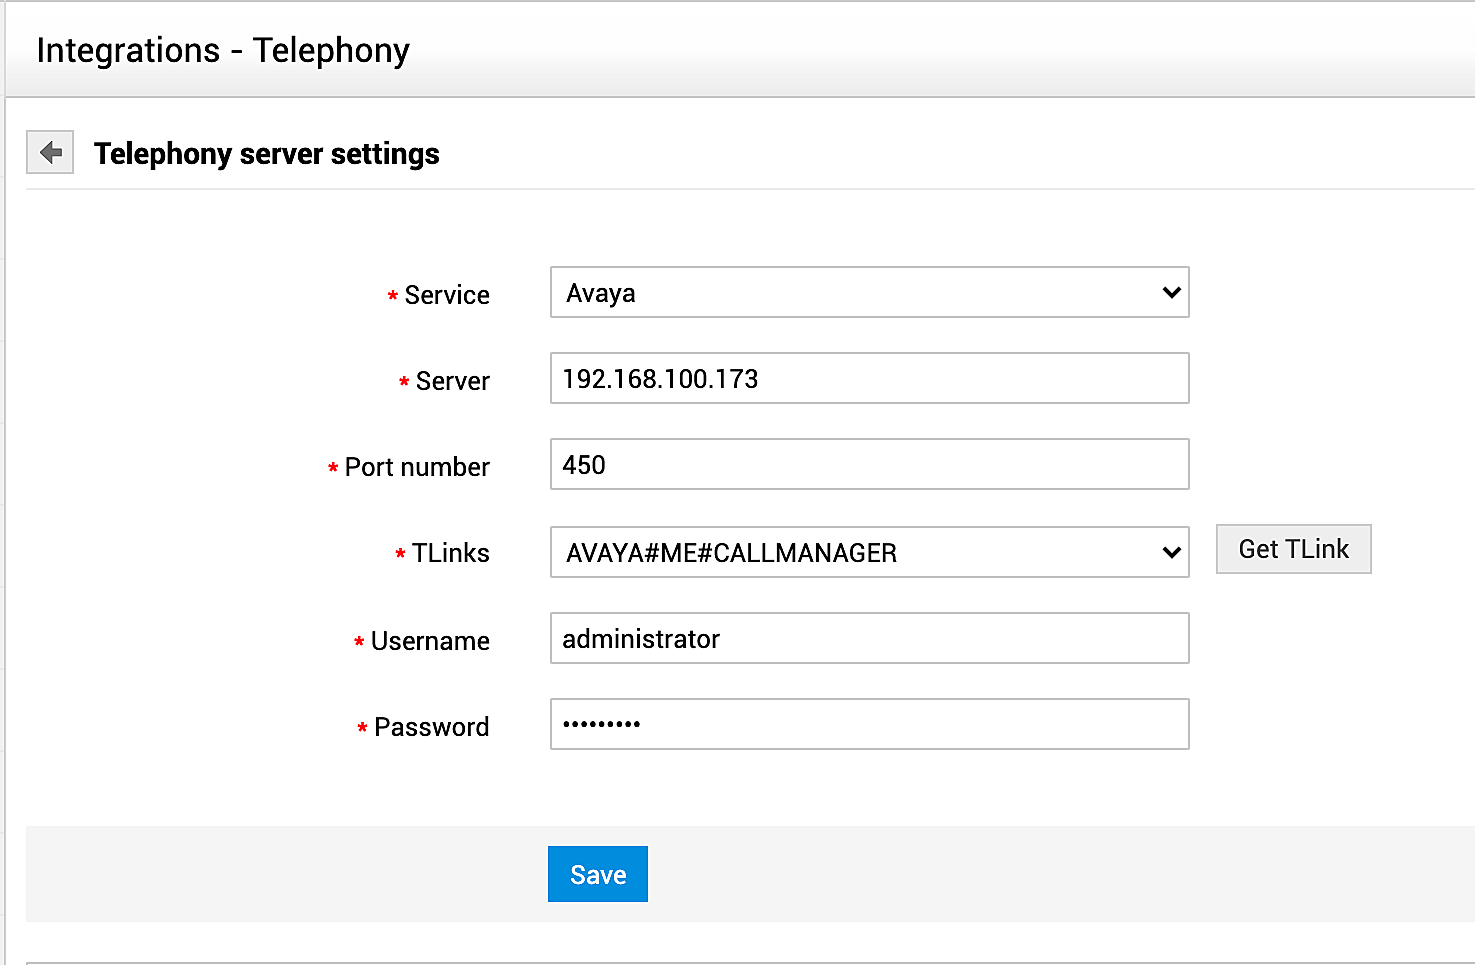
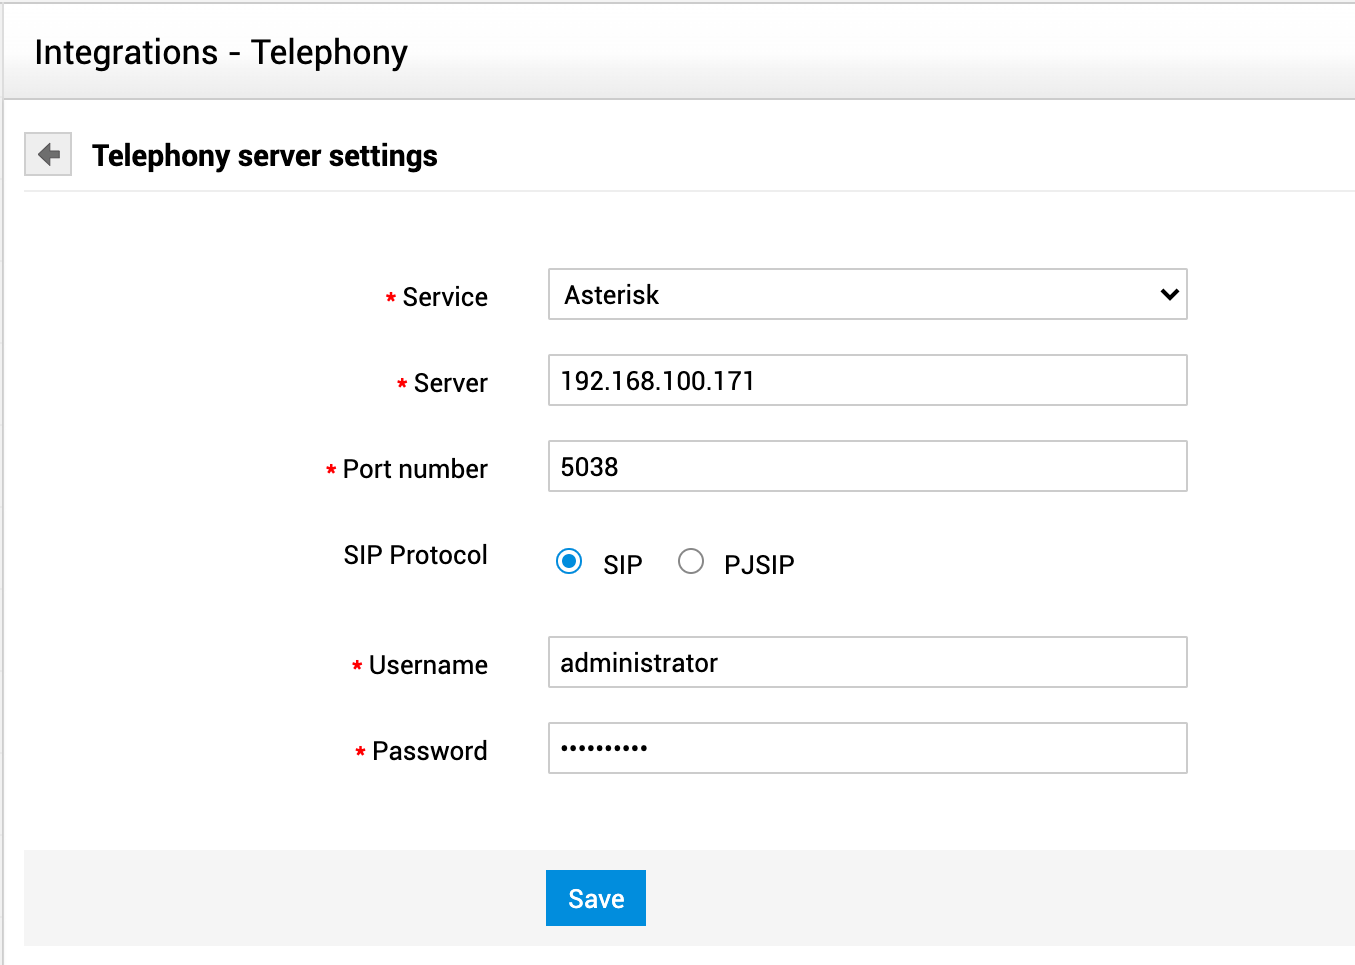
Service: Select your organization's telephony server. ServiceDesk Plus MSP supports Asterisk and Avaya servers.
You can also configure a custom server using scripts. To learn more, click here. -
Server: Enter the IP address of your organization's telephony server.
-
Port Number: The port number of the selected telephony service will be auto-populated here. Edit the port number if required.
-
TLink: TLink establishes the connection between your Call Manager and Avaya AES server. This option will be displayed only if you have selected Avaya service.
-
Click Get TLink to fetch the available TLinks in your organization. A pop-up displays on successful completion.
-
Select the required value from the Select TLink drop-down.
-
SIP Protocol: This option will be displayed only if you have selected Asterisk service. Select the protocol configured in your Asterisk server.
-
Username, Password: Enter your login credentials of the telephony service.
-
Click Save.
Avaya Telephony Server
Asterisk Telephony Server
Upon successful integration, technicians can initiate/accept calls for their extension from the application.
Configuring Custom Servers
You can integrate ServiceDesk Plus MSP with telephony servers other than Avaya and Asterisk using scripts. Follow the steps given below to upload and run a script to integrate ServiceDesk Plus MSP with a custom telephony server.
-
Upload the text file containing the custom script under <Application Directory>/integration/custom_scripts/executor_files
-
In the application, go to Admin
 > MSP Details > Telephony.
 -
Select Custom from the Service drop-down.
-
Under Script command to run, enter the file name uploaded in step 1 and click Save.
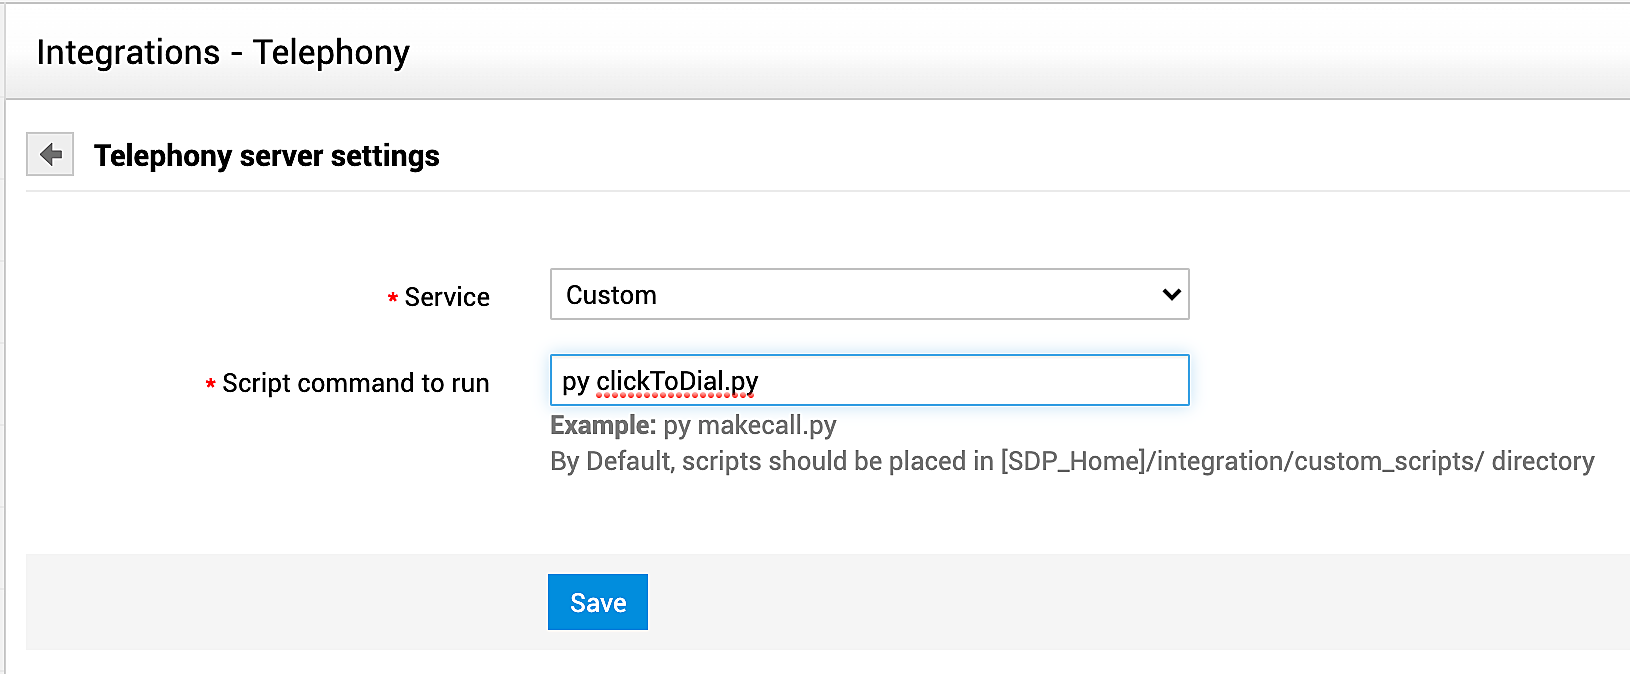
Upon successful integration, you can initiate outgoing calls of the custom server from within ServiceDesk Plus MSP.
Note: You can trigger incoming call pop-ups and support pick up/hang up events using API. Click here to view the list of supported API operations.
Update/Remove Integration
You can update the details of the existing server integration or remove the integration if you are switching to a different telephony service.
To update the integration, modify the required information under Admin  > Integrations > Telephony and click Update.
To re-configure the integration with a different telephony service, remove the existing integration by clicking Remove and follow the steps discussed earlier.
Enable/Disable Computer Telephony Integration
You can enable or disable an existing Computer Telephony Integration using the checkbox at the top of the page.
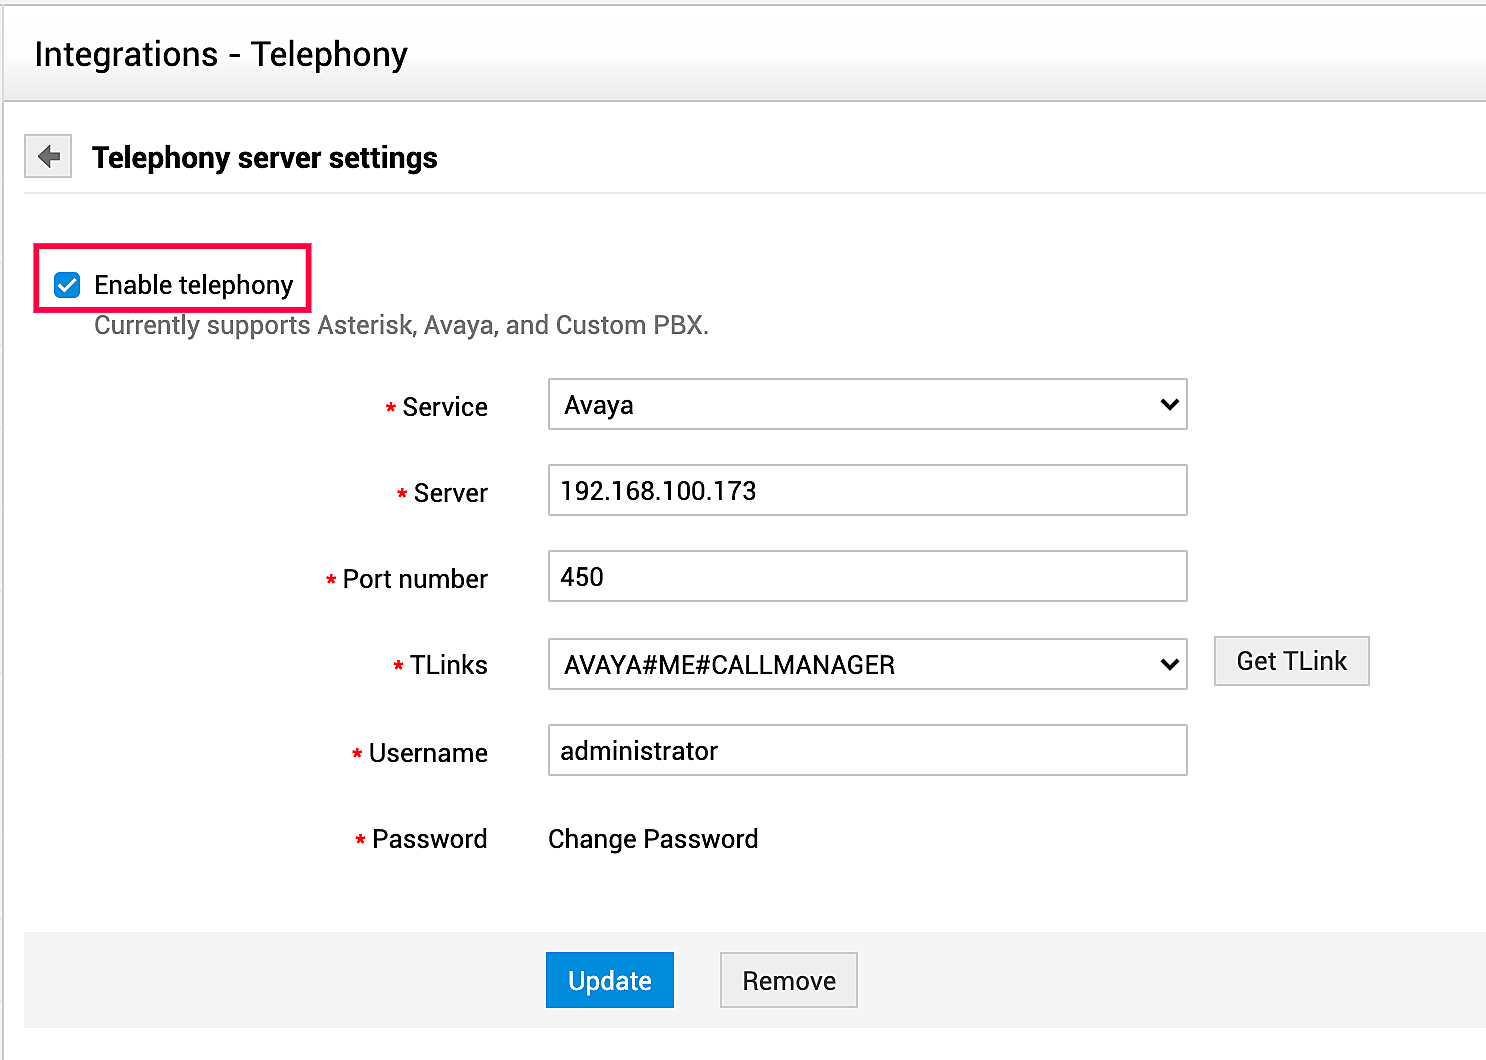
You can enable/disable telephony integration for specific technicians by following the steps given below:
-
Go to Admin
 > Users > Technicians.
 -
Open the details page of the required technician.
-
Deselect the Enable Telephony Integration checkbox.
Screen Pop-ups
Upon successful integration with a telephony server, the ServiceDesk Plus MSP application window notifies users about incoming/outgoing calls with screen pop-ups. These pop ups display detailed information of the caller, enables technicians to take notes about the call and even associate the call details with a new/existing request.
Incoming Calls
The application notifies users of incoming calls with a pop-up displaying the user information as given in the below screenshot:
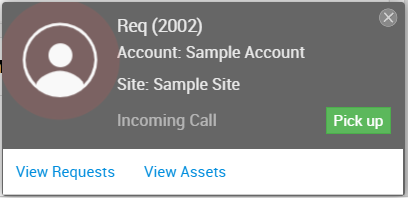
Click Pick Up to receive the call. The user image highlight changes from red to green upon successful connection.
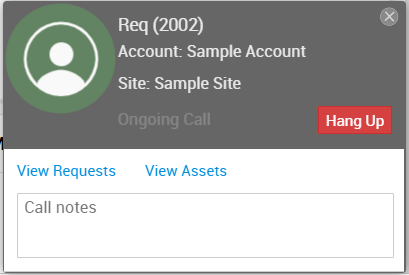
End Call
Click Hang up to end the call. You can associate the call details to an existing request or create a new request from the pop-up screen after the call is ended.
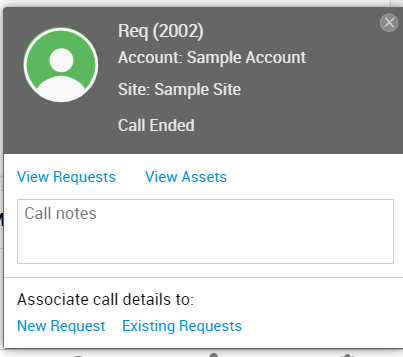
Note: Pick Up and Hang Up options are applicable only for Avaya service.
Click New Request to create a new request using the call details. The new request form pops up with the call description auto-populated in the request description. Add other required information and click Save to create the request.
Click Existing Request to append the call details as notes to an existing request.
View Requests and Assets of the Caller
If the call is from a user existing in the application, clicking View Requests displays the users requests along with the request details in a separate pop-up window as shown below:

Clicking View Assets displays the assets associated with the user in a separate window.

If the call is from an unknown user, the incoming screen pop-up will look as shown in the screenshot below:
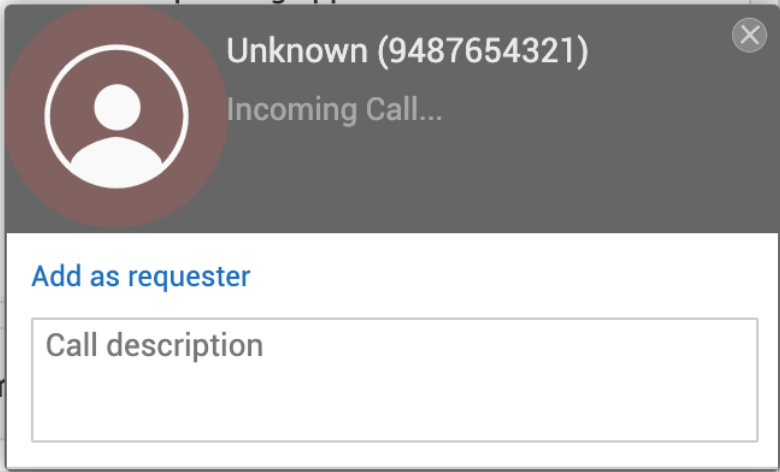
You can add the user into the application from the incoming call screen pop-up:
-
Click Add as requester. The new user form pops up.
-
Fill out the user details and click Save.
Add Notes
You can note down any important information discussed during the call in the Call description field.
Click to Dial
Upon successful telephony integration, ServiceDesk Plus MSP enables technicians to initiate outgoing calls to the requester from the request details page. Ensure that the requesters accounts are updated with valid contact details.
To initiate an outgoing call to a requester,
-
Open the details page of a request.
-
Click the contact number displayed next to the requester name. A screen pops up with the user image highlighted in red, indicating that the call is initiated.
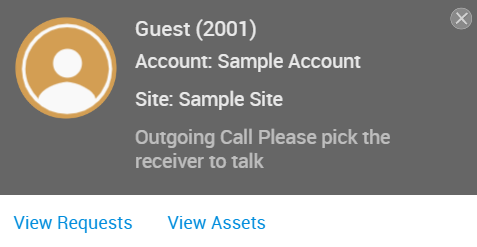
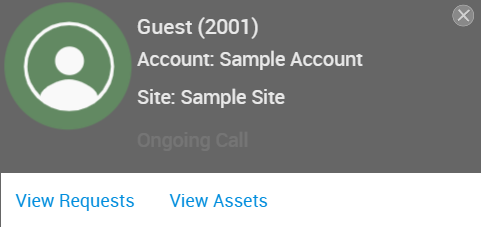
The user image highlight turns green upon successful connection.
If the call fails, the highlight disappears with the status updated as Outgoing call failed.
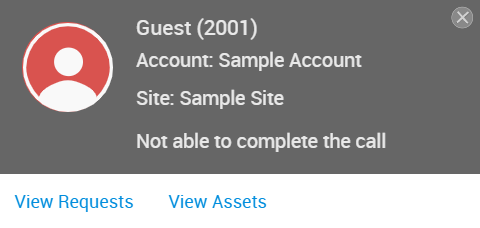
Note: Outgoing screen pop-up does not support Pick Up/Hang Up options.
Telephony Logs
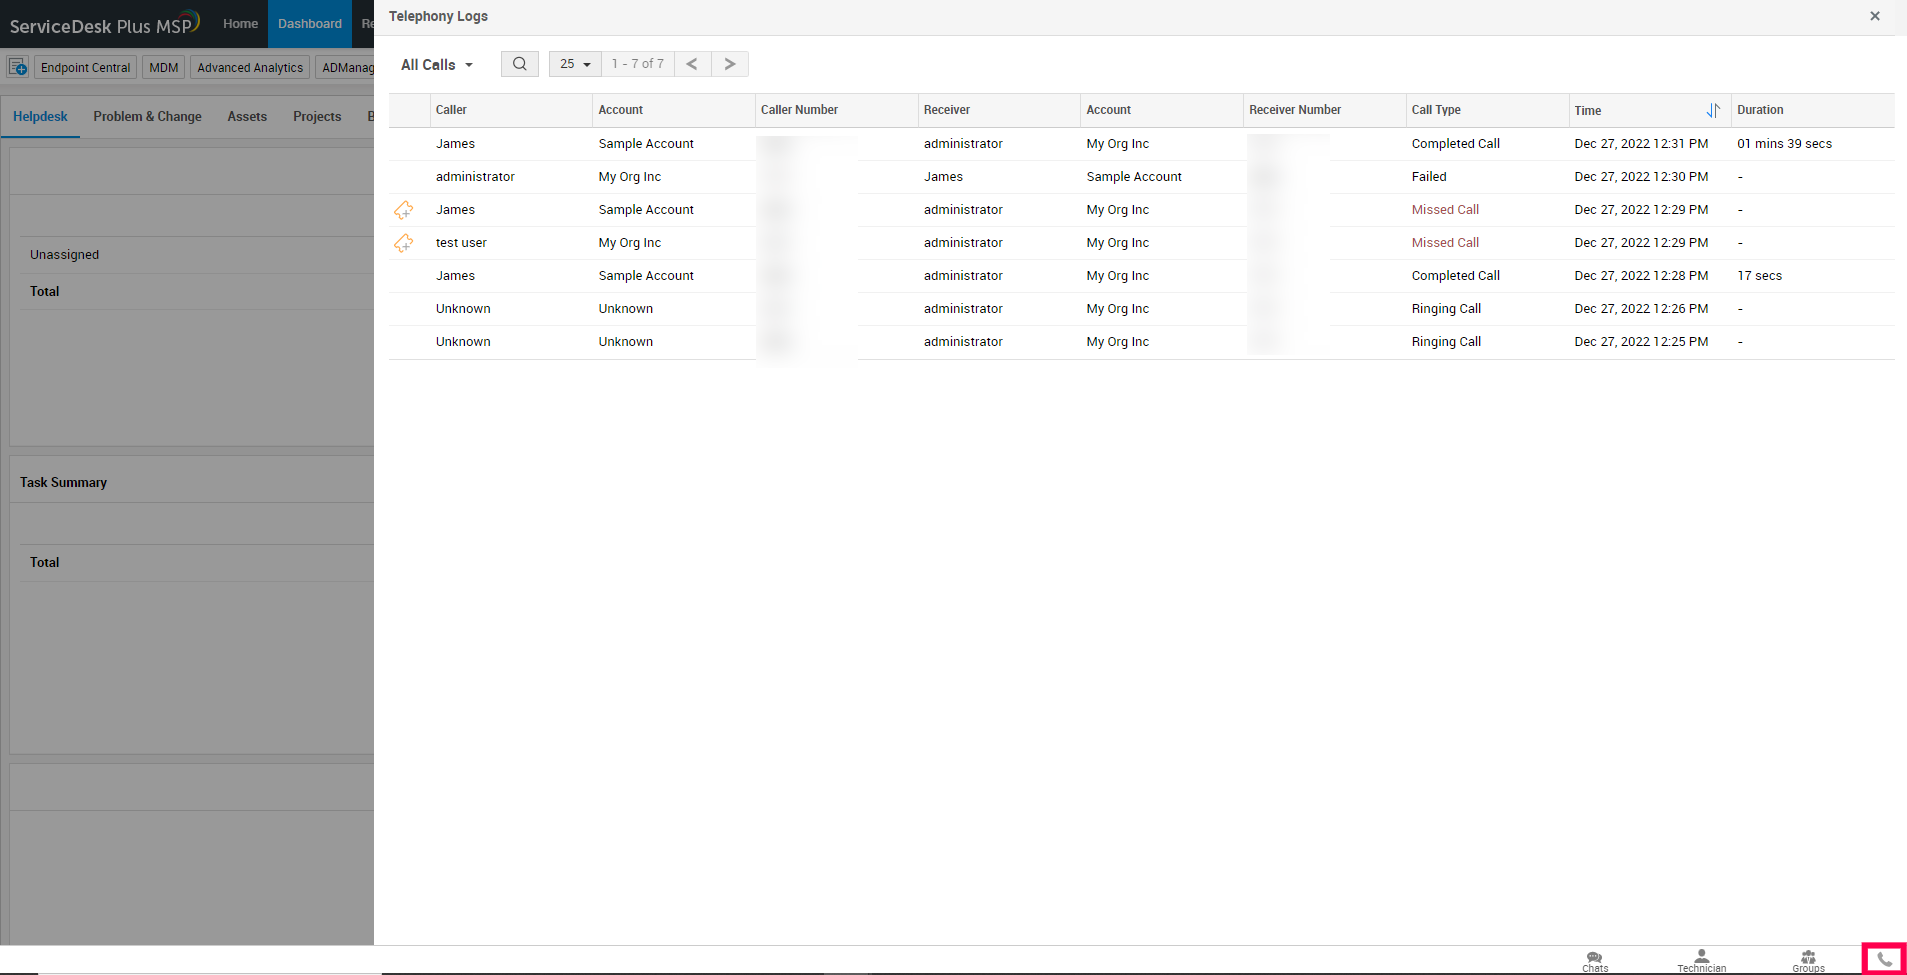
Under the Telephony Logs tab, you can access the details of all incoming and outgoing telephone calls. The details are tabulated with options to search, filter, sort (based on time), view caller or receiver details, and limit the number of items per page along with page navigation. The following information is recorded for each call entry in the log:
|
Column Name |
Description |
|
Caller |
Shows the caller's name. For unidentified callers, Unknown will be recorded. |
|
Account |
Shows the account details of the caller. For unidentified callers, Unknown will be recorded. |
|
Caller Number |
Shows the number used by the caller to initiate the call. |
|
Receiver |
Shows the call receiver's name. For unidentified receivers, Unknown will be recorded. |
|
Account |
Shows the account details of the receiver. For unidentified receivers, Unknown will be recorded. |
|
Receiver Number |
Shows the number to which the call was made. |
|
Call Type |
Shows one of the values below based on the status:
|
|
Time |
Shows the time when the call was initiated or received on ServiceDesk Plus MSP. You can sort the list in ascending or descending order using this column. |
|
Duration |
Shows how long the call lasted. |

To view details of the identified caller or receiver, click their name.
You can filter call logs based on the call type. To do this, click the filter drop-down on the top-left and choose your preferred option.

The telephony logs can also be accessed by clicking Call Logs ![]() on the bottom-right corner of the application.
on the bottom-right corner of the application.
Create Request from Logs
For call entries with the type "Missed Calls", you can create a request directly from the telephony logs page. To do this, click Create Request ![]() against the "Missed Call" type entry, and choose your preferred template and proceed with request creation.
against the "Missed Call" type entry, and choose your preferred template and proceed with request creation.
For entries from which a request was already created, you can access the request details directly from the Telephony Logs tab. To do this, click View Request Details ![]() against the call entry.
against the call entry.

You can also enable the option to create requests automatically when a technician misses a call. This option is available on the Telephony server settings page. To learn more, click here.
Telephony API (For Custom Server Integration)
Trigger Incoming call pop-up
Method: POST
Input the following URL pattern:
<protocol>://<hostname>:<port number>/api/v3/telephony/make_call
Sample Input Data
{"caller": "2001",
"callee": "1970"}
Sample Output Data
{"status_code": 2000,
"type": "success",
"message": "Telephony operation succeeded"}
Trigger Pick Up Event
Method: PUT
Input the following URL pattern:
<protocol>://<hostname>:<port number>/api/v3/telephony/pick_call
Sample Input Data
{"caller": "2002",
"callee": "1970"}
Sample Output Data
{"status_code": 2000,
"type": "success",
"message": "Telephony operation succeeded"}
Trigger Hang Up Event
Method: DELETE
Input the following URL pattern:
<protocol>://<hostname>:<port number>/api/v3/telephony/drop_call
Sample Input Data
{"caller": "2002",
"callee": "1970"}
Sample Output Data
{"status_code": 2000,
"type": "success",
"message": "Telephony operation succeeded"}

