Release Templates
Configuring Release Templates
To configure a release template,
-
Go to Admin > Templates & Forms > Release Templates.
-
Click New Release Template.
-
The displayed form consists of three main sections, namely Header, Field List, and Canvas.
-
In the header, provide the basic details of the template as explained below:
-
Enter the Template Name and Description.
-
Under Type, choose whether the template is a general or an emergency template.
-
Associate a Workflow to the template. You can configure custom workflows under Admin > Release Management > Release Workflows.
-
Select the This Template is applicable for all accounts checkbox to make the template available for all accounts. To limit the template availability to specific accounts, unselect the checkbox and associate accounts.

-
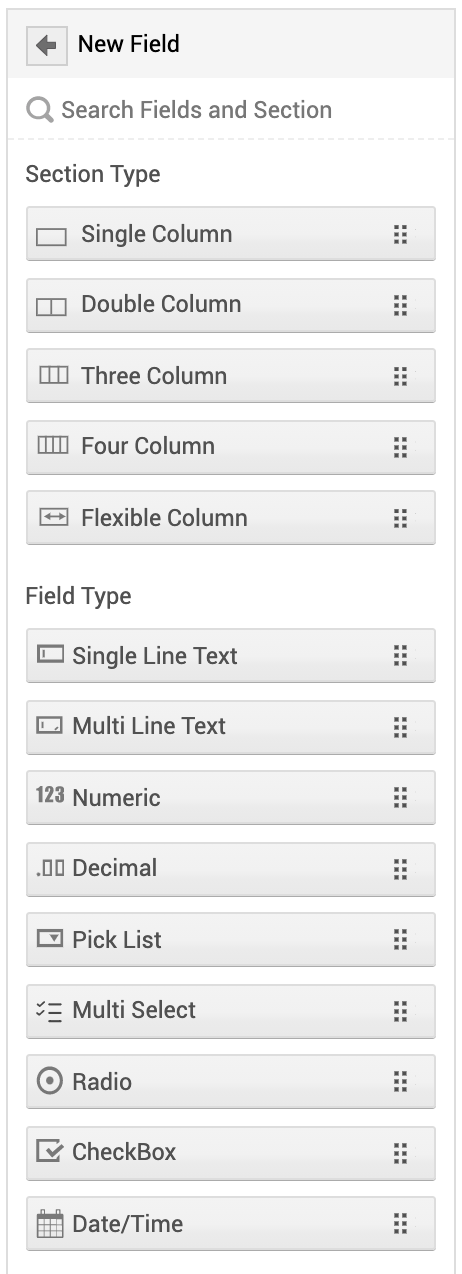
The field list on the left displays the available fields configured in the application. You can add any field from this list to the canvas using a simple drag-and-drop method. You can also add a new field/section by clicking
 .You can configure and manage additional fields for releases under Admin > Customization > Additional Fields > Release.

-
The canvas is where you build the template. In this block, you can:
-
Add Fields: Drag and drop an existing field from the field list to the canvas. You can also add a new field by clicking
 . You can add fields of type single line text, multi line text, numeric, decimal, pick list, multi select, radio, check box, and date/time.
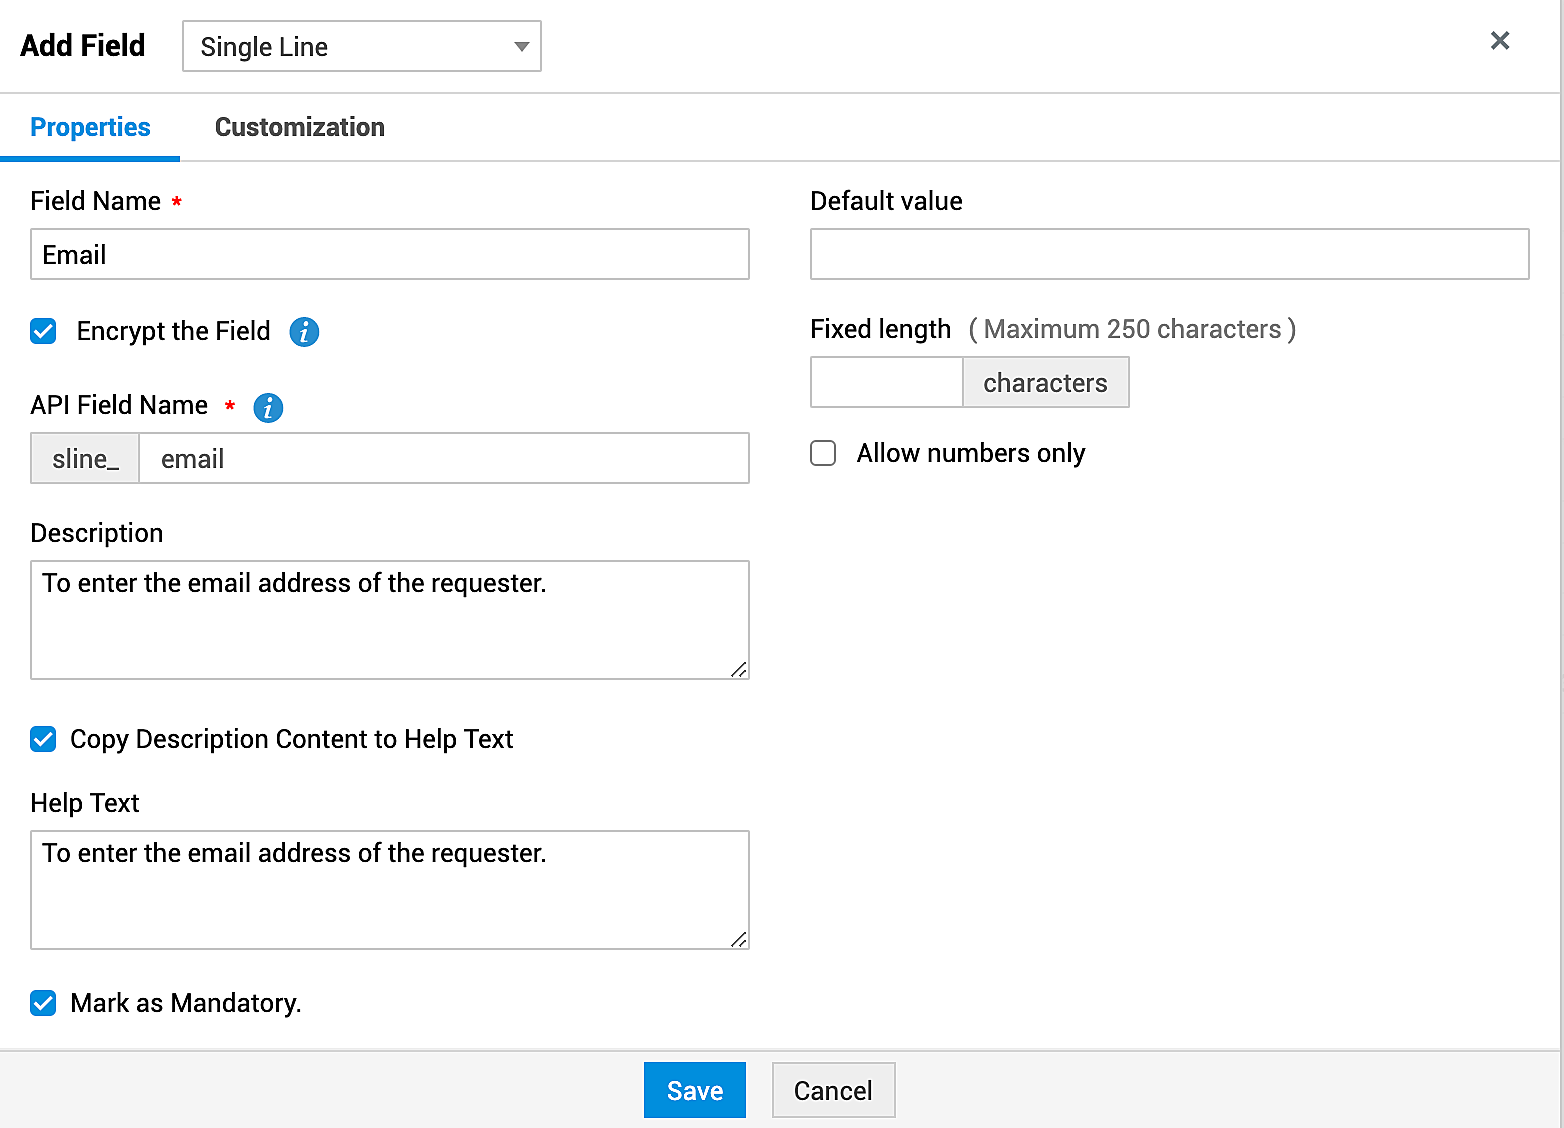
Under properties in the displayed window, provide a name and a description to the field, enter the character limit, and set a default value if required. You can also encrypt a field that may contain user's personal information. For fields with multiple options, provide all the values. Click Save.

-
Add Sections: Drag and drop a new section from the field list to the canvas by clicking
 . You can add sections of type single column, double column, three column, four column, and flexible column.
-
Enter Field Values: You can provide values to the fields in the template. These values will be auto-populated on applying the template to a release.
-
Edit Field: Hover over the required field and click
 to edit the field. Under the Properties tab, you can only modify the default value, help text, and mark the field as mandatory. Click Save after making the necessary changes.
-
Edit Section: Hover over the required section and click
 . You can modify the section details under the Properties tab and change the look and feel of the section under the Customization tab. Click Save once you have made the necessary changes.
-
Move Fields/Sections: You can rearrange the fields and sections by using a simple drag-and-drop method.
-
Delete Field/Section: To delete a field/section, hover over the required field/section and click
 .
.

-
Click Save after configuring the details.
Note:
-
You cannot edit or delete some system-generated fields.
-
Deleting a section will also delete the fields in it.
-
You cannot delete a section that contains a system-generated field.
-
If an Item is mandated, Category and Sub-category will be automatically mandated.
Adding Roles
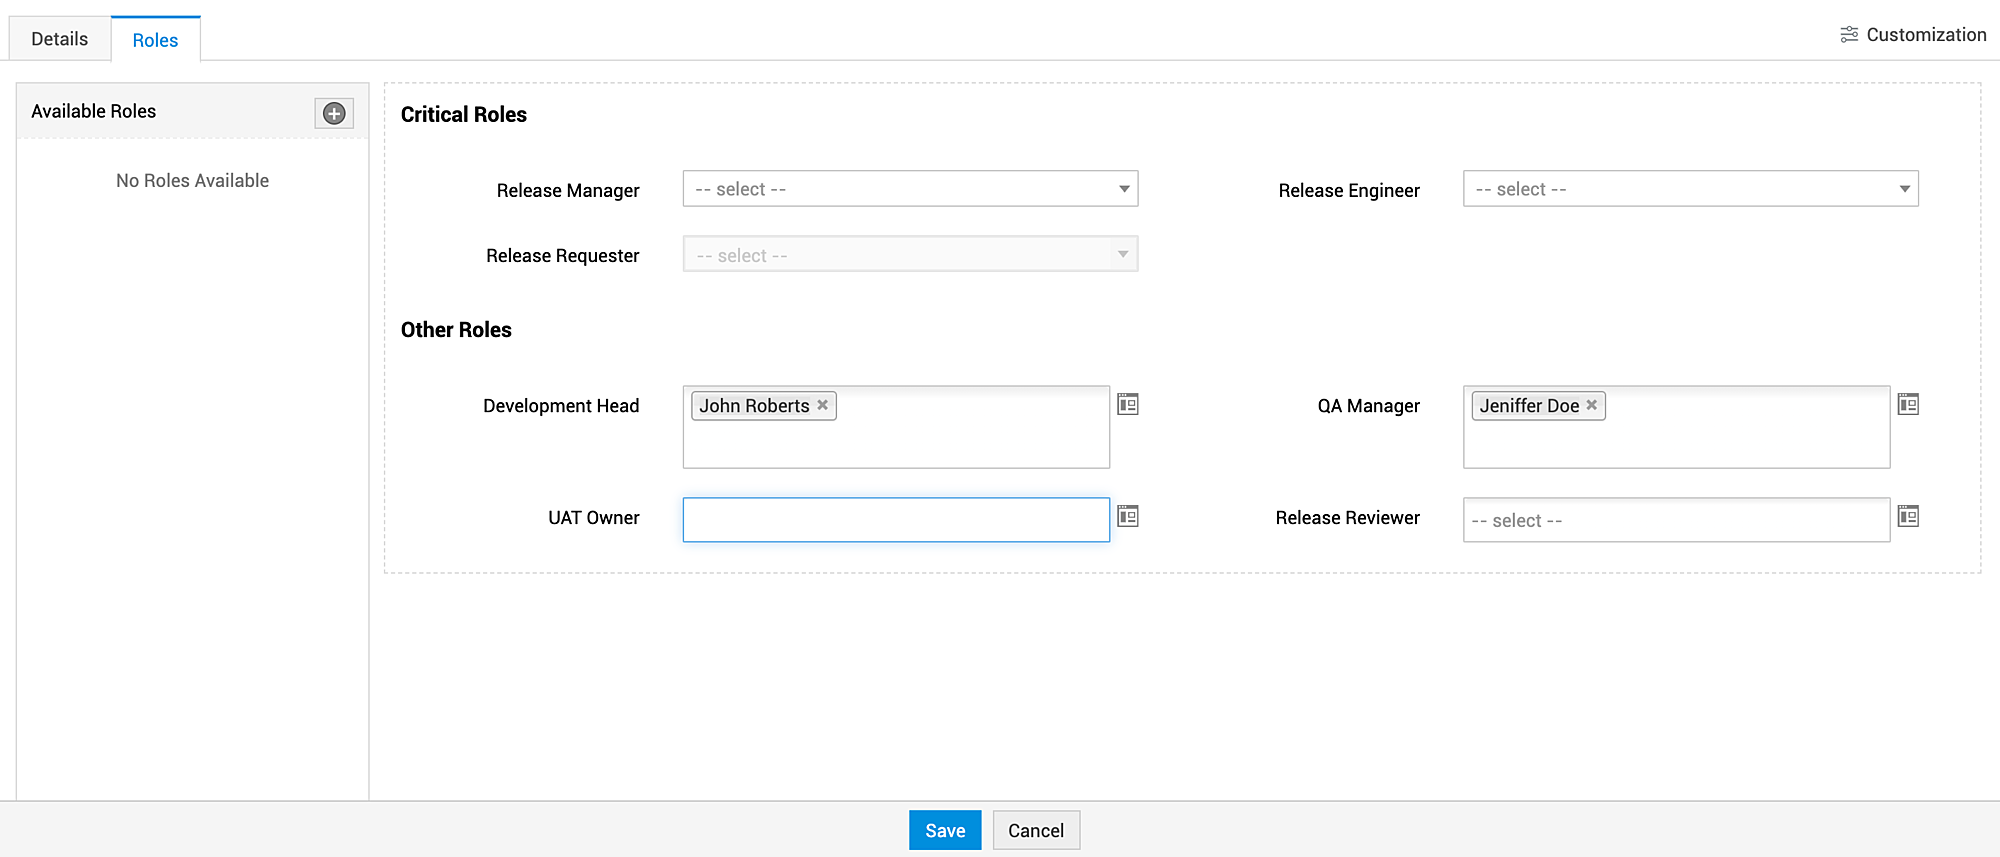
On saving a template, the Roles tab will be available in the template configuration page. Under this tab, you can add and manage roles related to the release and also assign default users to the roles. These users will be automatically assigned to the corresponding roles in releases configured using this template.
To associate a user with a role, click the required role. A drop-down consisting of the users eligible for the role will be displayed. Select the user to be assigned.
.

Copy Template
To address similar releases, you can copy an existing release template.
To copy a release template,
-
Open the required template from the release template list view.
-
Click Copy Template.
-
In the displayed pop-up, enter the new name of the template and click Copy. The template will be copied.
-
Open the copied template from the list view and make the necessary changes.
Template List View
You can add and manage release templates from the list view page. Use the filter drop-down to view the active/inactive release templates in the application. You can also limit the number of records displayed in the list view by invoking the corresponding drop-down.
The template type is indicated in the list view using two icons,
-
 - General Template
-
 - Emergency Template
To set a template as default, click ![]() > Set as Default beside the required template.
> Set as Default beside the required template.
To edit/delete a template from the list view, click ![]() beside the required template and invoke the corresponding action.
beside the required template and invoke the corresponding action.
To delete templates in bulk, select the required templates and click ![]() .
.
To reactivate an inactive template, choose the Inactive Release Templates filter and click ![]() > Mark as active beside the required template.
> Mark as active beside the required template.
You can search for a release template from the list view by clicking ![]() .
.
Click ![]() to sort the templates in ascending/descending alphabetical order.
to sort the templates in ascending/descending alphabetical order.

