Request Details Page Layout Customization
Organizations can personalize the request details page layout to their exact requirements by using simple drag and drop. With layout customization, you can add prioritized information to the right panel and reorder the request tabs such as Resolution, Tasks, Work Logs, Approvals, and more. In addition, you can sequence the sections displayed under the Details tab. Only the SDAdmin or the help desk admin can customize the request layout.
The layout can be customized for technicians and requesters separately. You can design the layout from within any request, and the new layout will be immediately applied to all requests.
Customizing the Request Layout
Go to Requests and click any request.
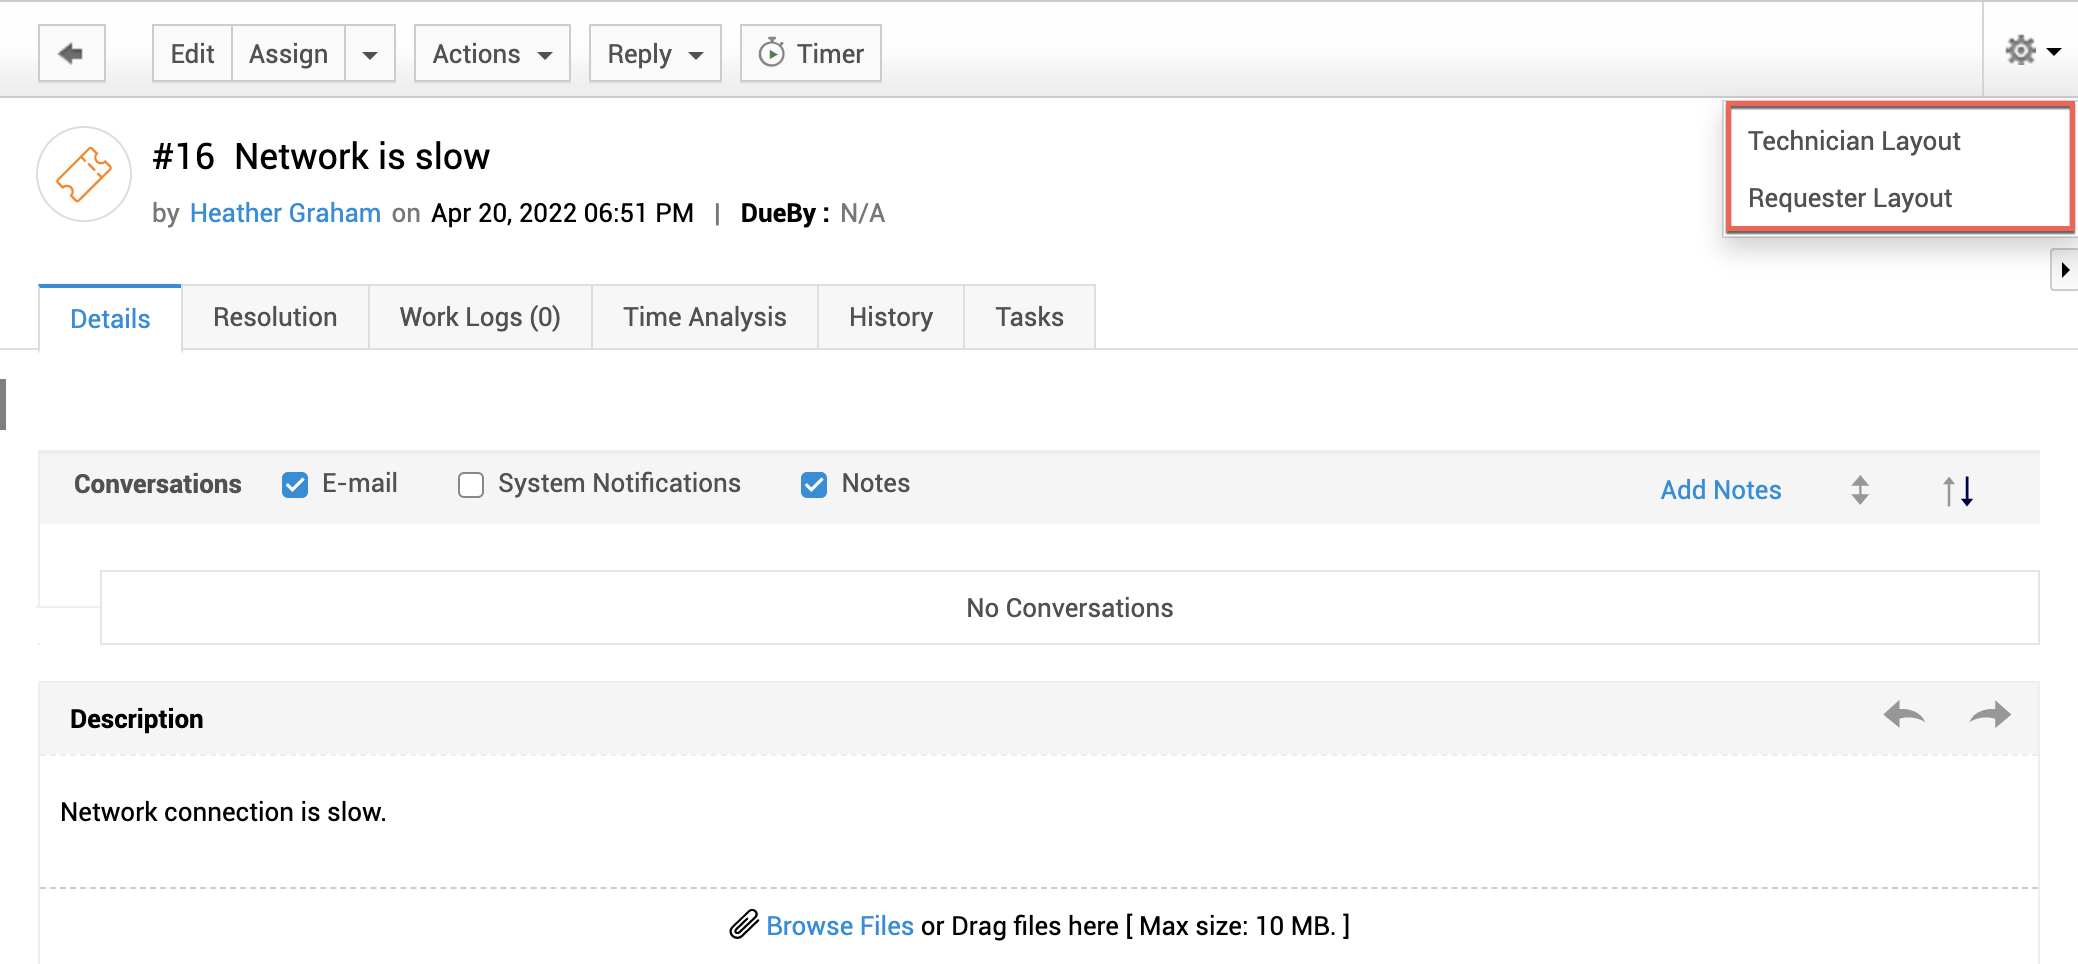
In the request details page, click the  icon displayed in the header.
Choose whether you want to customize the page for technicians or requesters.
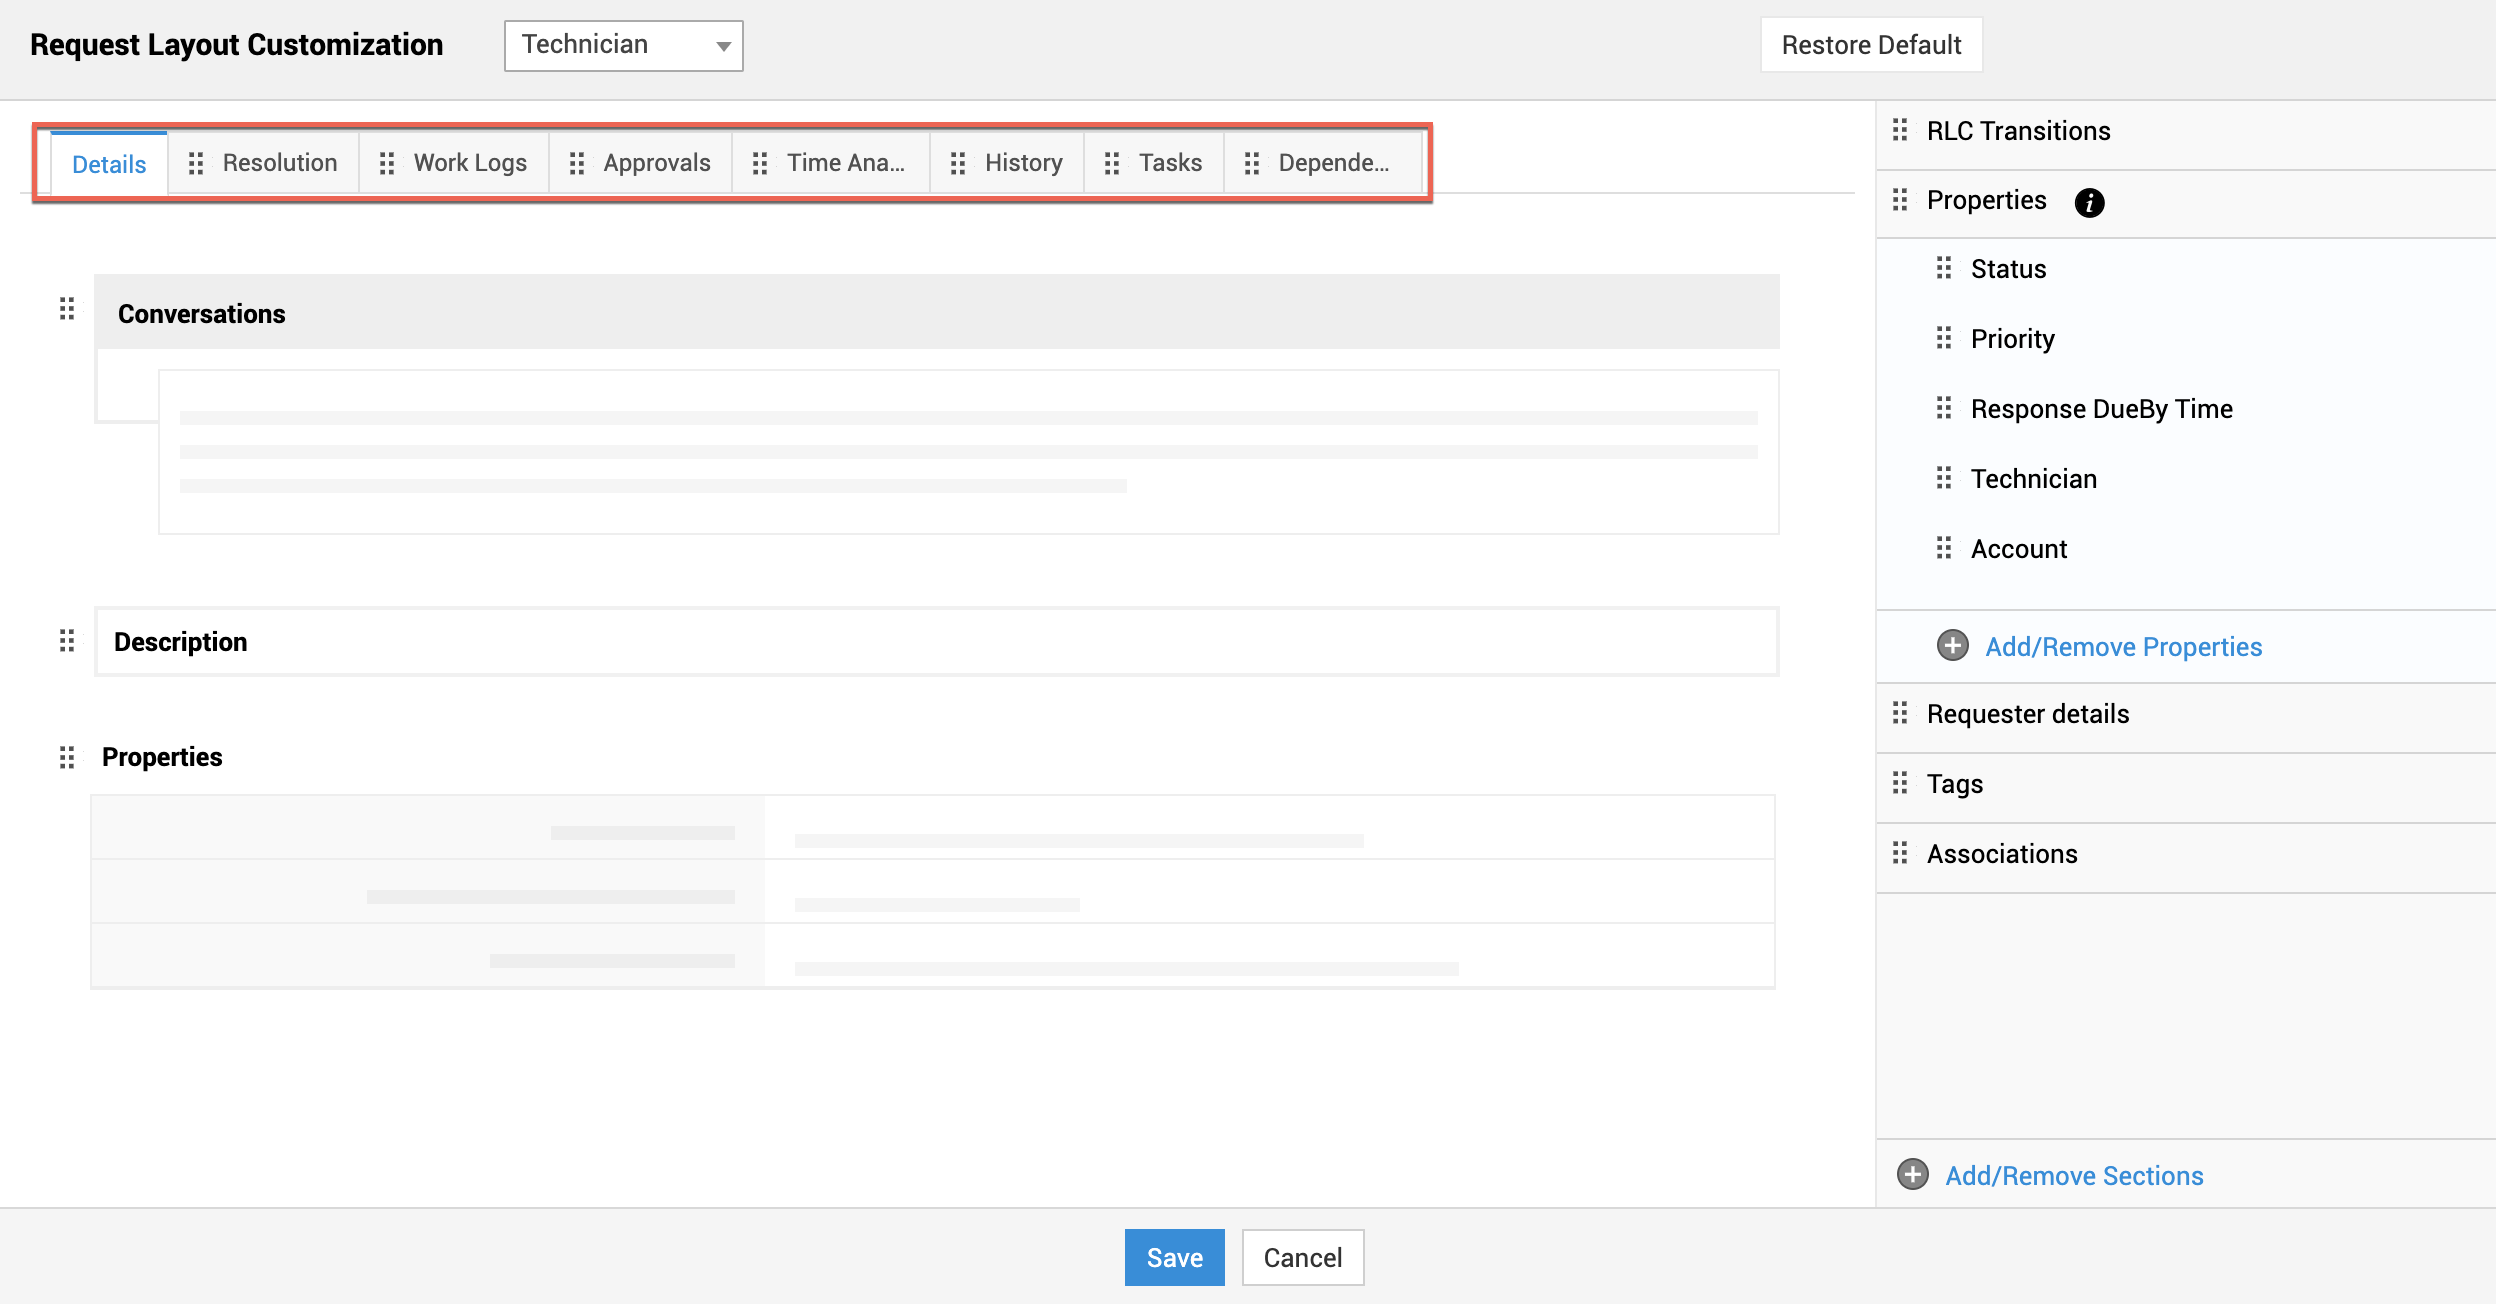
The Request Layout Customization window will pop up. (At anytime you want to switch the customization between Technician Layout and Requester Layout, you can do so easily inside the pop-up window.)
Reordering Request Tabs
When you customize the request layout for technicians, all tabs available on any request details page, including Resolution, Tasks, Work Logs, Approvals, Dependency, Time Analysis, and History will be displayed on the pop-up window.
For requesters, only Details, History, Approvals, and Resolution tabs will be available on the request details page, and the same will be displayed on the pop-up window.
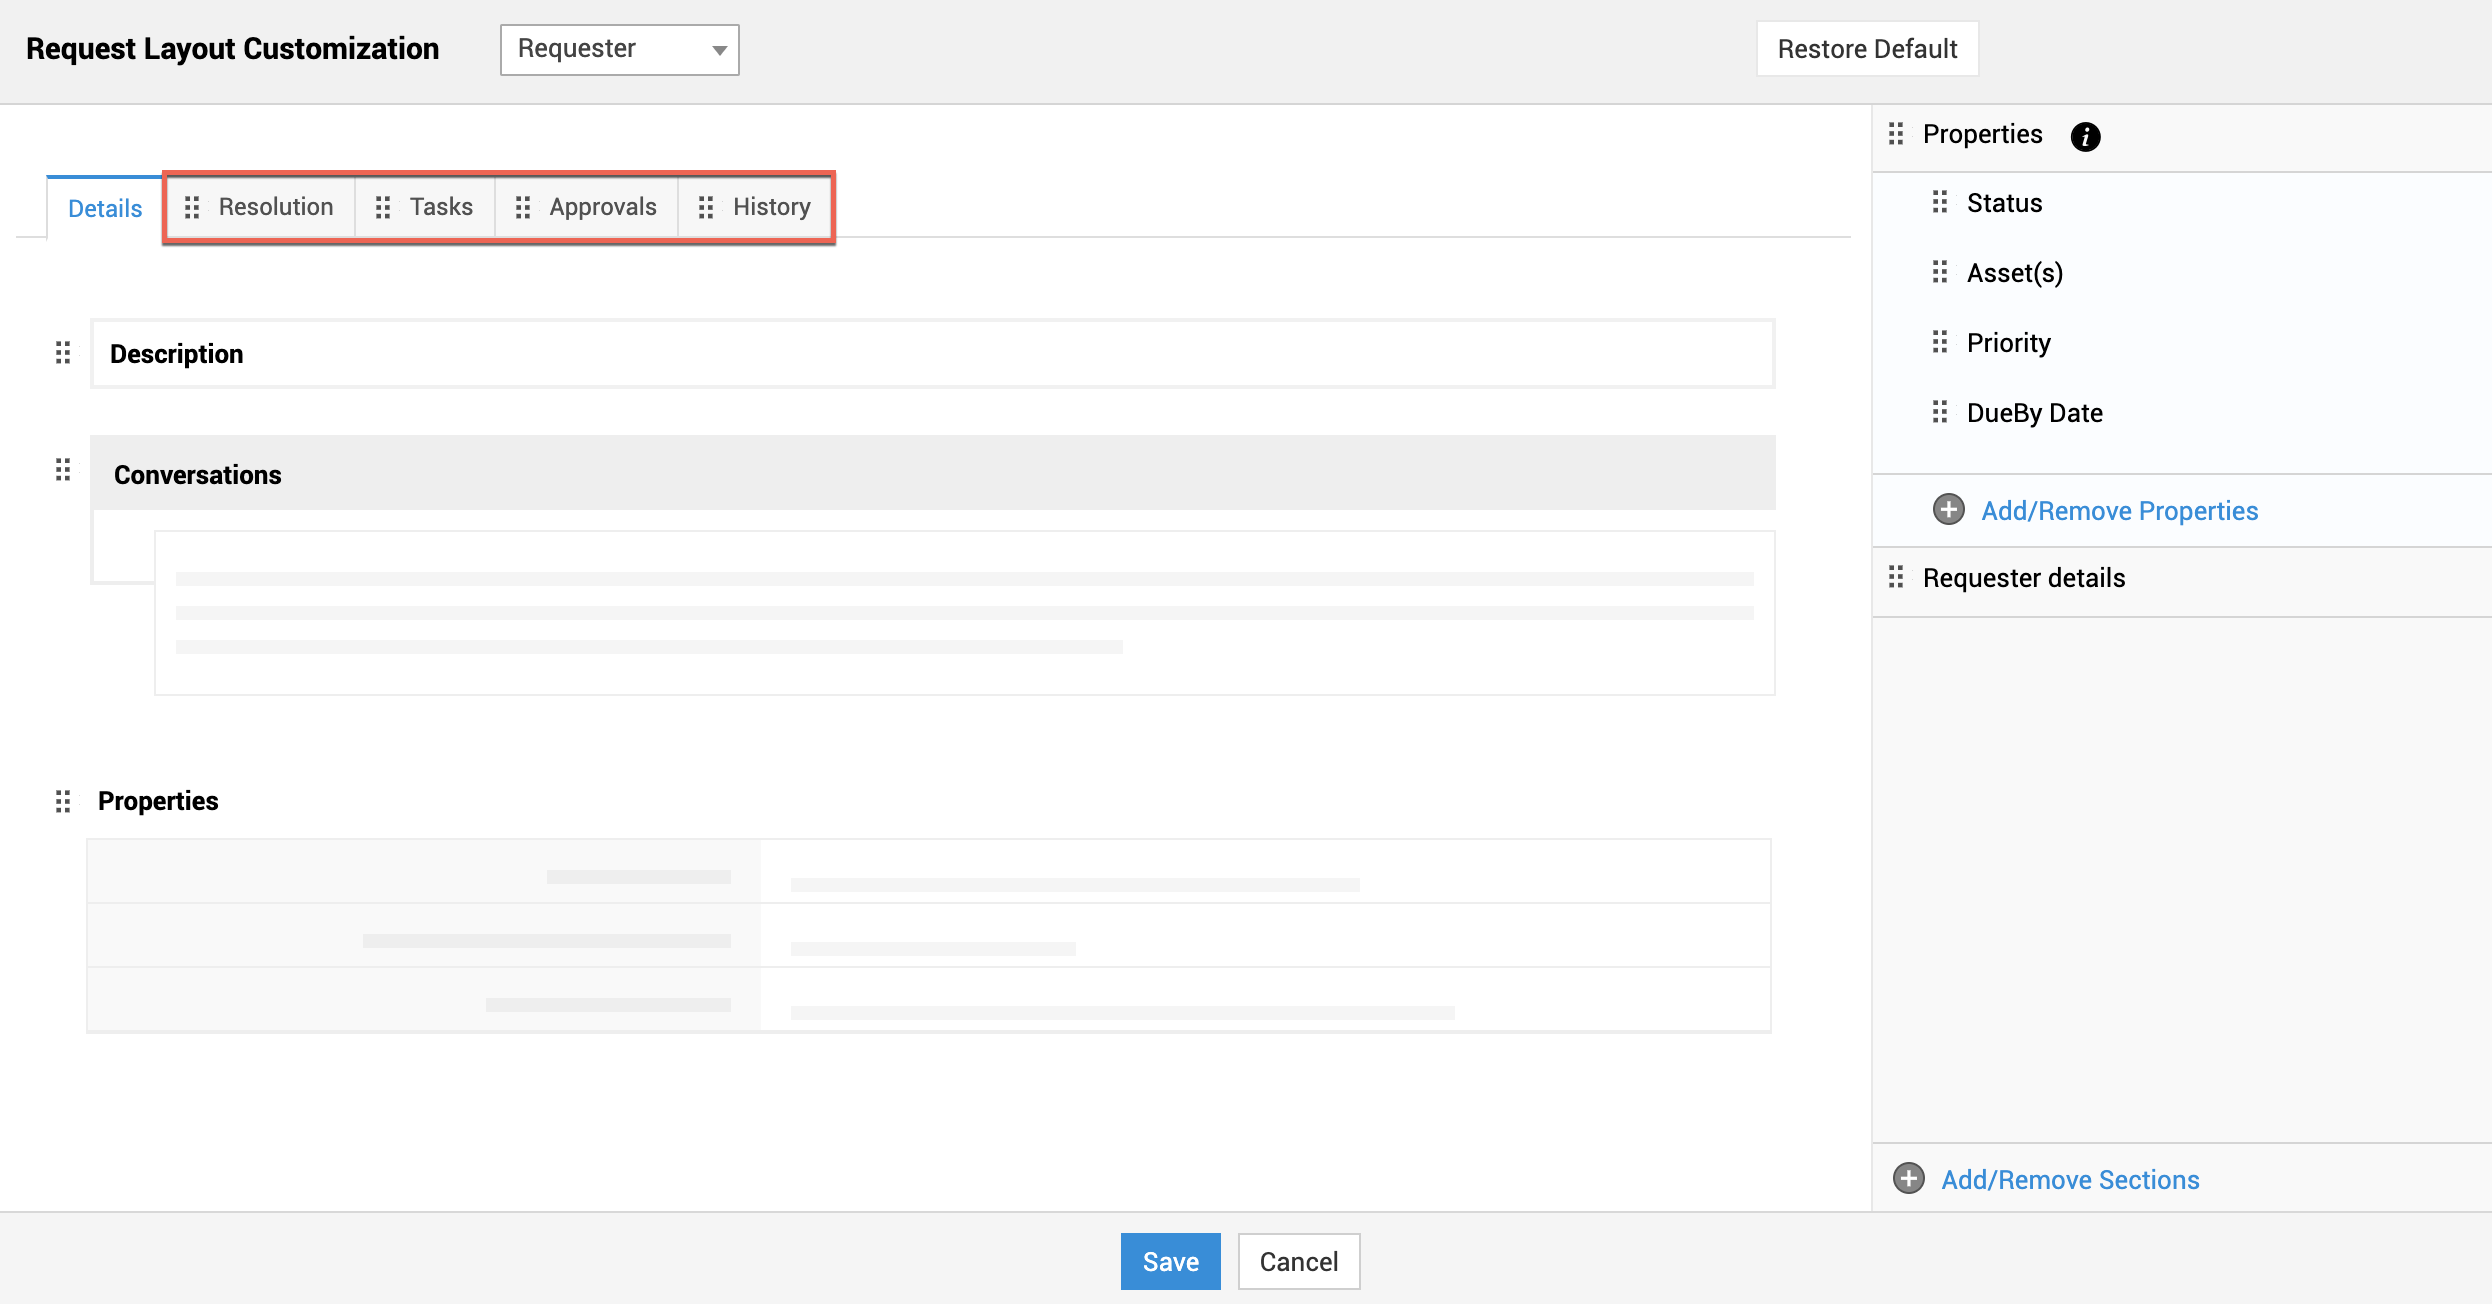
To reposition a tab, place the cursor on the tab; click, hold, and drag the tab to the required position.
Under Details, you can sequence the sections―Description, Conversations, and Properties per your requirements. For example, technicians are likely to go through a request's conversations before picking up or assigning the request. You can position the conversations on top to help technicians easily navigate to that section.
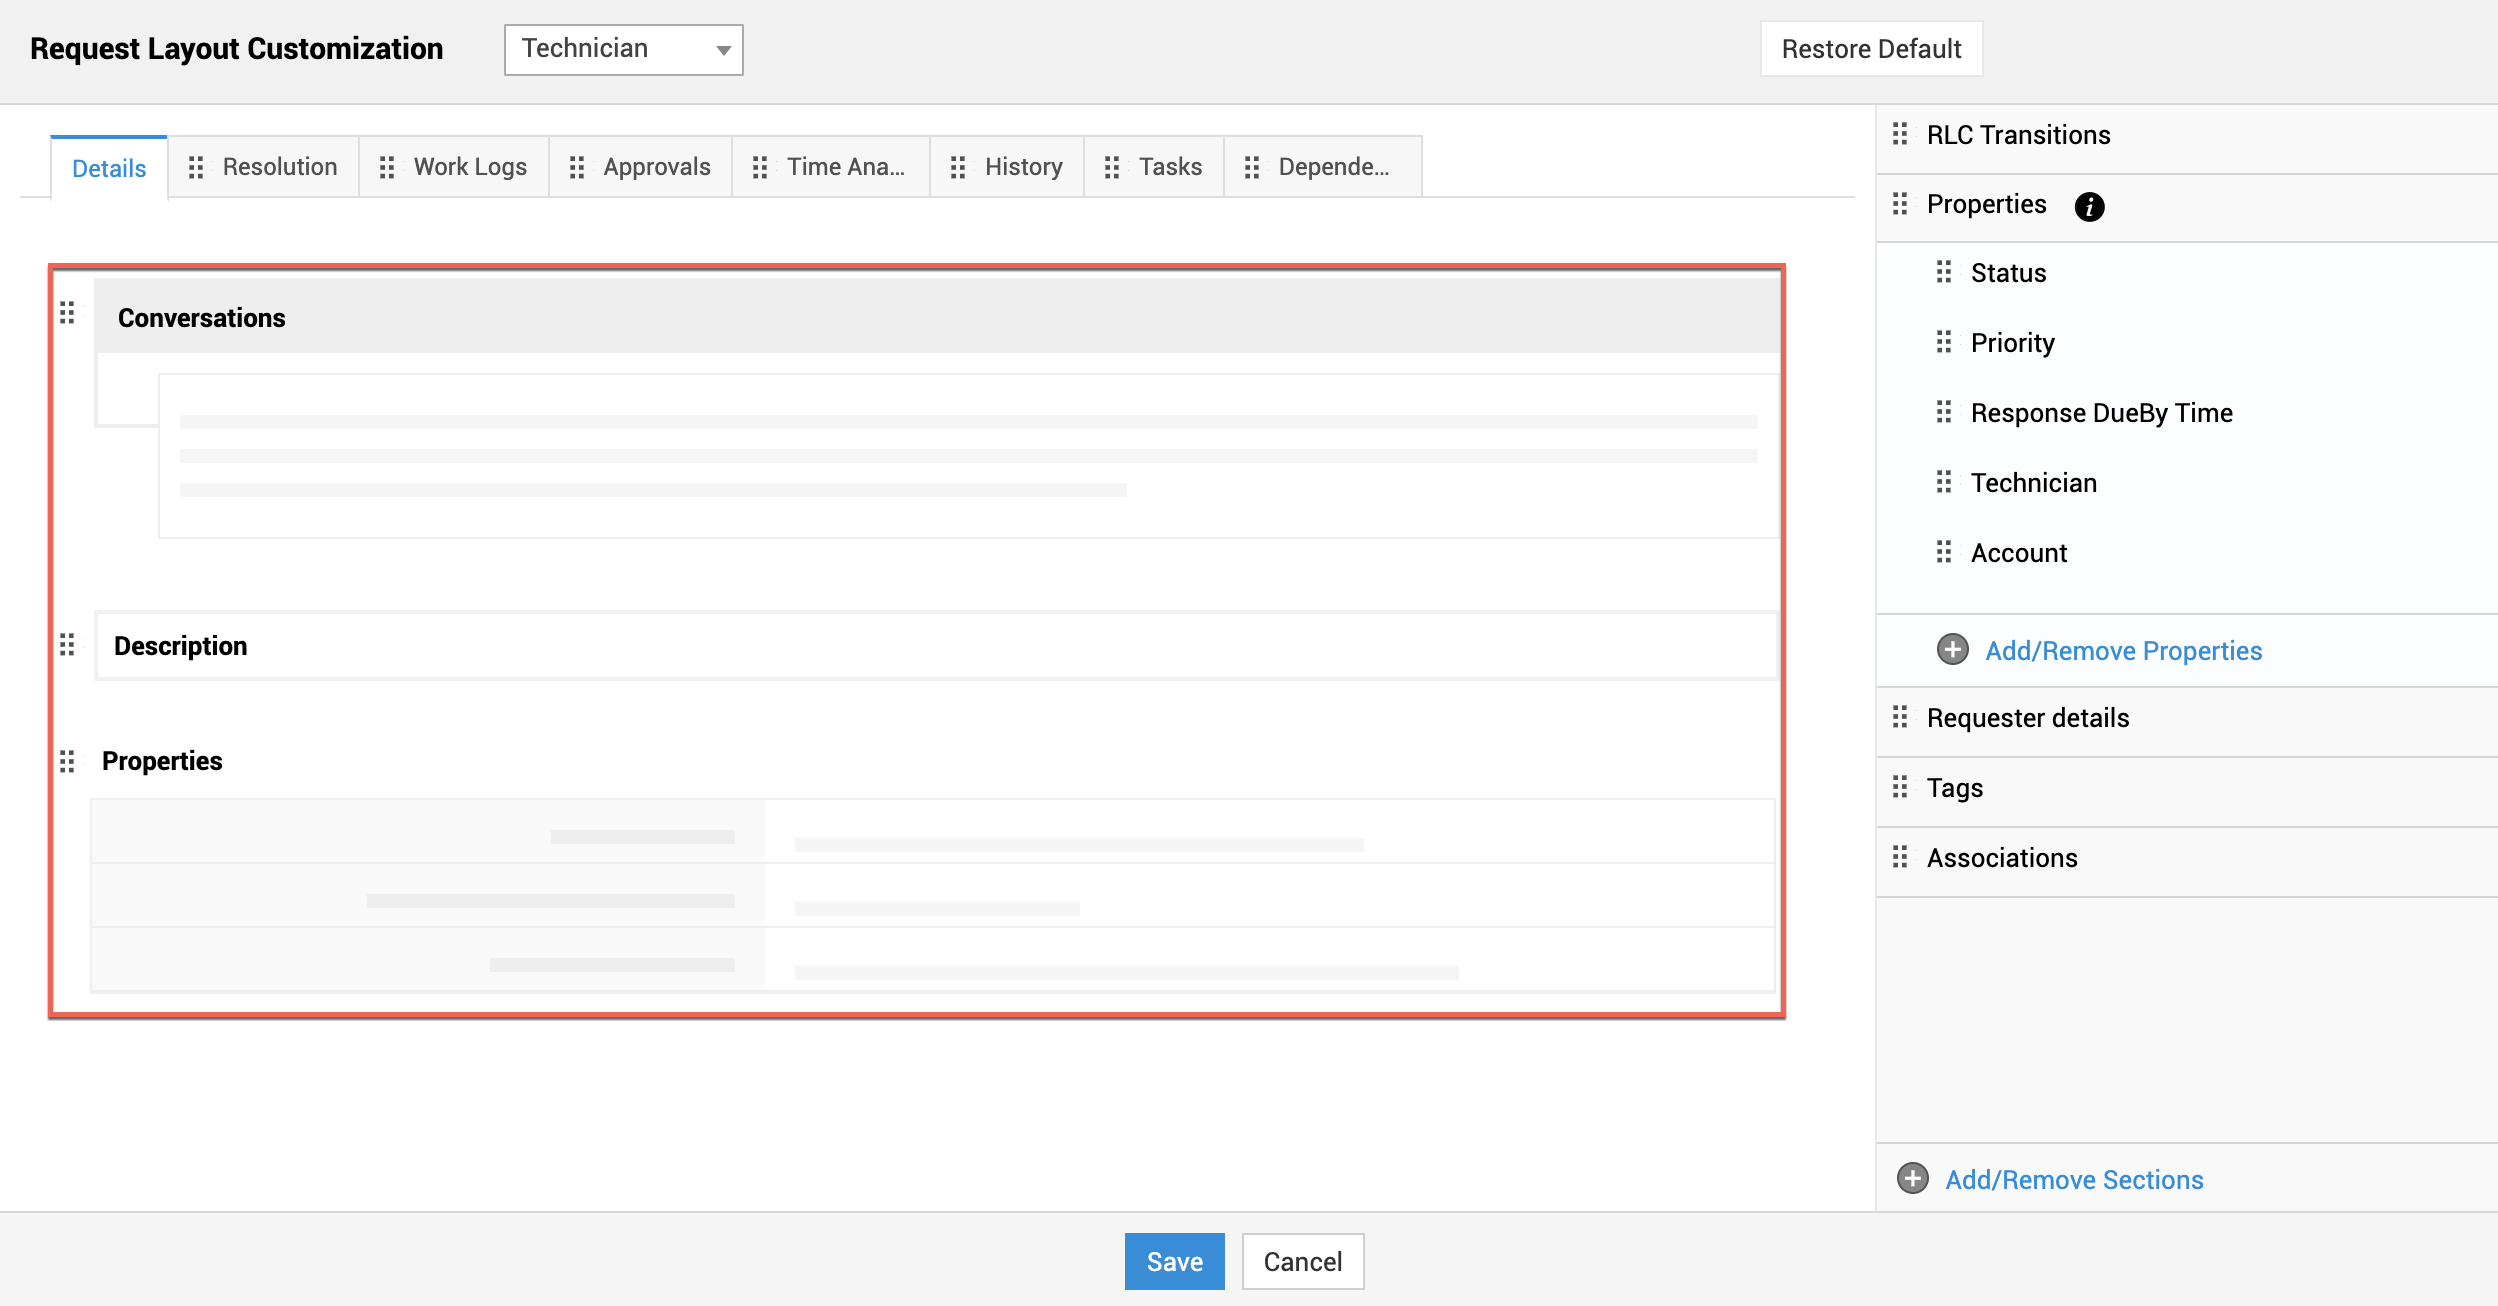
To reorder a section, place the cursor on the section; click, hold, and drag the section to the required position.
Customizing the Right Panel
Reordering Sections
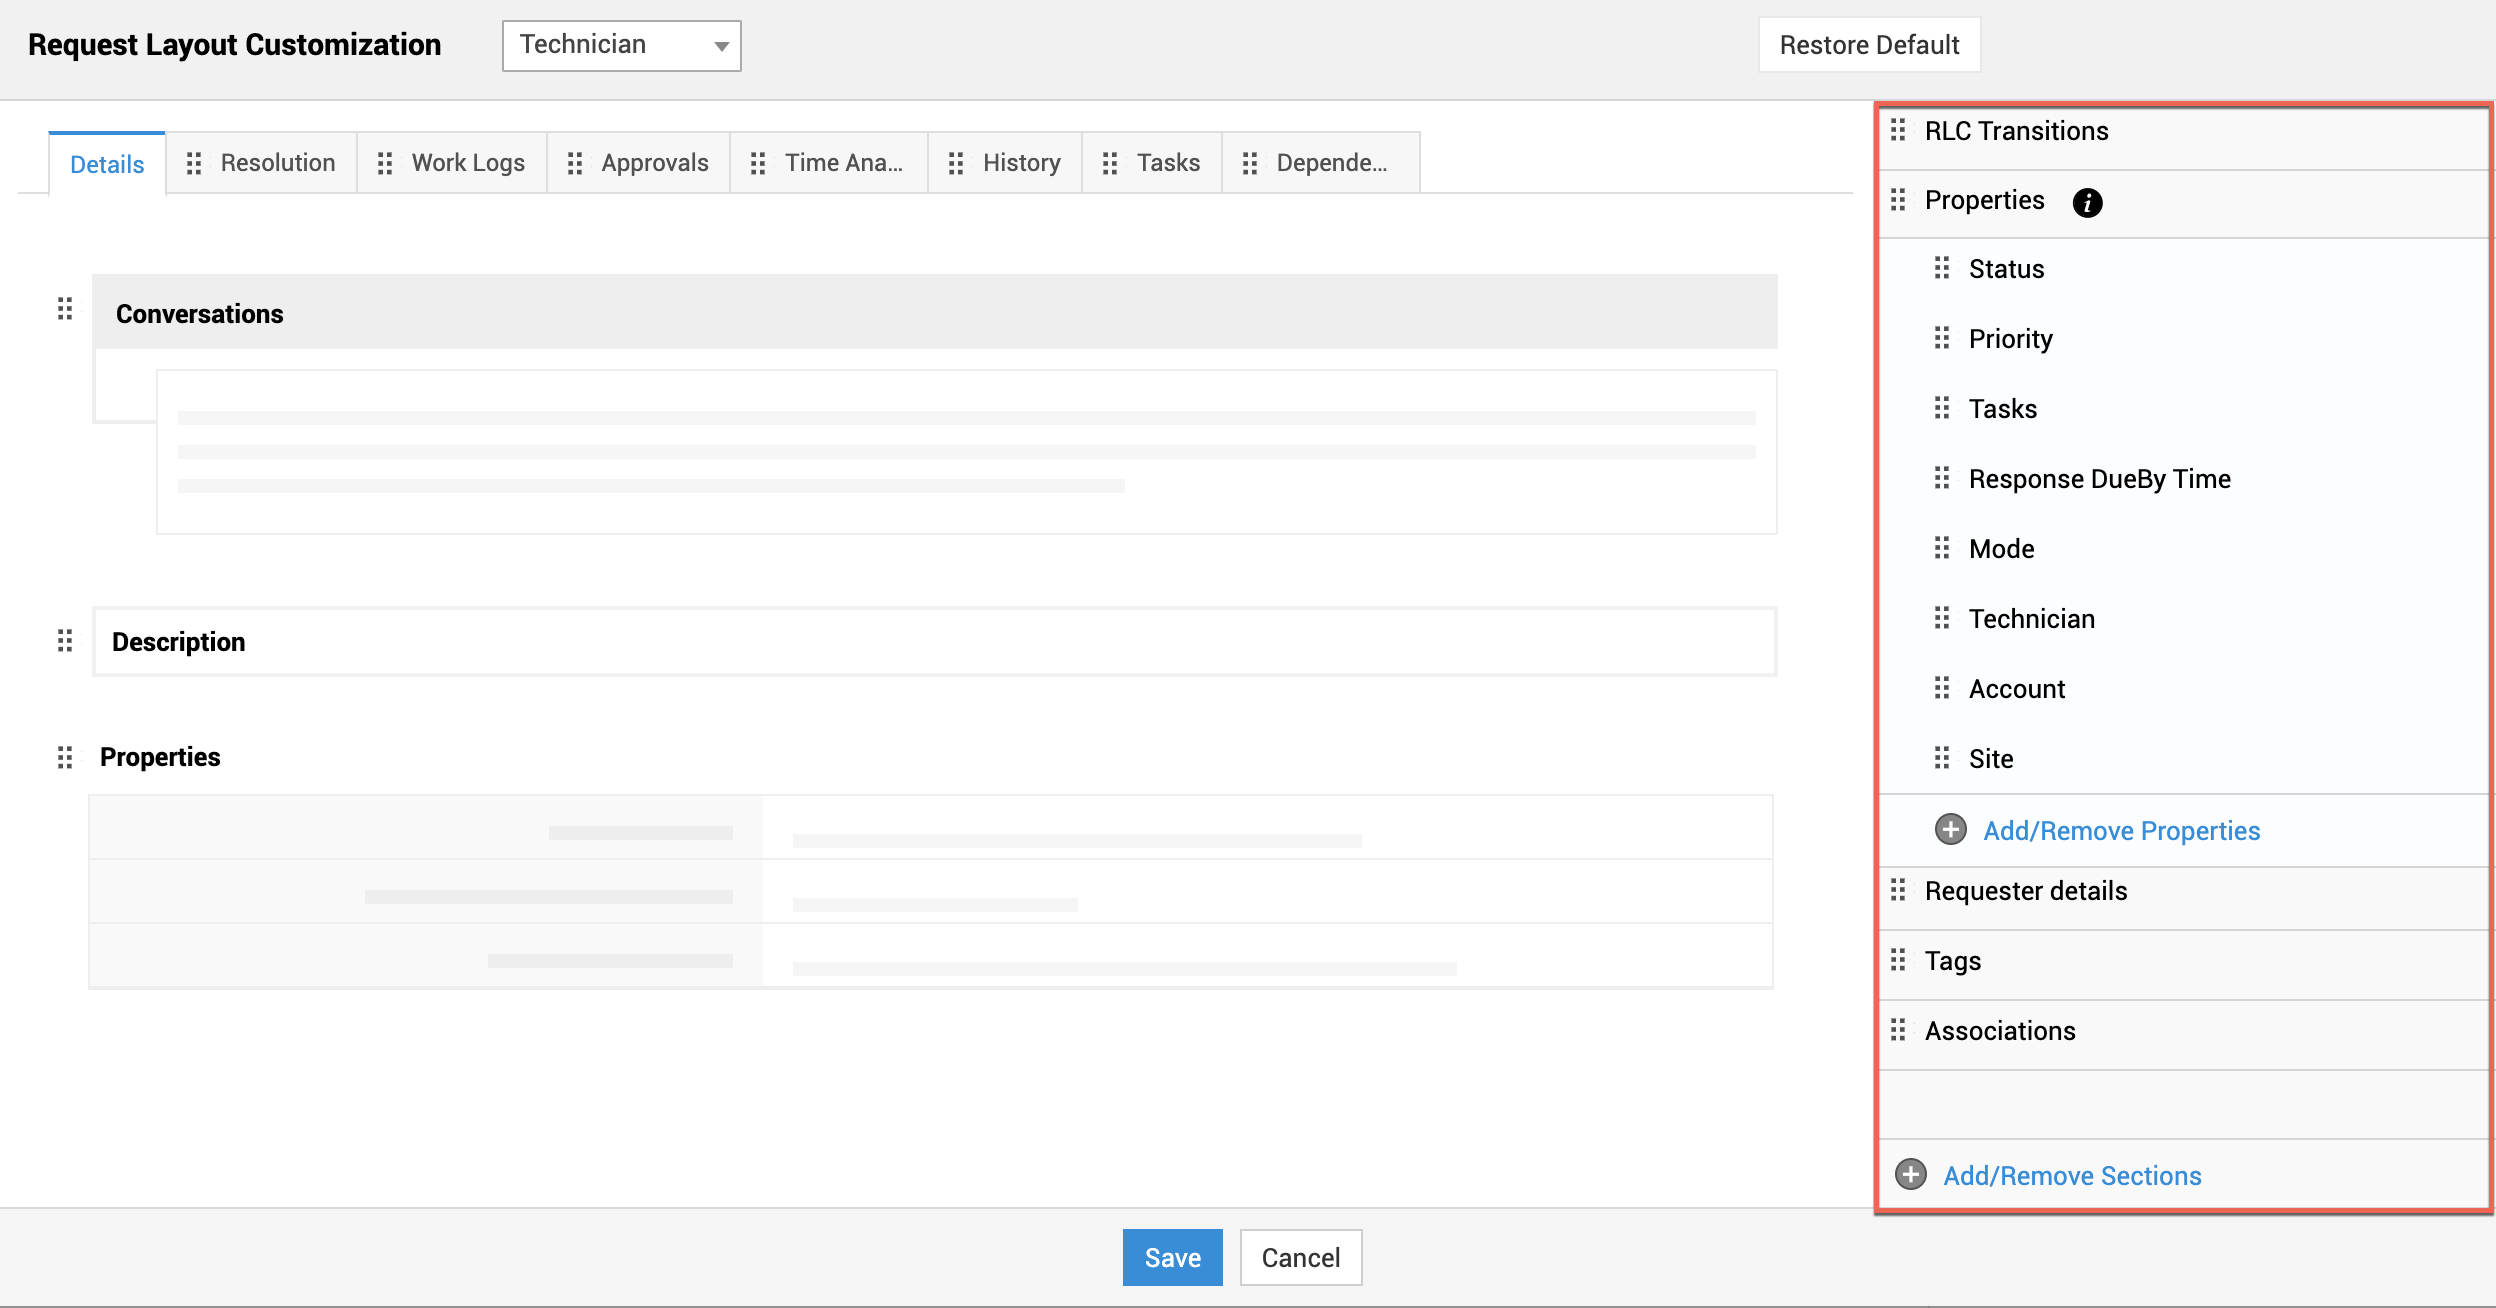
For technicians, the right panel of the request details page by default includes request life cycle (RLC) transitions, request properties and associations, request sharing with users, and requester details.
For requesters, the right panel by default includes the request properties and the requester details.
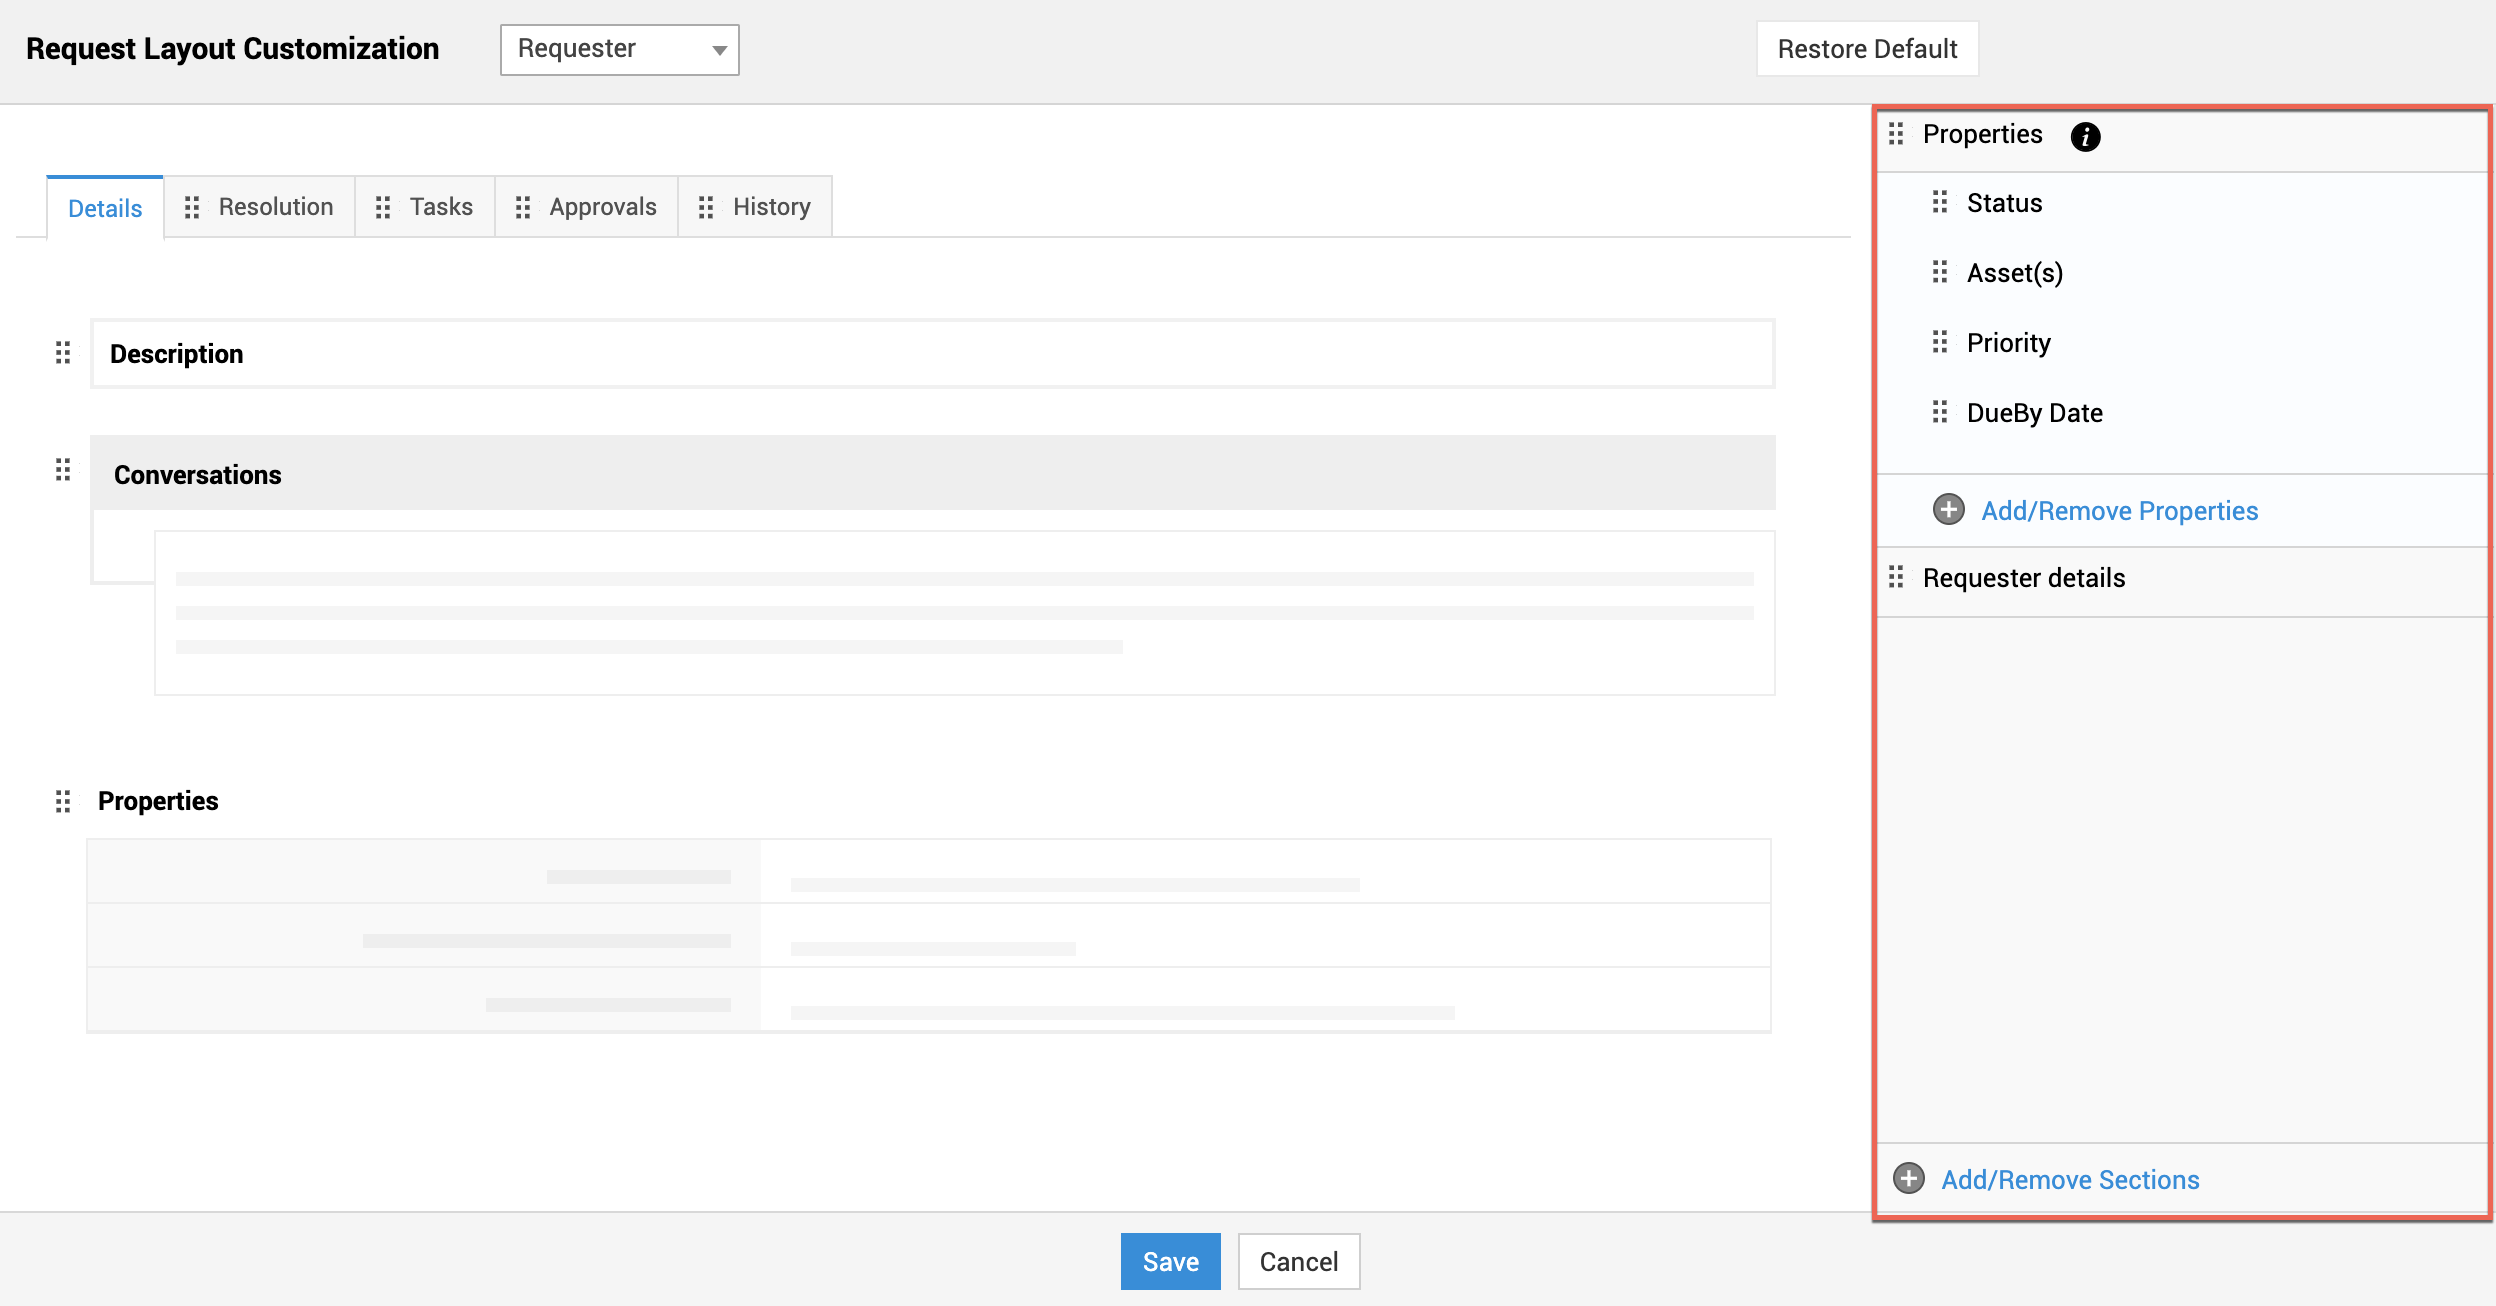
To reposition a section, place the cursor on the section; click, hold, and drag the section to the required position.
Reordering Properties
You can reorder the fields listed under Properties in the right panel. To reposition any field, click, hold, and drag the field to the required position.
Adding/Removing Sections
To remove a section from the right panel, hover over the section and click the Delete icon displayed.
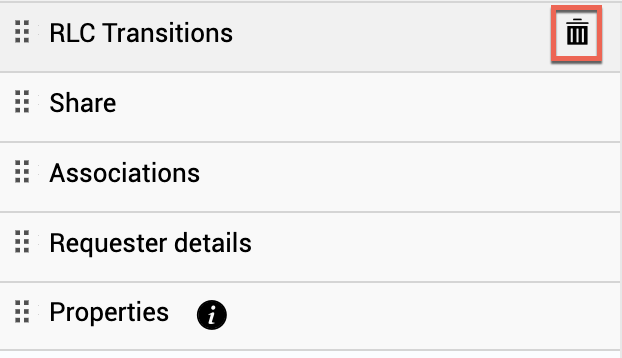
You have a two-step alternative: click Add/Remove Sections displayed at the bottom of the right panel; place the cursor on the required section; click, hold, and drag the section from the right panel to the adjacent pane.
To include the section back into the right panel, click Add/Remove Sections. Place the cursor on the required section; click and drag the section from its current location to the right panel.
Adding/Removing Properties
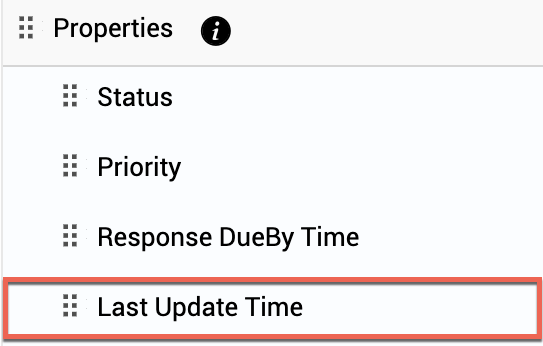
Under Properties in the right panel, specific fields are available by default. You can add more request properties, including additional fields. For example, Last Updated Time states when the last reply was sent from the request and is crucial to the technicians handling the request. You can include this field to the right panel.
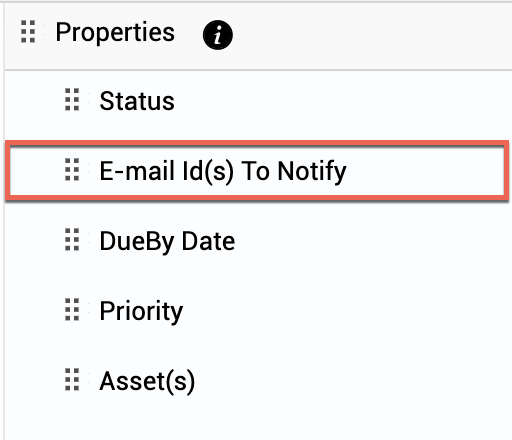
For requesters, you can add fields such as E-mail ID(s) To Notify to the right panel to help the requester quickly learn who are involved in the request processing.
Click Add/Remove Properties displayed at the bottom of the Properties section. Default and additional request fields from all request templates will be displayed in a pane adjacent to the right panel. However, additional fields configured for specific service categories will not be available in the list.
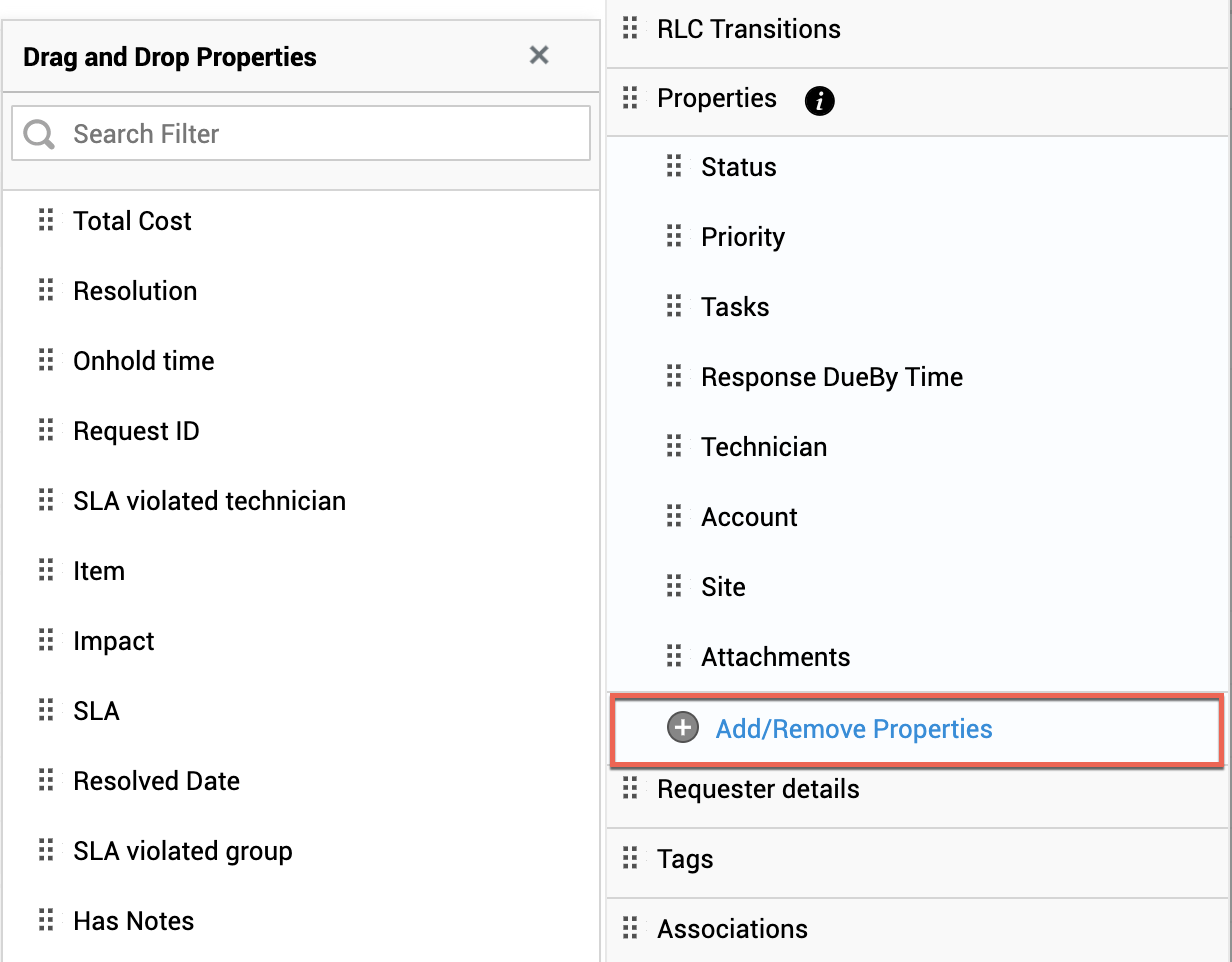
Use the Search button or browse through the list and locate the required field. After locating the field, click and drag the field to Properties in the right panel.
To remove any field from Properties, hover over the field and click the Delete icon displayed.
![]()
You have a two-step alternative: click Add/Remove Properties displayed at the bottom of the Properties section; place the cursor on the required section, then click, hold, and drag the required field from the right panel to the adjacent pane.
To include the field back into the right panel, click Add/Remove Properties. Place the cursor on the required field; click, hold, and drag the field from its current location to Properties in the right panel.
Updating the Customized Layout
Click Save after customizing the layout. The new layout will be immediately updated for the intended users (requesters or technicians).
Restoring the Default Layout
At any time you want to revert the request layout to the default configuration, open the Request Layout Customization pop-up window (open any request > click  > Technician Layout/Requester Layout) and click Restore Default displayed in the header.

Tracking Activities
Track the request layout customization-related activities by using the View History button displayed in the header of the Request Layout Customization pop-up window (open any request > click  > Technician Layout/Requester Layout).

The Use this version button displayed next to each layout under History allows you to restore the corresponding layout to the request.

Custom Layout for Technicians
You can allow technicians to customize their request details page layout. To enable this, select the checkbox Allow technicians to personalize their layout in the request details page customization window.
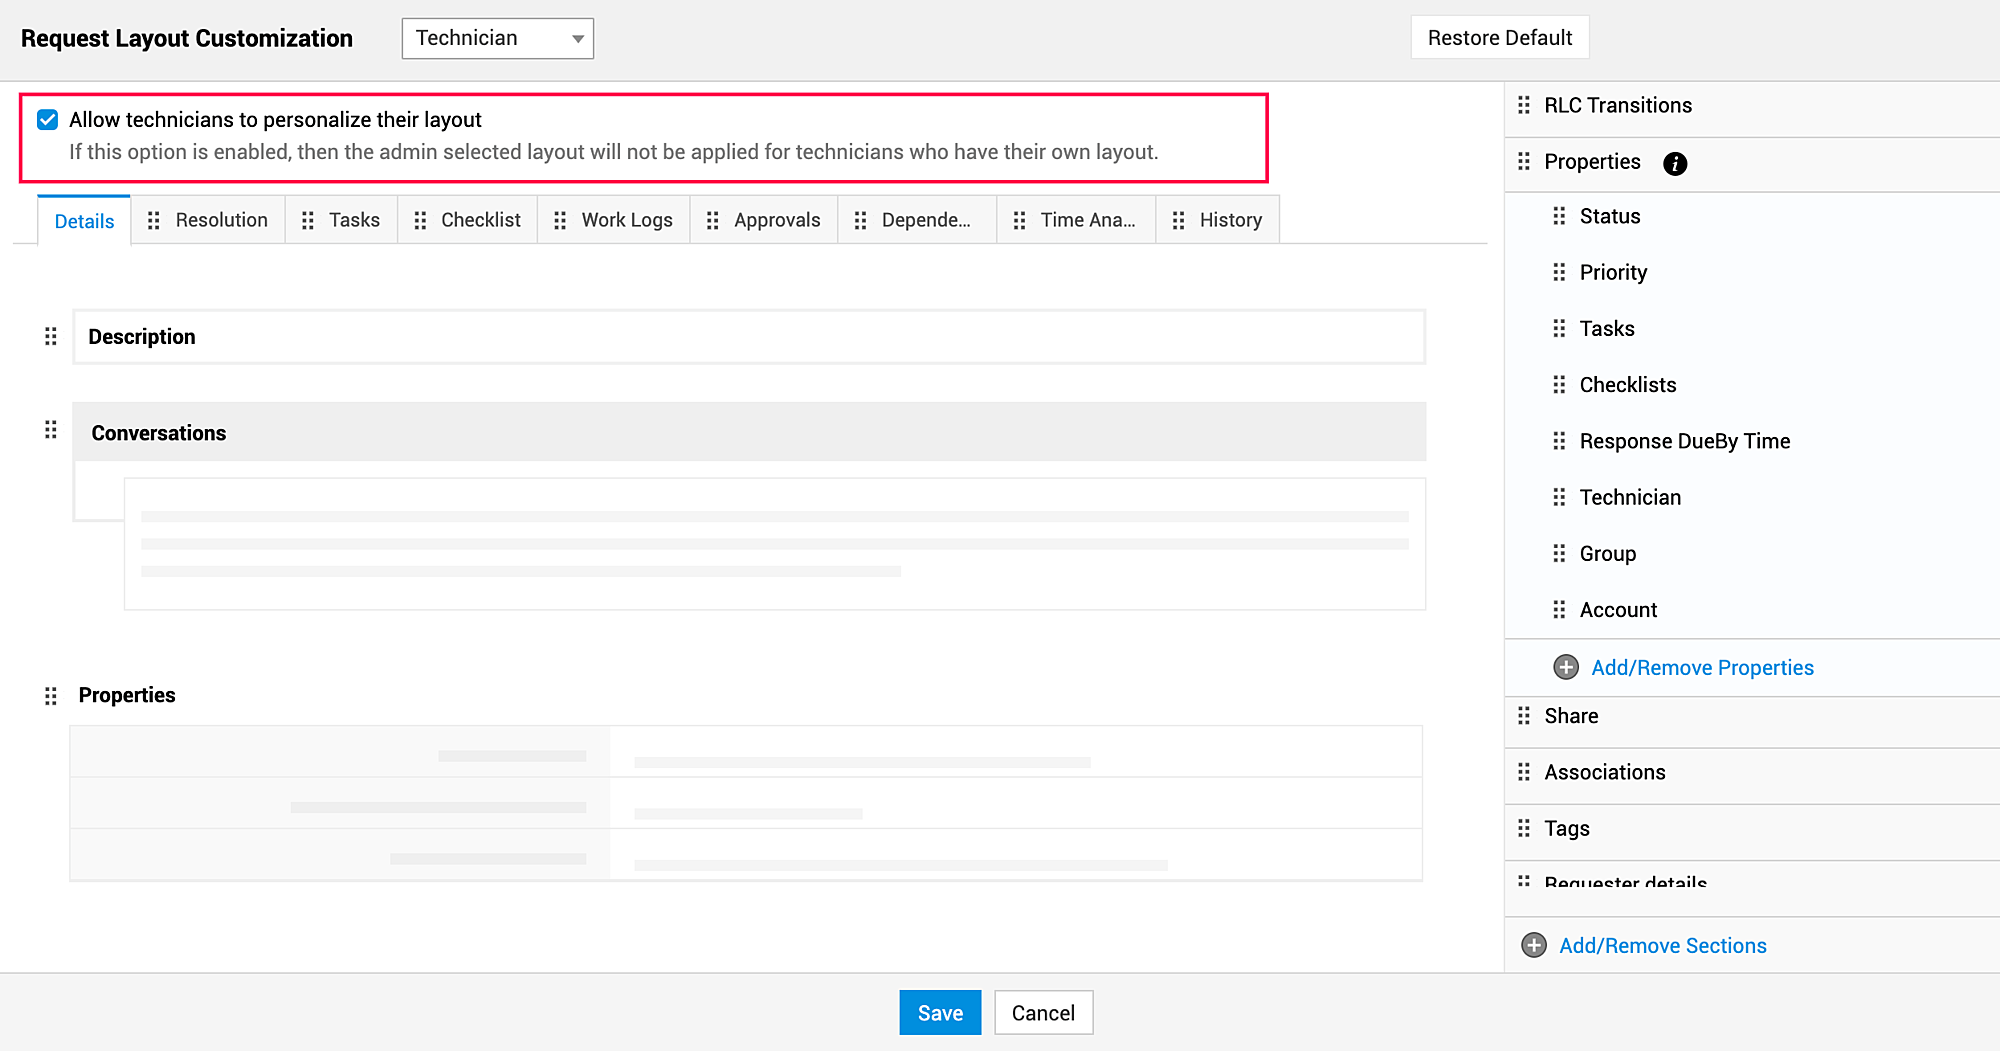
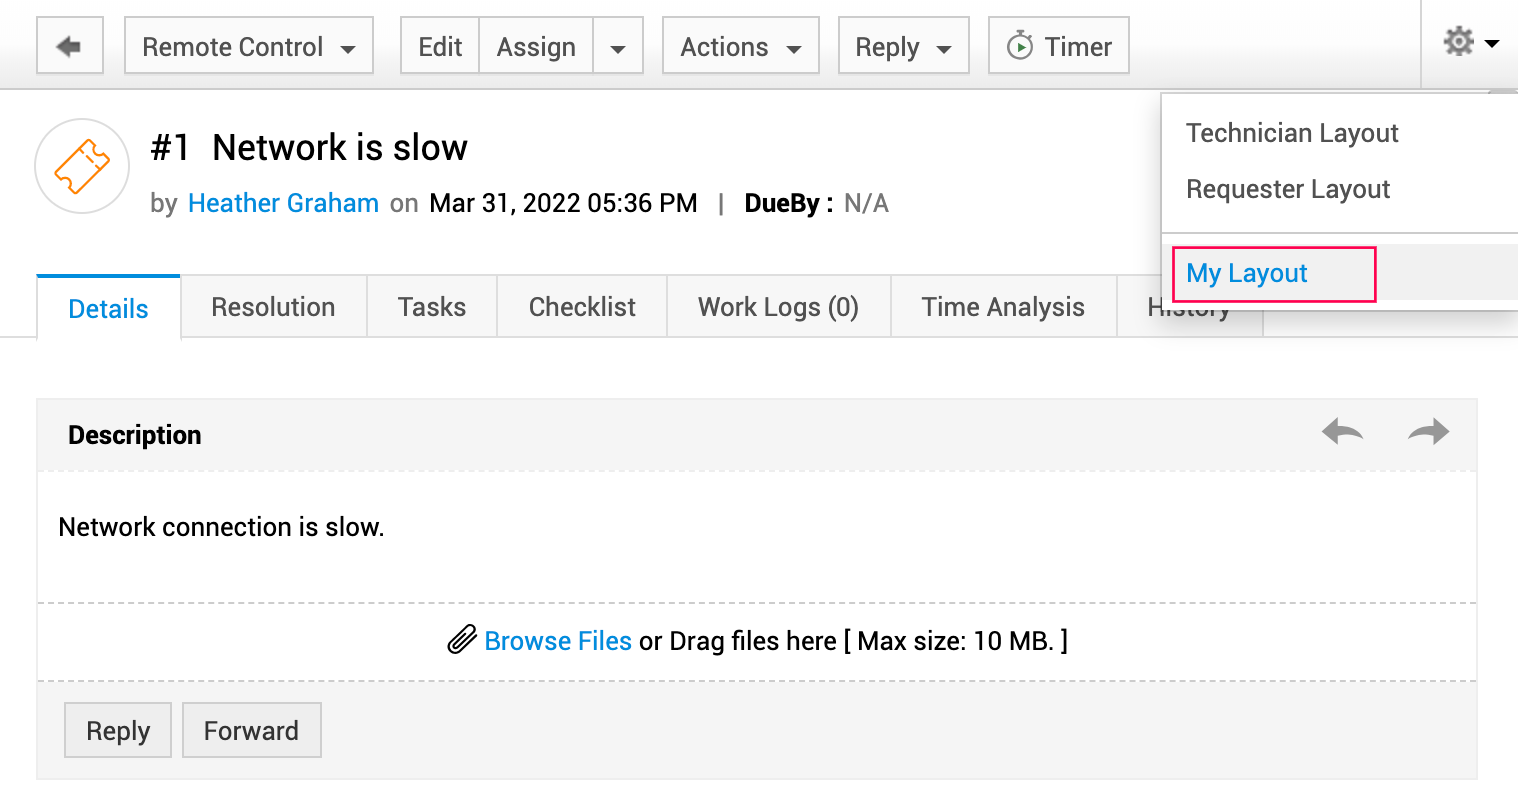
When enabled, technicians can personalize their request details page layout. Also, the admin can configure a personalized layout for themselves by clicking  > My Layout in the request details page.
