Replying to the Contact
Sending a response to the contact is required when a new request is received. Also, when a support rep is ready to close a request, the same can be notified to the contact so that if the contact has any concerns about the same, he/she can raise the issue. The support rep can then address the issue and close the request after the contact is completely satisfied.
To respond to the contact,
-
Click the Request tab in the header pane to open the request list view page.
-
Click the Subject link of the request to be replied.
-
From the request details page, select Reply drop down menu -> Reply option. The Mail to Contact form pops up.
Alternatively, you can click the Reply link below the Description from the request details page.
-
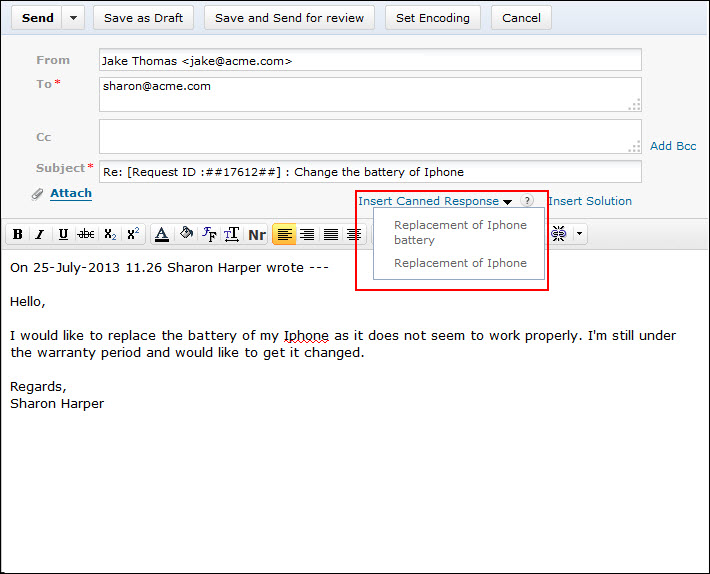
The From address is pre populated with the Reply-To mail address configured under Mail Configurations under Admin module.
-
If the email address of the contact is specified in the application then the same is populated in the To field.
-
You can also send the same information to more than one person by specifying the mail address in CC field.
-
If you do not wish to disclose the recipient then specify the mail address in the BCC field.
-
By default, the Subject and Description fields are pre populated with the specified data.
|
Warning

|
While editing the subject of the email, ensure that the request ID value remains intact with the # symbols beside it.
|
-
You can customize the message and content using Canned Response. Select the Canned Response from the available list. A message alert stating that the Subject and Description fields will be overwritten appears. Click Ok to proceed. To know more refer Canned Response.

-
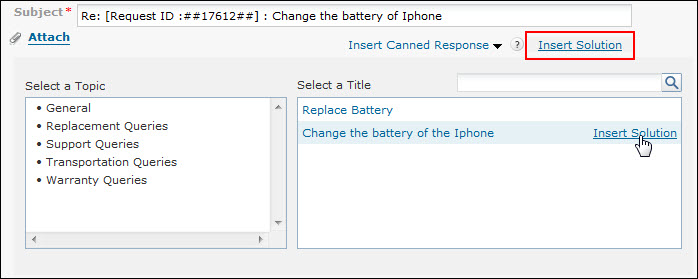
You can insert solutions directly into the application using Insert Solution link. Select a Topic. The corresponding solutions title under the topic is displayed. Click Insert Solution link beside the specific topic. The solution is added automatically as the message content.

-
Click Attach File(s) to add files as attachments to the mail.
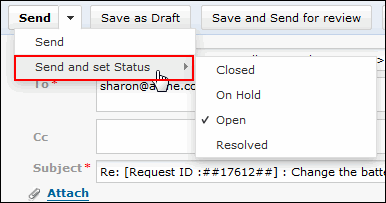
- Click Send to send the mail to the concern person. You also have an option to change the status of the request and send it to the concern person. If you would like to set the status of the request, click the icon
 beside Send button and select Send and set status option, then select the Status from the drop down which you wish.

-
You have an option to Save the request as draft. The email saved as drafts can be viewed, edited, deleted and sent for review from the request details page as shown below,

-
Click Save and Send for review if you wish to save the mail and send it for review to the concern authority. Enter the mail address of the concern authority to review the reply in the To field.
The responses that have been sent to the contact can be viewed as conversations in the request details view.


