What is grouping?
The Group feature in RMM Central helps the admin group devices or interfaces together for organized network management and to push bulk configurations easily throughout the product. Groups and subgroups can be used as a filter in Reports, Widget, Notification Profile, URL Templates, Downtime schedule, Alarm suppression, Device template, Interface template, Test credentials and Workflow. Groups are useful to view the average availability distribution of all the members in a group, automatically add members to a group on discovery and to configure threshold for a group of interfaces irrespective of the interface type. Admin users will have complete access to groups whereas, operator users will have only Read-Only access to groups.
What is a subgroup?
RMM Central allows you to create subgroups within a group. Subgroups make bulk configuration and filtering of devices much more easier. You can create multiple subgroups and associate it with a parent group.
For eg:
Consider two device groups - "Routers of model A" and "Routers of model B" in an organization. They can be collectively grouped under a parent group called "Routers".
Similarly two device groups - "Central Servers" and "Production servers" can be created and placed under a parent group called "Servers".
The two parent groups - "Routers" and "Servers" can be placed under a group "Network devices in India", which now becomes the parent group.
In Reports/Widgets, when "Network devices in India" group is selected, RMM Central provides a detailed report of all the devices under the subgroups present under the parent group - "Network devices in India".
Similarly the subgroup feature can be used in any module where grouping is supported.
How to create a group in RMM Central?
Steps to create a group
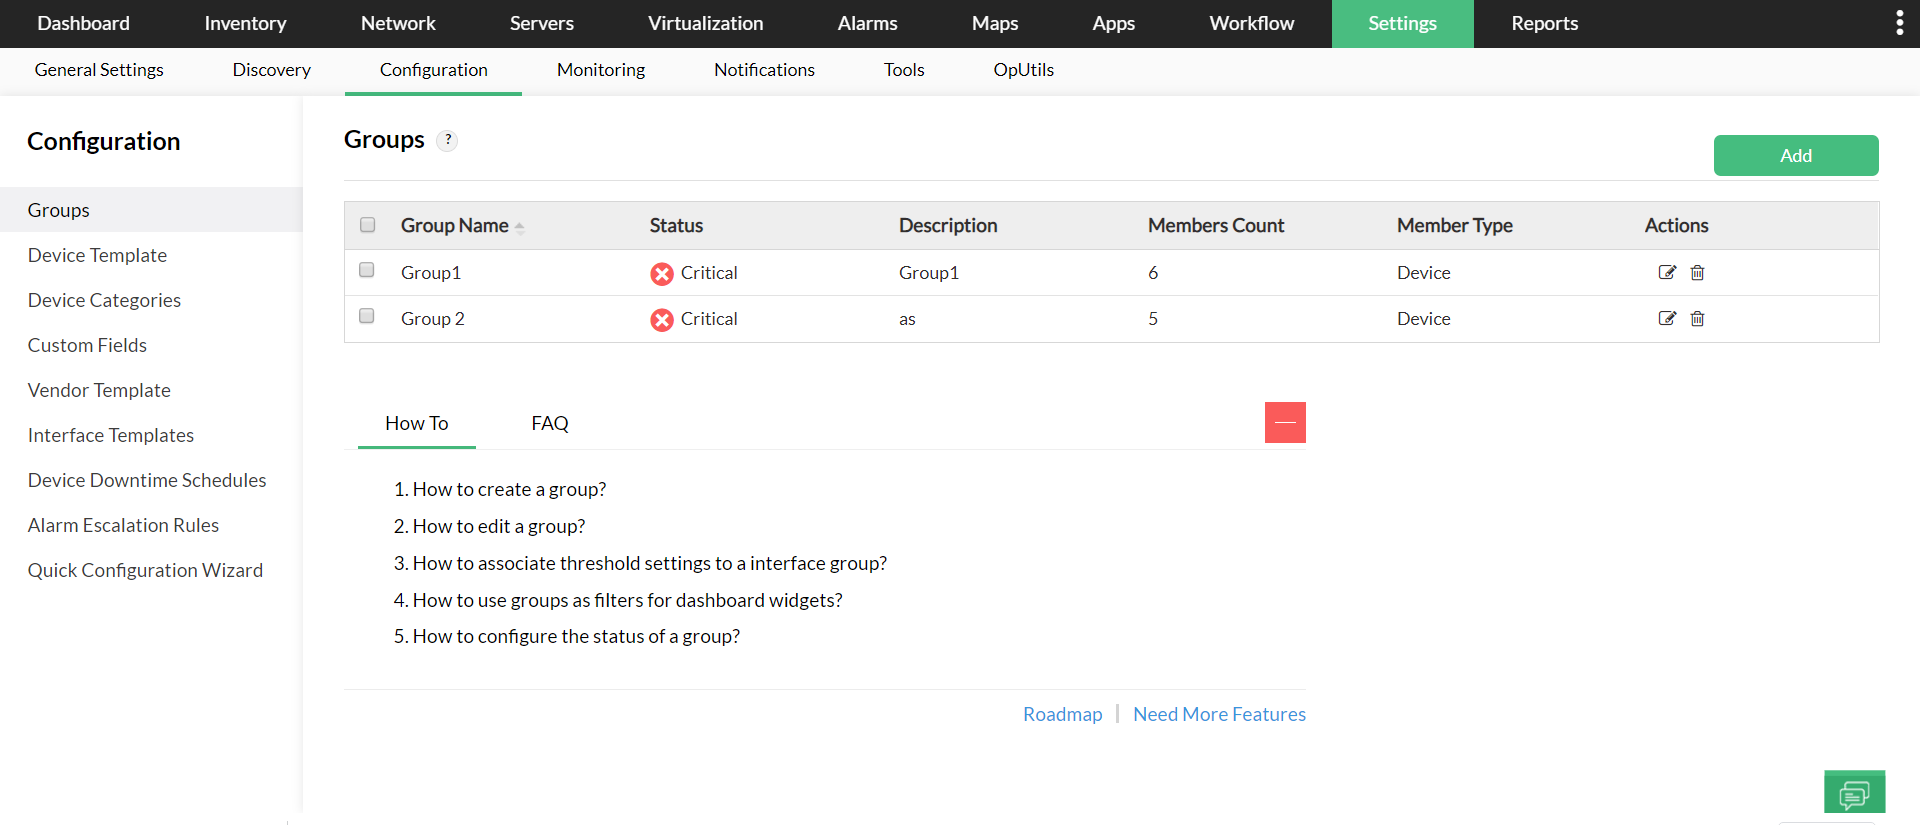
- Click on Settings → Configuration → Groups and click on the "Add" button or go to Inventory → Groups → Add Group.
- Provide a suitable group name and description and click on Next.
- Select the type of elements you want to add to this group.
- Select the method to group the elements. You can group elements either 'Manually' or by 'Criteria'.
- If you selected the 'Manually' option - Select the group members from the available list and click on 'Next'.
- If you selected the 'By criteria' option - Select any one of the property available from the dropdown box, select a condition and provide a suitable value resolving the property and condition and click on '+' icon.
- Add multiple criteria if needed, along with the logical operation you need to perform based on the criteria. Click on Next.
- From the available members listed, select the members you want the group's health to depend on. If no members are chosen, then the health status of the group will depend on all the available members by default.

How to edit a group in RMM Central?
- Click on Settings → Configuration → Groups and click on the 'Edit' icon under 'Actions'. You can also edit Groups from Inventory → Groups → and click on the 'Edit' icon under 'Actions'
- Edit the description if needed and click on 'Next'.
- The group type and method of creation of the group cannot be edited.
- If the 'Manually' option was selected - Edit the group members from the available list and click on 'Next'.
- If the 'By criteria' option was selected - The existing criteria can be deleted and new criteria can be added if required. Click on 'Next'.
- From the available members listed, edit the members you want the group's health to depend on.
How to create a group based on custom fields in RMM Central?
Groups can be created based on custom fields. Create a group with 'By Criteria' method and select the 'custom fields' properties from the drop down box. Select the suitable condition required and provide a custom field value associated to devices/interfaces.
How to associate threshold settings to an interface group in RMM Central?
Interface Groups :
- Click on Settings → Configuration → Interface Templates. Under the Interface groups tab, click on a group name and configure the threshold settings. Click on 'Save and Apply'.
- The configured threshold values will be applied to all interfaces in a group irrespective of type.
Interface Types :
- Click on Settings → Configuration → Interface Templates. Under interface types, click on a interface type name and configure the threshold values. Click on 'Save and Apply'.
- In the new tab displayed, click on "Select groups to apply" option and click on 'Save'.
- The threshold will be applied only to interfaces of the selected type.
How to configure status of a group?
While creating a group, you can configure the health status of the group. The health status of the group will depend on the members selected. If no member is selected, by default the health status will depend on all available group members.
How to use groups as filters for RMM Central's dashboard widgets?
Groups can also be used as a filter in the dashboard. You can customize the widgets to display only specific data or devices based on your requirement using Groups.
Steps to use Groups in dashboard:
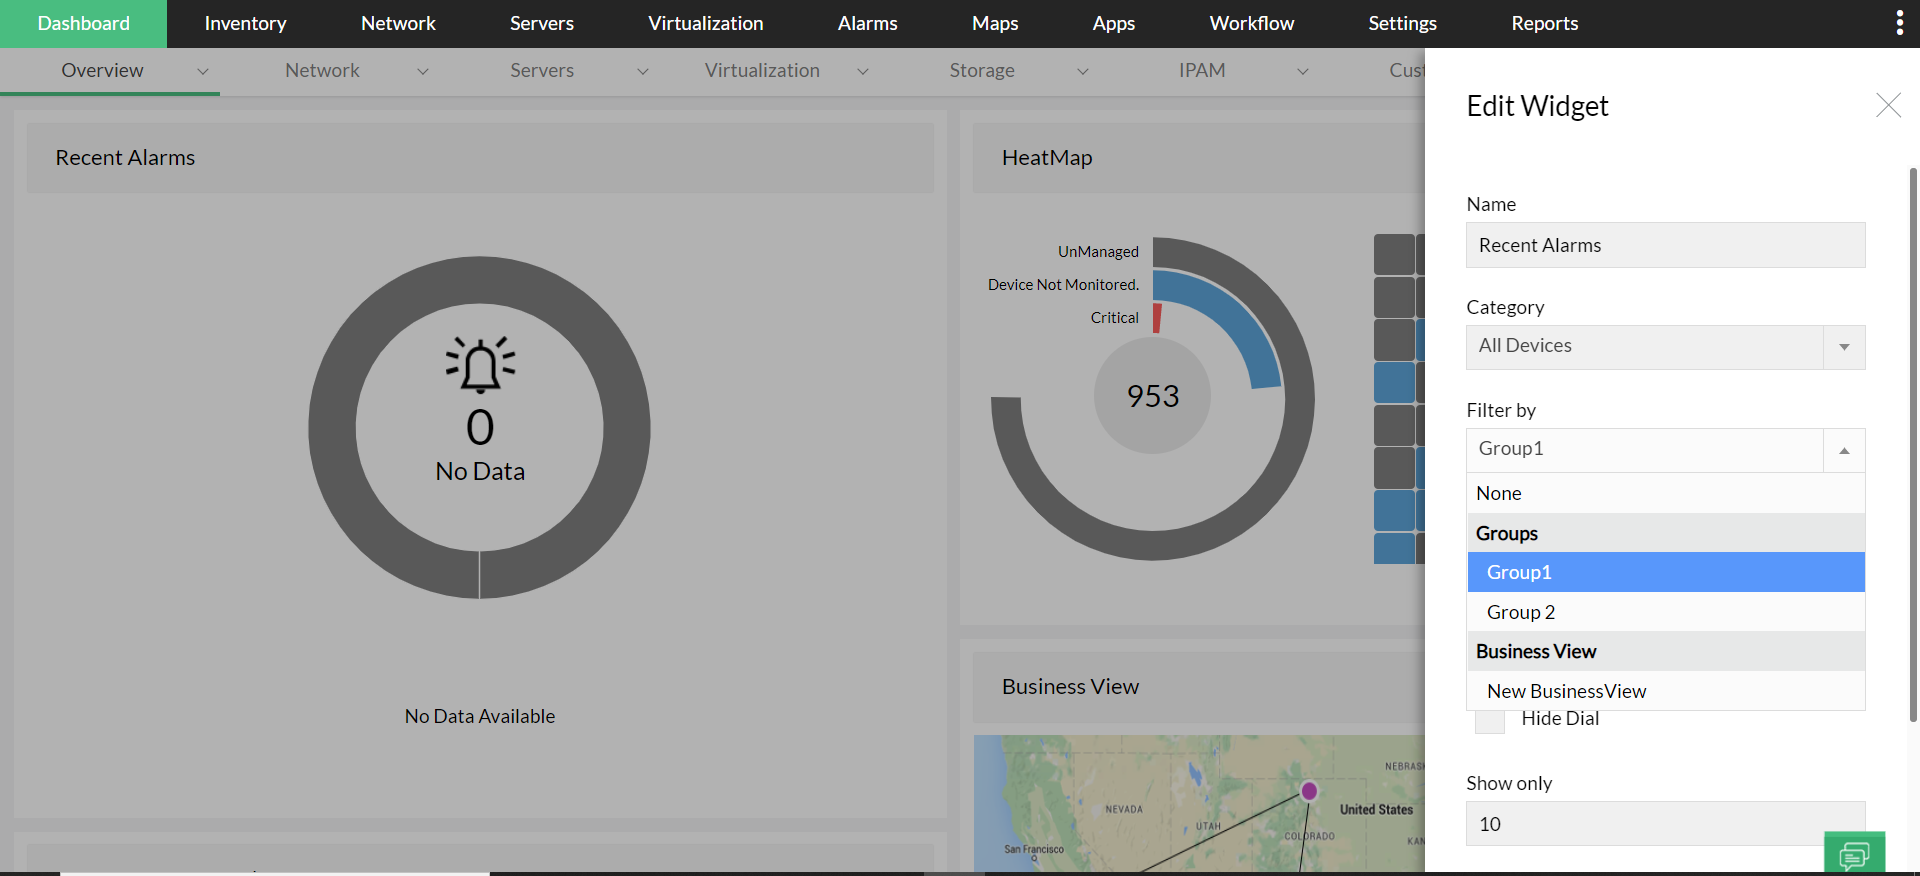
- In the Dashboard, click on the 'Edit' icon in any widget.
- In the 'Edit' widget menu, select groups under the 'filter by' drop menu and click on 'Save'.
You can also view the availability data in the 'all groups' widget in the dashboard of RMM Central.
How to create device downtime schedules for groups?
IT admins can now configure device downtime schedule for 'Groups' to prevent RMM Central from polling those devices during maintenance for availability.
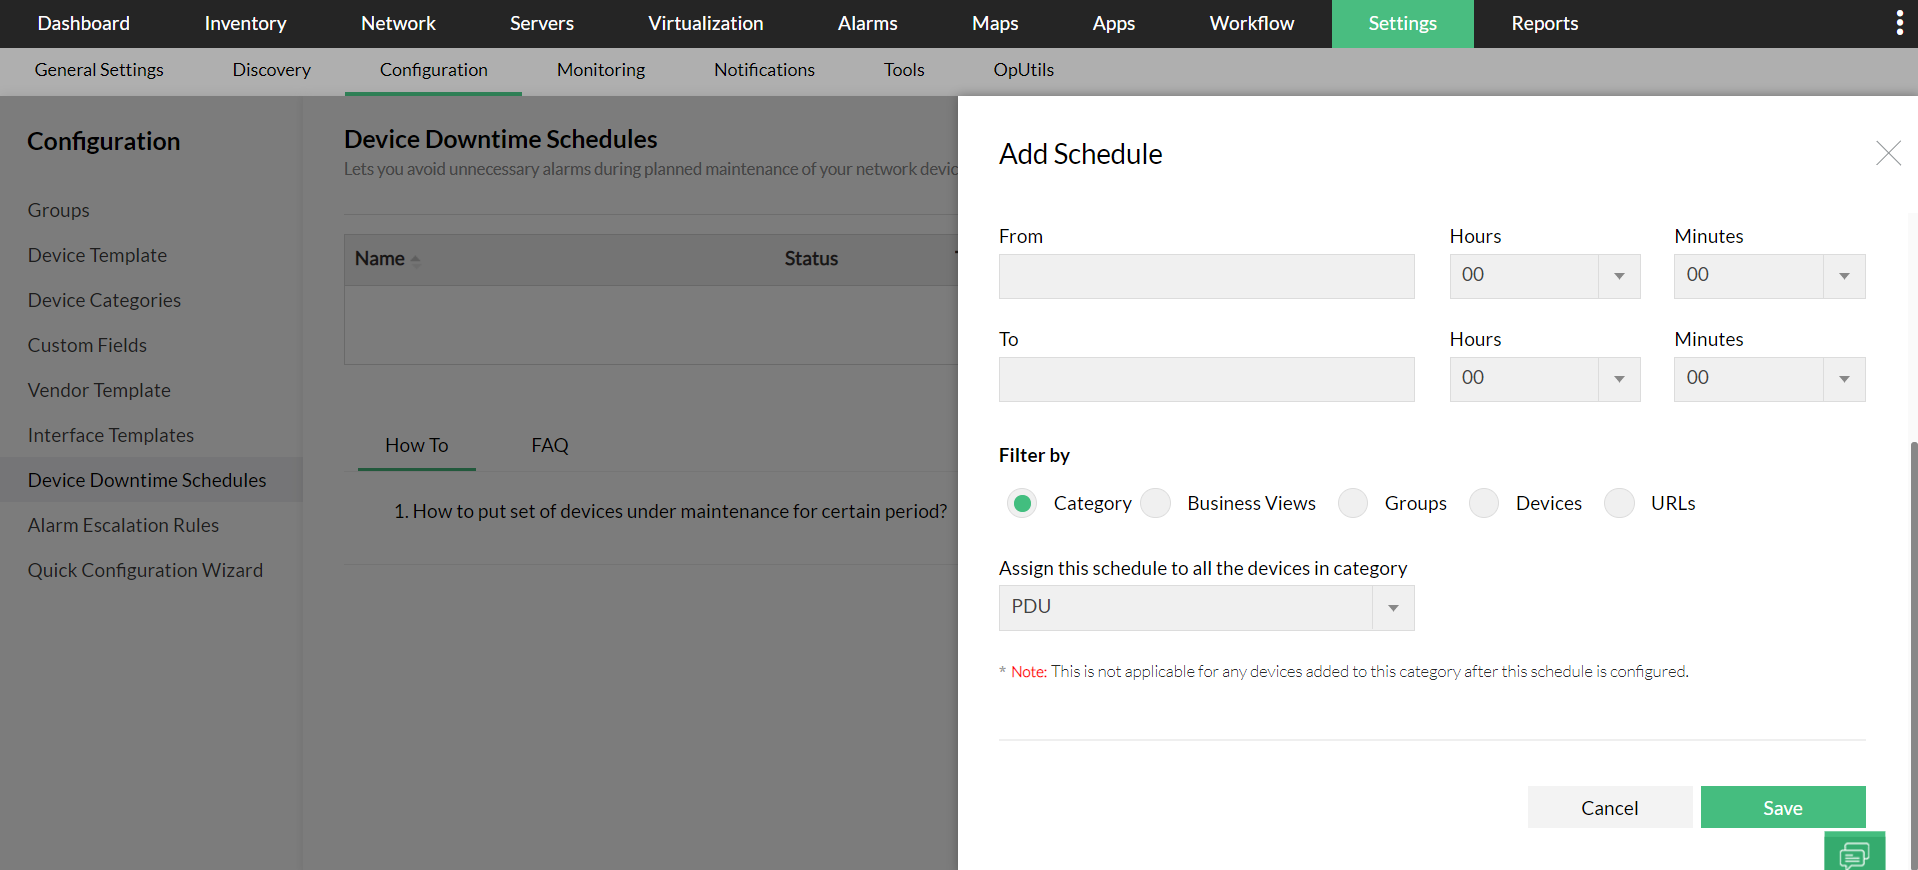
- Visit Settings -> Configuration -> Device Downtime Schedules.
- Click on 'Add Schedule'.
- Choose filter by 'Groups' after filling the relevant fields.


