Finding client ID and client Secret
To find the client ID and secret of your Entra tenant, follow the steps listed below.
- Sign in to the Microsoft Entra admin center using the credentials of an administrator.
- If your account gives you access to more than one tenant, select your account in the top right corner. Set your portal session to the Entra tenant that you want.
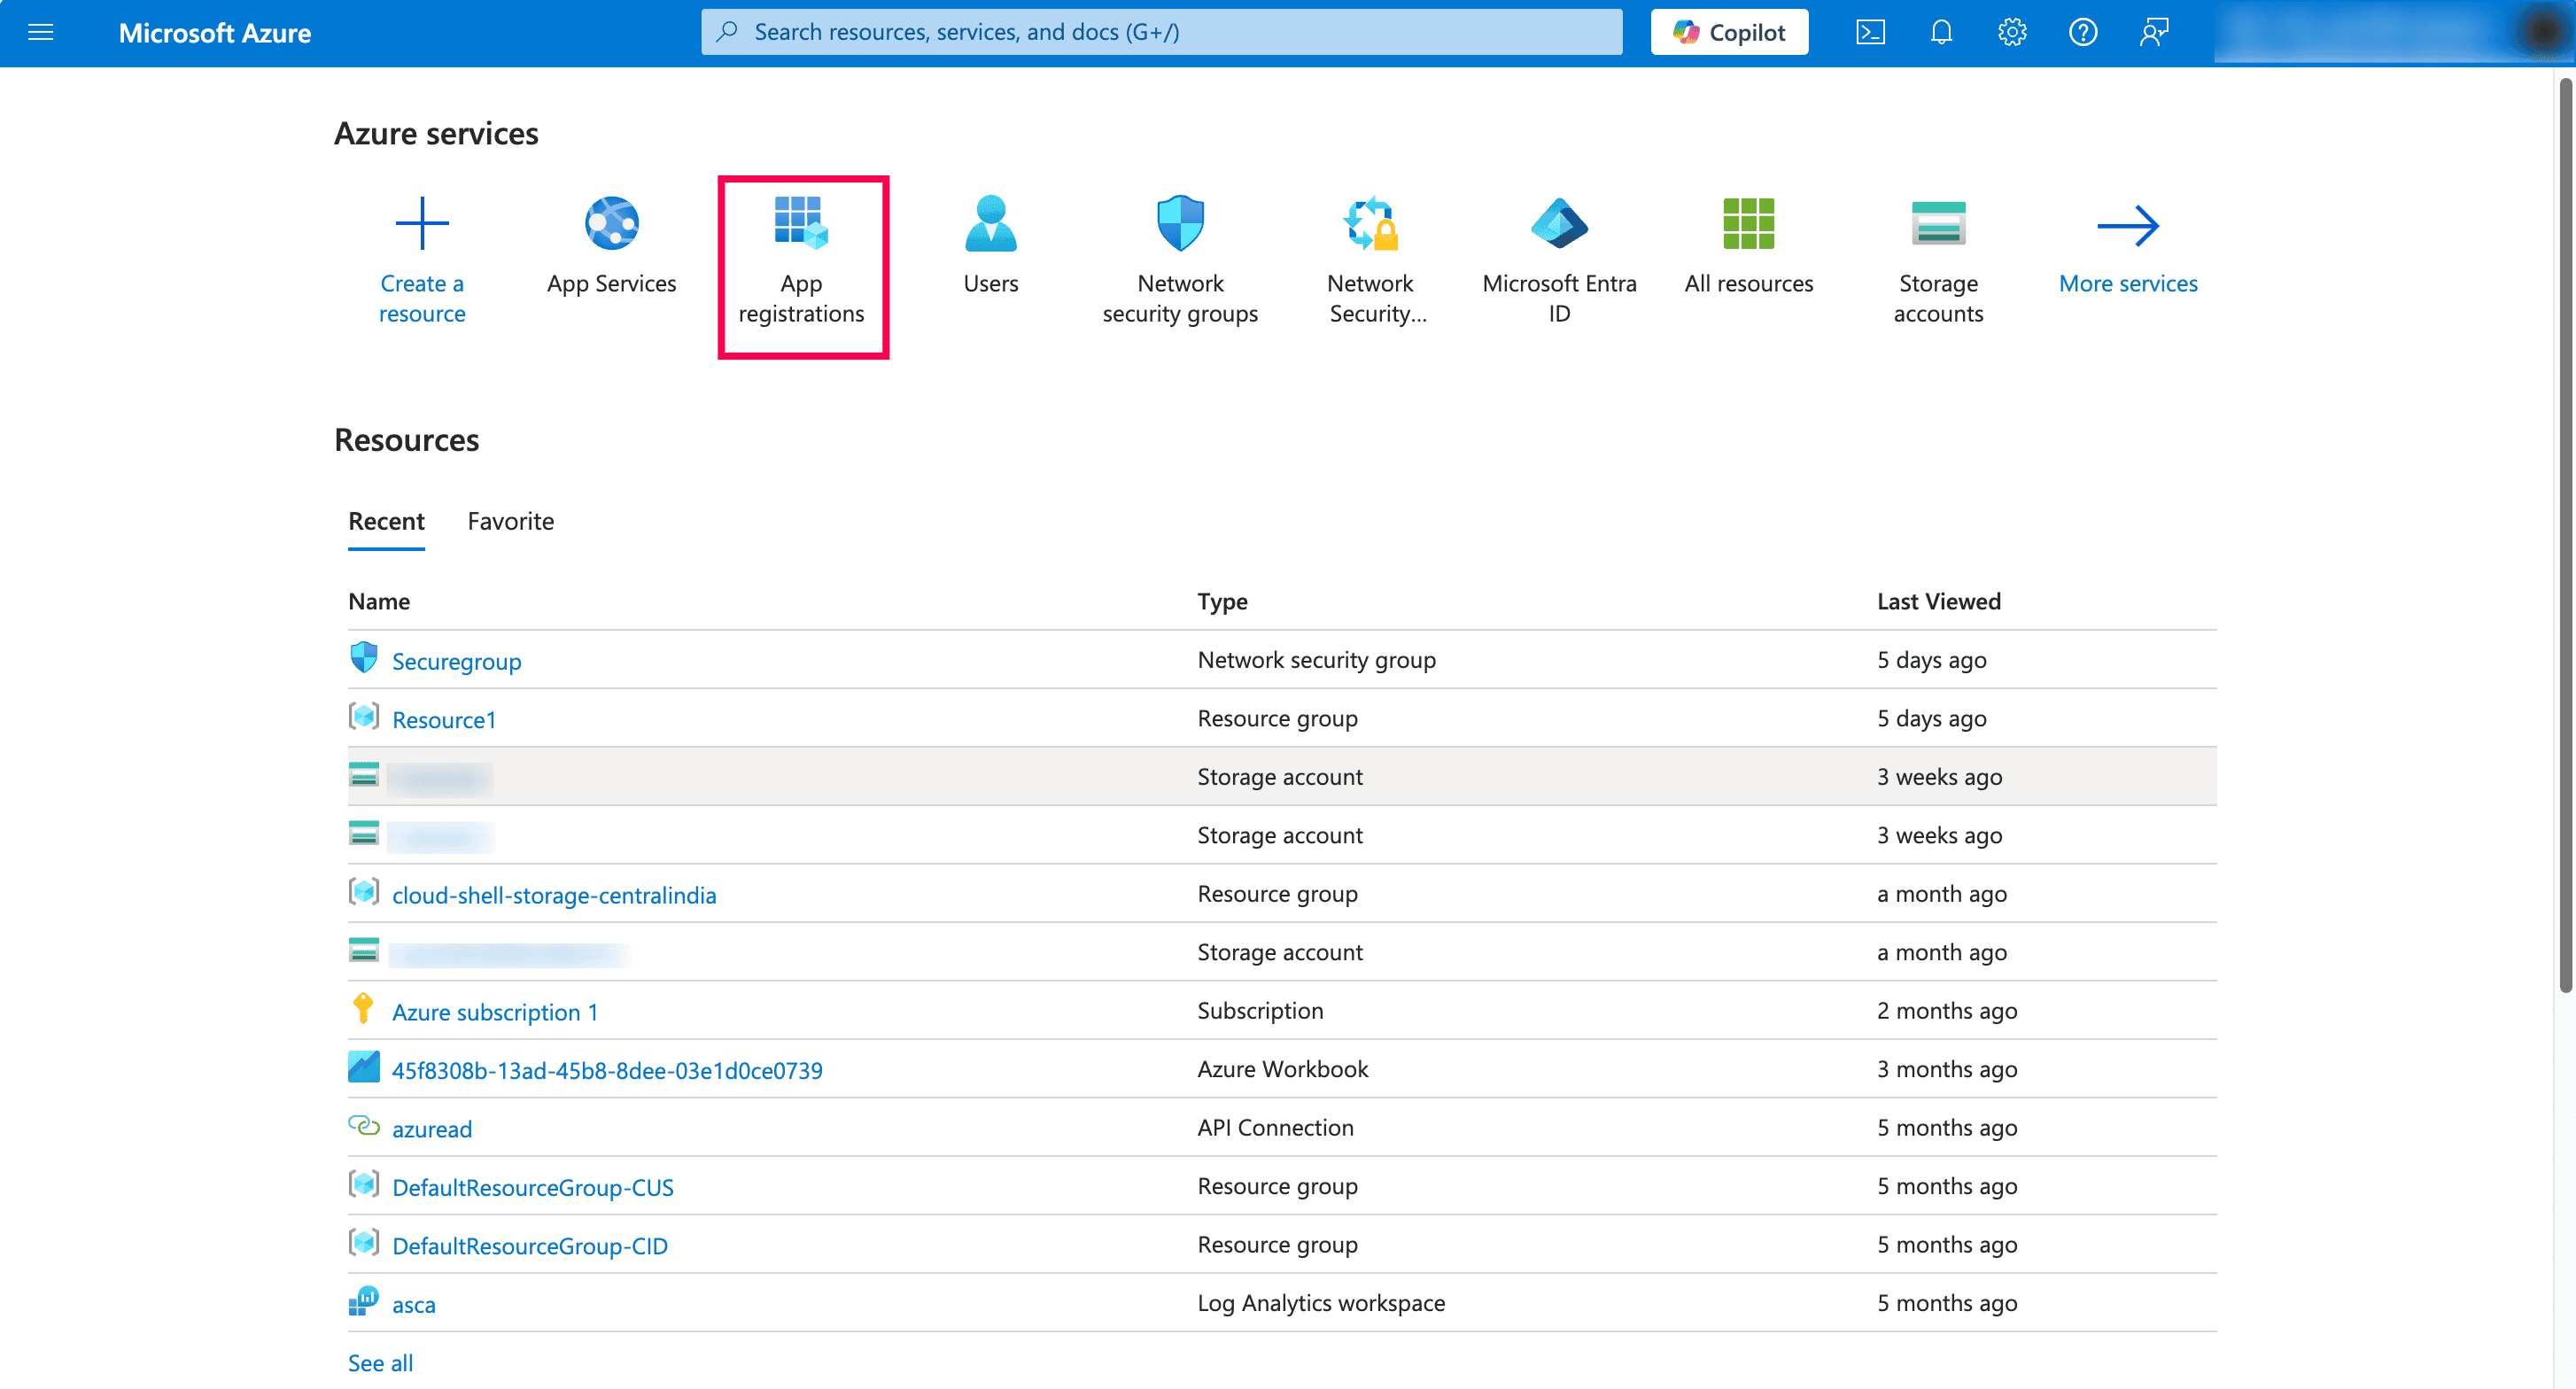
- Select App registrations from Azure services.
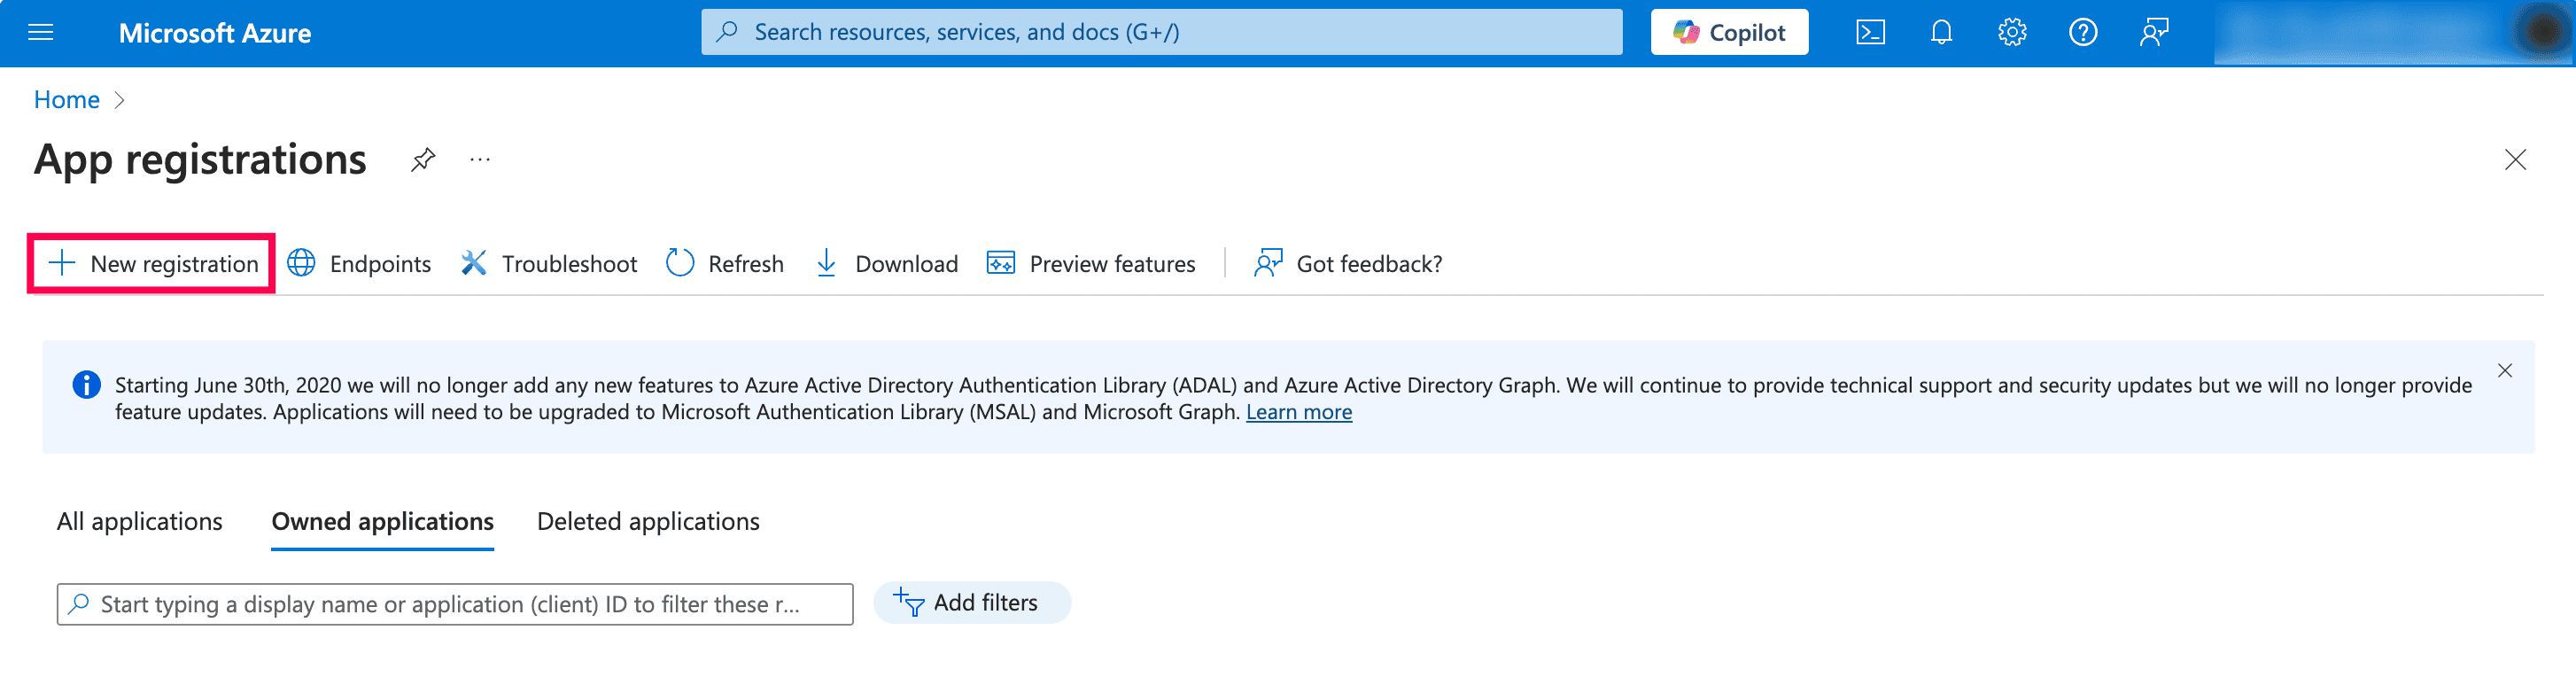
- Select New registration.
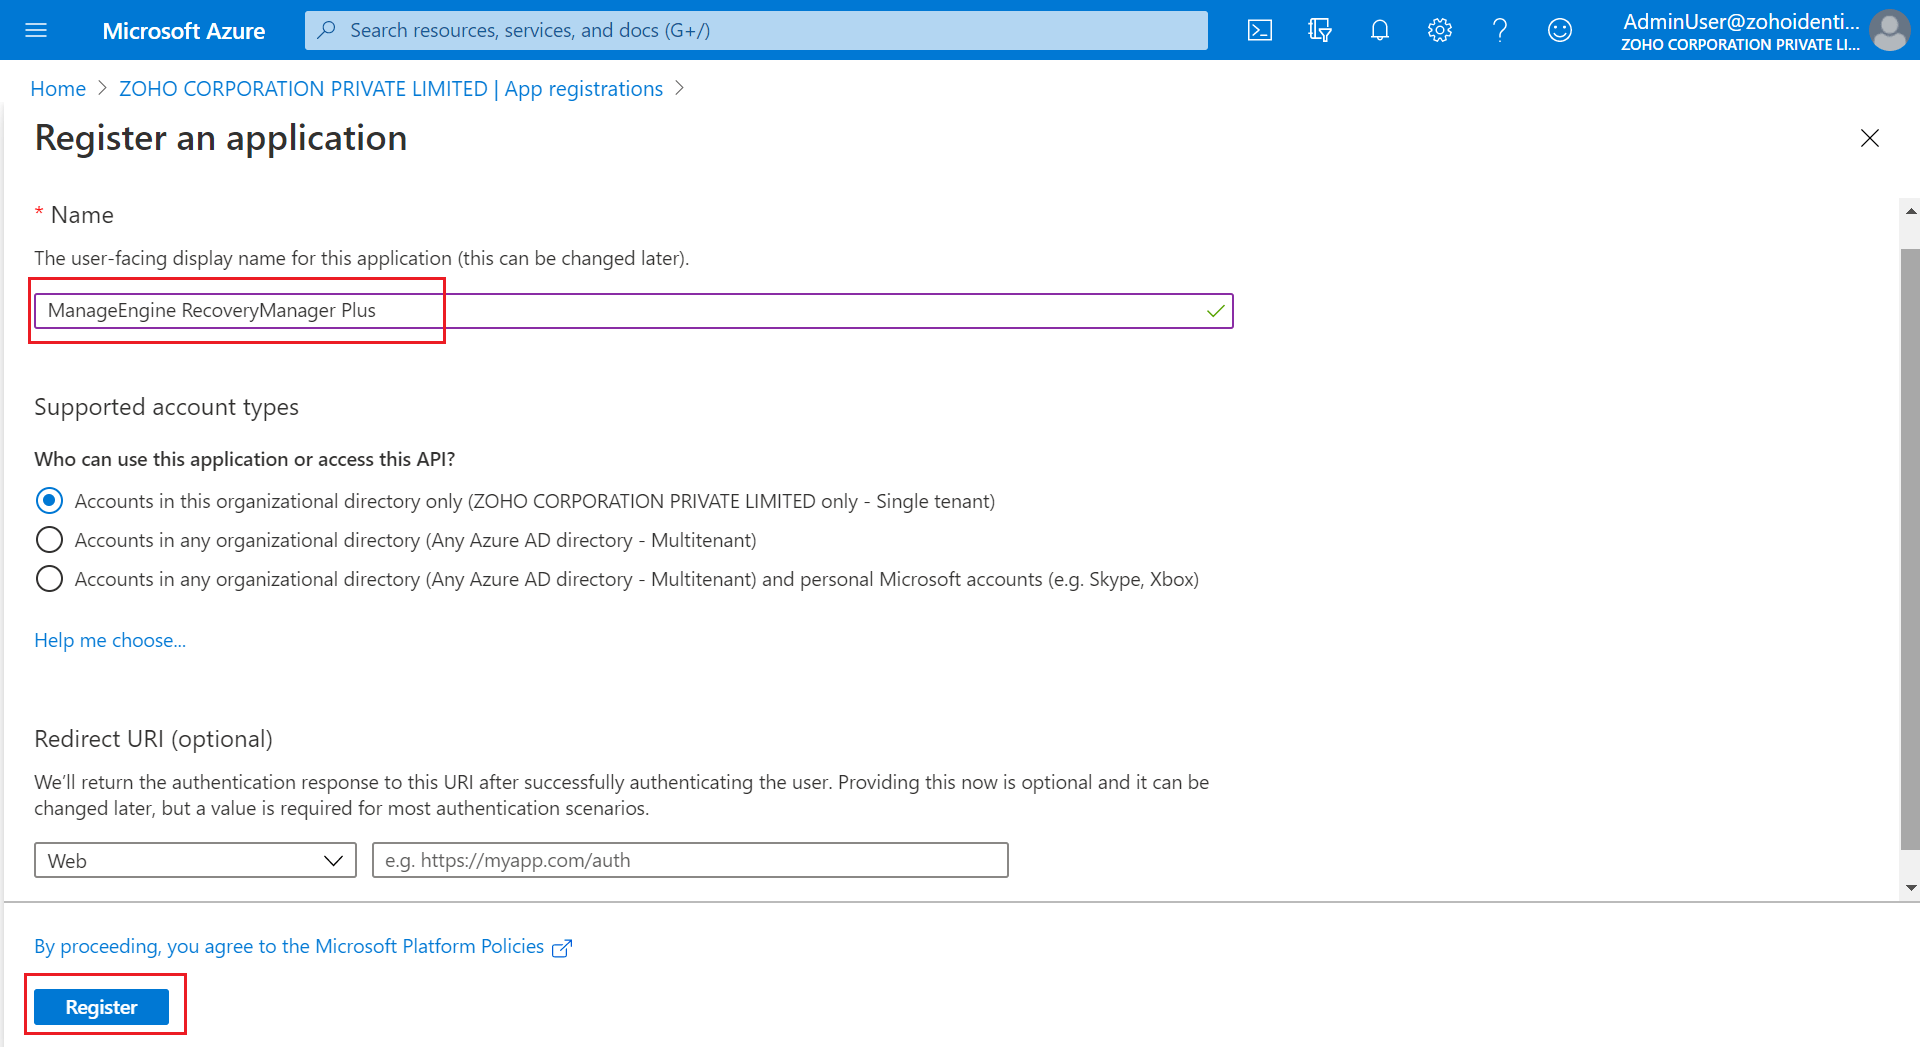
- In the Register an application section, enter a meaningful application name to display to users. Select who can use this application based on your environment and click Register.
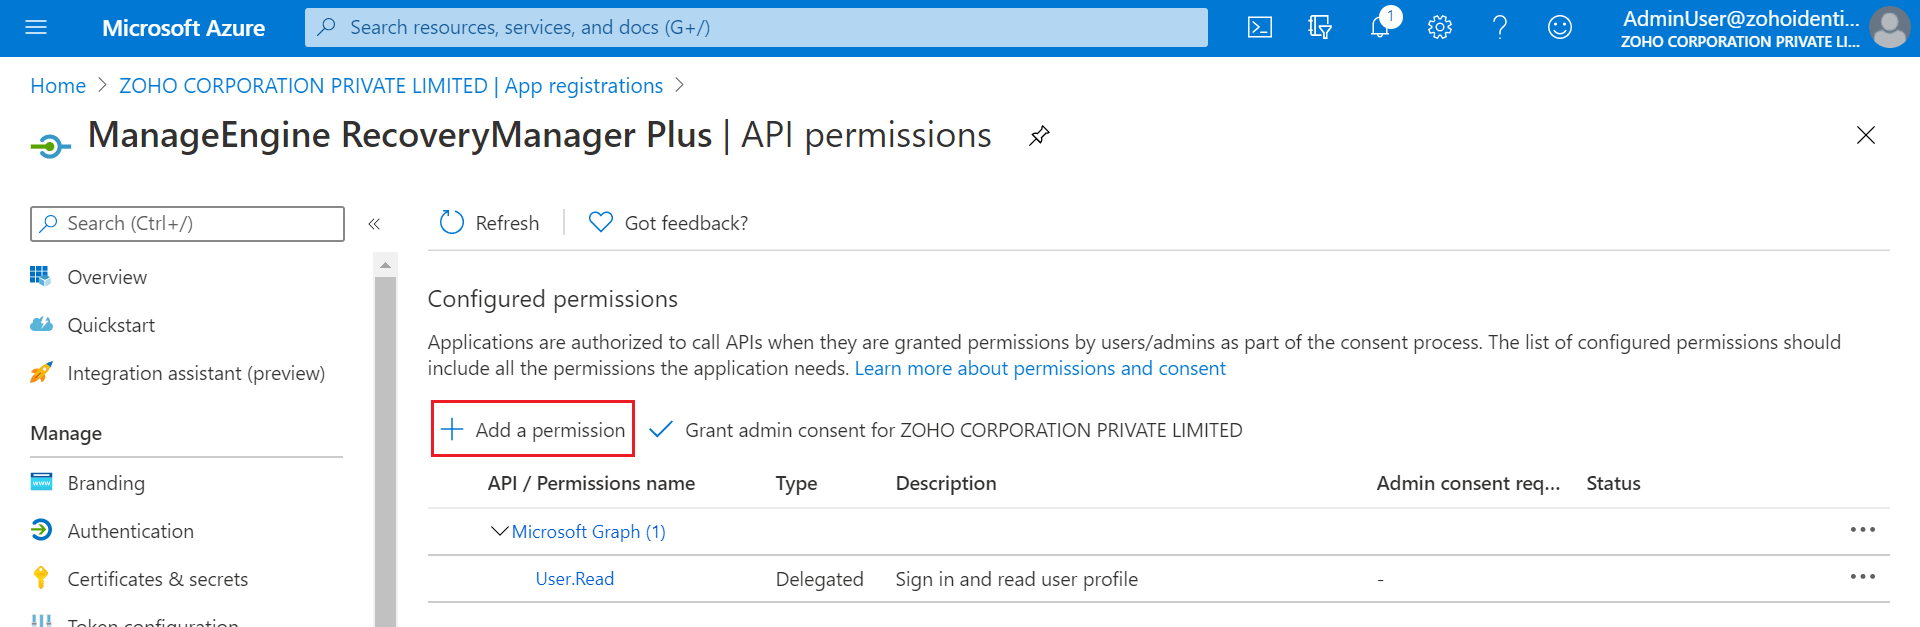
- Once you have registered the application, click on the View API permissions button.

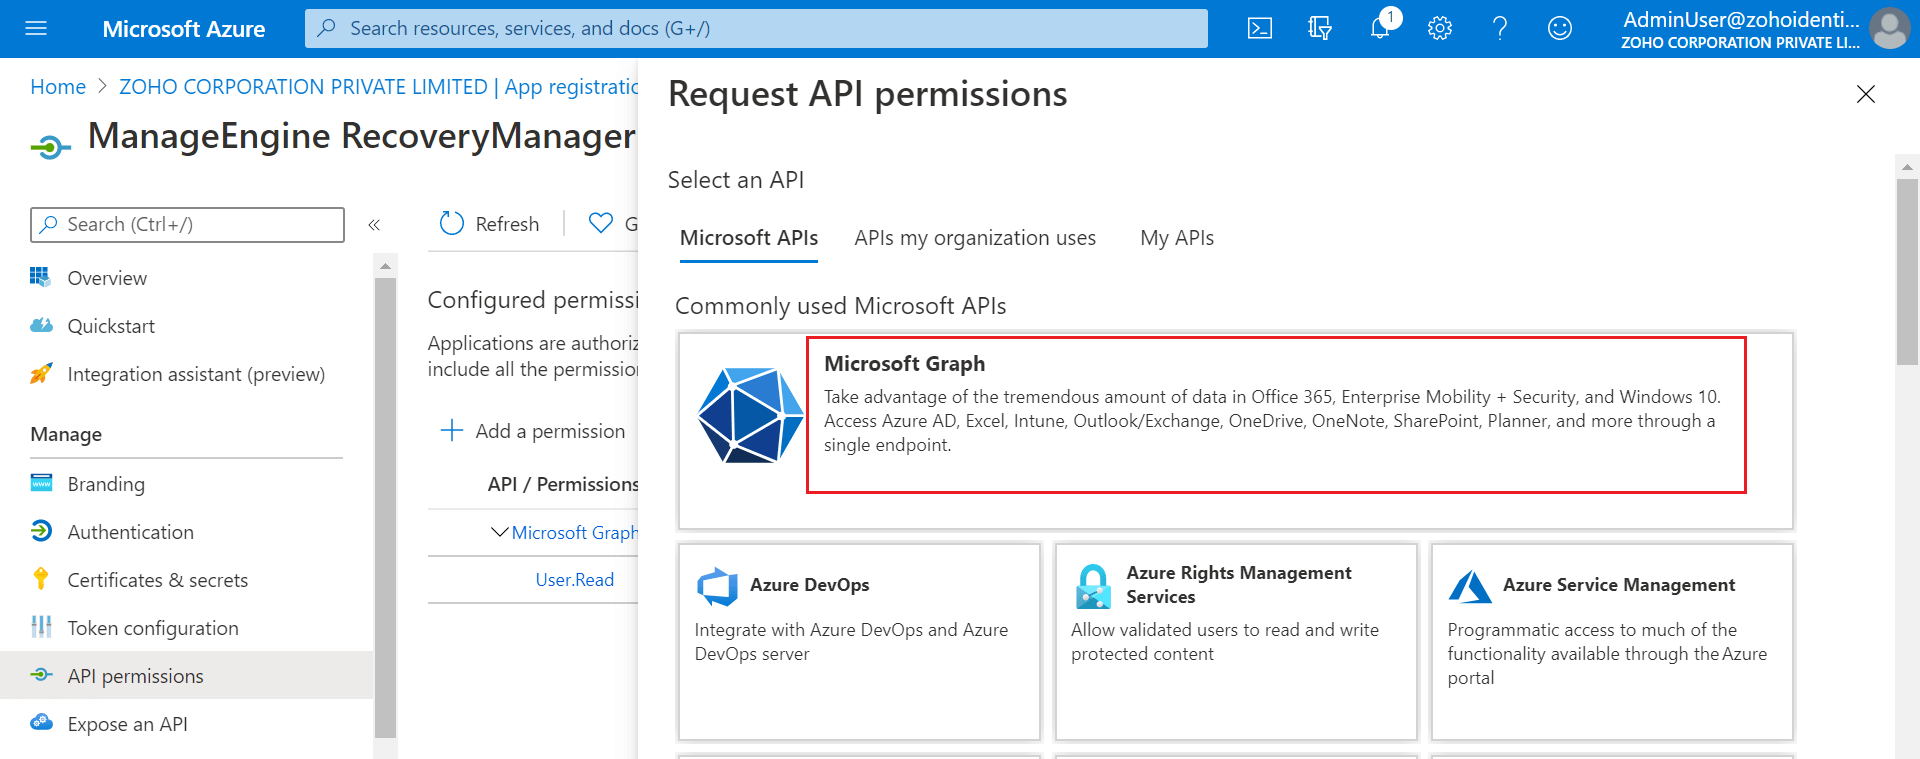
- Select Add a permission.
- Select Microsoft Graph.
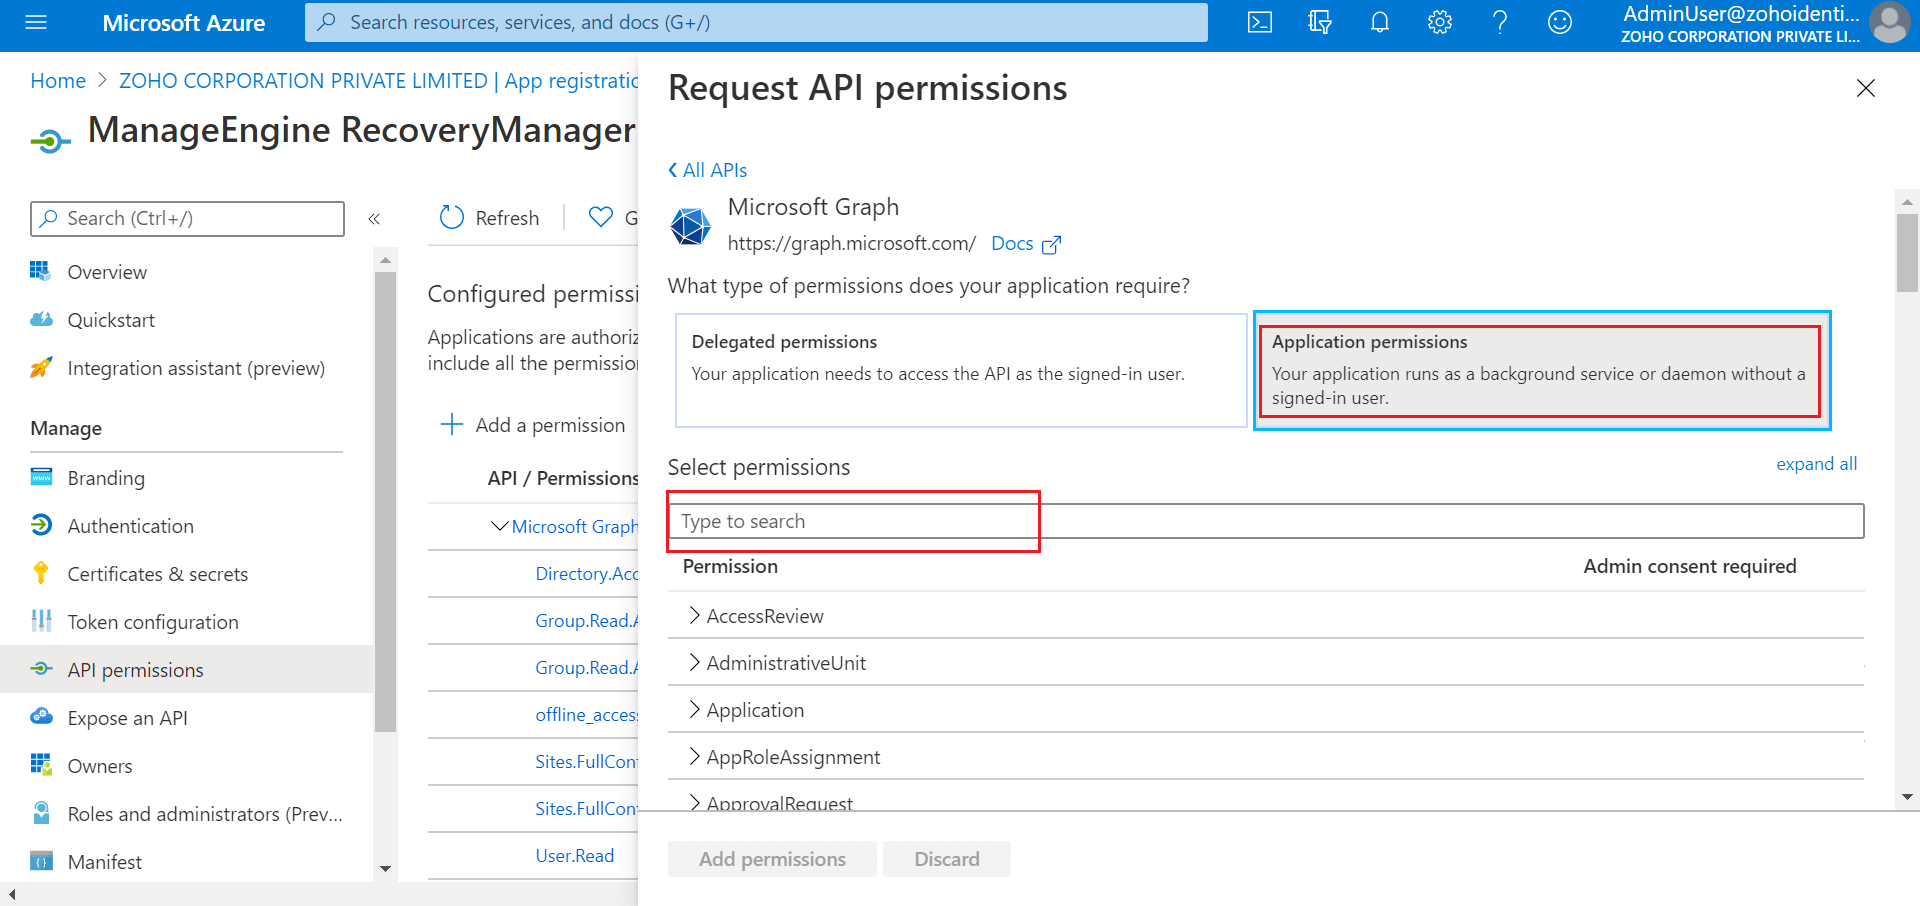
- Select Application permissions. Using the search box provided, add the following permissions: Application.ReadWrite.All, Device.ReadWrite.All, Directory.ReadWrite.All, Domain.ReadWrite.All, Group.Read.All, Group.ReadWrite.All, ServicePrincipalEndpoint.ReadWrite.All, Sites.FullControl.All, User.Read.All, and User.ReadWrite.All. Click the Add permissions button.
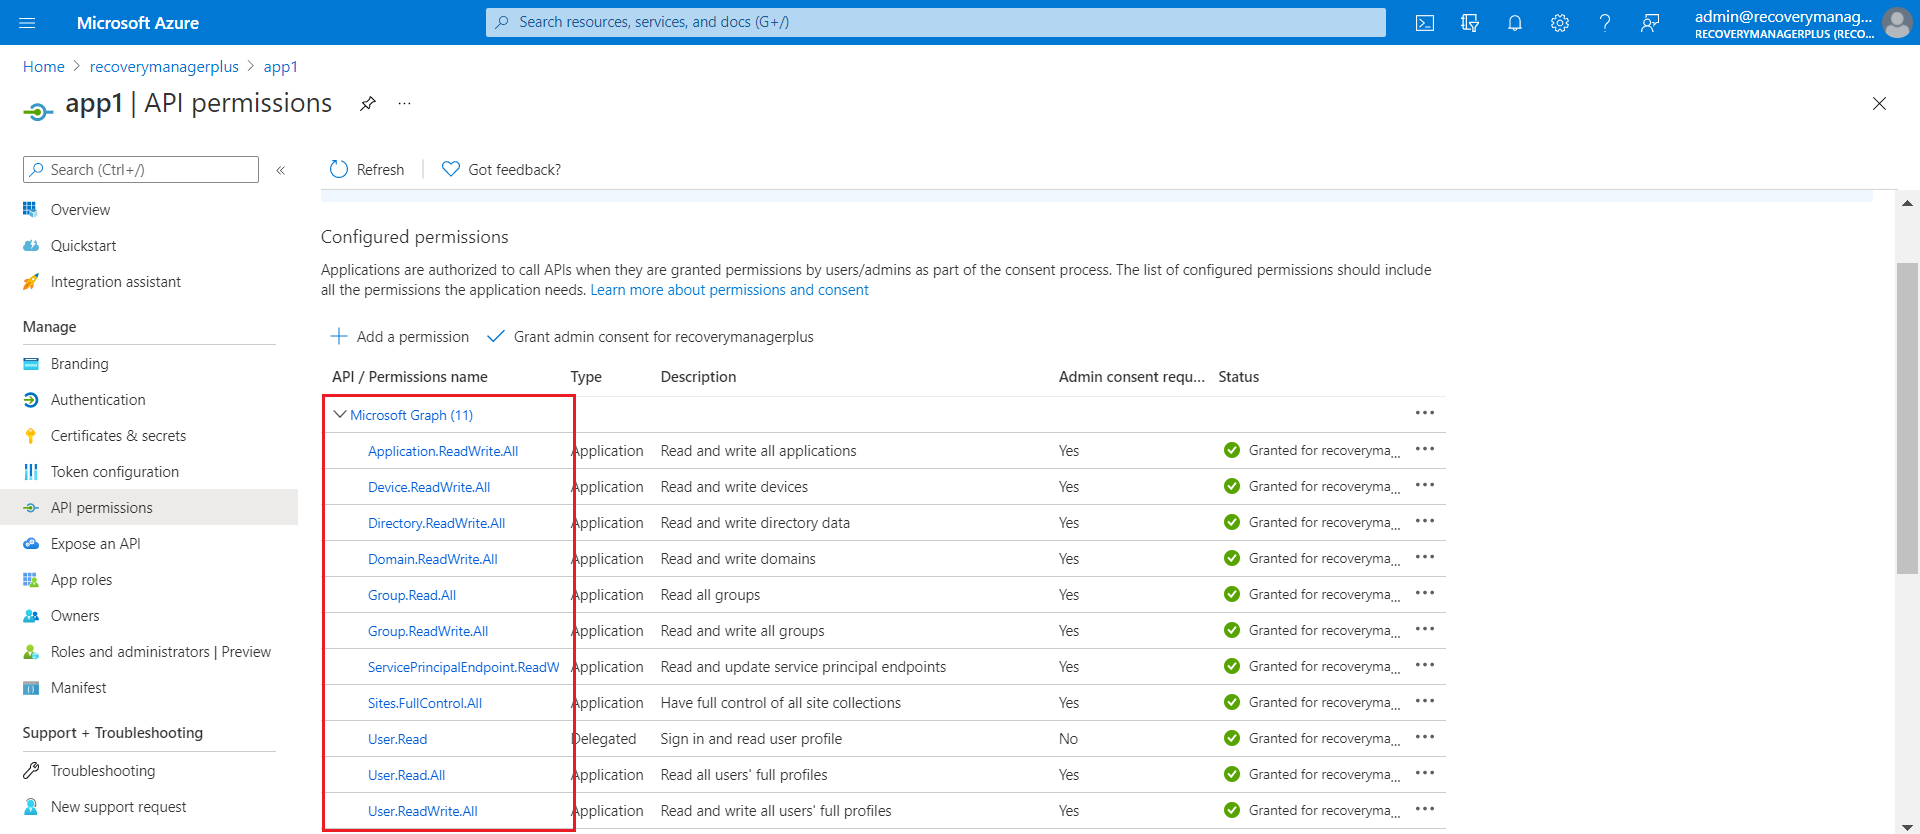
- Once you’ve selected all the graph permissions, your API permissions screen will look similar to this.
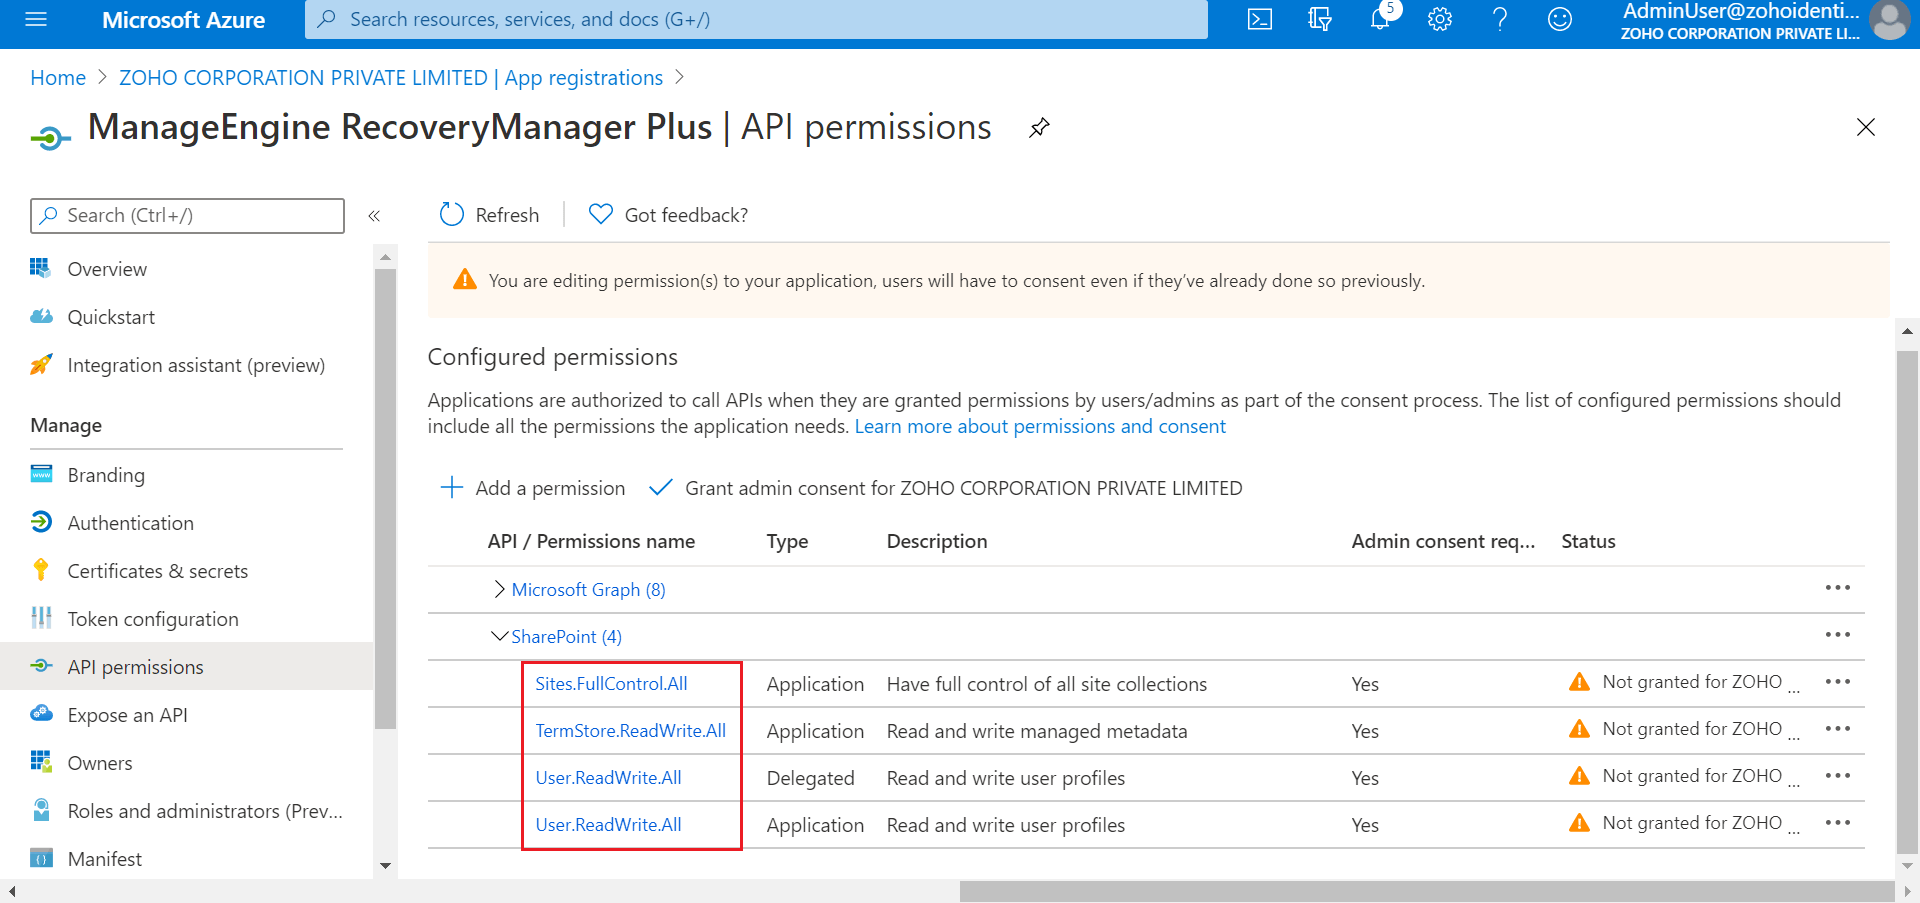
- Select Add a permission and select SharePoint.
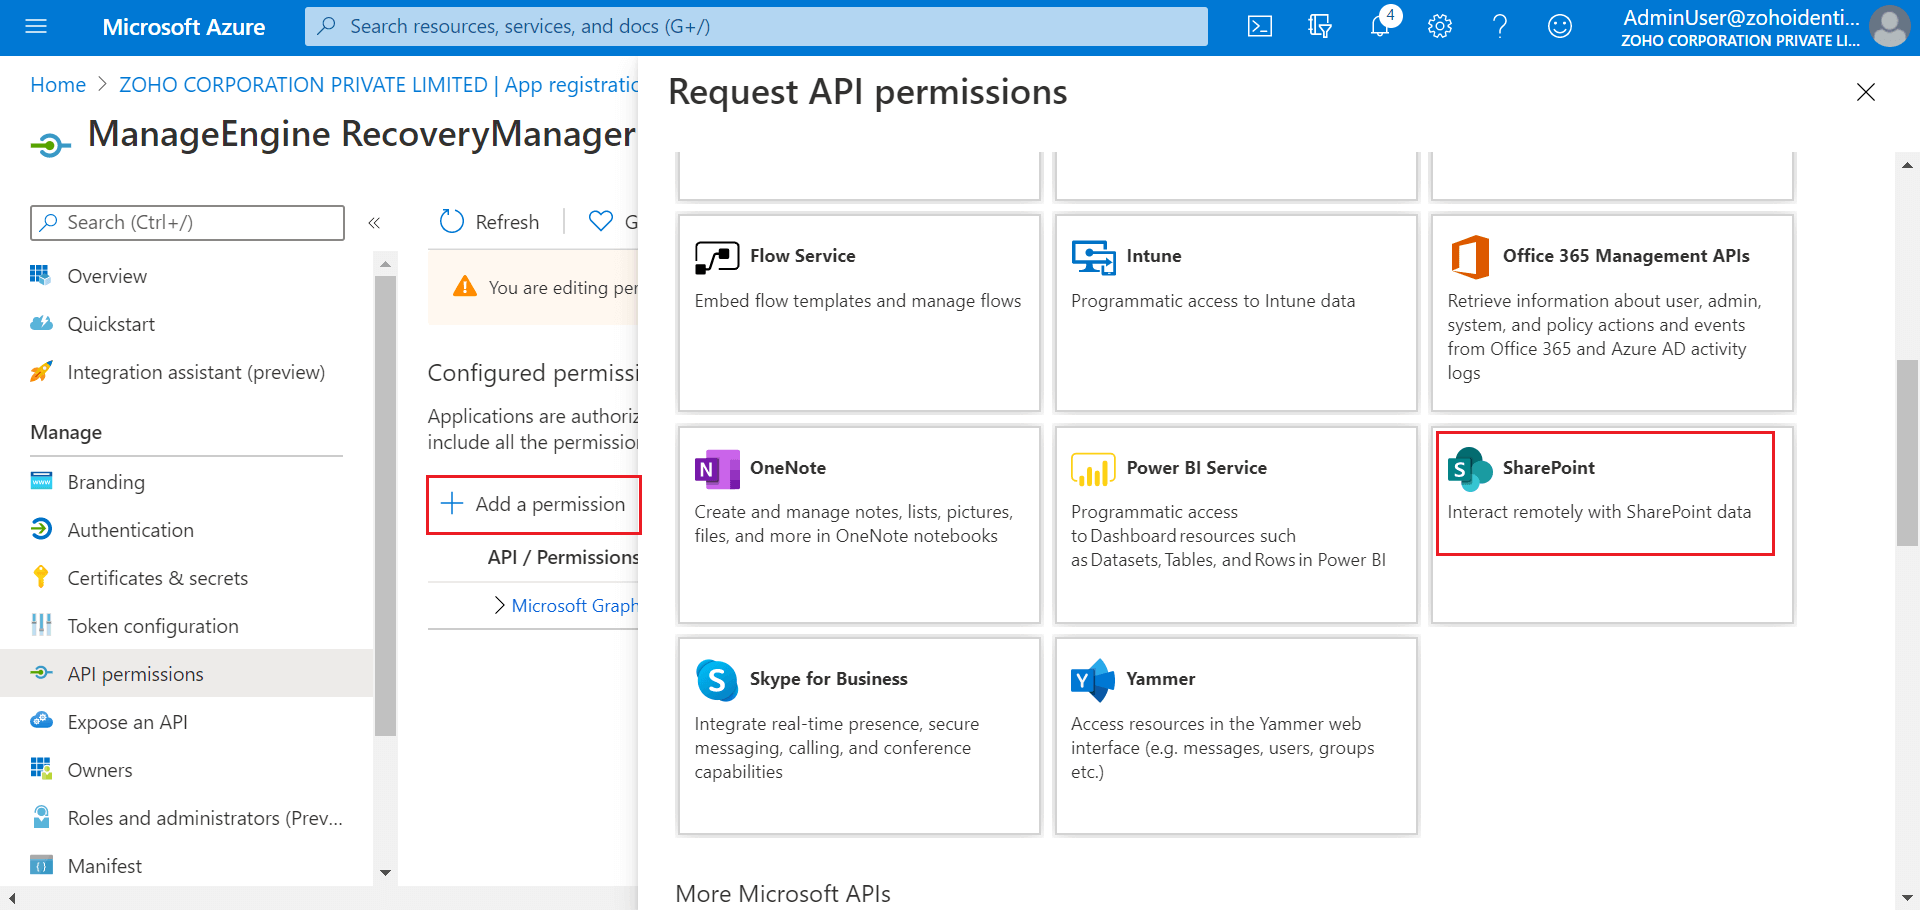
- Select the following SharePoint permissions: Sites.FullControl.All (Application permission), TermStore.ReadWrite.All (Application permission), User.ReadWrite.All (Application permission), User.ReadWrite.All (Delegated permission).
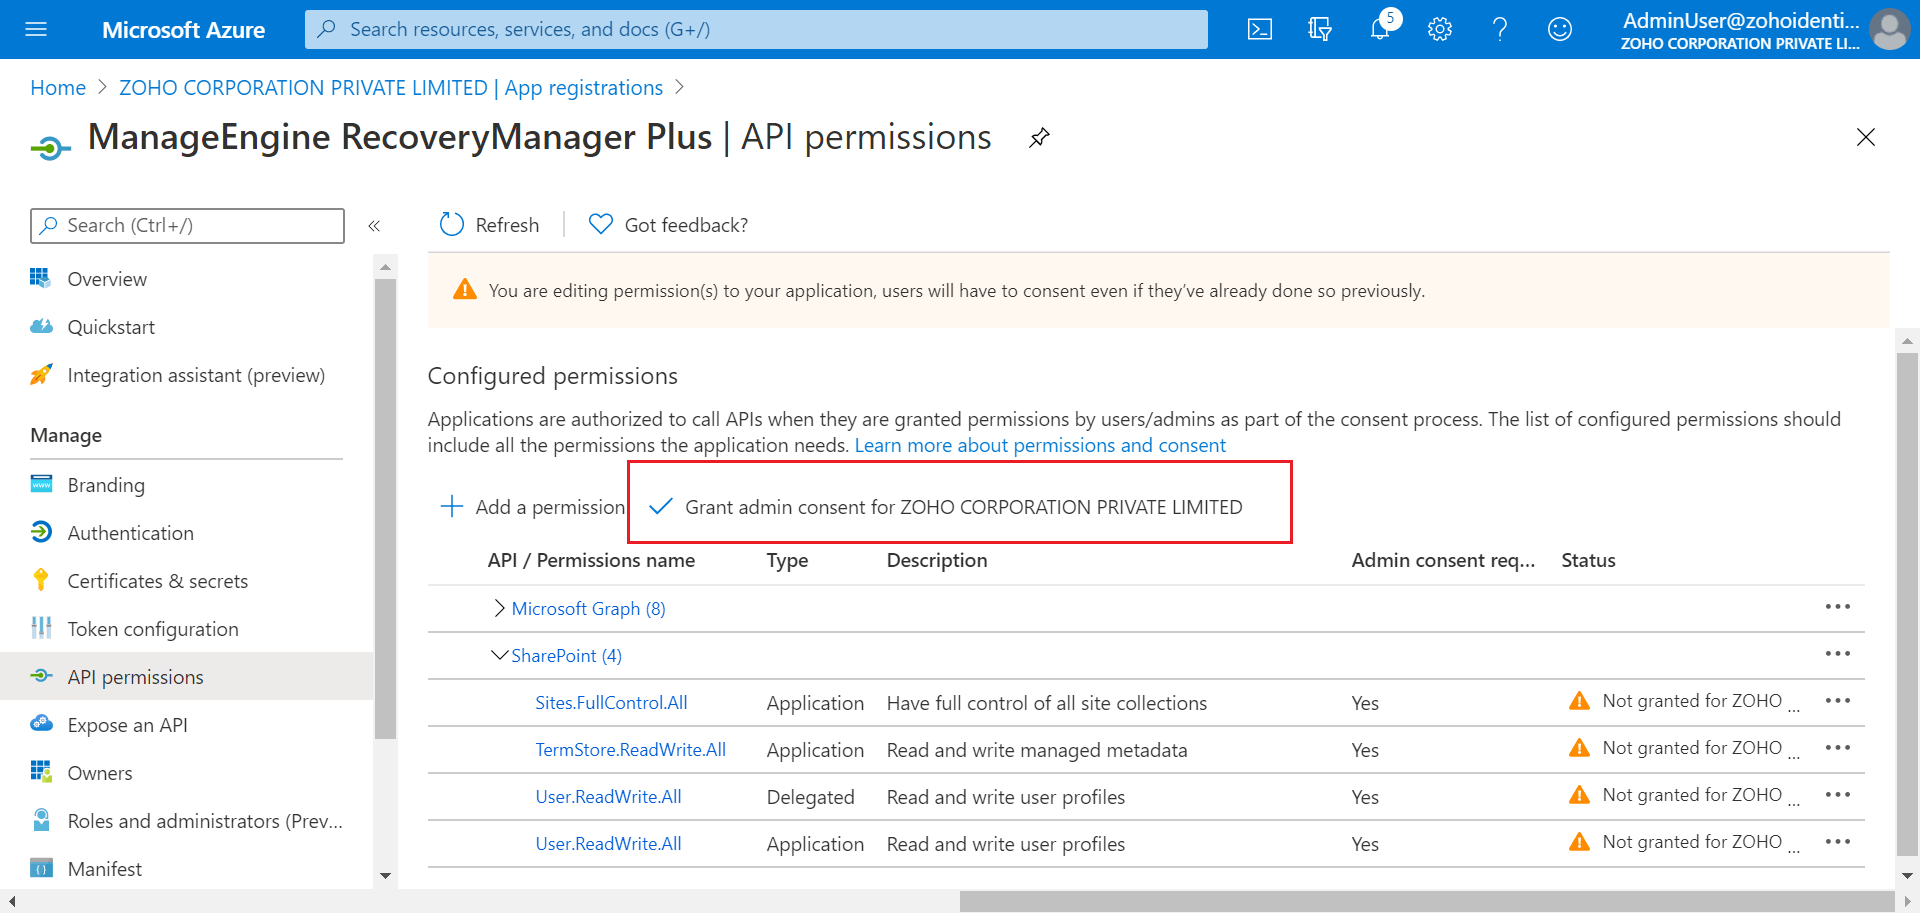
- Select the Grant admin consent for <Tenant name> button, where <Tenant name> will be the name of your Azure tenant.
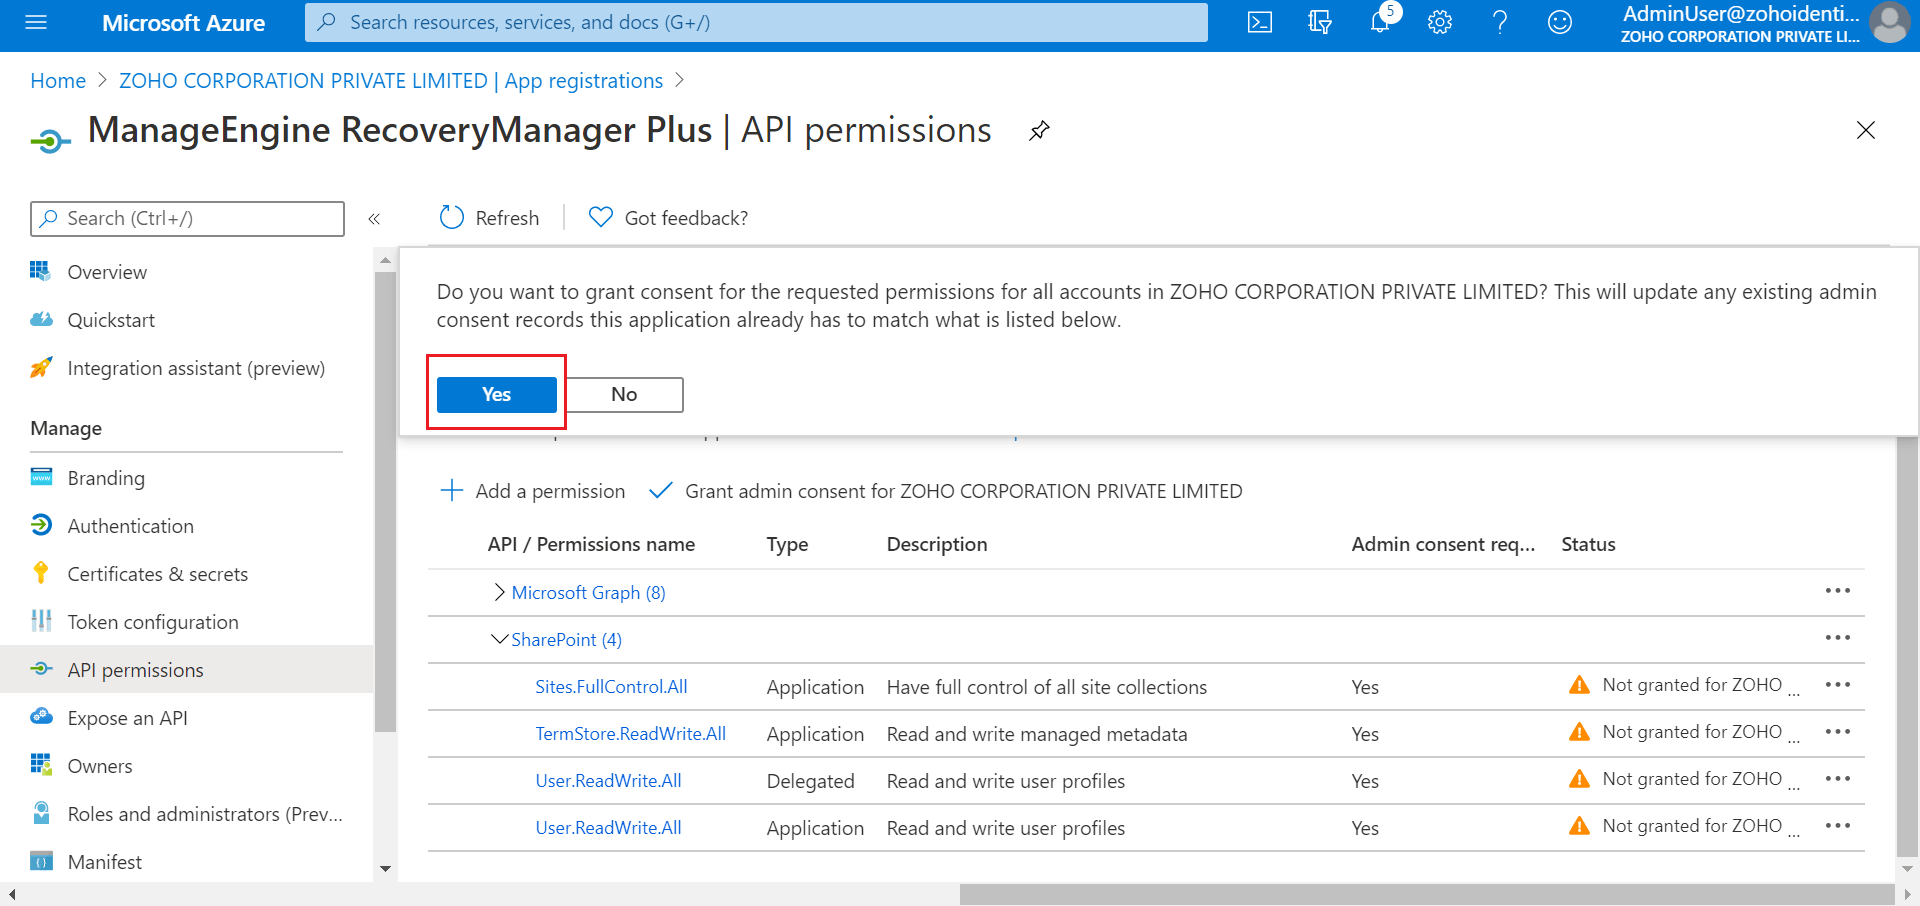
- Select Yes to confirm your choice.
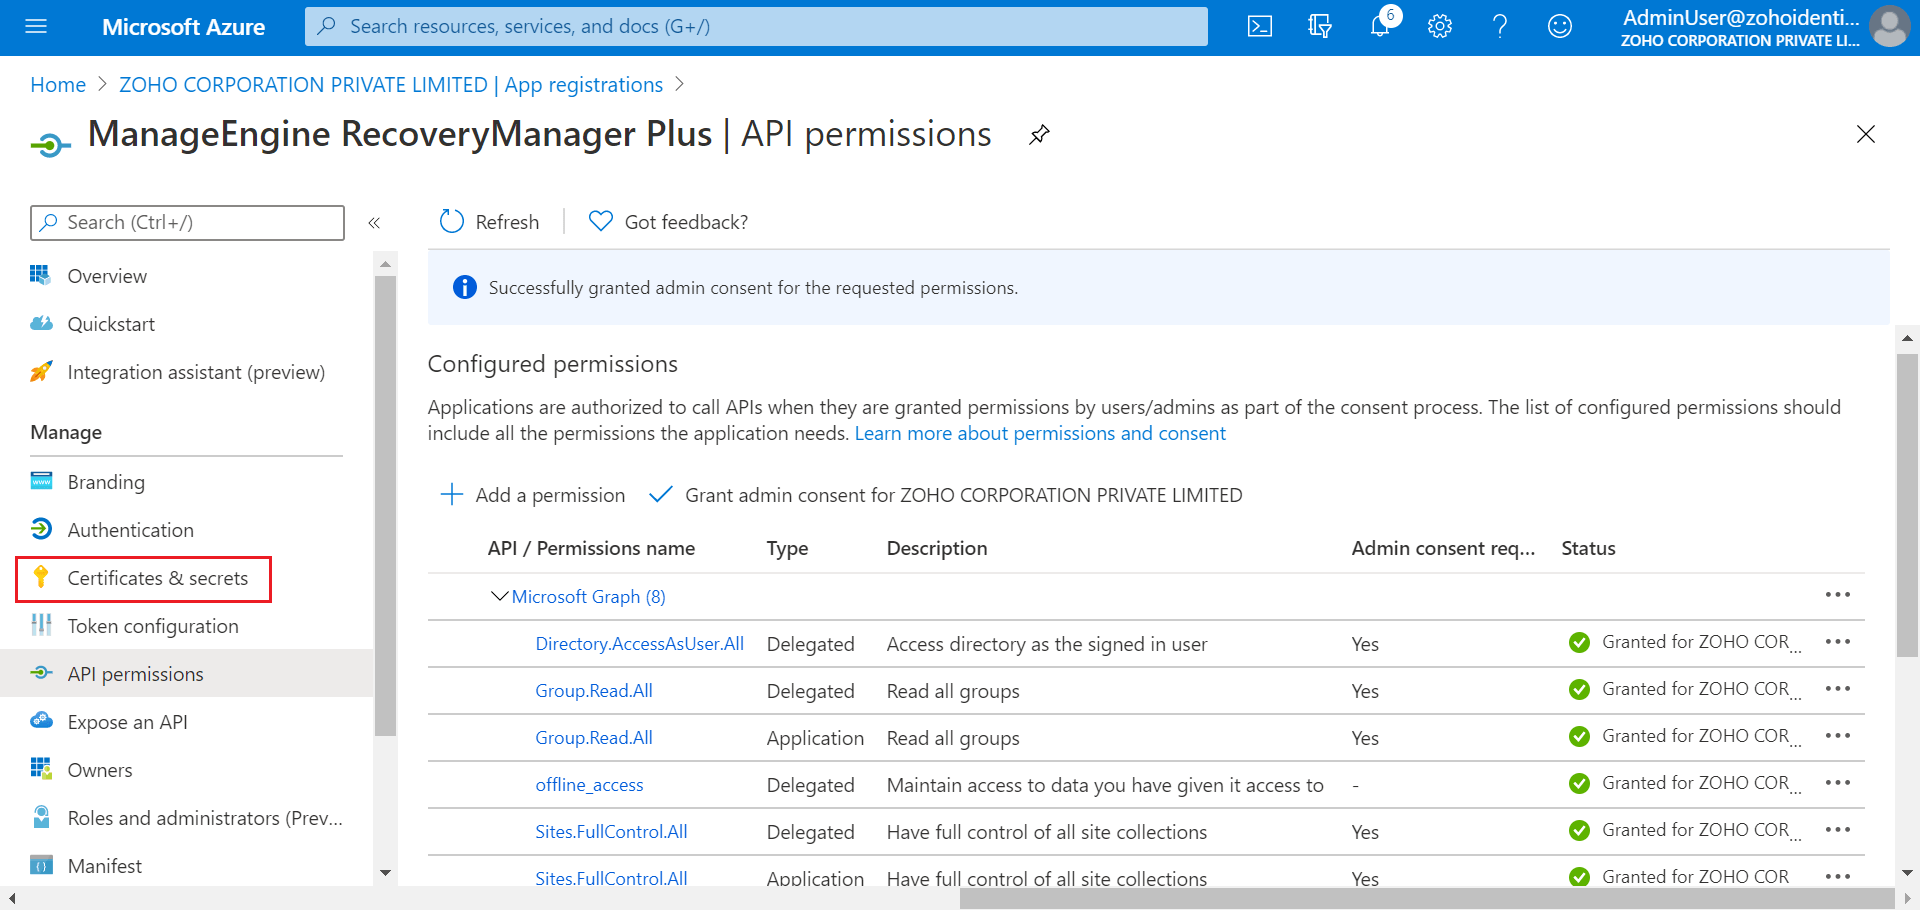
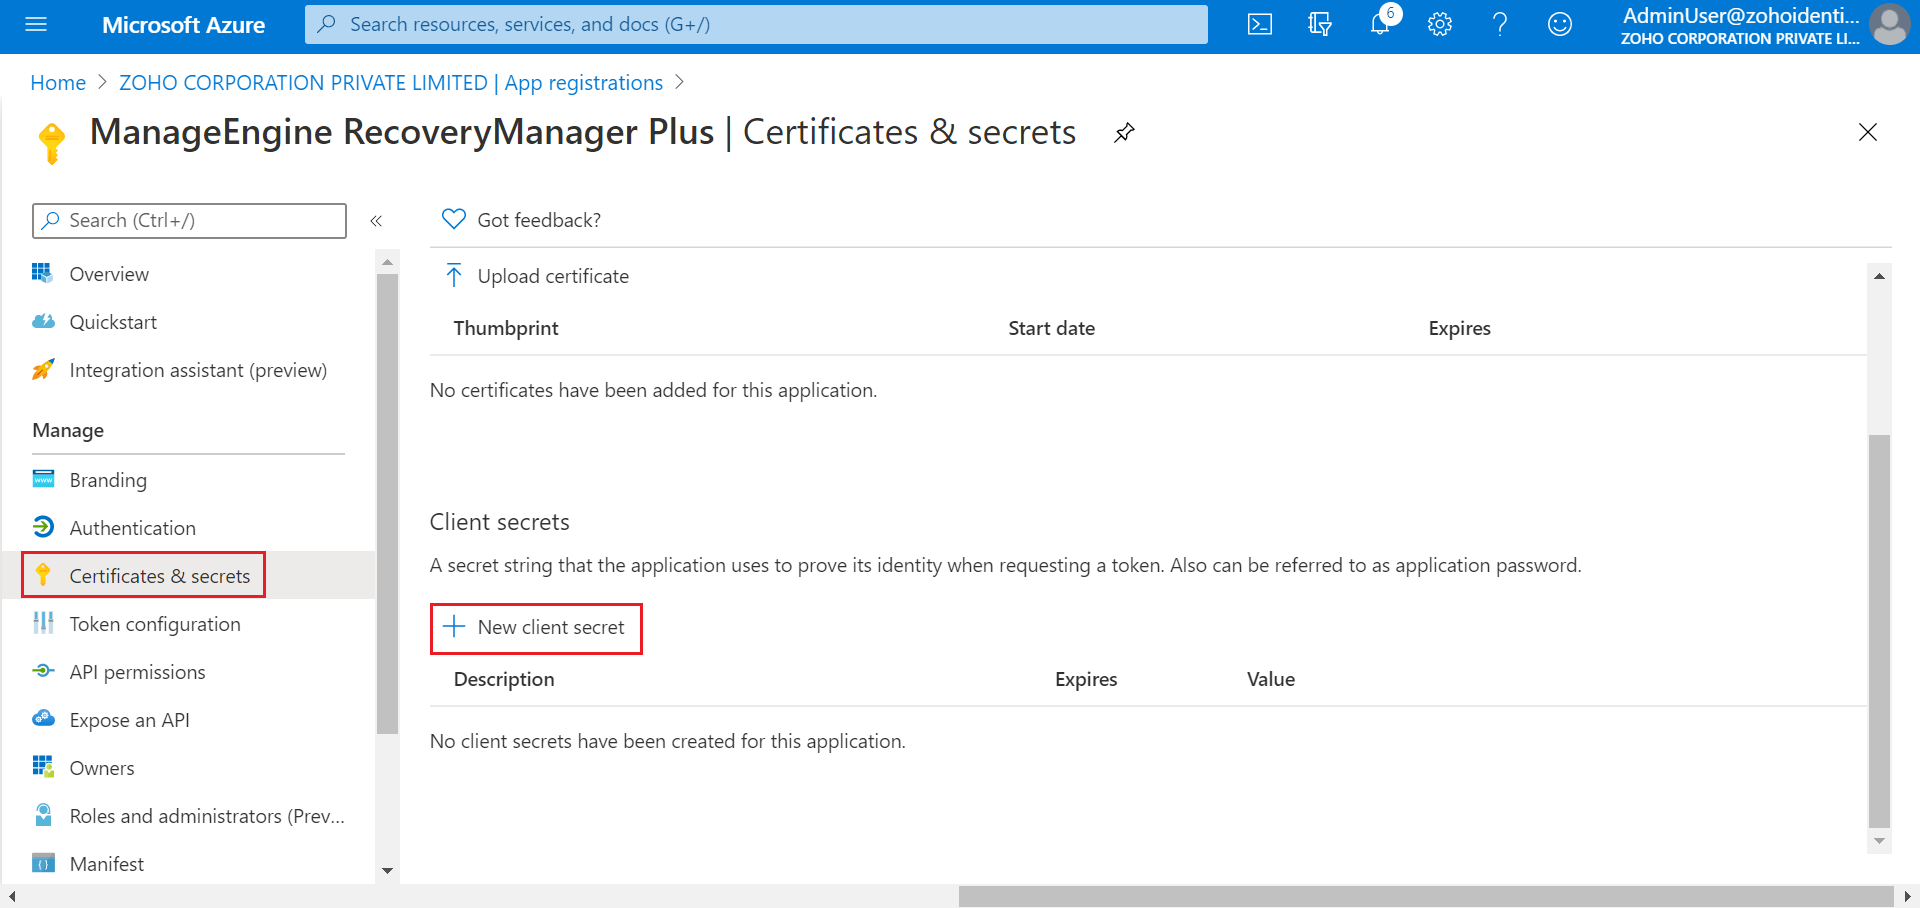
- Click Certificates and secrets from the left-pane.
- Select the New client secret button.
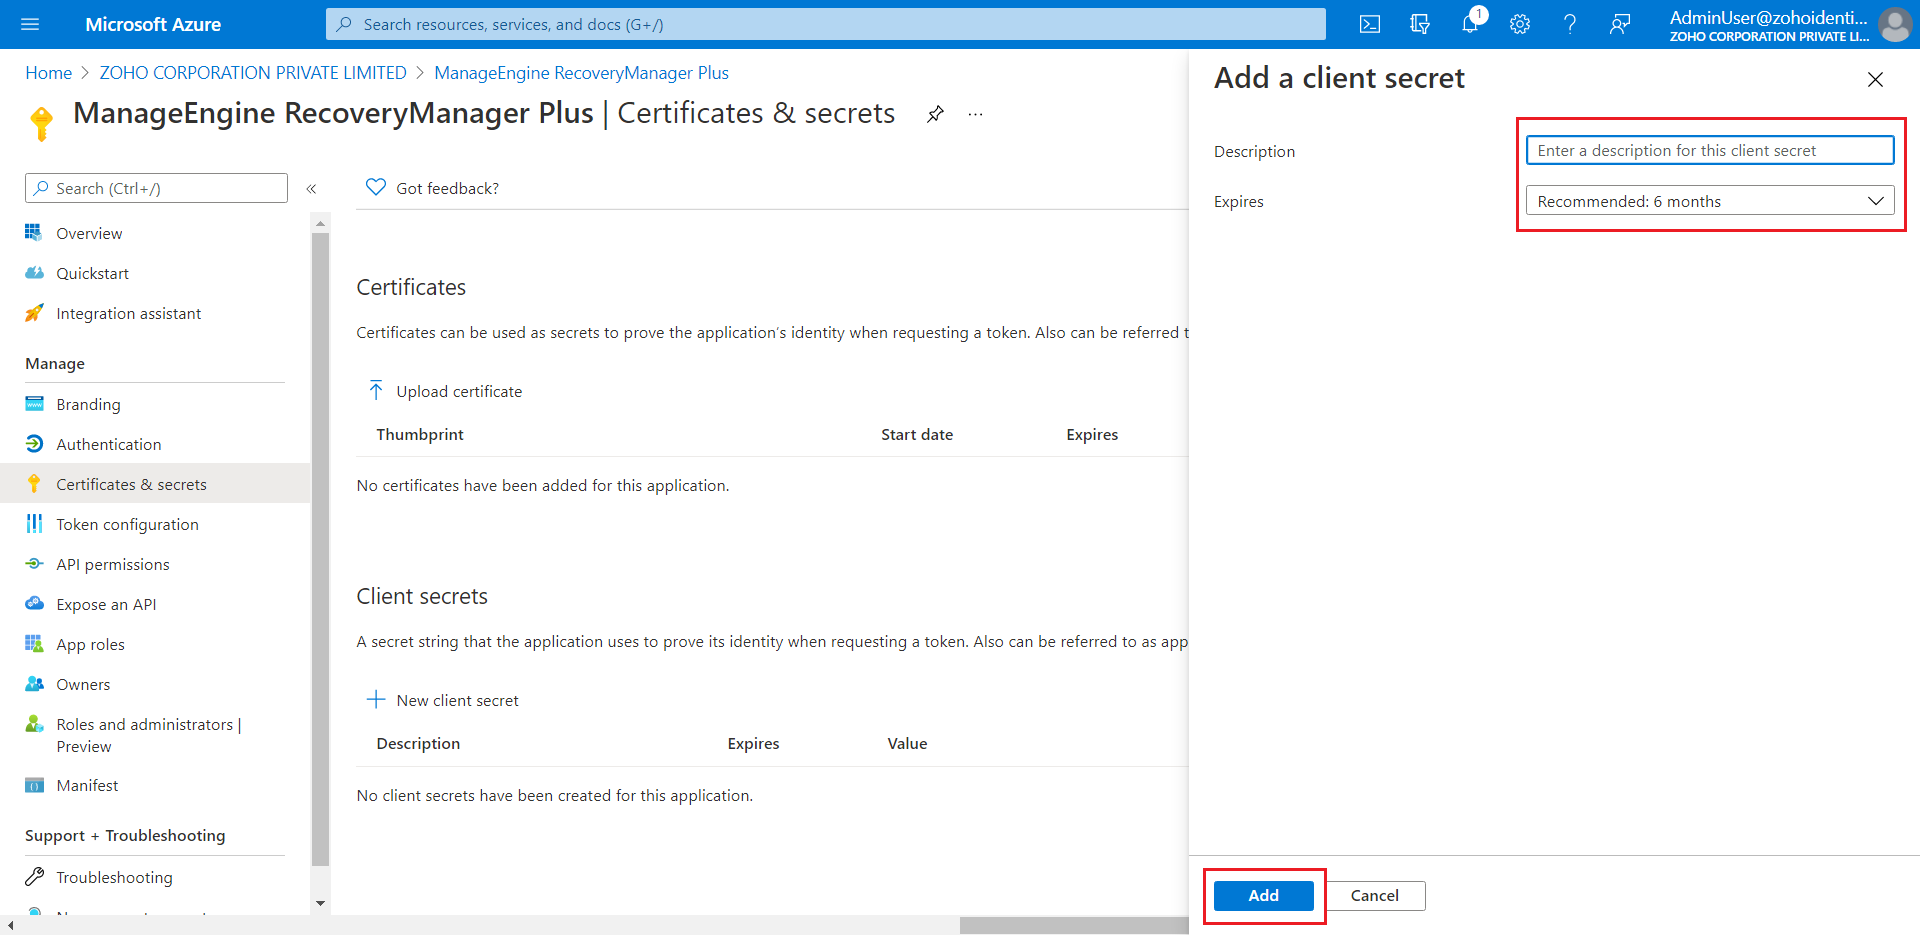
- Provide a description for the client secret, the duration for which the client secret will be valid, and click Add.
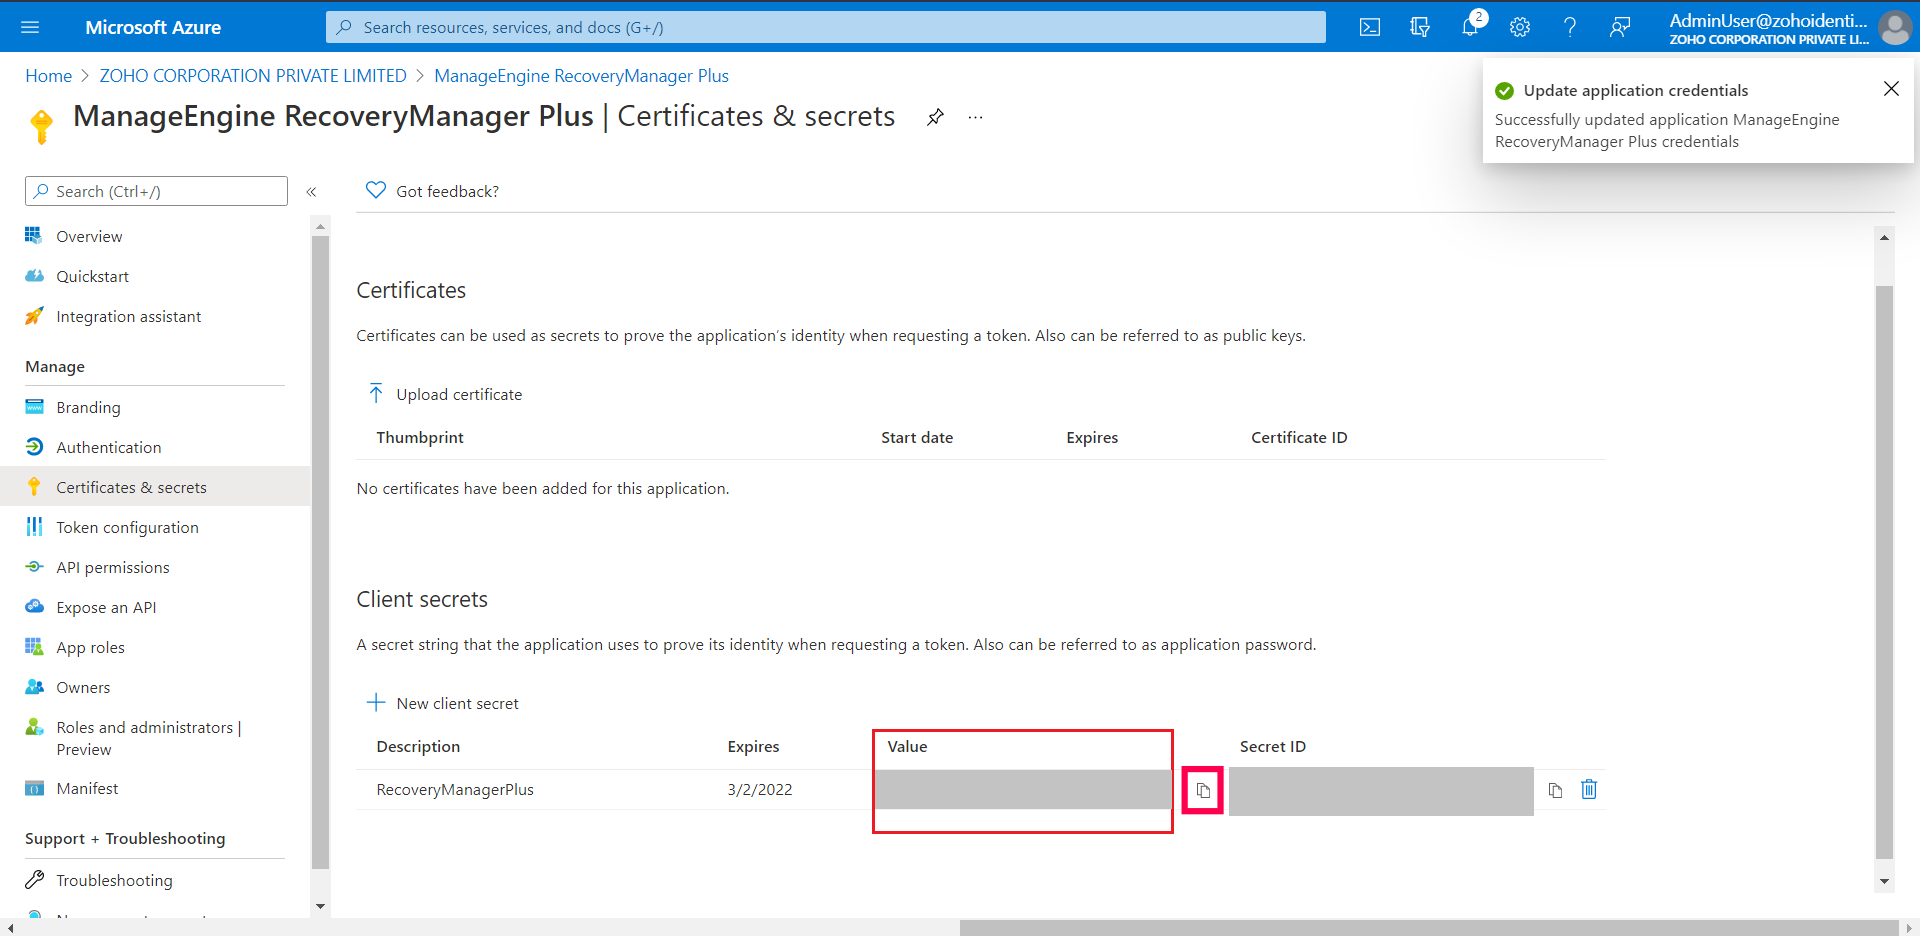
- Copy the string under the column Value. You won't be able to retrieve it after you perform another operation or leave this page. Use the copy icon marked below.
- Click Overview in the left-pane and copy the client ID.
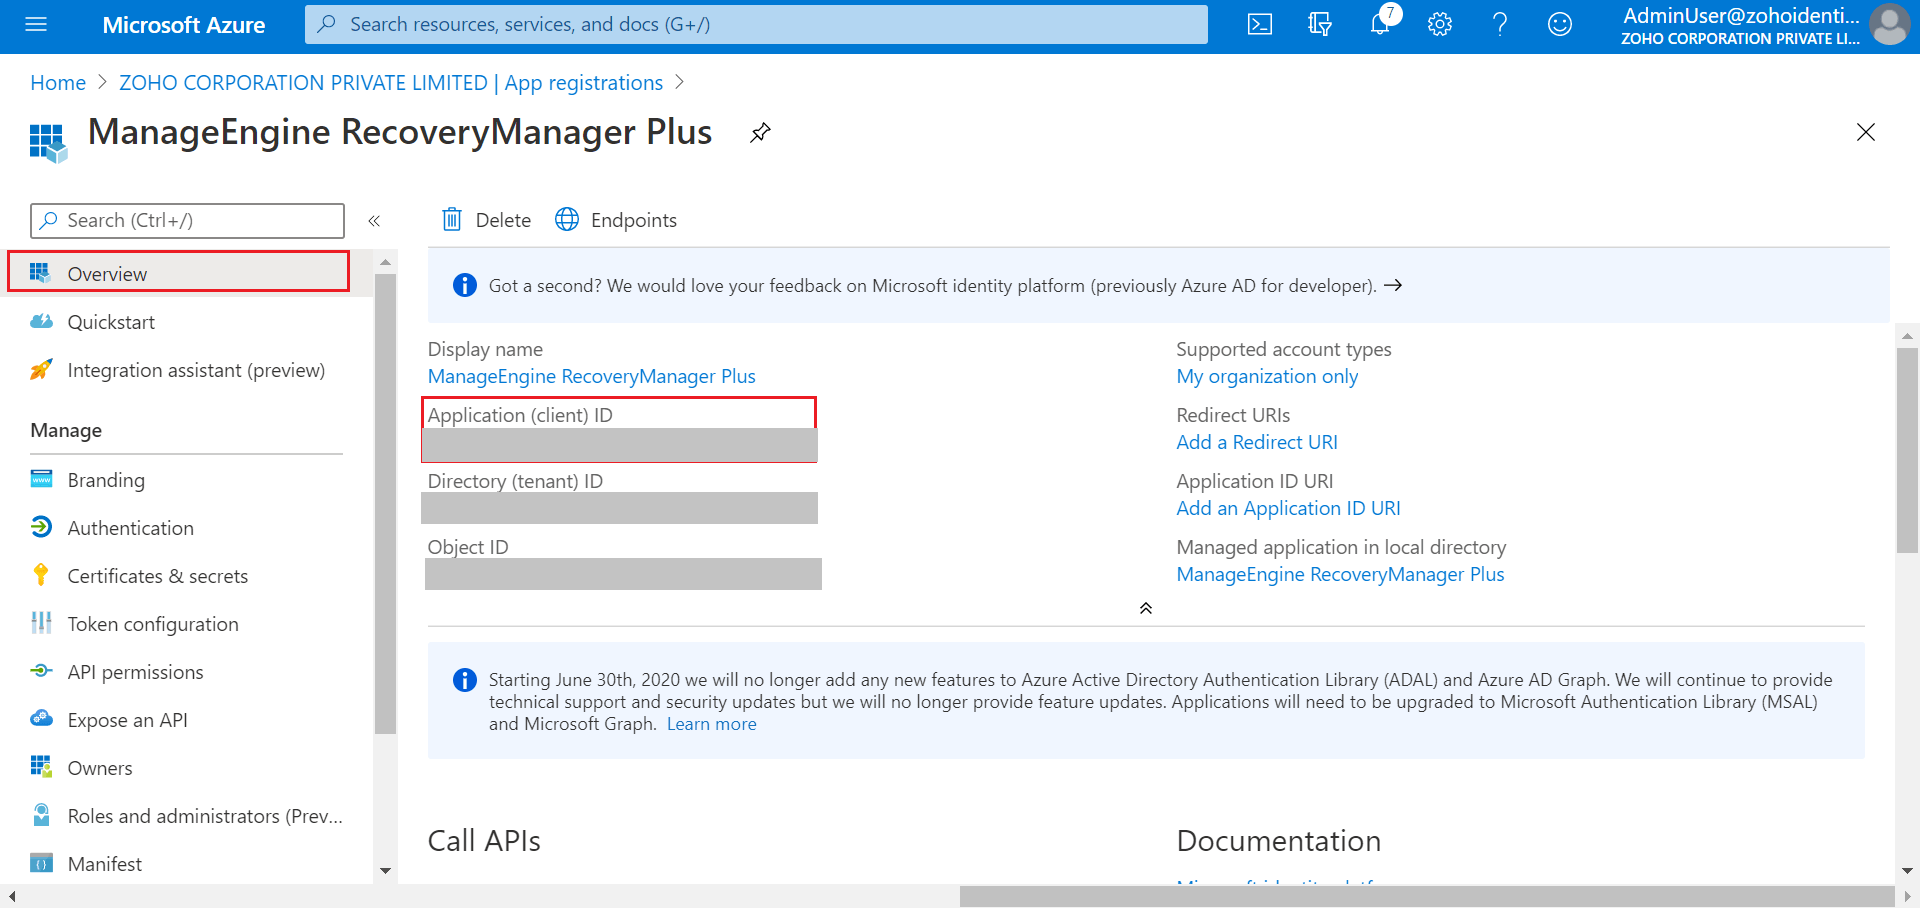
You can now use the client ID and secret for the duration specified in the expiration field, after which you’ll have to repeat the process.
 ADManager Plus
 ADAudit Plus
 ADSelfService Plus
 M365 Manager Plus