Data Bars
Data bars are visual indicators within pivot table cells, allowing for quick comparison and analysis of values. They offer an intuitive representation of relative values, making it easier to identify trends, outliers, and patterns at a glance.
Types of Data Bars
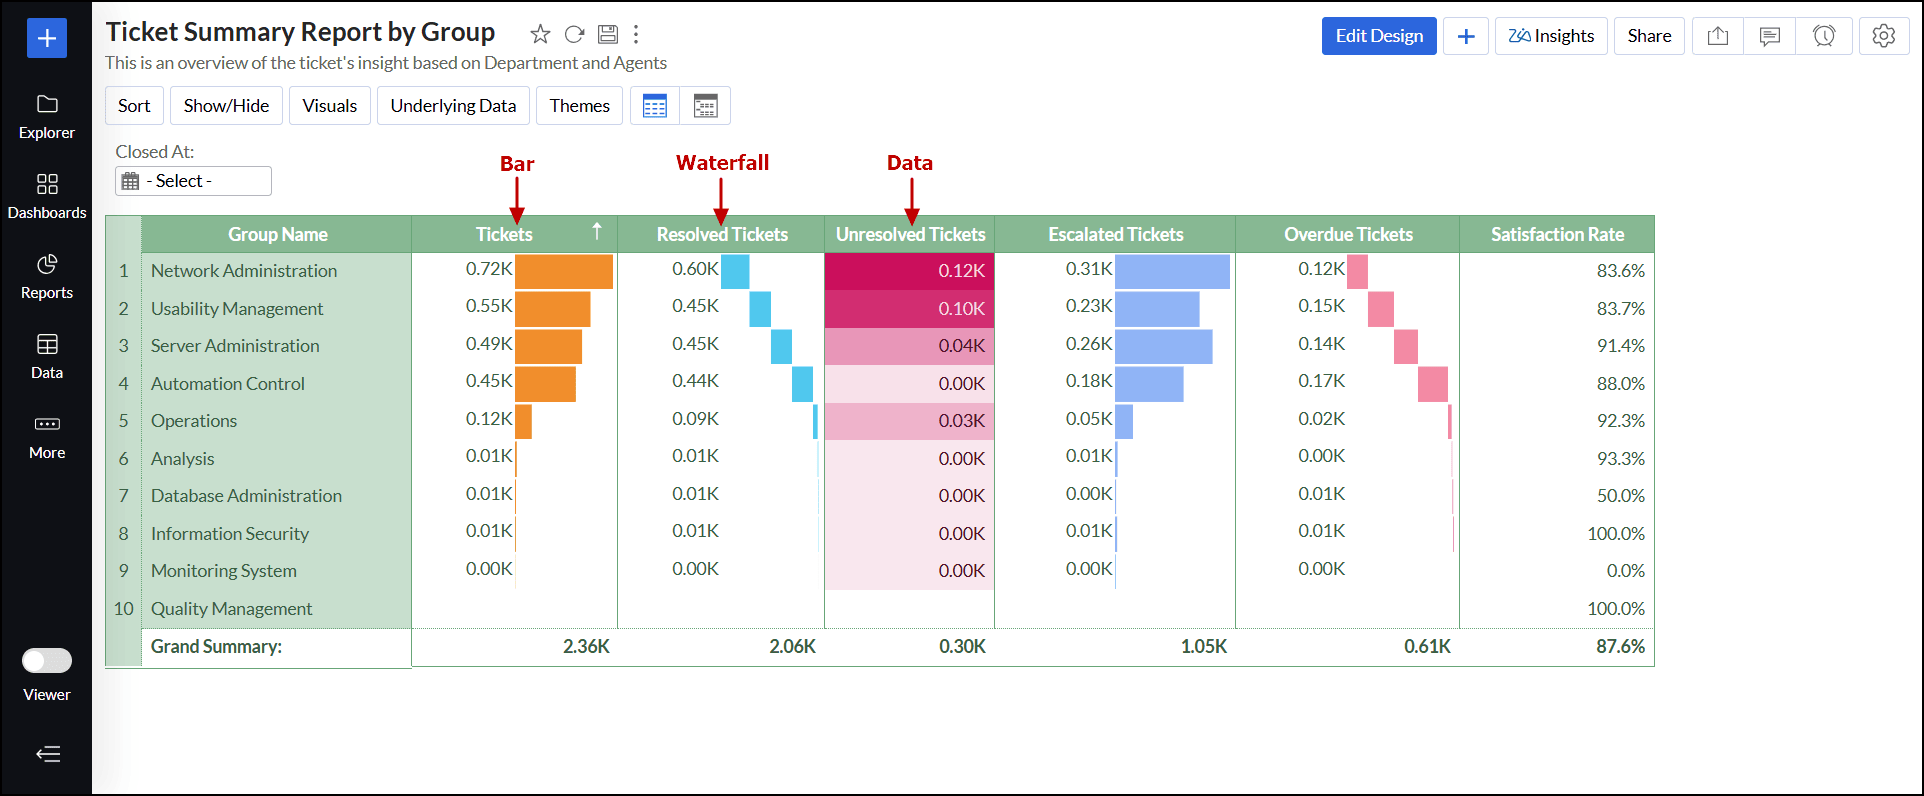
- Bar: A horizontal bar that visualizes data, where its length reflects the value.
- Waterfall: A sequence of bars displaying gradual changes, often used to depict variations across time, stages, or categories.
- Data: Shows only the raw data values without any graphical elements.
Adding Data Bars to the pivot table
Follow the steps below to add Data Bars to the pivot table:
- Open the desired pivot view in View mode or Edit Design mode.
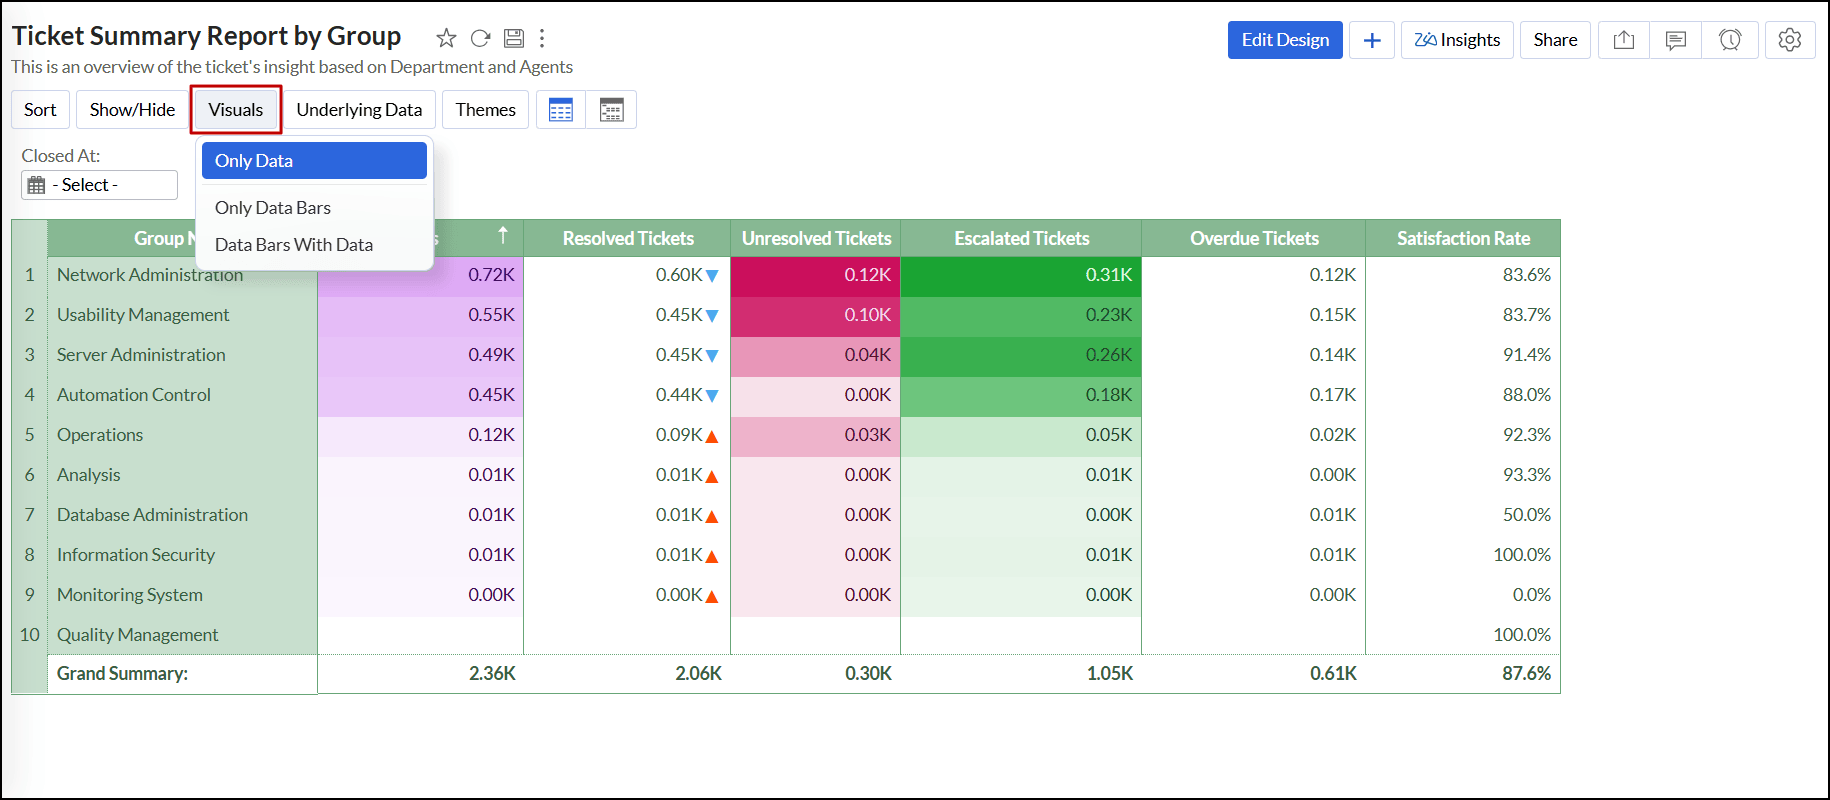
- Click the Visuals button on the toolbar and choose one of the following options:
- Only Data: This is the default option, where data is generated based solely on the columns placed on the designer shelf.
- Only Data Bars: Displays only the Data Bars of the selected column without showing the values.
- Data Bars with Data: Shows the data values alongside the Data Bars for the selected column.
Customizing Sparkline charts
To customize the Data Bars added to the pivot table, follow the steps below:
- Open the desired pivot table with Data Bars in View or Edit Design mode.
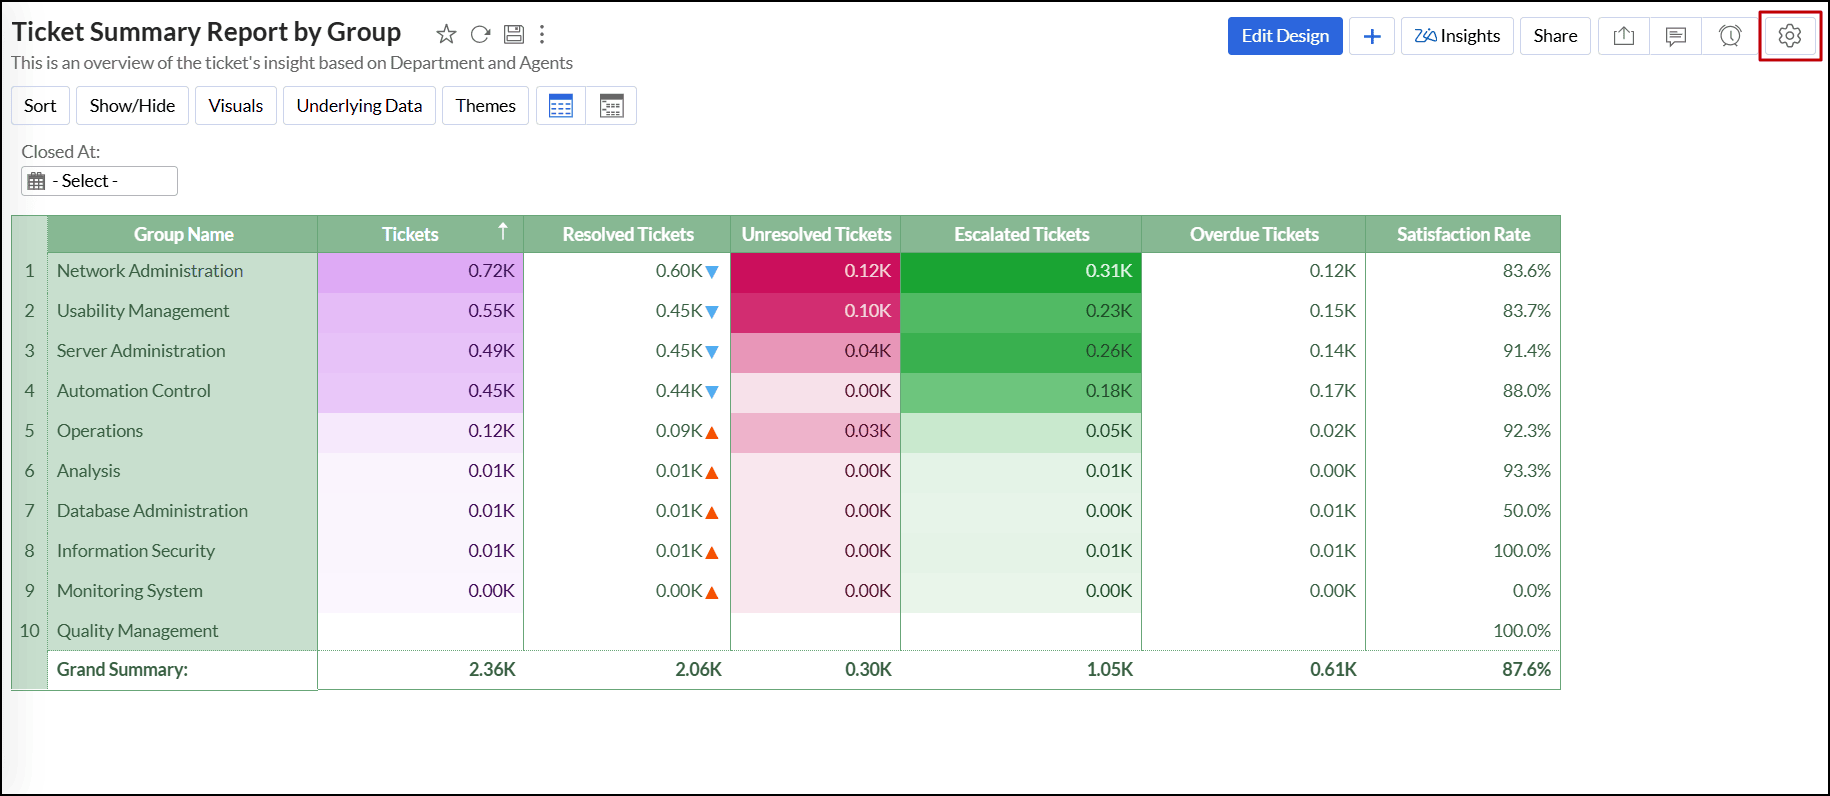
- Click the Settings icon at the top right corner.
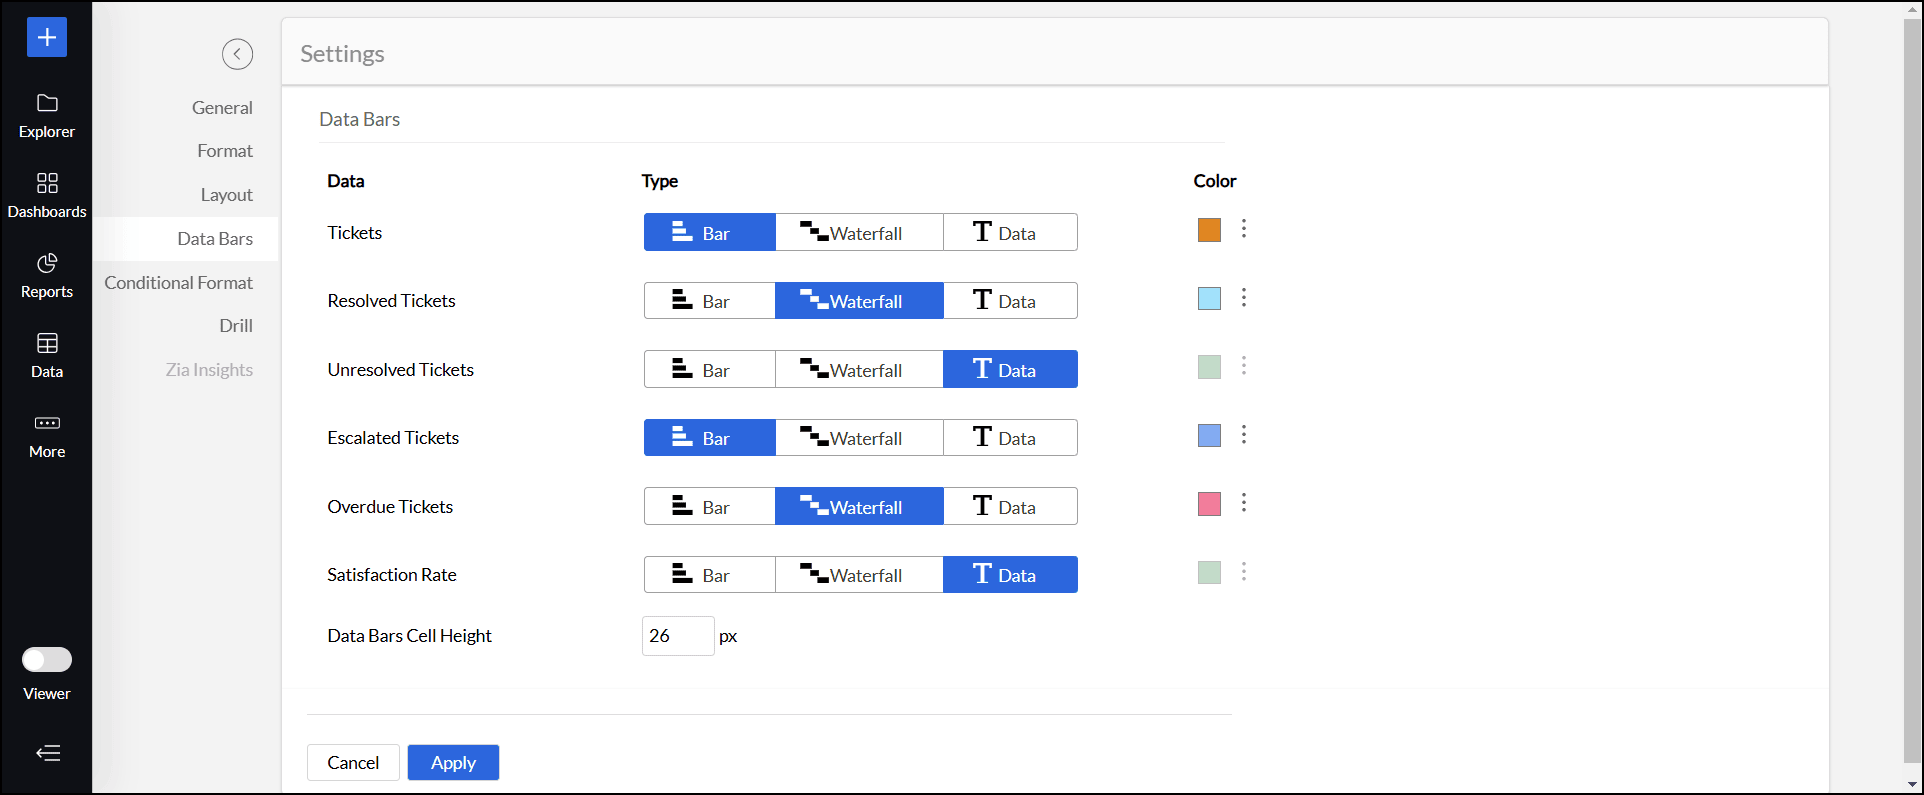
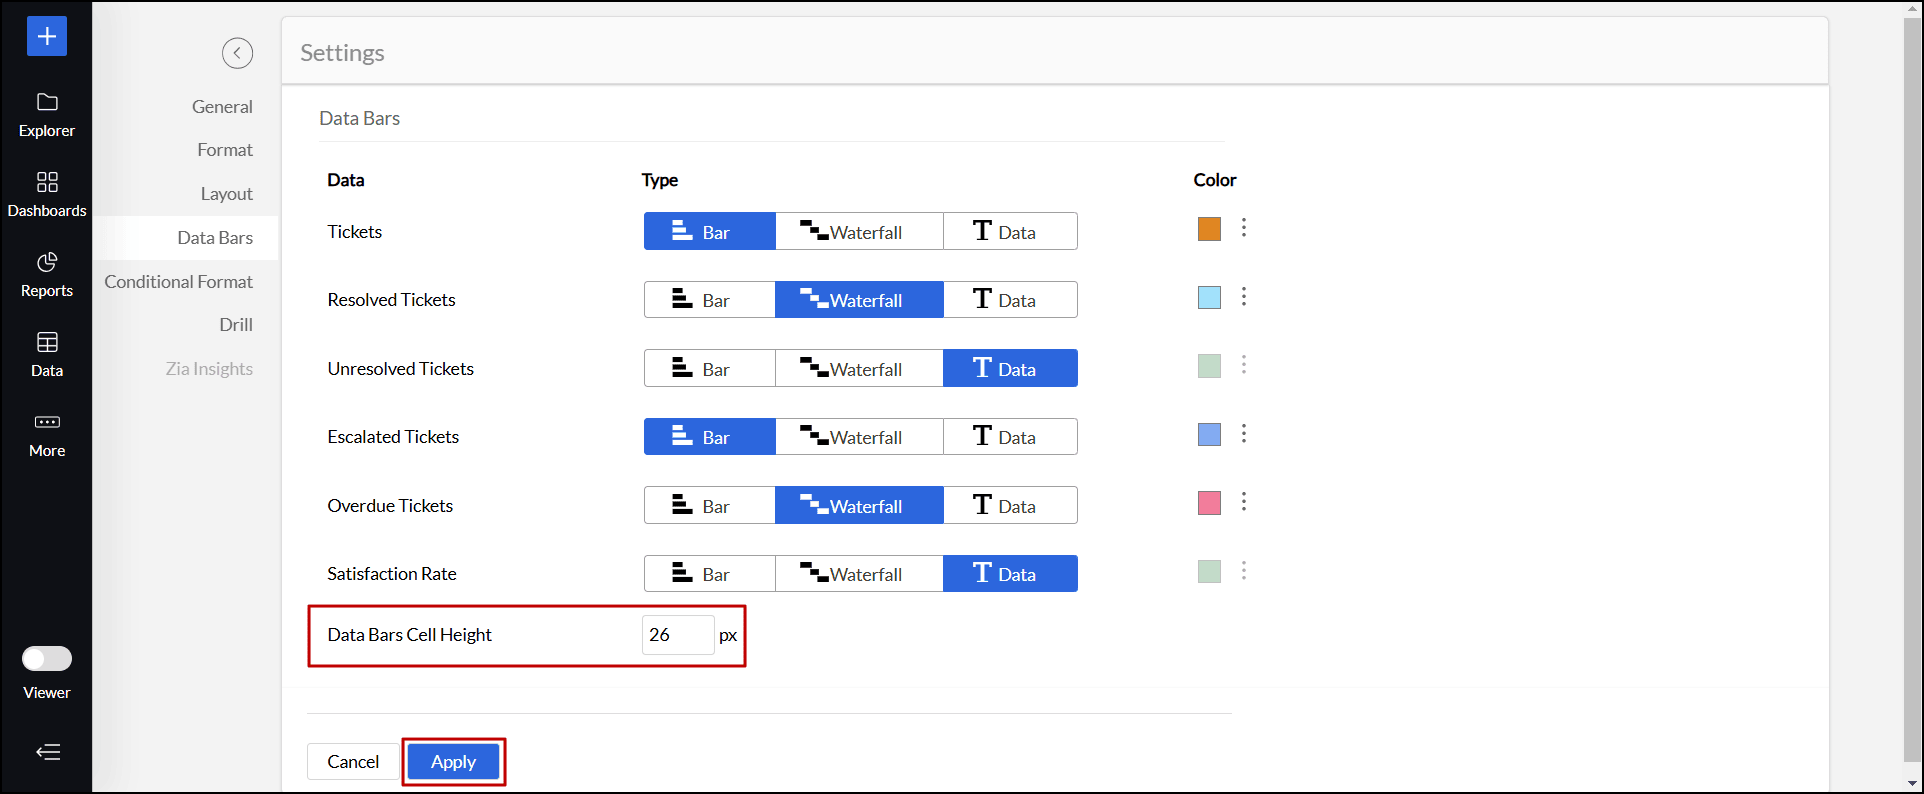
- In the window that appears, navigate to the Data Bars tab.
- Modify the settings detailed below as needed to adjust the appearance of the Data Bars:
- Type: Choose the desired type of Data Bars. Click here to learn about the types.
- Color: Select a color for the Data Bar.
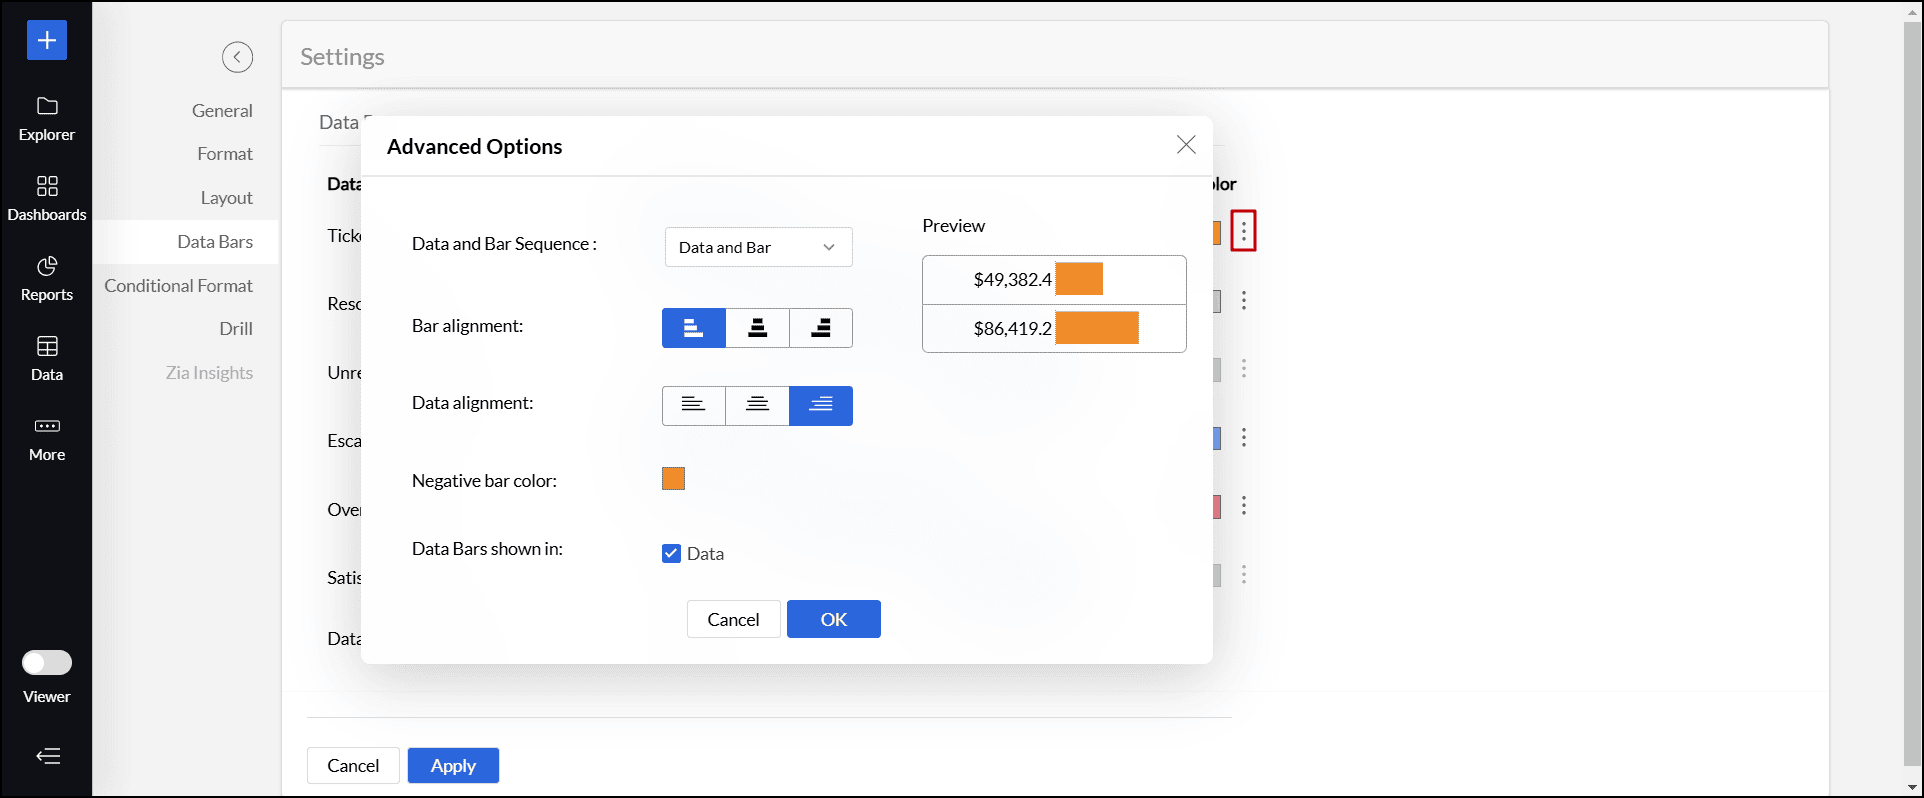
- Additional Formatting Options: Click the Vertical Ellipsis icon to view more options.
- Data and Bar Sequence: Click the drop-down menu to select the display order of the Data and Bars. This option is available only when the Data Bars with Data setting is enabled.
- Bar Alignment: When the Bar option is selected, you can align the bars to the left, right, or center. If the Waterfall option is selected, you can align the bars to the left or right.
- Data Alignment: When the Data Bars with Data option is selected, you can align the data to the left, right, or center.
- Preview: The preview area lets you see how different Data and Bar alignments or sequences appear in your pivot table.
- Negative Bar Color: Choose a color for the Data Bars to represent negative values.
- Data Bars Shown In: Select the checkboxes to display Data Bars in the Data, Row Grand Total, and Column Grand Total sections.
- Data Bars Cell Height: Enter your preferred height value in pixels for the Data Bars cells.
- Click Apply to save the changes.
Note:
- The data values are grouped based on the dimensions placed on the column shelf. When multiple dimensions are added, the Data Bar gets generated based on the last dimension in the column shelf. For example, if both Date (Year) and Date(Month) are placed on the column shelf, the Data Bar will be displayed for each month within each year.
- Data Bars can only be exported in the HTML format.