SSL Certificate Operations
The various operations performed using SSL certificates are:
- Import and Export Certificates
- Edit and Delete Certificates
- Certificate Requests
- Control Expiry Notification Schedules
- Domain Expiration
- SSL Certificate Group
1. Import and Export Certificates
1.1 Allowed Certificate Types
Key Manager Plus allows you to import and export the following certificate types:
- .cer
- .crt
- .pem
- .der
- .p7b
- .pfx
- .p12
- .pkcs12
- .jks
- .keystore
1.2 Steps to Import Certificates into Key Manager Plus
In addition to Certificate Discovery, Key Manager Plus offers multiple ways to manually add SSL certificates to its repository. These steps are listed below:
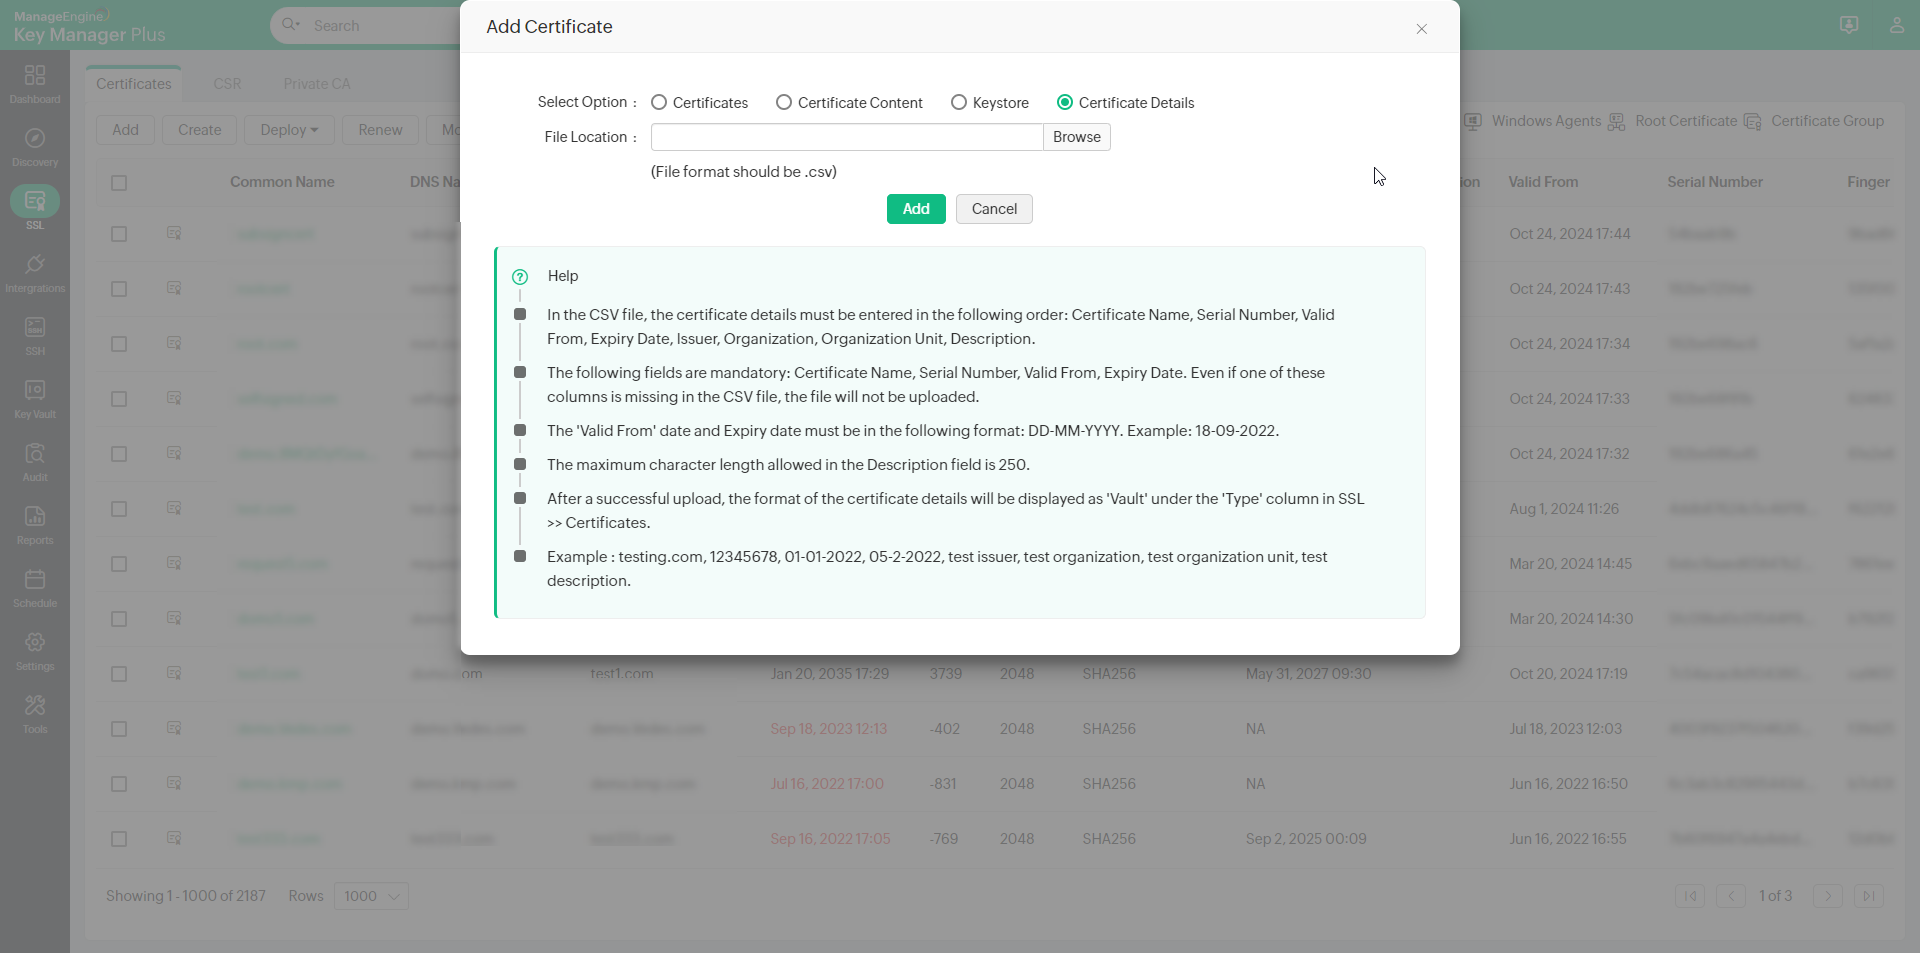
- Navigate to the SSL >> Certificates tab and click the Add button.
- In the Add Certificate window that appears, you can import certificates using any of the following methods:
- Certificates — Click Browse, select the desired certificate file from your computer, and click Open.
- Certificate Content — Copy the certificate content and paste it into the designated textbox within the Key Manager Plus window.
- Keystore Based — Click Browse and select the desired Keystore file. If the Keystore file is password-protected, enter the password in the designated field. Tick the checkbox Add Keystore digital certificates in a Certificate Group if you want to add the digital certificates from the Keystore file to a new certificate group. Enter a name for the certificate group in the given field.
Note: From build 7070 onwards, you can import certificates from JKS files that use separate passwords for the keystore and the private key by specifying the private key password in the Private Key Password field.
- Certificate Details — Click Browse, select the .csv file with the required certificate details, and click Open.
- Click Add to import the certificate(s) to the Key Manager Plus repository.
1.2.i Importing Certificate Details
Apart from adding SSL certificates, Key Manager Plus allows you to import certificate details into the repository. This option comes in handy in cases where you have the details of an SSL certificate but not the certificate itself.
Mentioned below are a few real-time scenarios where certain users may not have access to SSL certificates:
- An IT admin who manages a set of SSL certificates deployed to servers that reside in a demilitarized zone from which Key Manager Plus cannot discover the certificates.
- A compliance manager whose responsibility is to ensure that all digital identities used in their environment, including SSL certificates to which they do not have access, are documented in order to stay compliant and adhere to security standards.
- The procurement team in an enterprise that handles the business side of things, such as purchases, will not have direct access to SSL certificates like the engineering team, which takes care of the deployment and management of the certificates. Without direct access, the procurement team cannot determine when to renew existing SSL certificates and/or acquire new ones. Without timely renewal of certificates, there is a huge risk of exposing the enterprise's domains to cyberthreats.
In the scenarios presented above, the end user does not possess the SSL certificates for various reasons. By adding certificate details to Key Manager Plus, you can ensure that no certificate in your environment goes forgotten or undocumented. The Certificate Details feature helps you to consolidate and track the expiration of the certificates from a centralized console in the product and send out scheduled alerts.
When the certificate details are displayed in the SSL certificates table, they will be classified under the type 'Vault.' In SSL >> Certificates, click the column chooser to display the Type column in the certificates table.
Important Notes:
- Before you upload the CSV file, ensure that the certificate details are entered in the following order: Certificate Name, Serial Number, Valid From, Expiry Date, Issuer, Organization, Organization Unit, and Description.
- Among the aforementioned fields, the following are mandatory: Certificate Name, Serial Number, Valid From, Expiry Date. Even if one mandatory field is missing in the CSV file, the file will not be uploaded.
- The Valid From date and Expiry date must be entered in the following format: DD-MM-YYYY. Example: 18-09-2022.
- The maximum character length allowed for the 'Description' field in the CSV file is 250.
- The maximum number of lines allowed in the CSV file is 500. If the line count exceeds the limit, the file will not be uploaded.
- Certificate details added via this method will impact your licensed key count.
- Example: testing.com, 12345678, 01-01-2022, 05-02-2022, test issuer, test organization, test organization unit, test description.
1.3 Steps to Import Issuer Certificates
Key Manager Plus allows you to import issuer certificates into the repository and build a complete certificate chain in the product.
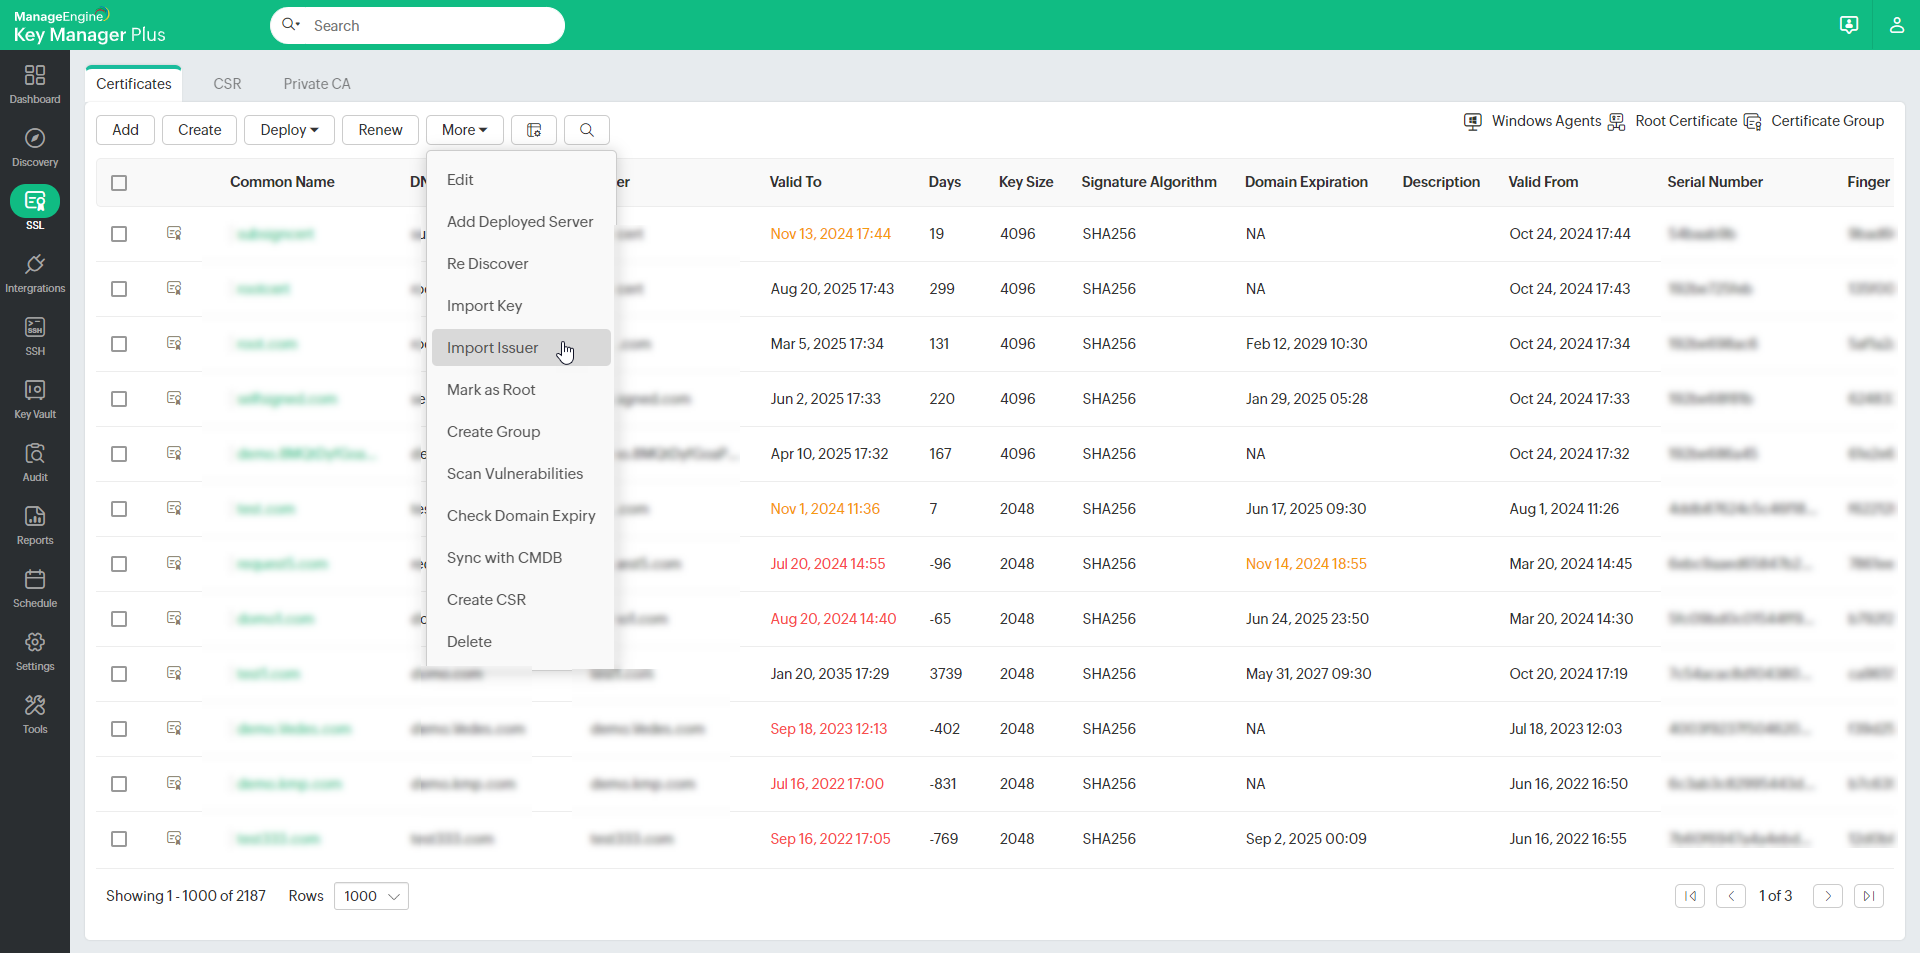
- Navigate to SSL >> Certificates. Select the required end certificate.
- Under the More dropdown, select Import Issuer.
- In the pop-up that appears, browse and add the issuer certificate.
- The additional issuer certificates you add will be appended to the existing SSL certificate in the repository based on the issuer name. To download the complete chain with the private key, export the certificate in JKS, PKCS, or PEM formats.
1.4 Steps to Export Certificates from Key Manager Plus
- Navigate to SSL >> Certificates.
- In the list view, click the certificate you want to export.
- In the certificate details window, click Export on the top-right corner and select the desired format.
- The certificate will be downloaded to your machine in the selected format.
2. Edit and Delete Certificates
2.1 Editing a Certificate
To edit a certificate from the Key Manager Plus repository:
- Navigate to SSL >> Certificates tab.
- Select the certificate to be edited, click More, and select Edit from the drop-down.
- In the Edit Certificate pop-up that appears, edit the DNS Name, Port, Description, Expiry Notification Email, Type, and Provisioning Type as required.
You can enable 'Deploy Certificate on Auto Renewal' to deploy the new certificate to all servers on auto-renewal.
Note: You will be able to deploy the certificate to all servers on auto-renewal only if the user credentials are available.
From the available additional fields, you can modify the text and dropdown fields with respect to the certificate details as added in the additional fields section.
Note: Click on the respective certificate from the Certificates tab to view the certificate details from the 'Certificate Details' window that opens.
- Click Save.
2.2 Updating the Expiry Notification Email
(Feature available from build 7060 and above only)
To edit the expiry notification emails of the SSL certificates available in Key Manager Plus, follow the steps below:
- Navigate to SSL >> Certificates.
- Select the certificates that need to be updated with the new expiry notification email.
- Click More >> Update Expiry Email from the top menu.
- In the pop-up window that appears, enter the expiry notification email in the field and click Save.
To update multiple certificates with different expiry emails, prepare a CSV file containing the following details in comma-separated format: Common Name, Serial Number, and Expiry Notification Email. Then, go to SSL >> Certificates >> More >> Update Expiry Email. In the pop-up window, browse and upload the CSV file. The corresponding certificates will be updated with their respective expiry emails. 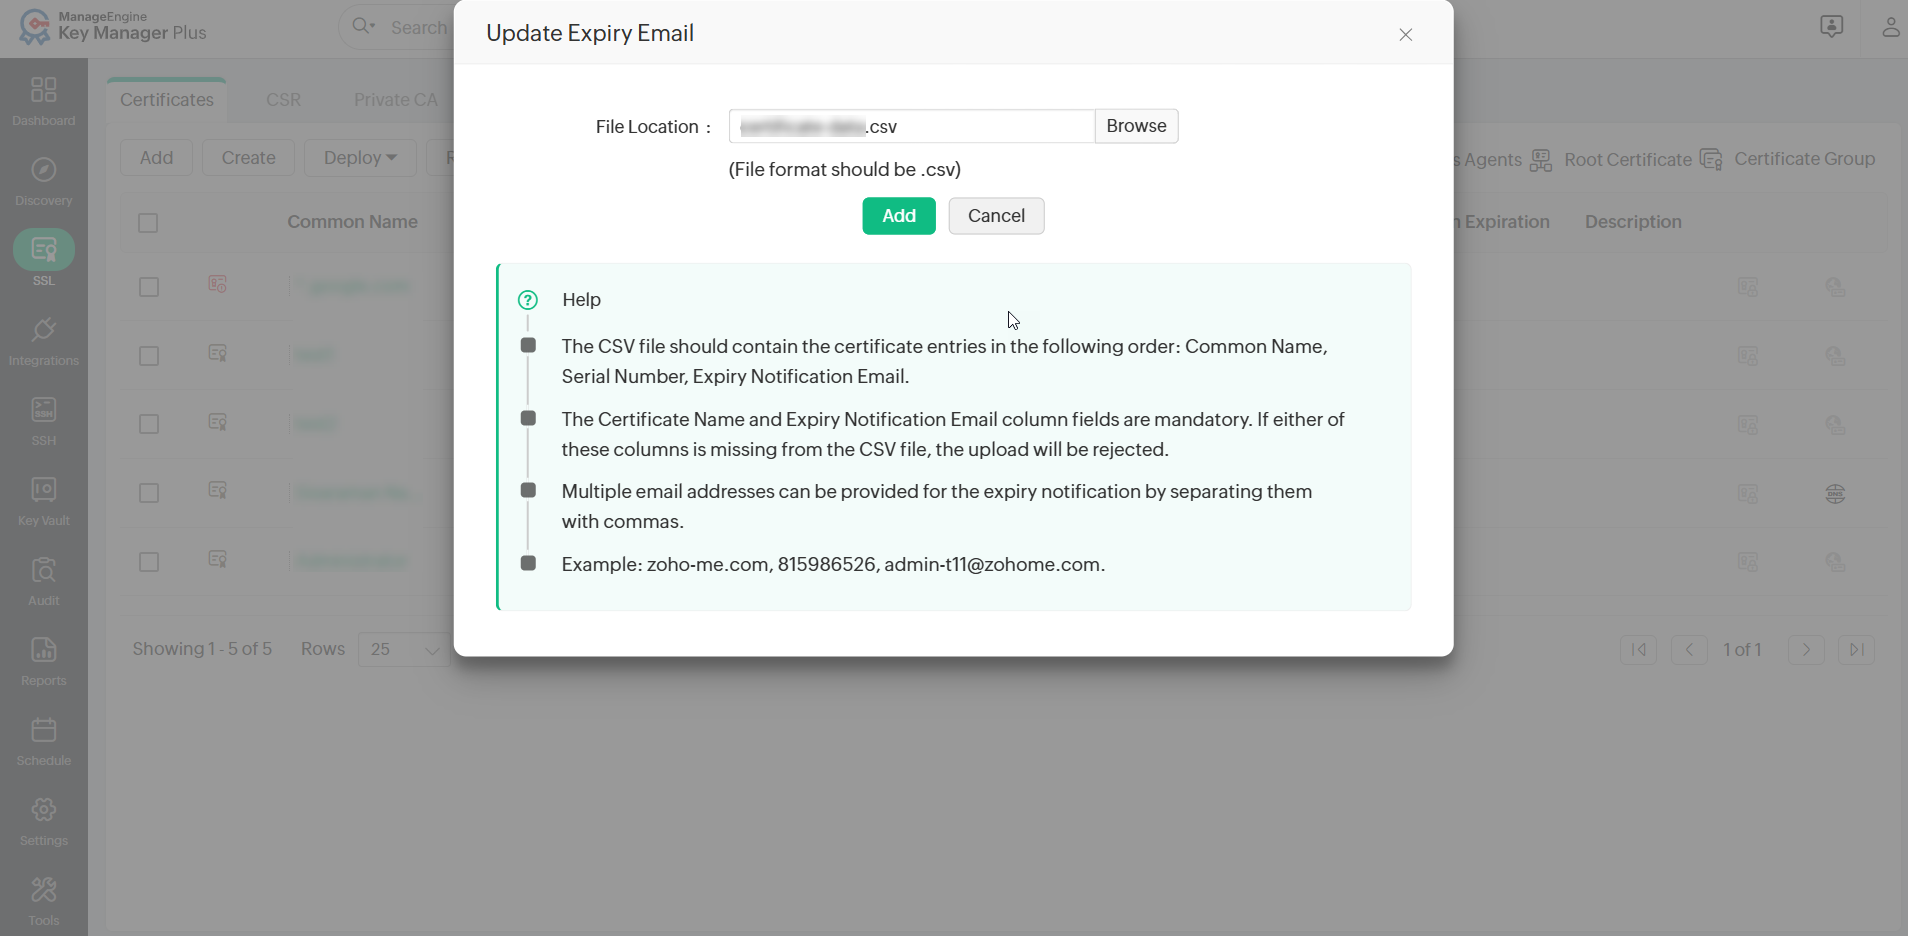
2.3 Deleting a Certificate
You can delete the certificates that are currently not in use. To delete a certificate from Key Manager Plus repository:
- Navigate to the SSL >> Certificates tab.
- Select the certificates to be deleted.
- Click More and select Delete from the drop-down.
- Click OK in the pop-up that appears.
3. Certificate Requests
The certificate request workflow is as follows:
- Add certificate request
- Close certificate request
3.1 Add Certificate Request
To add requests for new certificates or addition of sub-domains to existing certificates, in Key Manager Plus:
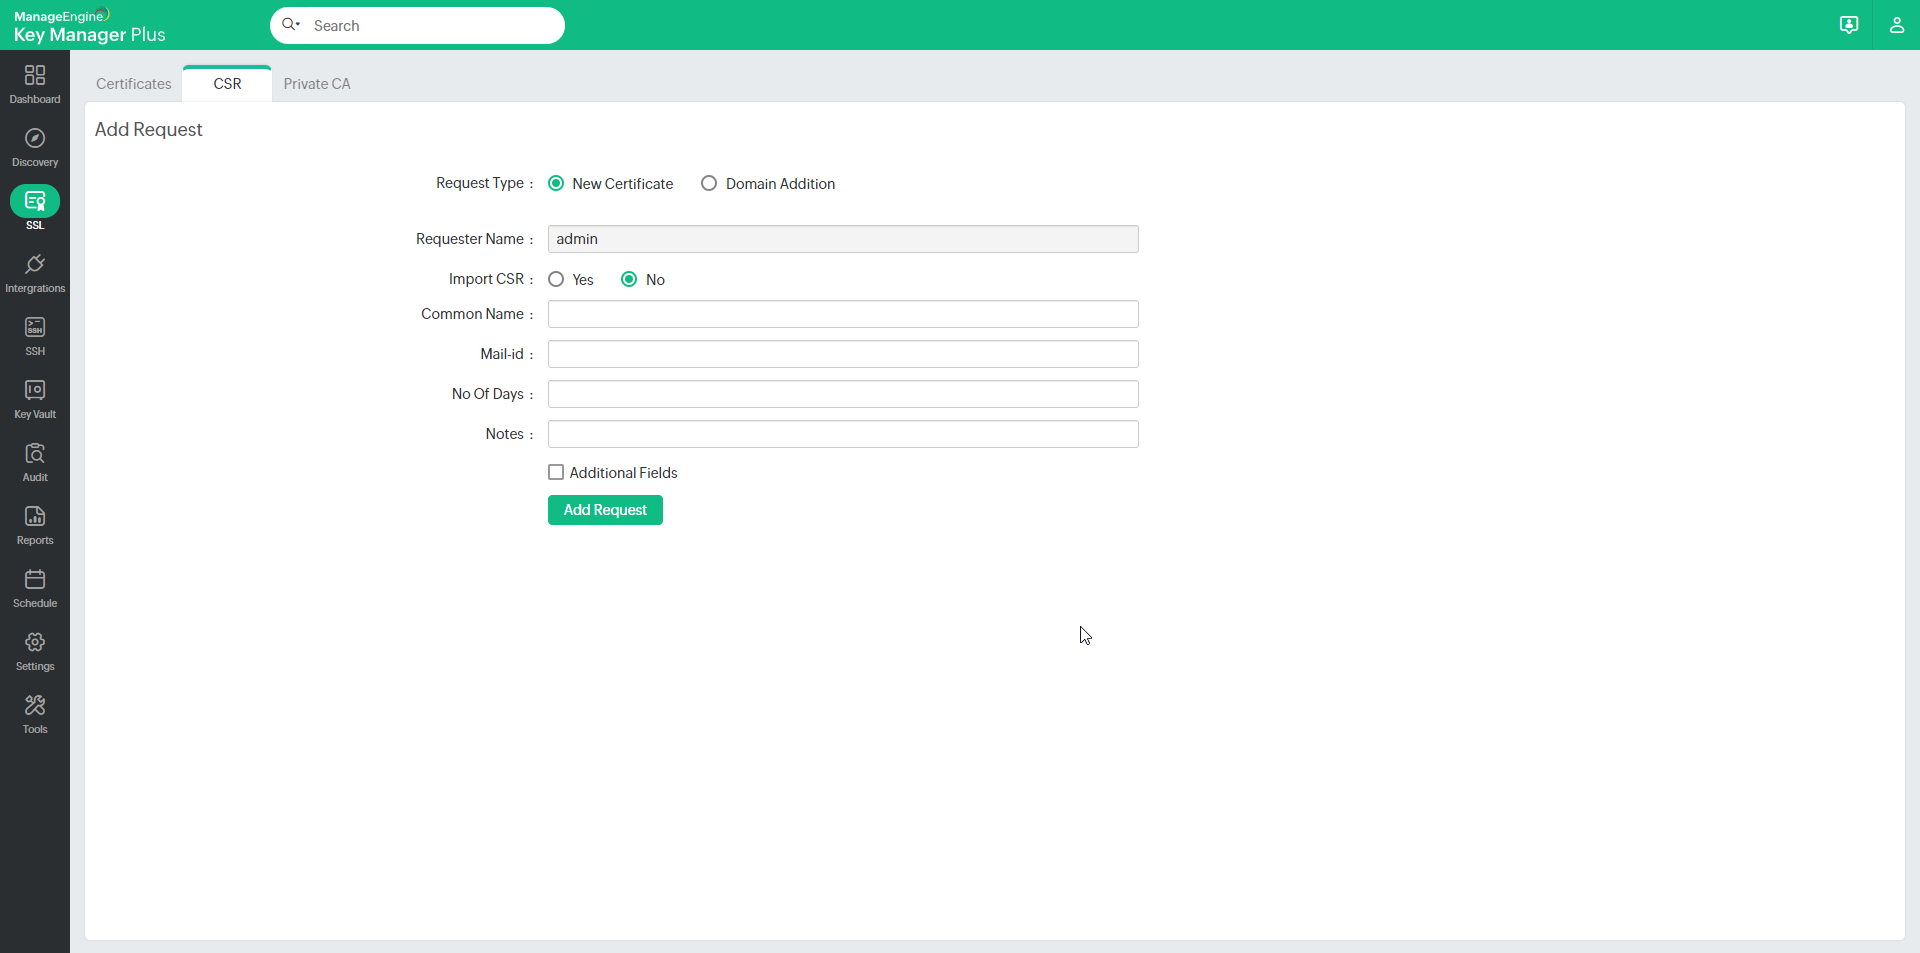
- Navigate to the SSL >> CSR >> Certificate Request and click the Add Request button.
- Select the type of request — Certificate or domain addition.
- New Certificate — Attach a CSR to your request (optional) and a domain name for the new certificate.
- Add domain — Enter the name of the new domain and select a parent domain from the certificates added to the Key Manager Plus repository.
- Enter the Email-Id to which you would like to send the request and specify the certificate validity period. These email addresses can be that of an administrator, an intermediary who handles certificate requests, or even your help desk software to raise the certificate request as a ticket.
- For eg., admin@keymanagerplus.com, help-desk@manageengine.com.
- The Operators can directly Select the administrators to notify them about the certificate request via email.
- Select Additional fields to add additional information such as device name and IP address
- Click Add Request to add it to the list of requests in the Certificate Request tab and to send the same to the specified email addresses.
3.2 Certificate Request Status
A certificate request is in either of the following statuses.
- Open
- Closed
When a certificate request is raised, it is automatically elevated to the Open State. The request details can be viewed from the SSL >> Certificate request tab, on clicking the domain name of the request.
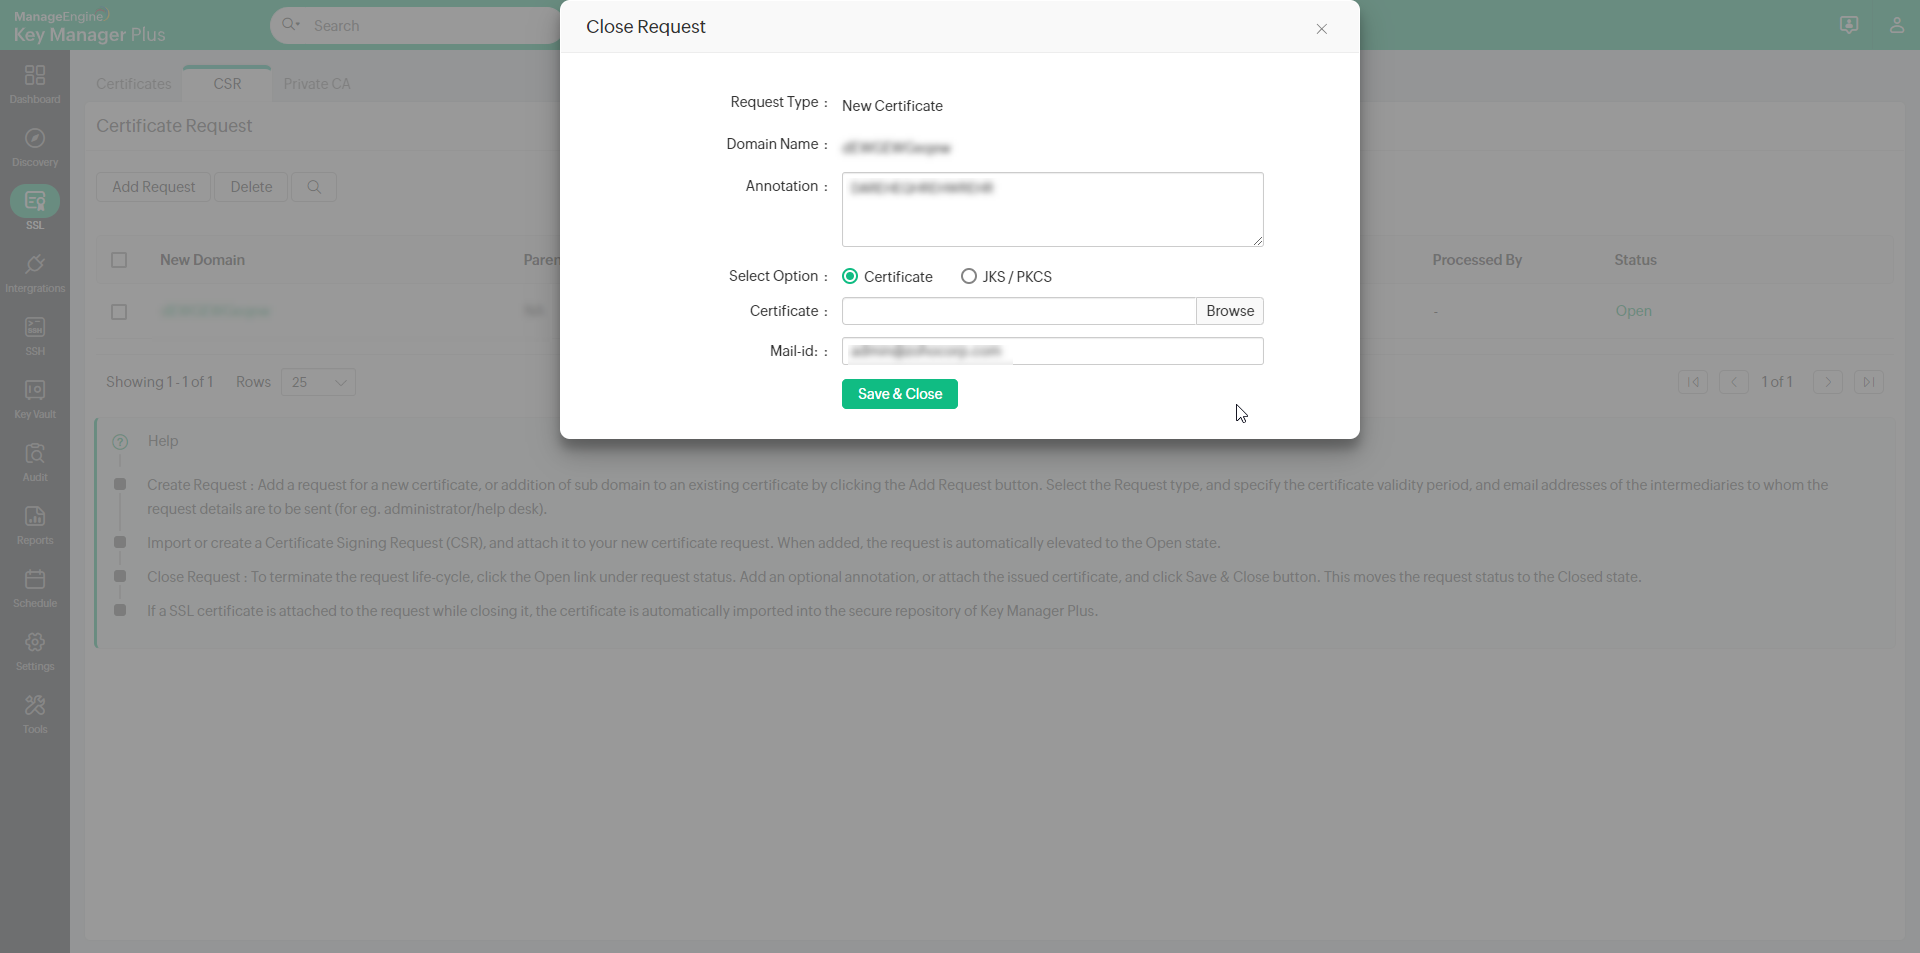
3.3 Close Certificate Request
To terminate the certificate request life-cycle:
- Navigate to the SSL >> CSR >> Certificate Request window in the GUI.
- Click the Open status link in the right corner of the table against the required open request process.
- In the Close Request window, add an optional Annotation, and attach the Certificate issued (optional), specify the Email-ids of users to whom the certificate is to be sent and click the Save & Close button. Once you click the button, the request is automatically moved to the Closed state.
- If an SSL certificate is attached while closing the request, the certificate is automatically imported to the Key Manager Plus repository.
- Also, the issued certificate is emailed to the user who raised the request, the user who closes the request, and also to those email IDs specified at the time of closing the request.
4. Control Expiry Notification Schedule
You can customize the periodicity of notifications you receive when a certificate is about to expire. To customize the notifications:
- Navigate to Settings >> Notifications>> Expiry in the GUI.
- Select the Notify about SSL certificates expiring within checkbox and select the number of days before the expiry of certificate within which you should start receiving notifications.
- Select the Email or Syslog checkbox from the respective pane and enter the appropriate details.
- Click the Save button.
Note: You will receive notifications every day after the selected date before the expiry of a certificate. For instance, if a certificate is about to expire in the last week of a month, and you select the Notify if SSL certificates are expiring within 7 days option, then, you will receive a notification that your certificate is about to expire every day of the week before the expiry of the certificate.
5. Domain Expiration
Key Manager Plus has an in-built WHOIS look up tool that helps administrators query and obtain information about any registered domain name, such as ownership details, date of registration & expiration, IP address history, and more.
To access the WHOIS look-up tool,
- Navigate to Settings >> Other Settings >> Domain Expiration.
- In the window that opens, enter the domain name for which you want to obtain the details (in terms of a top-level domain or sub domain of a top-level domain).
- Click Get Details. The details about the domain are displayed in the dialog box that opens below.
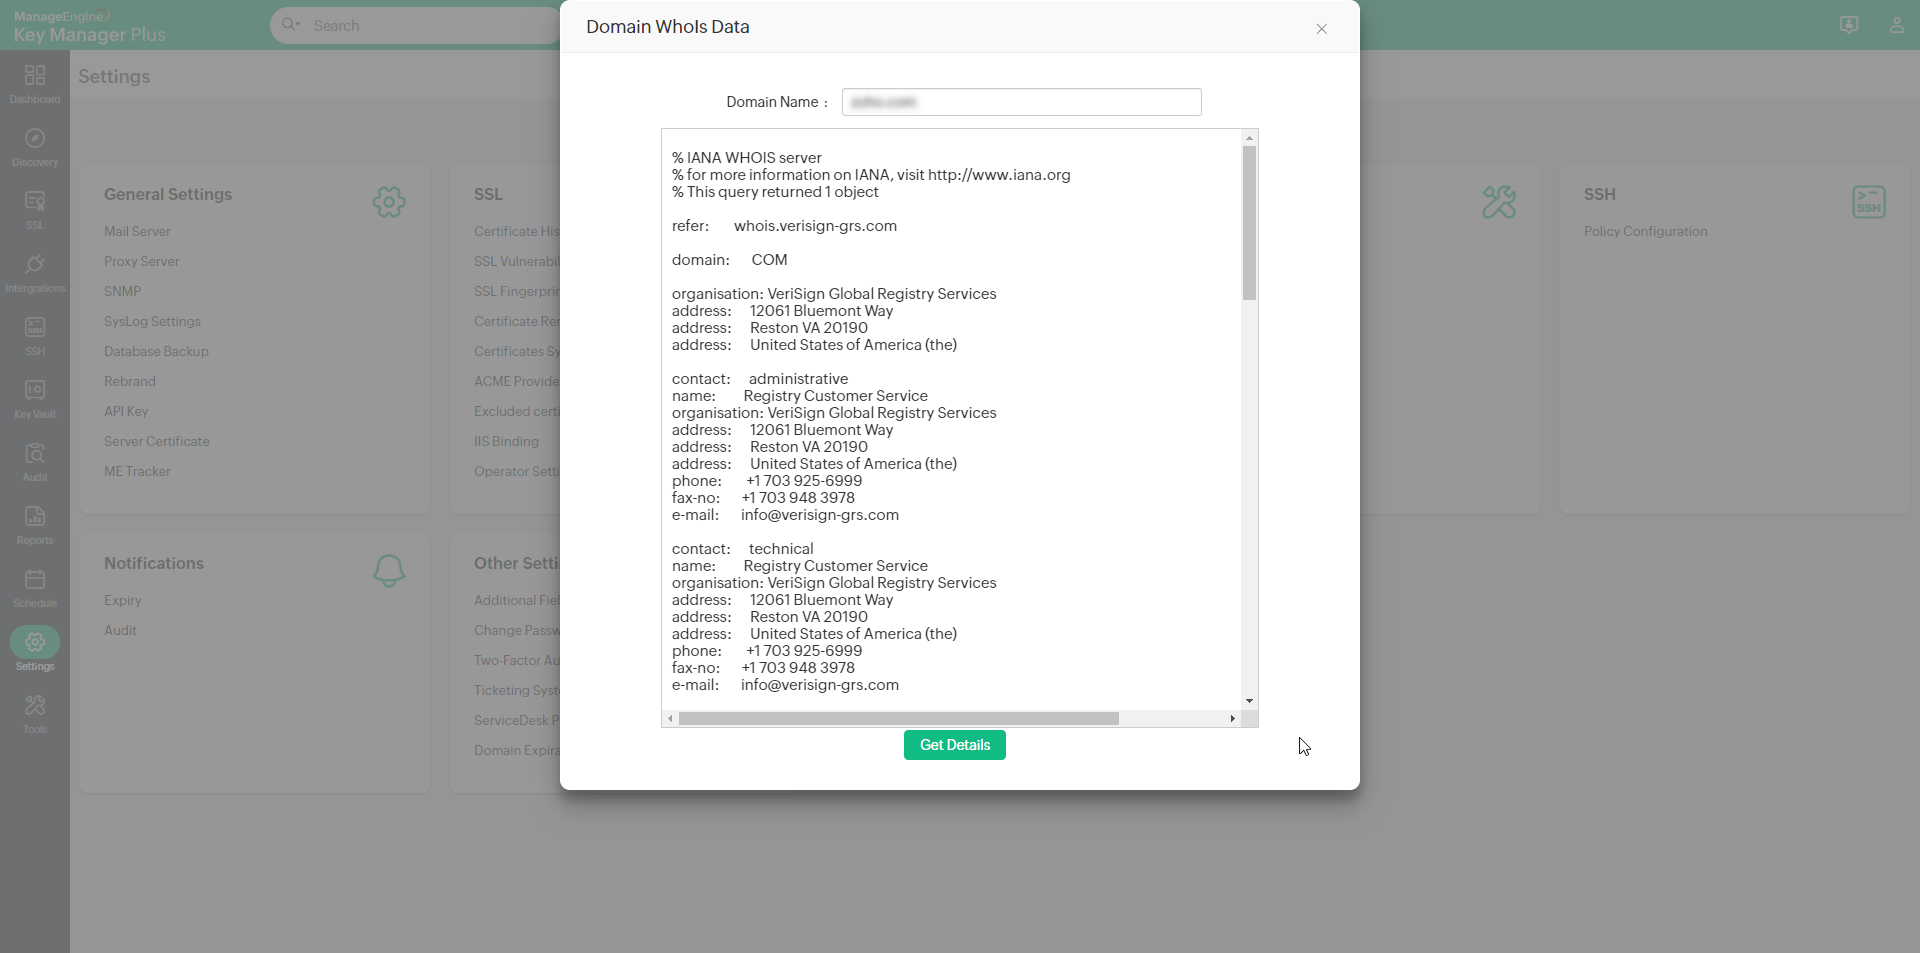
Note: Before performing the lookup, ensure that port 43 is open in your environment, without which connection to WHOIS servers would fail.
5.1 Track Domain Expiration through WHOIS Lookup
Apart from tracking certificate expiration, Key Manager Plus also helps administrators keep a tab on their expiring domain names through an automated WHOIS look up. The domain expiration details fetched through the lookup are displayed in SSL >> Certificates tab against its corresponding SSL certificate. Also, administrators can choose to receive timely email notifications of their expiring domains by configuring it in Settings >> Notification >> Expiry window.
How does the WHOIS lookup work?
Fetching domain expiration details requires a two-stage lookup to WHOIS servers from Key Manager Plus. The first lookup provides the details of the WHOIS server with which the domain was registered by its domain registrar. The second lookup provides information about the domain, such as owner details, expiration date etc. All these operations are automated the from Key Manager Plus' interface.
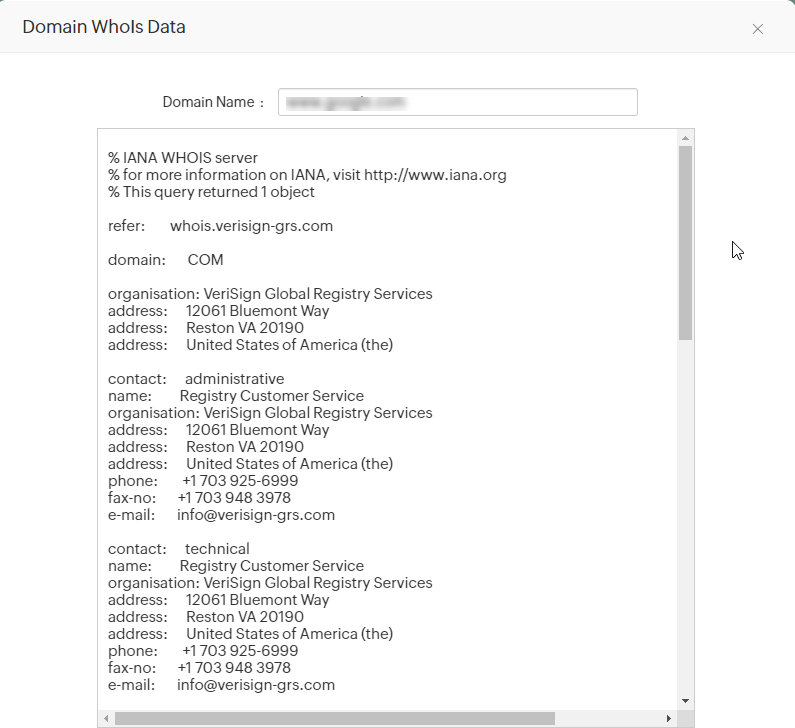
Note: Connection to WHOIS servers requires the use of Port 43. Ensure that port 43 is open in your environment, else the connection would fail and Domain Expiration will be marked Not Available (NA) in the Certificates tab.
6. SSL Certificate Group
Key Manager Plus allows you to organize SSL certificates into various logical groups, execute actions in bulk, and export these certificate groups as Truststore.
6.1 Create Certificate Groups
To create a certificate group, follow these steps:
- Click the Certificate group icon in the top-right corner of the SSL >> Certificates tab.
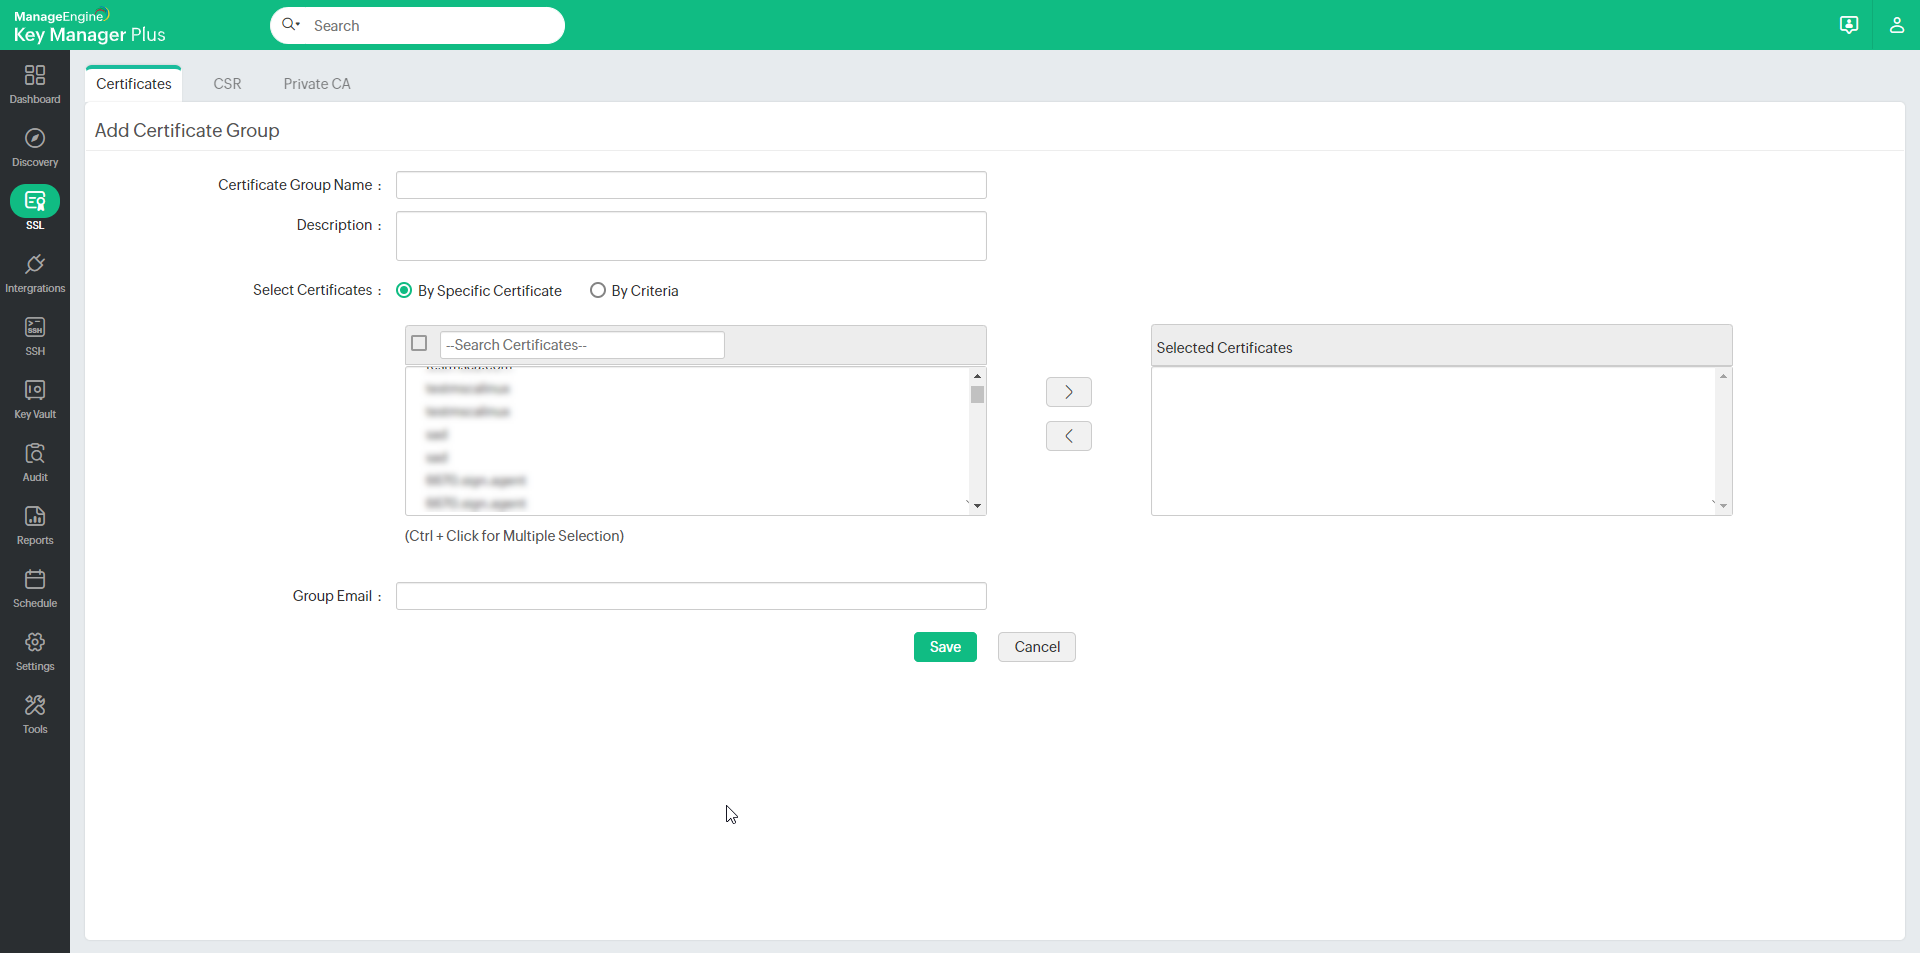
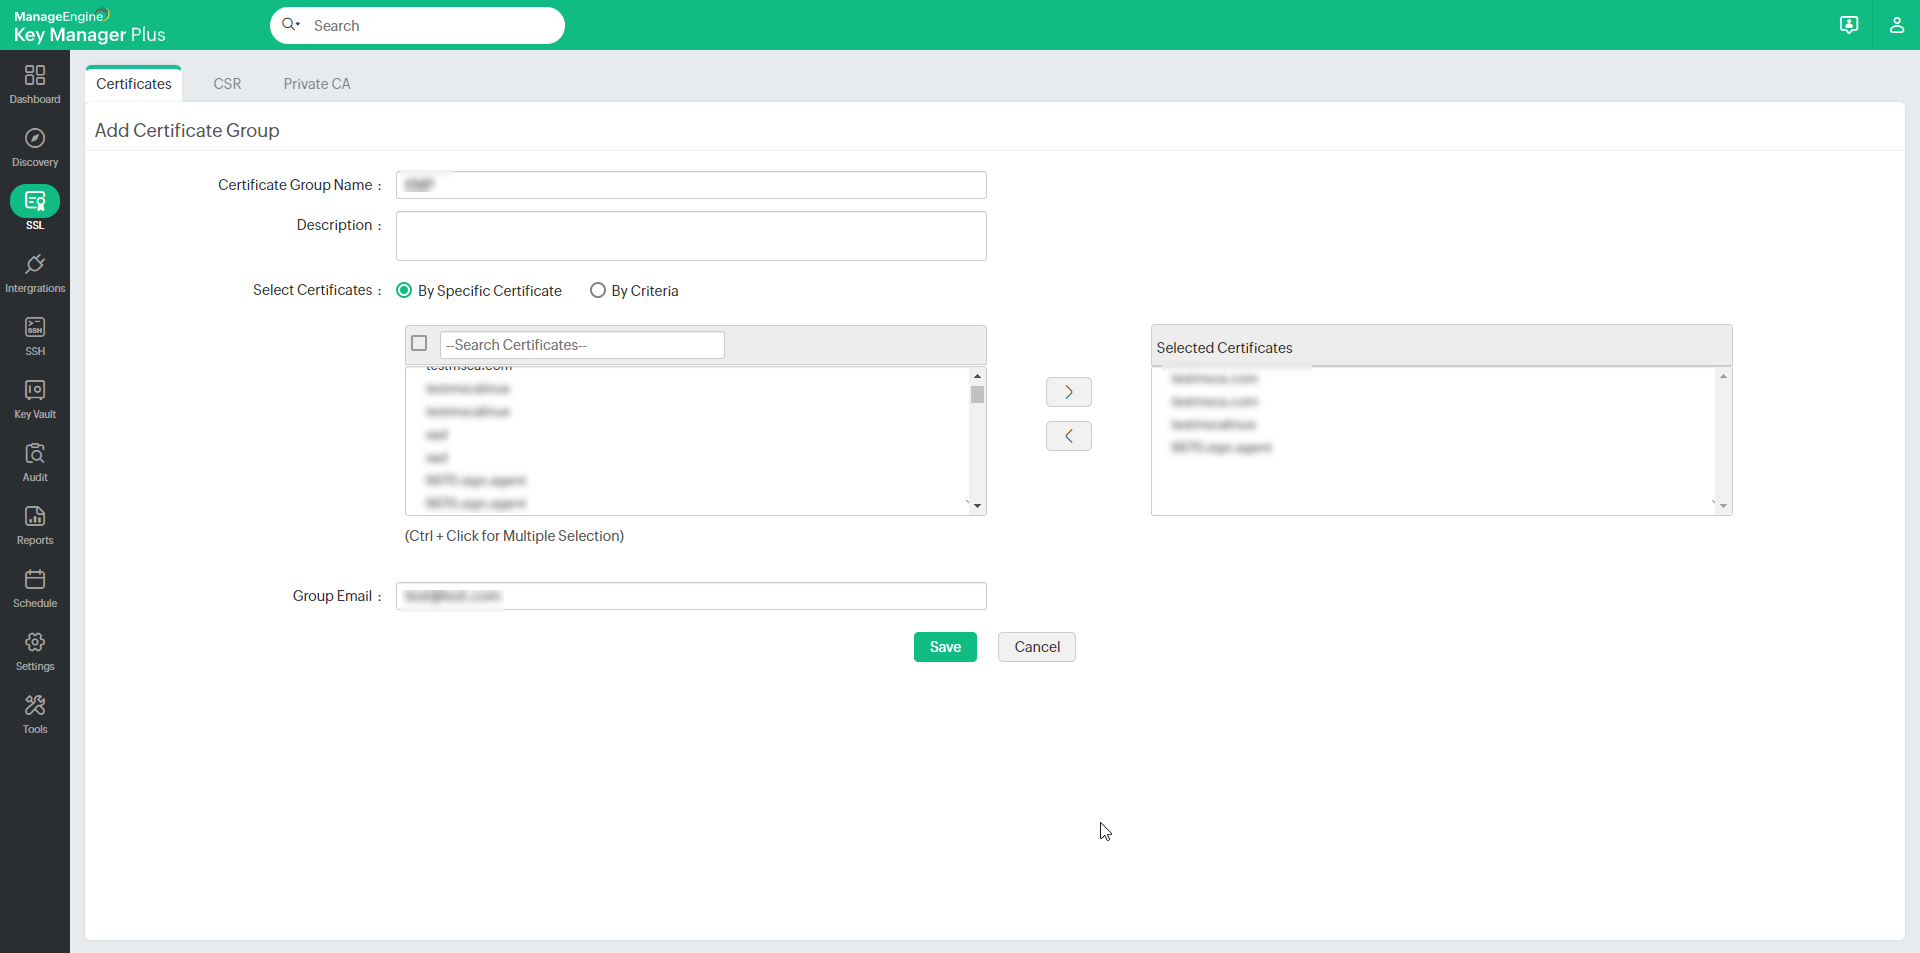
- Click Add Group. You will be directed to the Add certificate group window.
- Provide a name for the certificate group and an optional description. Exercise caution while providing the name since it cannot be changed later.
You can choose certificates to be added to a group in two ways:
- By specific certificate - Select the certificates to be added to the group individually and click Save.
- By criteria - This serves as a dynamic method of grouping certificates. You will specify various criteria based on which the group will be created. Here, you can choose certificates based on various criteria such as issuer, common name, key algorithm, key size, key length, etc. The additional fields that are added will also be displayed in the list. You can filter the search in a fine-grained manner based on conditions such as "equals" or "does not equal", "contains" or "does not contain", "starts with" or "ends with". Click the Matching certificates button at the bottom-right corner to see the corresponding certificates.
Note: From build 7060 onwards, Expiry Days can be added as a criterion to group the certificates.
- Mention the Group Email address to send expiry notifications and click Save.
- The certificate group is created. To know more about additional fields, click here.
Note: If you choose to group certificates based on criteria, the conditions will be applied to certificates discovered in the future, and they will automatically be added to groups that match the criteria.
6.2 Edit Certificate Groups
To make changes to existing certificate groups,
- Click the certificate group icon on the top-right corner of the SSL >> Certificates tab.
- Click the edit icon present in the right corner of the table view.
- You can change the certificate selection type, edit the certificates present in a group, or add, modify, or delete the filters applied to a group and Group Email.
- Once you update the changes and save them, a pop-up message will be displayed confirming the updates.
Note: The certificate group name cannot be modified. However, you can add or modify the list of certificates in a group or the description.
6.3 Export Certificate Groups
To export certificate groups as Truststore,
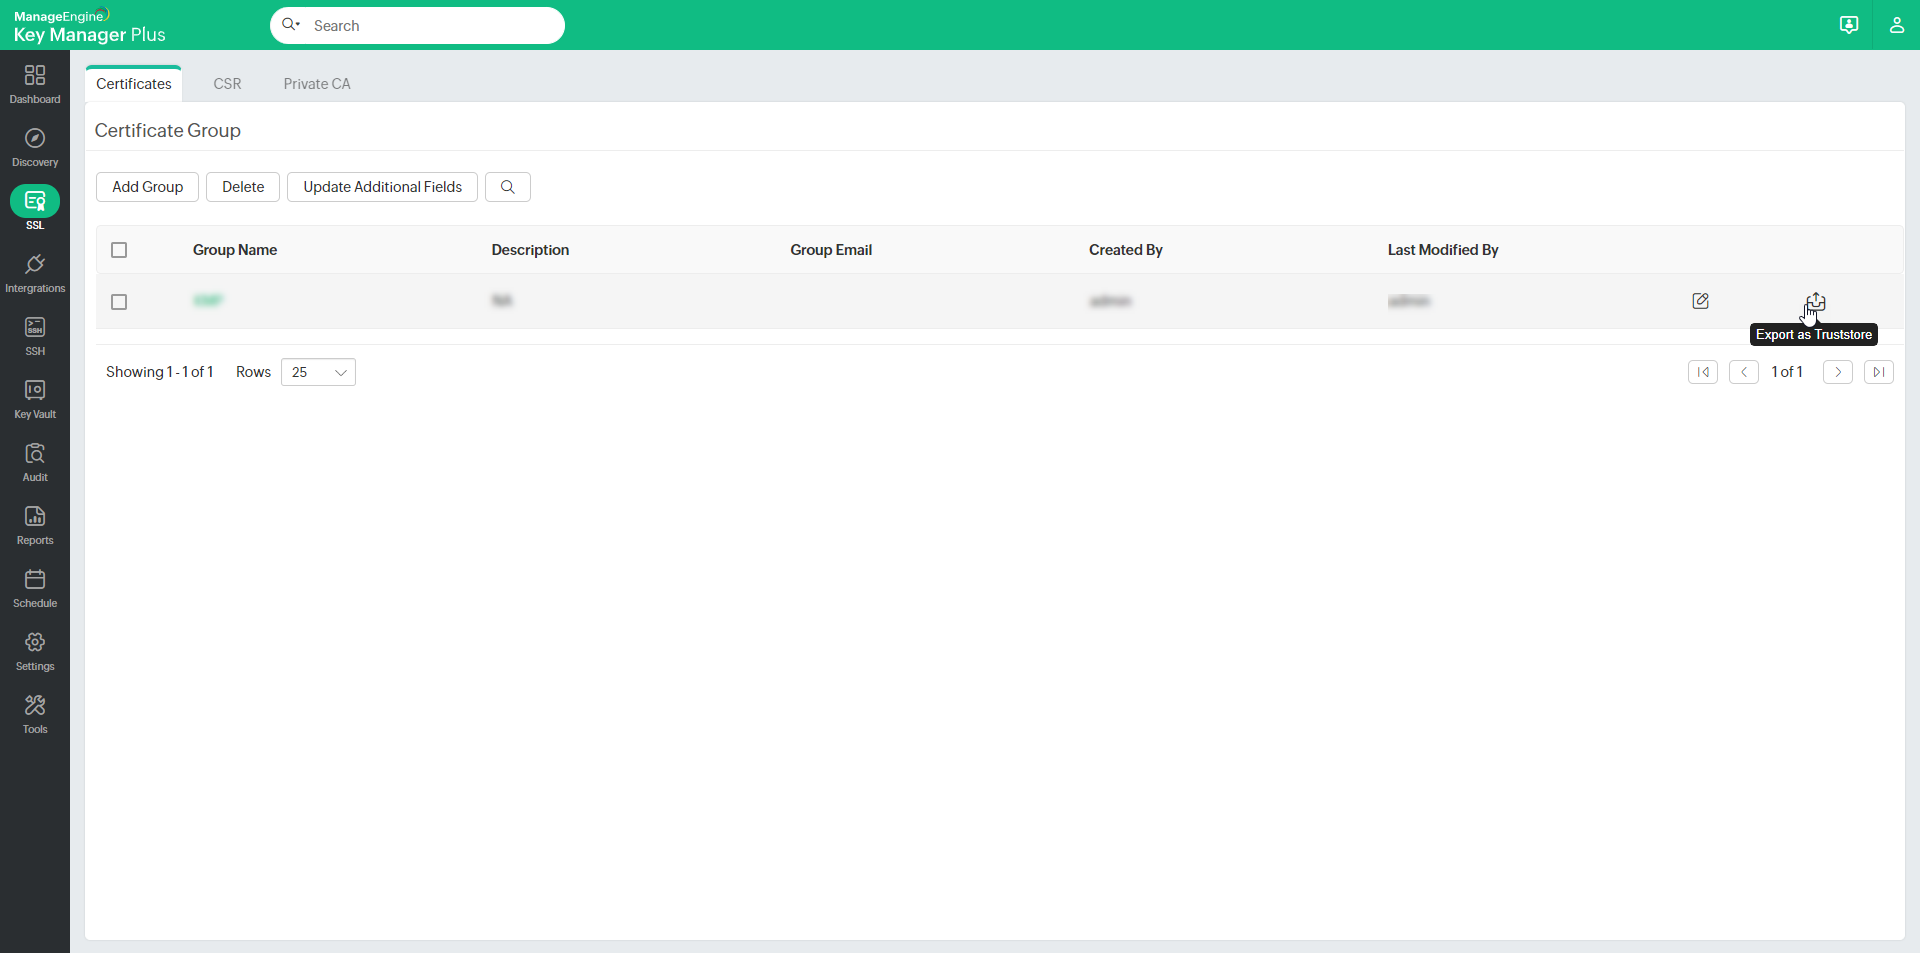
- Navigate to SSL >> Certificate Group.
Click the Export icon beside the respective certificate group you wish to export.
In the pop-up window that appears, enter a password in the designated field and click Export.
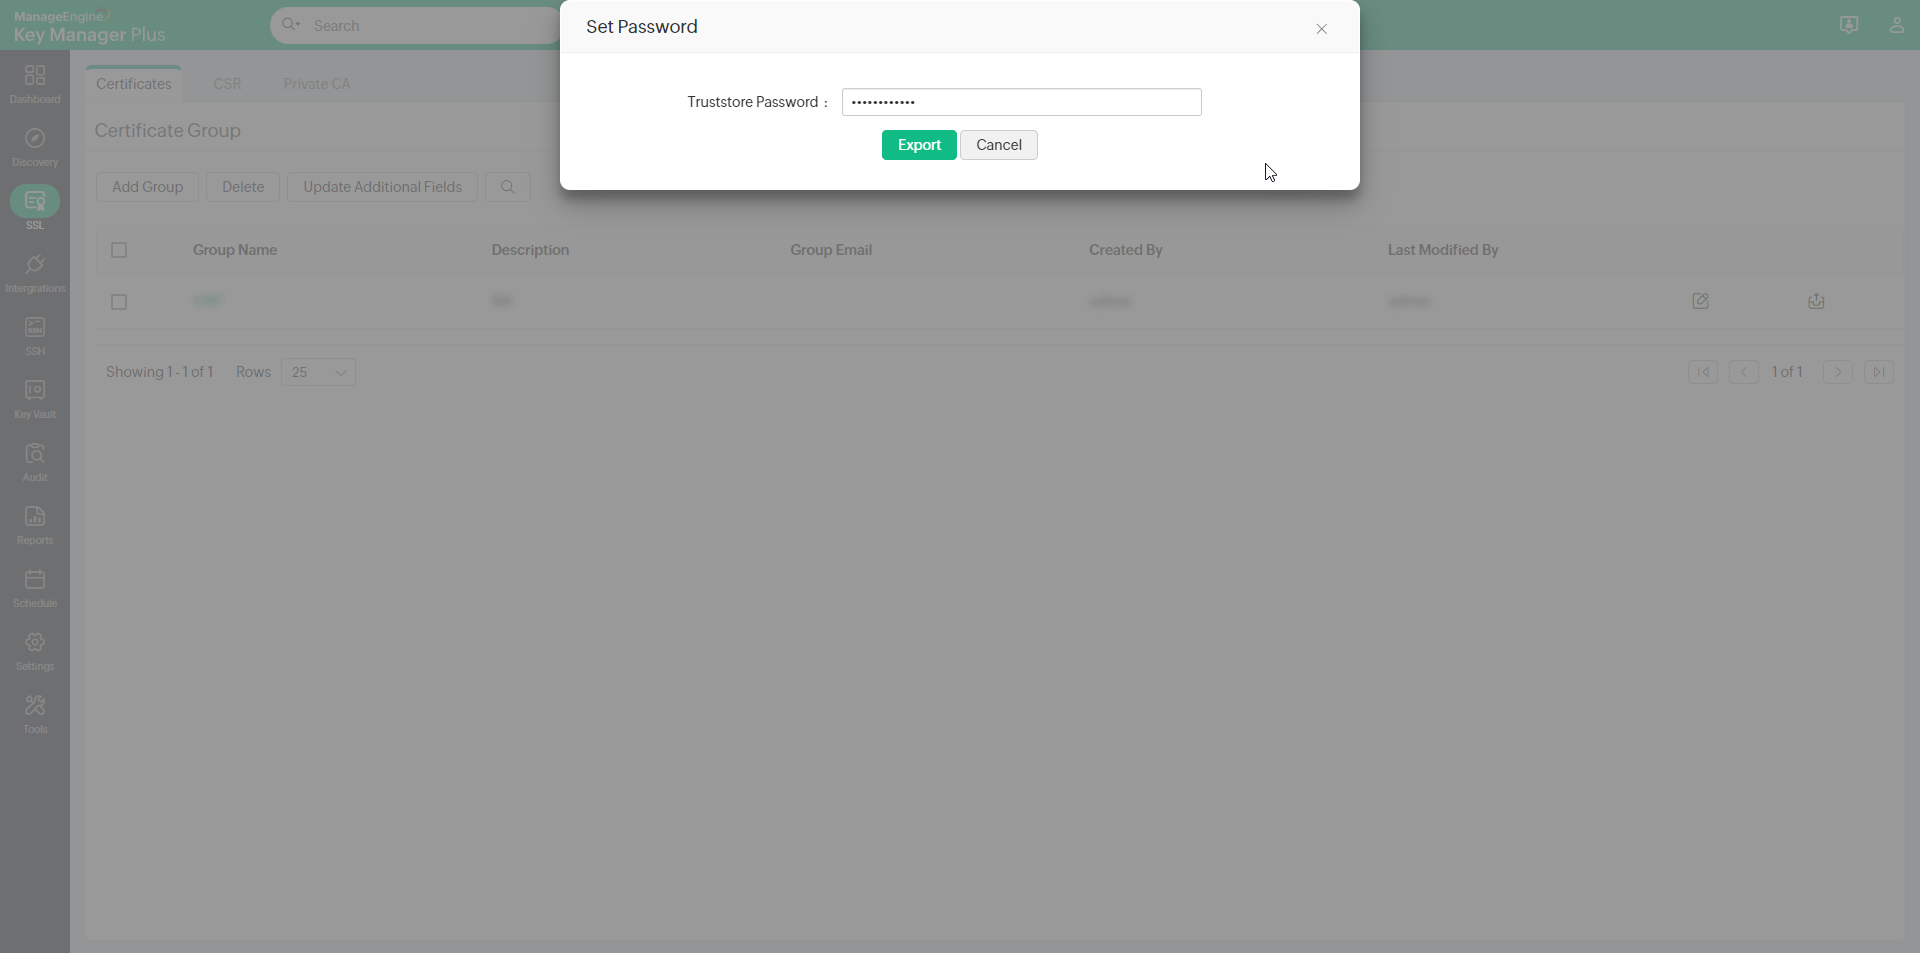
The certificate group will be exported as Truststore and encrypted with the specified password.
6.4 Delete Certificate Groups
To delete a certificate group,
- Click the Certificate group icon on the top-right corner of the SSL >> Certificates tab.
- Select the groups that you want to delete and click Delete.
- A pop-up window will appear asking you to confirm the action.
- Click OK and the selected certificate groups will be deleted.
