Amazon Virtual Private Cloud (VPC) is a commercial cloud computing service that enables users to create a logically isolated section of the AWS Cloud. Here are the steps that are required to configure Amazon VPC.
Step 1:
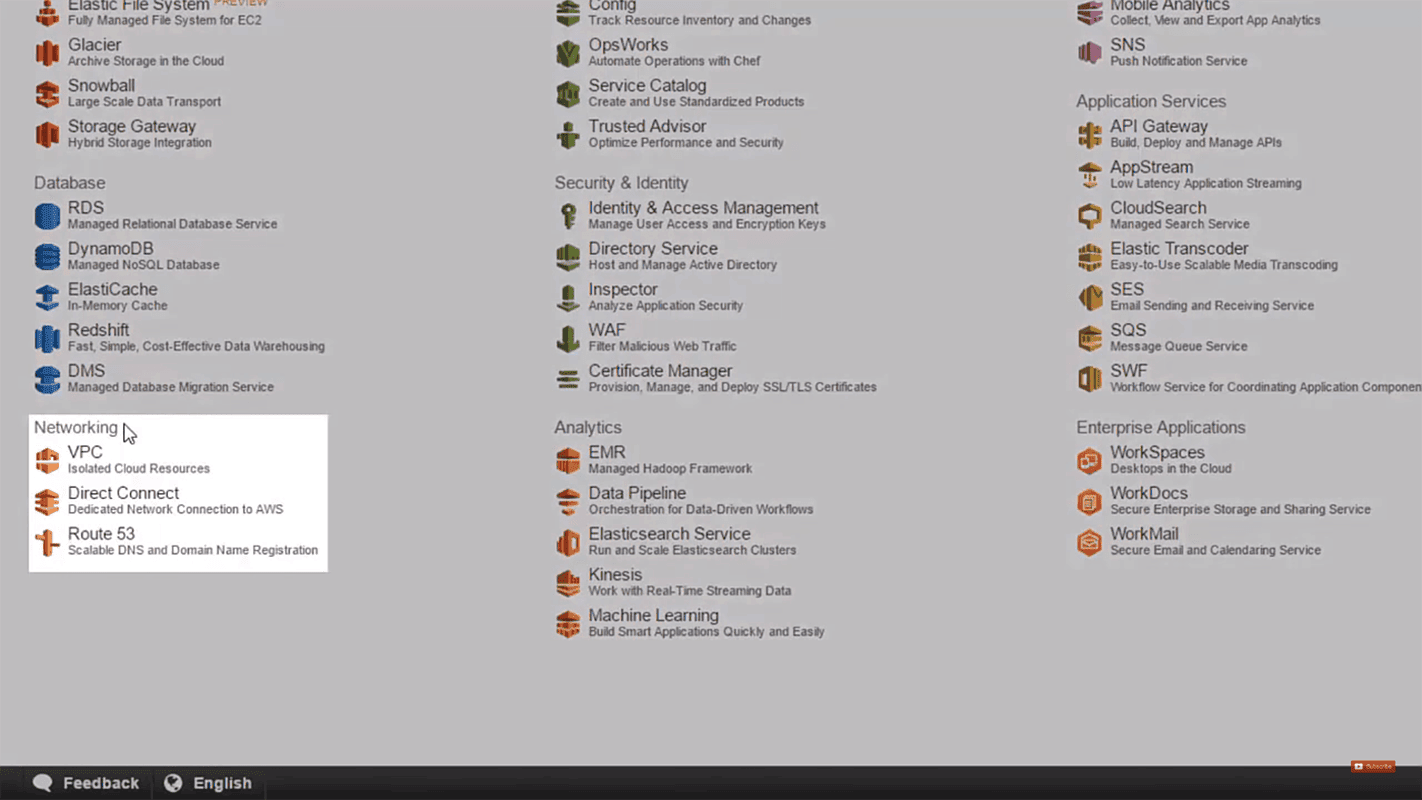
Open the AWS Management Console and click VPC under the Networking section.
Step 2:
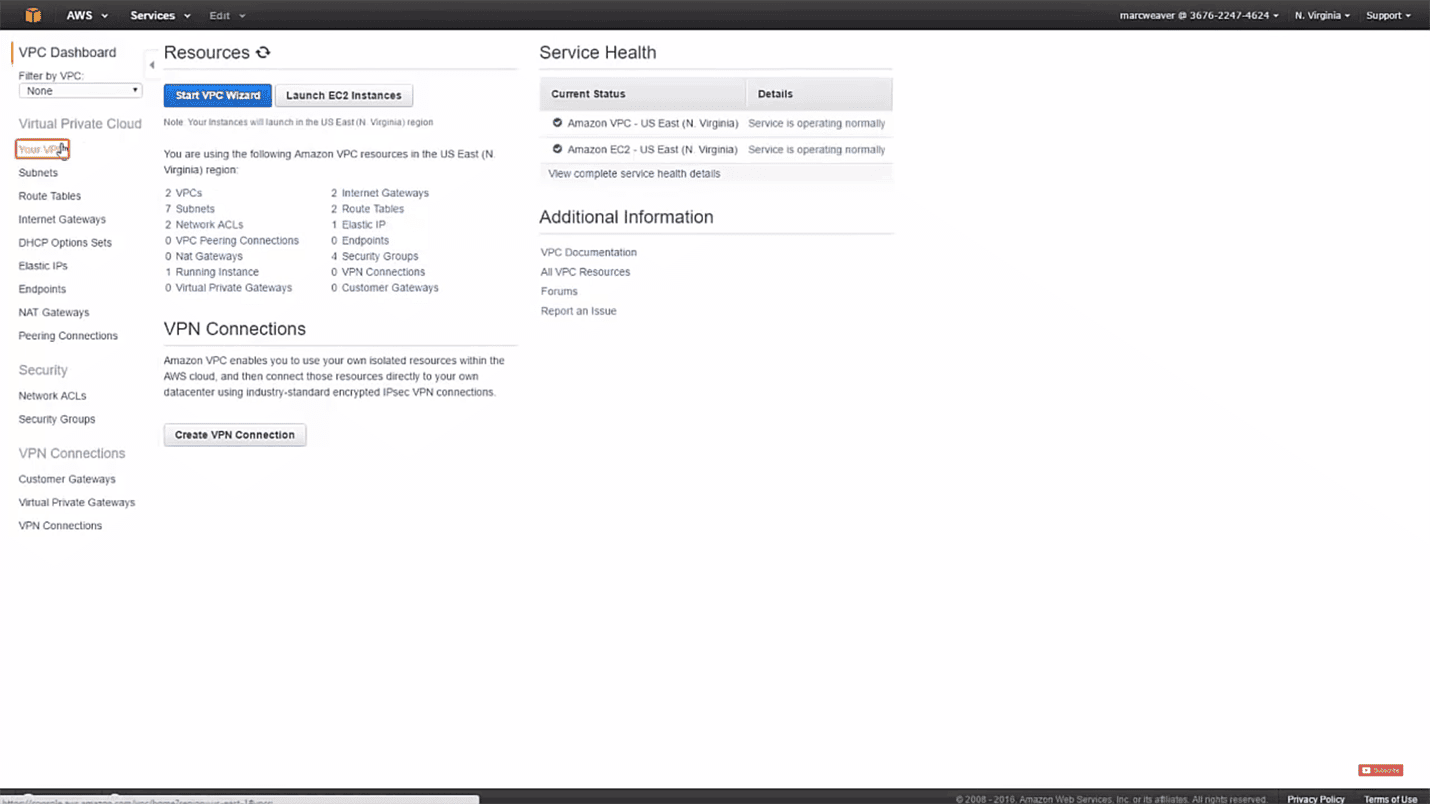
Once the VPC dashboard loads, click on your VPC and choose Create VPC.
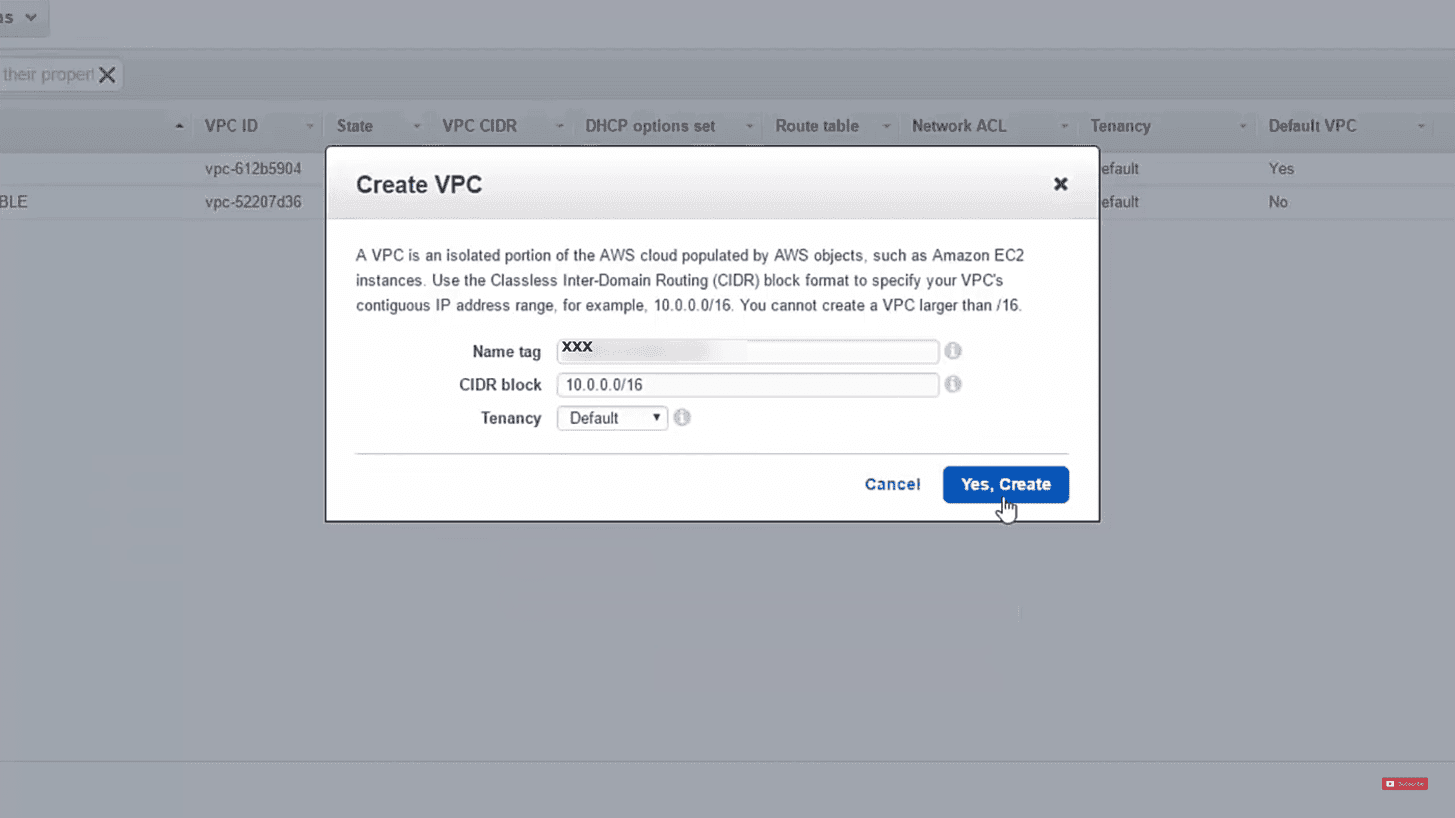
Step 3:
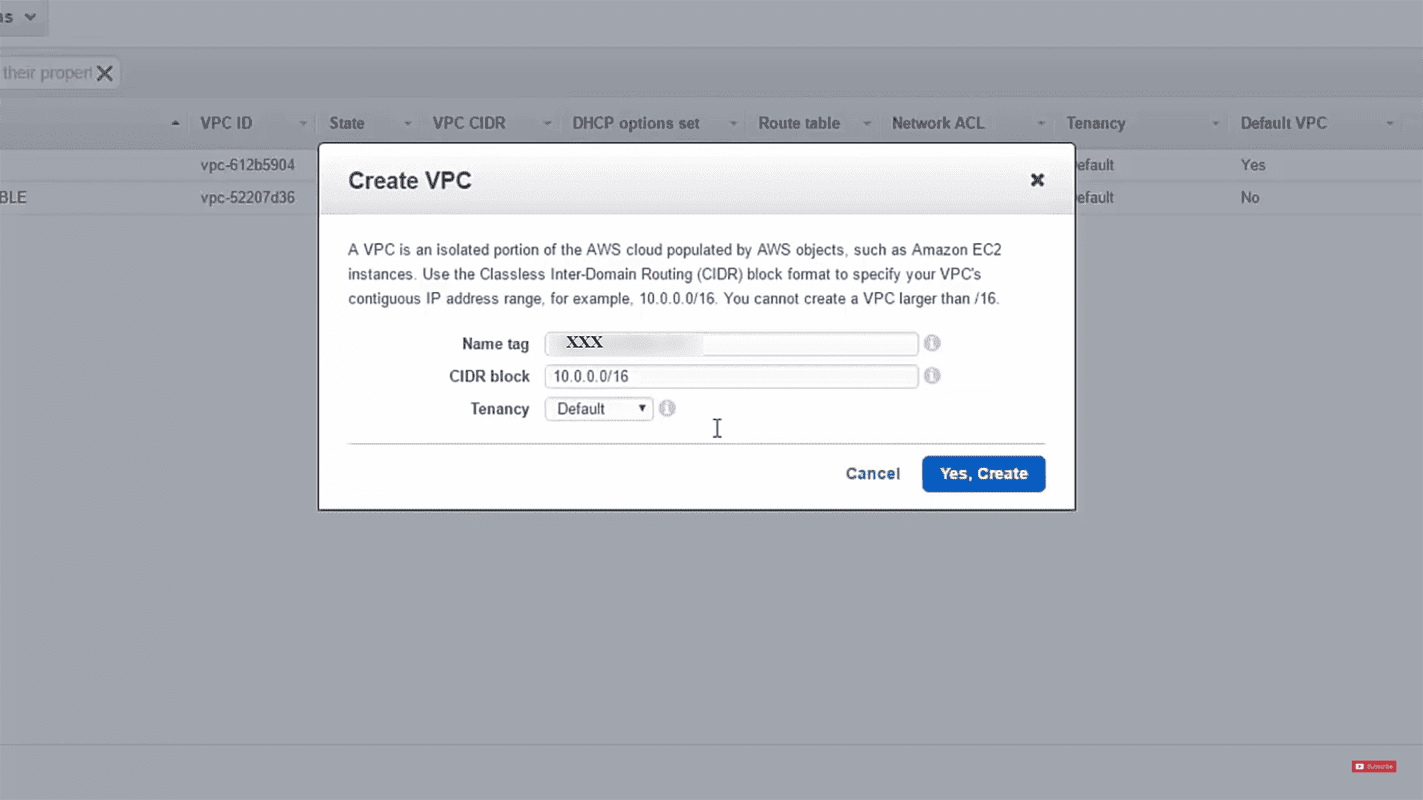
After the Create VPC window opens, enter the name of your VPC in the Name tag field and include a range of IPv4 addresses for the VPC (e.g., 10.0.0/16) under CIDR block.
Step 4:
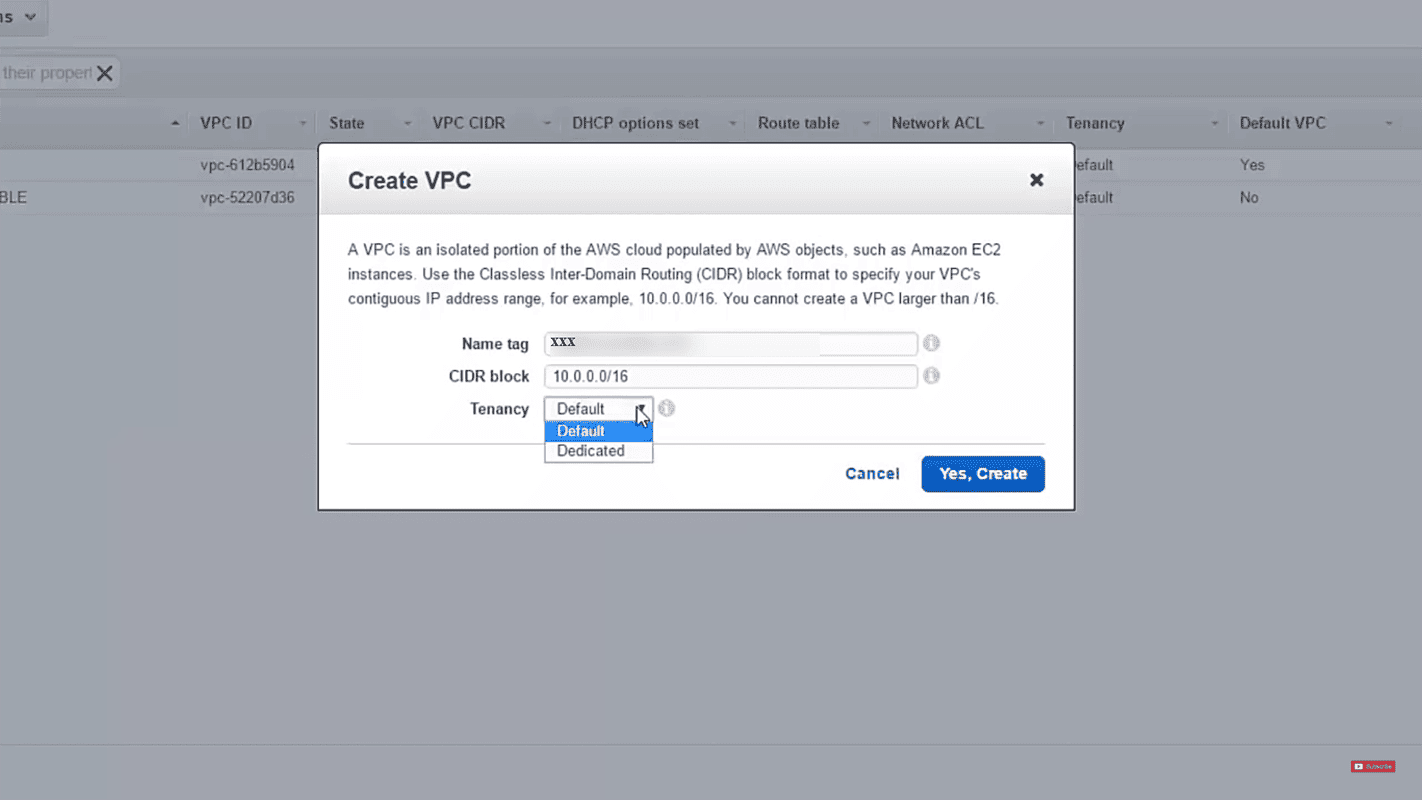
Set the Tenancy as either default or dedicated. If you choose Dedicated, the EC2 instances will reside on hardware that is dedicated to you. However, this significantly increases the cost.
Step 5:
Once you have entered all of the above fields, click Yes, Create. Wait for a few seconds and you will be able to see the VPC created in your dashboard. After creating the VPC, you can add one or more subnets to an availability zone.
Alternatively, you can also use the VPC Wizard to create a VPC; but doing so will not enable you to define the parameters according to your requirements.