Managing Certificates with Internal PKI
Note: This feature is only available in the Professional edition of MDMP.
MDM's integrated PKI server allows you to issue and distribute certificates in bulk directly from the console, streamlining your certificate management process. These internally-generated certificates can be used to authenticate access to resources like Wi-Fi, VPNs, email, and more. With MDM's built-in public key infrastructure (PKI), your organization no longer needs additional SCEP servers, reducing potential points of failure and increasing control. Our internal PKI utilizes advanced encryption standards such as RSA 4096 for signing and SHA-512 for hashing, ensuring your certificate management is secure and reliable.
Whether you're securing access to corporate resources, enabling encrypted communications, or verifying user identities, this guide will walk you through the essential steps to leverage internal PKI for robust certificate management in your MDM environment.
Supported Platforms
The MDM Internal PKI can be used to generate certificates for devices of these platforms:
- iOS/iPadOS
- Android
- macOS
- Windows
Internal PKI Workflow
The diagram illustrates the process of certificate issuance and distribution using the internal PKI component in MDM. Here's a breakdown of the workflow:
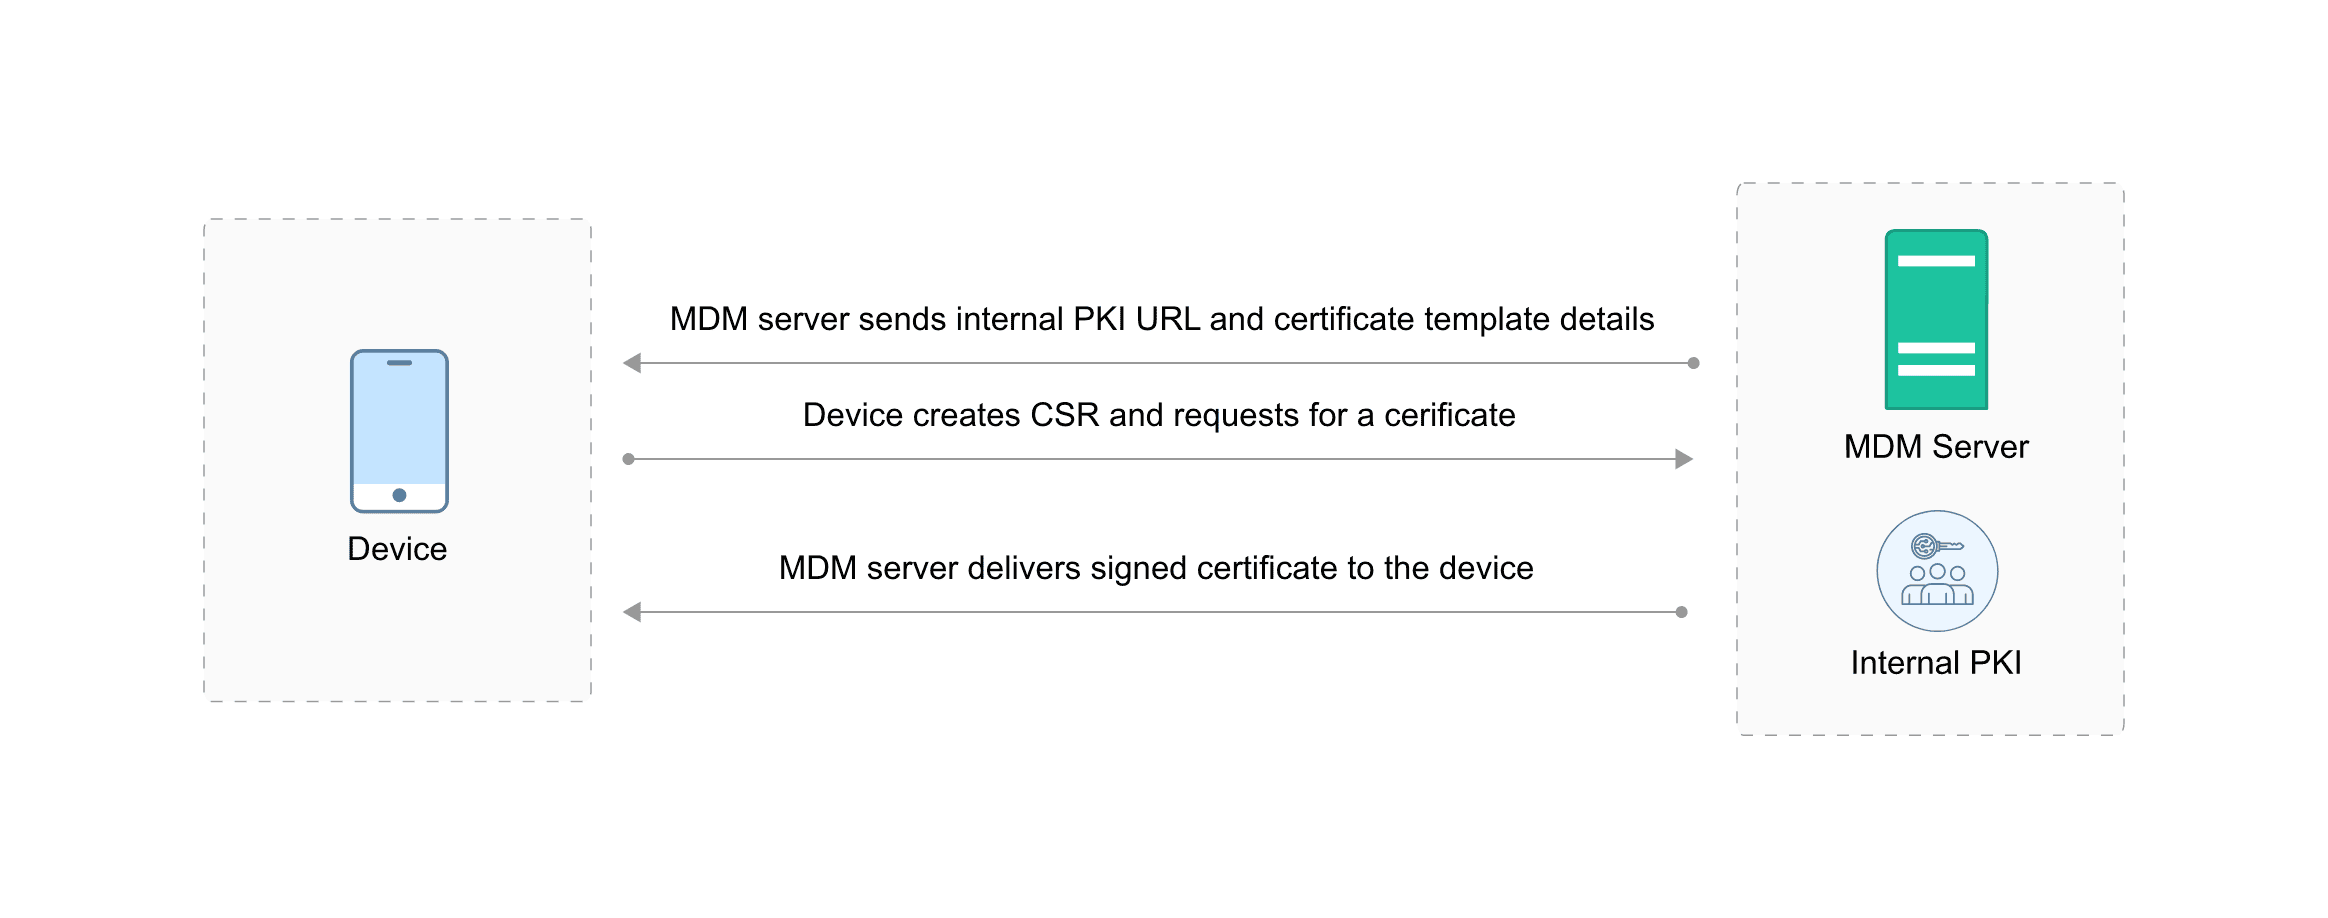
- MDM server sends configuration: The MDM server sends the internal PKI URL and certificate template details to the device. This information is essential for the device to initiate the certificate request process.
- Device creates CSR: The device generates a Certificate Signing Request (CSR). This CSR contains information about the device, such as its unique identifier and public key.
- Device requests certificate: The device sends the CSR to the MDM server, requesting a certificate based on the provided template.
- MDM server delivers certificate: The MDM server processes the CSR and issues a signed certificate. This certificate is then delivered back to the device.
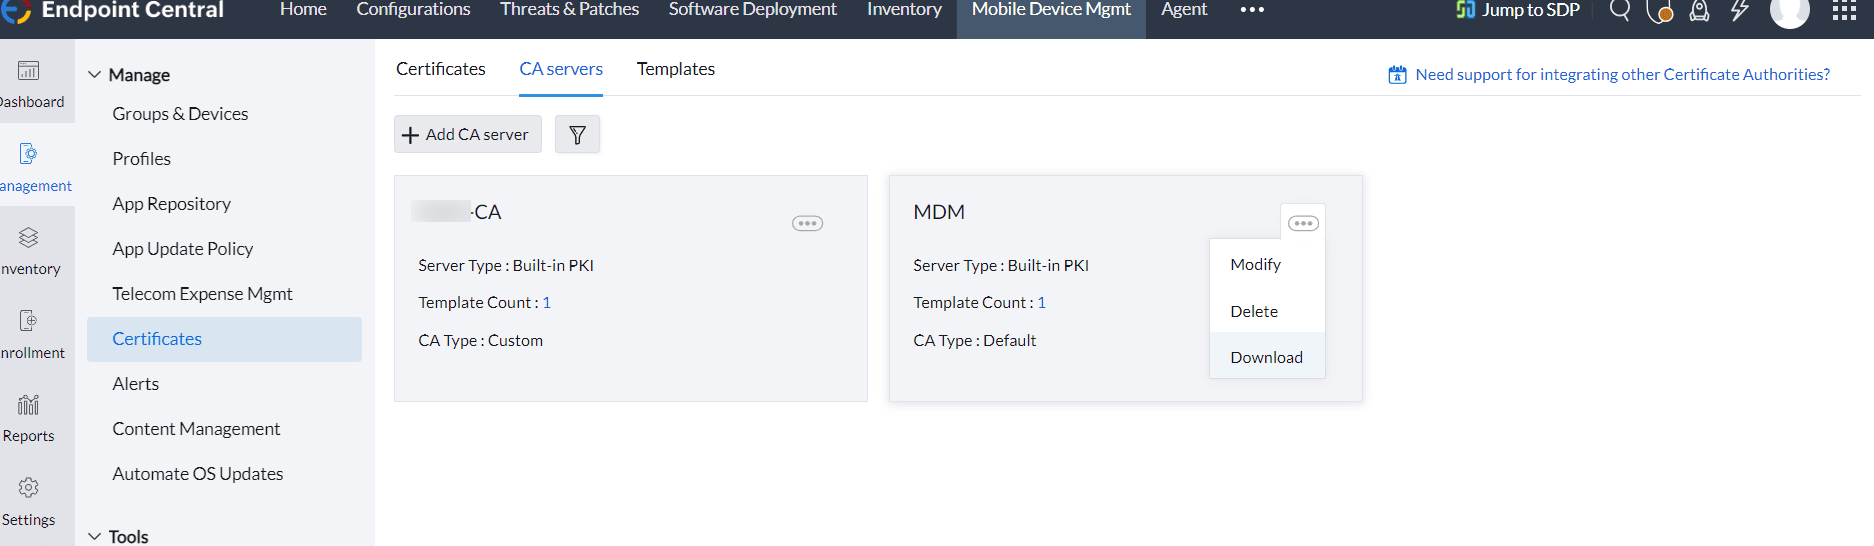
Configuring built-in PKI in MDM
- Navigate to Device Management -> Certificates -> CA Servers -> Add CA Server.
- In the Server Type drop-down, select Built-in PKI.
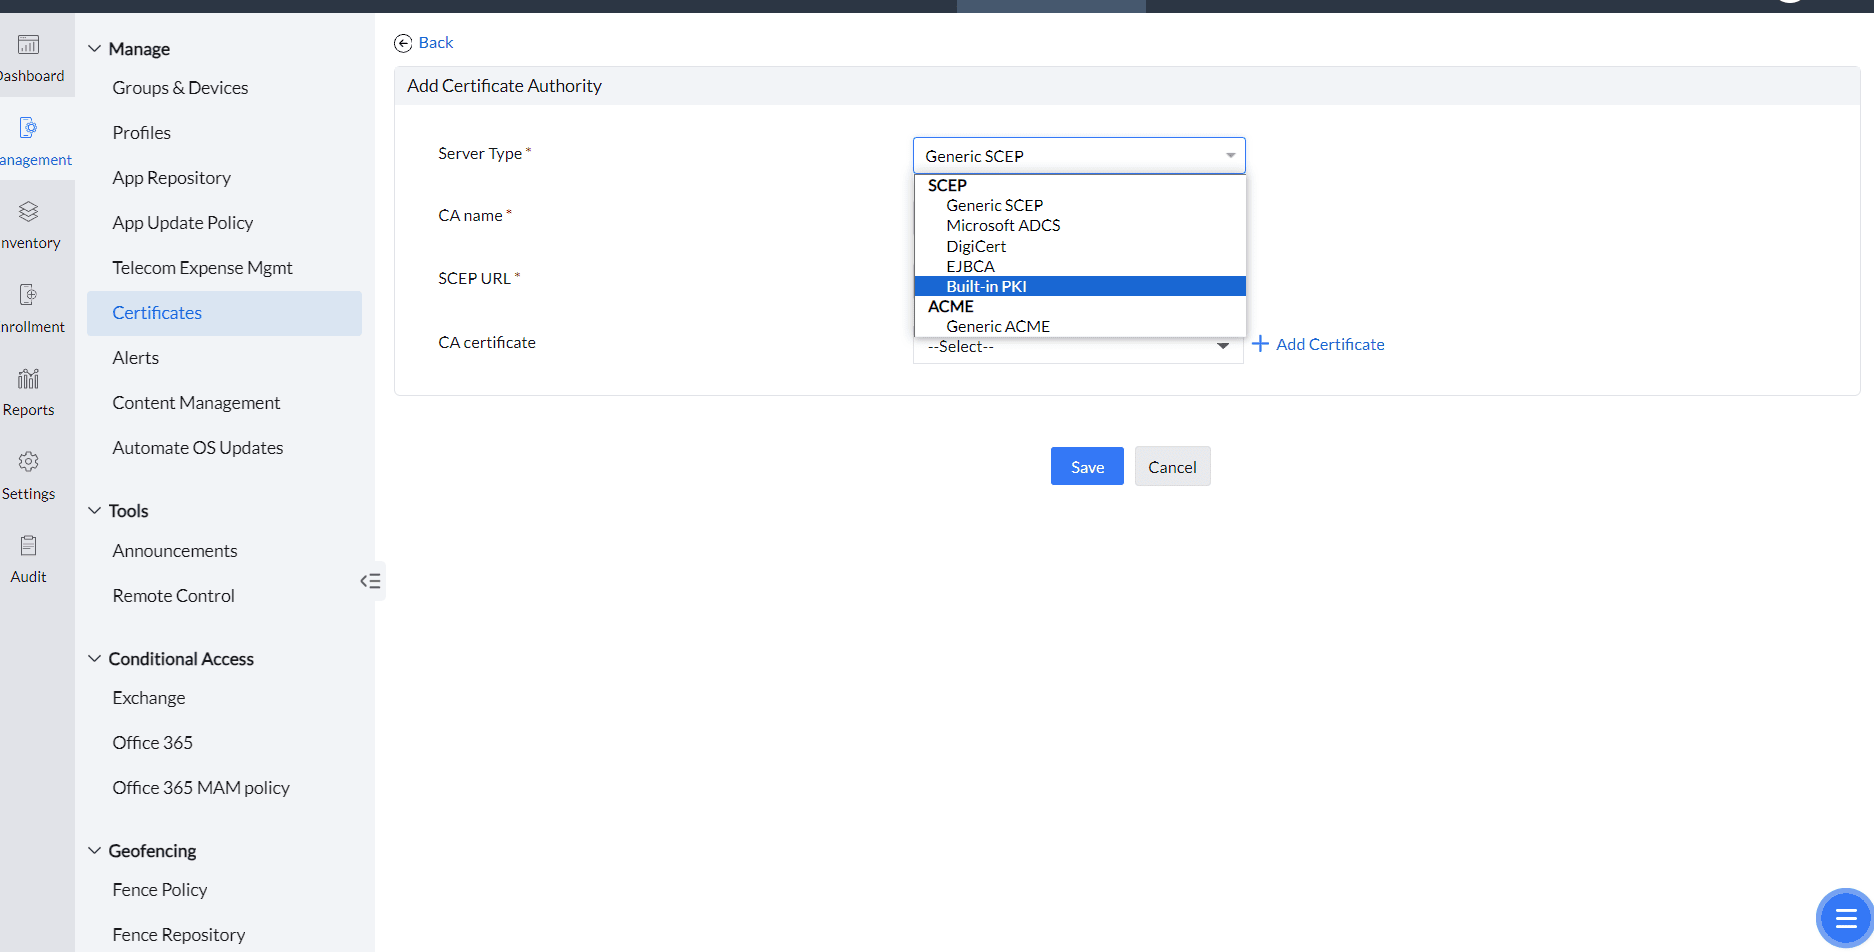
- Under Built-in PKI, you can add two different CA types: Default and Custom.
- Default CA Type: MDM uses its own certificate authority and private key to sign client certificates. After saving the CA server with the Default CA type, you can download the MDM root CA certificate to configure it on authentication servers.
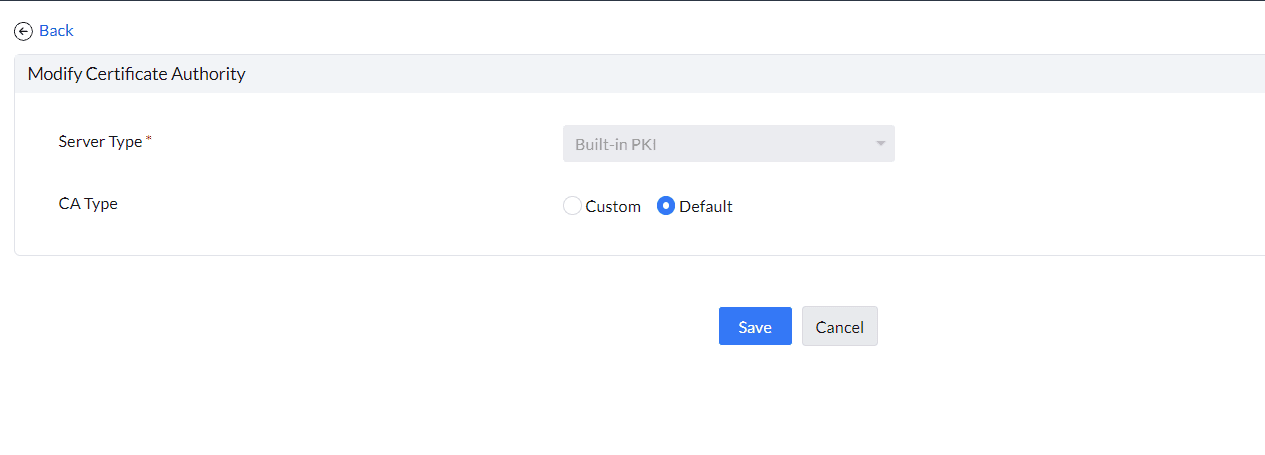
- Custom CA Type: Upload a signing certificate with its private key in a .p12 file. This private key will be used to sign client certificates. Before saving the certificate, the server will validate whether the certificate includes the necessary critical extensions required for signing certificates. Ensure that the certificate includes these extensions: digitalSignature, keyCertSign, and cRLSign.
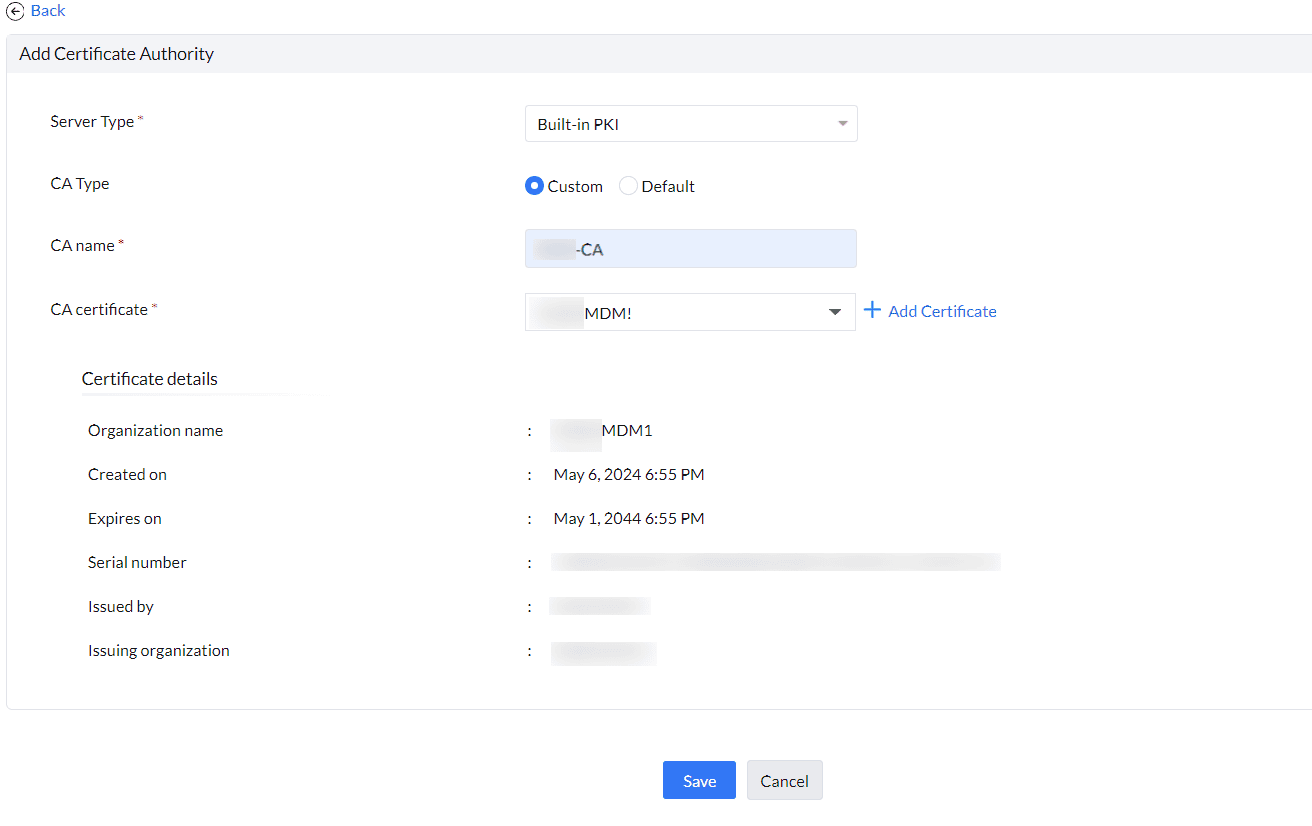
- Click Save.
Creating templates for the CA servers
For creating certificates, a template needs to be configured based on which all the certificates will be issued by the CA. Follow the steps given below to configure the template on MDM:
- Navigate to Device Mgmt -> Certificates.
- Click on Templates tab and click on Add Templates
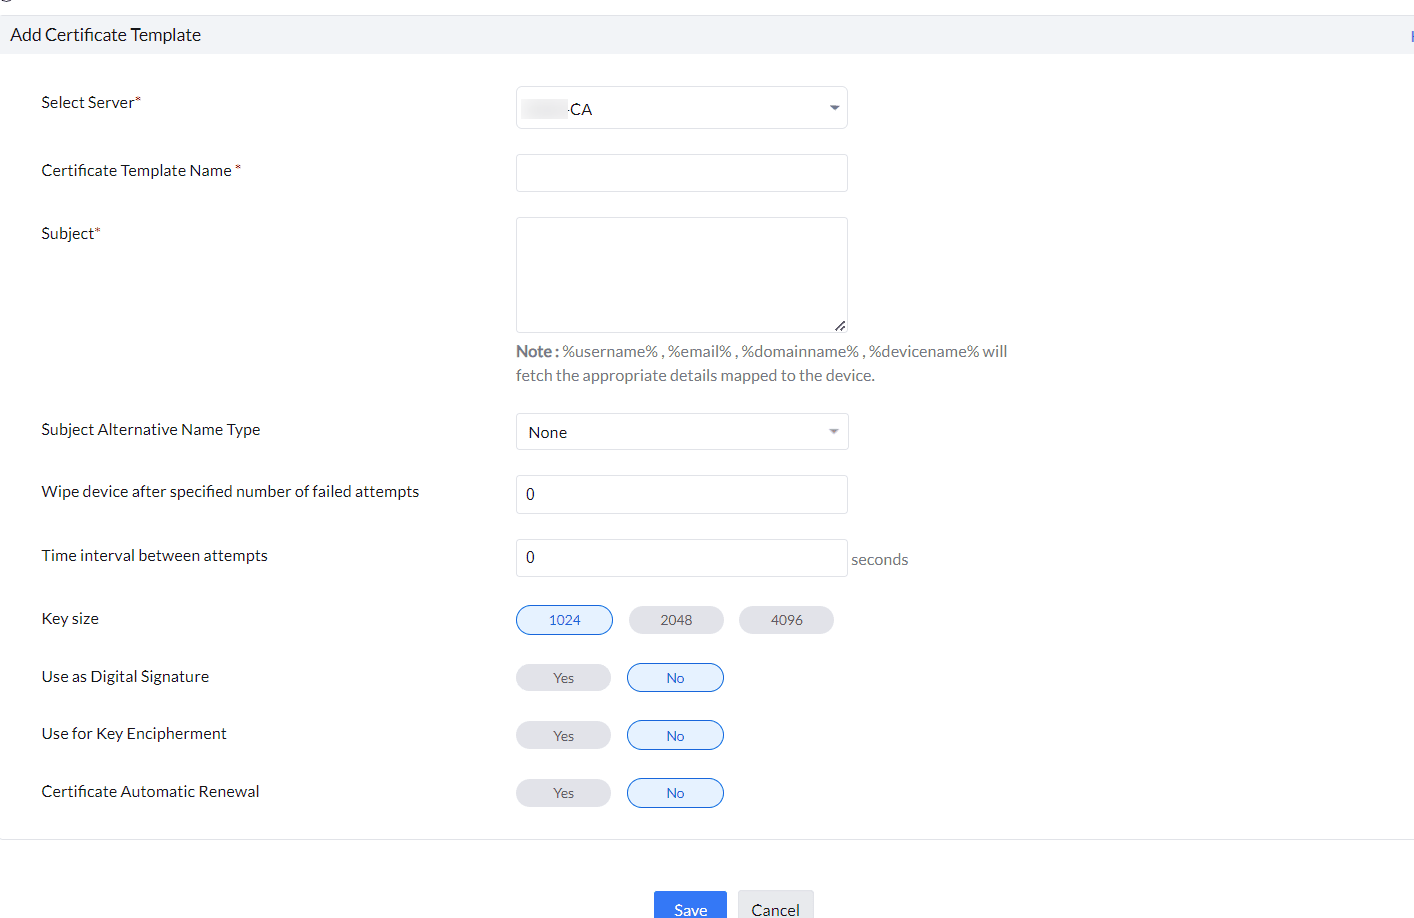
- Select the server to which the template belongs. In this case, select the Built-in PKI server that was previously added.
- Provide the following details:
| Profile Specification | Description |
|---|---|
| Certificate Template Name | Specify the certificate template name. |
| Subject | Specify the Subject DN that needs to be present in the certificate. You can use dynamic keys such as %username%, %email%, %firstname% to fetch the the corresponding details mapped to the device. For instance, you can enter C=US,O=Zylker,OU=Zylker,CN=%firstname%. |
| Subject Alternative Name Type | Specify one of the following values, None, RFC 822 Name, DNS Name or Uniform Resource Identifier for the subject alternative name type. |
| Subject Alternative Name Value (Can be configured only if Subject Alternative Name Type is configured) | Specify a value for subject alternative name value. The value to be entered can include DNS name, URI or email. For instance, you can use the dynamic key %email% for email. |
| NT Principal Name | Specify the NT Principal Name used in the organization. |
| Maximum Number of Failed Attempts | Specify the maximum number of failed validation attempts allowed to obtain the certificate from the CA. Once the maximum limit is exceeded, users will be temporarily restrcted from attempting to vaildate the user account. |
| Time interval between attempts | Time to wait before subsequent attempts to obtain the certificate |
| Key Size | Specify whether the key is 1024 or 2048 bits |
| Use as Digital Signature | Enabling this option ensures the certificate can be used for Digital Signature |
| Use for Key Encipherment | Enabling this option ensures the certificate can be used for Key Encipherment |
| Certificate Auto Renewal | Enabling this option ensures the certificates are renewed automatically before it expires. |
| Certificate Automatic Renewal Before | Specify the number of days before which the the certificate must be auto-renewed. |
Creating a SCEP profile
To distribute certificates to managed devices, a SCEP profile need to associated with these devices. Follow the steps given below to create and associate the SCEP profile to devices
- Navigate to Device Mgmt -> Profiles and create either an Apple, Android or Windows profile.
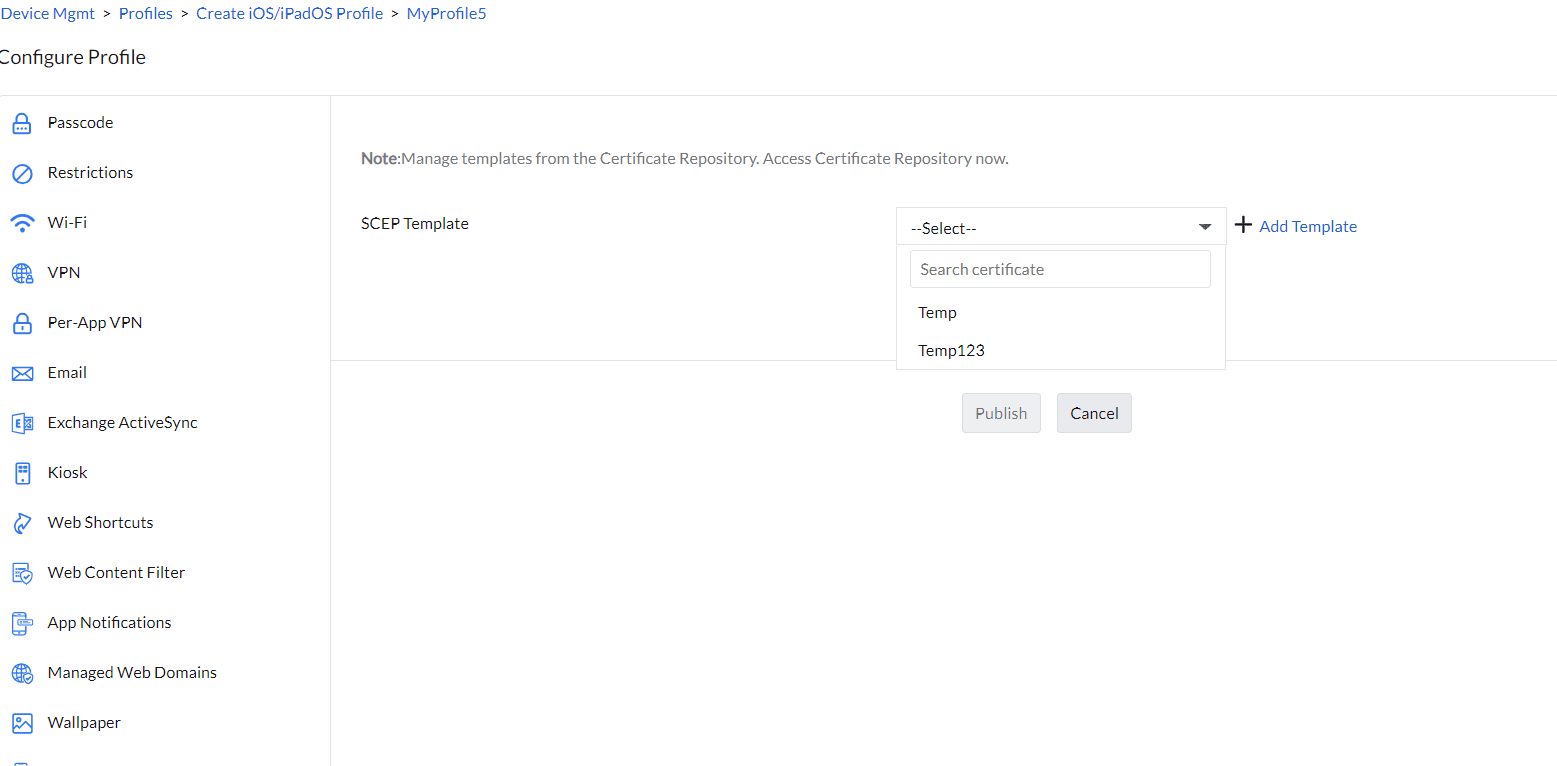
- Select SCEP from the left pane.
- Select the created Certificate template.
- Click on Save and publish the profile.
It is recommended to distribute the profile to a device for testing before distributing it to your production environment. Once testing is complete, you can distribute the profile to your production environment using Groups.