Installation & Basic Settings
Overview
Welcome to ManageEngine Network Configuration Manager!
This section provides information on how to install Network Configuration Manager solution in your system. This section also deals with the system requirements for Network Configuration Manager, how to install the solution, how to start and shutdown the product, the ports occupied by Network Configuration Manager and licensing information.
Prerequisite Software
There is no prerequisite software installation required to use Network Configuration Manager. The standard system (hardware and software) requirements as mentioned below plus an external mail server (SMTP server) are essential for the functioning of Network Configuration Manager server, to send various notifications to users.
Components of Network Configuration Manager
The ManageEngine Network Configuration Manager consists of the following components:
The Network Configuration Manager server consisting of server and database
Built-in TFTP server running on port 69
Built-in syslog server running on port 514
JRE 1.8.181 bundled with Network Configuration Manager
PostgreSQL 10.12 bundled with Network Configuration Manager
SSH server
Editions & scalability
Network Configuration Manager comes in two editions:
- Free edition : 2 devices, free forever
- Trial edition : unlimited devices, free for 30 days
- Professional edition and Enterprise edition: unlimited devices, paid version.
Network Configuration Manager can monitor upto 5000 devices.
Installing Network Configuration Manager
In Windows
Download and execute ManageEngine_NetworkConfigurationManager.exe. The installation wizard will guide you through the installation process
Choose an installation directory - by default, it will be installed in C:/ManageEngine/NCM; Henceforth, this installation directory path shall be referred as "NCM_Home".
While installing Network Configuration Manager, you have the option to install Network Configuration Manager as a service. Just uncheck the checkbox, in case, you do not wish to install it as service
In the final step, you will see two check-boxes - one for viewing ReadMe file and the other one for starting the server immediately after installation; if you choose to start the server immediately, it will get started in the background. As unpacking of jars will be done during the first startup, it will take sometime to fully start.
- If you choose to start the server later, after installation, you can start it from the Start >> Programs >> ManageEngine Network Configuration Manager menu.
In Linux
Download ManageEngine_NetworkConfigurationManager_64bit.bin for Linux.
Login as root user.
Assign executable permission using command chmod a+x <file-name>
Execute the following command with administrator privileges (sudo):
./<file_name>
Follow the instructions as they appear on the screen
Network Configuration Manager is installed in your machine in the desired location. Henceforth, this installation directory path shall be referred as "NCM_Home".
Installing Network Configuration Manager on Linux using console mode/silent mode
Step 1: Execute ManageEngine_NetworkConfigurationManager_64bit.bin with administrator privileges (sudo) and -i console option.

Step 2: Go through the license agreement and enter 'Y' to proceed.
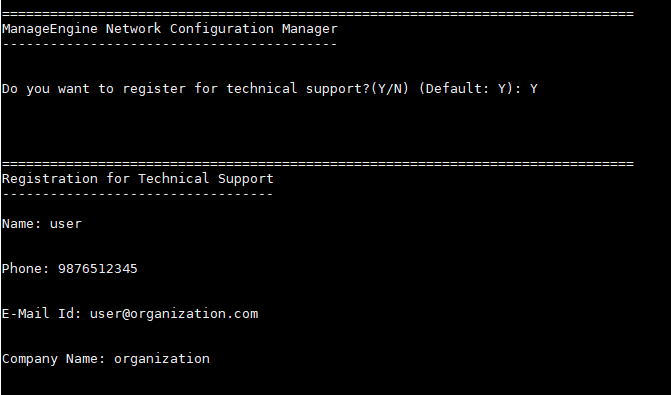
Step 3: You can register for technical support by providing the required details (Name, E-mail ID, Phone, Company Name).
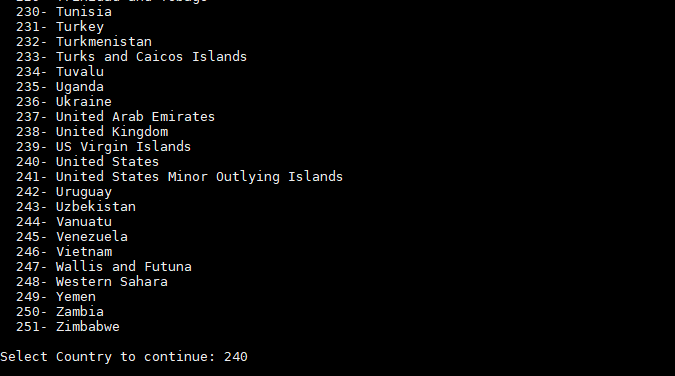
Step 4: Select your location.
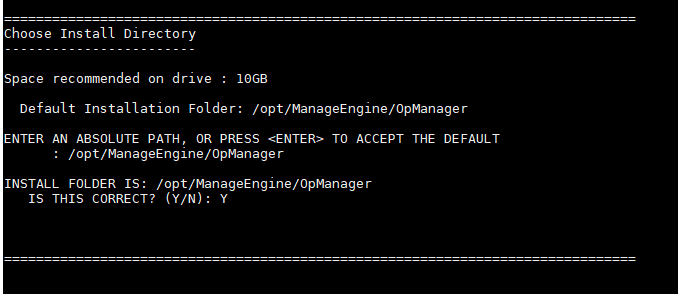
Step 5: Choose the installation directory.
Step 6: Configure the web server port.
Step 7: Verify the installation details and press 'Enter' to complete the installation.

Installing Network Configuration Manager on Linux with MSSQL database
From version 12.8.330, MSSQL database is supported for Linux setups. As of now MSSQL database cannot be configured directly from the installation wizard for Network Configuration Manager's Linux installation. Instead, perform a default installation with PgSQL database in Linux environment and then migrate the database to MSSQL.
Note: MSSQL database is not included with the setup for Linux installations.
Steps to migrate to MSSQL DB
After installing, follow the below steps before starting the product, to migrate from PgSQL to MSSQL database in Linux installations.
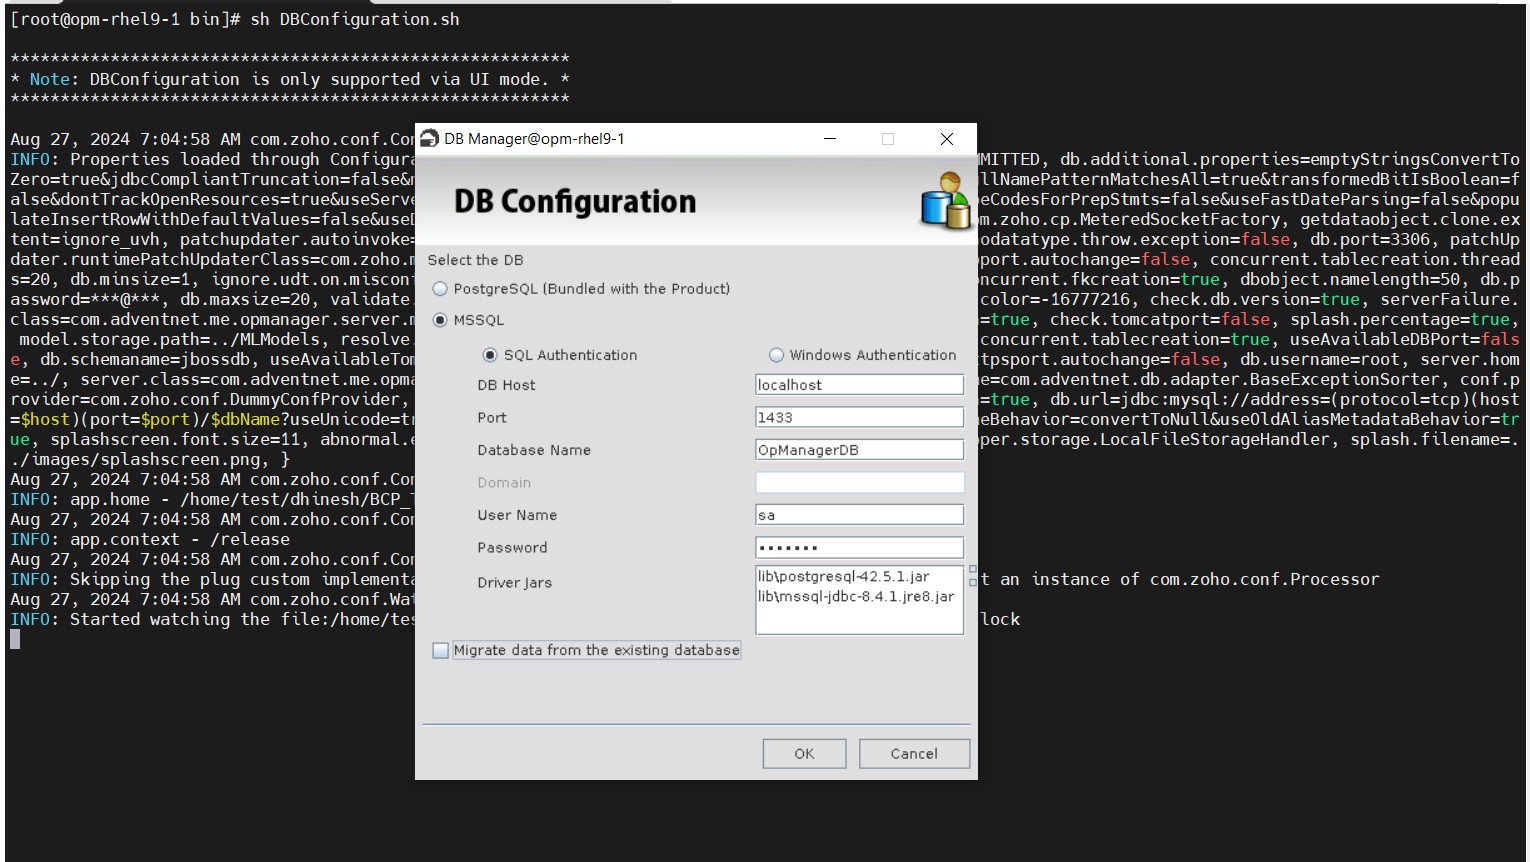
- Step 1: In terminal, go to <Network Configuration Manager _Home>/bin directory and execute the DBConfiguration.sh file.
- Step 2: Provide the SQL server details with the DB name.
- Step 3: Leave the Migrate data from existing database option unchecked.
- Step 4: Then, click OK to start migration.
A success message will be displayed in a dialog box after the migration is successful.
Note:
- The DBConfiguration.sh file can be executed either directly from the Linux machine or from X11 enabled environments.
- Executing DBConfiguration.sh from the console mode is currently not supported.
- For BCP utility details, please refer this link.
Installing Network Configuration Manager with Kingbase DB
Starting & Shutting Down Network Configuration Manager
Windows:
Click on Start > Programs > ManageEngine Network Configuration Manager to start the server.
Linux:
Navigate to the <NCM Home>/bin directory and execute the StartOpManagerServer.sh file.
When the server is started, a command prompt window opens up showing startup information on several modules of Network Configuration Manager. Once all the modules have been successfully created, the following message is displayed:
Server started.
Please connect your client at http://localhost:8080
where 8080 is replaced by the port you have specified as the web server port during installation.
Starting as Service :
Windows:
If you have chosen the Start as Service option during installation, Network Configuration Manager will run as a service on Windows.\
Linux:
- Log in as 'root' user.
- Execute the StartOpManagerServer.sh file present in the <NCM Home>/bin directory.
To stop NCM running on a linux machine, execute the ShutDownOpManager.sh file present in the <NCM Home>/bin directory.
Alternatively, you can choose to start Network Configuration Manager as a service:
- Open Terminal and log in as 'root' user.
- Access the path where Network Configuration Manager is installed.
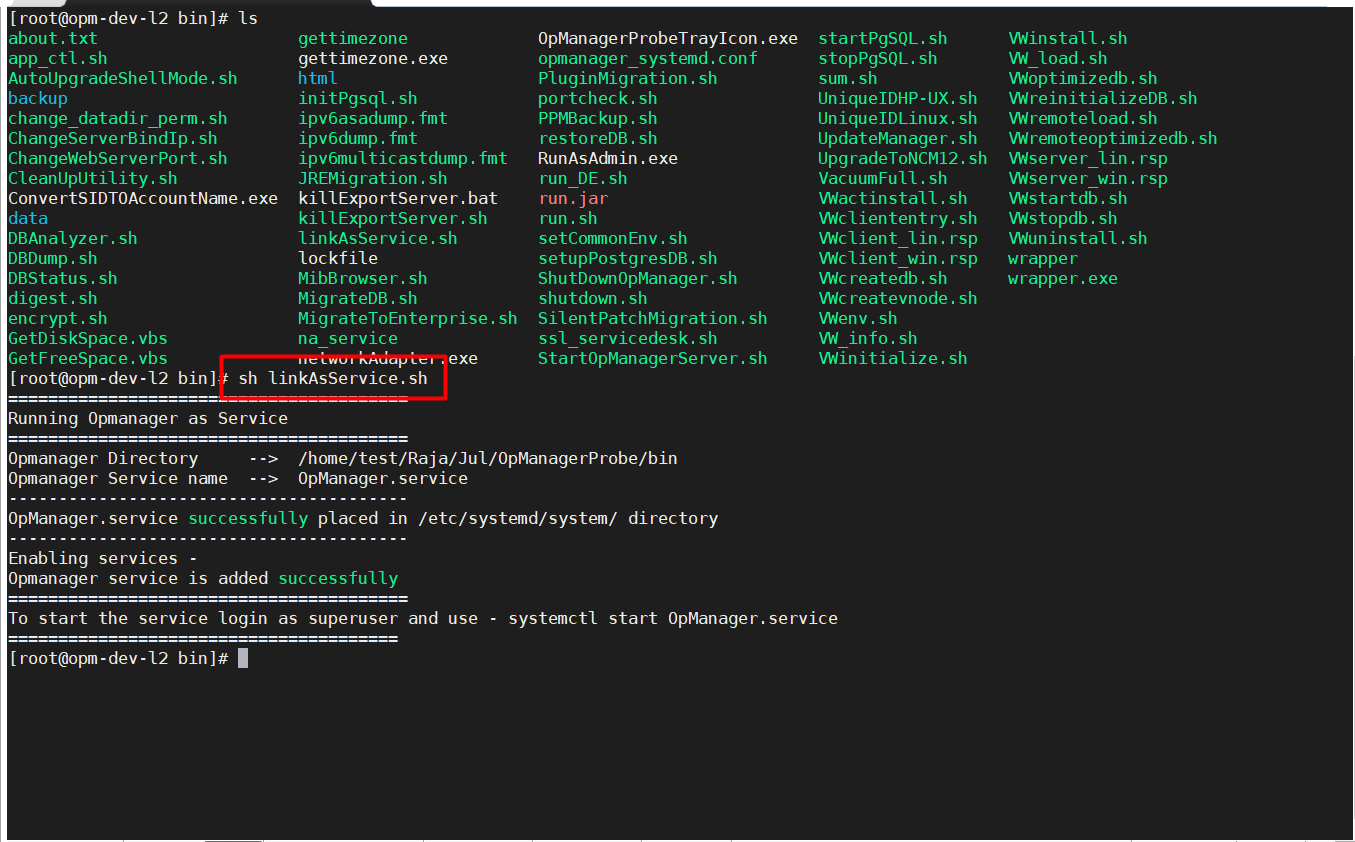
- Execute the linkAsService.sh file present in the<NCM Home>/bin directory by using the sh linkAsService.sh command.
- Start Network Configuration Manager by executing systemctl start OpManager.service or /etc/init.d/OpManager.service start files, depending on your OS version.
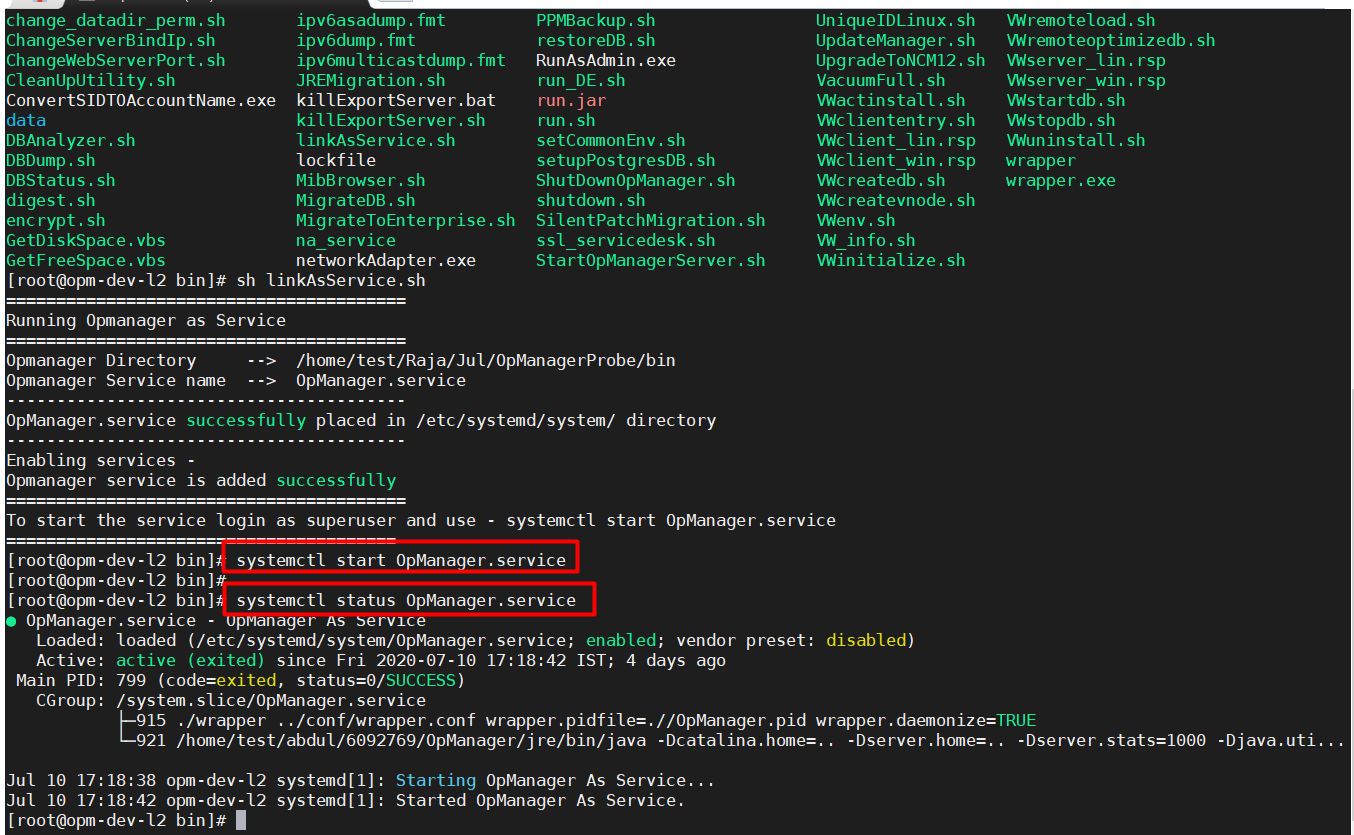
- Check the status of Network Configuration Manager by executing thesystemctl status OpManager.service or /etc/init.d/OpManager.service status files.
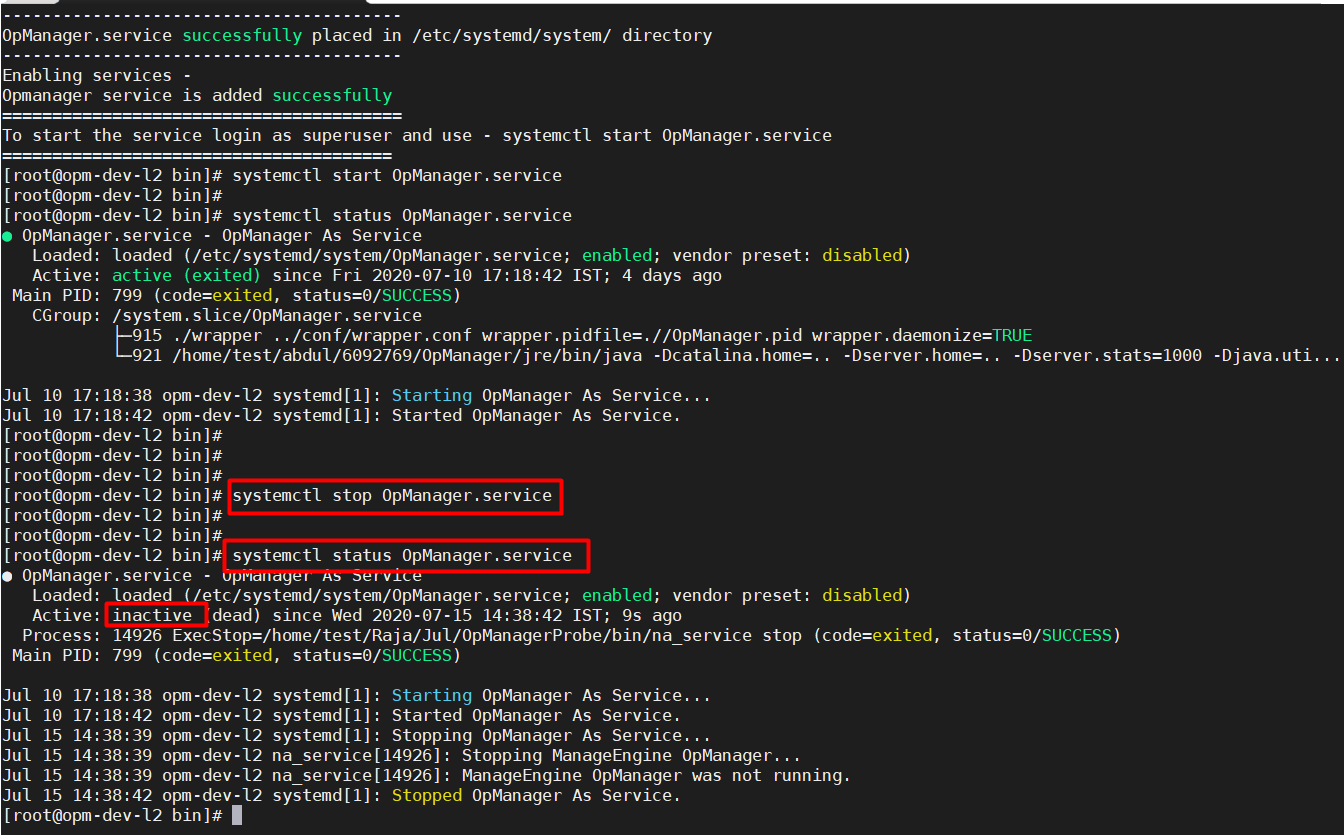
- Stop Network Configuration Manager by executing thesystemctl stop OpManager.service or the/etc/init.d/OpManager.service stop commands.
This starts Network Configuration Manager as a service on Linux.
Moving Network Configuration Manager installation to another machine or Moving to a different location within the same machine
If you want to move the Network Configuration Manager installed in one machine to another or to a different location within the same machine, follow the procedure detailed below:
Prerequisite
Do not remove existing installation of Network Configuration Manager until the new installation works fine. This is to ensure backup, to overcome disasters/data corruption during the movement.
Procedure
Stop Network Configuration Manager server / service, if running
If you have installed Network Configuration Manager to run as a startup service, remove it as service before proceeding further. See the table below for the procedure to remove it as service.
Take a zip of the entire Network Configuration Manager installation folder; move the zip to a different machine or to a different location in the same machine as required
Then, install it to run as service.
Installing as Startup Service in Windows | Installing as Startup Service in Linux |
|
|
Note:
In this option, you will not be able to uninstall the program through windows Add/Remove programs console. If you want to uninstall anytime, just delete the entire installation folder.
You need not reapply the license after moving the installation.
Licensing
There are three license types:
Evaluation download is valid for 30 days and supports unlimited devices during the time period. After 30 days, one can manage up to 2 devices.
Free Edition - licensed software allows you to manage up to 2 devices. To get a free license for additional 2 devices, please fill the form in this link - https://www.manageengine.com/network-configuration-manager/download-free.html
Professional Edition and Enterprise Edition - need to buy license based on the number of devices to be supported
For more information and to get license, contact sales@manageengine.com
Acknowledgement: This product includes software developed by SSHTools (http://www.sshtools.com/).
Thank you for your feedback!
