SAML Authentication
Security Assertion Markup Language (SAML) is an XML-based standard that exchanges authentication credentials between a service provider (SP) and an identity provider (IdP). It eliminates the need for multiple passwords and, with the help of single sign-on (SSO) functionality, offers a secure, easy way to access multiple applications with common login credentials.
Service provider: The SP is an application or a third-party entity that provides service to an end user. SPs need authentication from the IdP to facilitate authentication for the user. Examples: ManageEngine Network Configuration Manager, ManageEngine OpManager, and ManageEngine Desktop Central.
Identity provider: The IdP is an entity that stores user identities or resources such as usernames, passwords, and SSH keys. Examples: Okta, Microsoft ADFS, Auth0, CyberArk, and Azure SSO.
SAML authentication in Network Configuration Manager
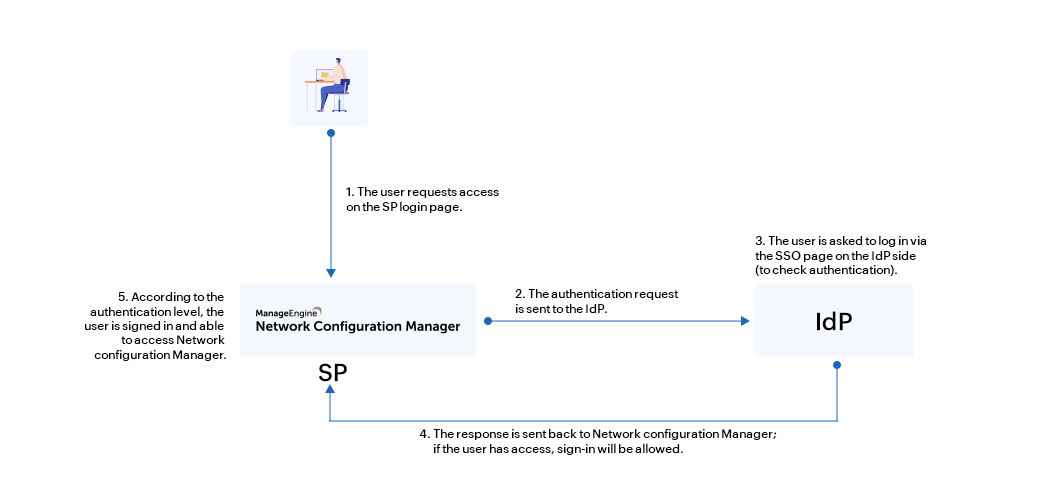
Users can now log into Network Configuration Manager with SAML. During sign-in, a request is sent to the IdP and checked for the necessary authentication credentials for that particular user. The response is then communicated back to Network Configuration Manager, and the user gains access.

For example, once SAML is configured, users will have an option on Network Configuration Manager's login page to connect them to the SSO login page on the IdP side. Once signed in, the user will be redirected back to Network Configuration Manager and logged in using the authentication given by the IdP, assuming the user account is available. If the user can’t be authenticated, their access will be denied and they will be returned to the Network Configuration Manager login page.
Configuring SAML in Network Configuration Manager
There are two ways to configure SAML in Network Configuration Manager. You can either do it manually by providing the necessary credentials or you can upload the metadata file directly, if available.
Service provider details
If you opt to configure SAML manually, you will be provided with the following details: the Entity ID, Assertion Consumer URL, SSO Logout URL, and a link to download the SP certificate file. This information, available in the Network Configuration Manager's UI, can be used to add Network Configuration Manager as a supported application in your IdP.
You can also download the SP metadata file directly from Network Configuration Manager and import it on the IdP side. This metadata file will have all the above-mentioned details in XML format.

Click the corresponding IdP name to see the steps to configure SAML between Network Configuration Manager and that IdP.
Identity provider details
Similar to the SP details configuration, you can either configure the IdP details manually or upload the metadata file fetched from the IdP side.
Uploading the IdP metadata file:
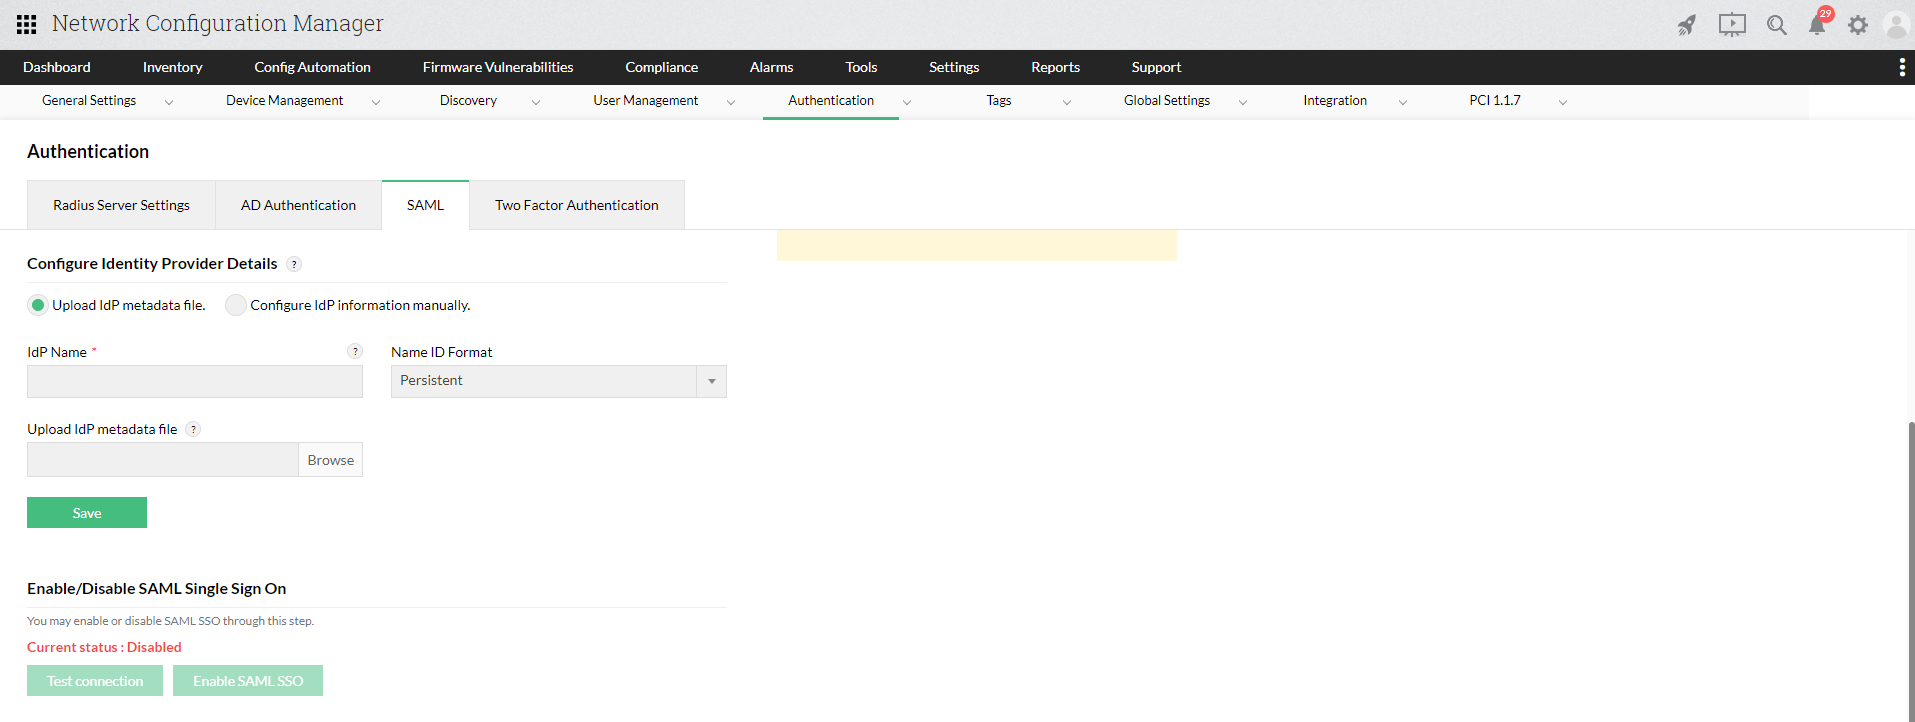
If you have a metadata file from your IdP, upload it directly in Network Configuration Manager.
- Under Settings -> Authentication, navigate to the SAML Authentication tab.
- Under the 'Configure Identity Provider Details' section, choose Upload IdP metadata file and enter the IdP Name.
- Find the metadata file acquired from the IdP and click Upload.
Configuring IdP information manually:
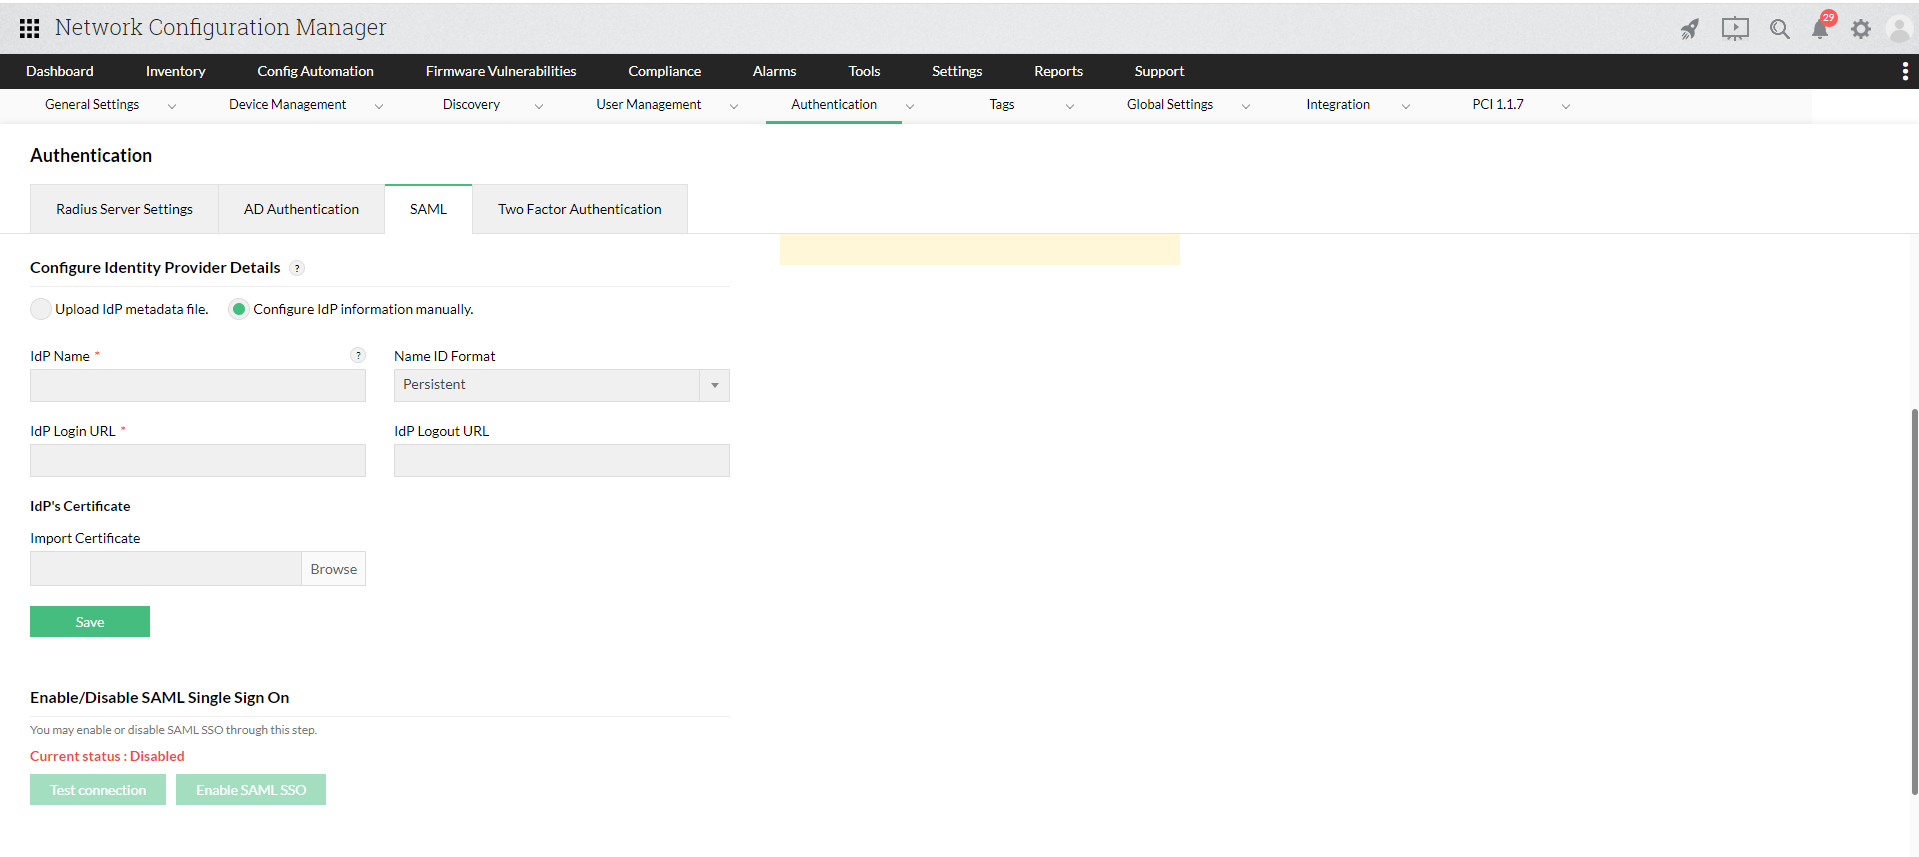
You can also enter the IdP details manually in Network Configuration Manager. For this, you will need the following details:
- IdP name
- IdP login URL
- IdP logout URL
- IdP certificate
Enter the above details in the 'Configure IdP information manually' section under Settings -> Authentication->SAML tab.

Note:
- Network Configuration Manager also offers an option called Single Logout. Similar to SSO, users will be able to log out of Network Configuration Manager and the configured IdP at once from the Network Configuration Manager UI by clicking the logout URL provided.
- As of now, either transient or persistent name identifiers can be used for common IdPs like Okta and OneLogin, whereas only persistent name identifiers are supported for Azure.
- To authenticate AD users of Network Configuration Manager through SAML authentication, the name ID value from the IdP should be in the format - <domainname>/<username>
