Integrating OpManager with WhatsApp Messenger
WhatsApp by Meta is a popular instant messaging and VoIP platform that allows users to seamlessly communicate with each other. By integrating OpManager with WhatsApp, users can now easily receive OpManager alerts as messages via WhatsApp. This helps them stay aware of their network faults on-the-go and initiate fault remediation measures that ultimately enhance the network uptime.
To integrate OpManager with WhatsApp messenger, you need
- Facebook account
- WhatsApp business account
- Meta business account with business profile
- Meta developer account
Carry out the following steps to integrate OpManager with WhatsApp.
NOTE: Kindly note that this feature is only supported for OpManager versions 128100 and above.
Now, from Meta's console, carry out the following steps.
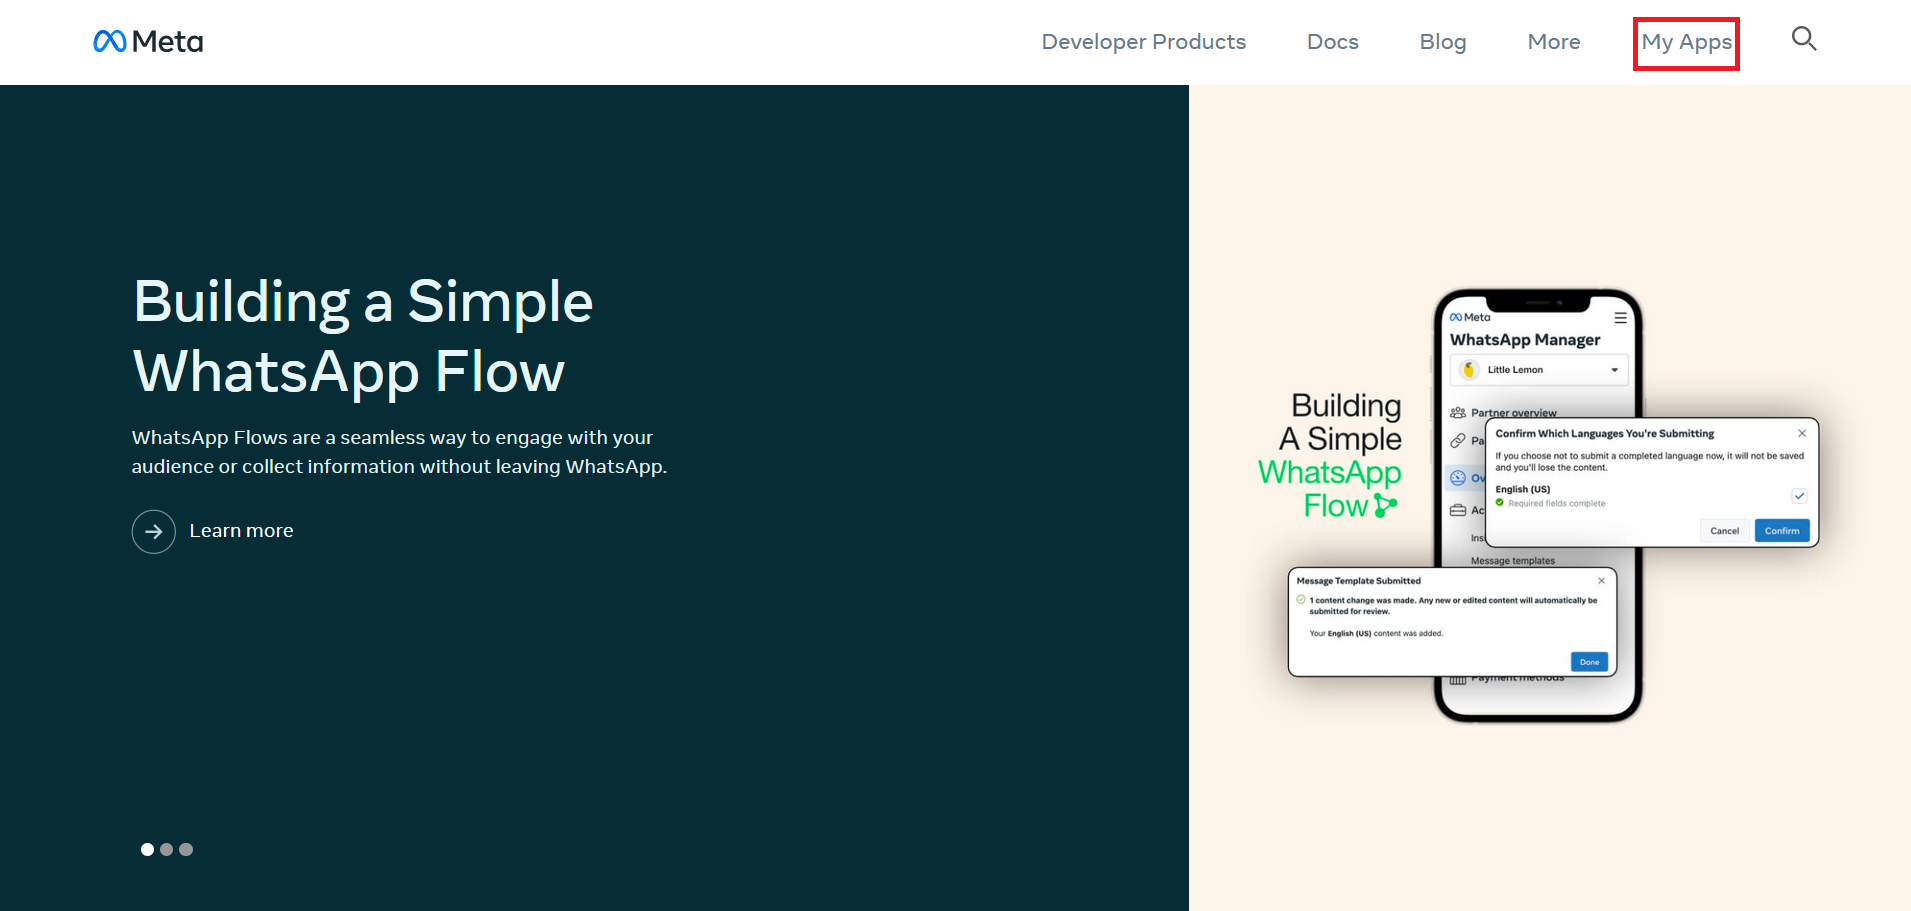
- Login to your Meta developer account and go to "My Apps".
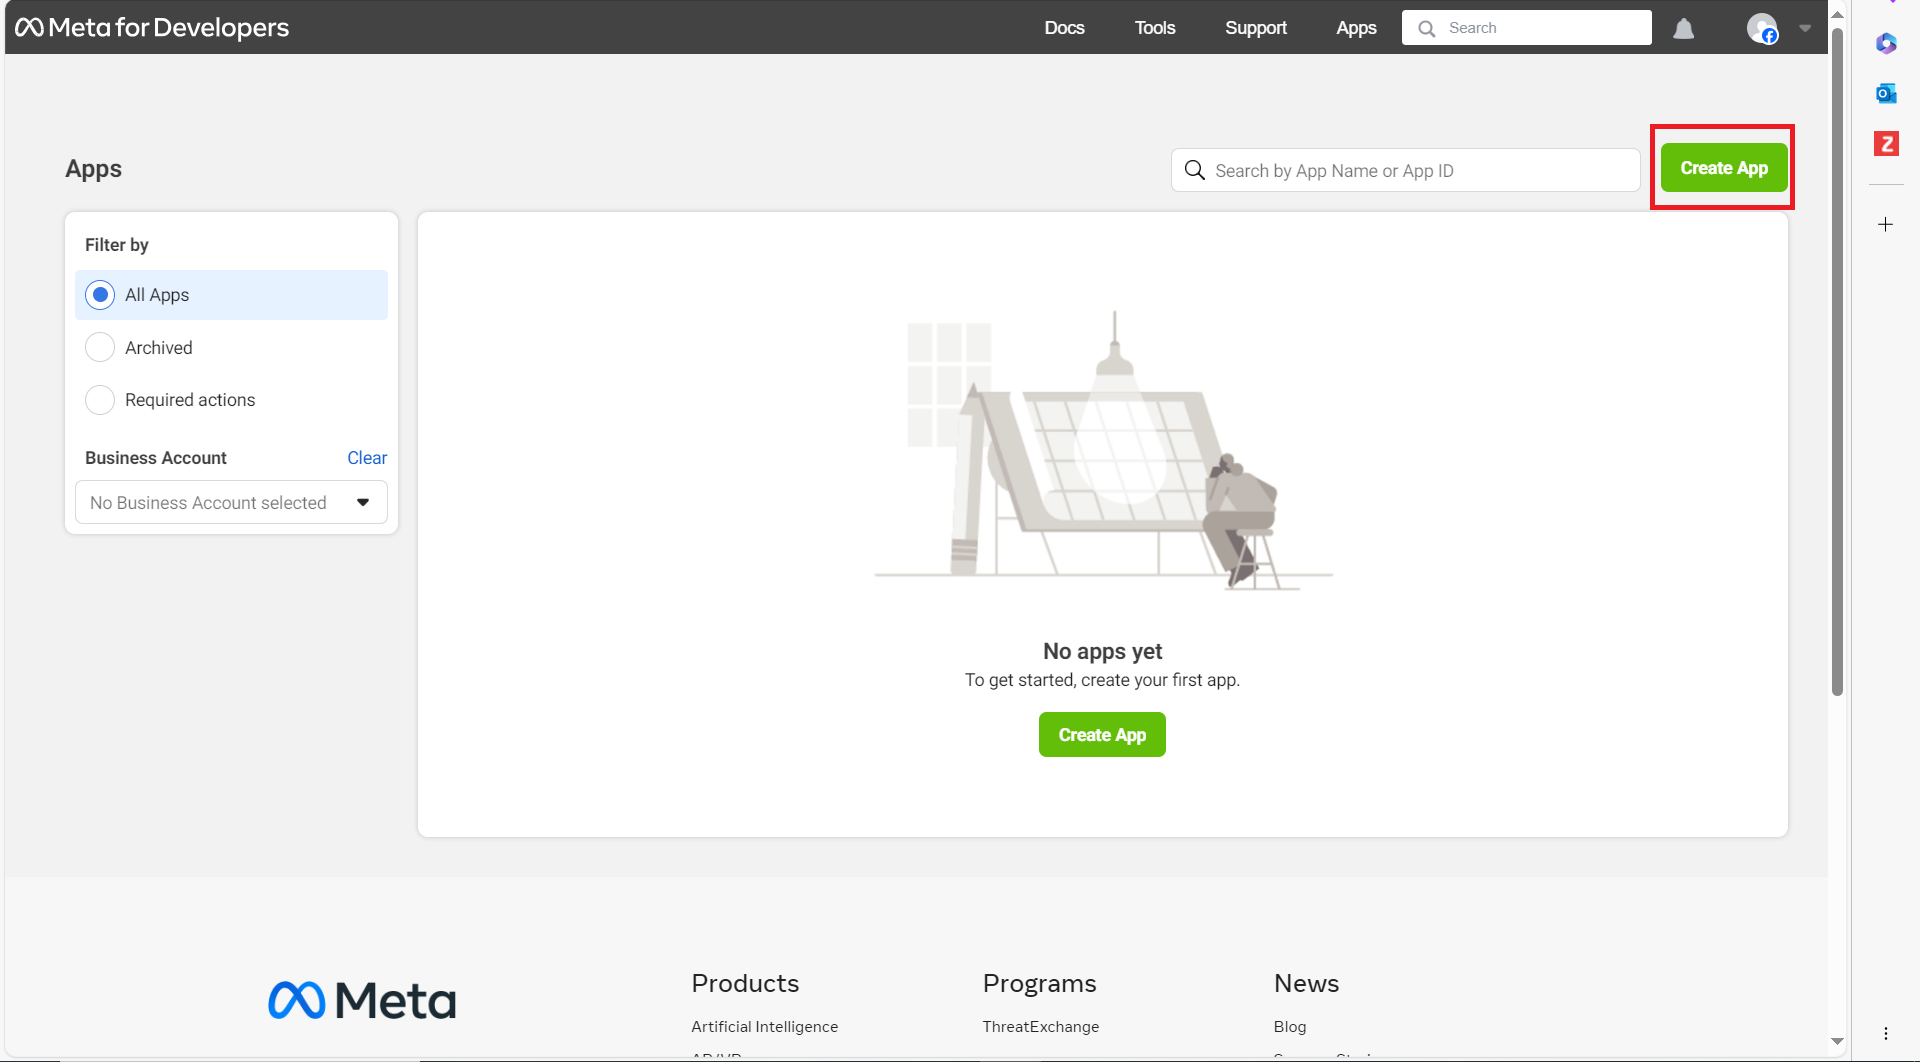
- Now, click on the "Create App" button.
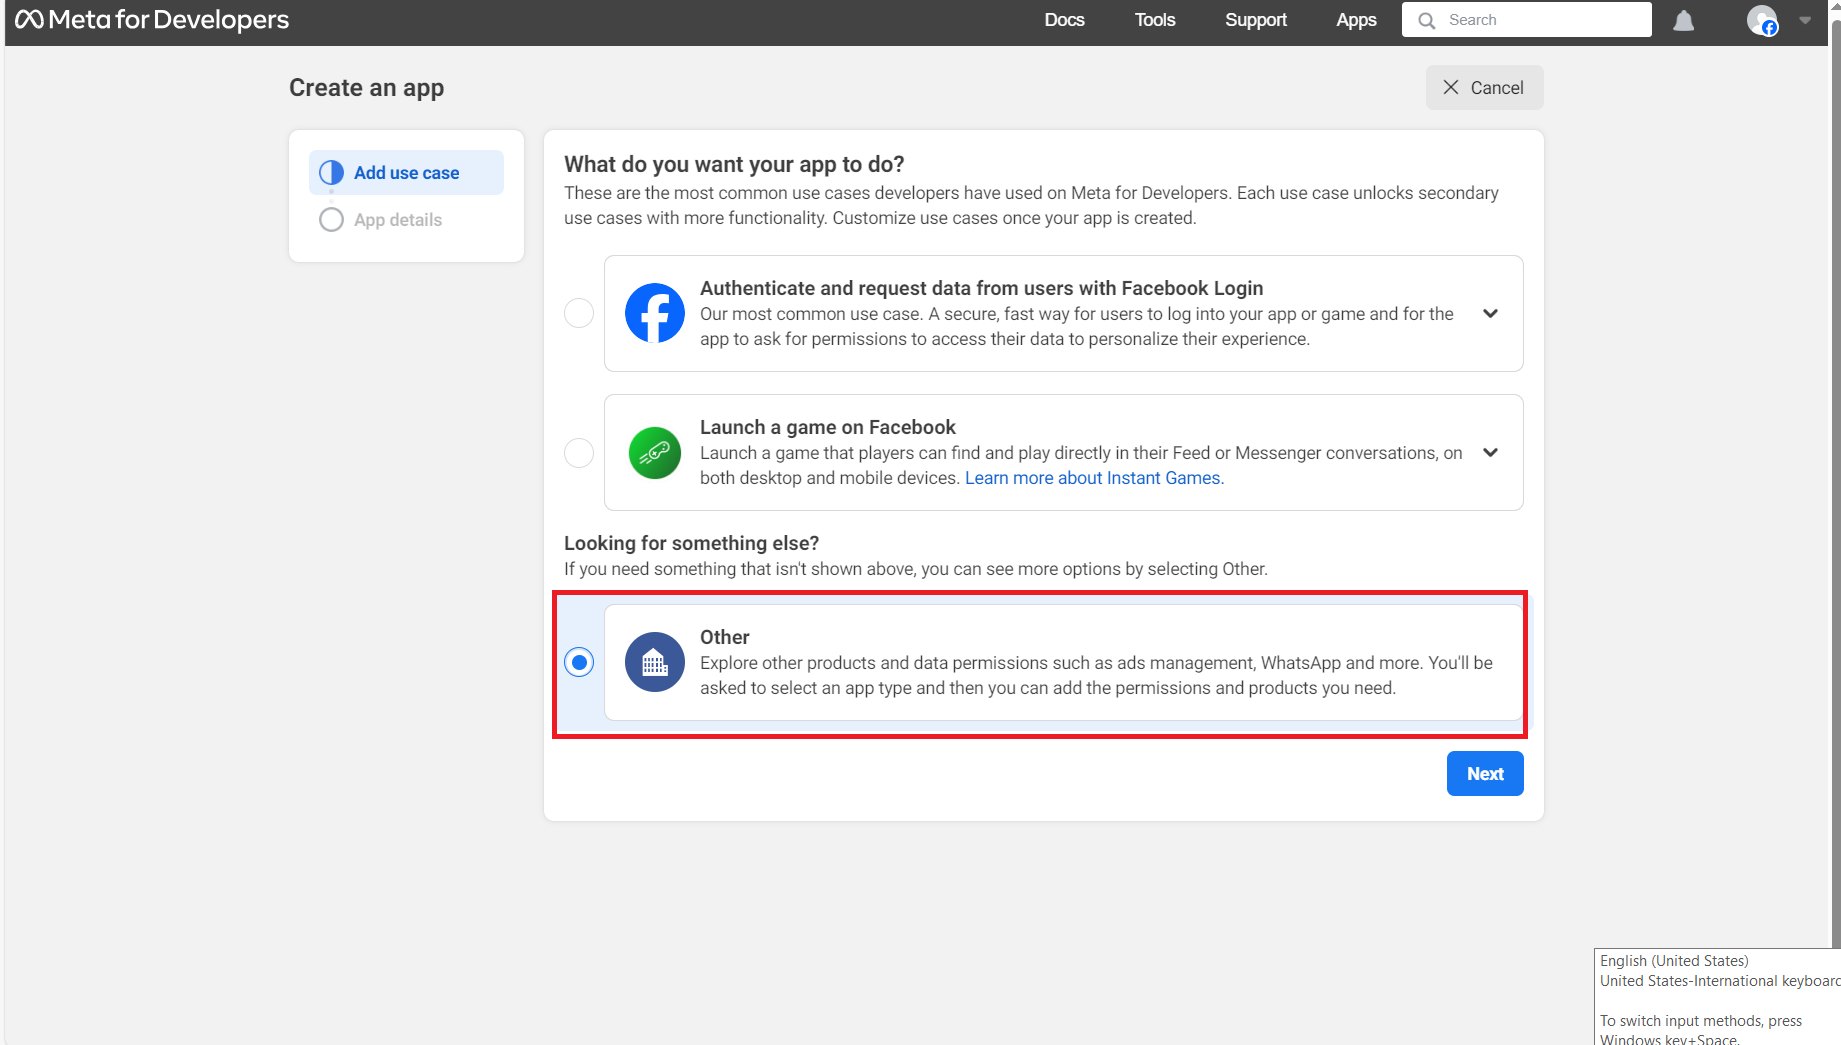
- Now, select "Other" as the use case, and click on Next.
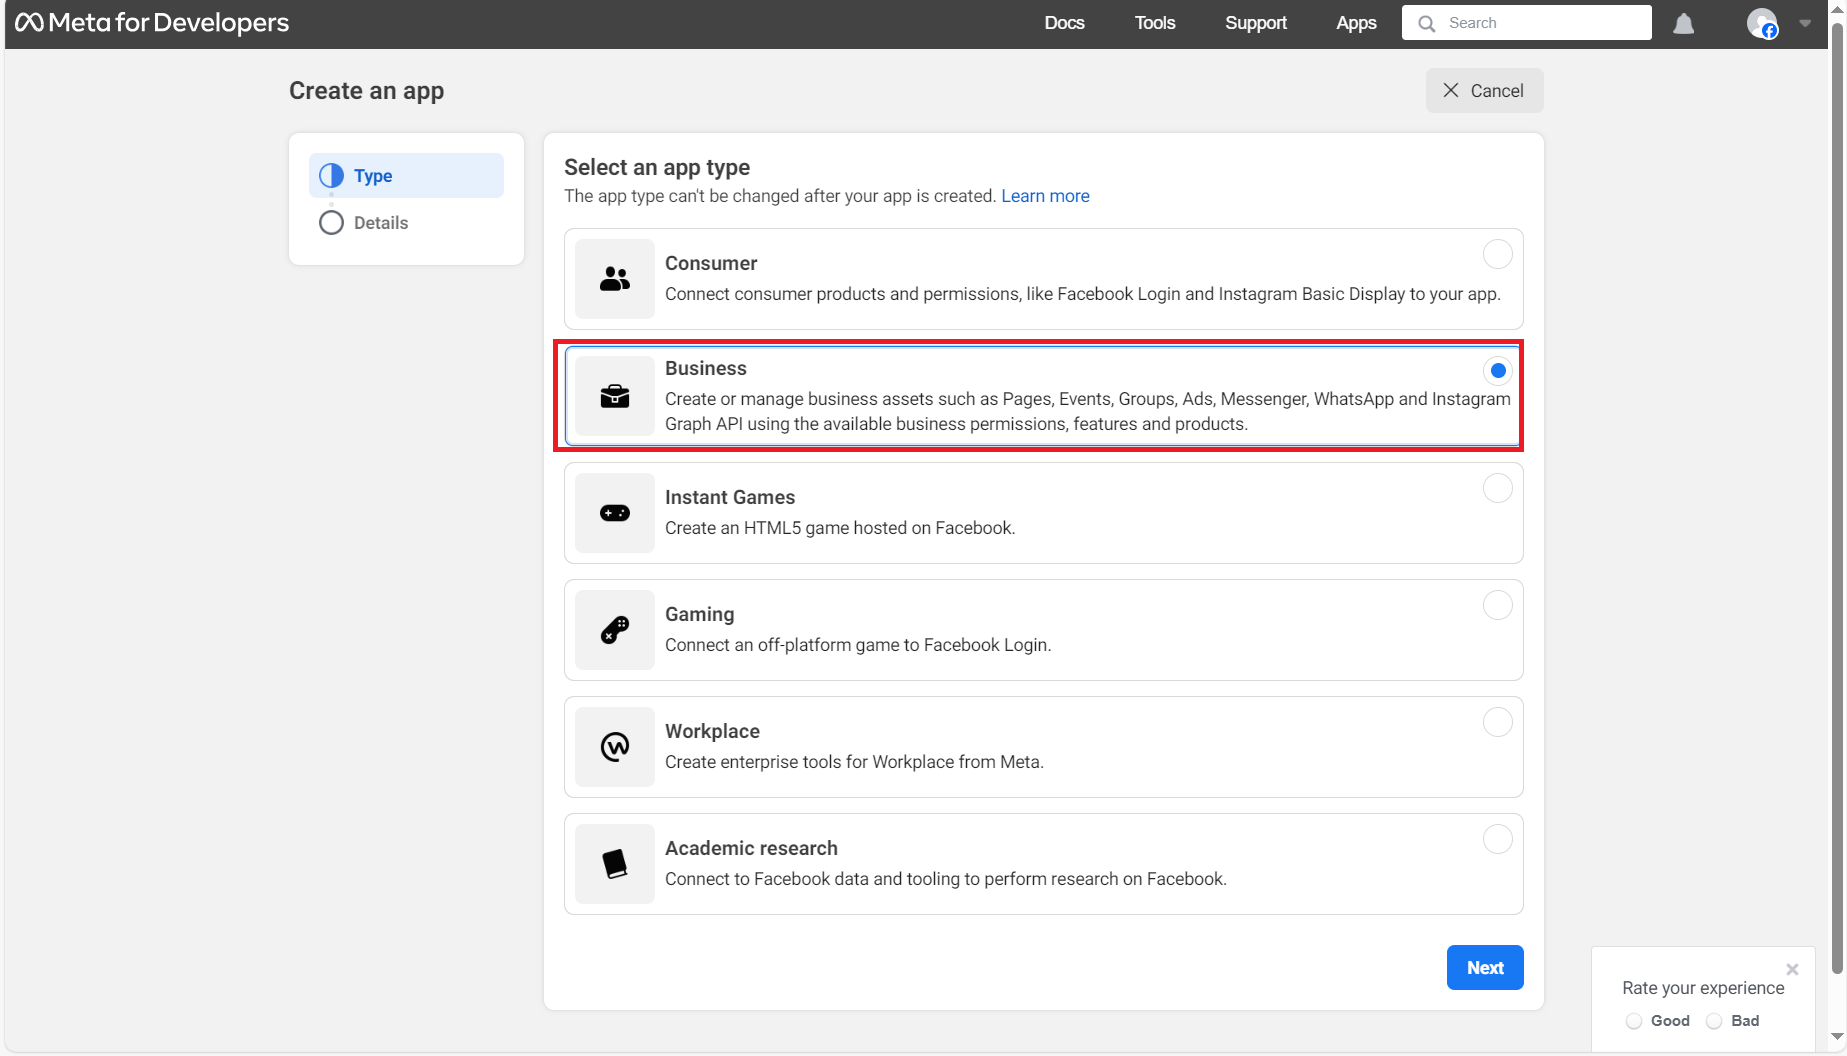
- Select the app type as "Business", and click on Next.
- Now, enter the name for the app, and select the corresponding business account.
- Now, click on the "Create App" button.
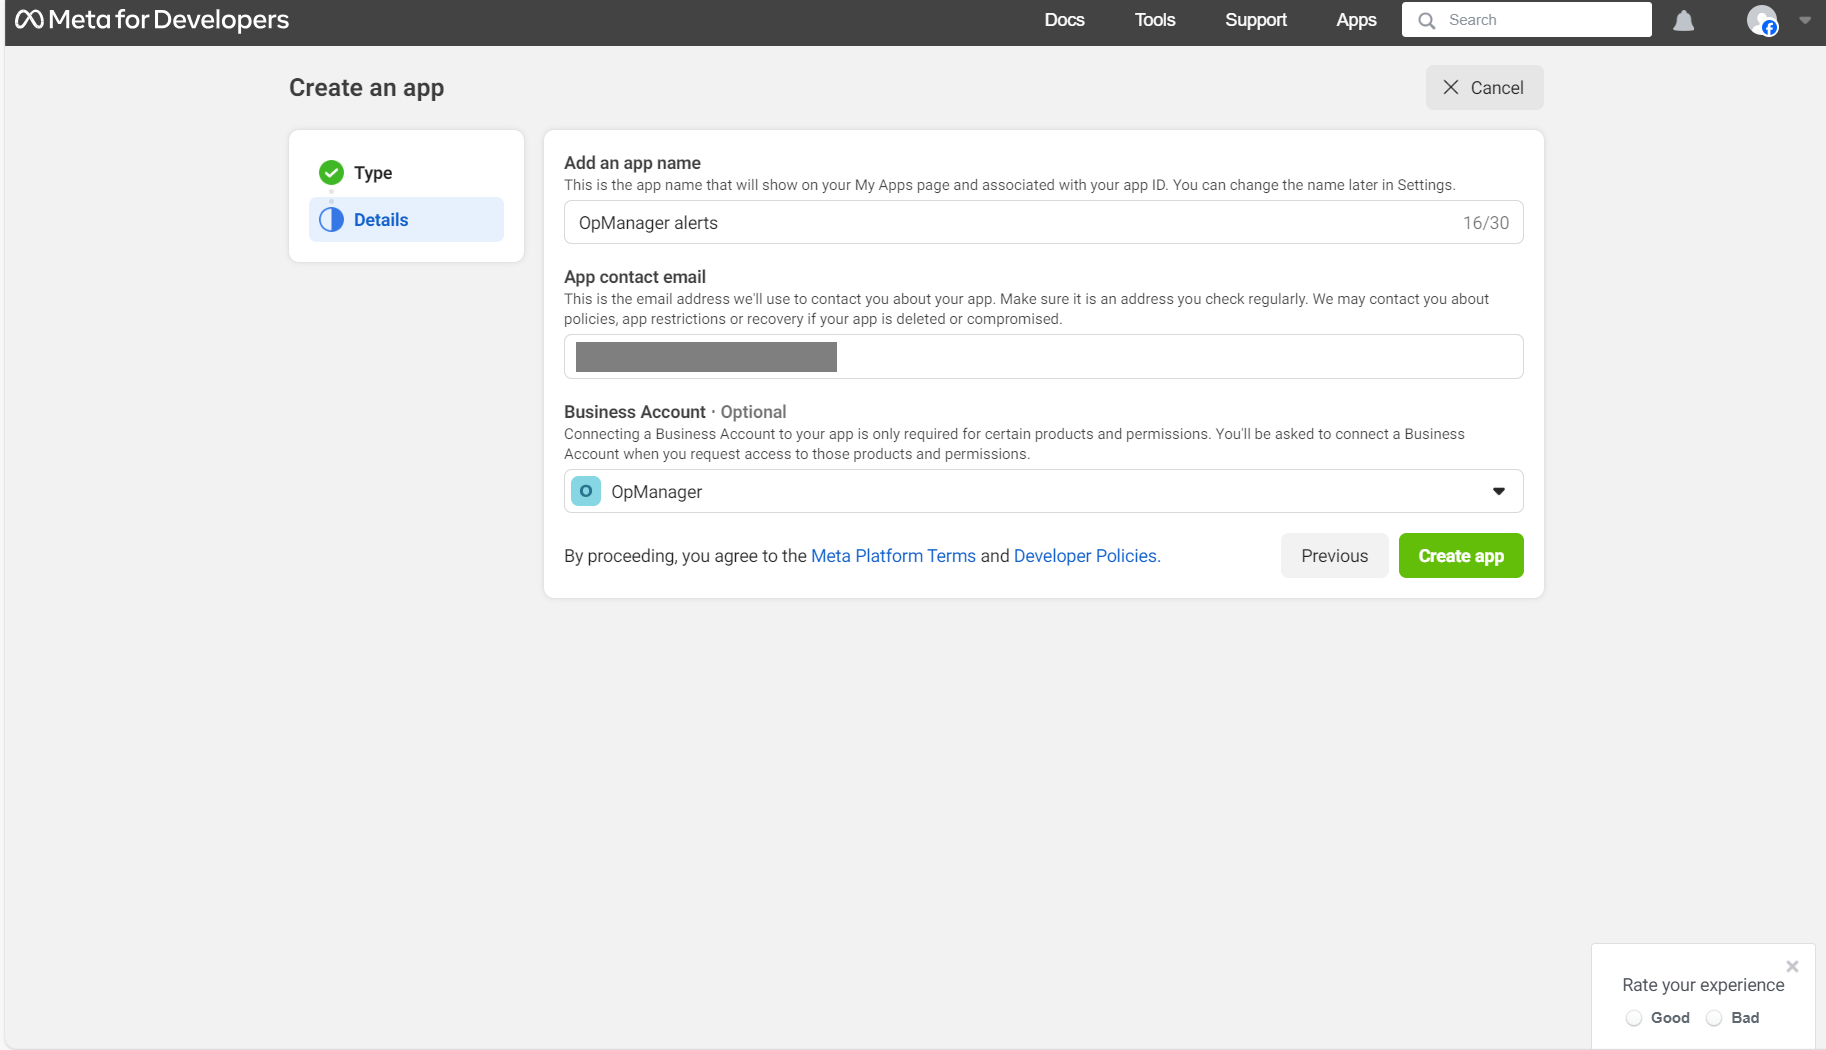
- You will be asked to re-enter your password. Once you are done, click on "Submit".
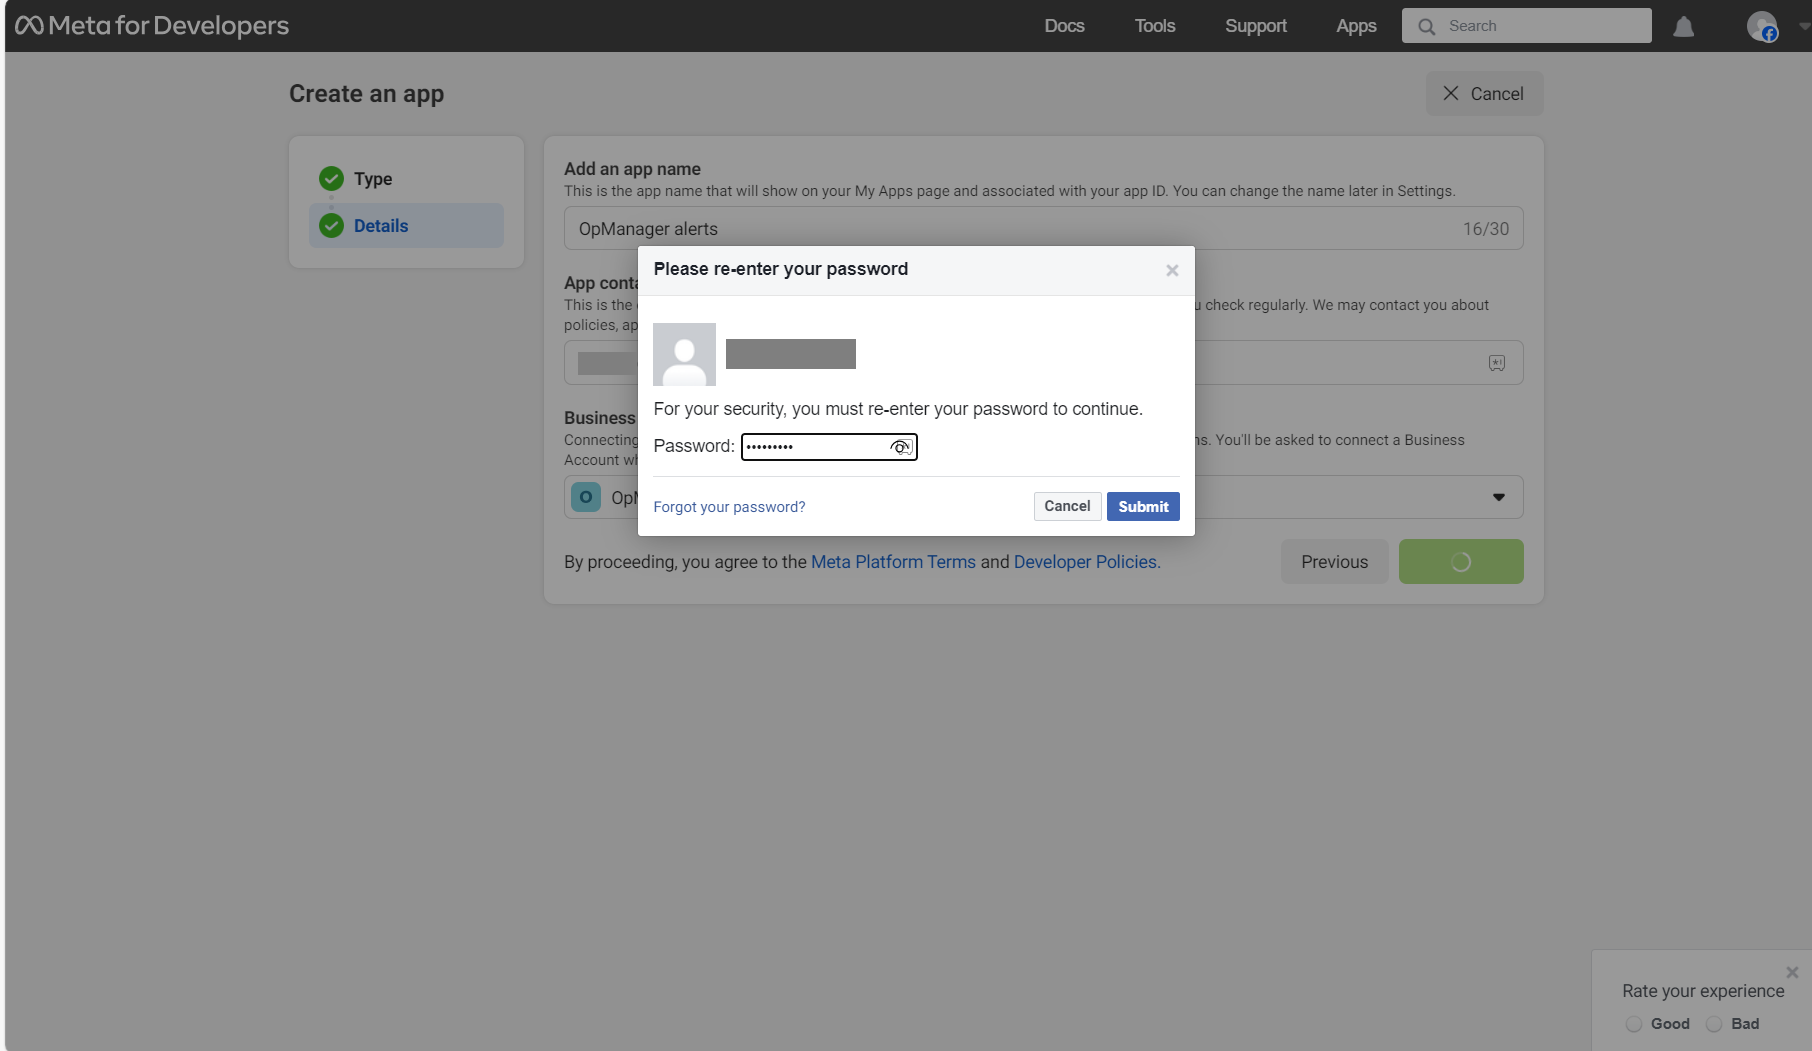
- In the subsequent screen that appears, click on the "Set Up" option that appears at the bottom-right of the WhatsApp section.
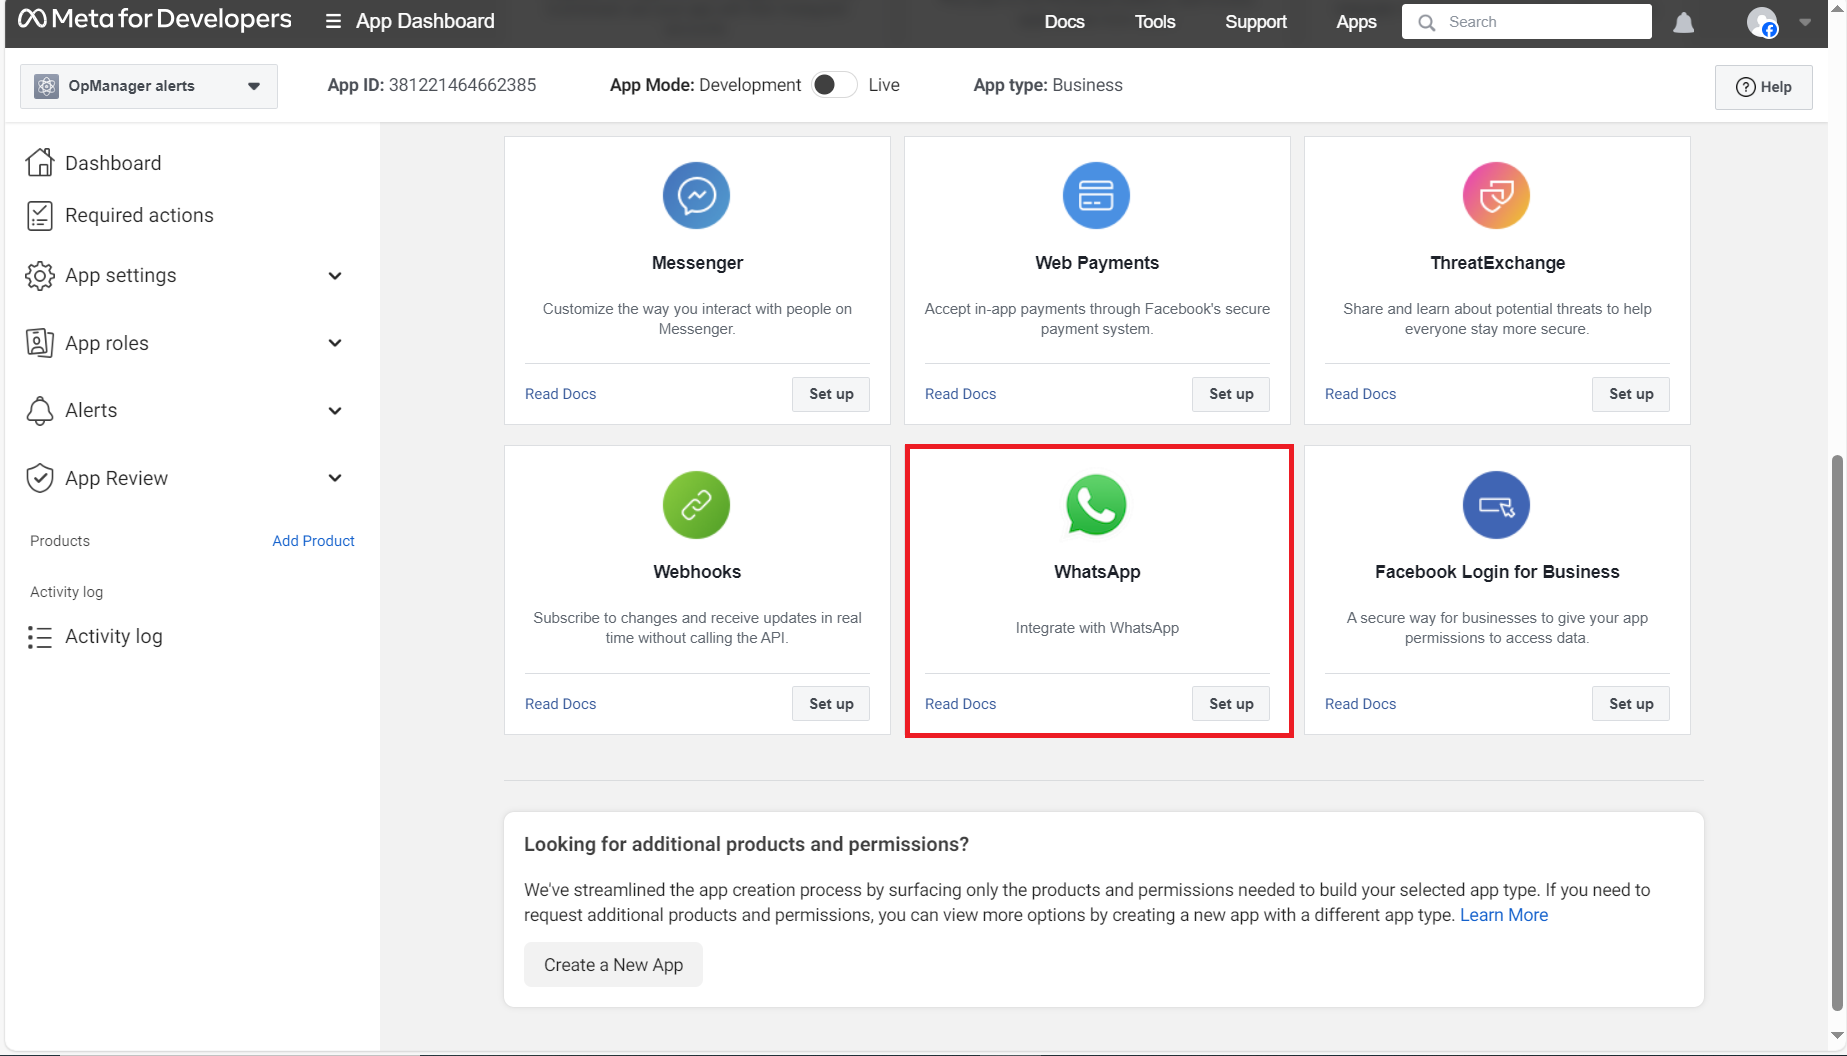
- Select a business account and click on "Continue".
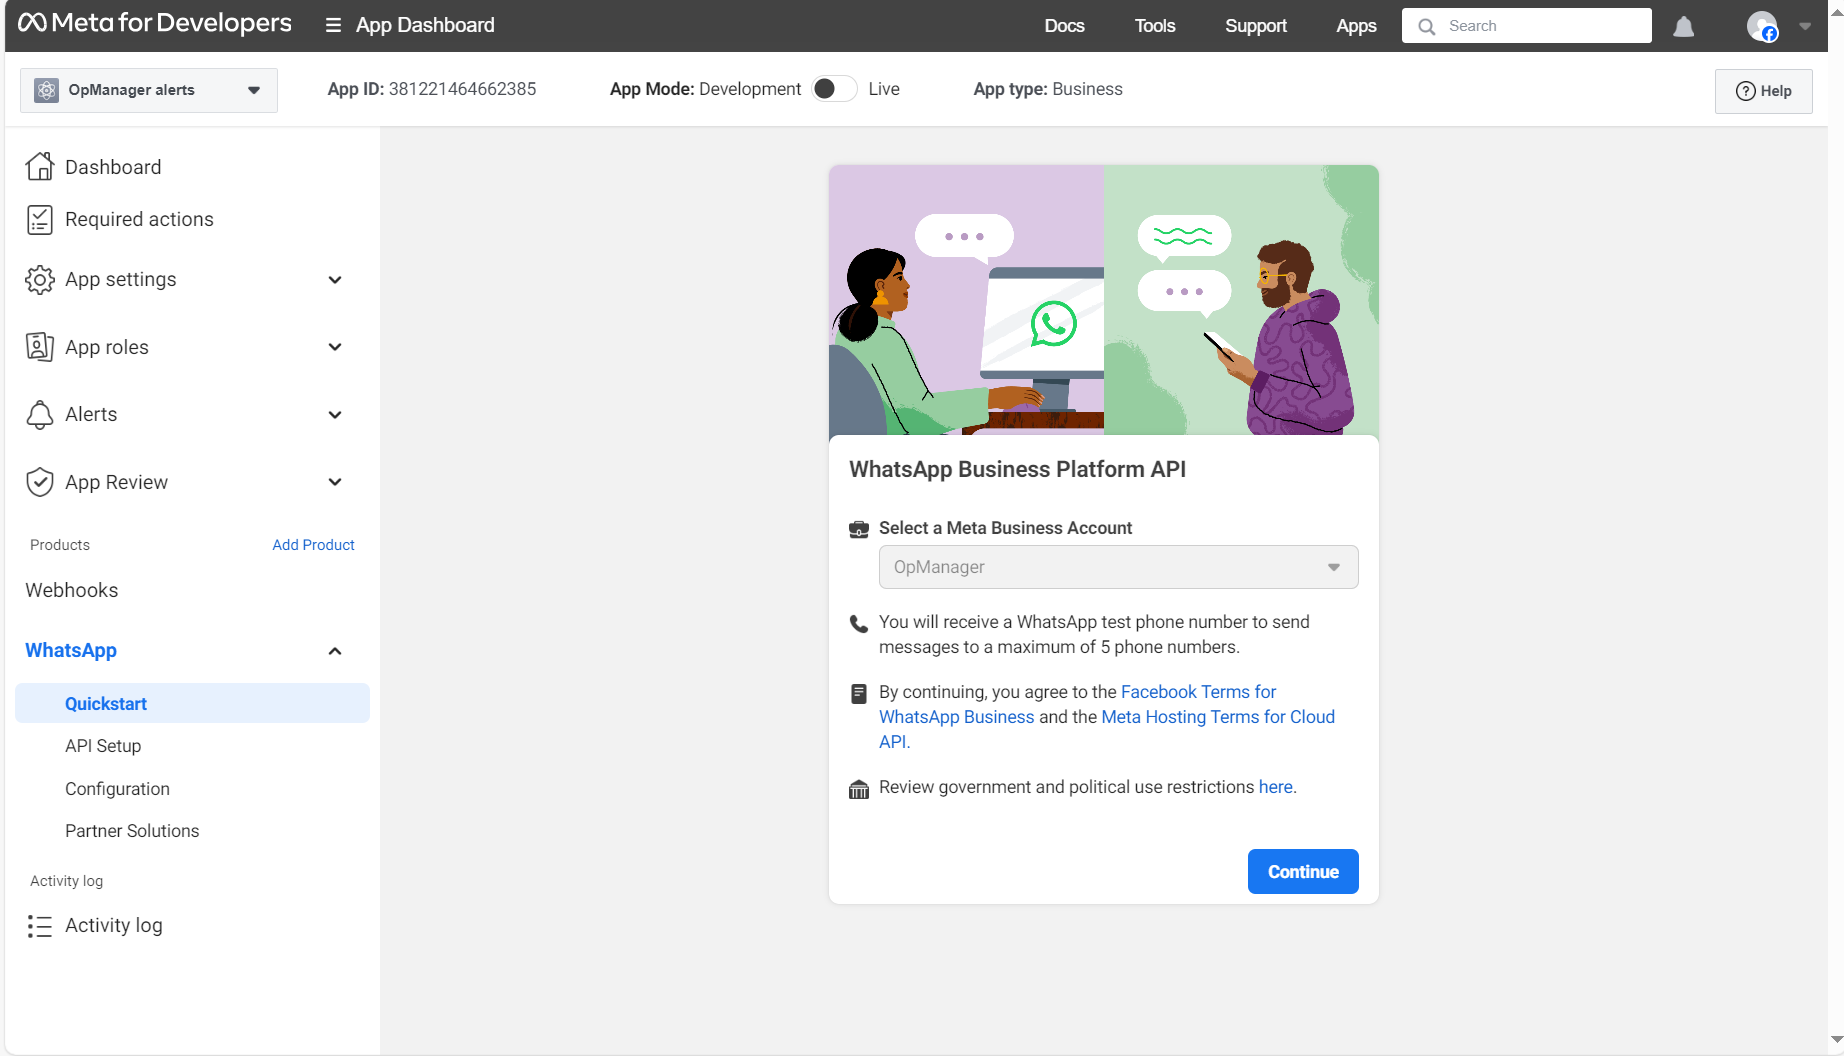
- You will now be redirected to the WhatsApp quickstart screen.
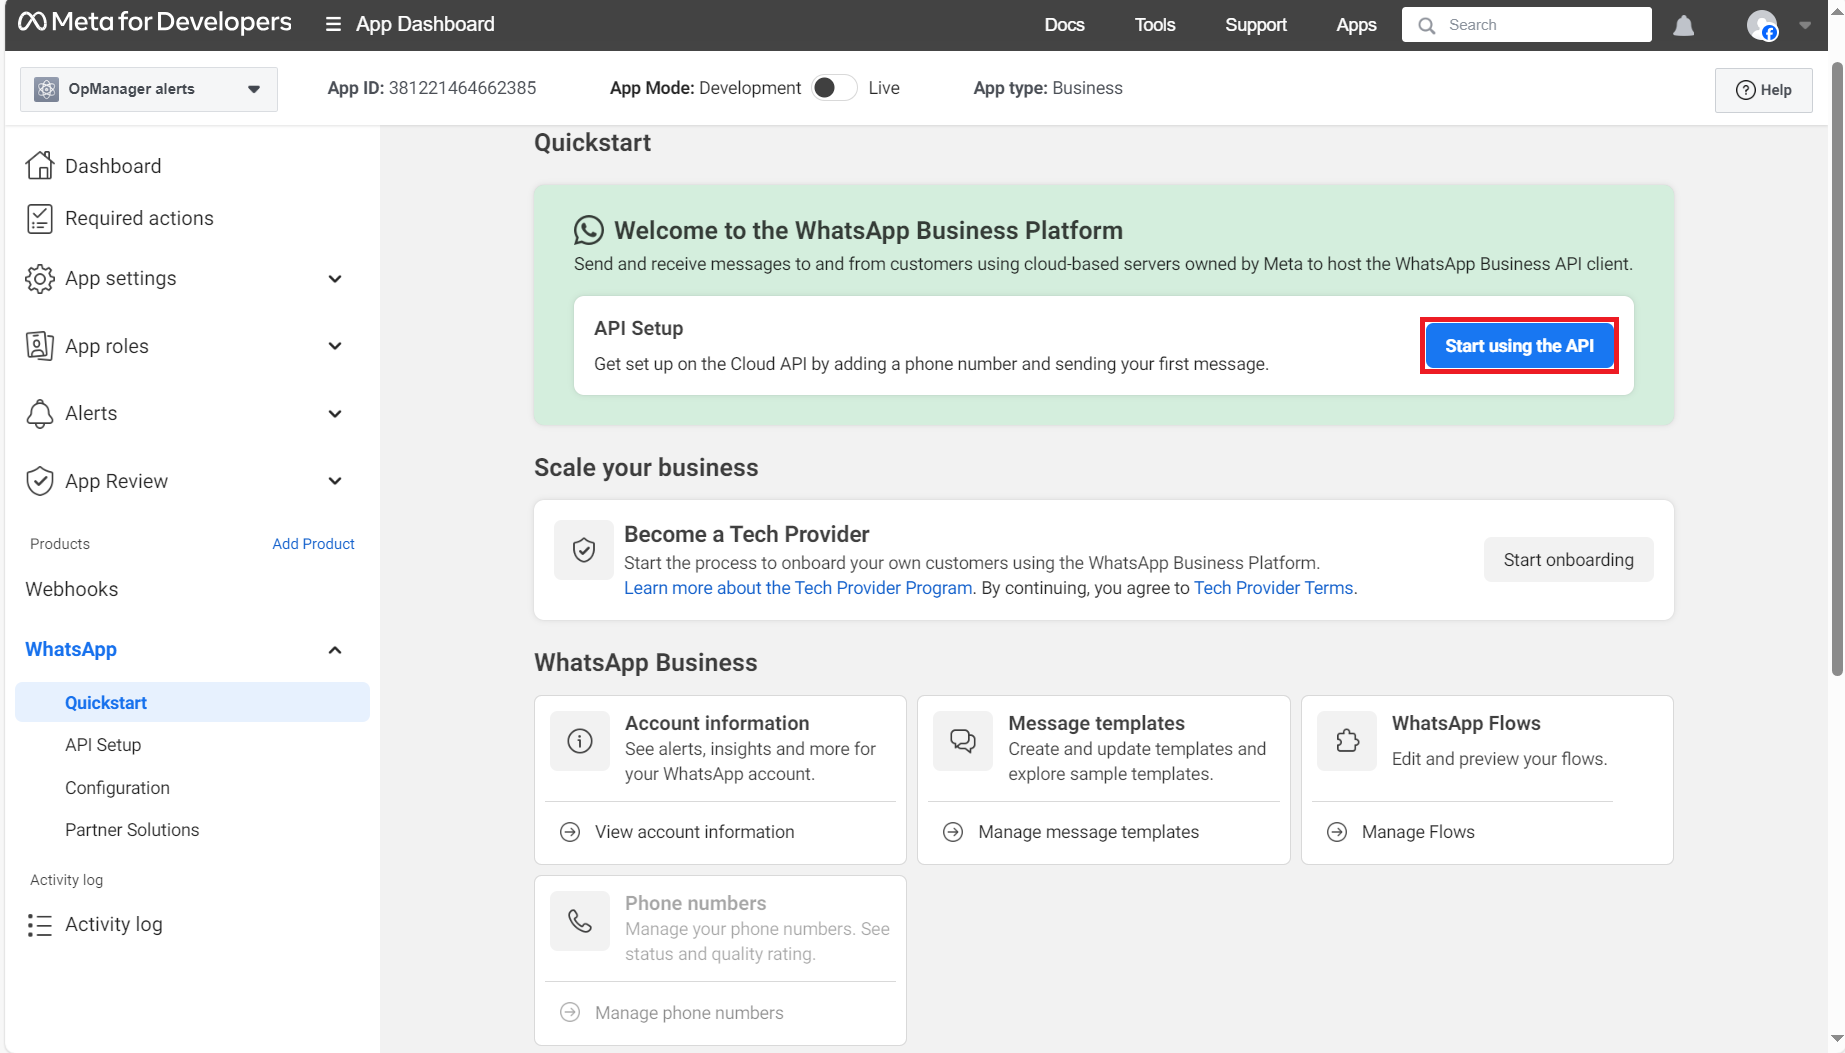
- Now, click on the "Start using the API" option that is found in the WhatsApp quickstart screen.
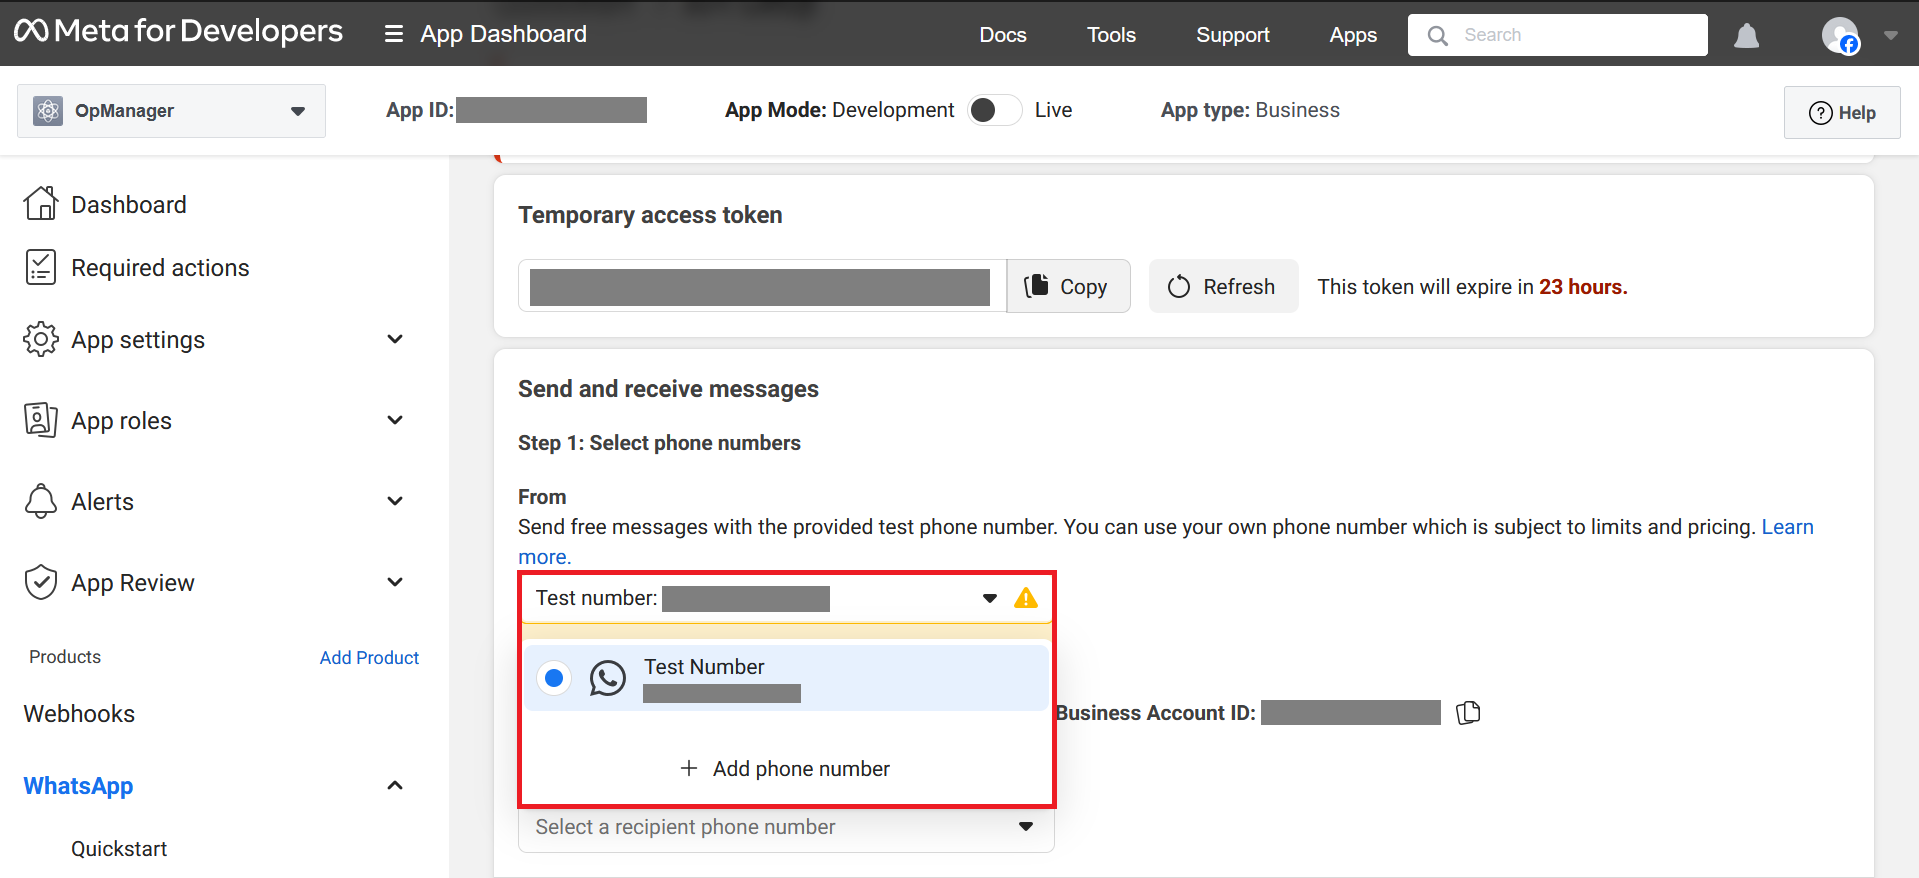
- Under the "Send and receive messages" section, select the "Add phone number" option from the "From" dropdown box(Highlighted in the below screenshot).
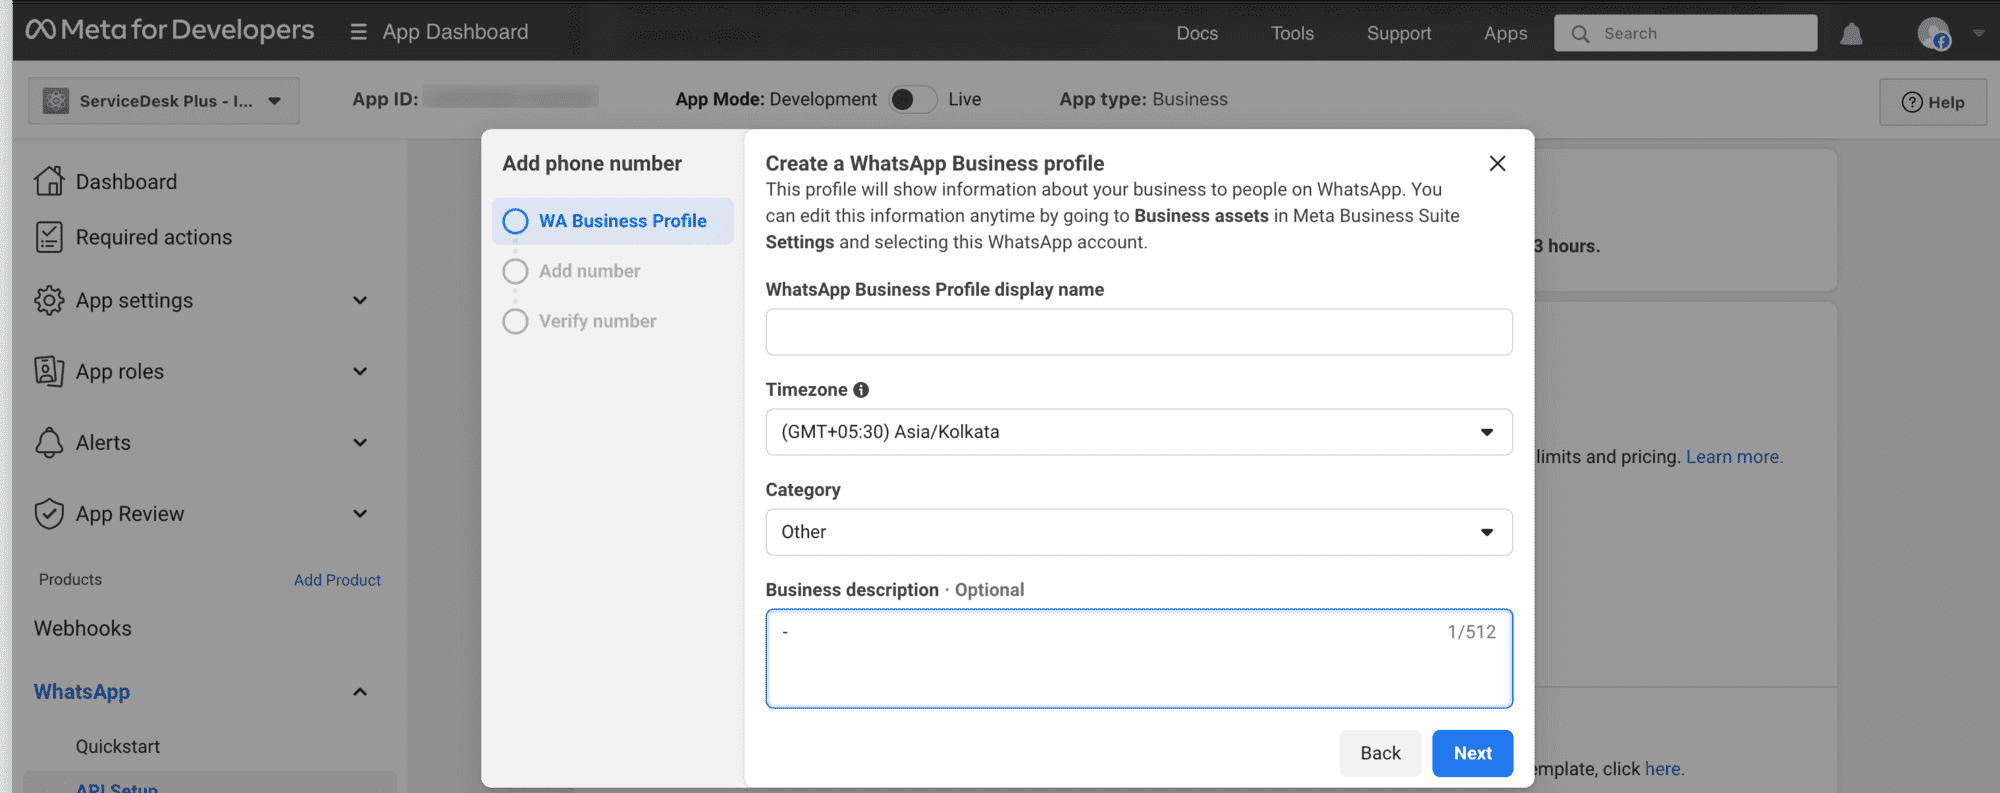
- Now enter the WhatsApp business profile details, and enter the name as "OpManager".
- Choose the business category as "Other", and click on "Next".
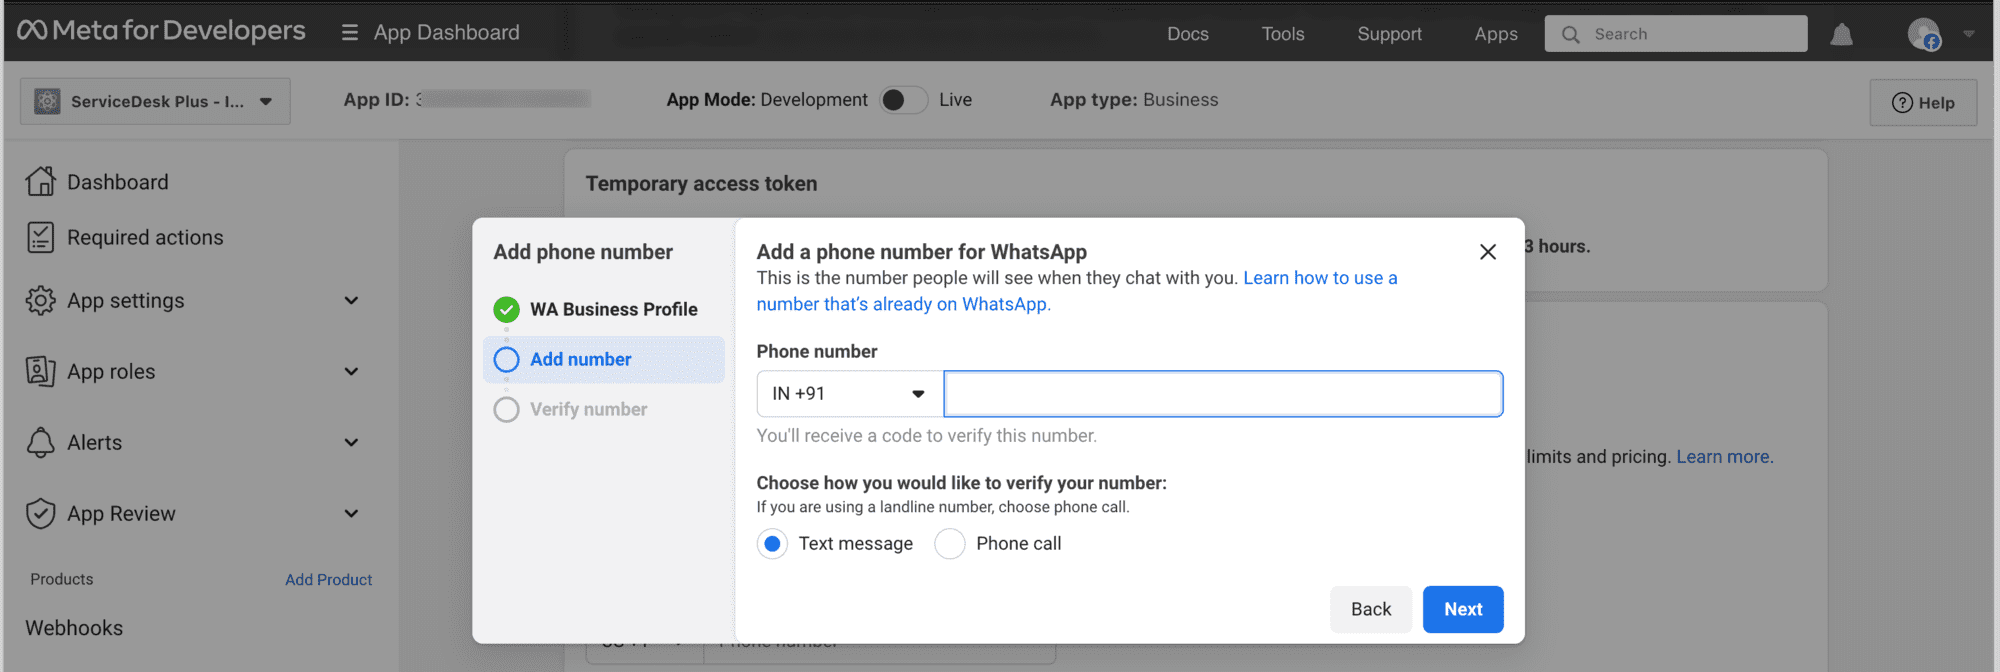
- Now, enter your WhatsApp business number, and choose the mode of verification.
- Once the number has been verified, then it can be used to send messages.
- Now, copy the URL found in the terminal below.
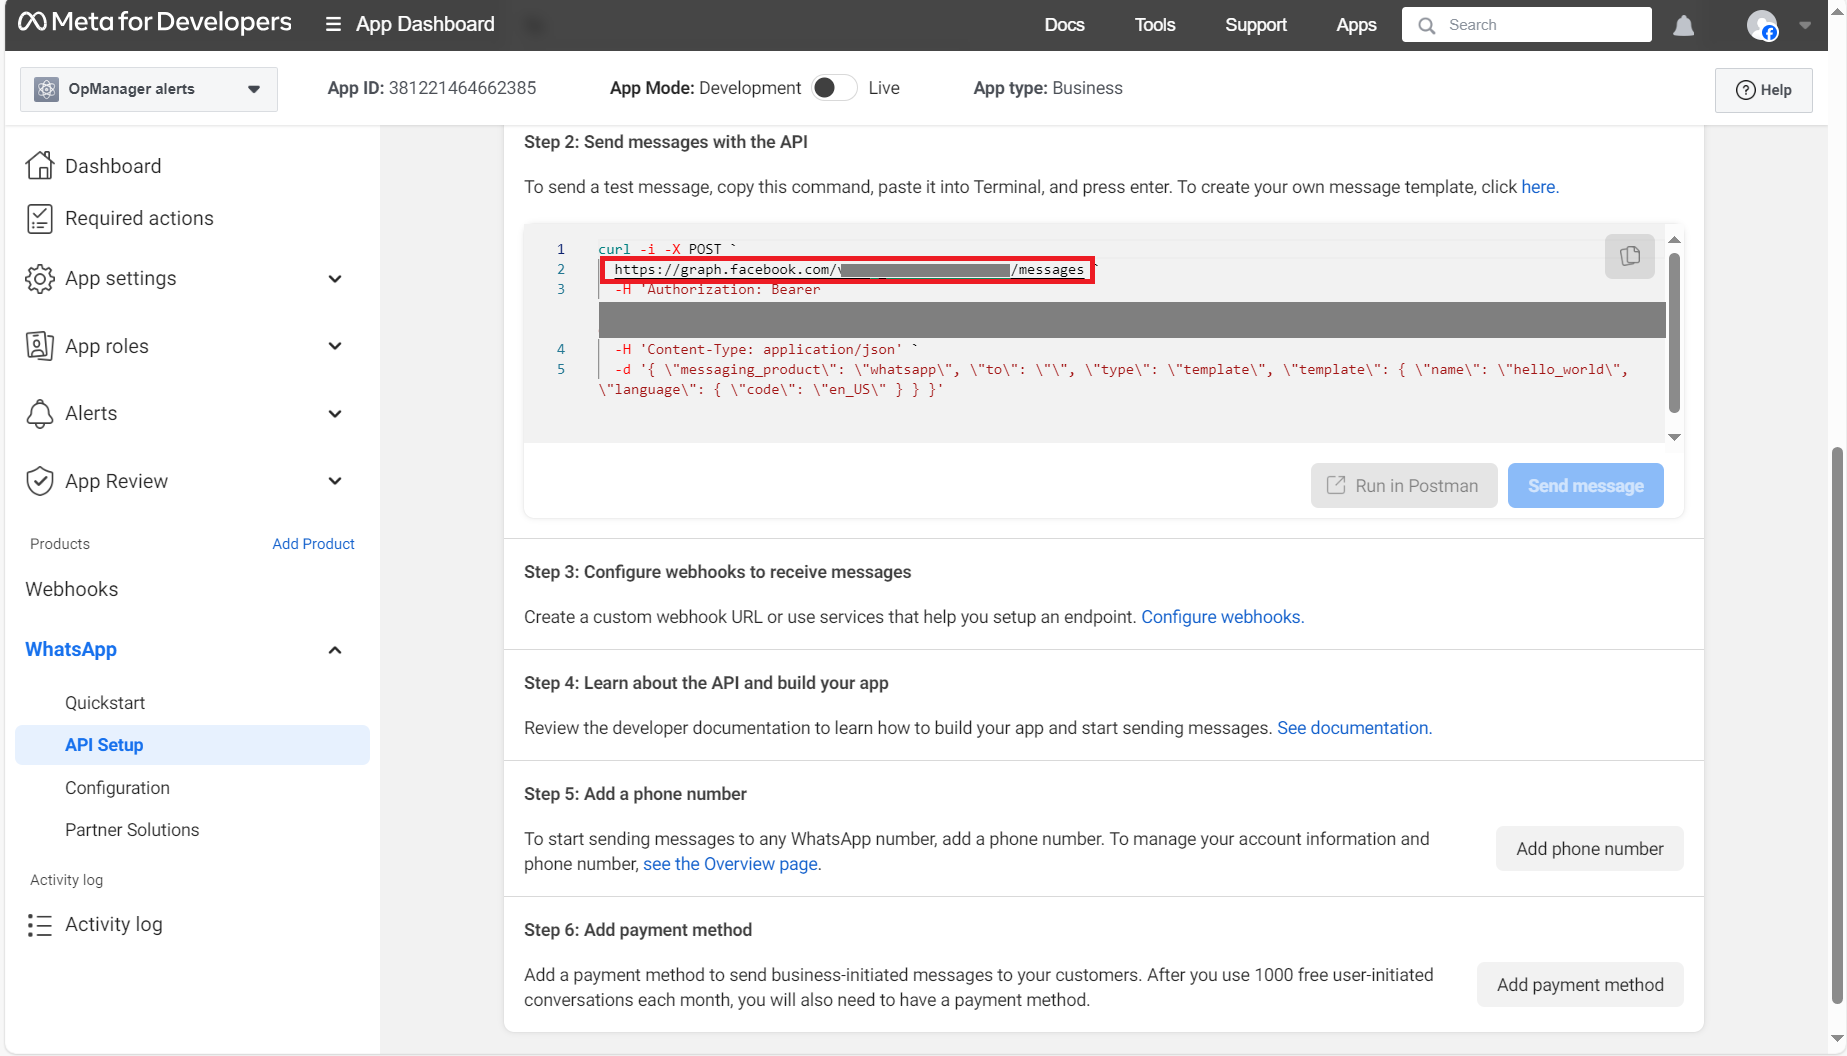
- Open the meta business account, and go to the "Business settings" page.
- Now, under the "Users" section, get to the "System Users" tab, and click on the "Add" button.
- Provide the name of the user as "OpManager" and grant them "Employee" access.
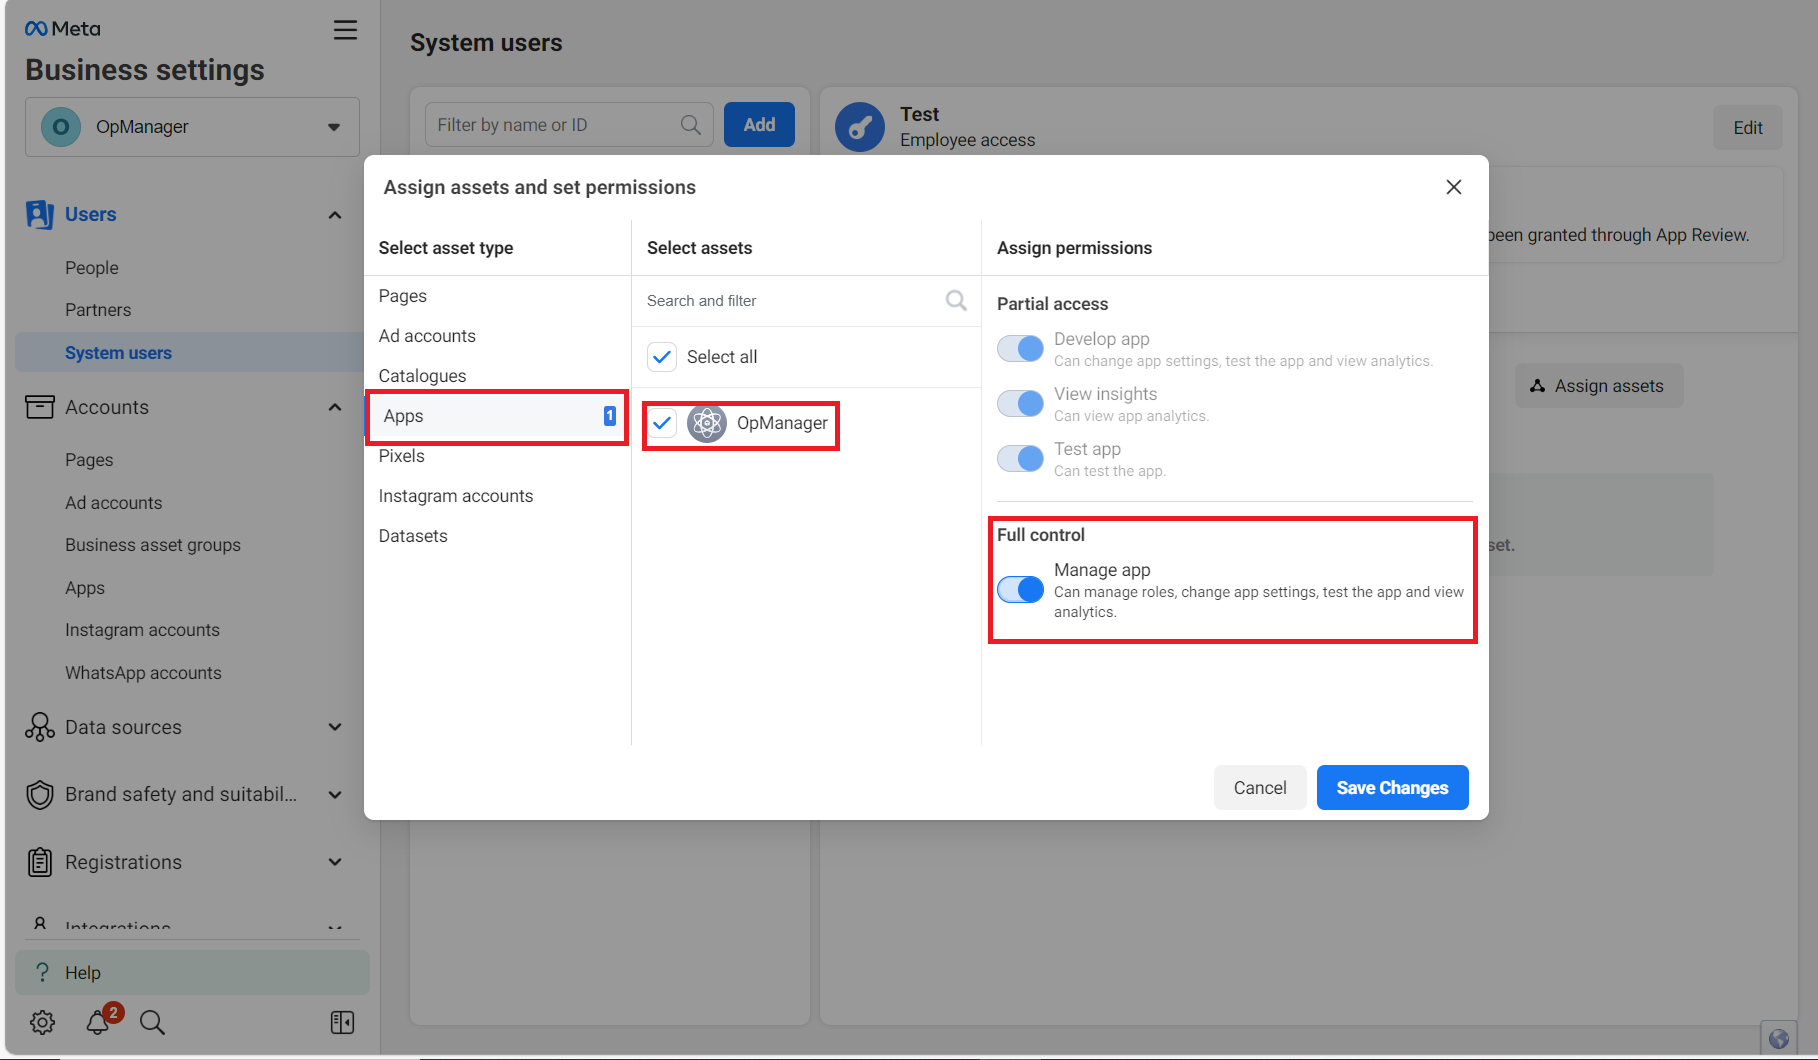
- Now that the user has been created, you have to assign the app as an asset.
- Now, click on the "Assign Assets" option, and then click on "Apps". Now, choose the app that you just created (i.e. OpManager), and enable "Full Control".
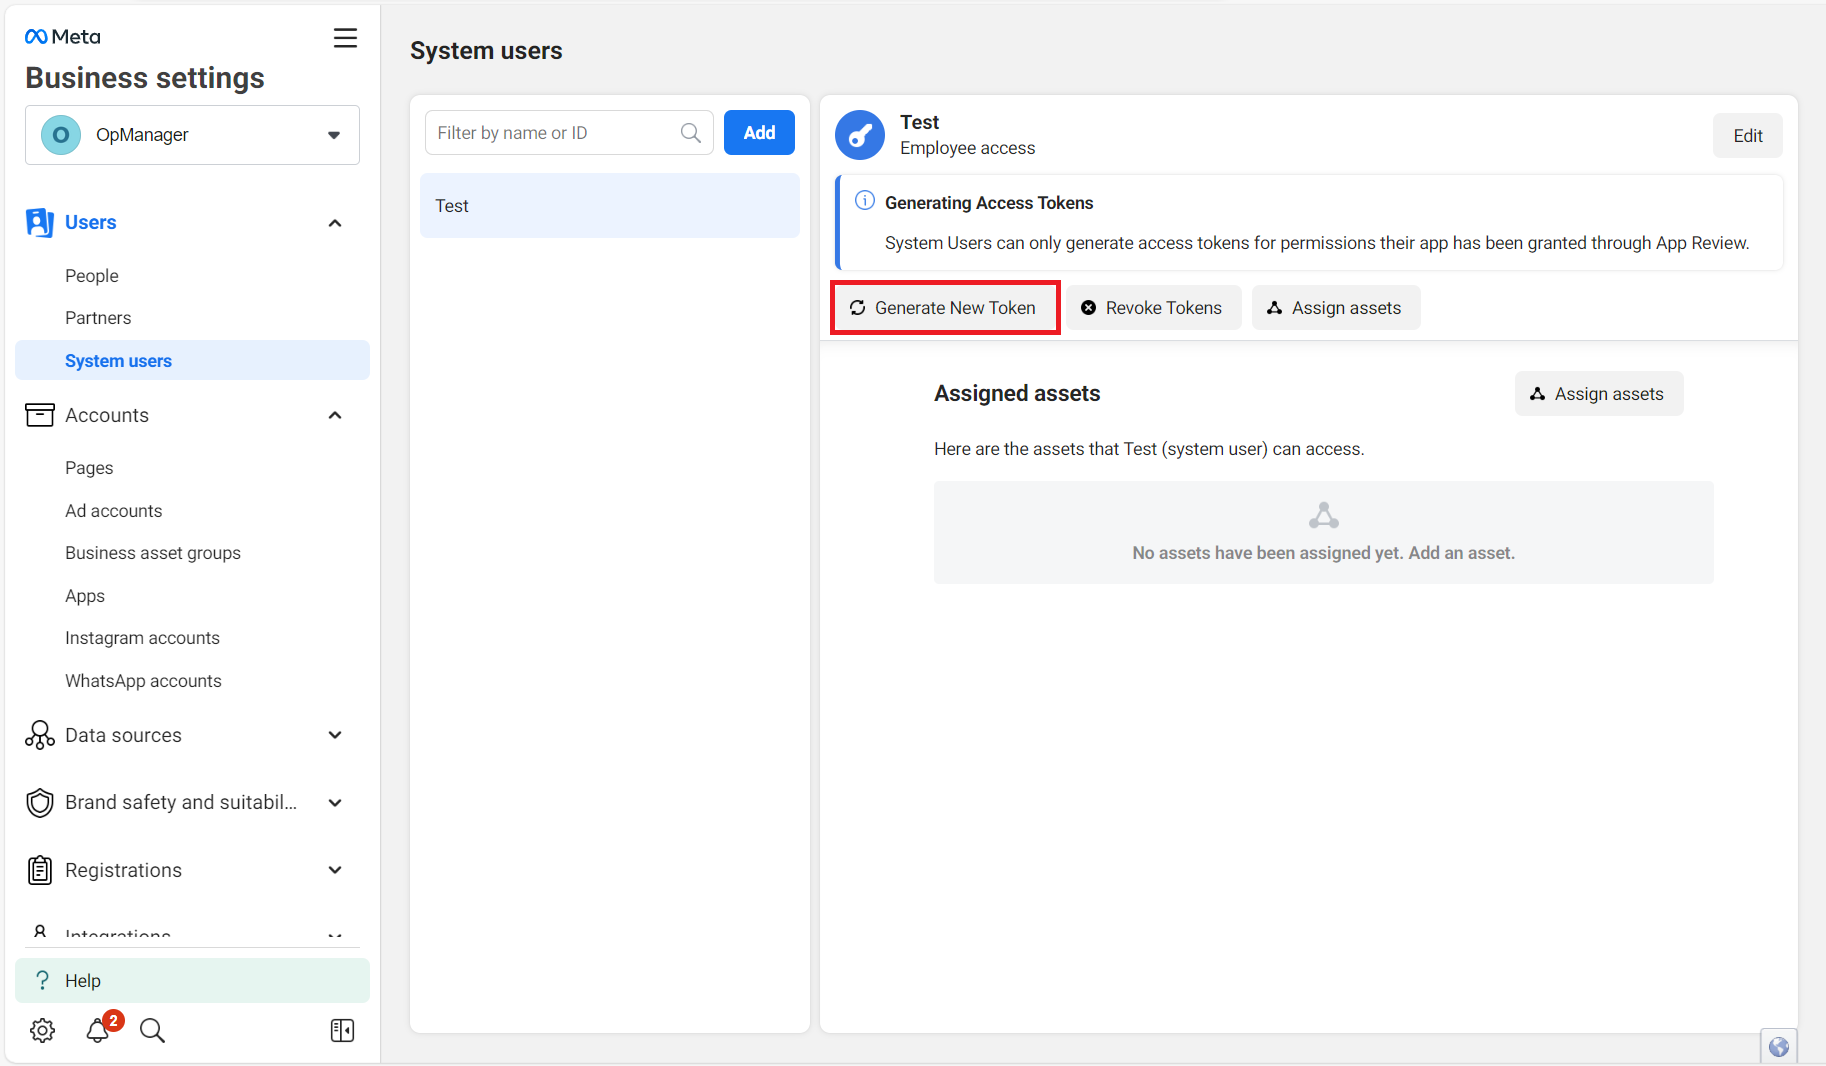
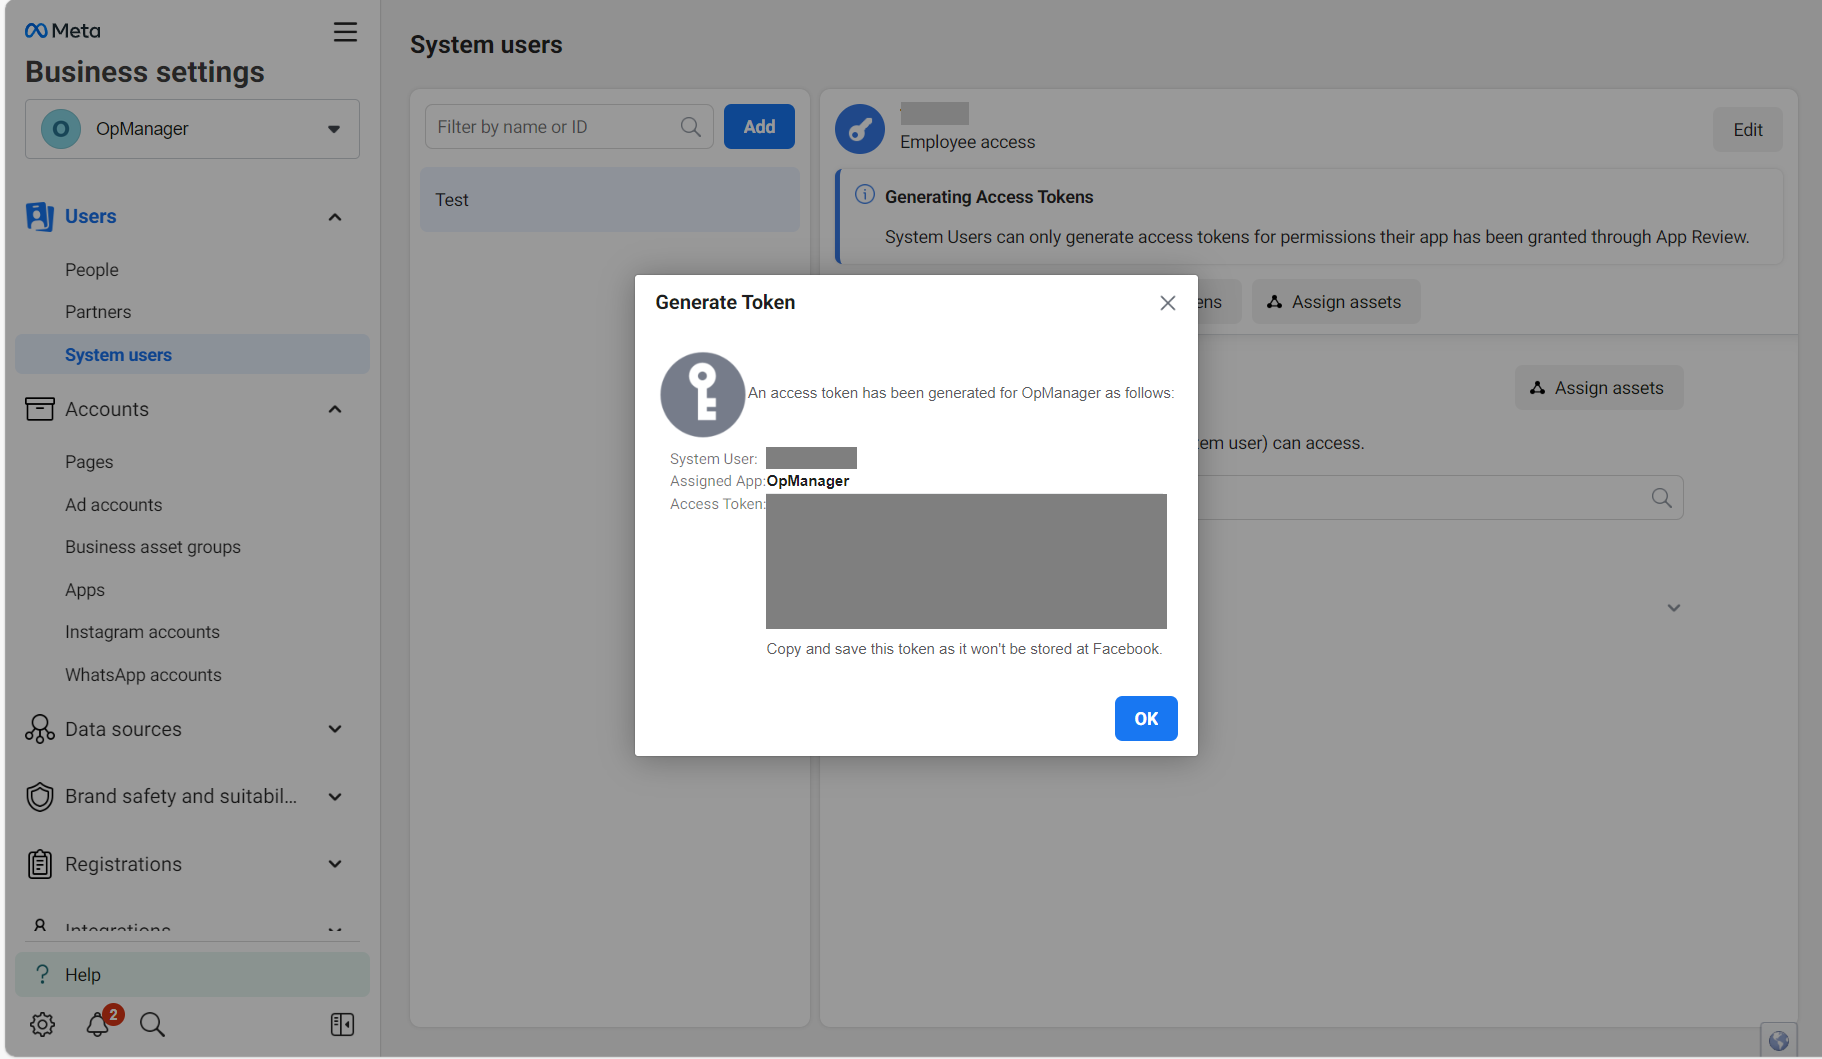
- Once again, go to the "Users" option found under the "System Users" section, and select the created user.
- Now, click on the "Generate New token" option.
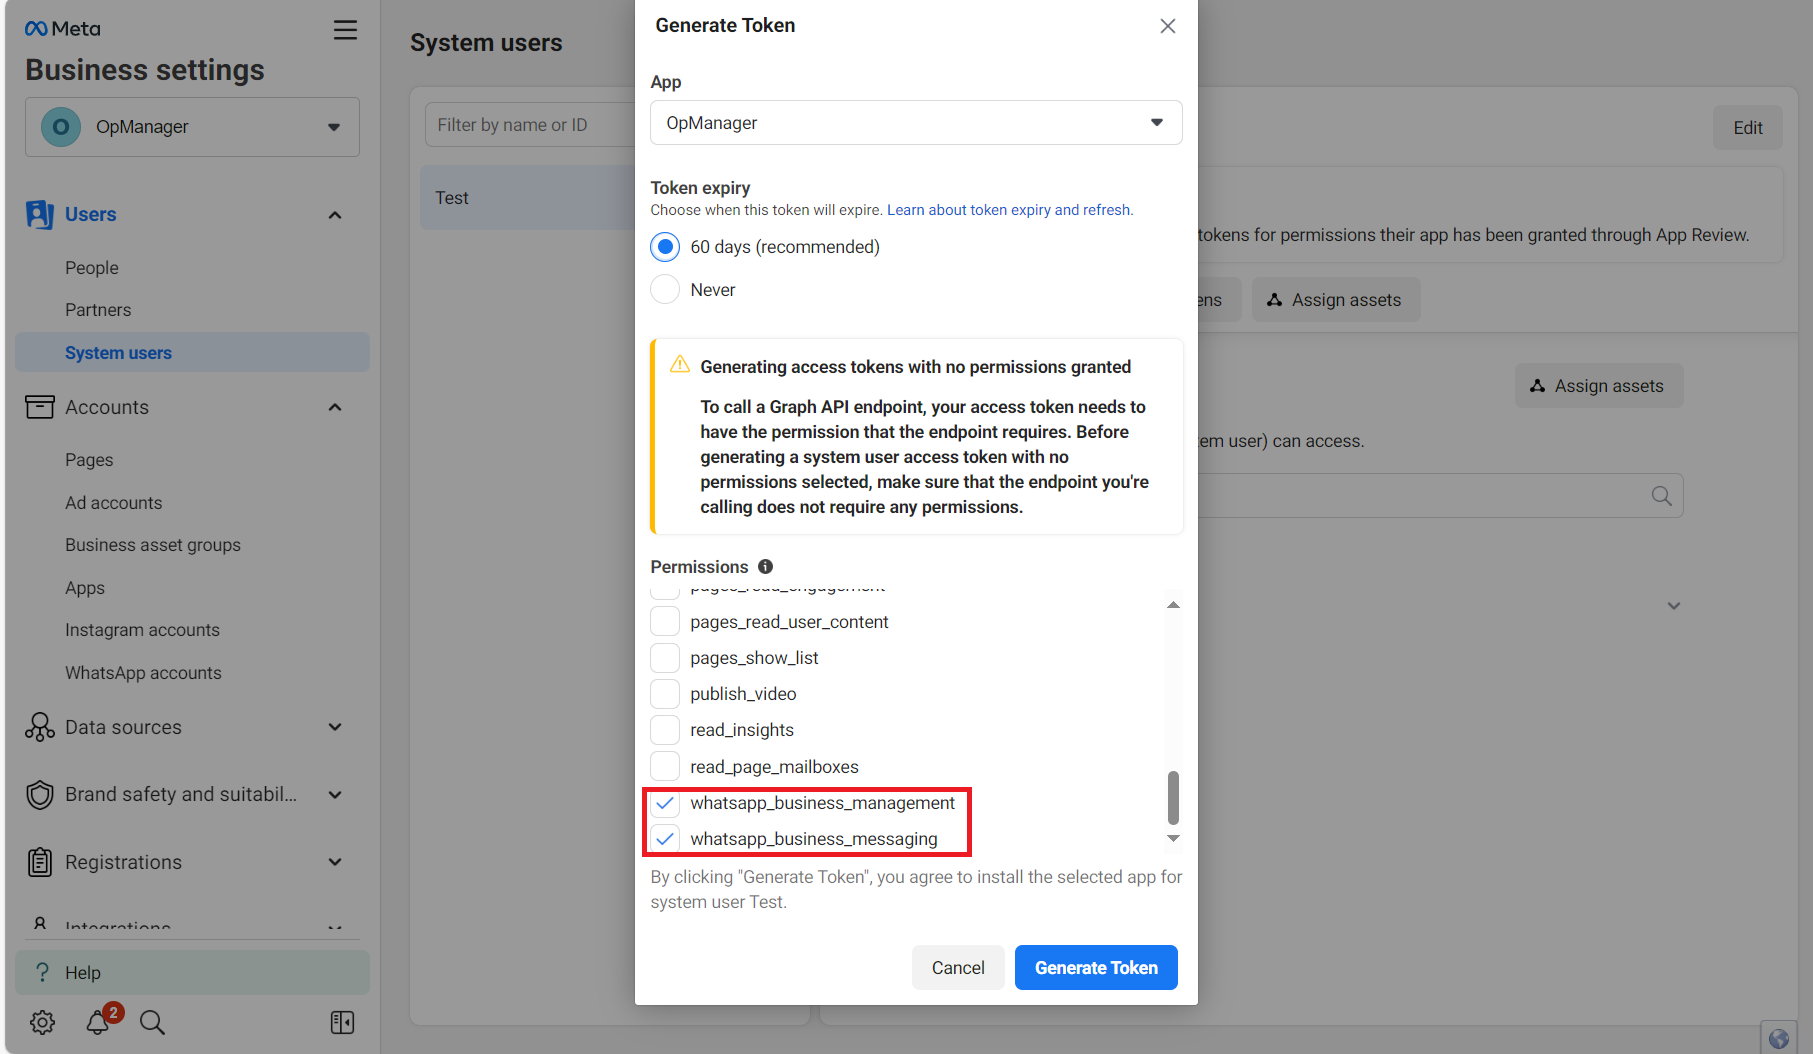
- Now, select the app from the drop-down, and choose the expiry time for your token.
- Enable the following two permissions: WhatsApp_business_management, and WhatsApp_business_messaging
- Now, click on "Generate Token".
- Copy and save the token.
Follow the below steps from the OpManager console.
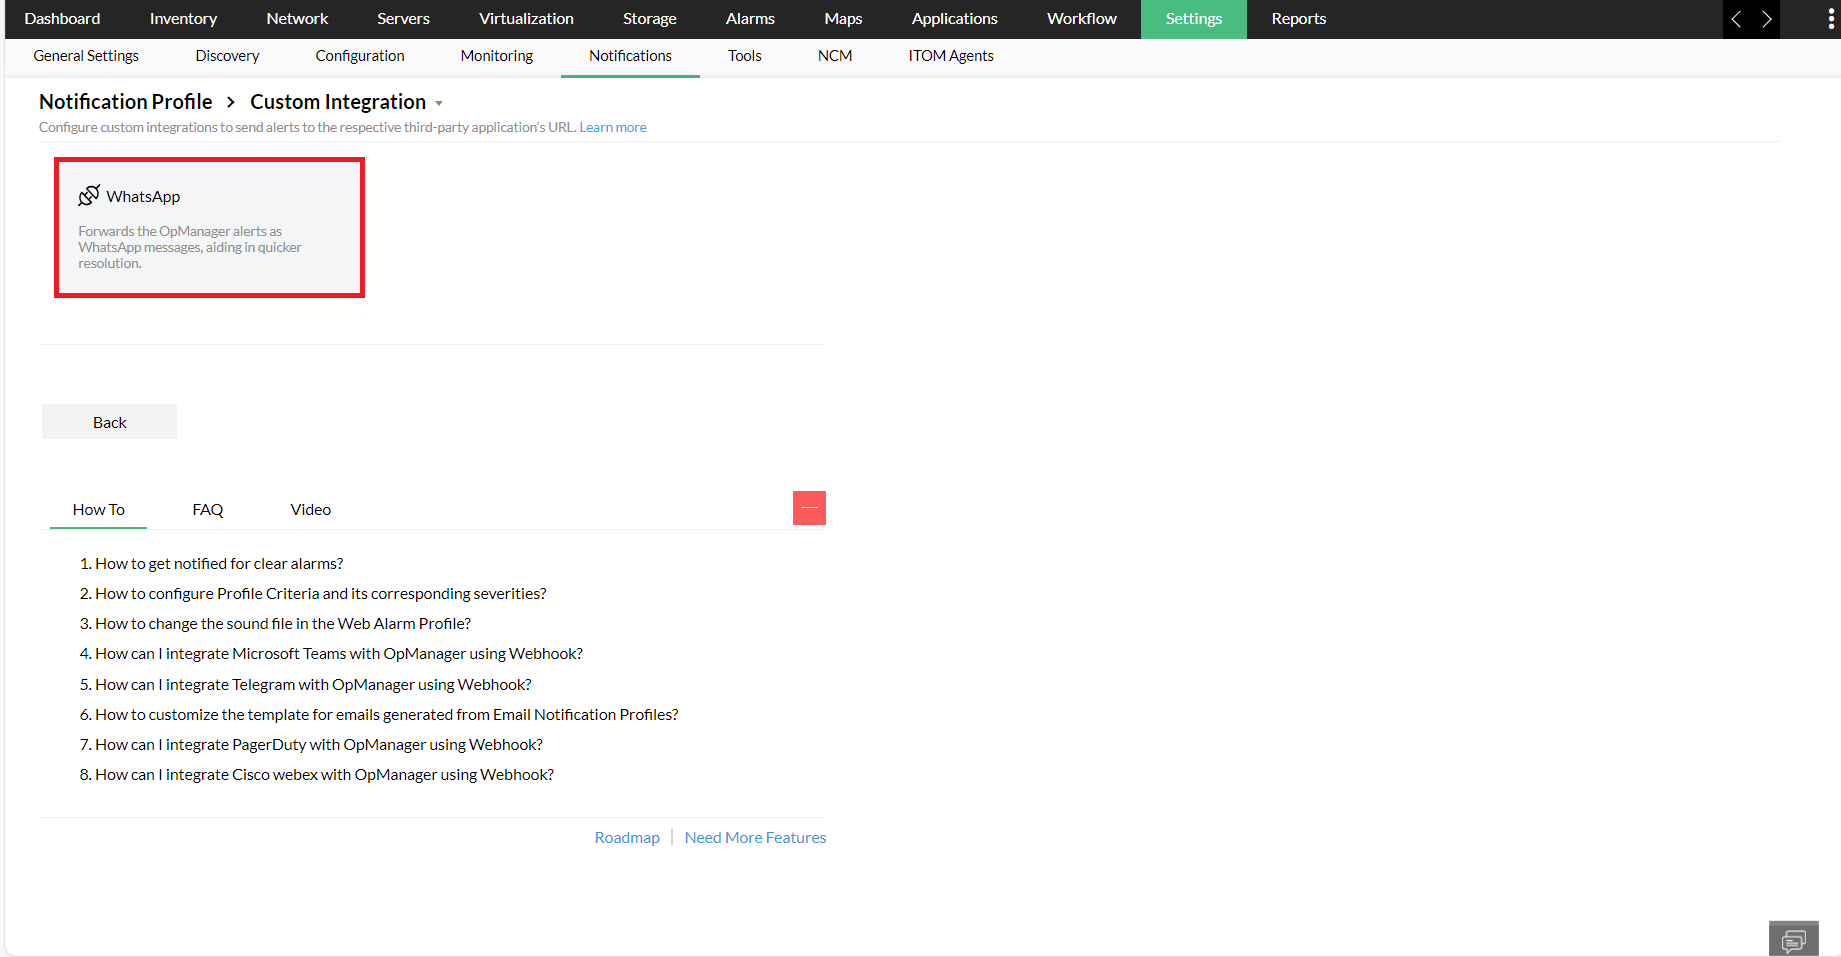
- Go to Settings -> General Settings -> Integrations -> New Custom Integration
- Give a name and description for this integration profile.
- Select the Integration type as "Chat".
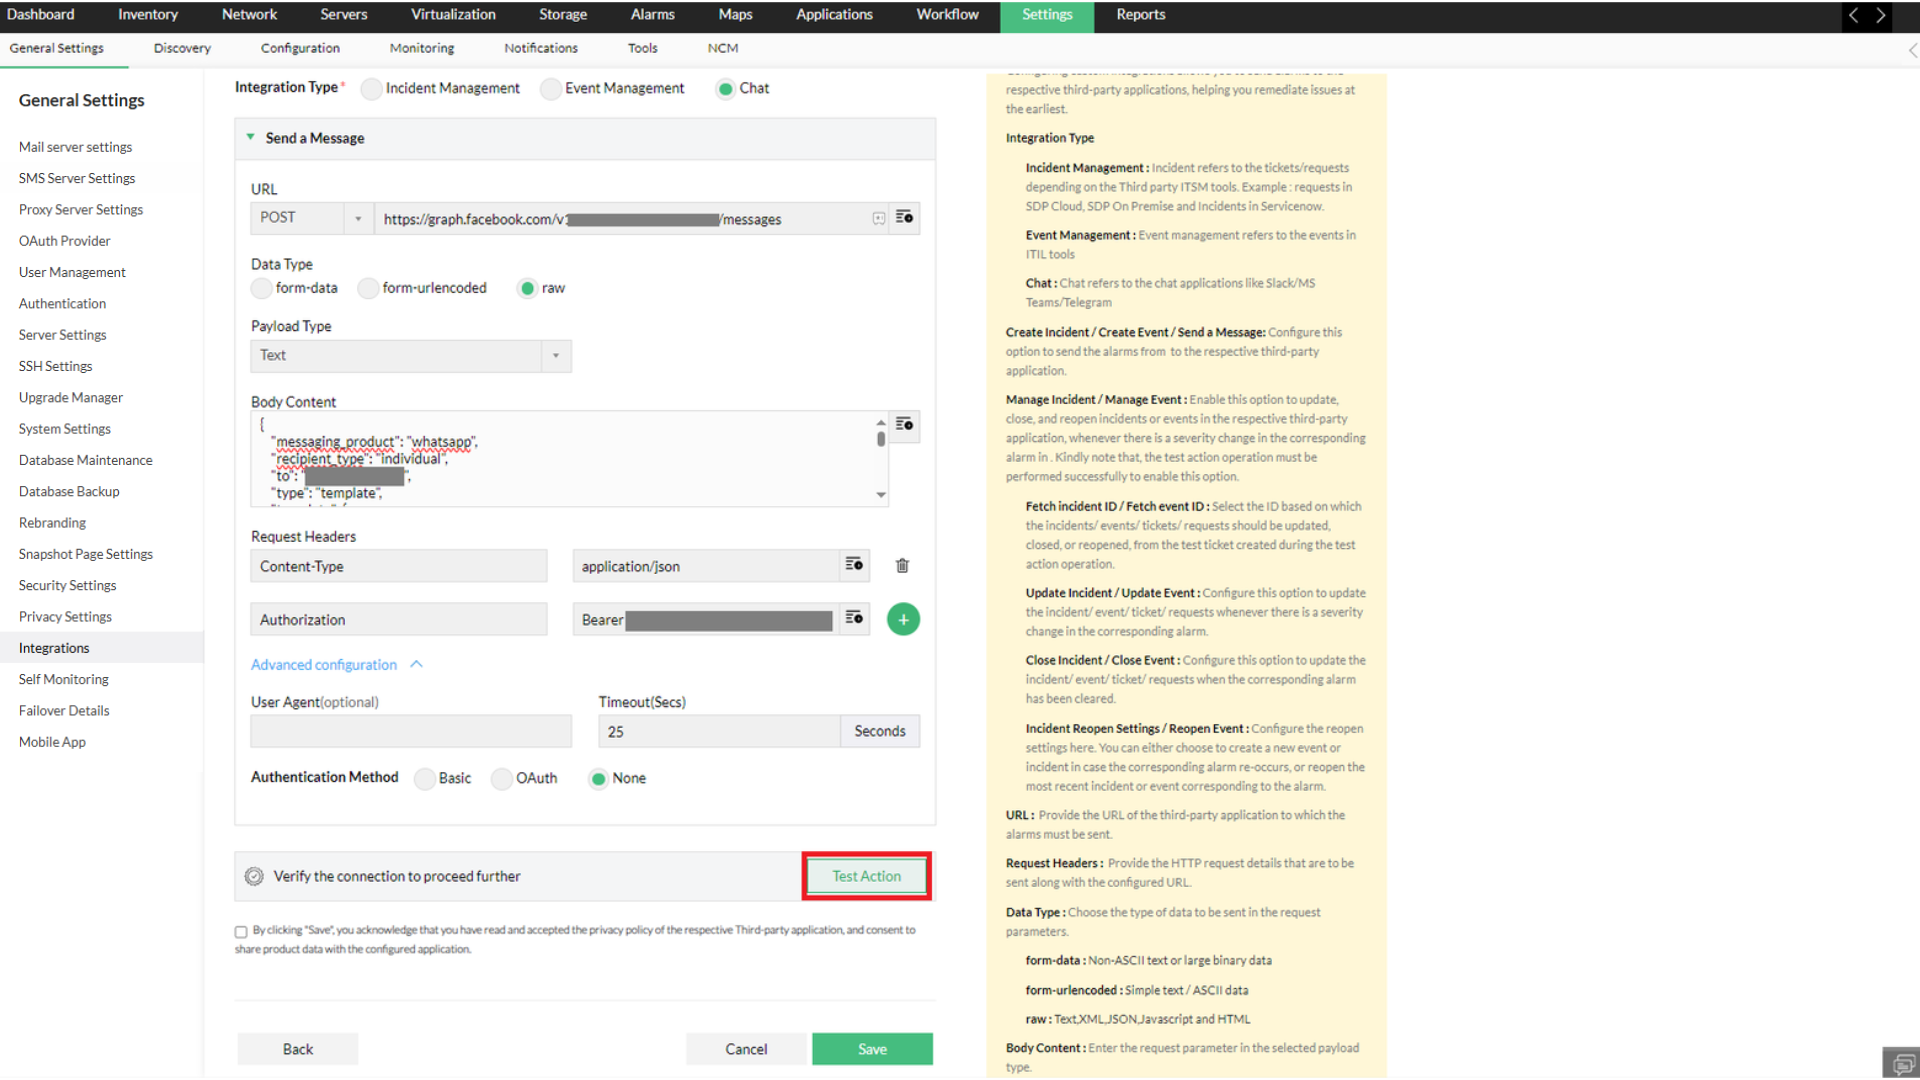
- Under the "Send a Message" section, choose the POST method, and enter the integration URL that we obtained earlier, from here.
- Choose the "Data Type" as raw, and the "Payload Type" as JSON.
- Under the body content, define the input variables that you defined under the body content of Message templates in Meta Business page. Click here to know more.
- Under the request headers, declare the value of "Content-type" as application/json.
- Add another request header called Authorization. In its value field, enter the following: Bearer<space><App token created from Meta Business Account>
- Configure the timeout value.
- Use the "Test Action" button to verify the connection.
- Once the test action is successful, select the checkbox stating that you have read and comply to the terms and conditions of the respective third party application you are integrating OpManager with, which is WhatsApp in this case.
- Click on Save.
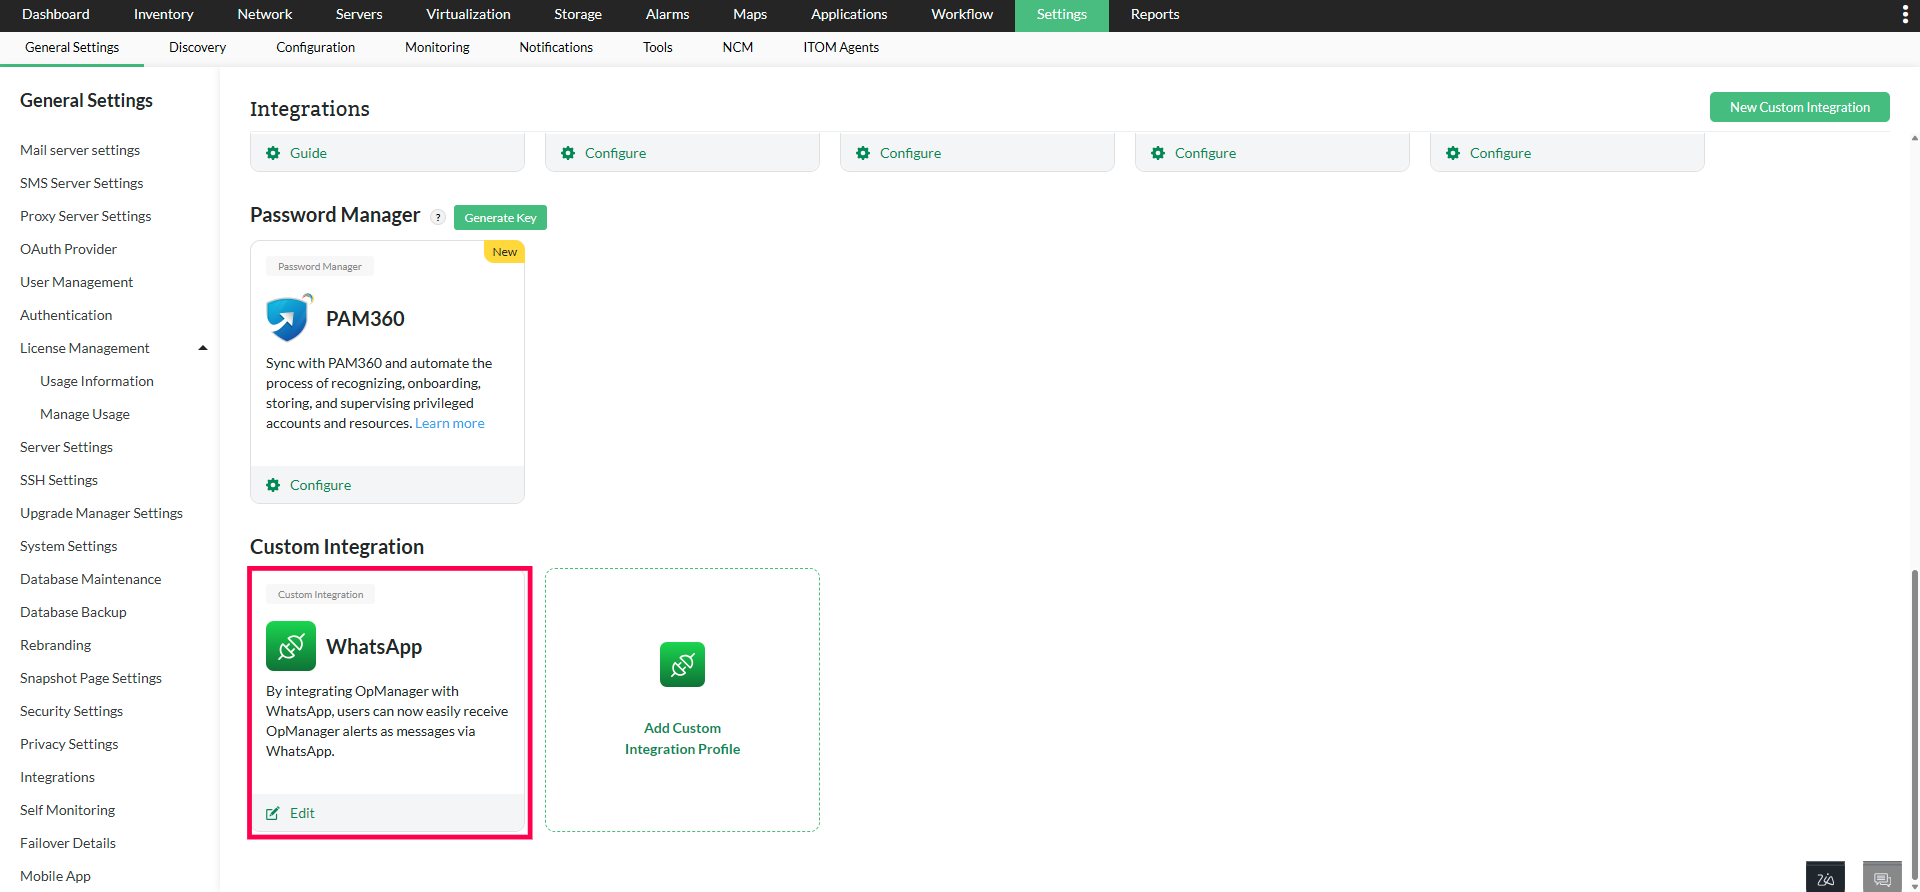
- Now that OpManager has been integrated with WhatsApp, we have to configure notification profiles for the same.
- Go to Settings -> Notifications -> Add Profile.
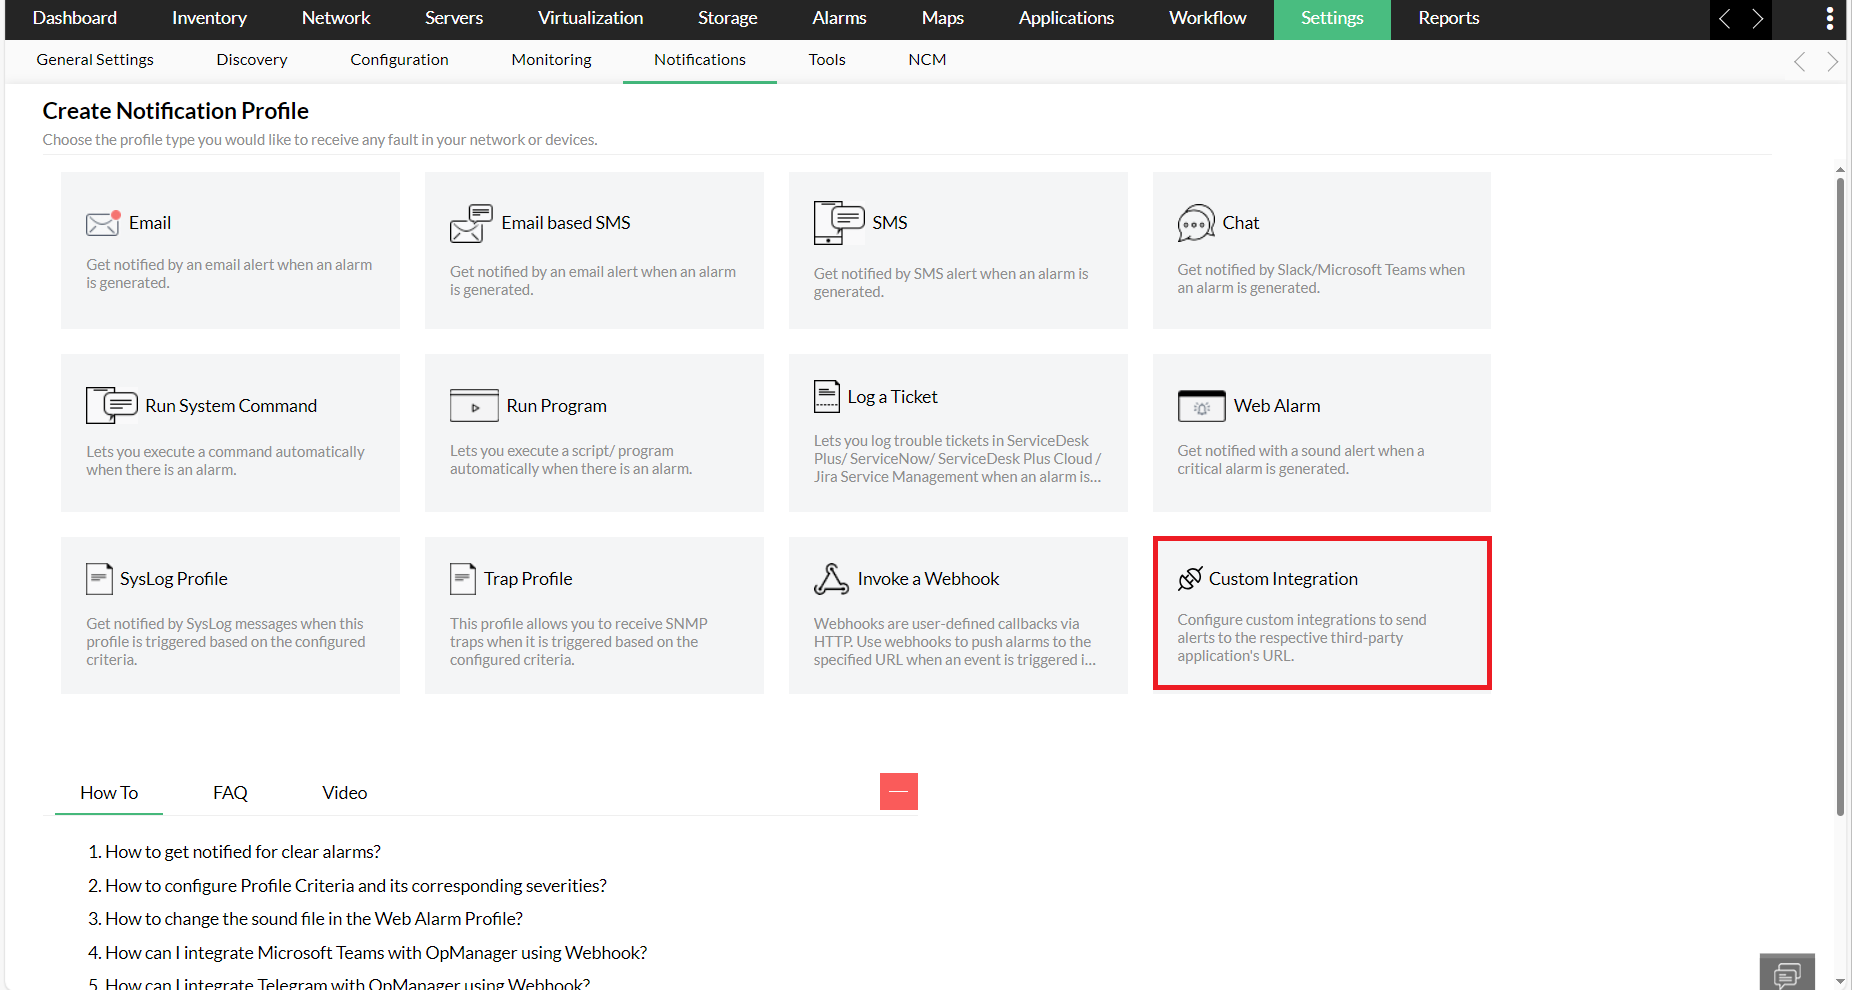
- Under the "Custom Integrations" section, select the configured profile. Click here to know more about how to configure notification profiles in OpManager.
{
"messaging_product":"whatsapp",
"recipient_type":"individual",
"to":"<PhoneNumber>",
"type":"template",
"template": {
"name":"opm_alerts",
"language": {
"code":"en_US"
},
"components": [{
"type":"body",
"parameters": [{
"type":"text",
"text":"$displayName"
}, {
"type":"text",
"text":"$message"
}
]
}
]
}
}
- recepient_type: Must be individual
- to: Enter the phone number to which the alerts from OpManager should be forwarded as WhatsApp messages.
- type: Must be template
- name: Must be the name of the message template that was created with Meta business account (opm_alerts in the example used).
- code: Enter the code of the language in which you want to receive OpManager alerts. (en_US in the example used)
- type (Under components): Must be body
- type (Under Parameters): Enter the text that needs to be sent along with the alerts. (Since we have used two variables in our examples)
- Text 1: Enter the first variable of the parameter that has to be sent as WhatsApp messages. ($displayName in the example used)
- Text2: Enter the second variable of the parameter that has to be sent as WhatsApp messages.($message in the example used).
NOTE: Apart from the above variables, you can also send other variables via WhatsApp.
Click here to know about the list of supported OpManager dynamic variables.
OpManager has now been successfully integrated with WhatsApp, and you can receive OpManager alerts via WhatsApp messages.
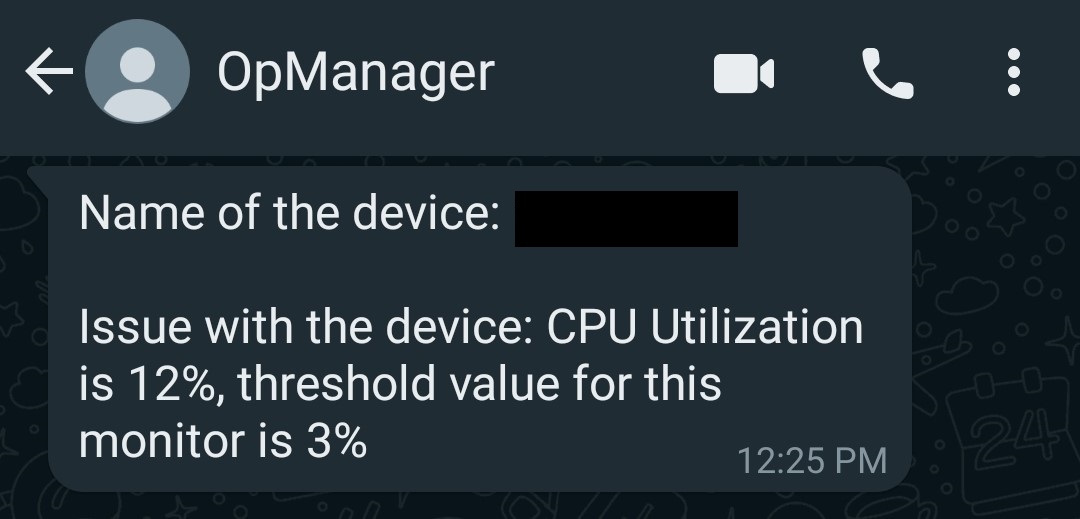
Click here to know about WhatsApp's pricing, and for information regarding messaging limits, click here.
Thank you for your feedback!