How to share a common folder in OpManager
This help document contains the steps for sharing a common folder in OpManager in Windows and Linux.
Before sharing the common folder, ensure that the following pre-requisites are satisfied.
Prerequisites:
- The server should have high connectivity and bandwidth.
- The server in which the shared folder is created and OpManager server should be reachable.
Steps to share a common folder with OpManager in Windows
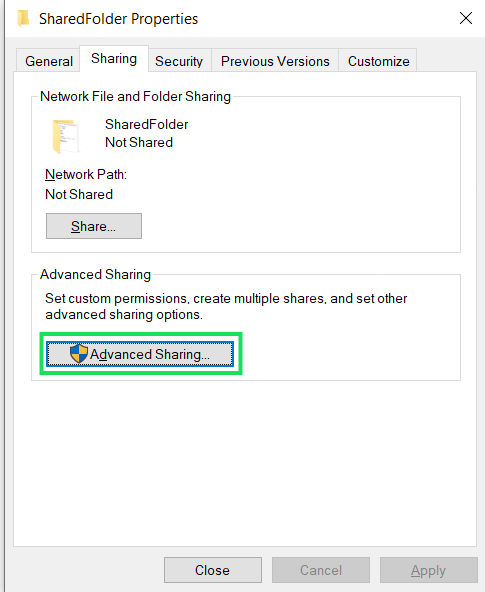
- Right click on the folder you wish to share and click on Properties.
- Under Sharing tab, Click on Advanced Sharing.
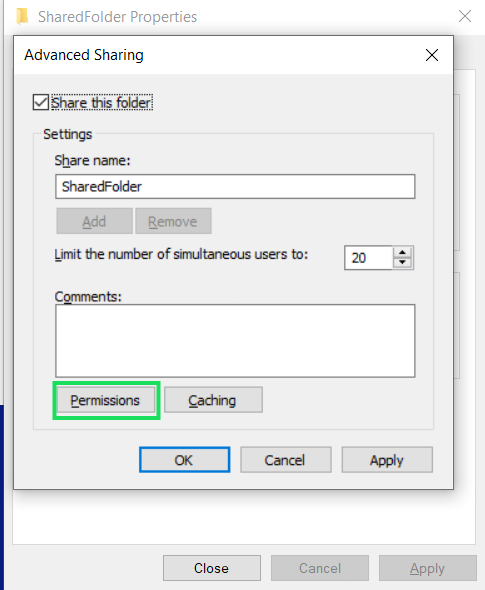
- Check the Share this folder option and provide a Share Name.
- Click on Permissions. In the window that opens, click on Add.
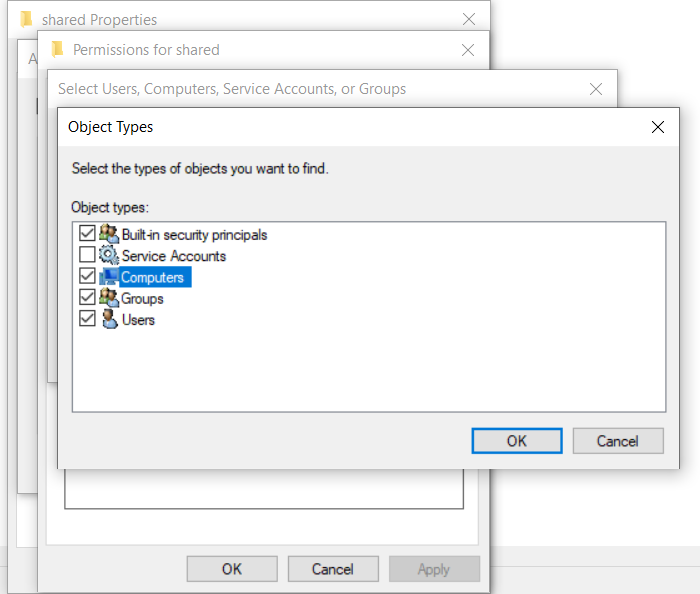
- Click on Object Types and make sure that both 'Computers' and 'Users' options are selected. This will allow you to share the file with a particular device in the network.
- Specify the server name with which you wish to share the folder. Click on Check Names to select the server name from the list and click ok.
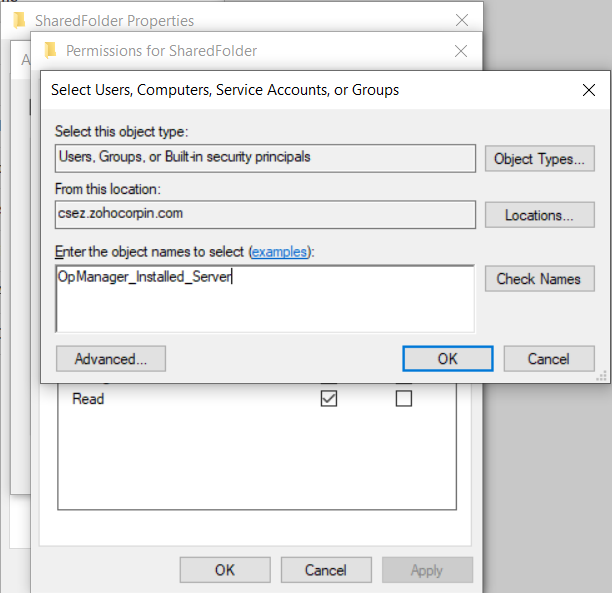
- Or you can specify the users with whom you wish to share the folder. Click on Check Names to select the user name from the list and click ok.
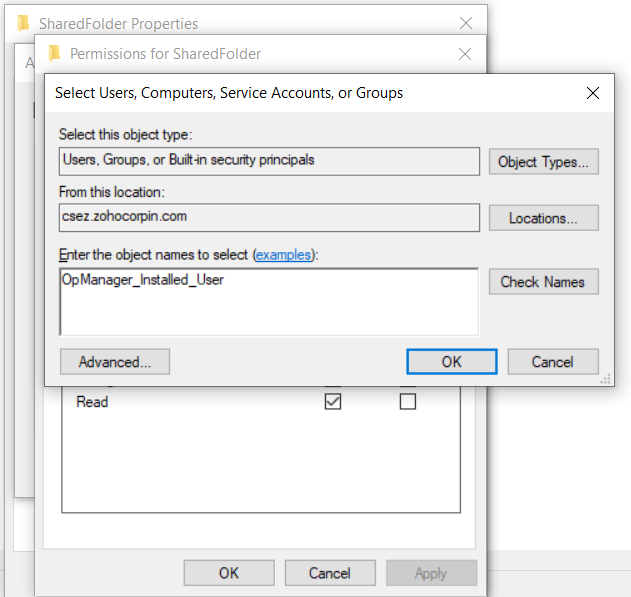
- Select the required users and servers and select the access privilege as Full Control.
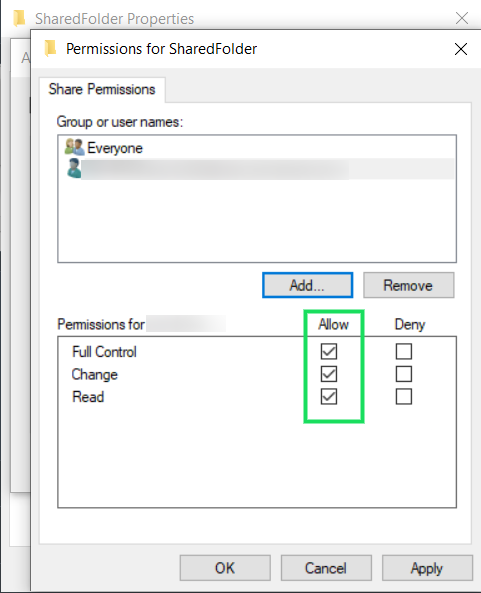
- Click on Apply
Steps to share a common folder with OpManager in Linux
In Linux installations, you can configure file sharing between your servers using Remote Synchronization (Rsync). It can be used to transfer the differences between folders for keeping files and directories synchronized across the network. You should configure SSH authentication between these servers for the rsync to work.
Pre-requisites
- File sharing must be configured in both the servers.
- Root user's password is mandatory for both the servers.
- Make sure that the shared folder is empty.
Follow the steps below to configure Rsync:
- Log in to the server, launch a terminal and execute the ssh-keygen command. This will generate a pair of public and private keys.
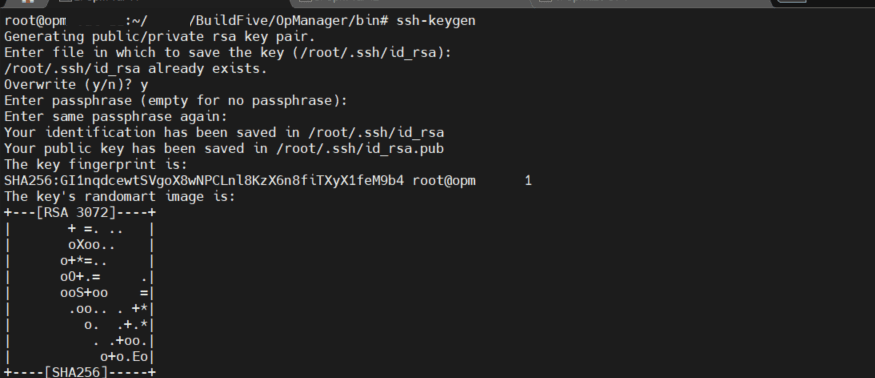
- Provide a path to store the generated keys in that directory, or save in default path. Press the Enter key twice for the password prompt. The public and private key will be generated successfully.

- Copy the generated public key to the peer server using the command,
ssh-copy-id -i <key-file-path>/id_rsa.pub <peer-machine-name>
<key-file-path> refers to the directory where the generated public key is saved.
Enter the peer server's root password to successfully copy the current server's key to the peer server.
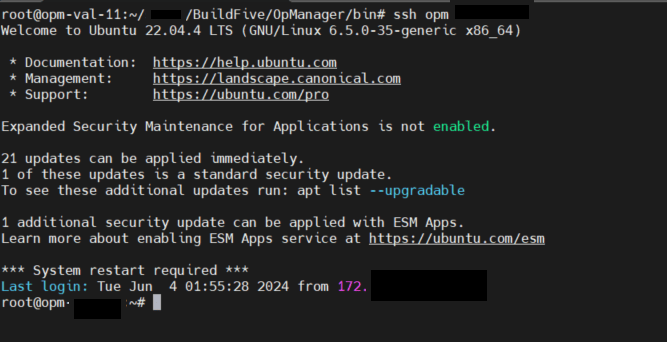 To verify if the key has been copied to the peer server, log in to the peer server from the current server using the command,
ssh <peer-machine-name>
Once the login attempt is successful, use the command exit to log out.
Note:
To configure SSH authentication for a shared folder server from OpManager server, follow the above steps but replace the command, <peer-machine-name> with <shared_folder_machine_name>
SSHFS (SSH File System) is a client tool that allows you to mount a remote file system onto your local server through an SSH connection, essentially creating a virtual local folder accessible by authorized users. SSHFS (Secure Shell Filesystem) uses the SSH (Secure Shell) protocol to communicate with the server, which encrypts all connections, keeping them secure. SSH authentication should be configured to shared folder server from OpManager servers.
Steps to install SSHFS by following the below command based on your Linux OS:
Debian/Ubuntu:
sudo apt-get update
sudo apt-get install sshfs
CentOS/RHEL:
sudo yum install epel-release
sudo yum install sshfs
FEDORA:
dnf install fuse-sshfs
SUSE:
sudo zypper install sshfs
After the installation is complete, create a folder in the required path ( eg: /opt/OpManager/SharedFolder), so that the input provided for common folder path during Failover Configuration should be in the format SHARED_HOST:/Desired/Path eg: opm-shared:/opt/OpManager/SharedFolder)
Thank you for your feedback!


