Attack Surface Analyzer for Amazon Web Services
With the Attack Surface Analyzer, you can identify misconfigurations in your AWS cloud directory and enhance cloud security.
Listed below are the services tracked by the Attack Surface Analyzer for AWS cloud directory:
- Amazon EC2
- Amazon VPC
- AWS IAM
- Amazon S3
- Amazon RDS
- Amazon DynamoDB
- AWS Lambda
- AWS Elastic Beanstalk
- AWS CloudTrail
- Amazon EFS
- AWS KMS
- Amazon SNS
- Amazon SQS
- Amazon EC2 Auto Scaling
- AWS Elastic Load Balancing
- AWS Elastic Load Balancing V2
- Amazon CloudFront
- Amazon CloudWatch
- Amazon CloudWatch Logs
- Amazon ElastiCache
- Amazon MemoryDB for Redis
- Amazon DocumentDB
- AWS CodeBuild
- Amazon Config Service
- Amazon Route 53
- AWS WAF
- AWS WAF Regional
- AWS WAF V2
Prerequisites
For the Attack Surface Analyzer to function seamlessly, the ADAudit Plus server should have a working internet connection. Additionally, the outbound HTTPS port 443 needs to be opened on the ADAudit Plus server to communicate with AWS cloud directory.
Before configuring your AWS cloud directory for attack surface analysis in ADAudit Plus, you will need to:
- Create a user and attach appropriate permissions through an IAM policy.
- Retrieve the account ID, access key, and secret access key.
There are two ways to create the user and attach appropriate permissions through an IAM policy:
- Using AWS CloudFormation
- Using the AWS IAM console
Create a user and attach the IAM policy using AWS CloudFormation
- Sign in to the AWS Management console and go to CloudFormation.
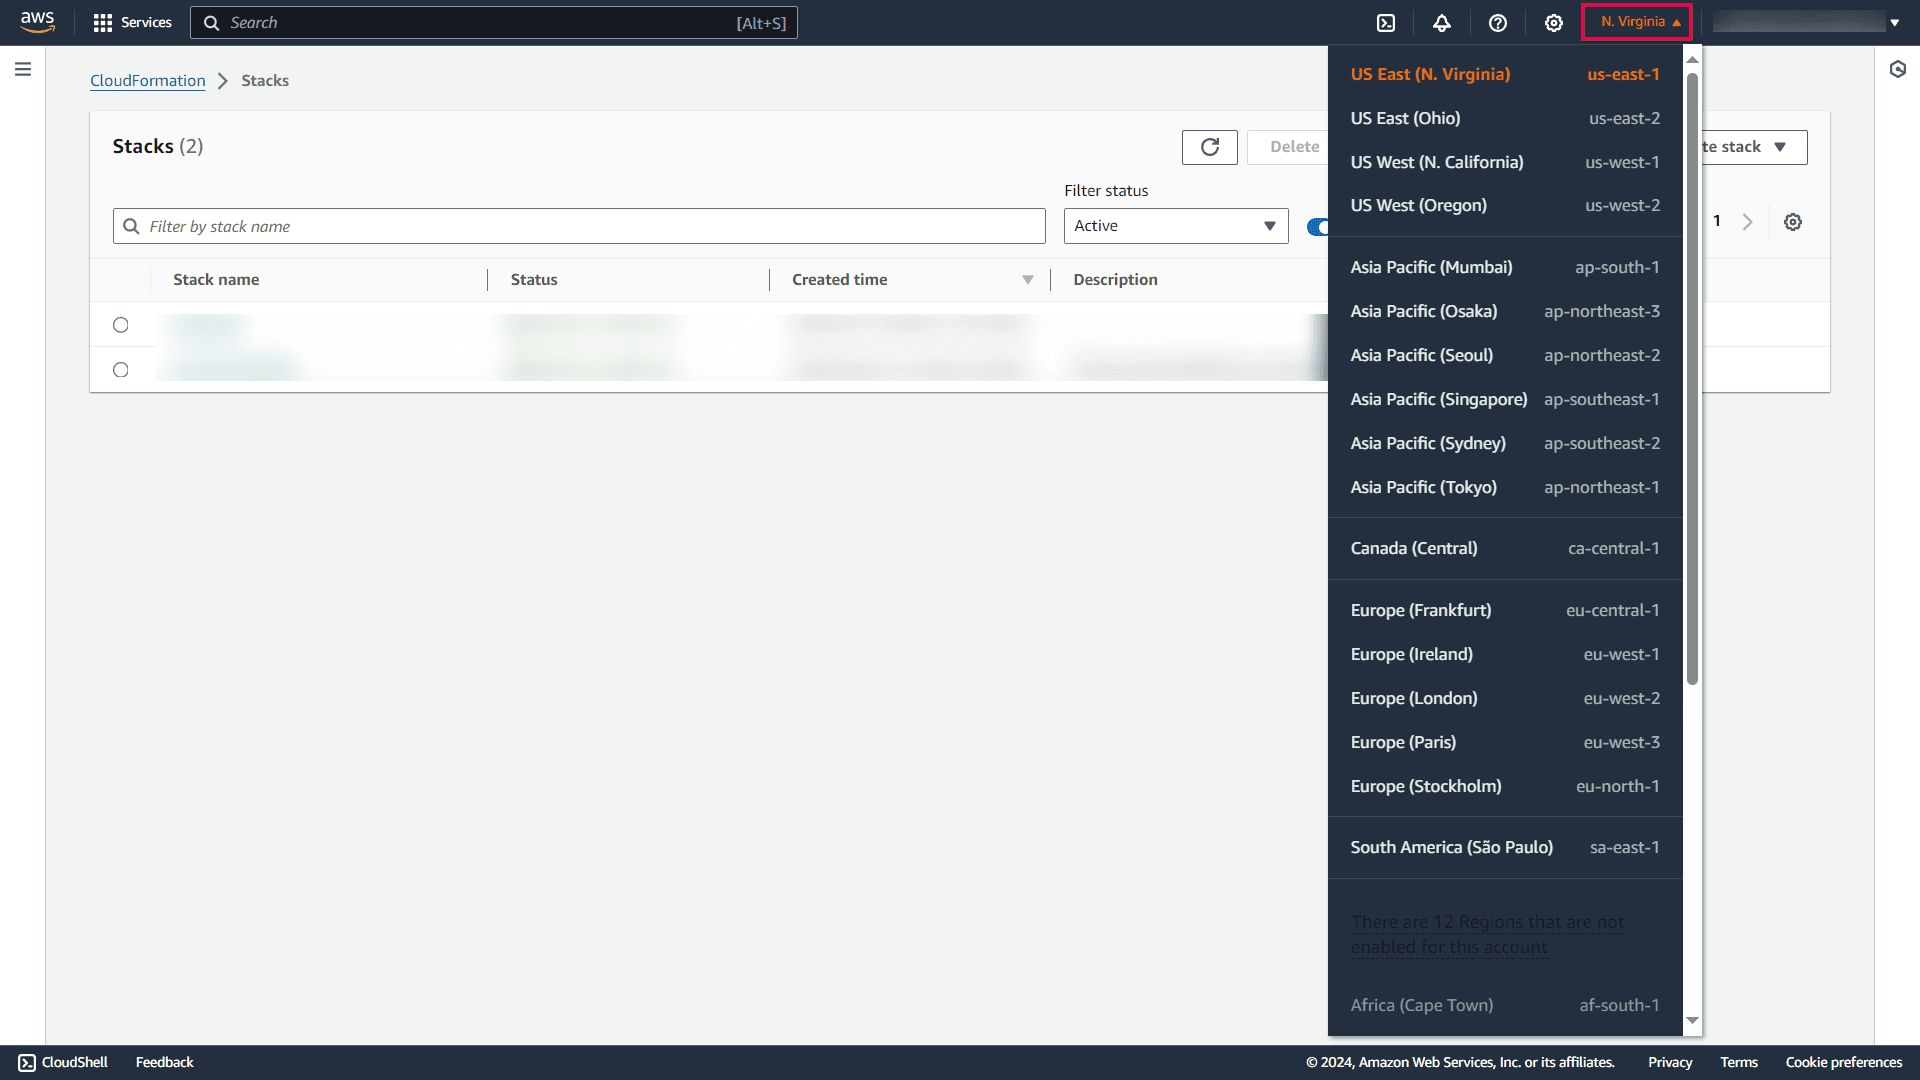
- From the navigation bar on the top, click the region list to the left of your account information, and select the region where you want to create the stack.
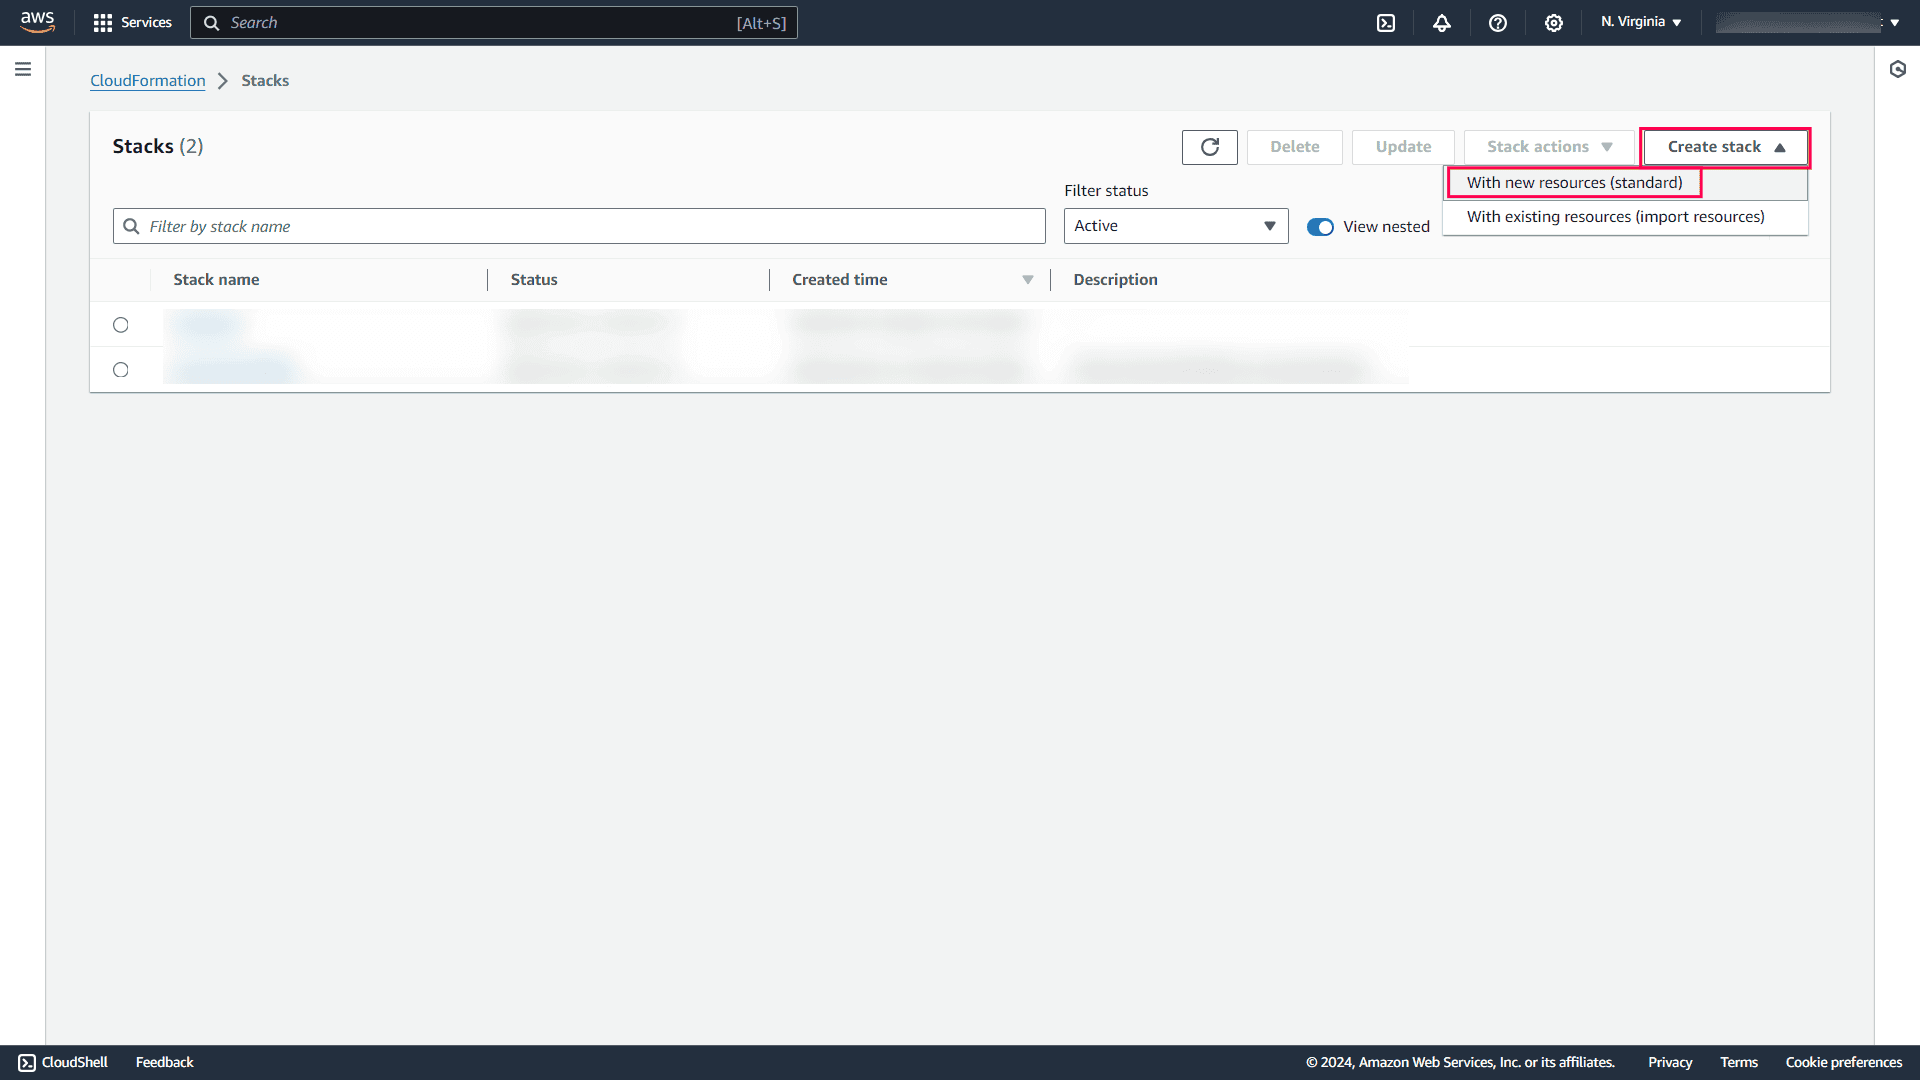
- Click Create stack and select With new resources (standard) from the drop-down.
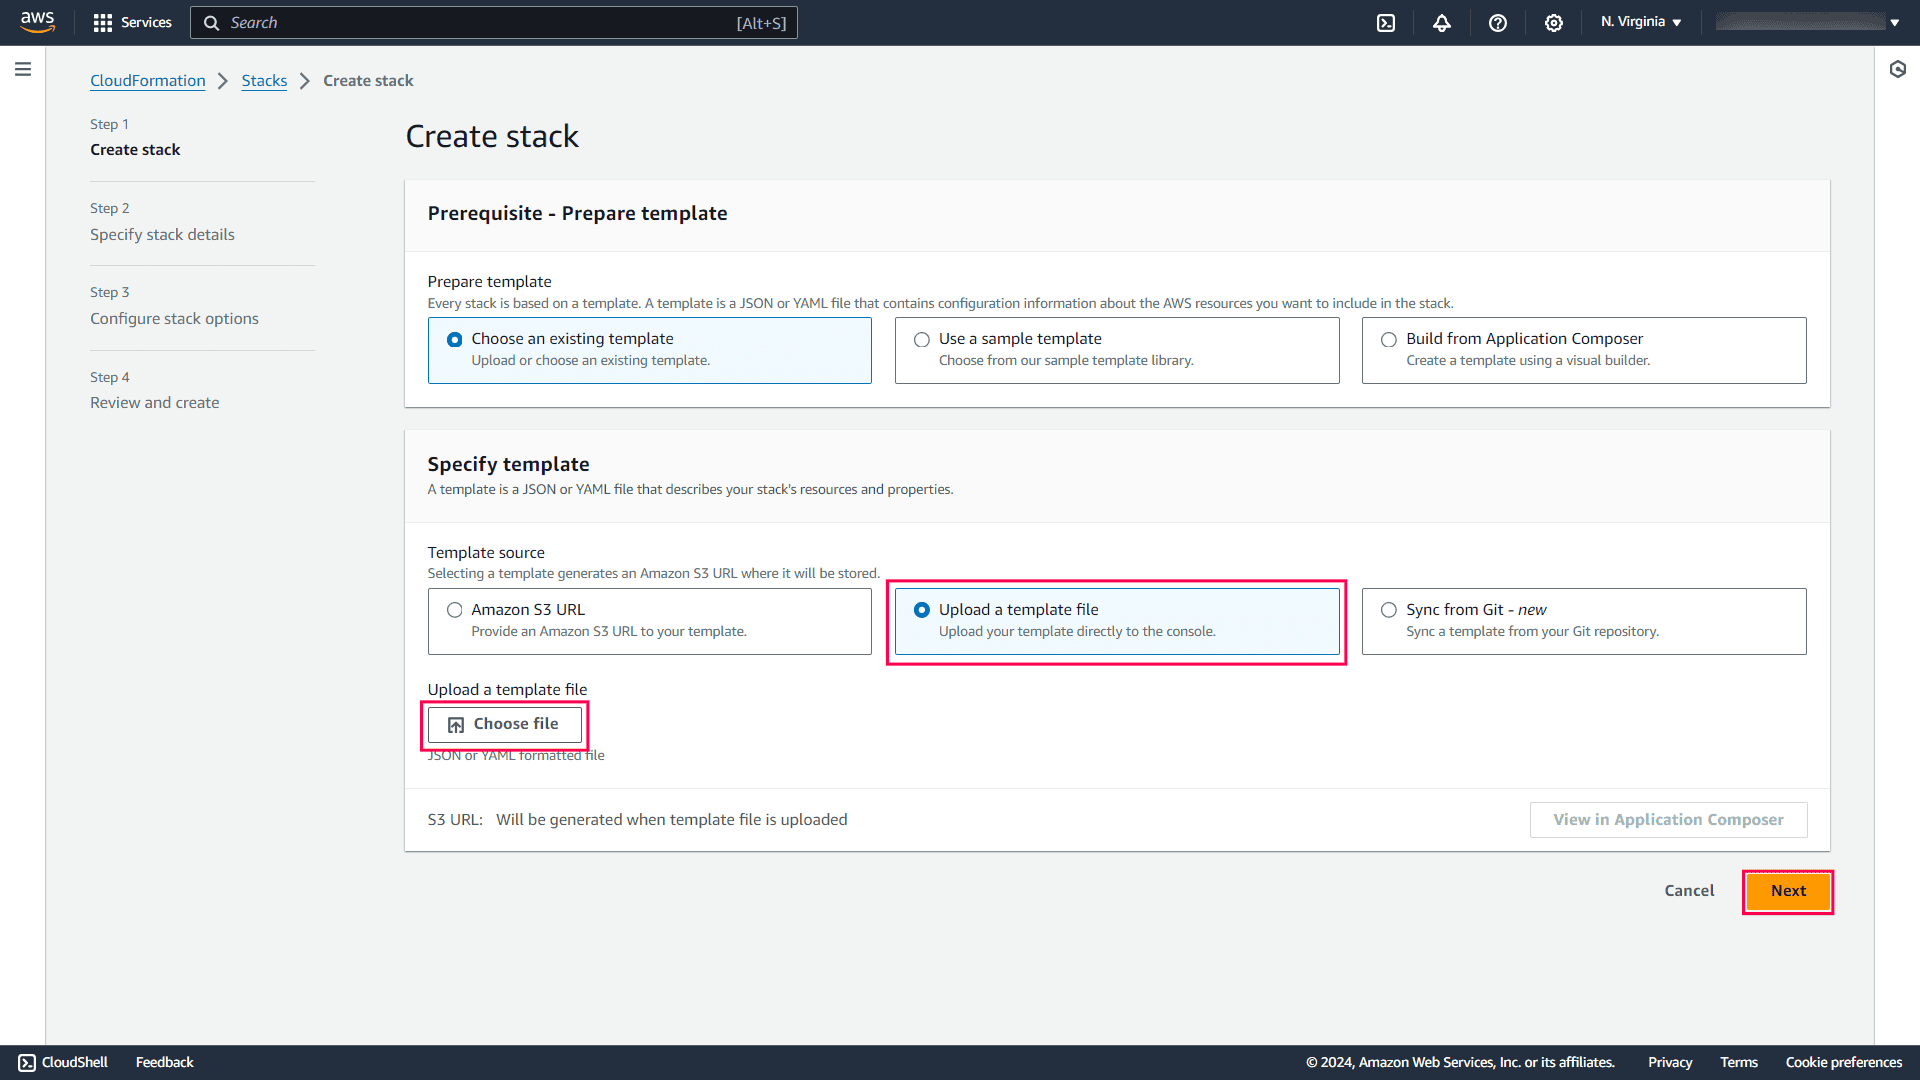
- On the Create stack page, on the Specify template panel under Template source, choose Upload a template file.
- Download this template file.
- Click Choose file, browse to the file that you just downloaded, select it, and click Open.
- Once the file is uploaded, click Next.
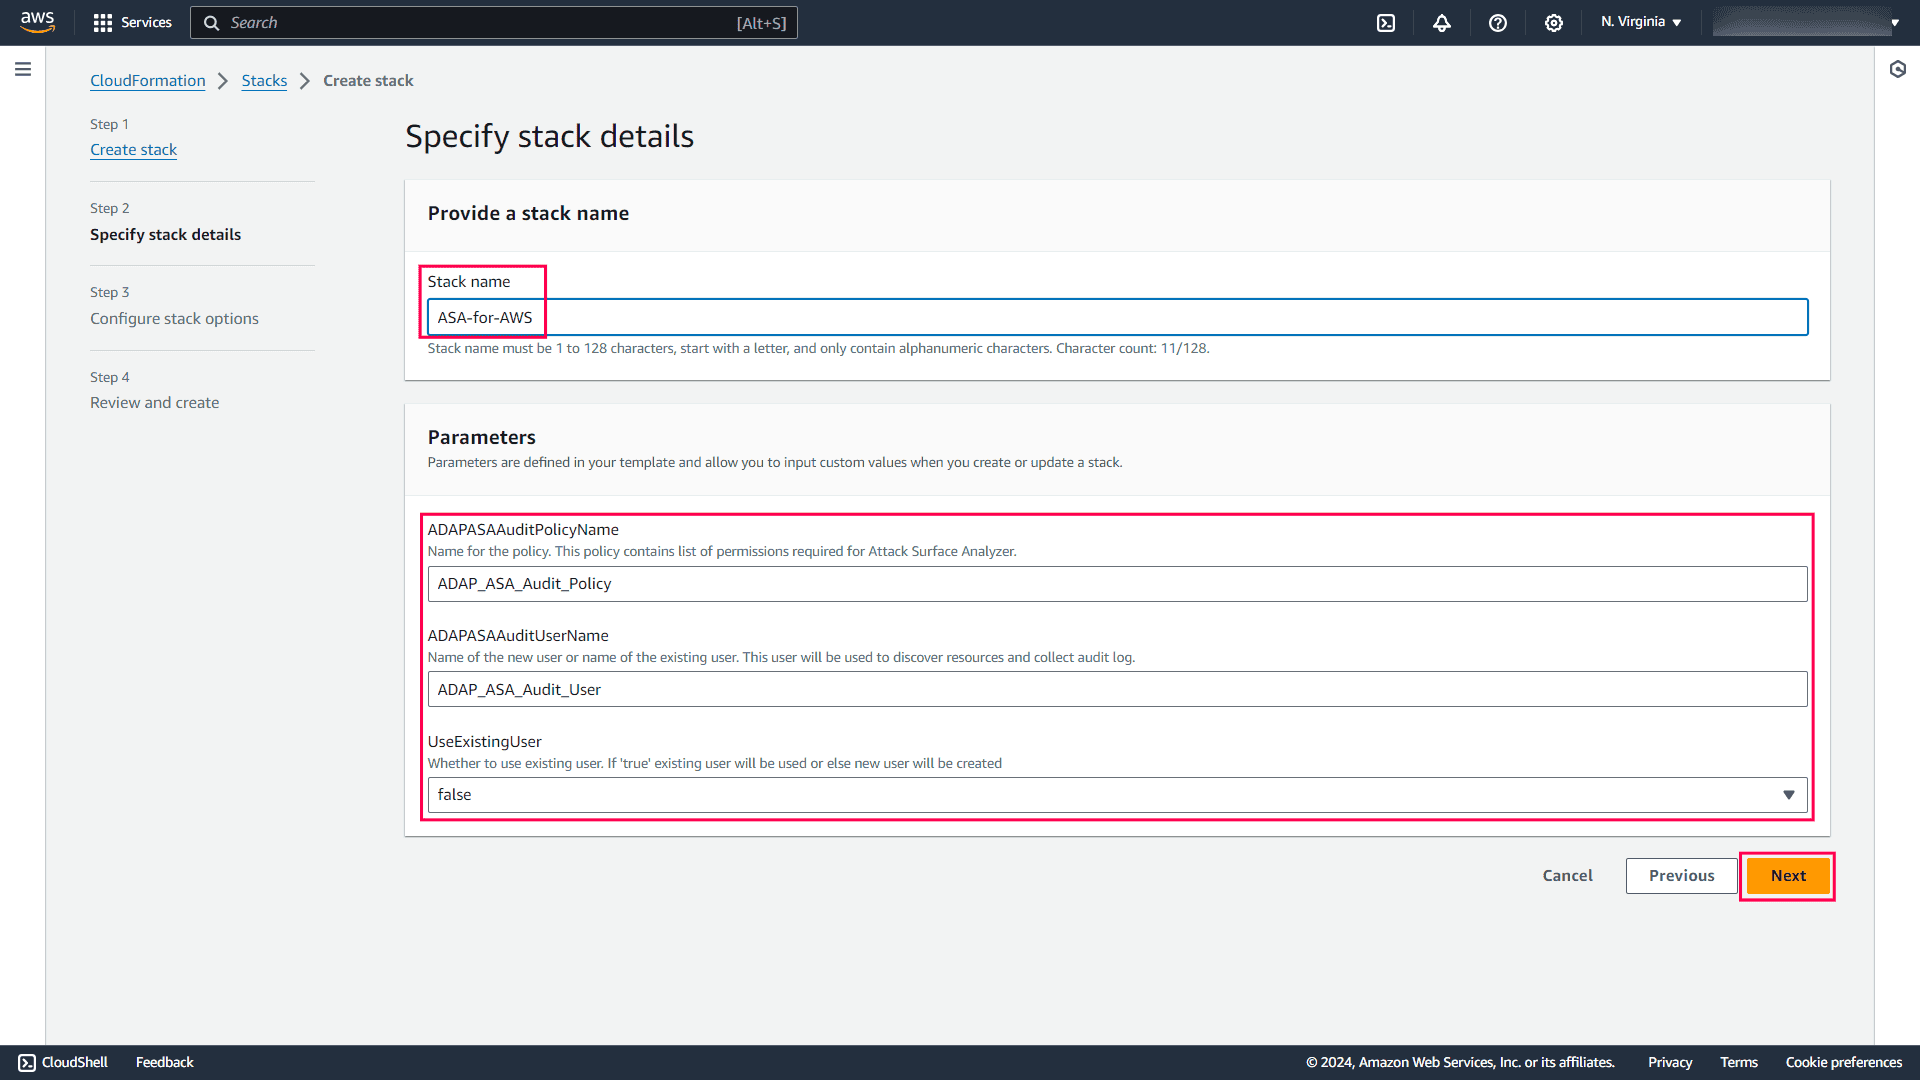
- Enter a suitable Stack name. On the Parameters panel, you can choose to change the name of the policy and the user. Select false under UseExistingUser and click Next.
- On the Configure stack options page, retain the default settings and click Next.
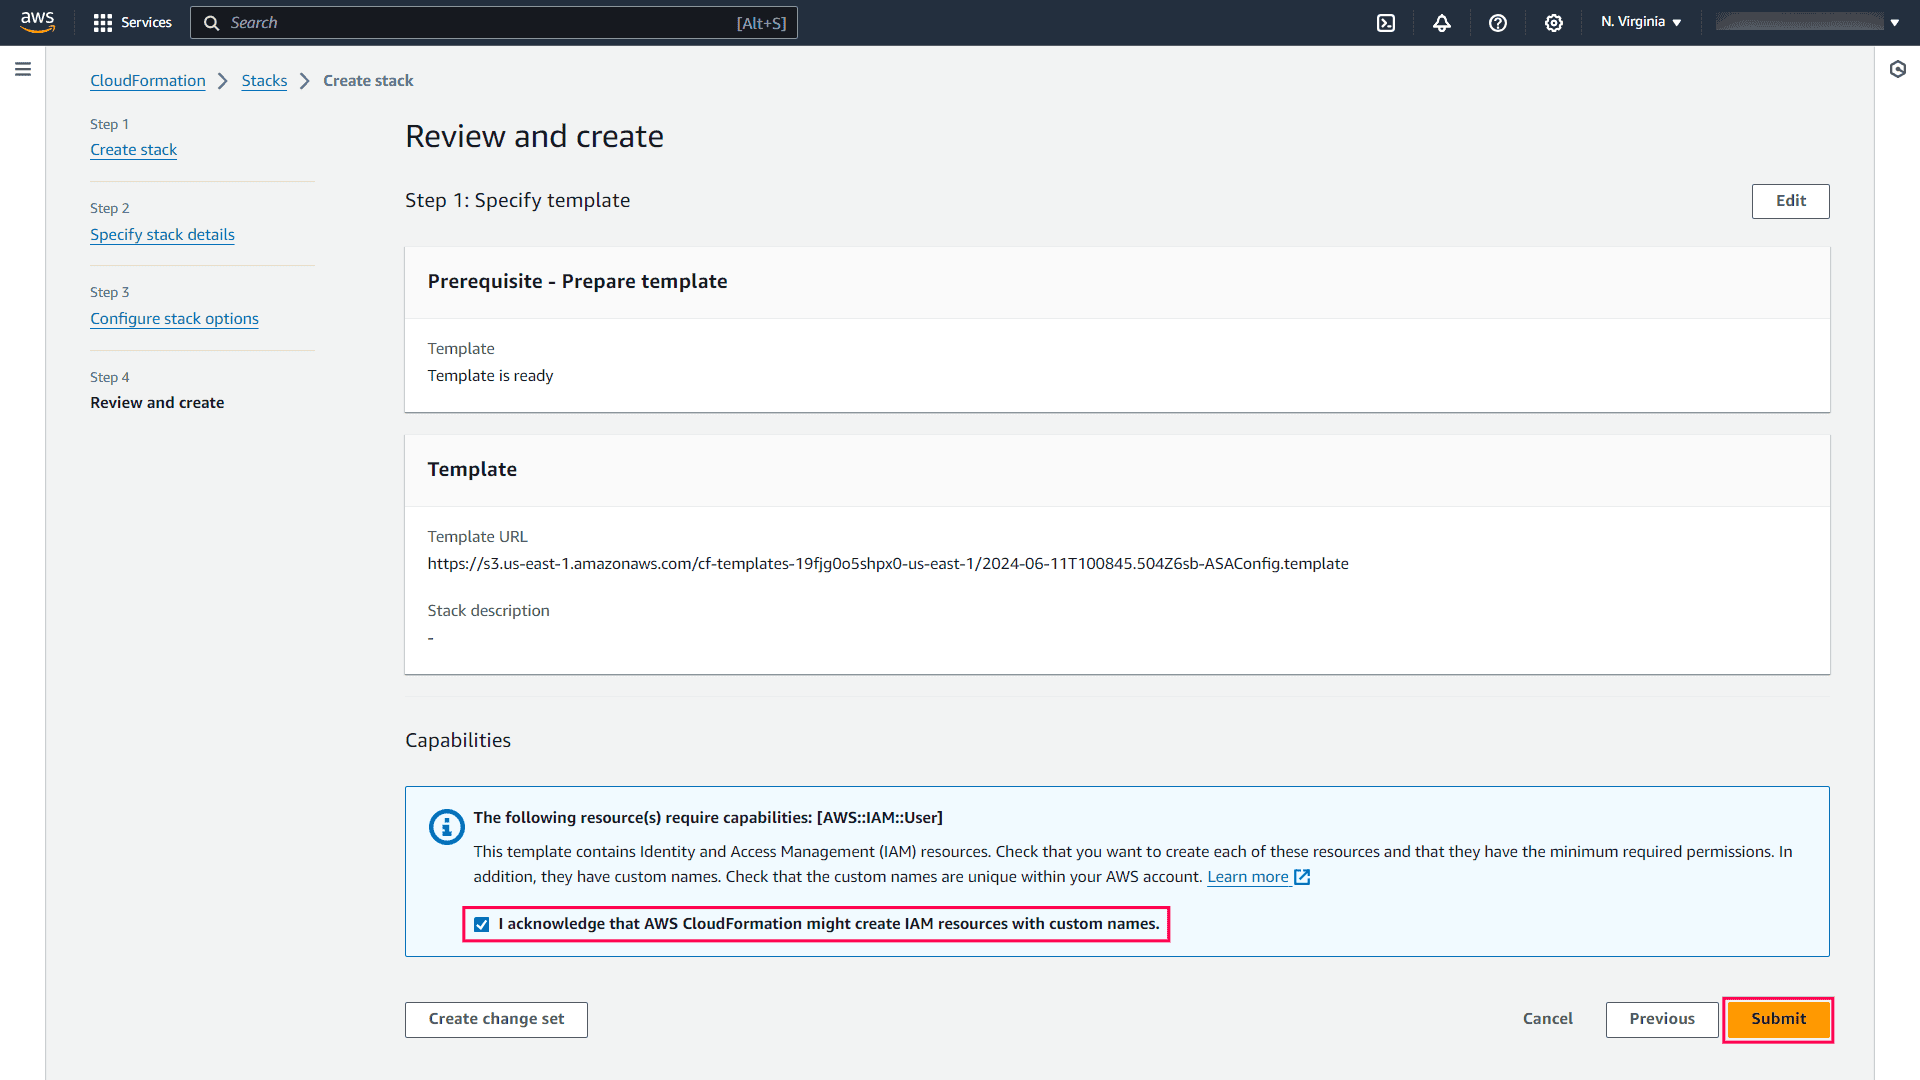
- On the Review and create page, review your settings, check the Acknowledgement check box, and then click Submit.
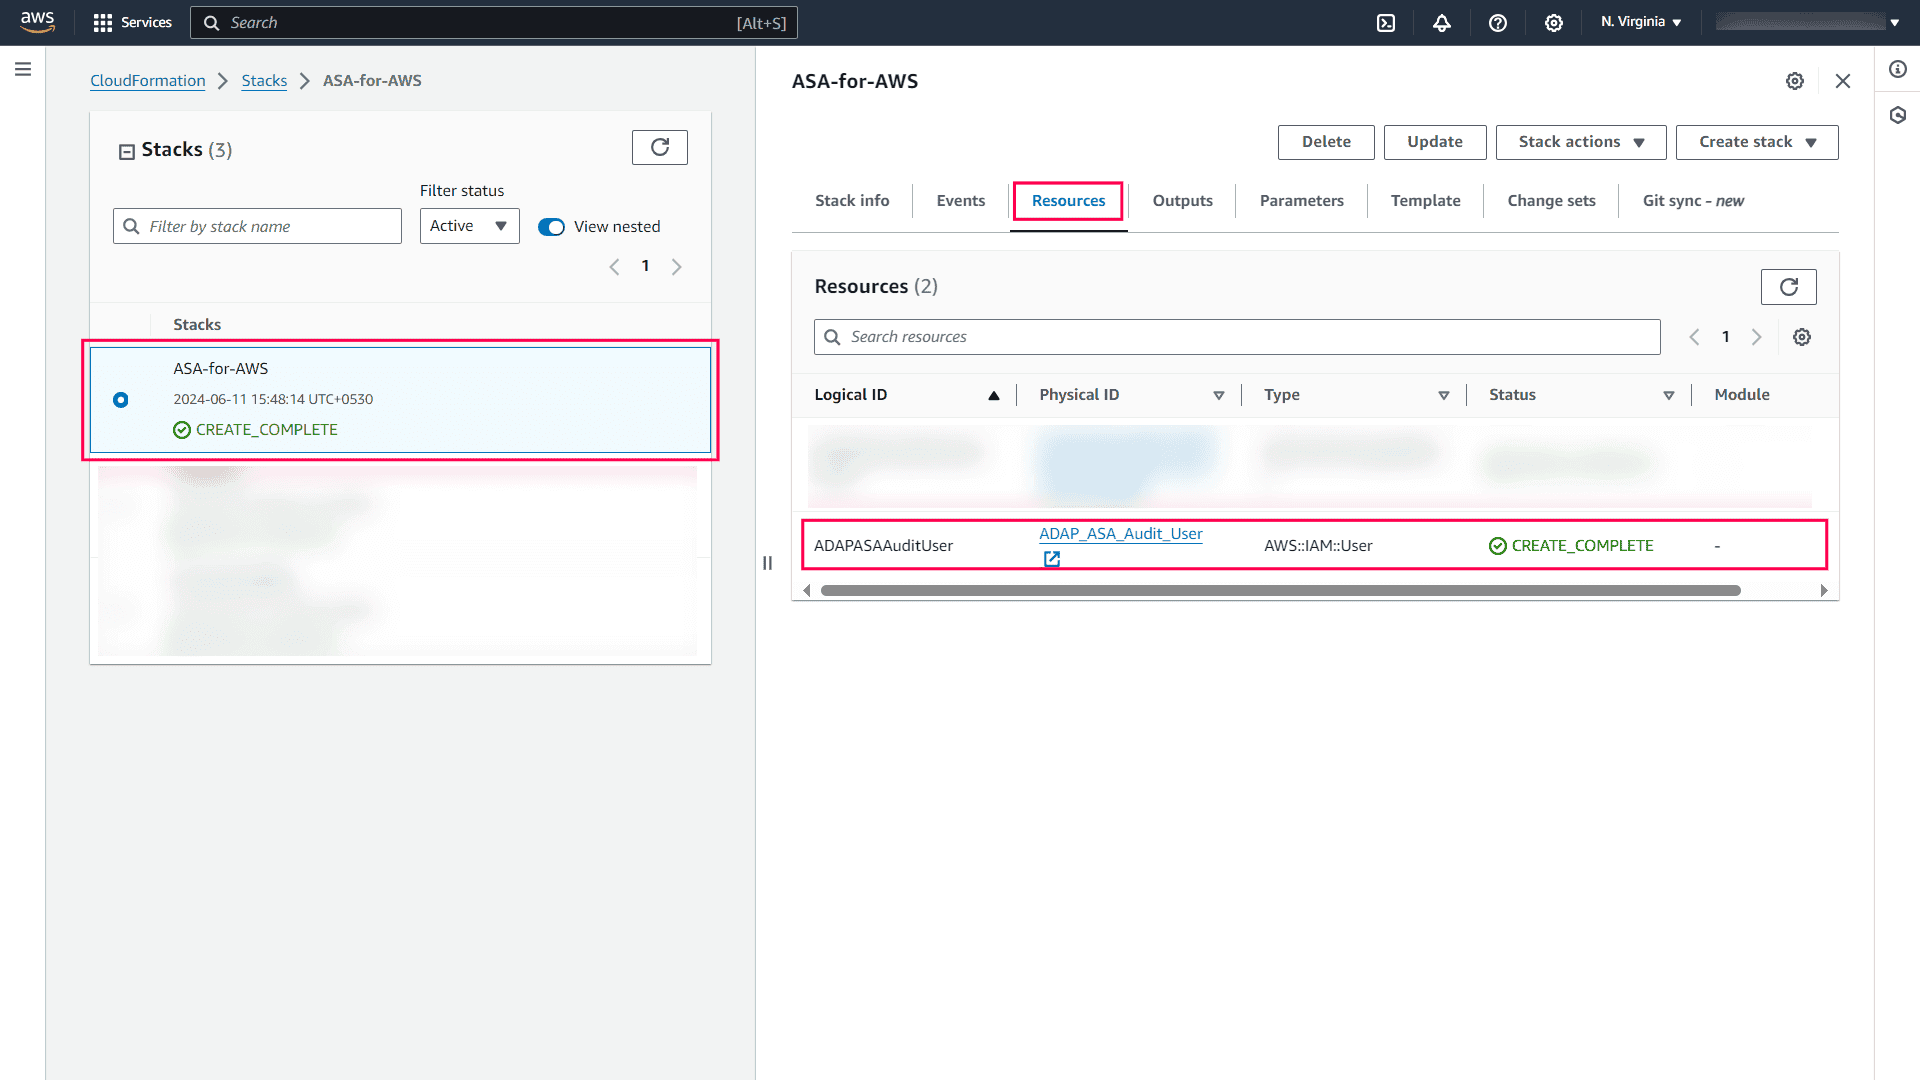
- Once the stack is created, select the Resources tab and click the user you just created. You will be redirected to the IAM console. Proceed with the steps under Retrieve the access key and secret access key.
Create a user and attach the IAM policy using the AWS IAM console
In this method, you need to create a policy in the IAM console first, and then create a user and attach the policy.
Create a policy in the IAM Console
- Sign in to the AWS Management console and open the IAM console.
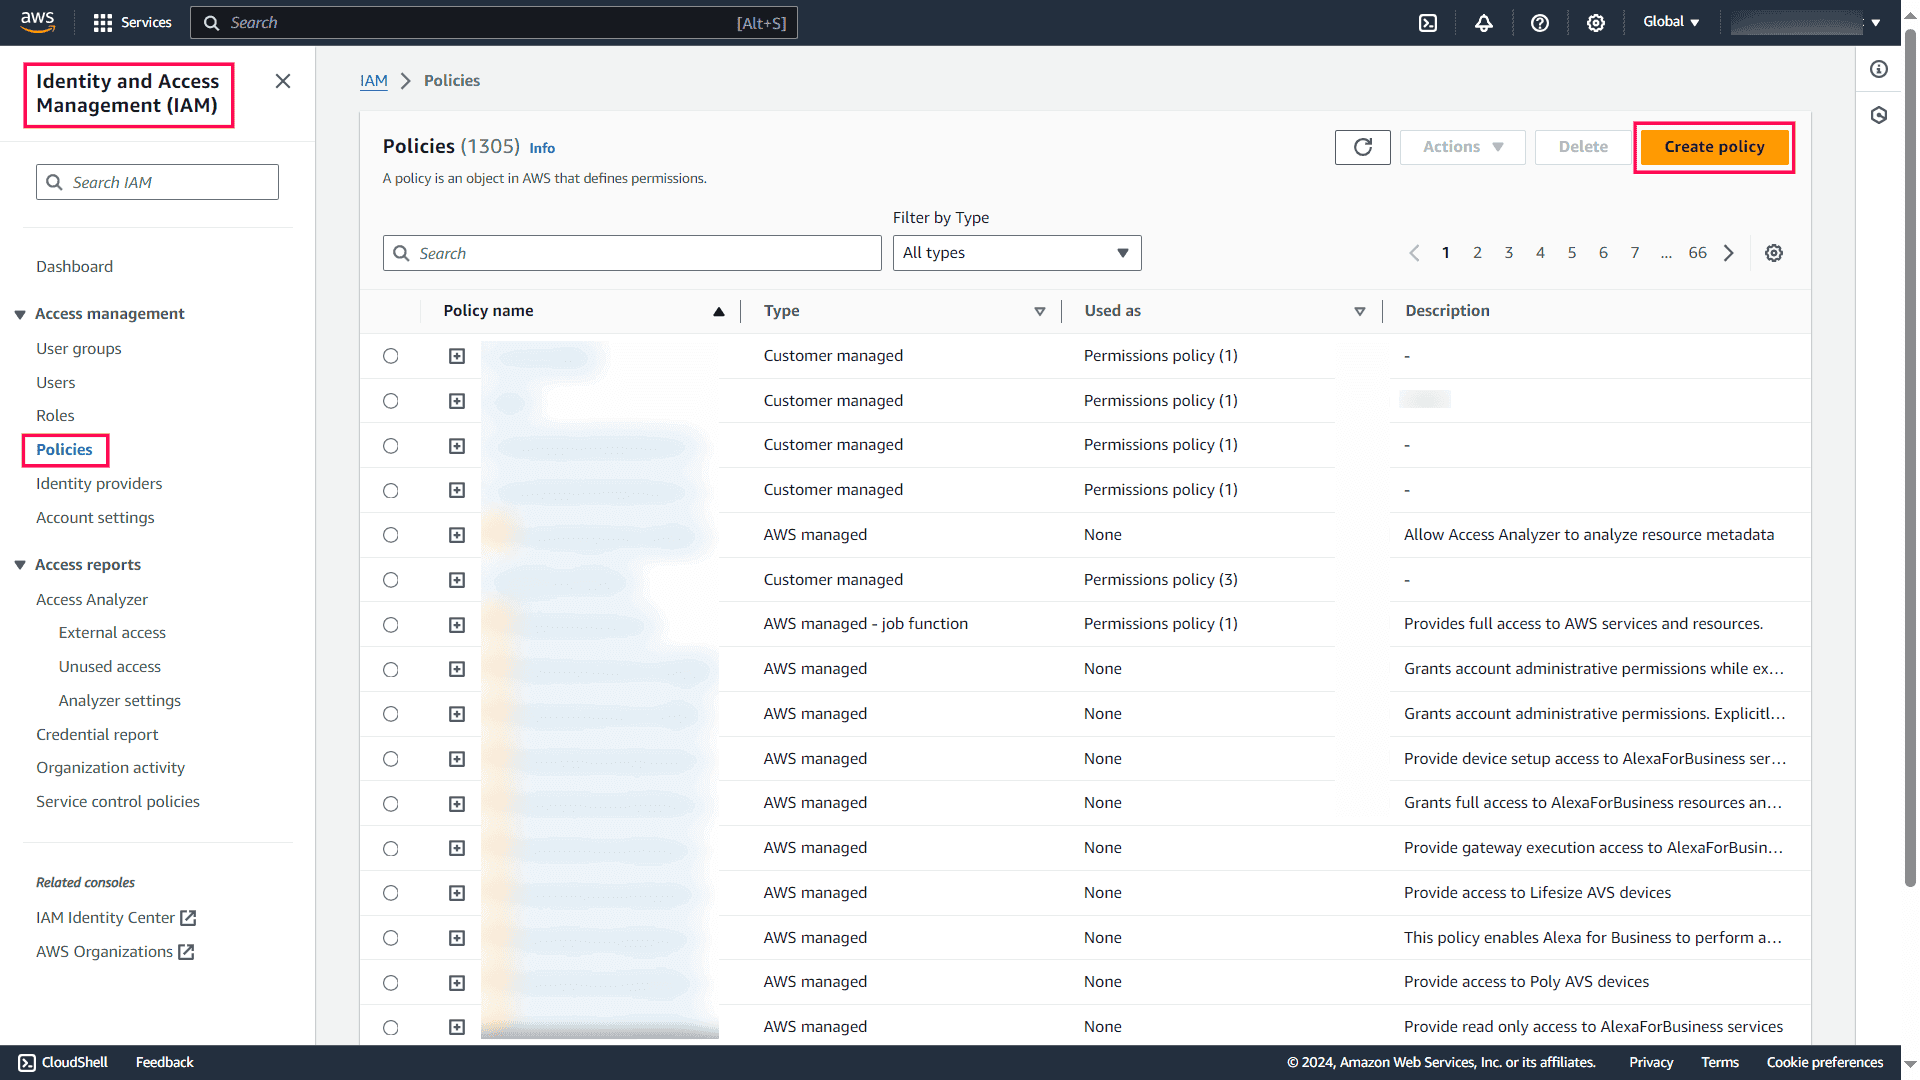
- From the IAM dashboard, select Policies, and then click Create policy.
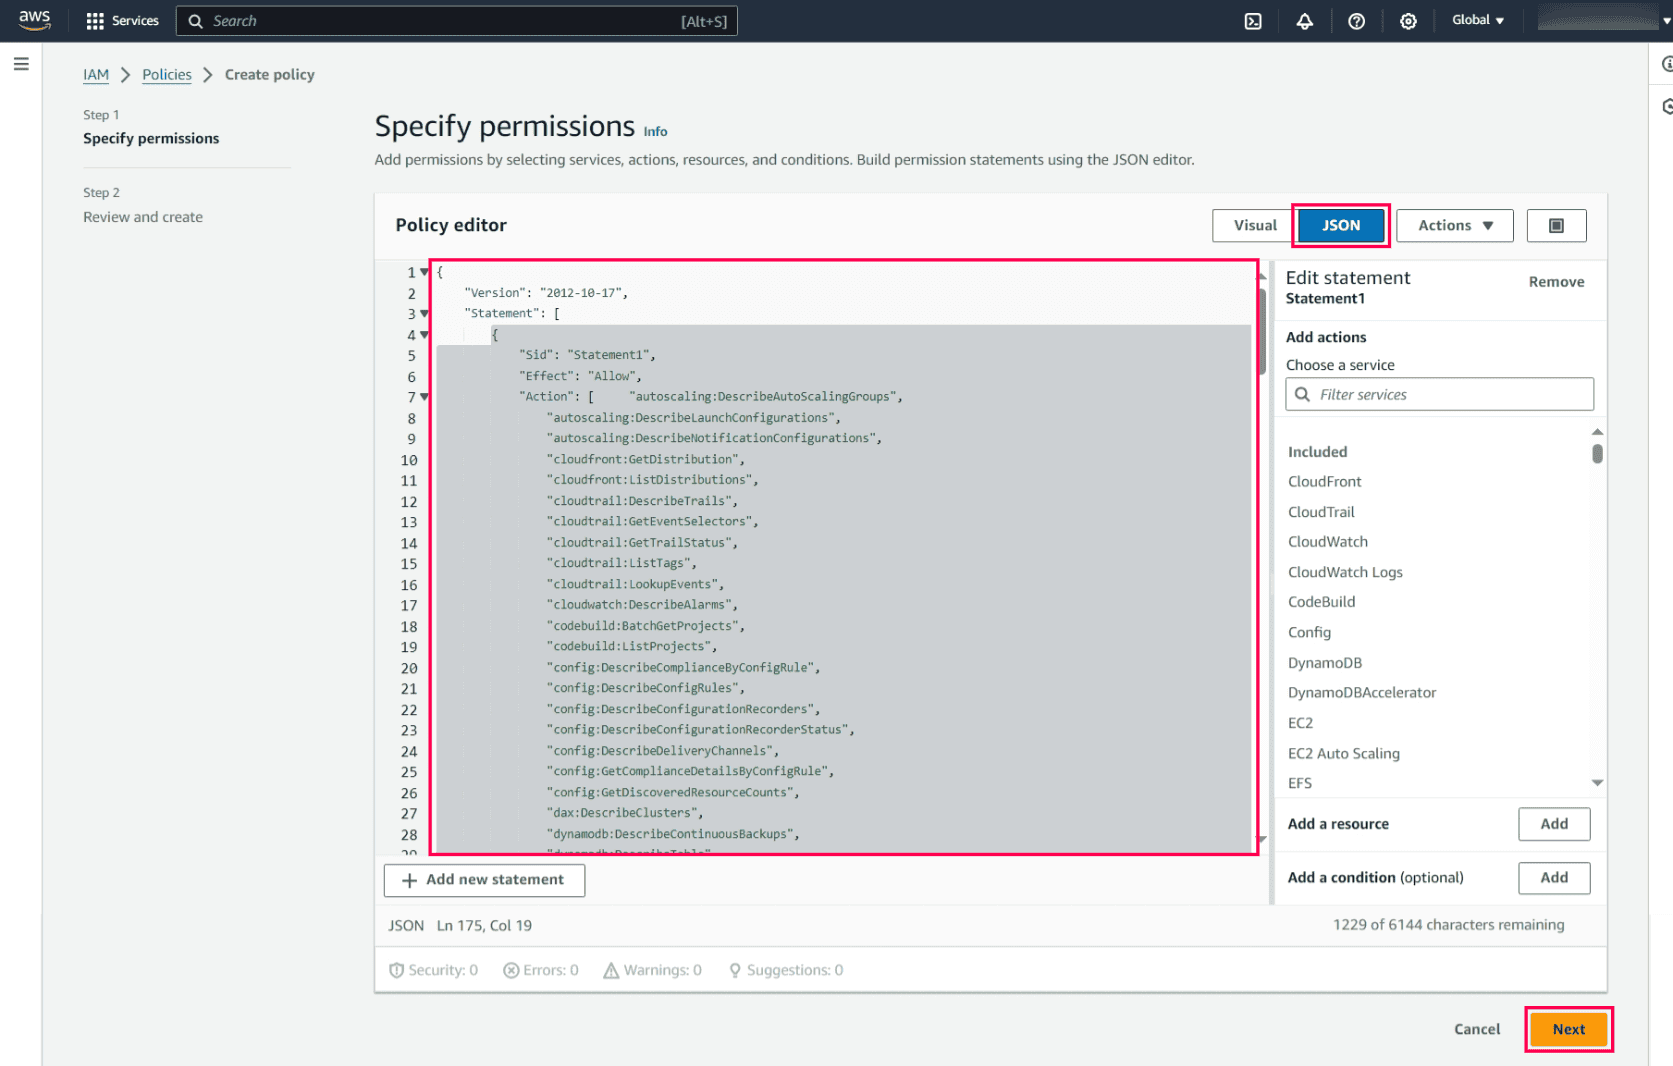
- On the Policy Editor page, select JSON mode, copy and paste the permission statement from this file, and click Next.
- Enter a suitable name and description for this policy, review the permissions required by the service, and then click Create policy.
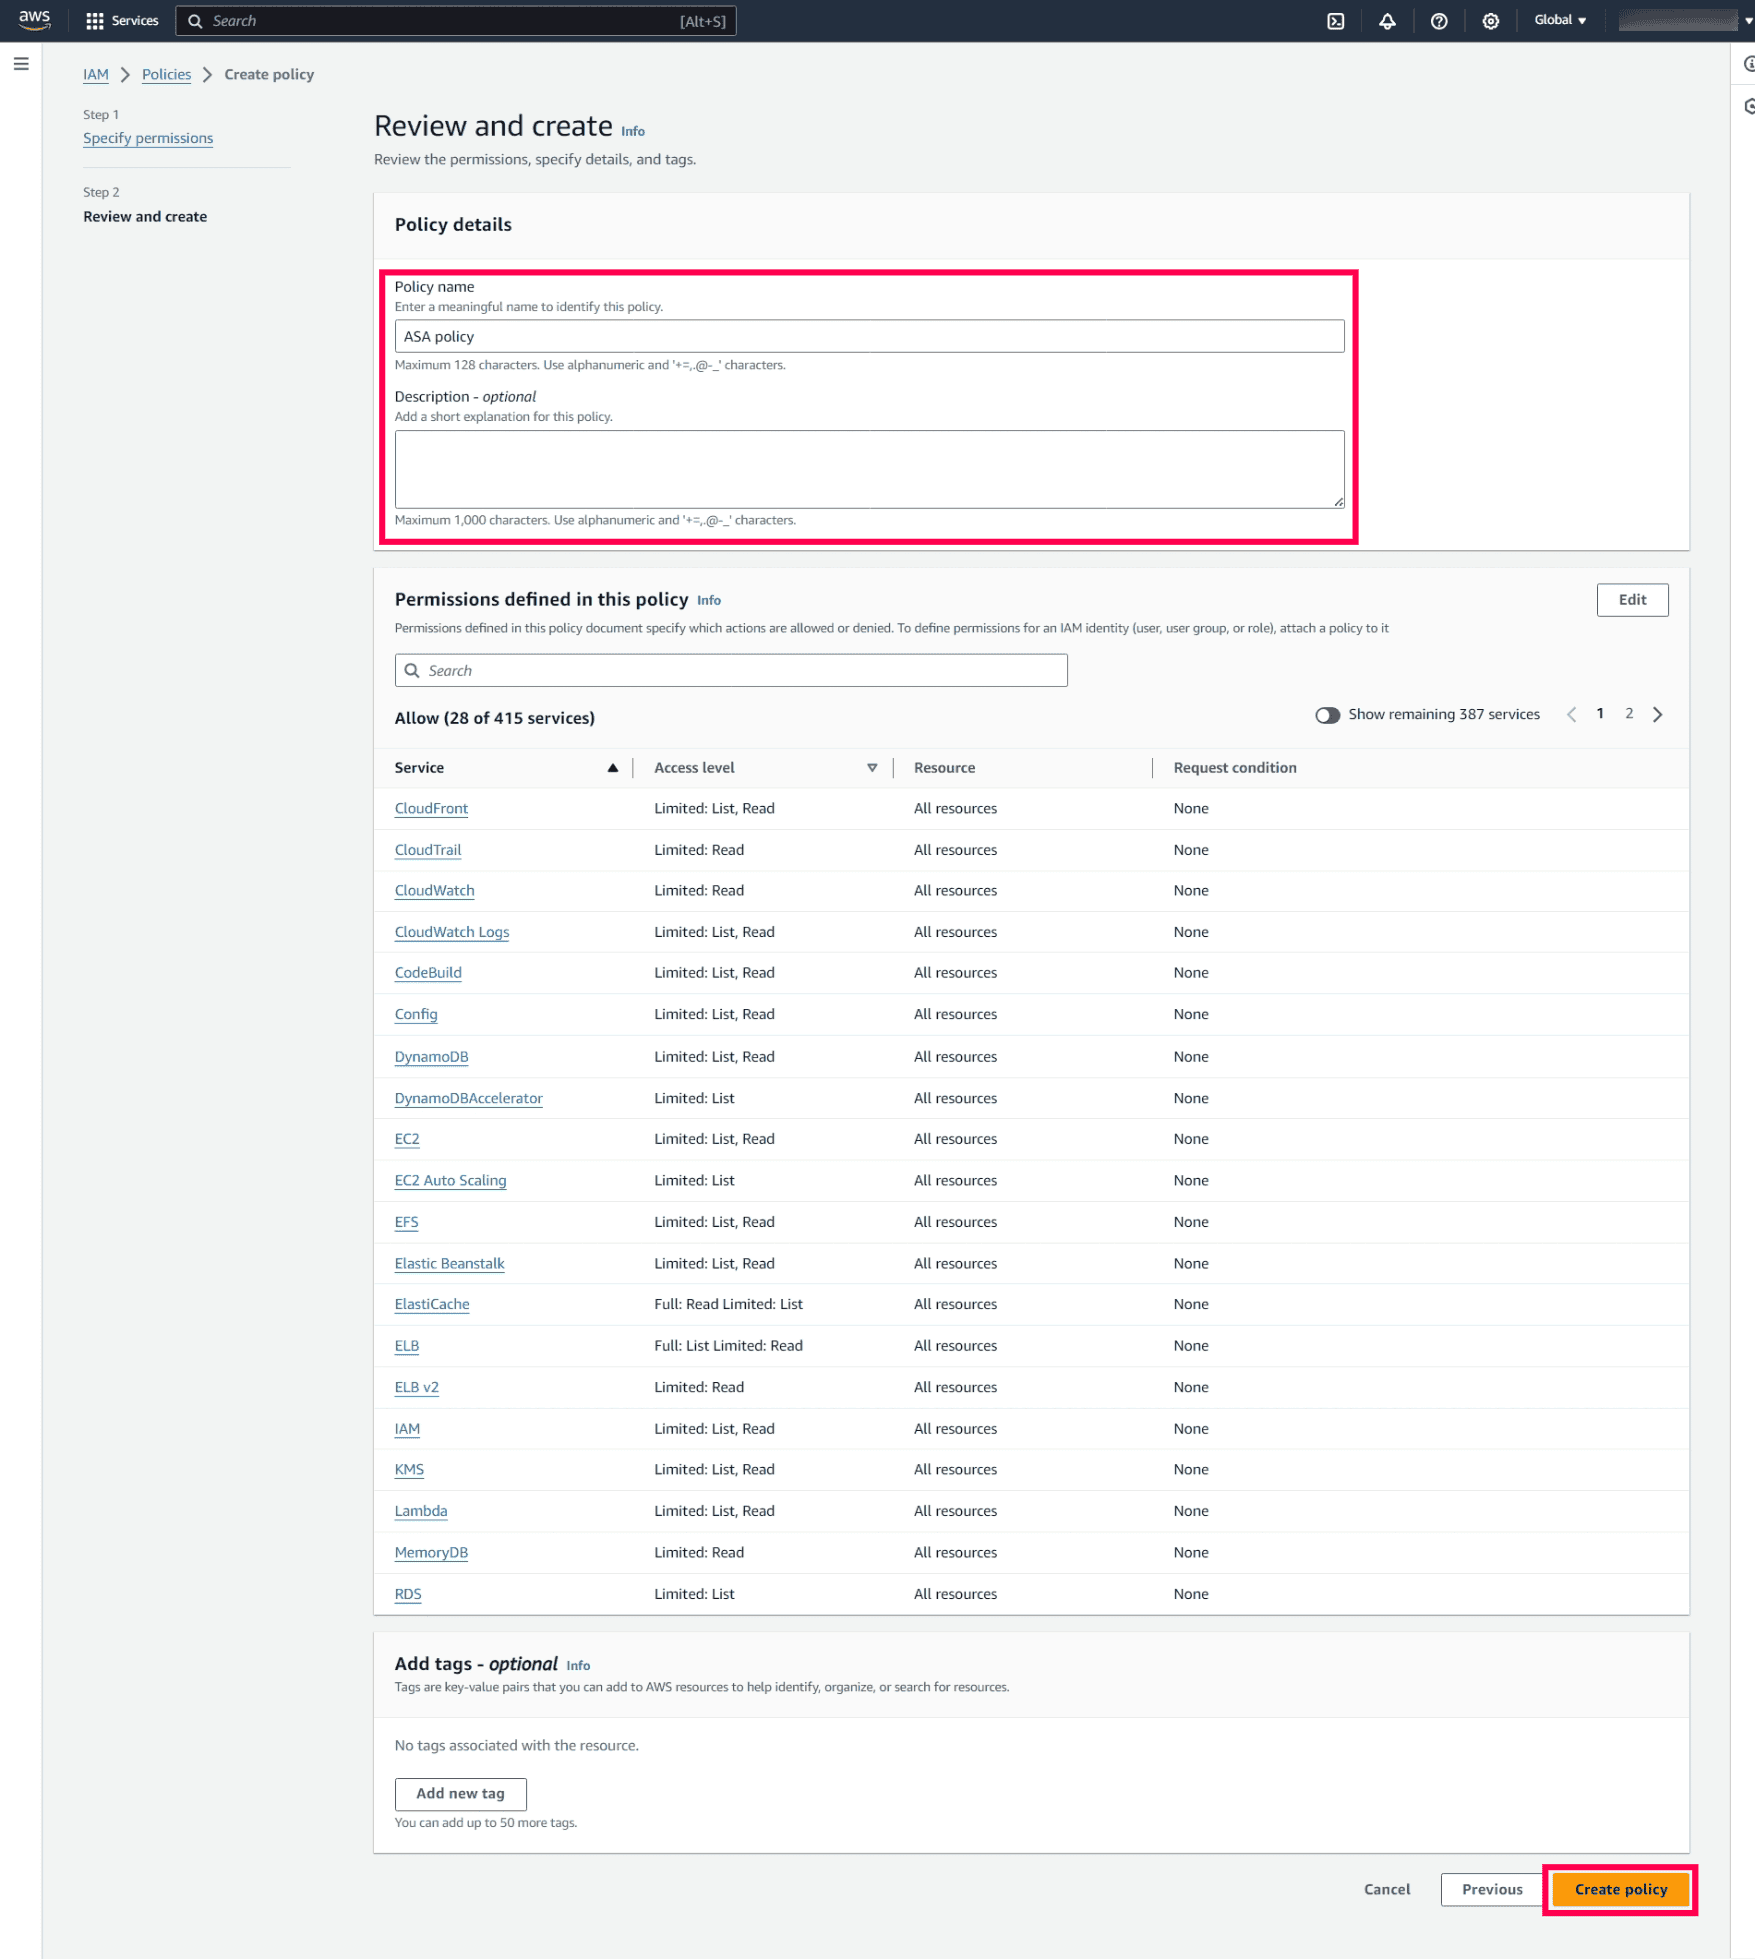
- You will be redirected to the IAM policies page on completion.
Create a user and attach the policy
- In the the IAM console, select Users from the navigation menu, and then click Create user.
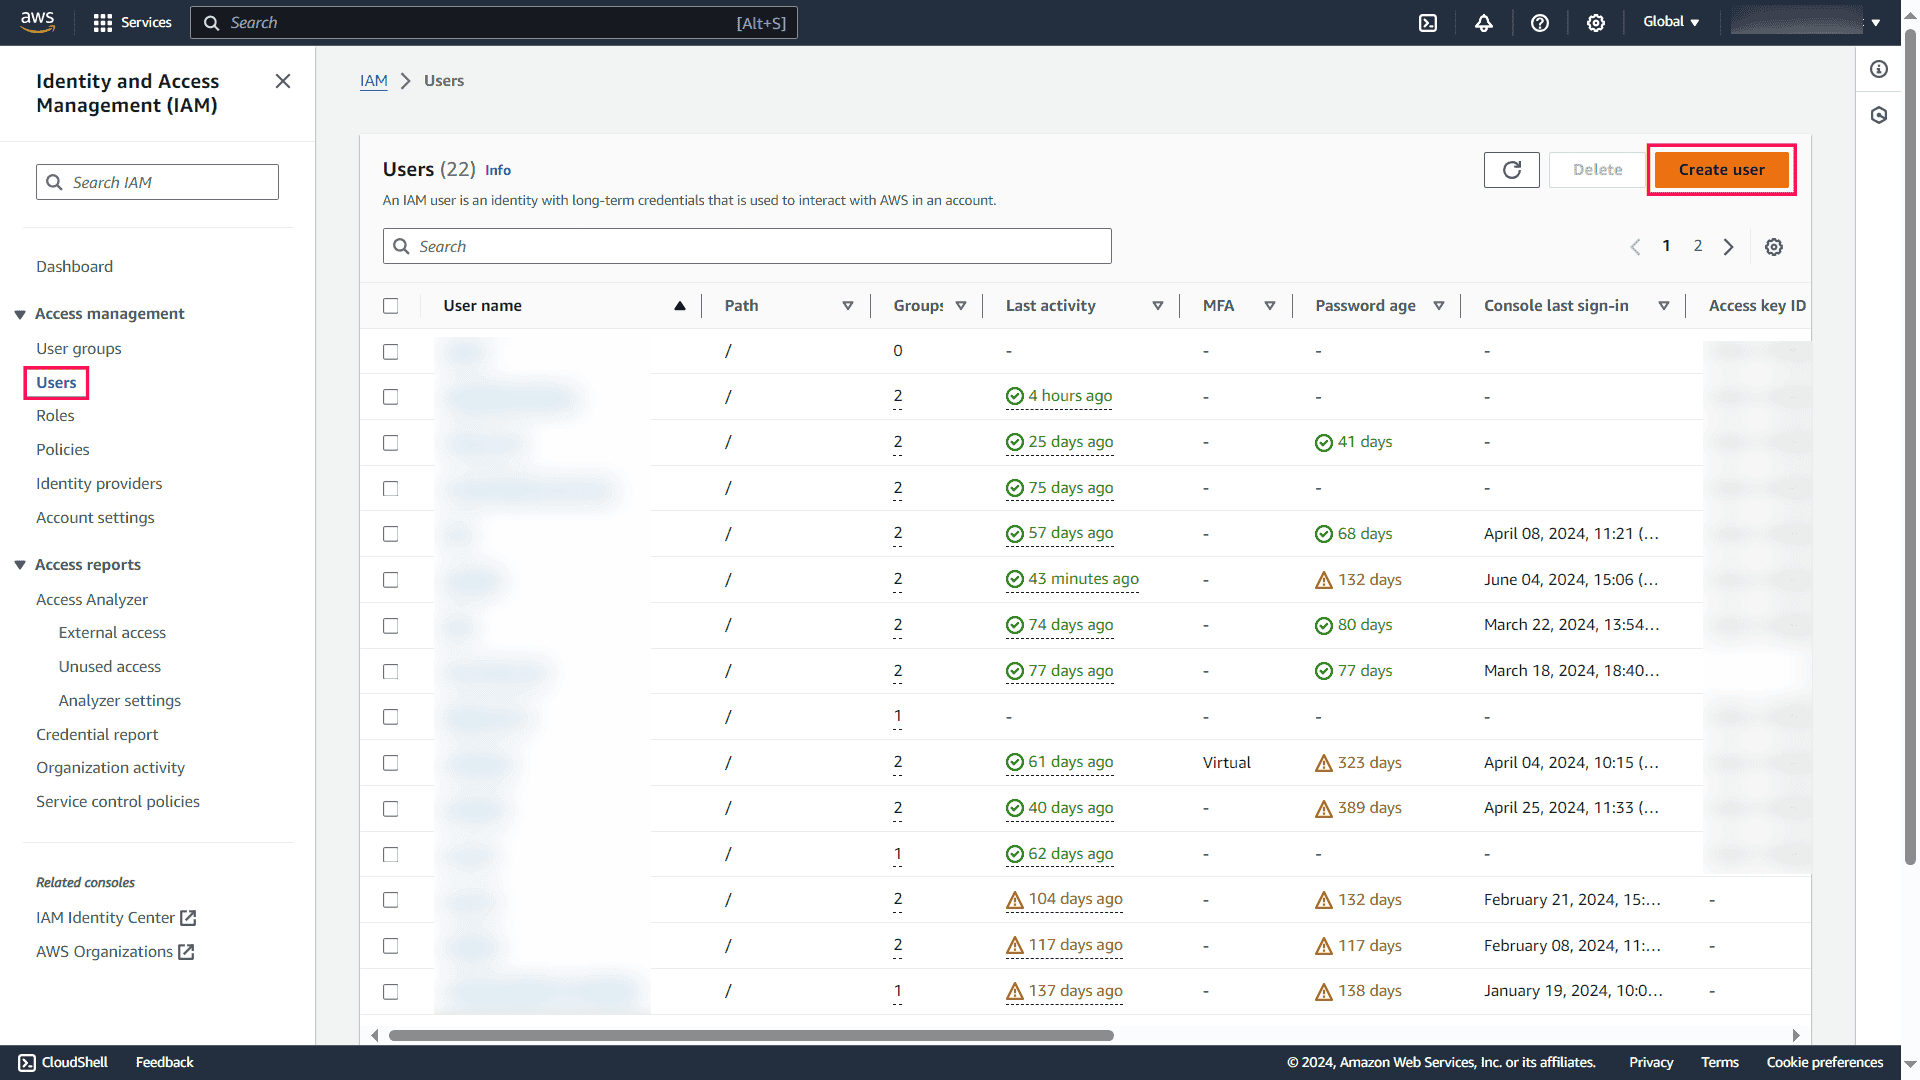
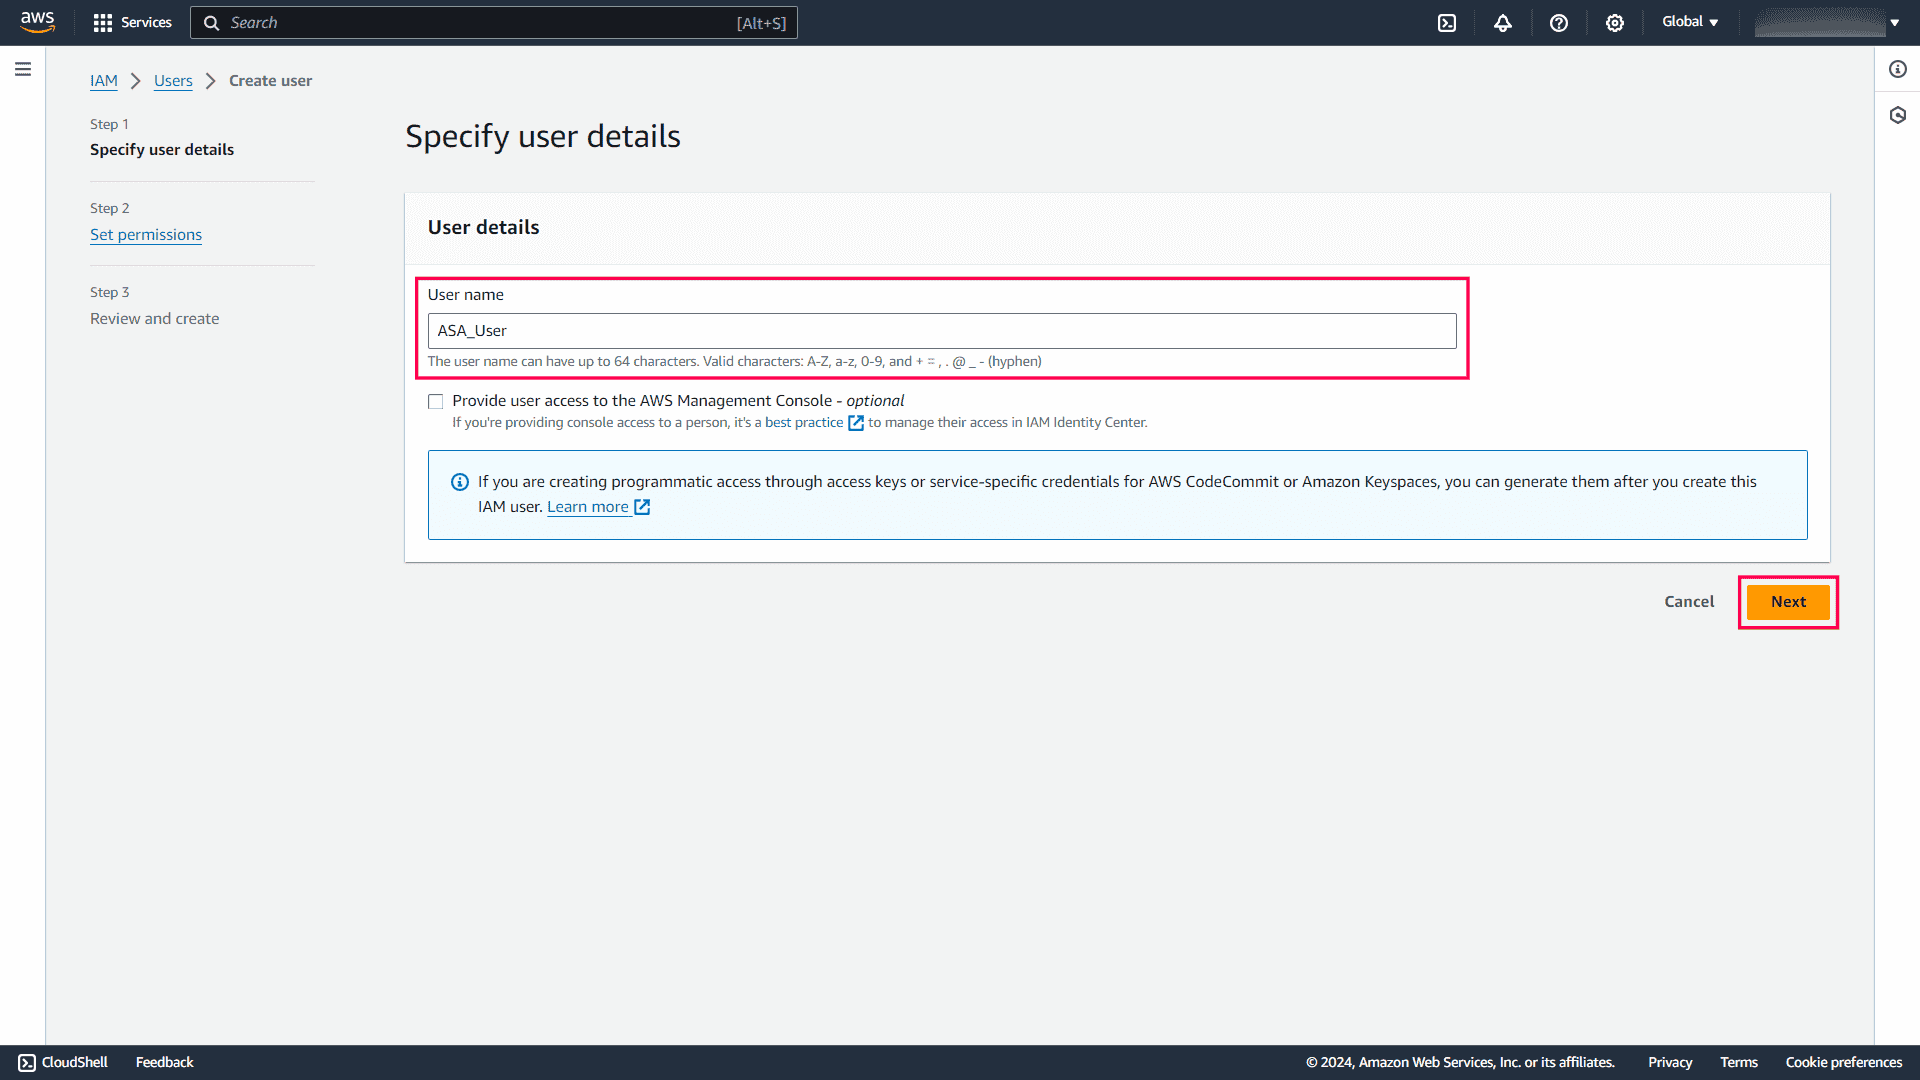
- Enter a suitable User name for the new user, and click Next.
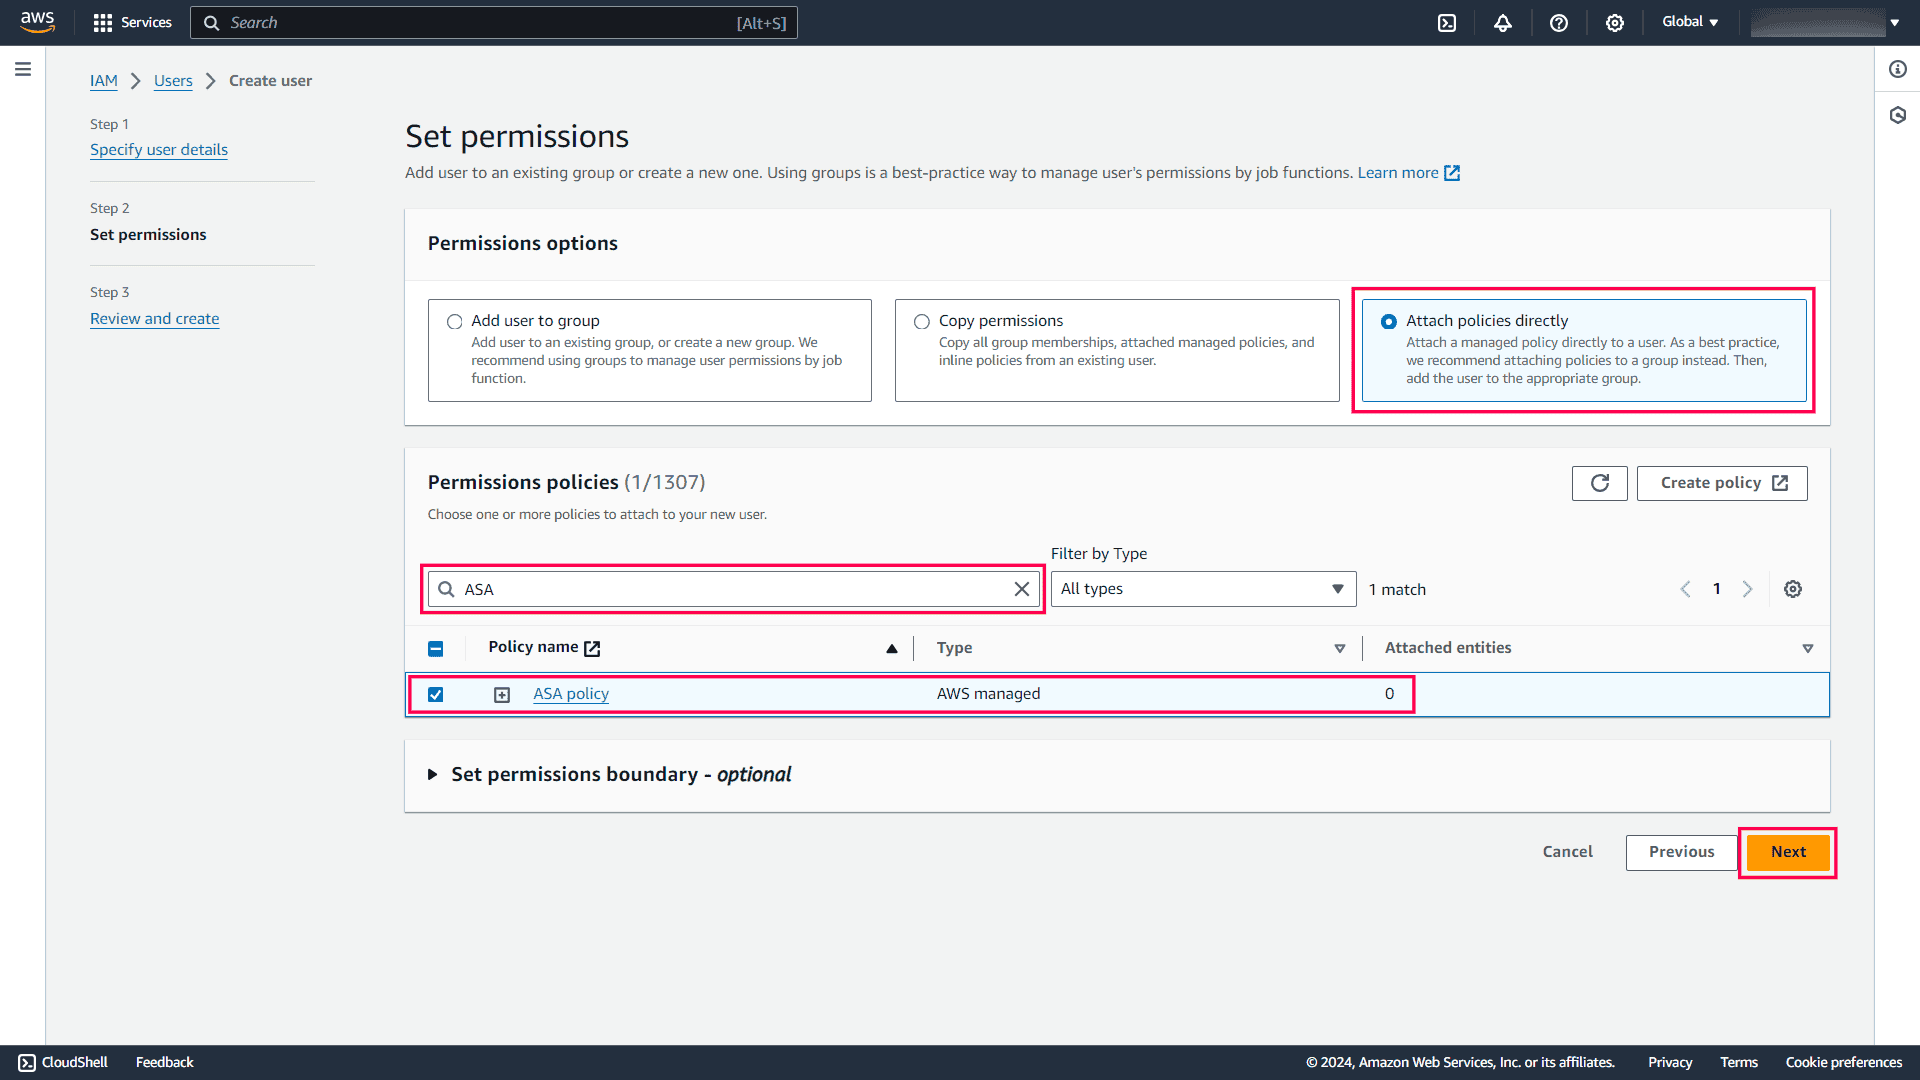
- On the Set permissions page, select Attach policies directly.
- Browse and select the policy that you just created and click Next.
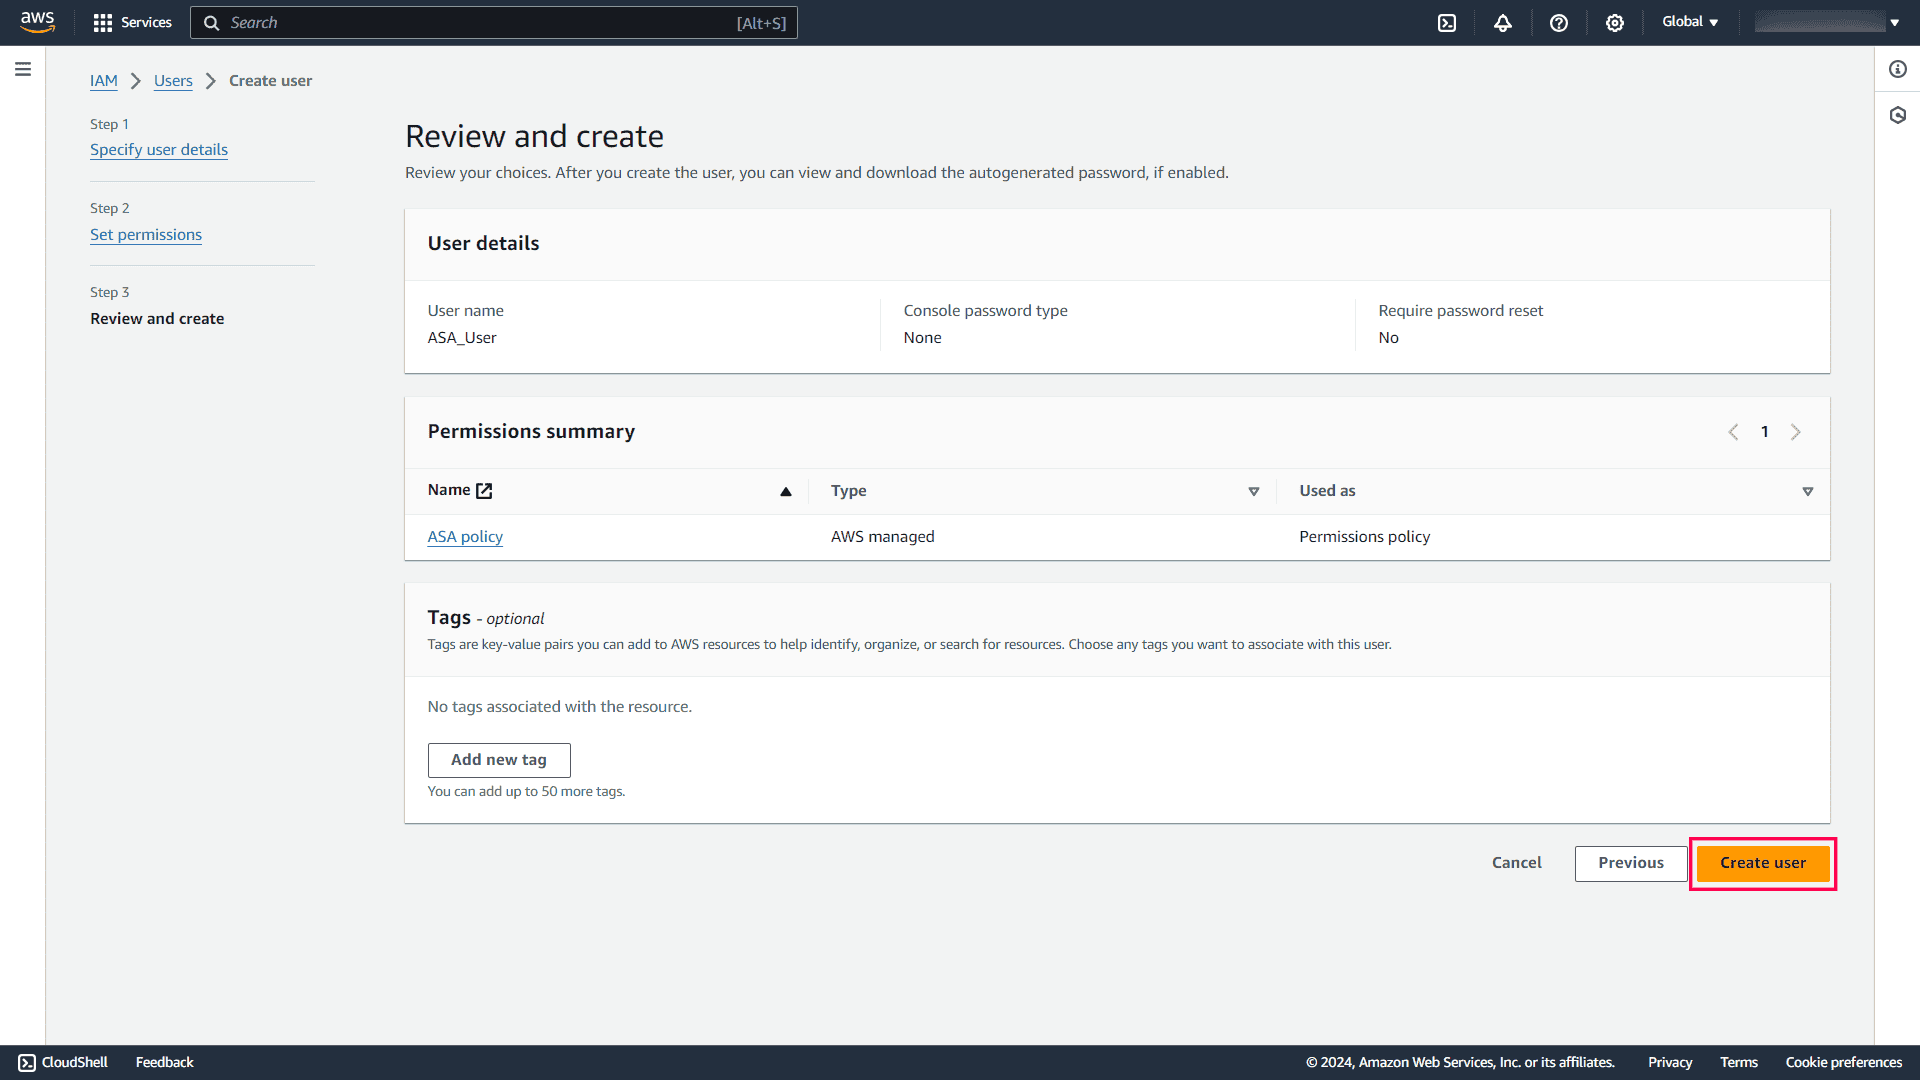
- Review your choices and click Create user.
Retrieve the access key and secret access key
- In the IAM console, click Users from the navigation menu, and select the user that you created.
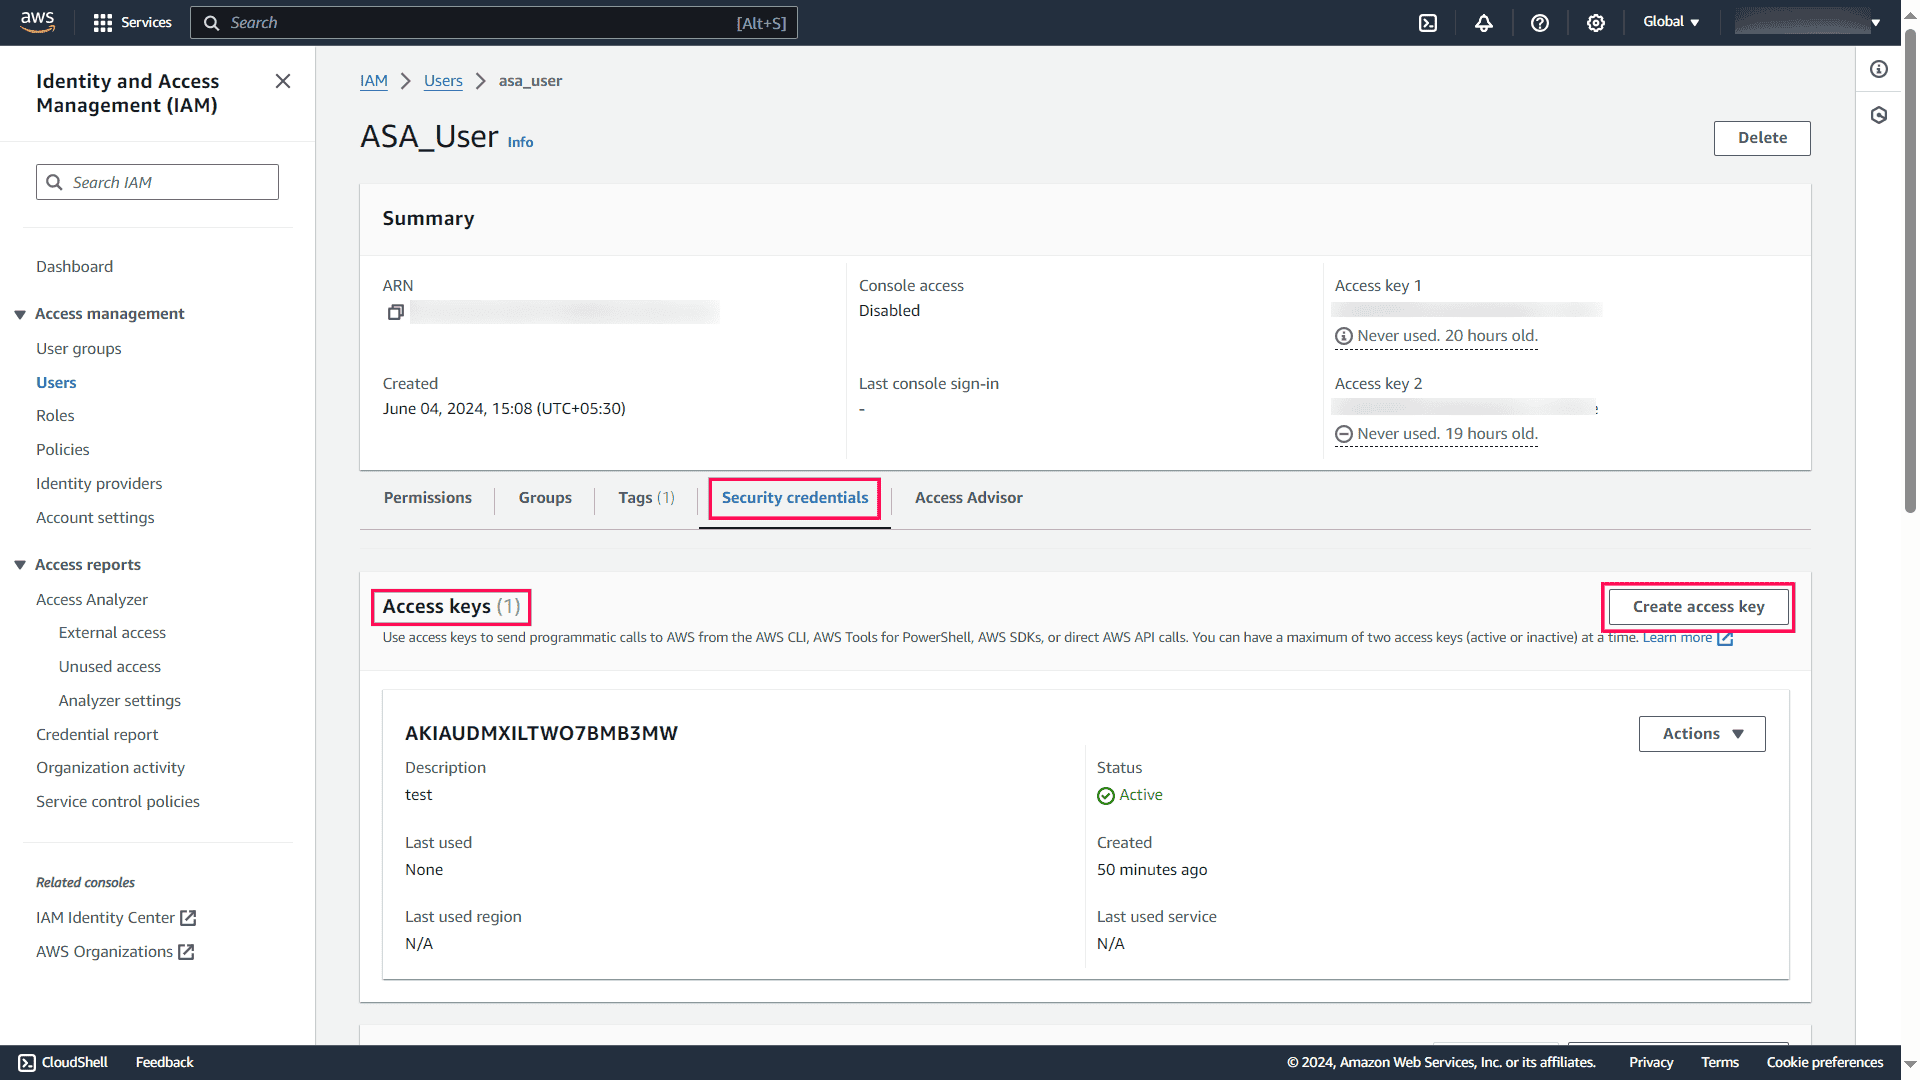
- Click the Security credentials tab, and on the Access keys panel, click Create access key.
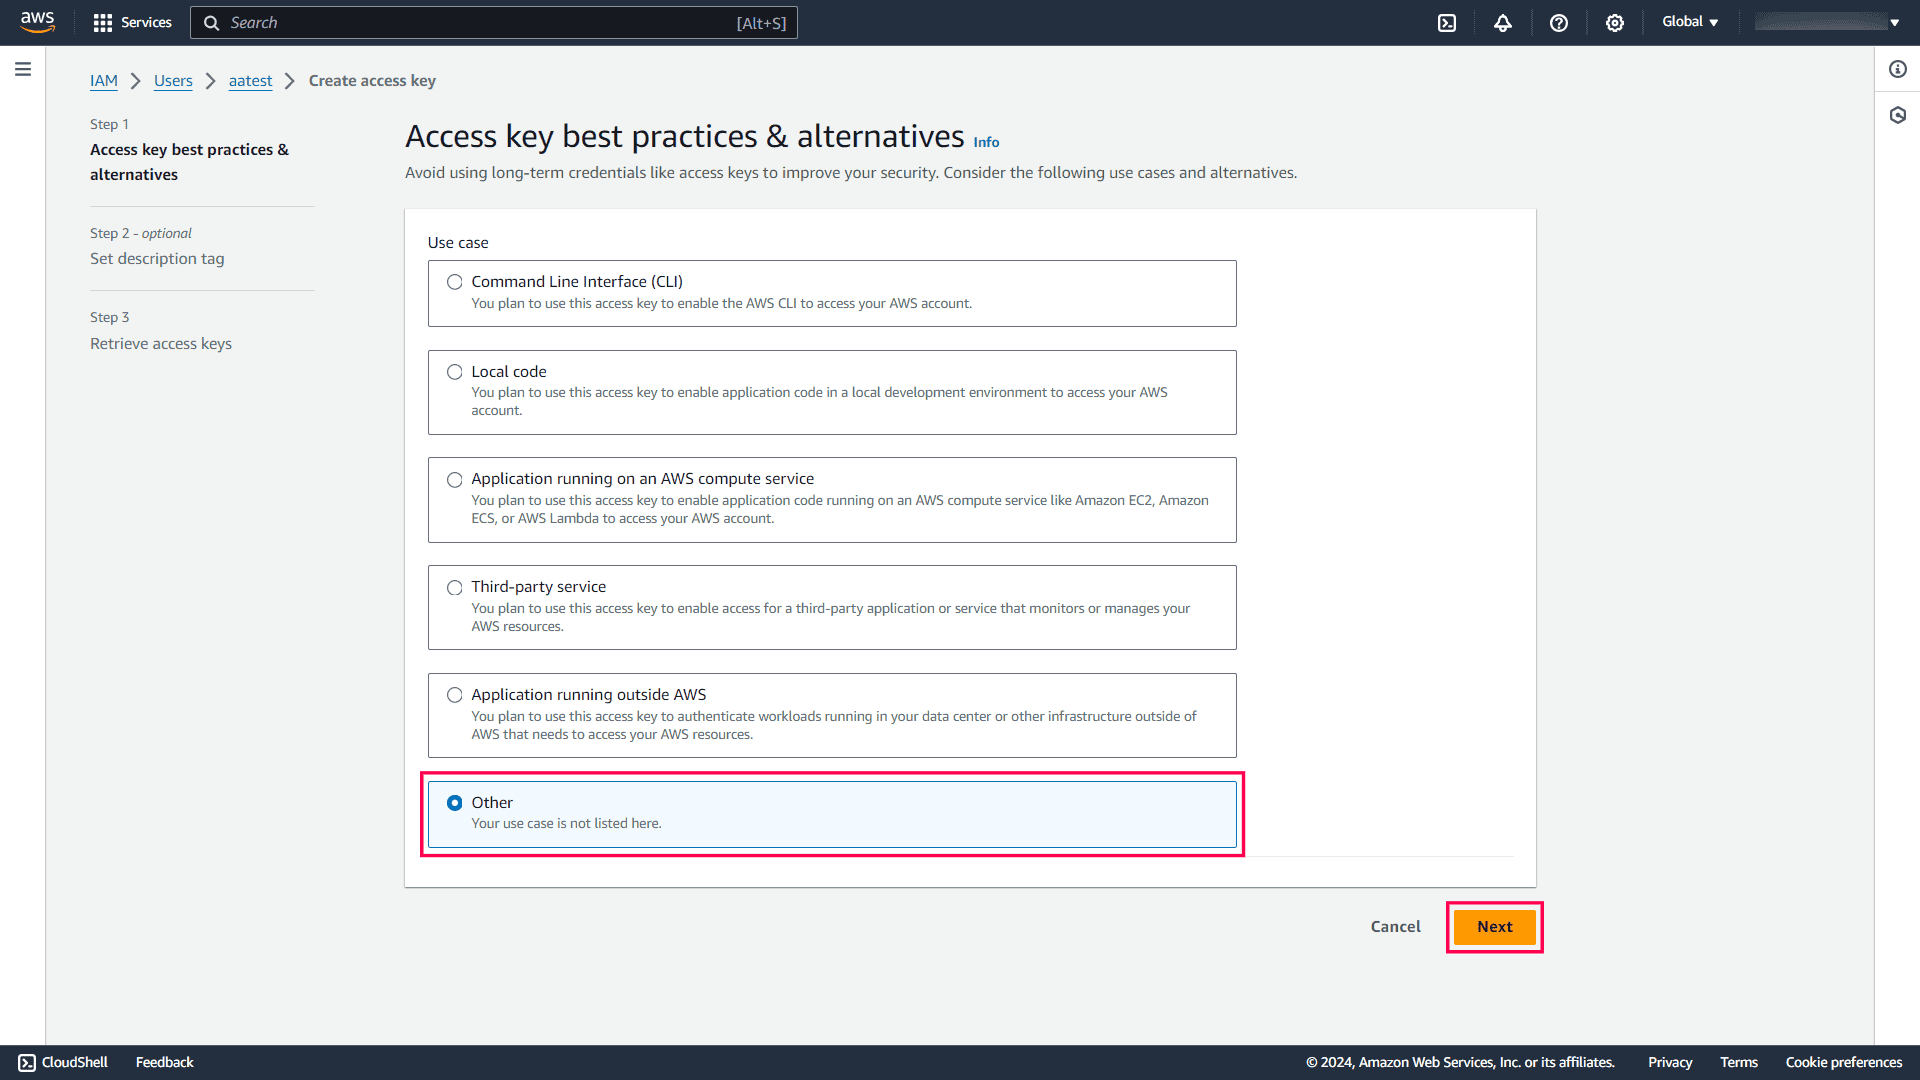
- Select Other as your use case, and click Next.
- Set a suitable description tag value if required, and click Create access key.
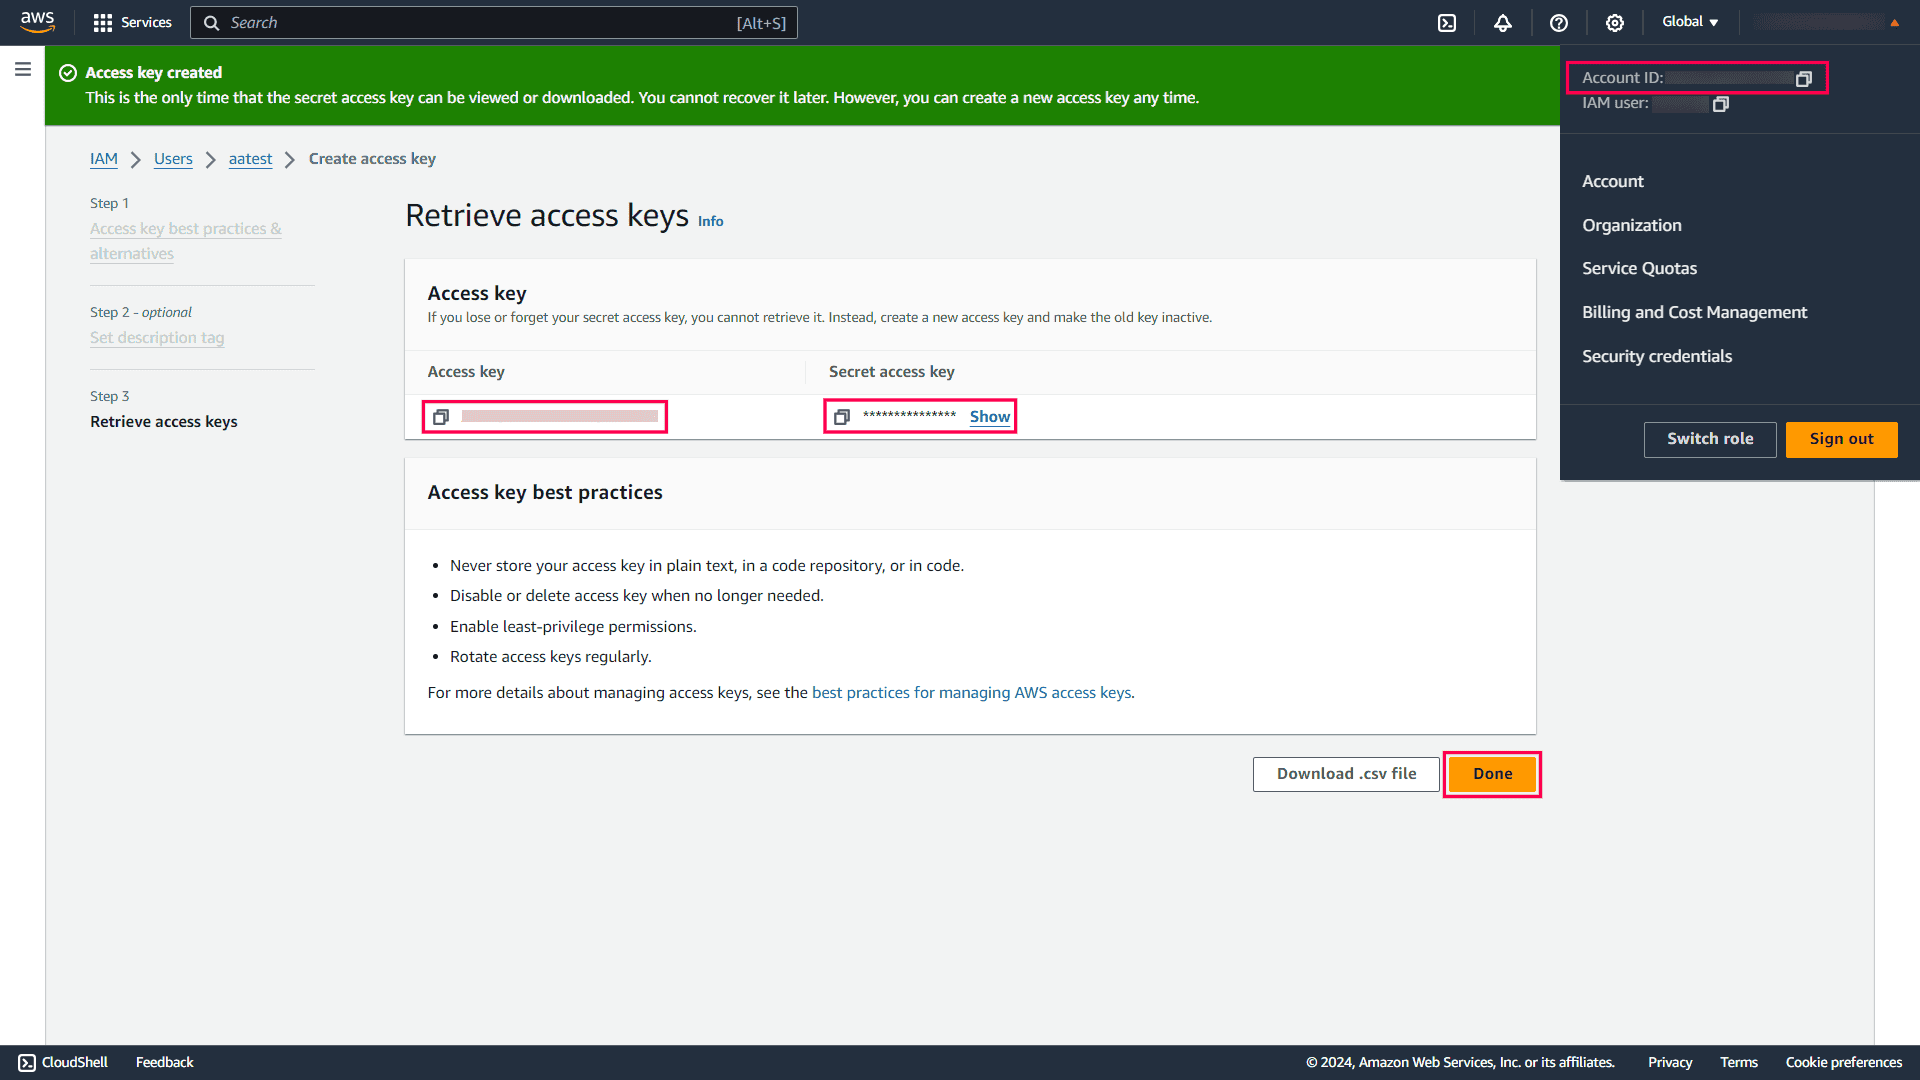
- Once the key is created, you can view the user's Access key and the Secret access key. Copy them to your clipboard as you will need them when configuring the AWS cloud directory in ADAudit Plus.
- From the navigation bar on the top, click the drop-down next to your account information, copy the Account ID, and then click Done.
- Log in to your ADAudit Plus web console.
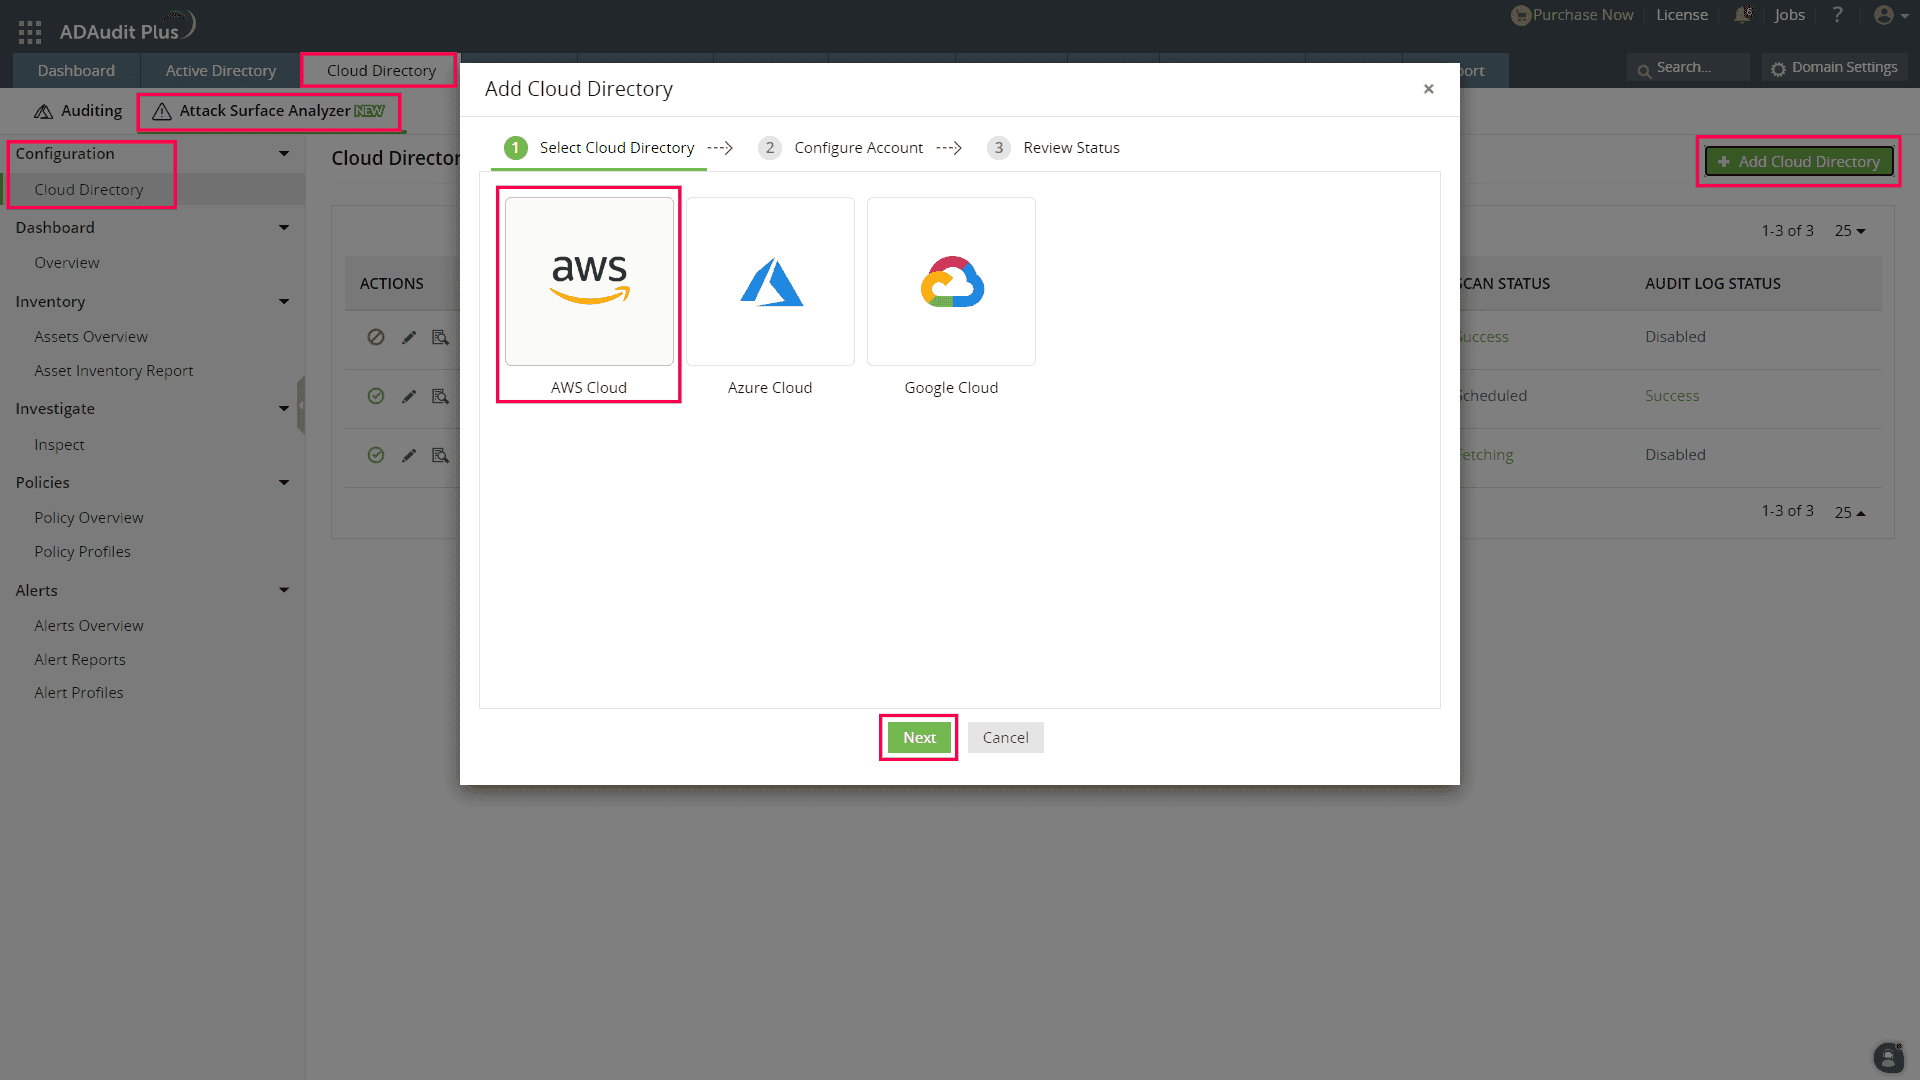
- Navigate to the Cloud Directory tab > Attack Surface Analyzer > Configuration > Cloud Directory.
- Click +Add Cloud Directory in the top-right.
- Select AWS Cloud from the Add Cloud Directory popup.
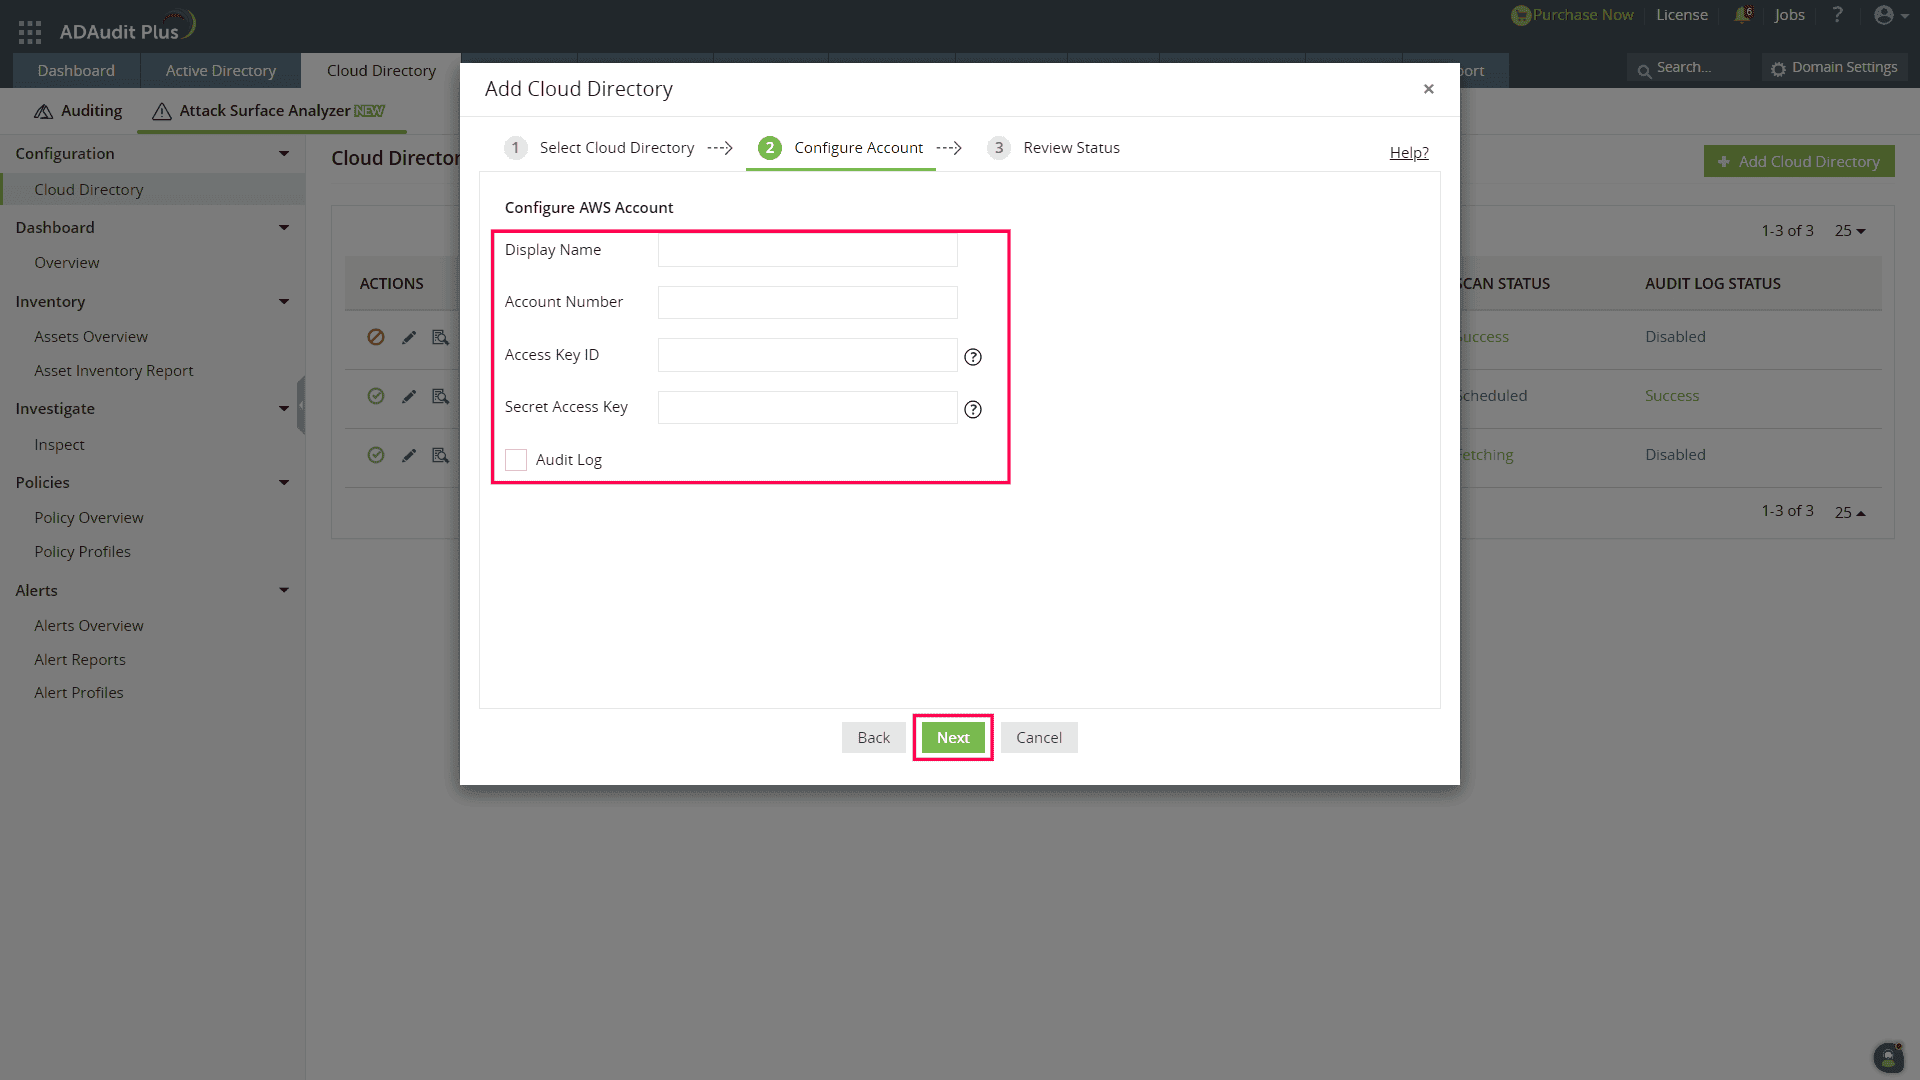
- Enter a suitable Display Name and enter the account ID, access key, and secret access key that you copied earlier in the Account Number, Access Key ID, and Secret Access Key fields respectively.
- Select the Audit Log check box if you want to fetch and monitor all the operations performed in your AWS cloud directory, and then click Next.
- Review your settings and click Finish.
Don't see what you're looking for?
-
Visit our community
Post your questions in the forum.
-
Request additional resources
Send us your requirements.
-
Need implementation assistance?
Try OnboardPro

 Click here to expand


