Attack Surface Analyzer for Google Cloud Directory
With the Attack Surface Analyzer, you can detect threats within your Google Cloud directory and enhance cloud security.
Listed below are the services tracked by the Attack Surface Analyzer for Google Cloud directory:
- GCP Compute Engine
- GCP VPC Networks
- GCP Big Query
- GCP Network Services
- GCP Cloud Storage
- GCP KMS
- GCP SQL
- GCP Logging
- GCP Kubernetes Engine
- GCP Organization
- GCP App Engine
- GCP Cloud Function
- GCP Composer
- GCP Dataproc
- GCP Cloud Run
- GCP Big Table
- GCP Deployment Manager
- GCP Pub/Sub
- GCP FileStore
- GCP Spanner
- GCP AlloyDB
- GCP Batch
- GCP Build
- GCP API and Services
- GCP DataFlow
- GCP Load Balancing
- GCP API Keys
- GCP IAM
- GCP Projects
Prerequisites
For the Attack Surface Analyzer to function seamlessly, the ADAudit Plus server should have a working internet connection. Additionally, the outbound HTTPS port 443 needs to be opened on the ADAudit Plus server to communicate with Google Cloud Directory.
Before configuring your Google Cloud Directory for attack surface analysis in ADAudit Plus, you will need to:
Note: ADAudit Plus supports project-based Google Cloud directory configuration for attack surface analysis.
Create a custom role
- Open the Google Cloud console and select the project for which you want to create a custom role.
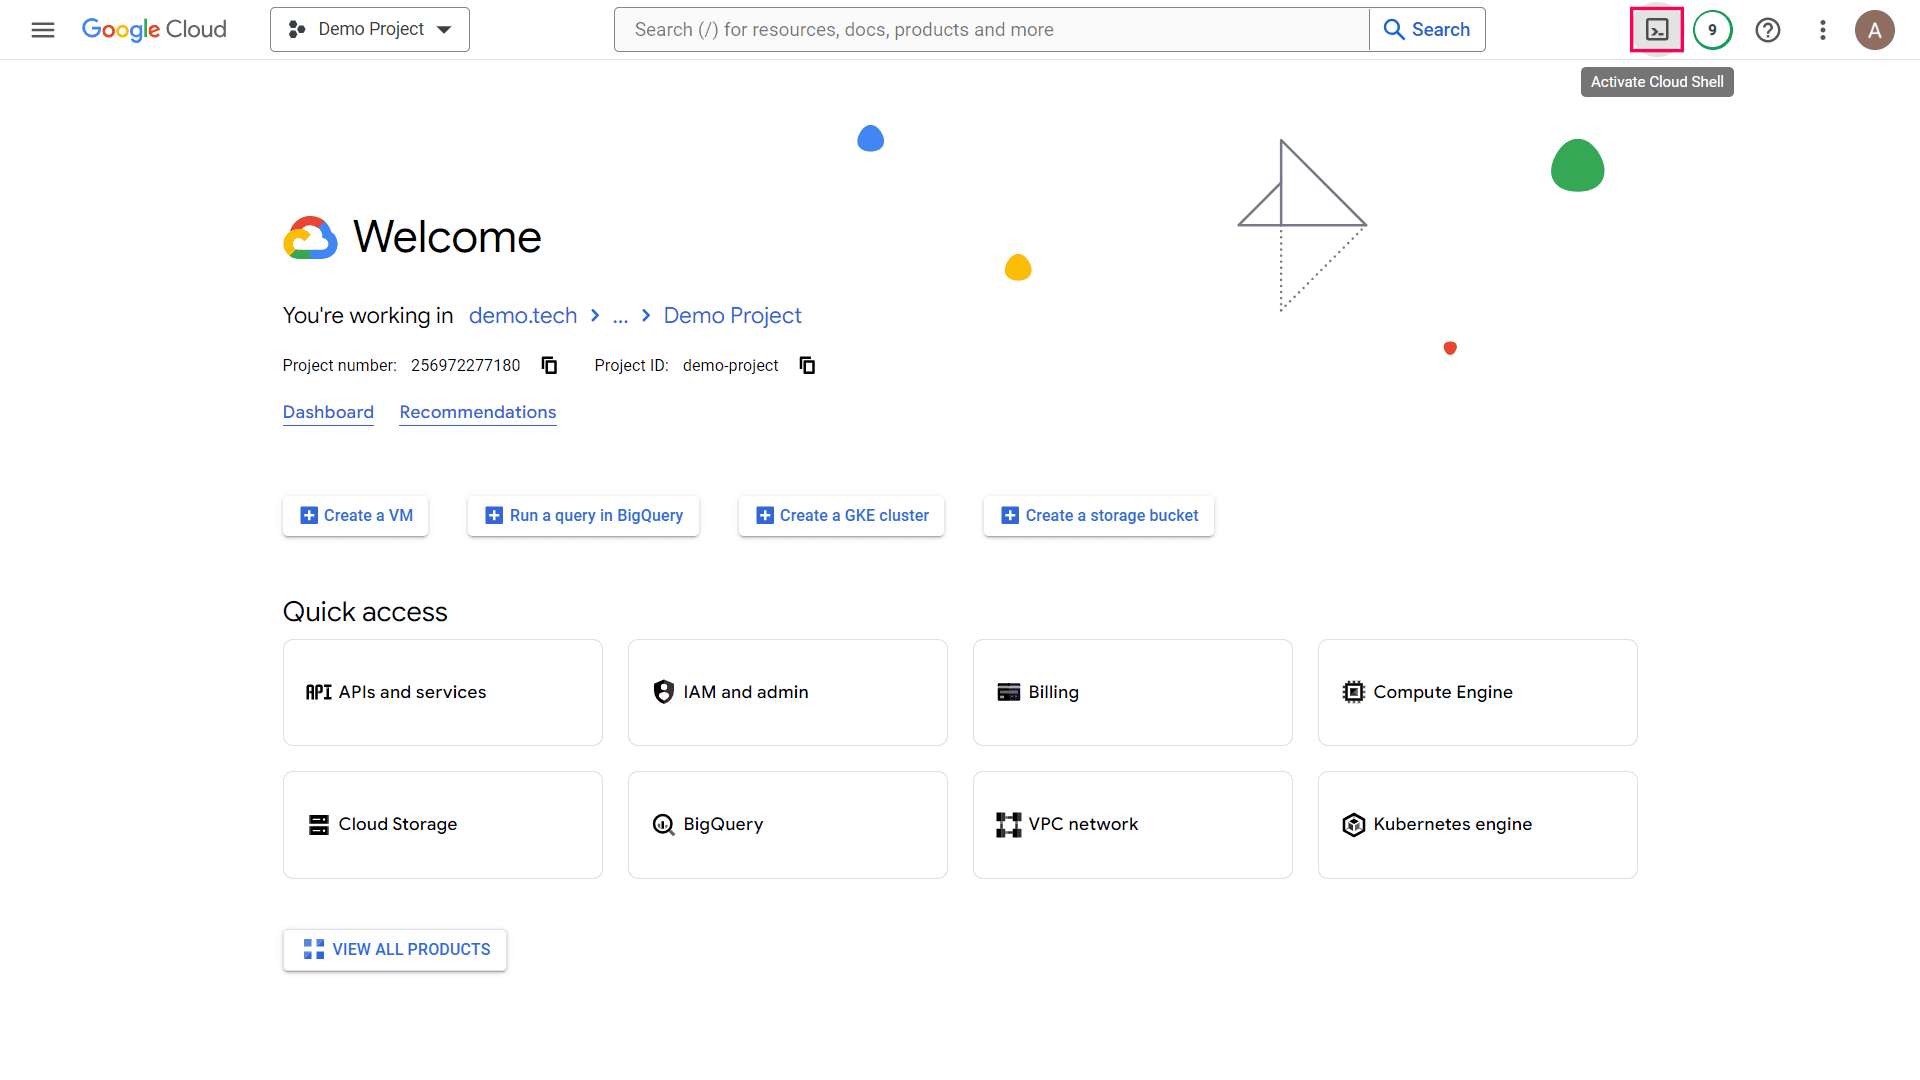
- In the top-right, find and select the Activate Cloud Shell icon.
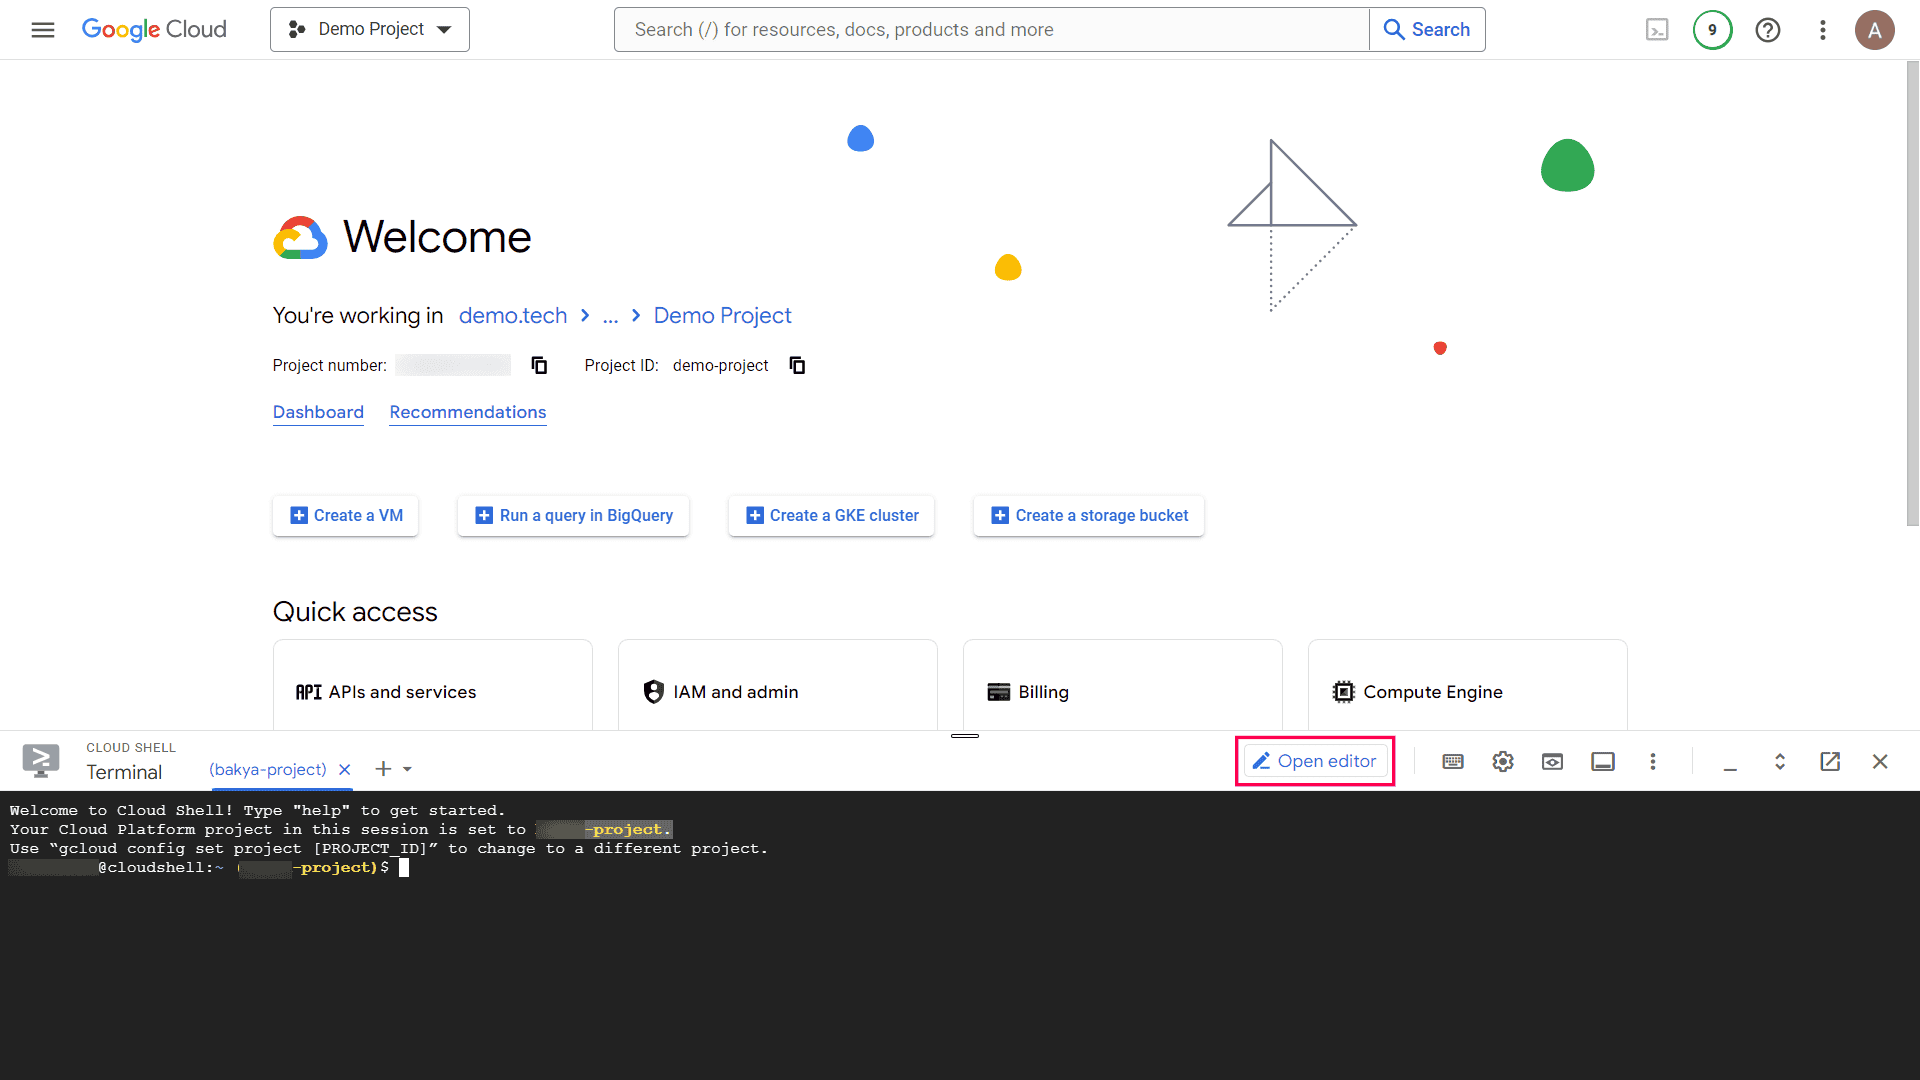
- Within the Cloud Shell Terminal, select Open editor on the top menu.
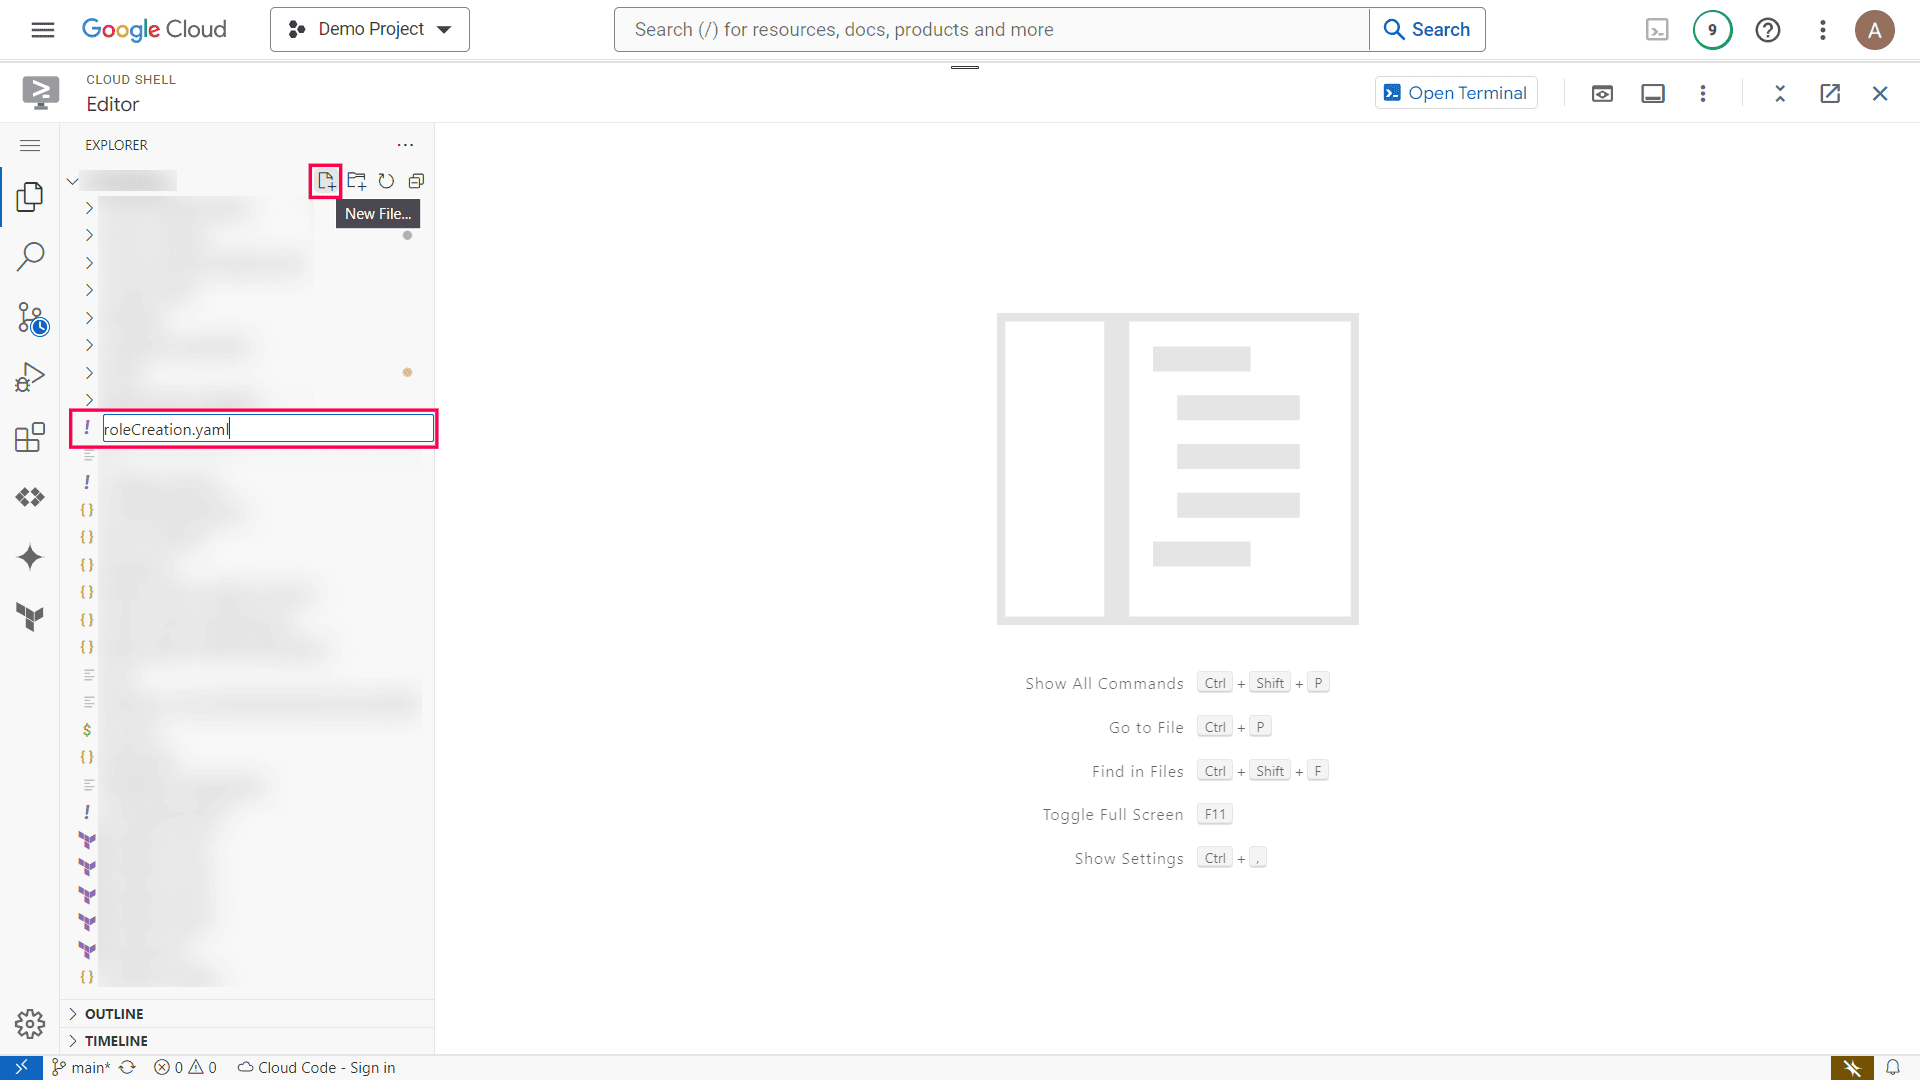
- In the left pane, find and select the New File... icon and create a new YAML file with a suitable name. For example: roleCreation.yaml.
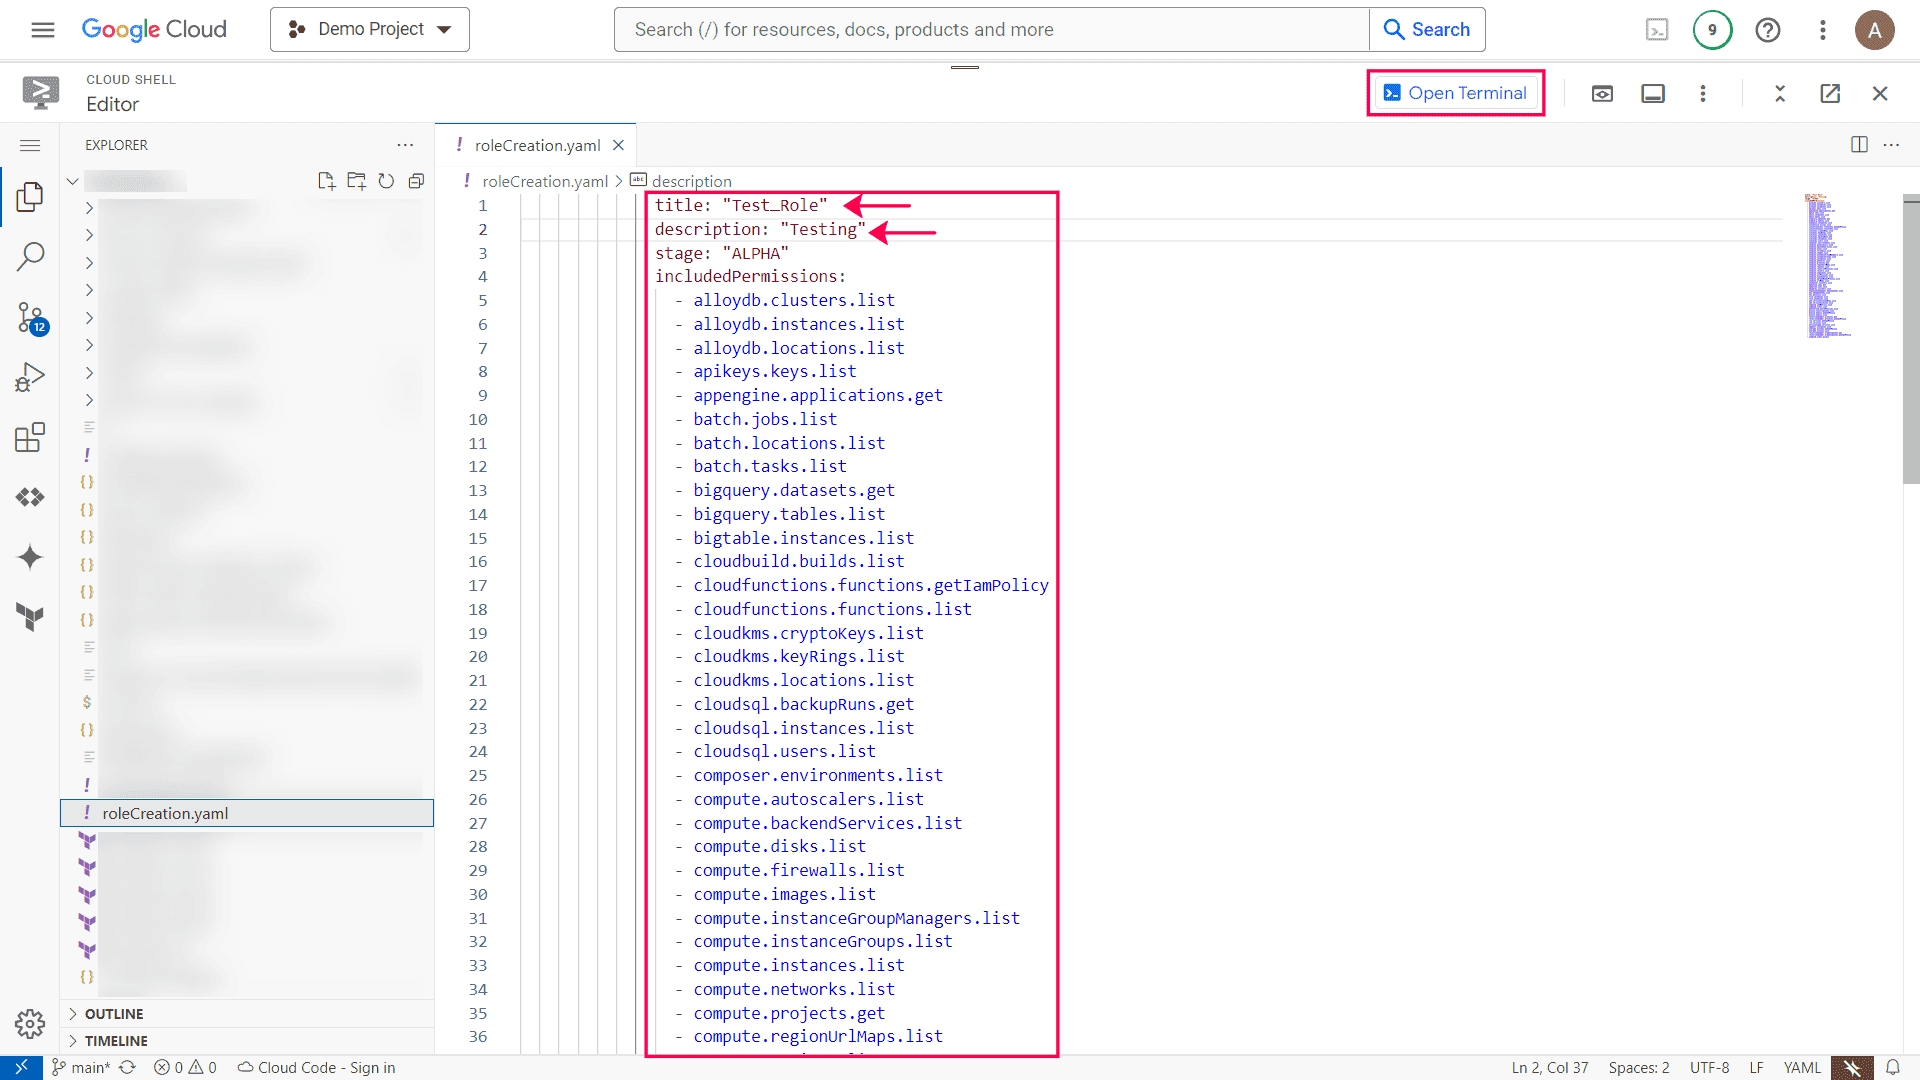
- Copy the permission statement from this file and paste it in the YAML file that you just created.
Note: Ensure that you don't modify the indentation when pasting the permission statement.
- In the permission statement that you just pasted in the YAML file:
- Find the line containing title: "ROLE_NAME" and replace "ROLE_NAME" with a suitable title of your choice. For example: Test_Role.
- Find the line containing description: "ROLE_DESCRIPTION" and replace "ROLE_DECRIPTION" with a suitable description of your choice.
- Execute the following command to create the custom role at the organization level:
gcloud iam roles create ROLE_ID --organization=ORGANIZATION_ID --file=YAML_FILE_PATH
For example: gcloud iam roles create Test_Role --organization=********* --file=roleCreation.yaml
In the above command:
- Replace ROLE_ID with the title that you used in the YAML file in step five.
- Replace ORGANIZATION_ID with the Project ID.
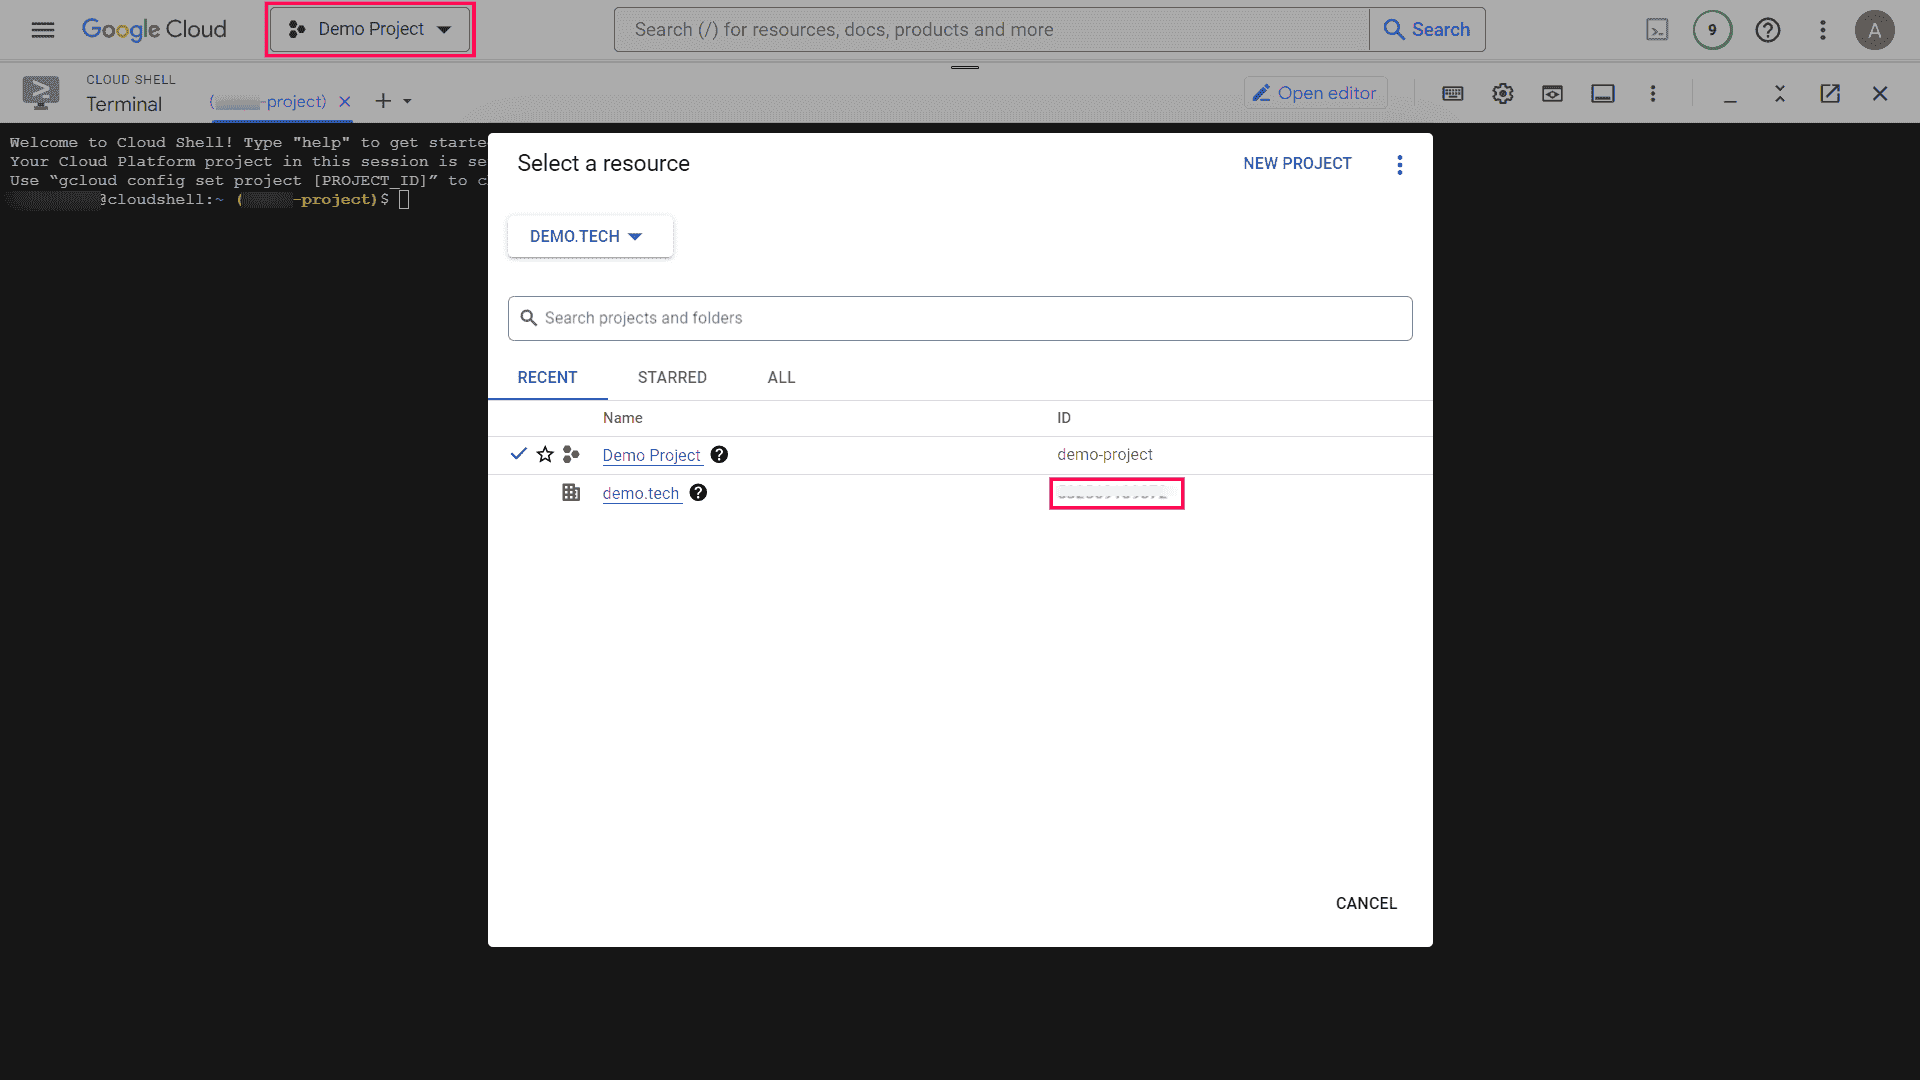
- Replace YAML_FILE_PATH with the name of the YAML file that you created in step four.
- In the Authorise Cloud Shell pop-up that appears, click AUTHORISE.
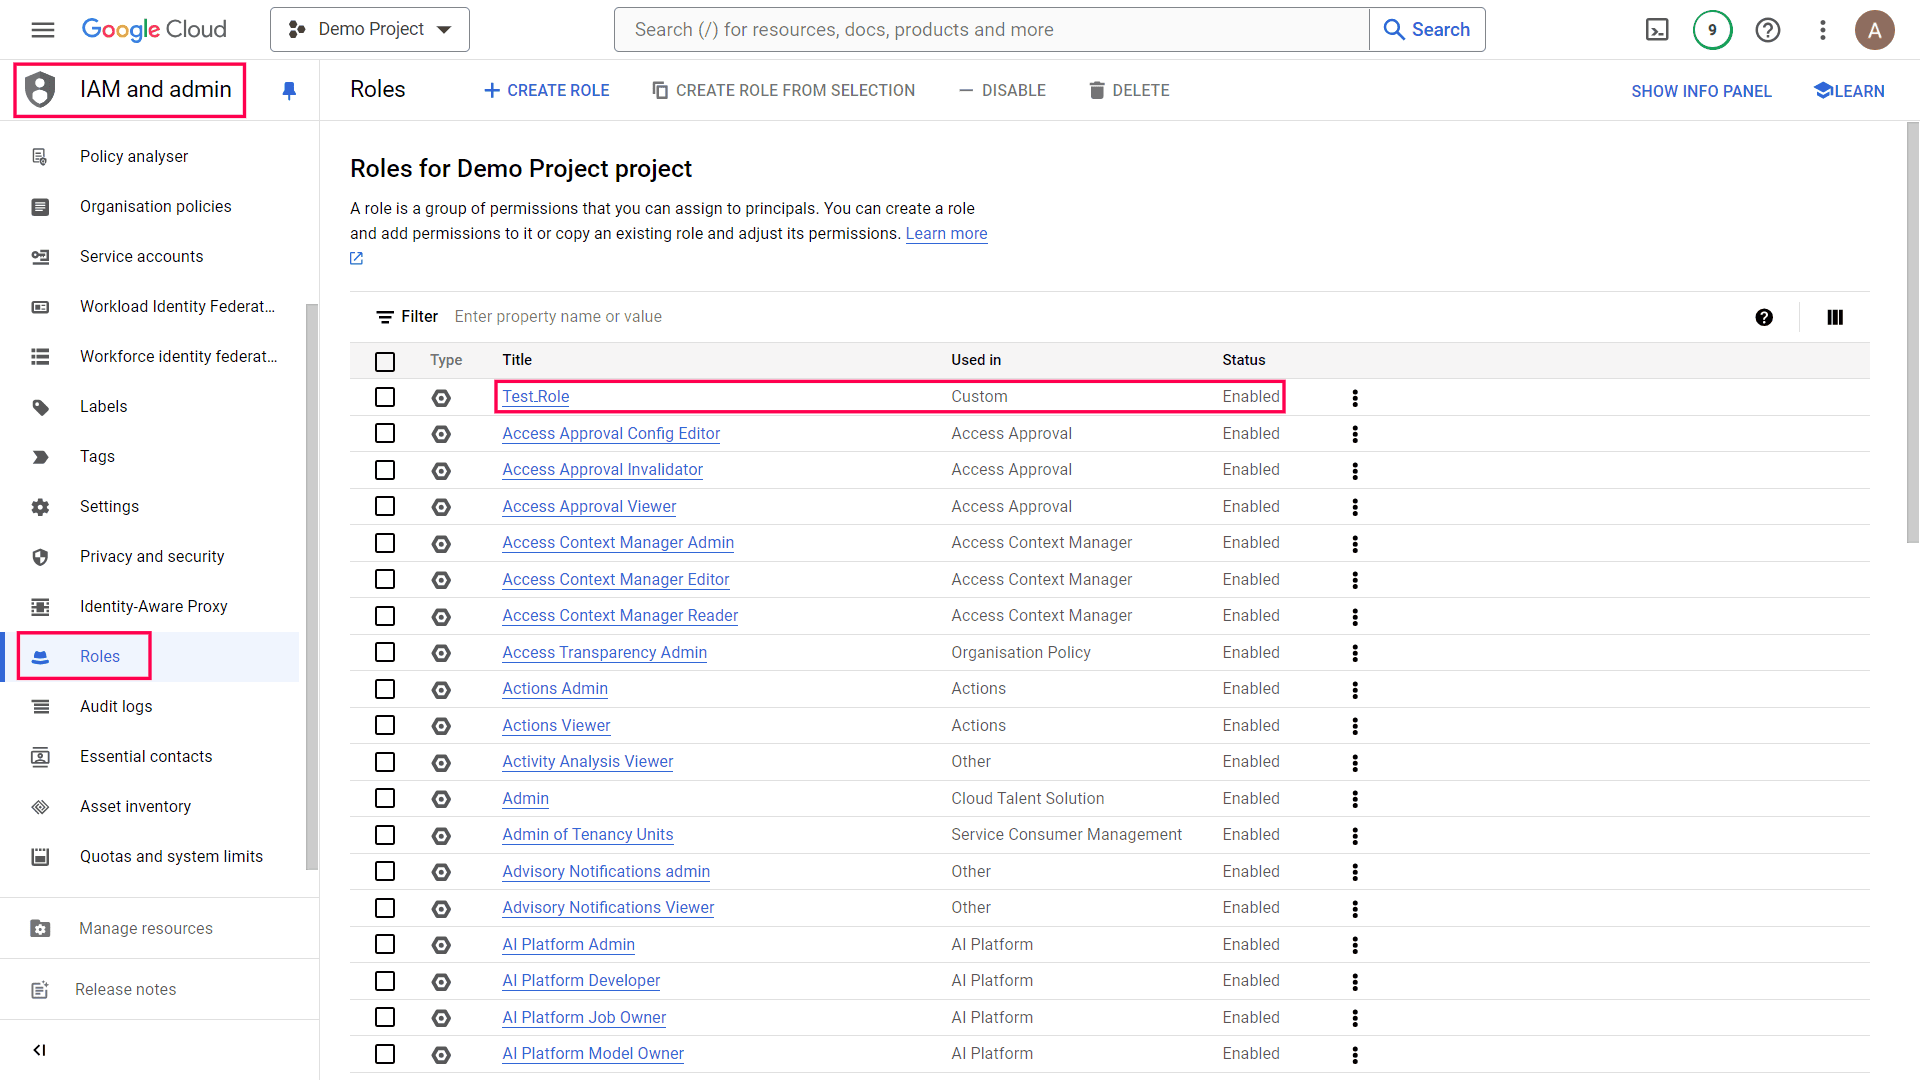
- In the Google Cloud console, navigate to the IAM and admin section, select Roles from the left pane, and ensure that the role you just created is listed.
Create a service account
- Open the Google Cloud console and select the project for which you want to create a service account.
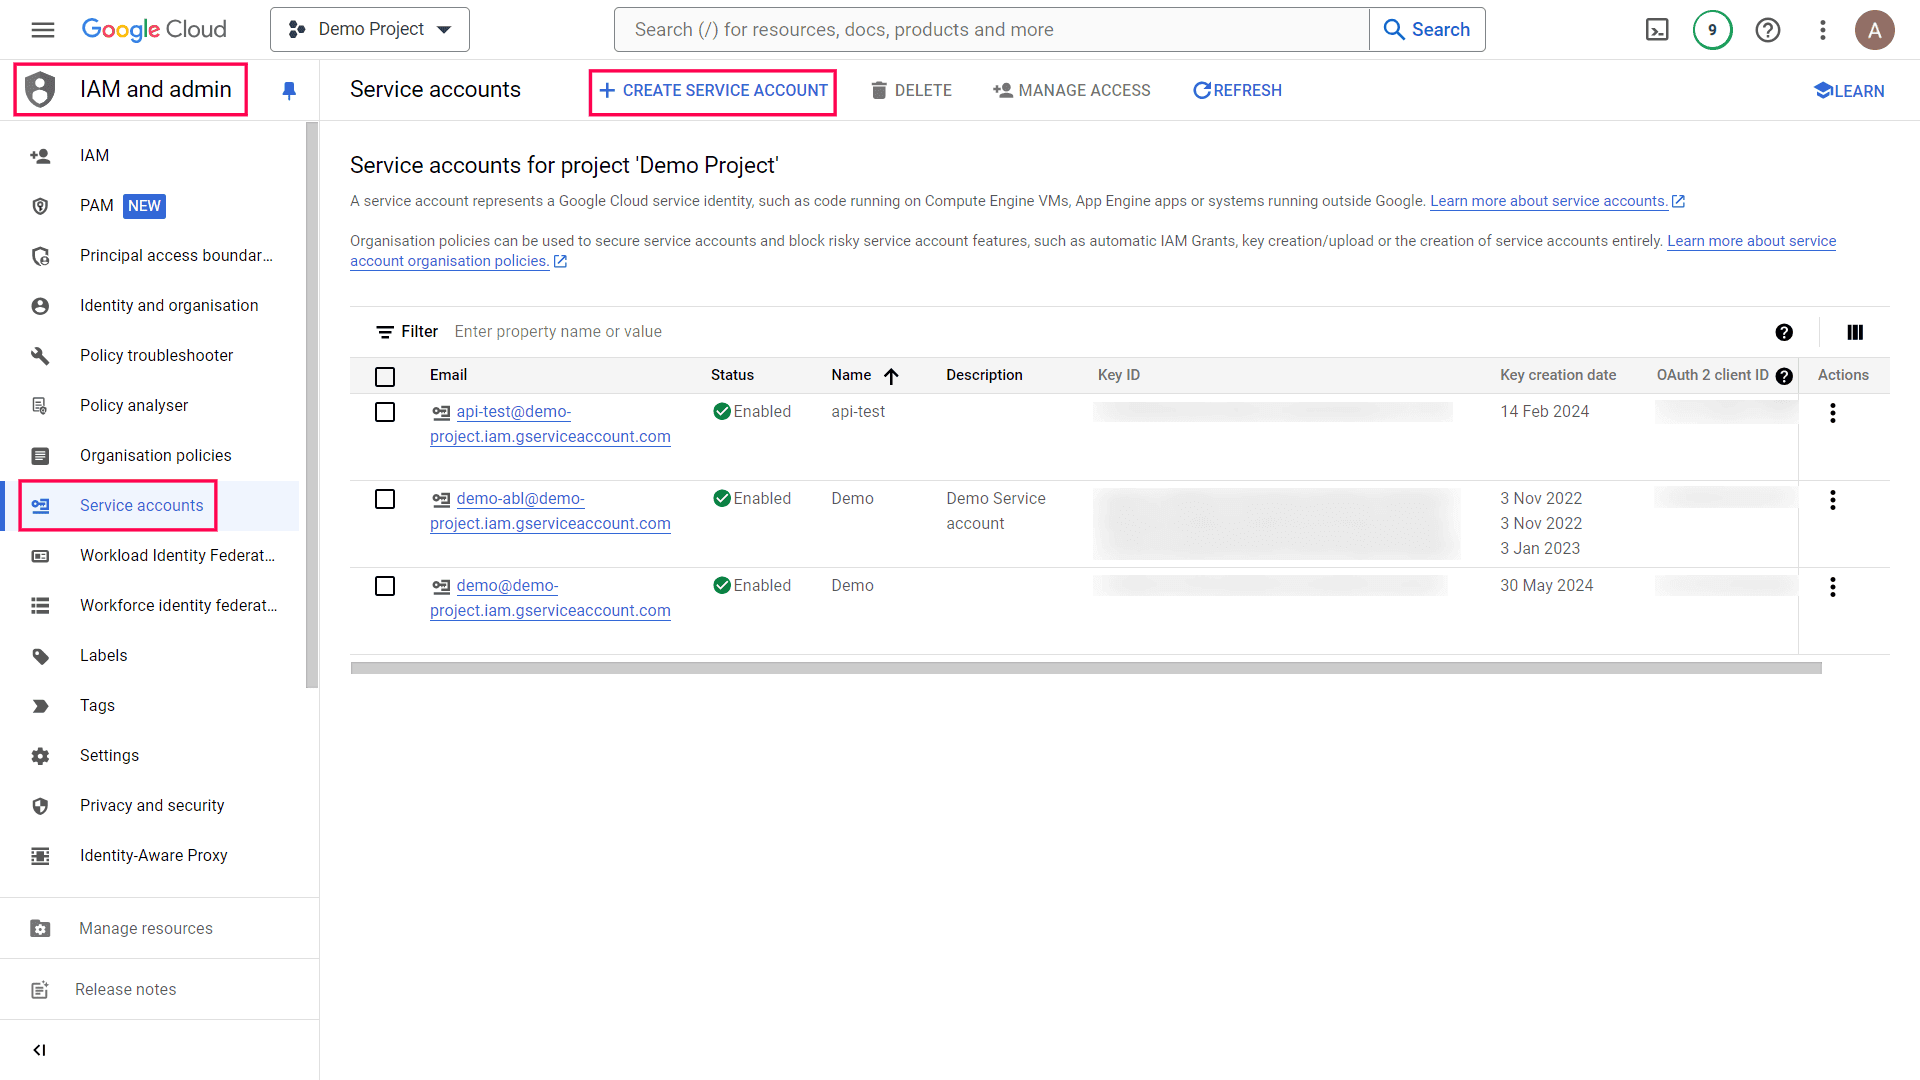
- Navigate to the IAM and admin section, select Service accounts from the left pane, and click +CREATE SERVICE ACCOUNT.
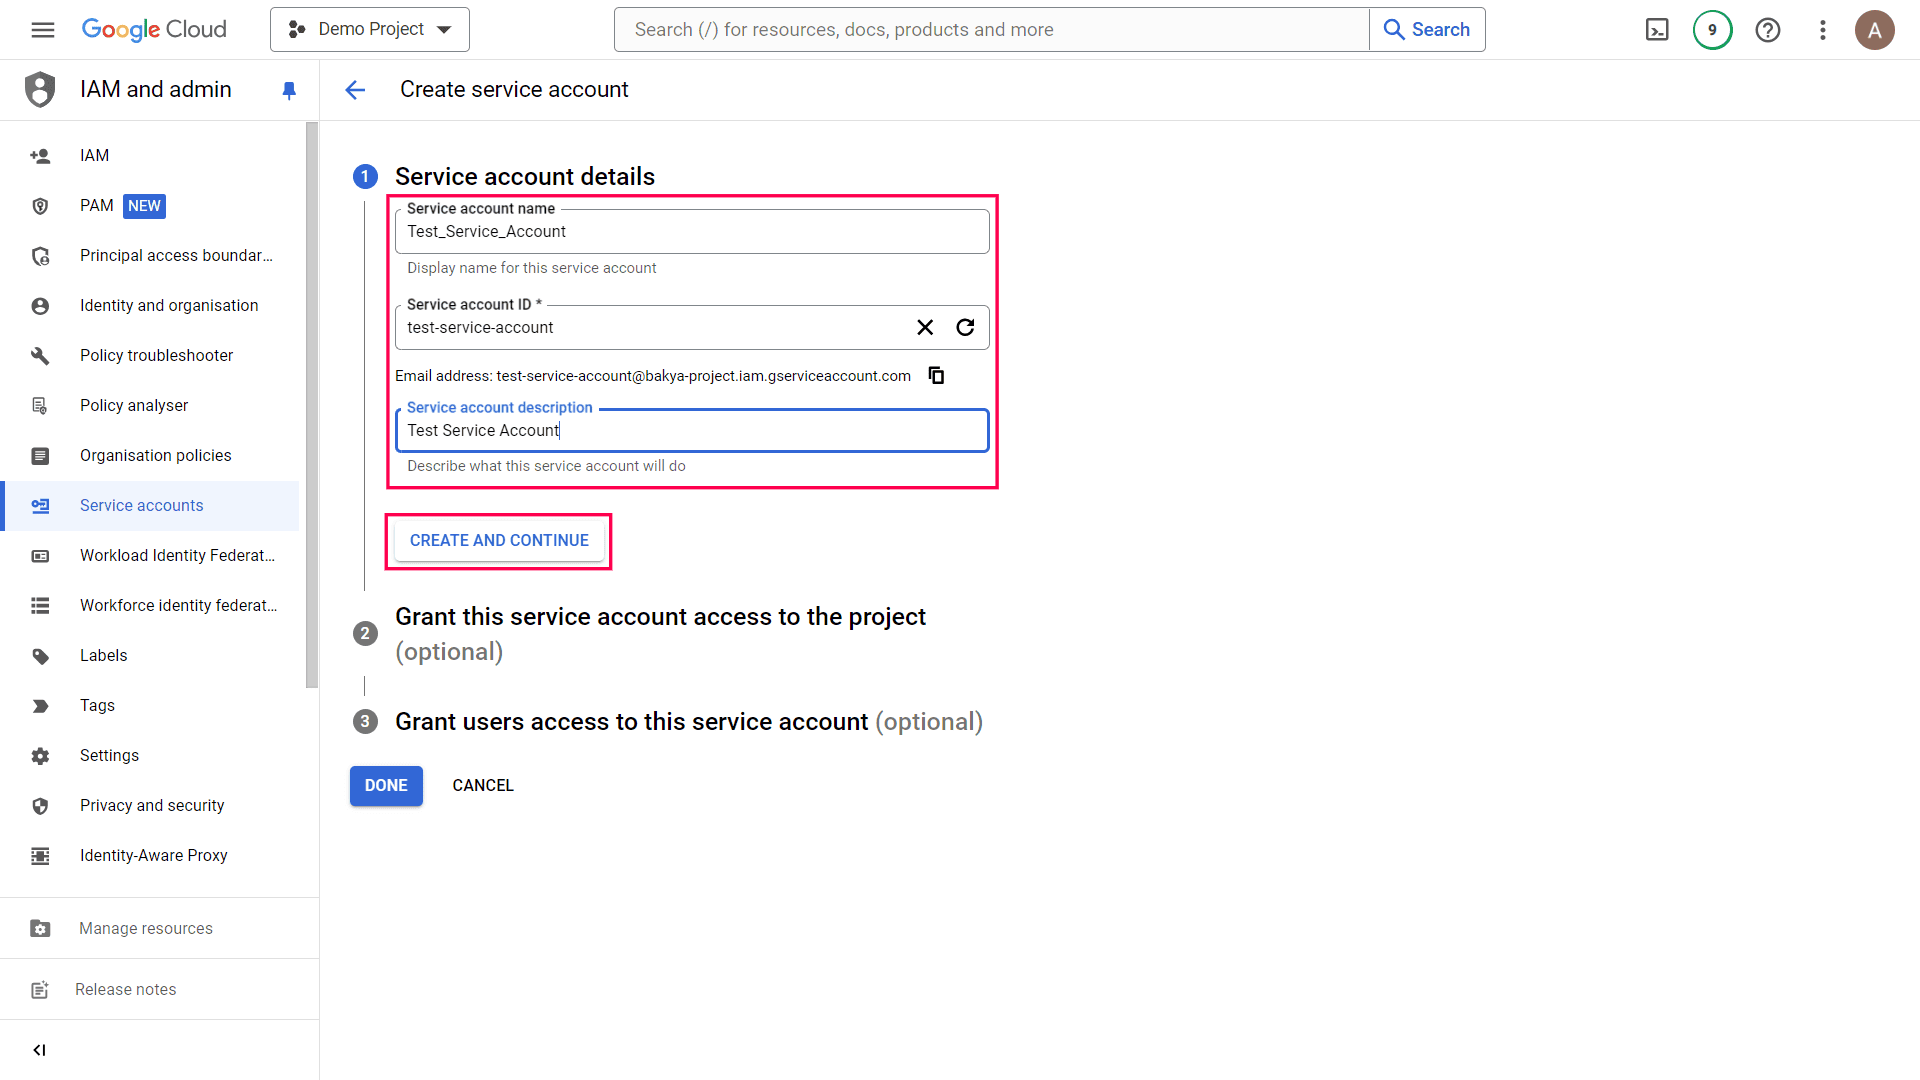
- Under Service account details, enter a suitable Service account name and a Service account description. The Service account ID will be generated automatically based on the service account name.
- Click CREATE AND CONTINUE.
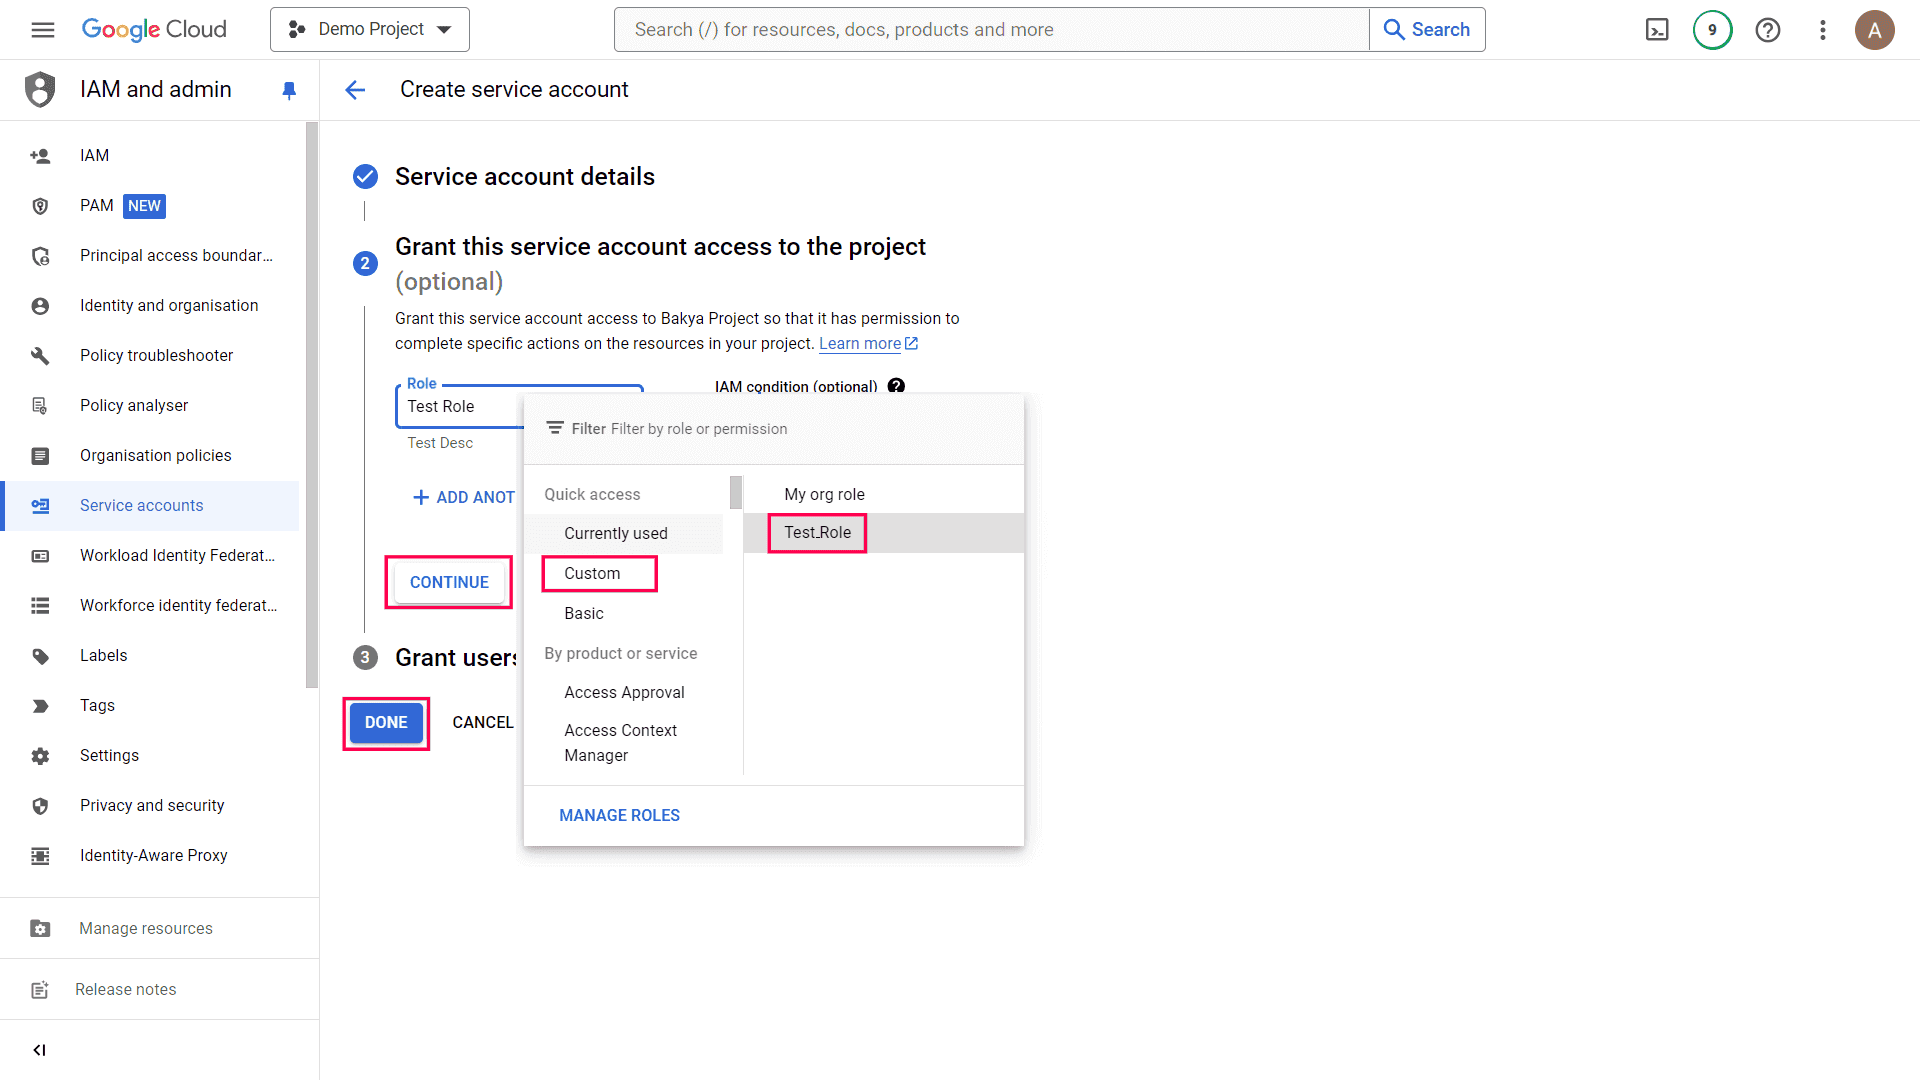
- Under Grant this service account access to the project, click Select a role, choose Custom, and select the role that you created earlier.
- Click CONTINUE, and then click DONE.
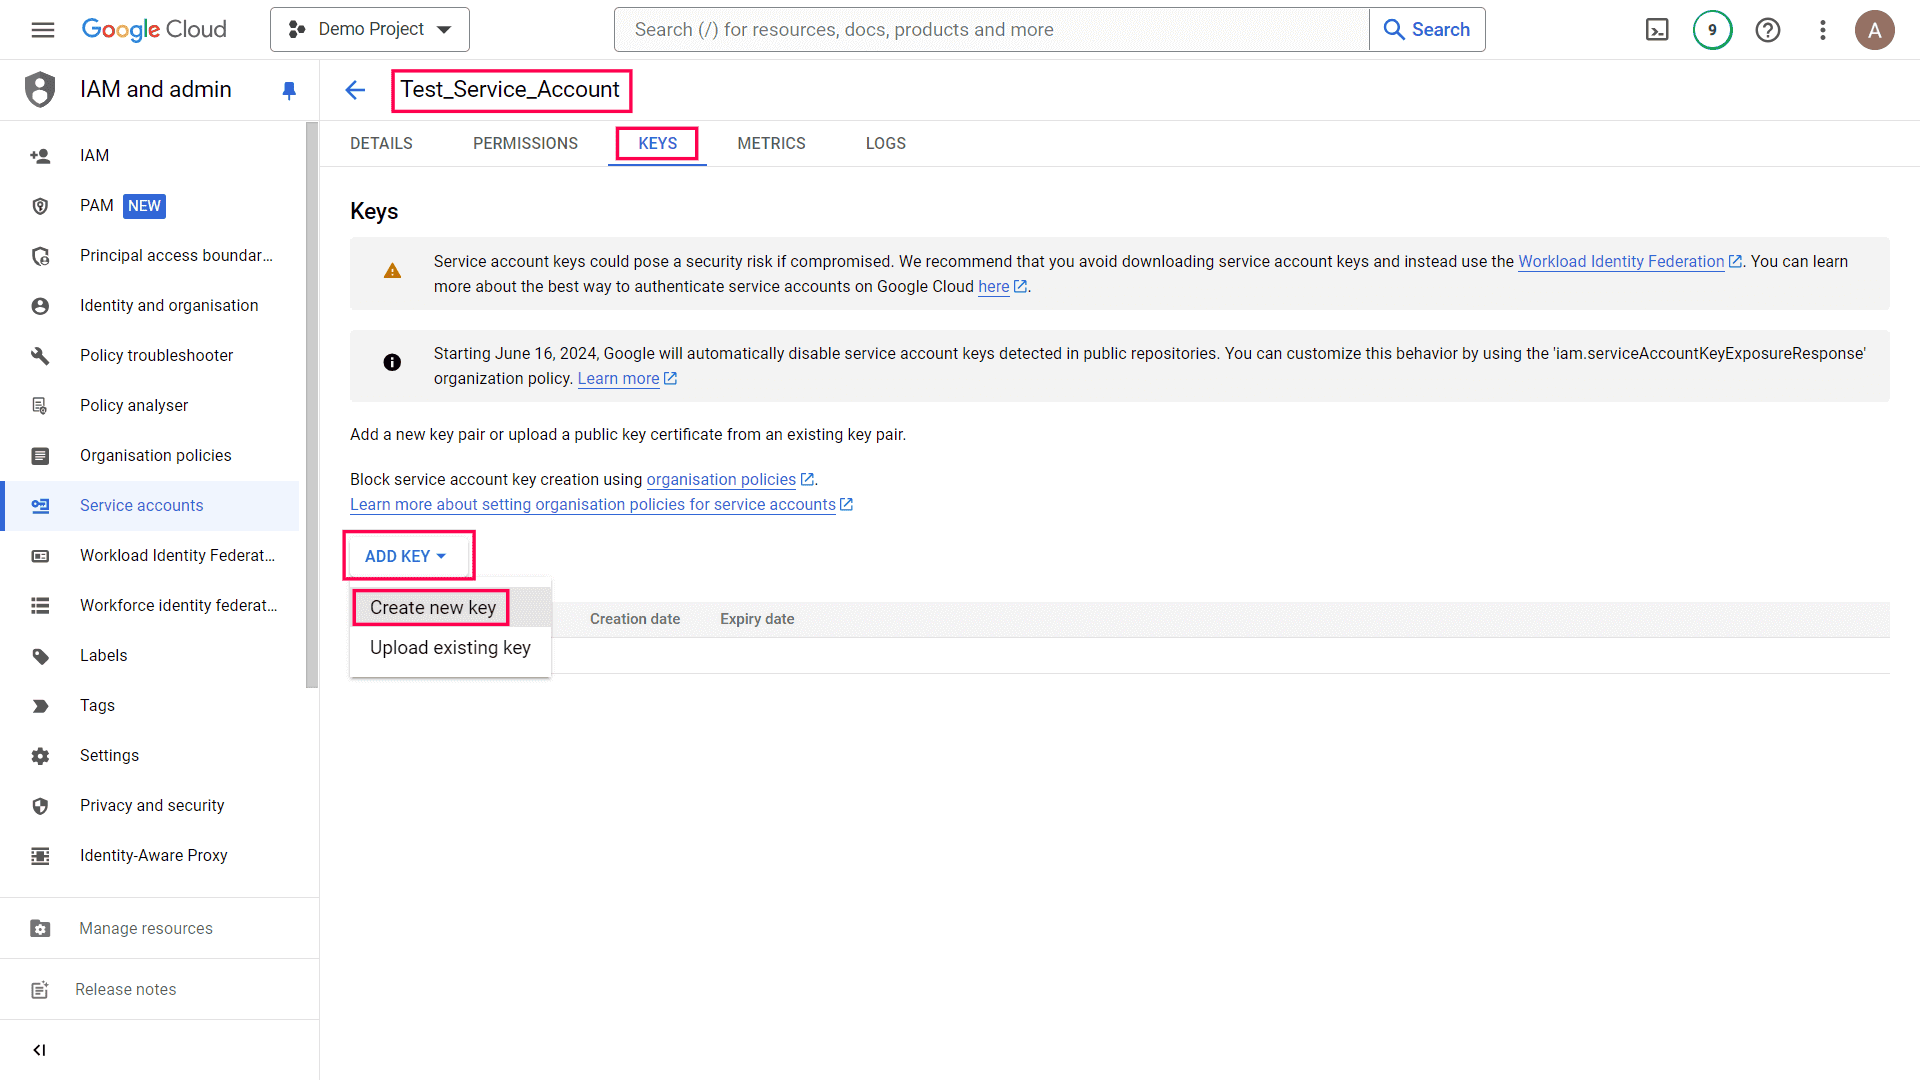
- Once the service account is created, select it, navigate to the KEYS tab, click ADD KEY, and select Create new key from the drop-down.
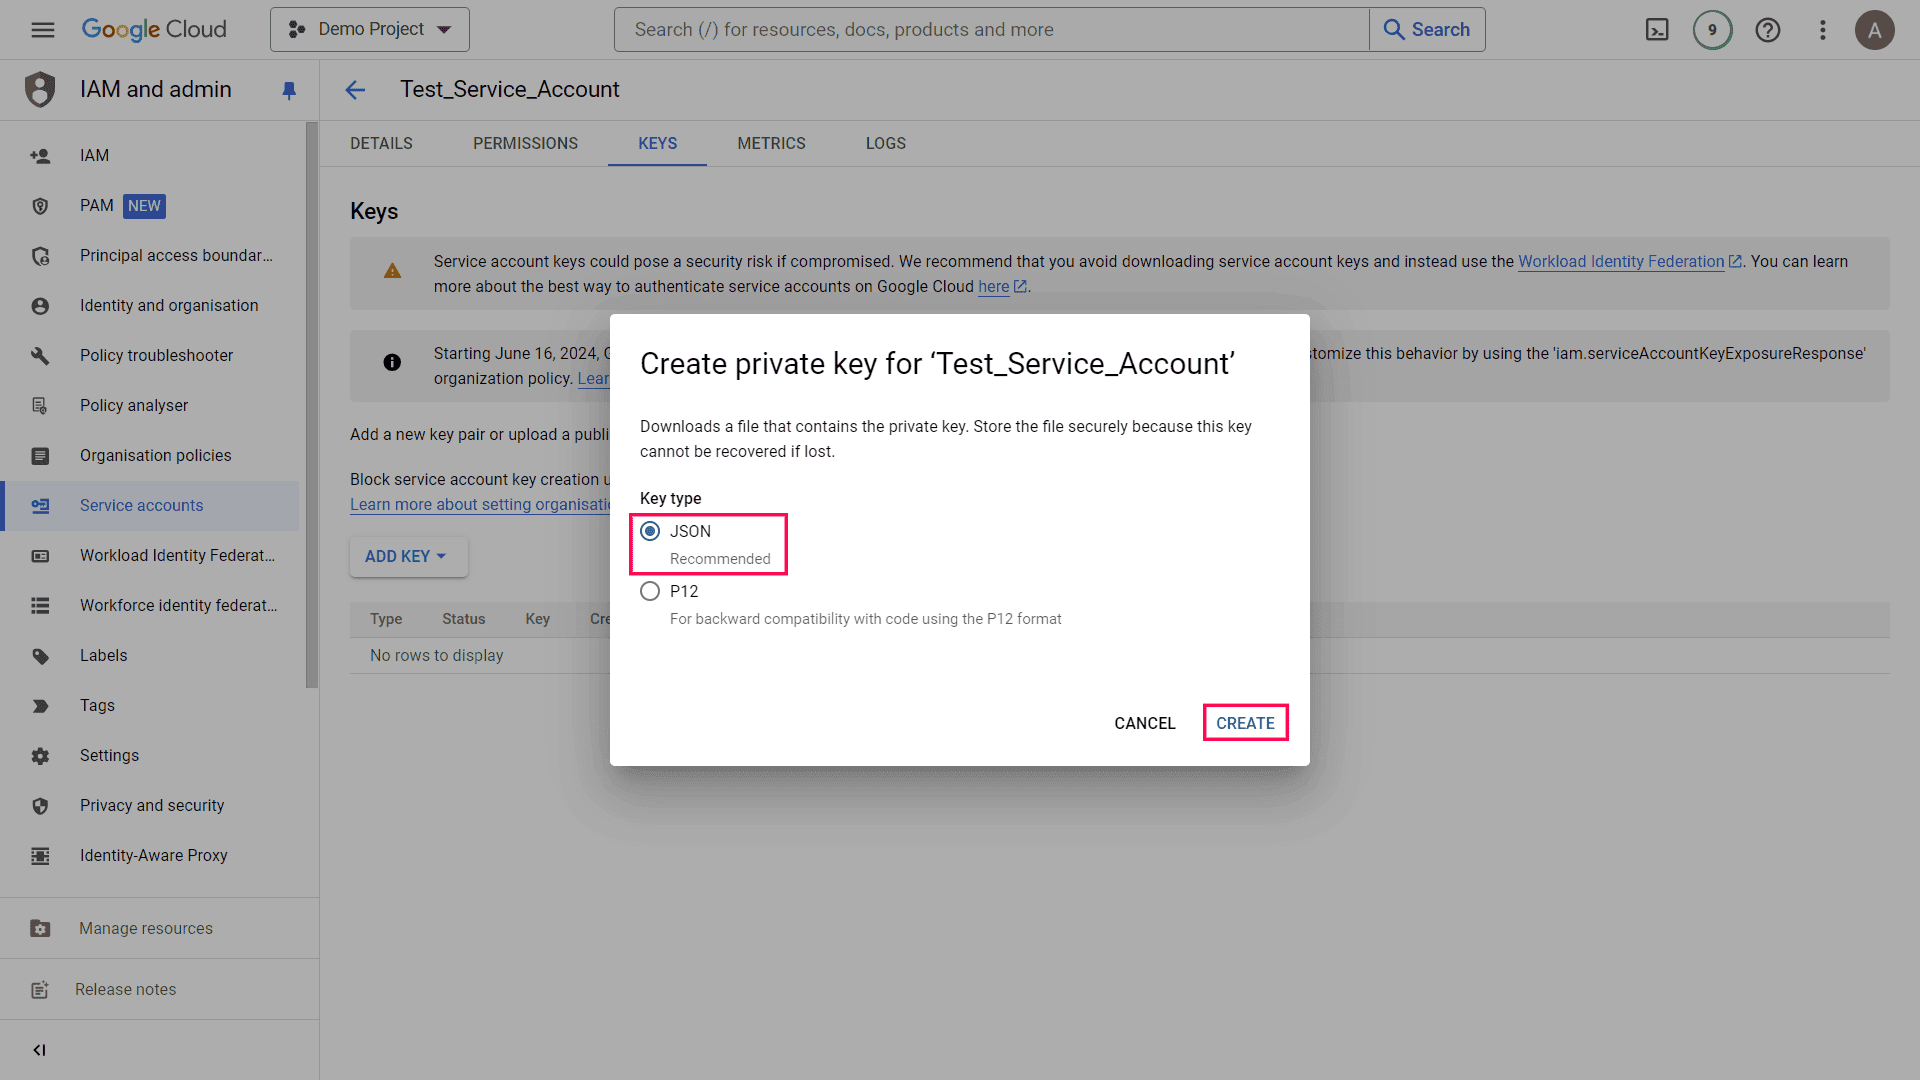
- Choose JSON as the key type and click CREATE. This will create a JSON key file for your service account and save it to your local machine.
- Open the JSON file to find the Client Email, Project ID, and Private Key values, which will be needed when configuring the Google Cloud directory in ADAudit Plus.
Note: Remember to keep this JSON key file secure as it contains sensitive information and grants access to your Google Cloud directory resources. If it is ever compromised, you should regenerate the key and update any services that are using it.
- Log in to your ADAudit Plus web console.
- Navigate to the Cloud Directory tab > Attack Surface Analyzer > Configuration > Cloud Directory.
- Click +Add Cloud Directory in the top-right.
- Select Google Cloud from the Add Cloud Directory pop-up.
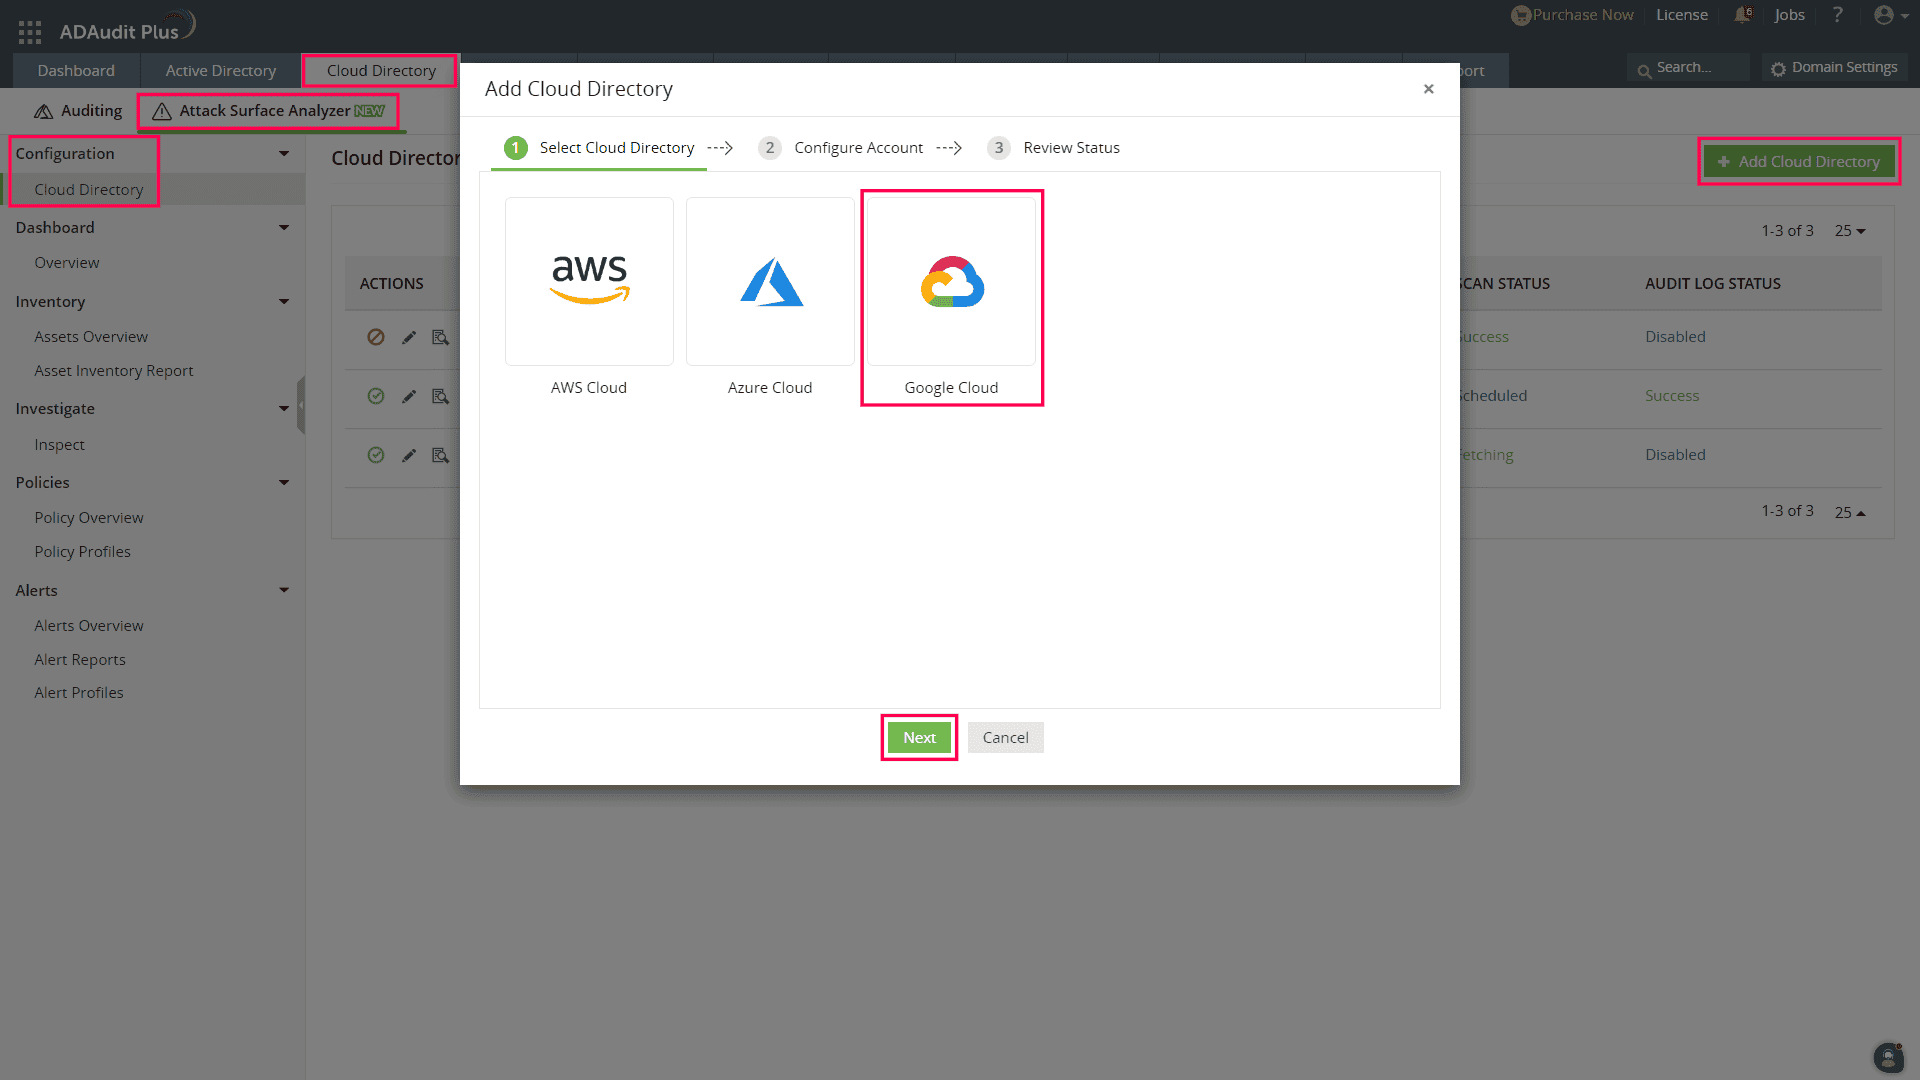
- Enter the Display Name, Client Email, Project ID, and Private Key values found in the service account JSON key file that you downloaded.
- Select the Audit Log check box if you want to fetch and monitor all activities happening within your Google Cloud directory environment, and then click Next.
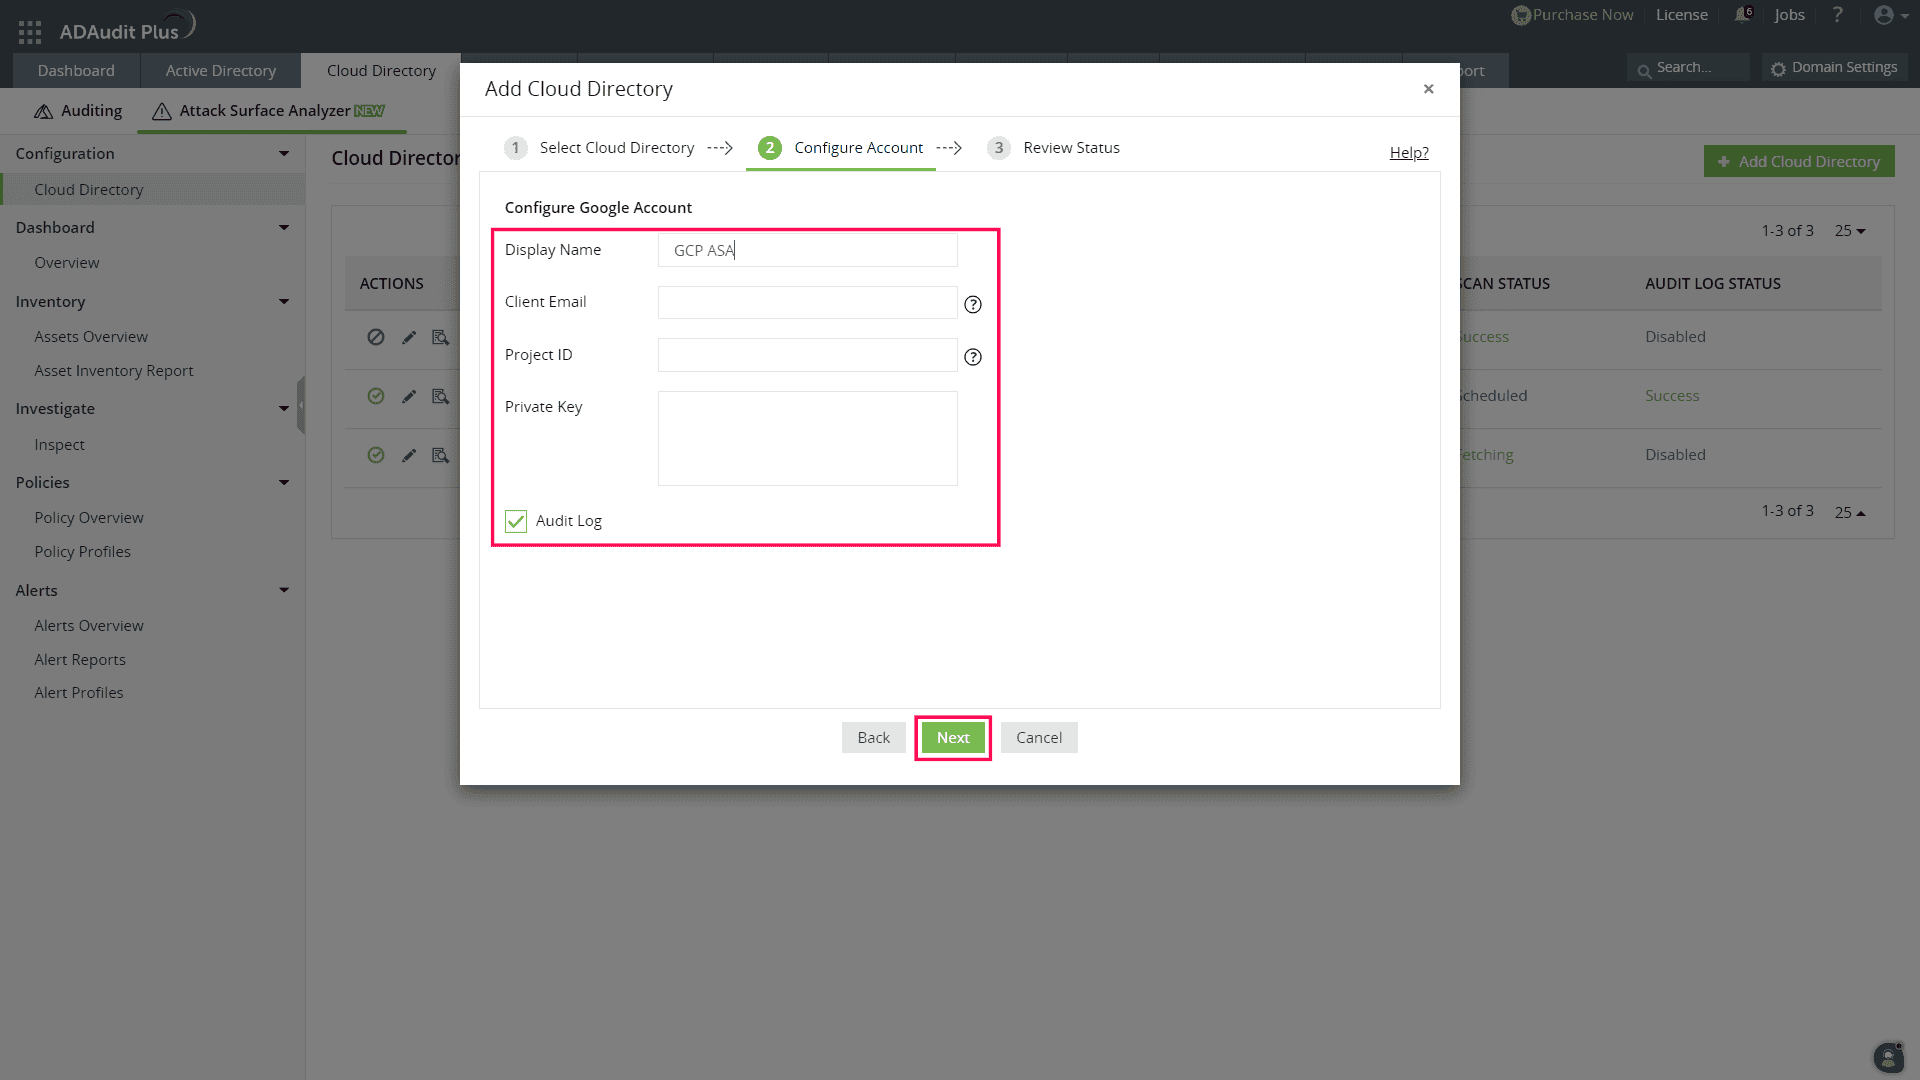
- Review your settings and click Finish.
Don't see what you're looking for?
-
Visit our community
Post your questions in the forum.
-
Request additional resources
Send us your requirements.
-
Need implementation assistance?
Try OnboardPro

 Click here to expand


