Revert AD changes
The Revert AD Changes feature in ADAudit Plus enables users to revert the changes made to Active Directory (AD) objects by initiating a revert request directly from reports.
Supported event categories
User Management
- Recently Created Users
- Recently Deleted Users
- Recently Undeleted Users
- Recently Enabled Users
- Recently Disabled Users
- Recently Moved Users
- Renamed Users
- New Value and Old Value
Computer Management
- Recently Deleted Computers
- Recently Created Computers
- Recently Enabled Computers
- Recently Disabled Computes
- Recently Moved Computers
- Computer Attribute New and Old Value
- Recently Undeleted Computers
OU Management
- Recently Created OUs
- Recently Deleted OUs
- Recently Moved OUs
- Recently Undeleted OUs
- Recently Renamed OUs
Group Management
- Recently Created Security Groups
- Recently Created Distribution Groups
- Recently Deleted Security Groups
- Recently Deleted Distribution Groups
- Recently Moved Groups
- Renamed Groups
- Recently Added Member to Security Group
- Recently Added Member to Distribution Group
- Recently Removed Member from Security Group
- Recently Removed Member from Distribution Group
- Group Attribute New and Old Value
Note: Changes to certain attributes cannot be reverted via the Revert AD Changes feature.
Steps to revert AD changes in ADAudit Plus
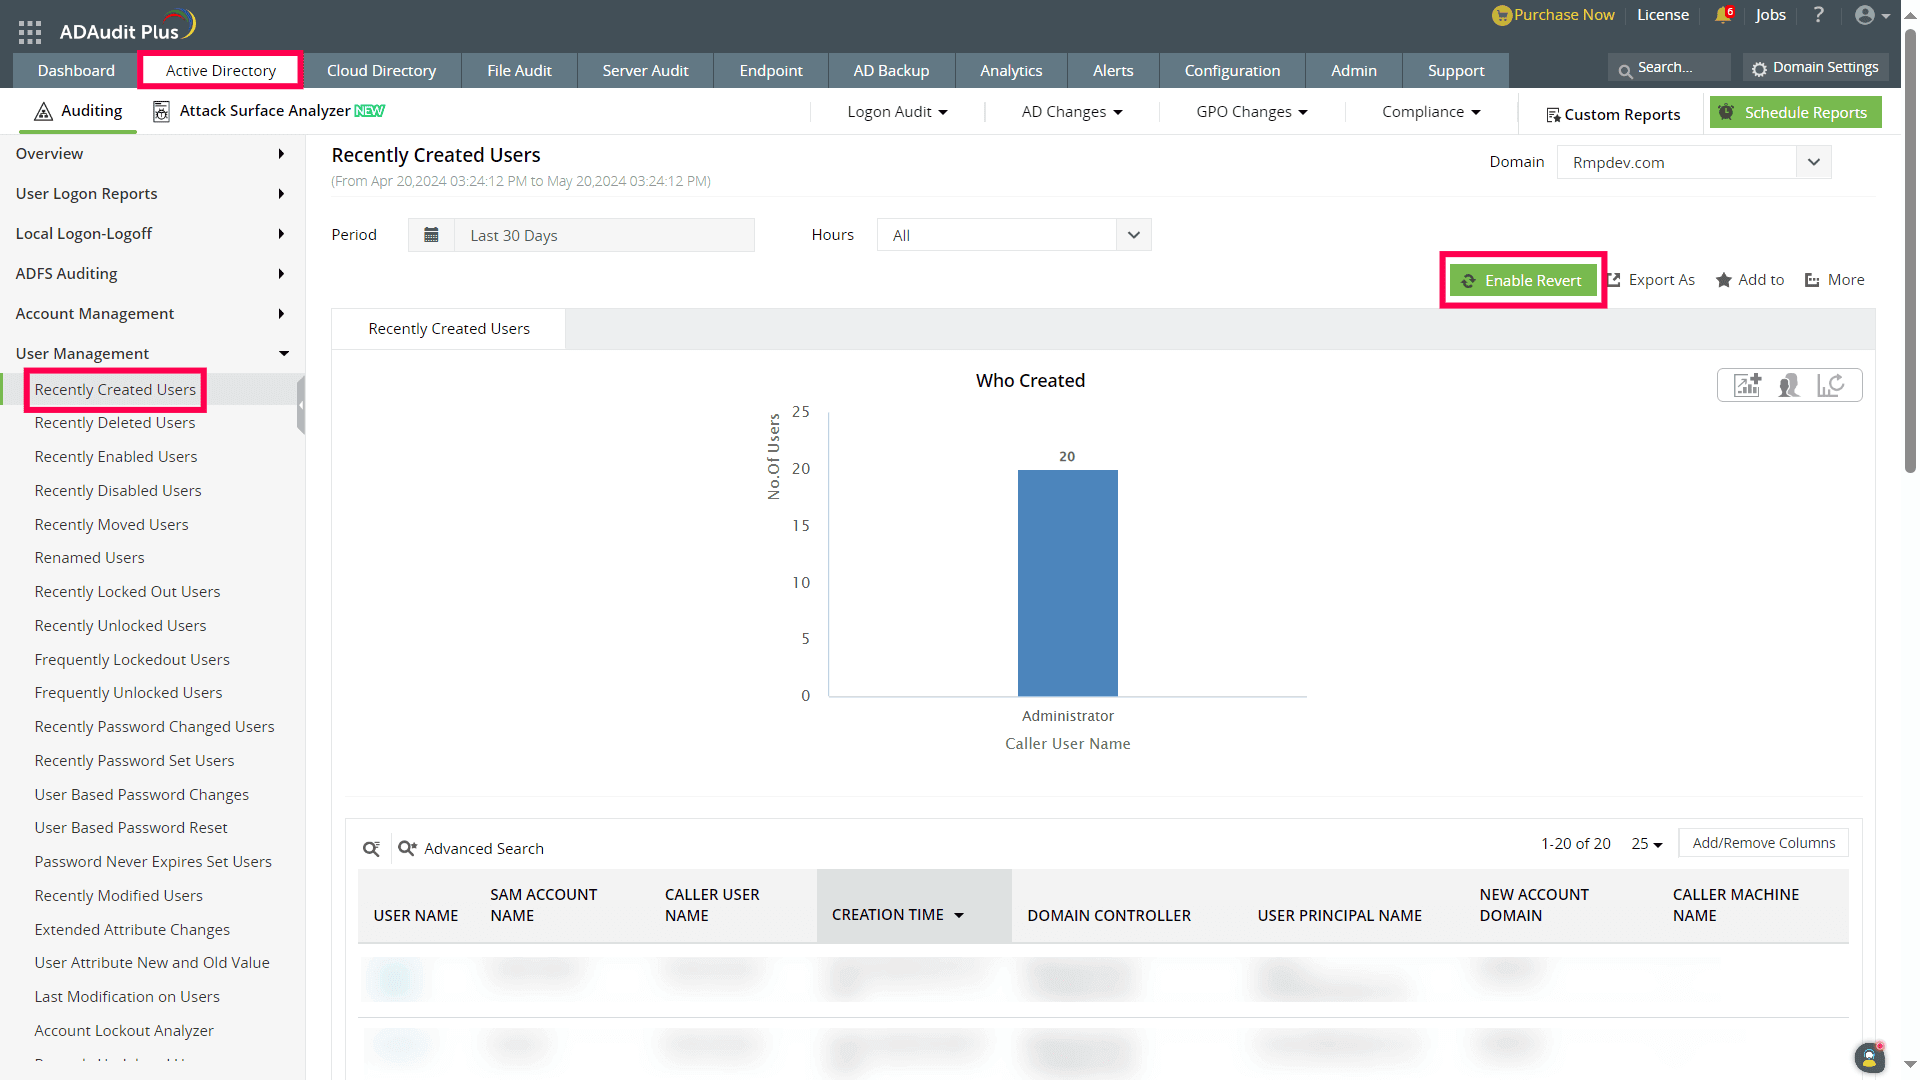
- Launch the ADAuditPlus web console and navigate to the Active Directory tab.
- In the left menu, click User Management and select the Recently Created Users report.
- On the right side of the screen, locate and click the Enable Revert option.
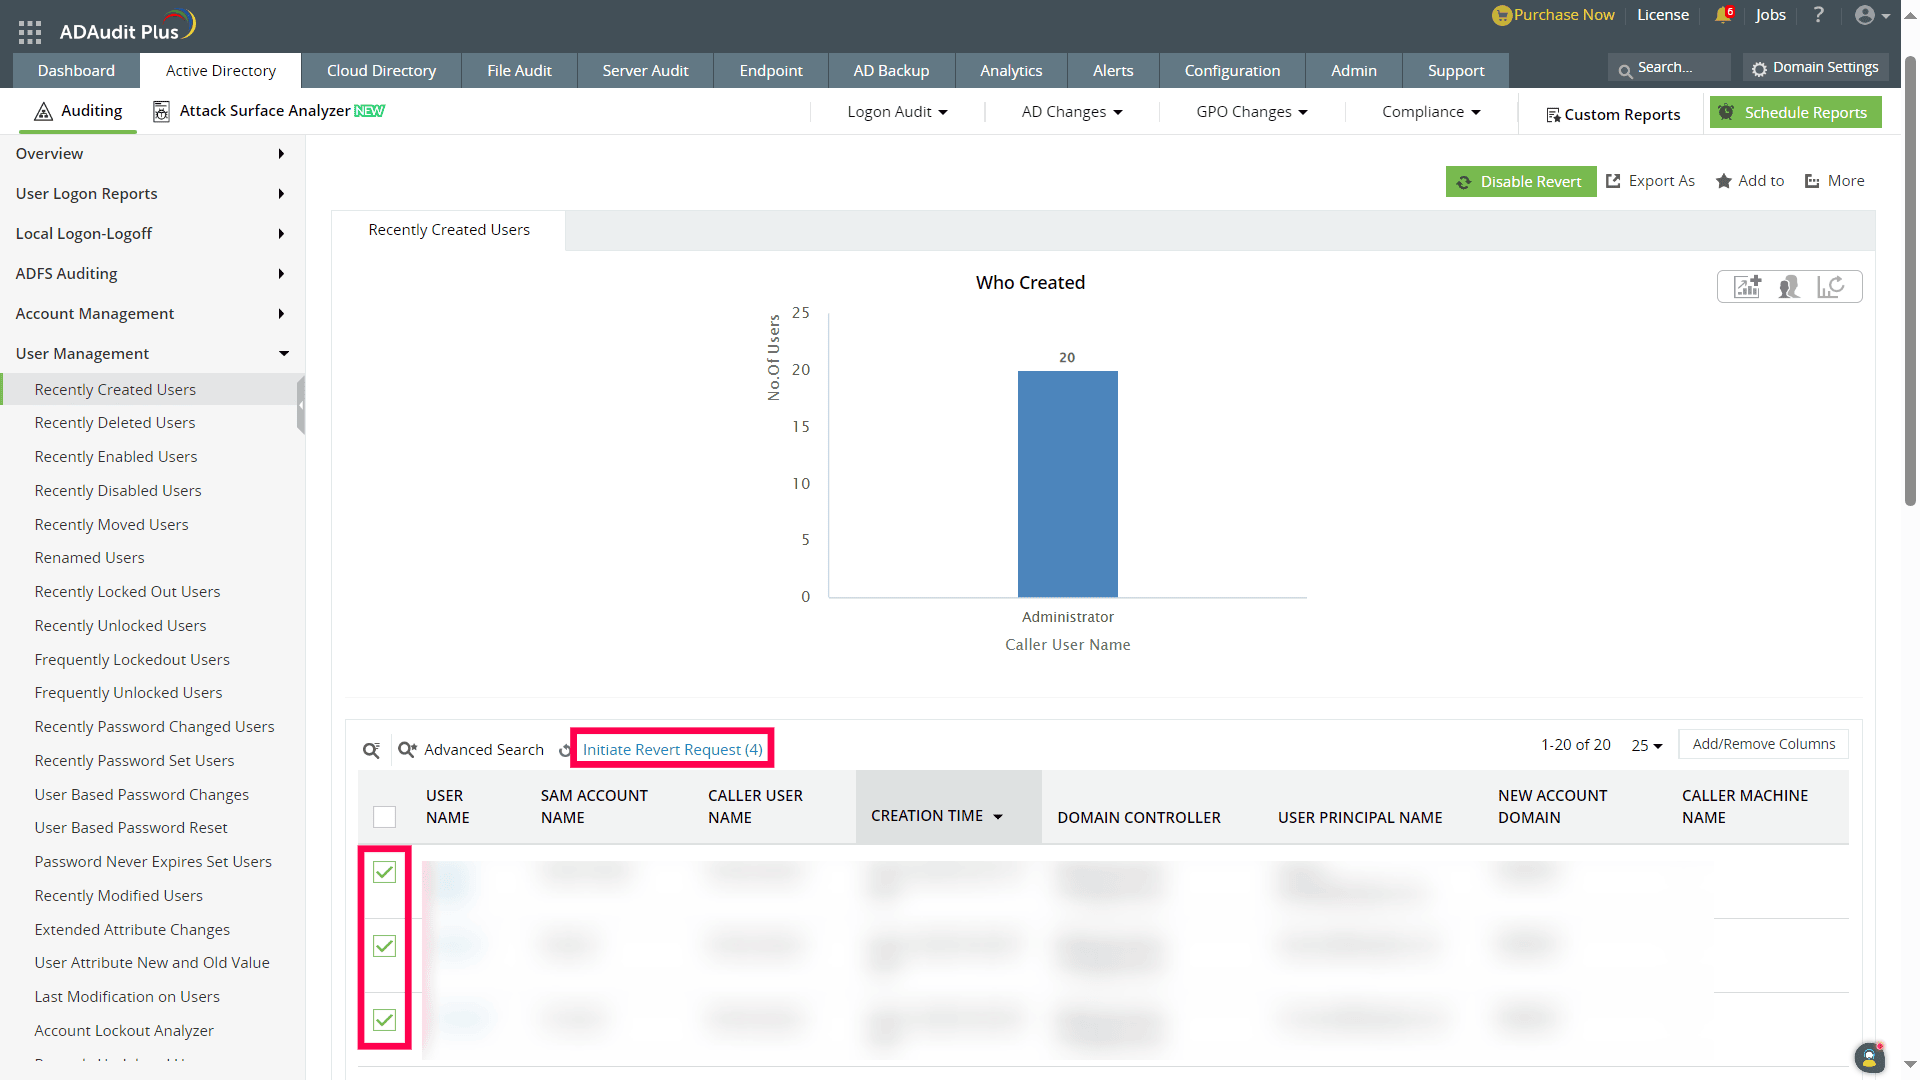
- Choose the specific user-creation-related changes you want to revert. Click Initiate Revert Request next to Advanced Search.
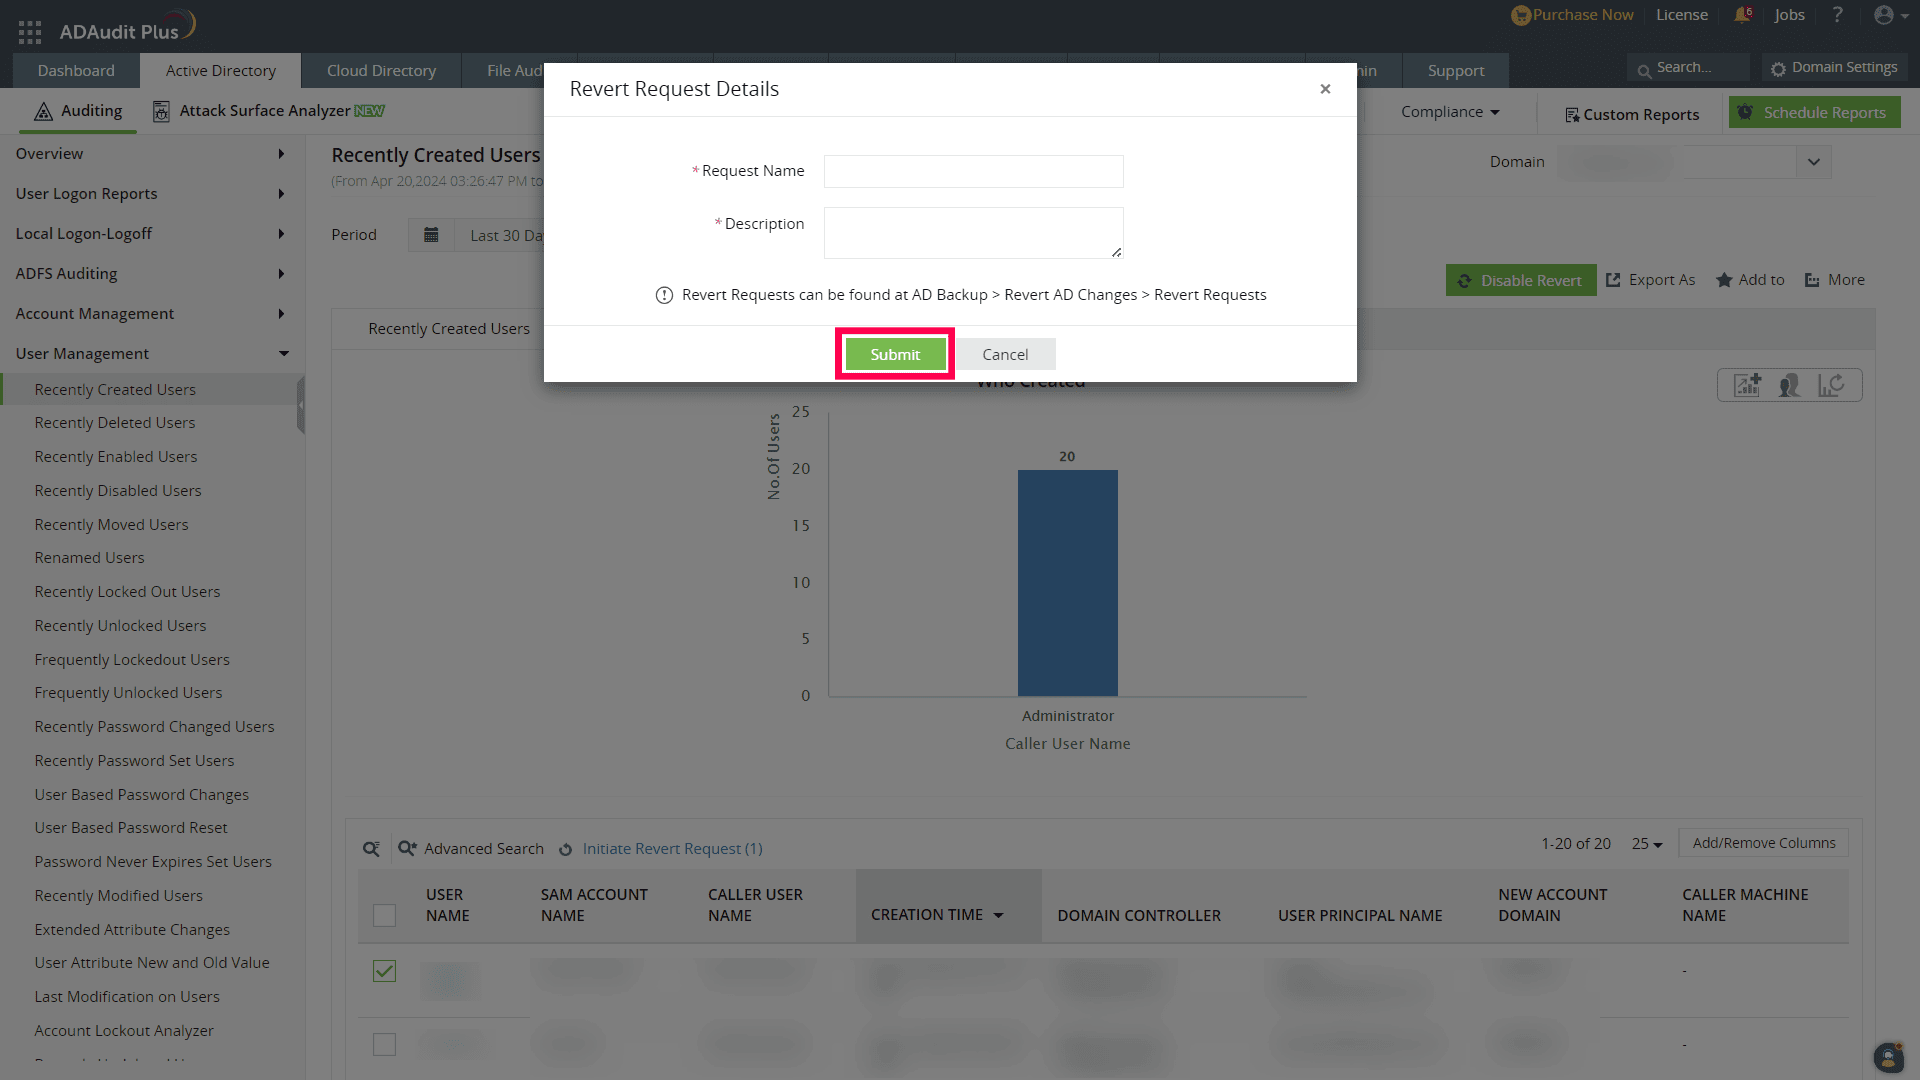
- In the dialogue box, enter the Request Name and Description as required and click Submit to initiate the revert request. Once the request is successfully raised, you will receive a notification at the top of the screen.
- Now, go to the AD Backup tab, and under the Revert AD changes section, click Revert Requests.
- Select the request that you created, then select the object changes you wish to revert, and click Revert.
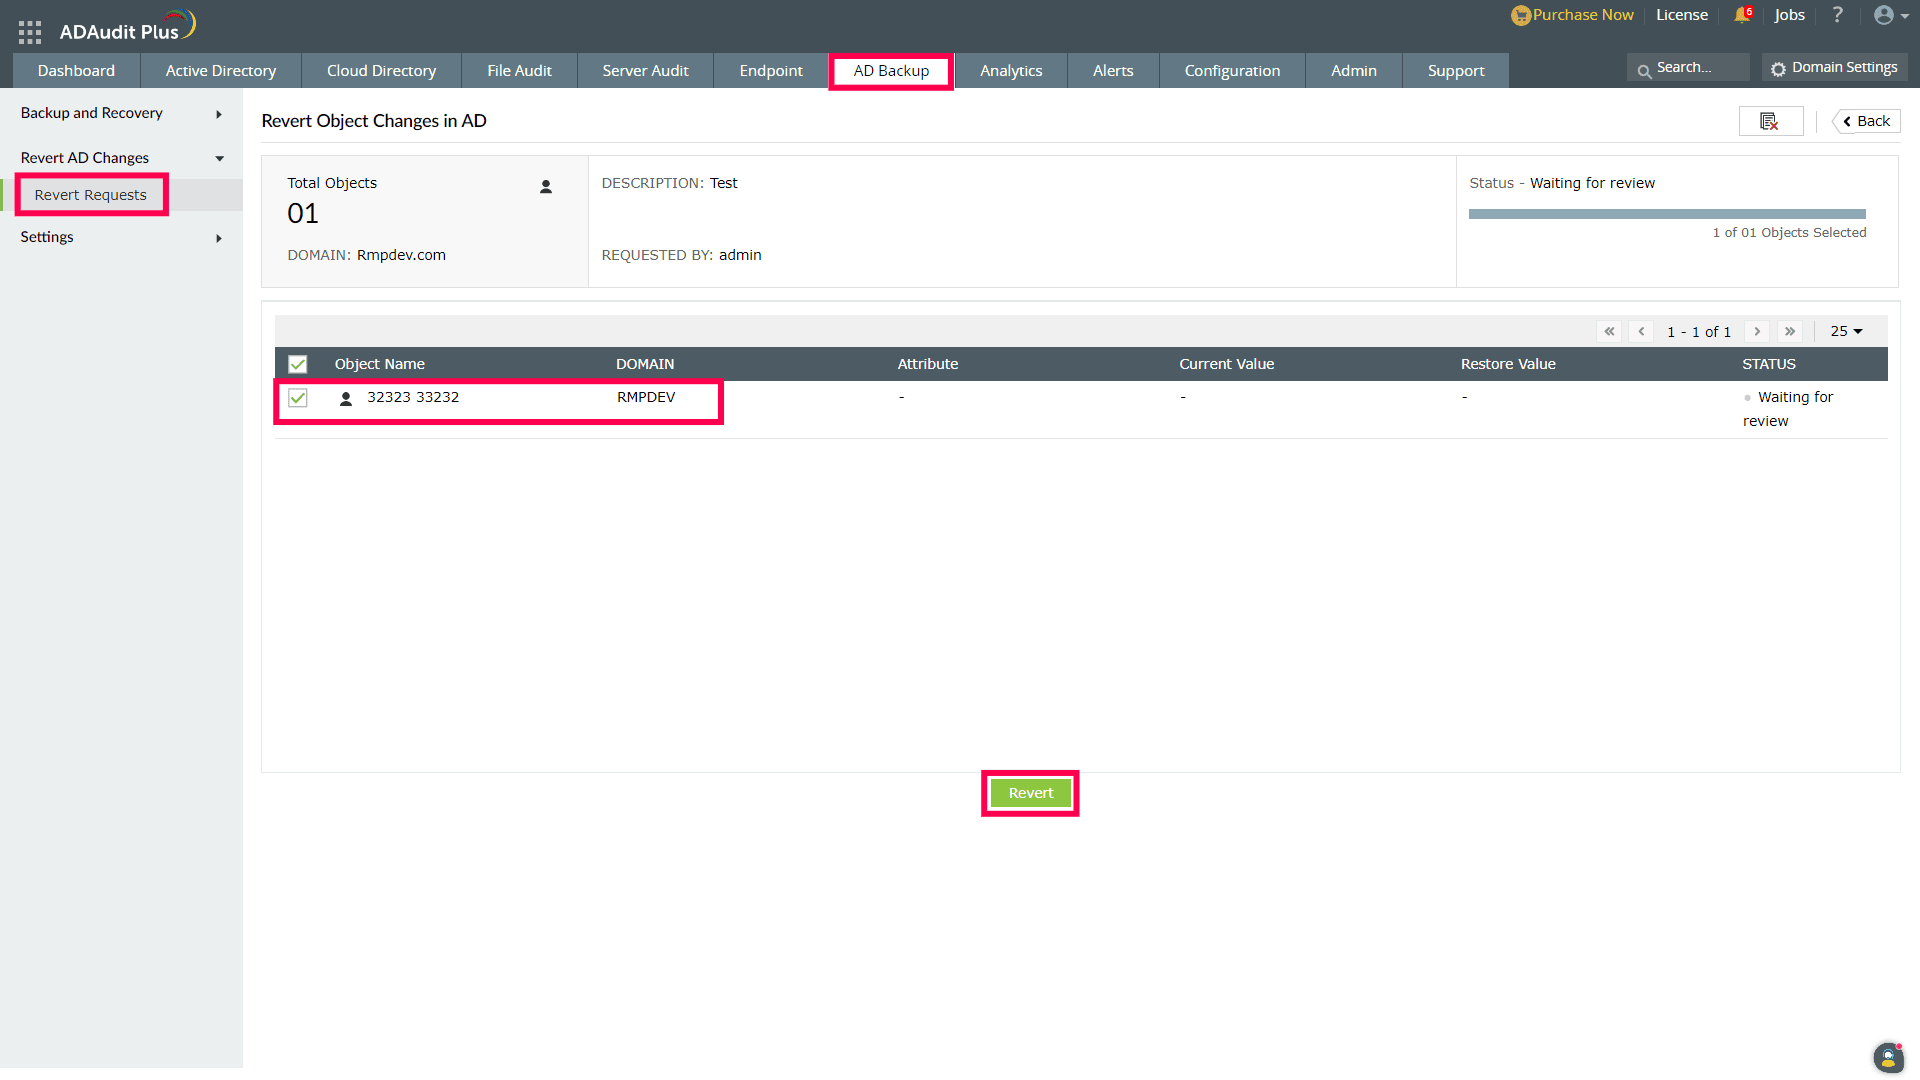
- A dialogue box will appear. Click Yes to proceed with the reversion.
Don't see what you're looking for?
-
Visit our community
Post your questions in the forum.
-
Request additional resources
Send us your requirements.
-
Need implementation assistance?
Try OnboardPro
