- Overview
- Configuration
Zendesk
Streamline IT Operations with Zendesk and ADManager Plus Integration
Integrating Zendesk with ManageEngine ADManager Plus reduces the burden on IT staff by automating tickets and user lifecycle management and security operations at your organization. By synchronizing the data between Zendesk and Active Directory, IT teams will now have the option to manage user provisioning, password resets and updates, groups, and permissions directly from the Zendesk console.
Here are some key highlights of this integration:
Automated user provisioning
Configure automated workflows to fetch ticket details from Zendesk to automate user creation, modification, or deletion tasks across AD, Exchange, M365 and other systems.
Simplified user account management
Reset passwords, unlock user accounts, enable or disable user accounts right from your Zendesk console.
Role-based access controls
With ADManager Plus- Zendesk integration, you can automatically adjust and assign permissions for Zendesk users based on their roles in Active Directory.
Steps to integrate ADManager Plus with Zendesk
- Log in to ADManager Plus.
- Navigate to Admin > System Settings > Integrations.
- Click on Zendesk under ITSM/Help Desk Tools.
Steps to integrate ADManager Plus users in Zendesk
- Log in to Zendesk.
- Download ADManager Plus from Zendesk's Marketplace.
- On the Installation page, set the role and group-based restrictions for accessing ADManager Plus and click Install.
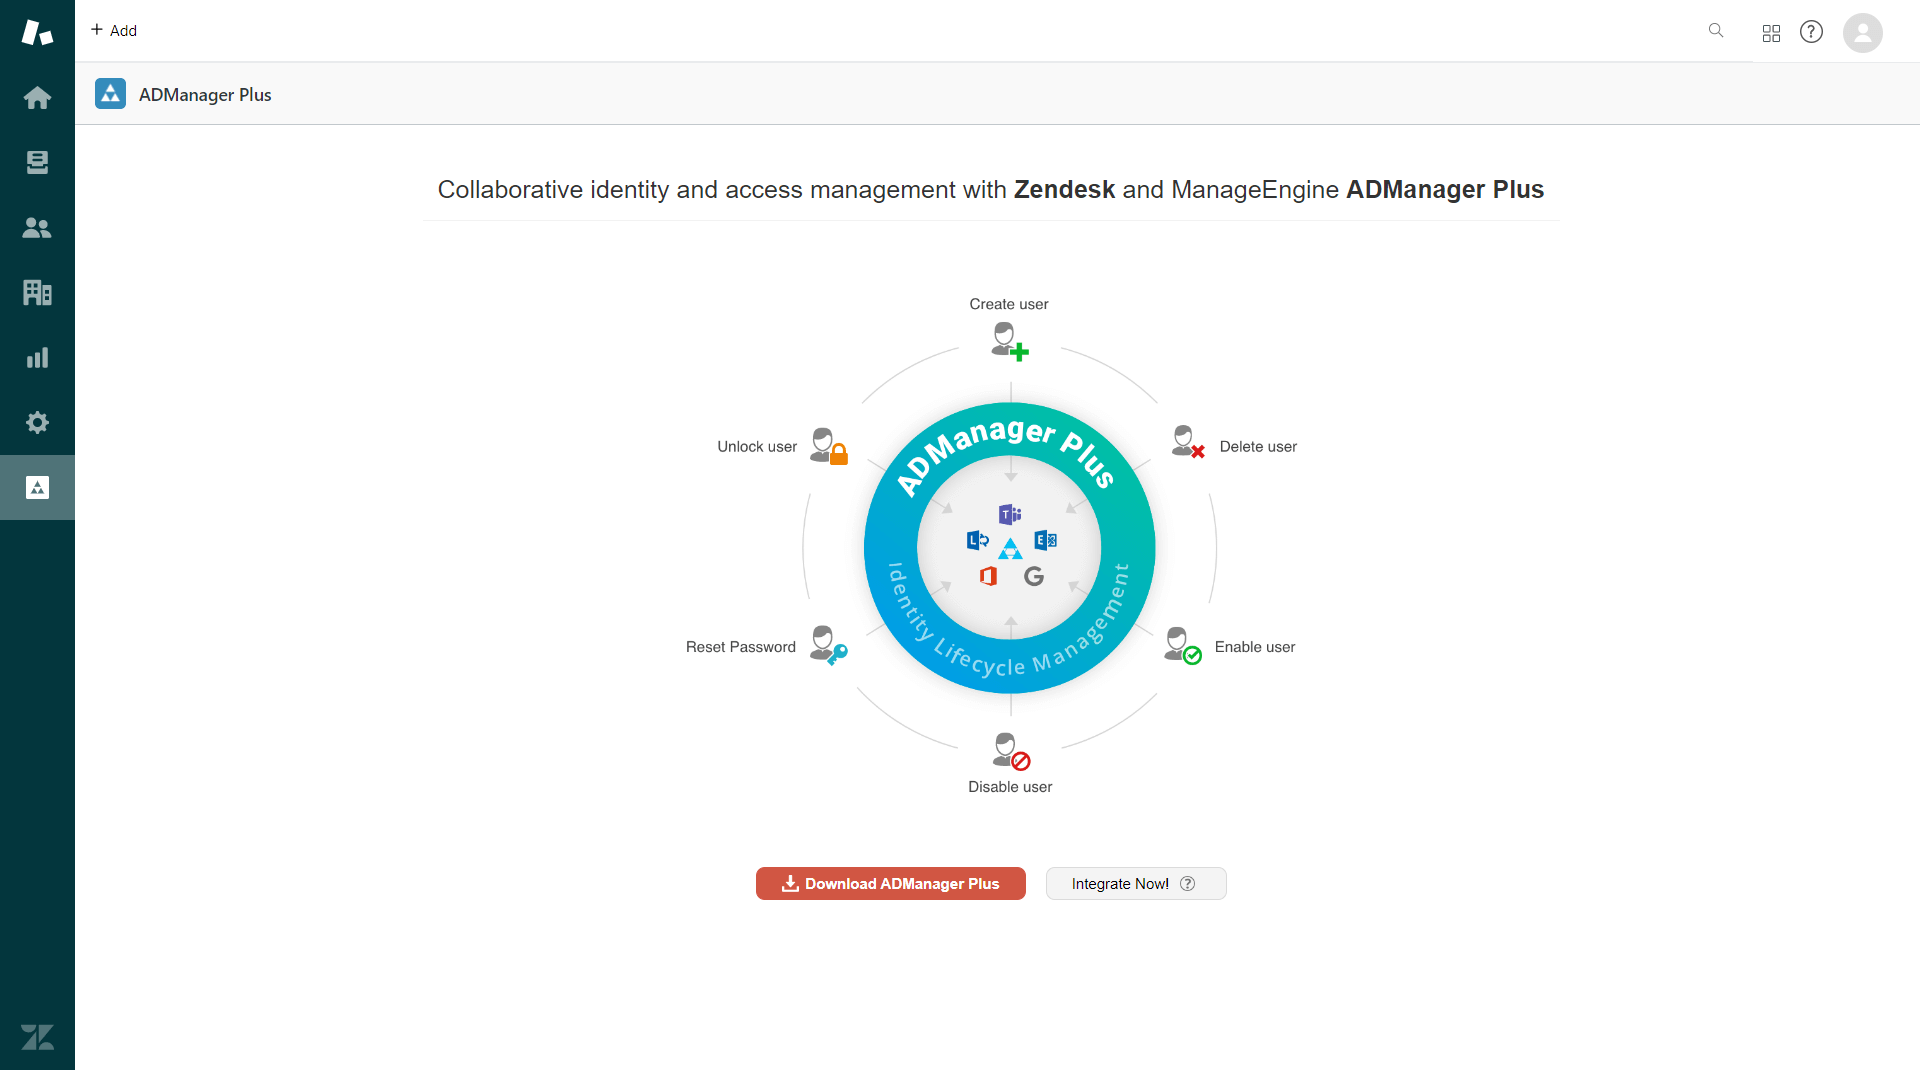
- Once it is installed, click the ADManager Plus icon in the left pane and click the Integrate Now! button.
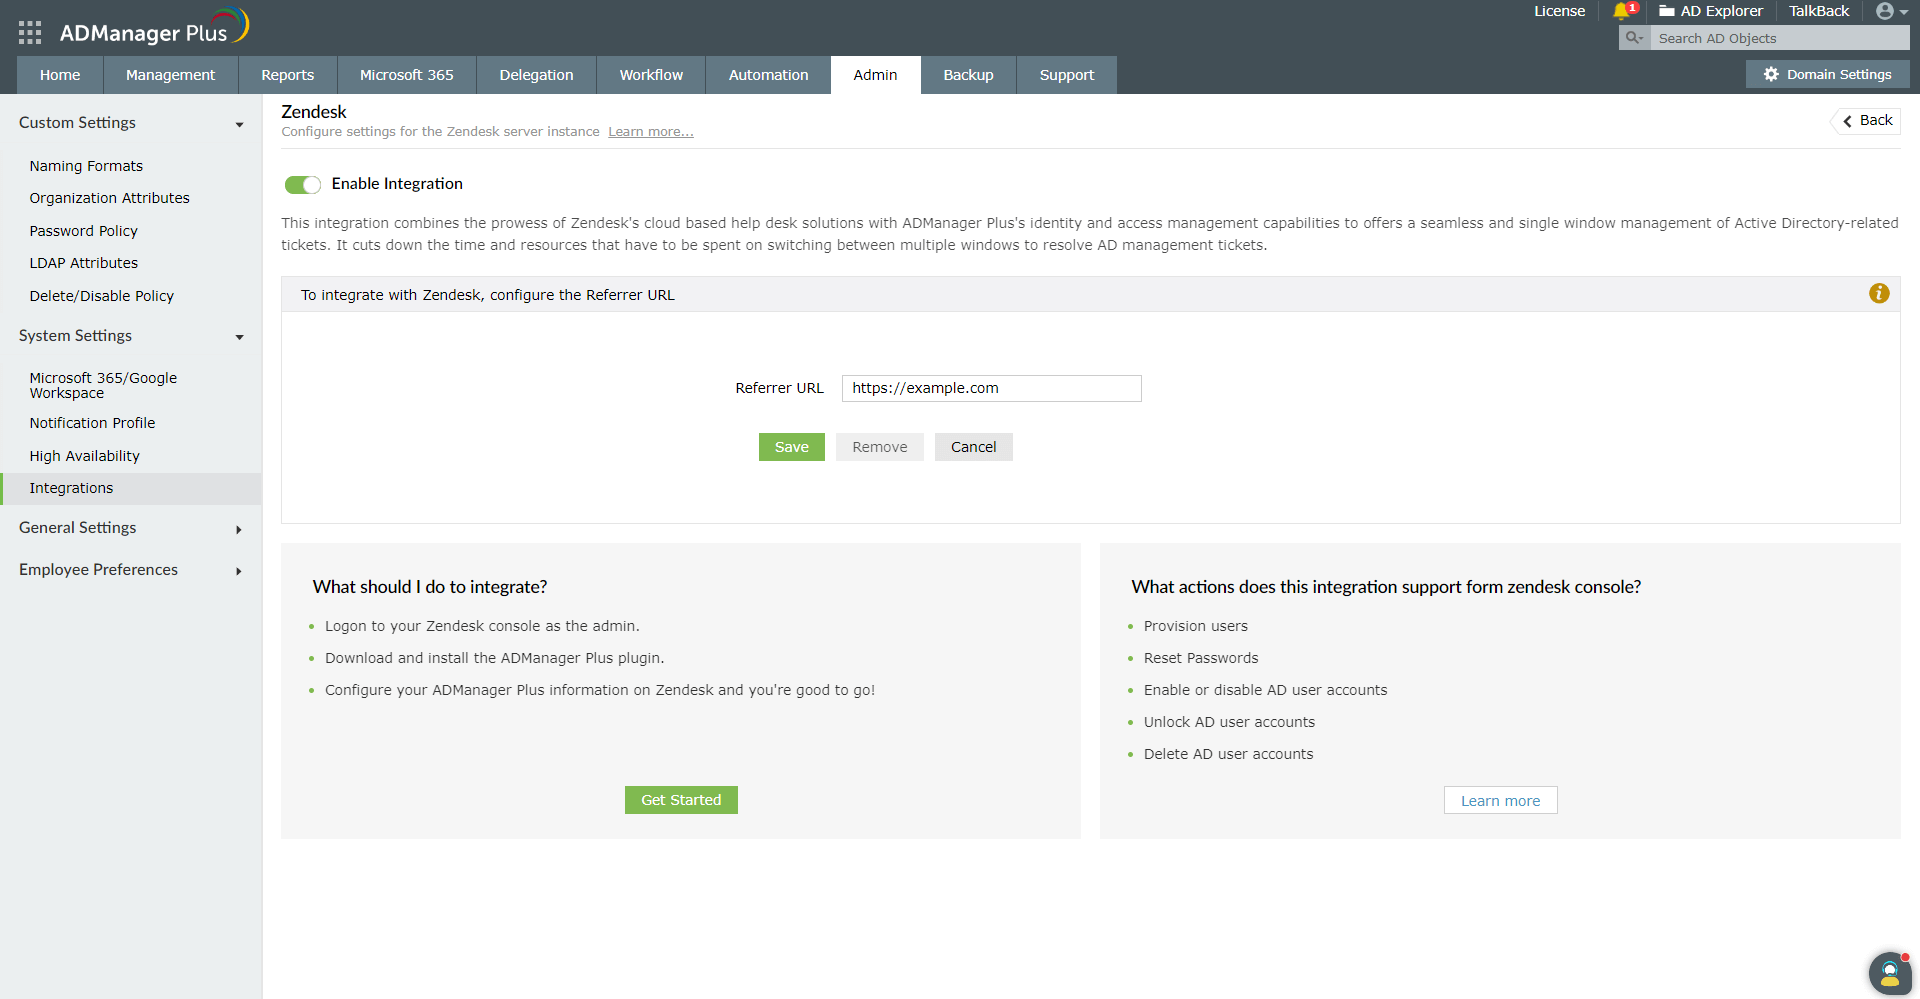
- Copy the Referrer URL displayed on the page, and open ADManager Plus.
- In ADManager Plus, paste the copied Referrer URL in the Referrer URL field and click Save.
- Navigate back to Zendesk, and click Next.
- Enter the URL of the server where ADManager Plus is running in the ADManager Plus' Server URL field, and click Next.
- Enter the ADManager Plus technician's authtoken in the Authtoken field, and click Validate to fetch the associated technician from ADManager Plus.
- Note: The technician's authtoken can be obtained by navigating to Delegation > Configuration > Technician Authtokens in ADManager Plus.
- Once the technician's details are auto-populated in the Technician field, click Finish.
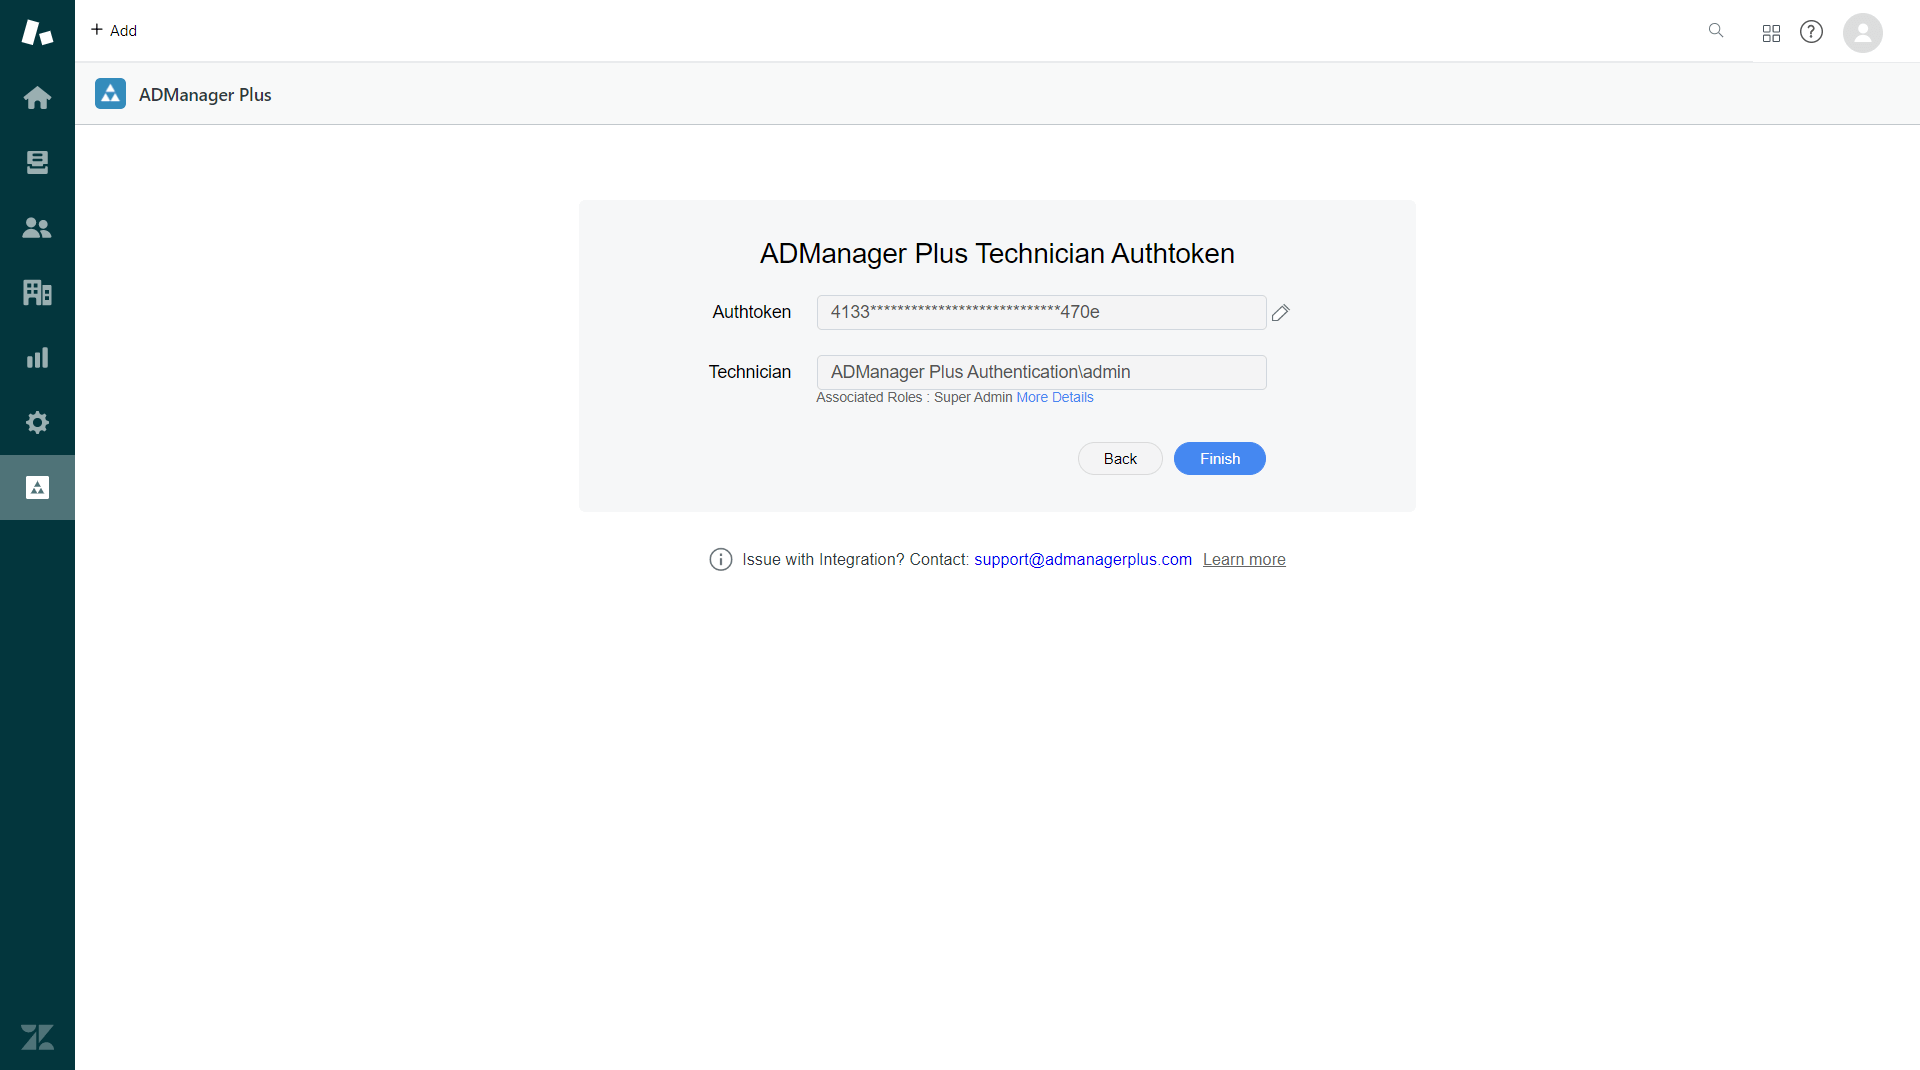
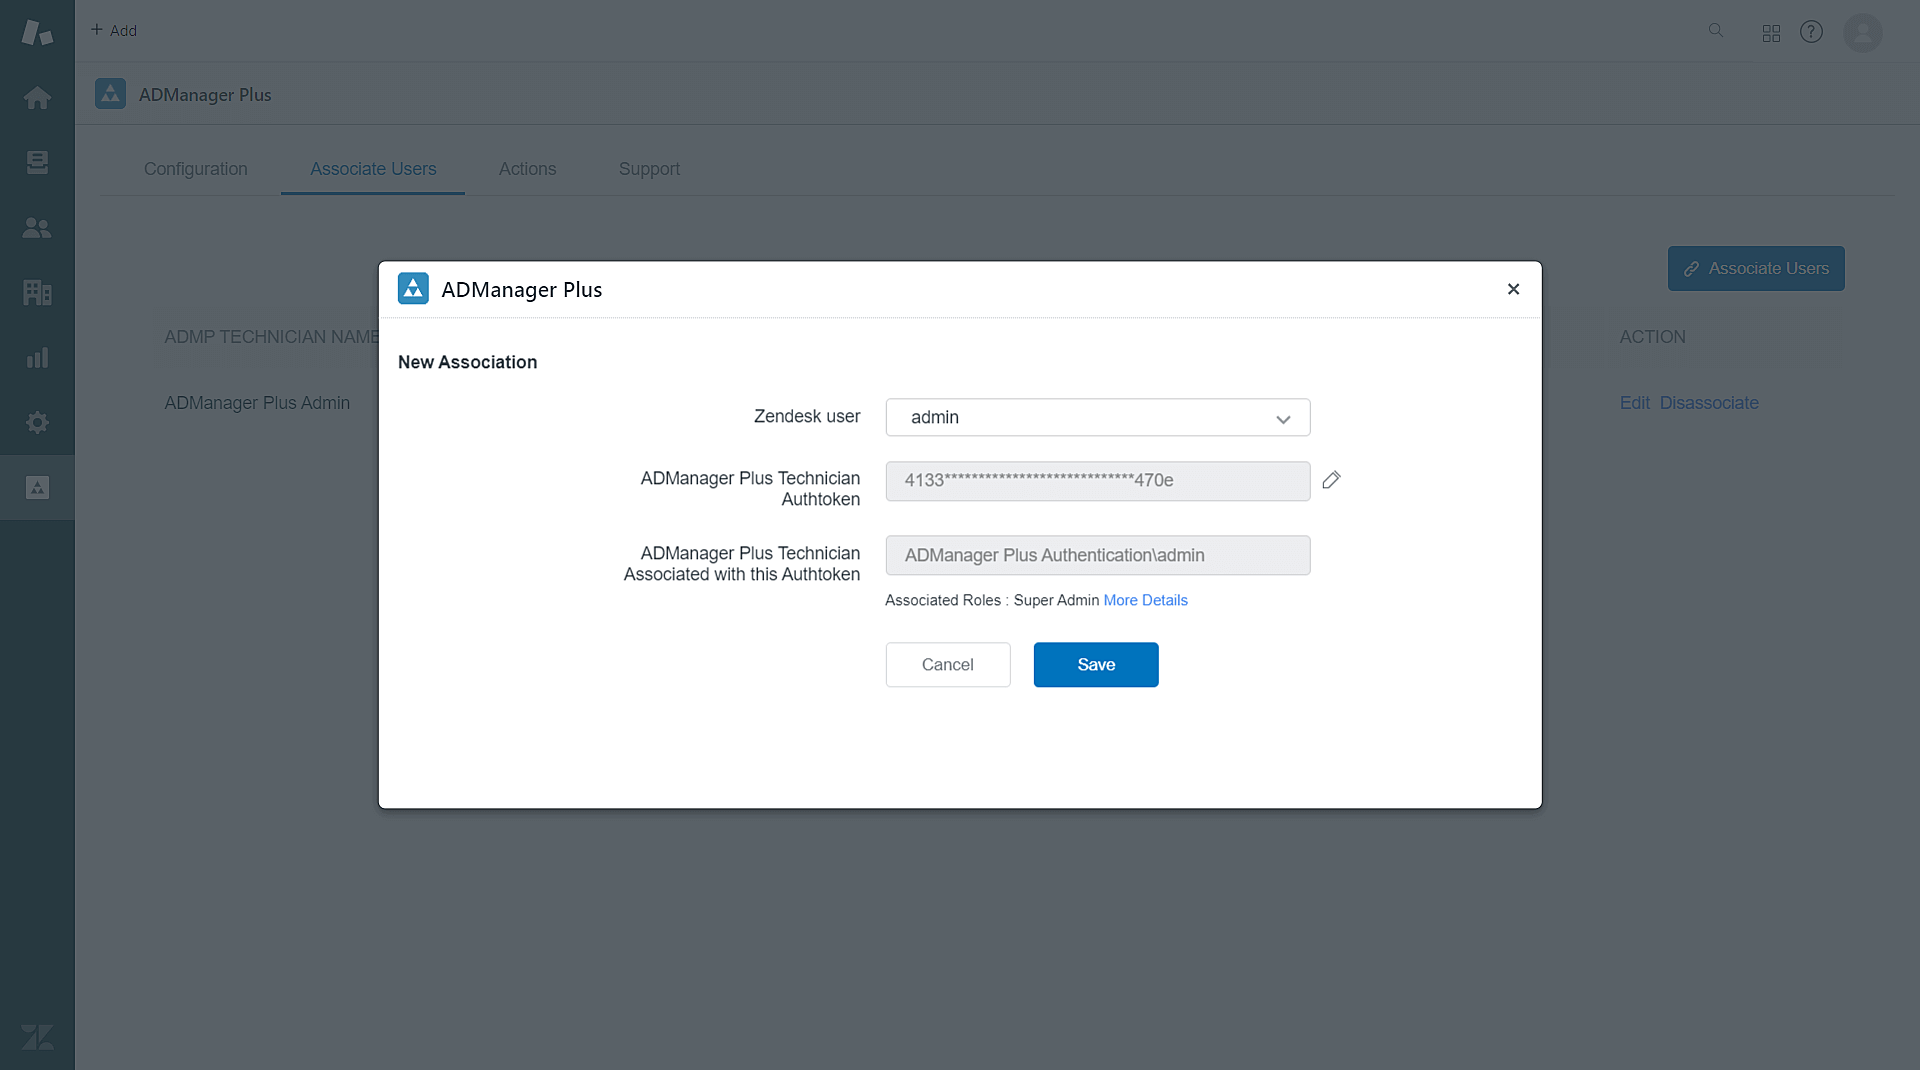
- You can add more technicians in Zendesk by navigating to the Associate Users tab under ADManager Plus. Click Associate Users, specify the technician's authtoken in the ADManager Plus Technician Authtoken field, and click Validate. Once the technician's details are auto-populated, click Save.
- Note: Authtokens can be edited by clicking the Edit icon next to the Authtoken field.
Customizing user creation form in Zendesk
- Log in to Zendesk.
- In the left pane, click ADManager Plus.
- Navigate to the Actions tab in the navigation bar.
- Hover and click the edit icon next to Create User option.
- In User Creation Fields:
- Click the + icon to add a field from the list of available fields to the user creation form in Zendesk.
- Hover over a field and click X to remove that field.
- If you'd like to make a field mandatory, hover over the field and click Set as Mandatory.
- Click Save to update the changes.
- User creation fields can be customized in instances integrated with ADManager Plus builds 7185 and above, and Zendesk plugin versions 2.1 and higher.
- The user creation fields are text boxes and require technicians to enter a value.
- Fields can also be added or removed and made silent or read-only in the User Creation Templates in ADManager Plus. Therefore, it is recommended to add only the required fields to the user creation form in Zendesk.
Actions supported:
- Reset passwords in AD
- Enable or disable AD user accounts
- Unlock AD user accounts
- Delete AD user accounts
- Provision users in AD, Microsoft 365, Exchange Server, Skype for Business, Lync, and Google Workspace, in parallel, using templates