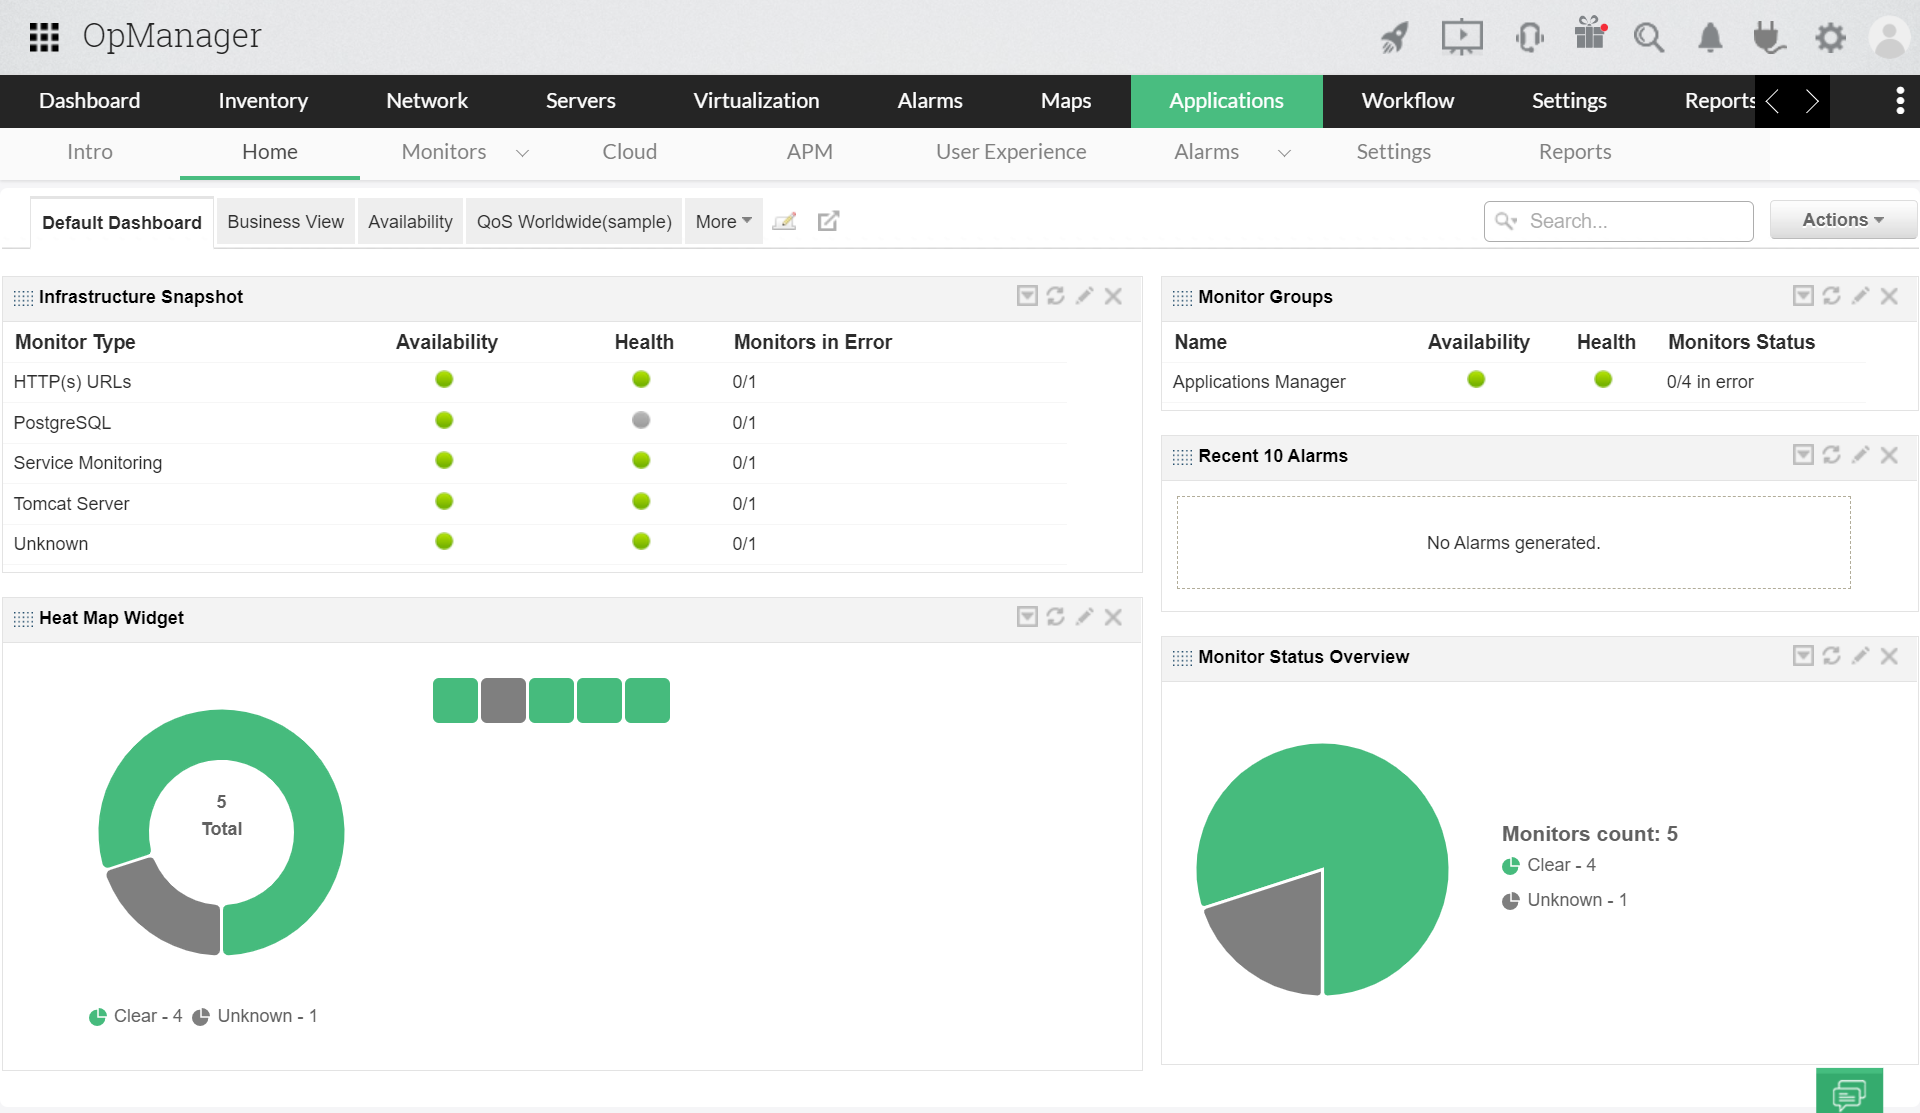
With Applications Performance Management plug-in (APM Plugin) for OpManager, you can proactively monitor business applications and help businesses ensure their revenue-critical applications meet end user expectations. This plug-in offers out-of-the-box monitoring support for 50+ applications and servers.
Monitoring Highlights:
Limitation: Users with business view restriction in OpManager will not be synced to Applications Manager Plugin.
| OpManager | Applications Manager Plugin Standalone | Applications Manager Plugin Enterprise Edition |
|---|---|---|
| Versions 128628 and above | Version 178100 and above | |
| Versions 128510 to 128627 | Versions 174400 to 178099 | |
| Versions 128168 to 128509 | Versions 170000 to 174399 | |
| Versions 127185 to 128167 | Versions 16590 to 16999 | |
| Versions 127131 to 127184 | Versions 16560 to 16580 | |
| Versions 127000 to 127130 | Versions 16450 to 16550 | |
| Versions 126306 to 126999 | Versions 16410 to 16440 | |
| Versions 126262 to 126305 | Versions 16300 to 16390 | |
| Versions 126167 to 126255 | Versions 16210 to 16250 | |
| Versions 126132 to 126166 | Versions 16100 to 16200 | |
| Versions 125630 to 126131 | Versions 15670 to 16093 | |
| Versions 125614 to 125629 | Versions 15560 to 15660 | |
| Versions 125561 to 125613 | Versions 15470 to 15550 | |
| Versions 125468 to 125560 | Versions 15340 to 15402 | |
| Versions 125393 to 125467 | Versions 15160 to 15330 | |
| Versions 125307 to 125392 | Versions 15000 to 15150 | |
| Version 125214 | Versions 14540 to 14700, or Versions 14730 to 14911 | Versions 14860 to 14911, or Hotfix versions 14843 to 14845 |
| Version 125000 | Versions 14540 to 14700, or Versions 14730 to 14780 | |
Note: It is mandatory for customers to upgrade Applications Manager to 15160 if OpManager is upgraded to 125393 and vice versa.
| OpManager | Applications Manager Plugin (Both Standalone and EE) |
|---|---|
| Version 124070 | Versions 14310 to 14530 |
| Version 123150 | Versions 13730 to 14300 |
| Version 123111 Versions 123150 and below |
Versions 13680 to 13720 with backup of conf files. Replace the old Plugin.properties file in OpManager\AppManager\conf. Update APM_BUILD_NUMBER with the correct version in Plugin.properties before restarting. |
| Version 12 and above Version 123111 and below |
Versions 13110 to 13670 |
| Versions 11500 and 11600 | Versions 13010 and below |
Note: Applications Manager plugin should be upgraded to version 14540 or above before upgrading OpManager from its service pack version 12.5
Please refer to this link for the recommended software requirements for installing and running the Applications Manager plug-in setup.
You can initiate the APM Plugin installation directly from OpManager UI by navigating to Applications tab and clicking on Download and Install button. Doing so will download the APM Plugin automatically and checks whether the required pre-requisites are met, after which will initiate the installation process. Once the installation process is completed, you will automatically be redirected to the monitor dashboard of your APM Plugin console under the Applications tab.
Note: The Download and Install button will be displayed in the Applications tab only when the OpManager-installed machine has internet connectivity to access the ManageEngine site.
Alternatively, you can also install the APM Plugin manually for offline users by following the steps mentioned in this link.
In version 125614 of OpManager, Applications Manager can be accessible under “Dashboards → Servers → Applications” or by clicking the Applications tab directly.

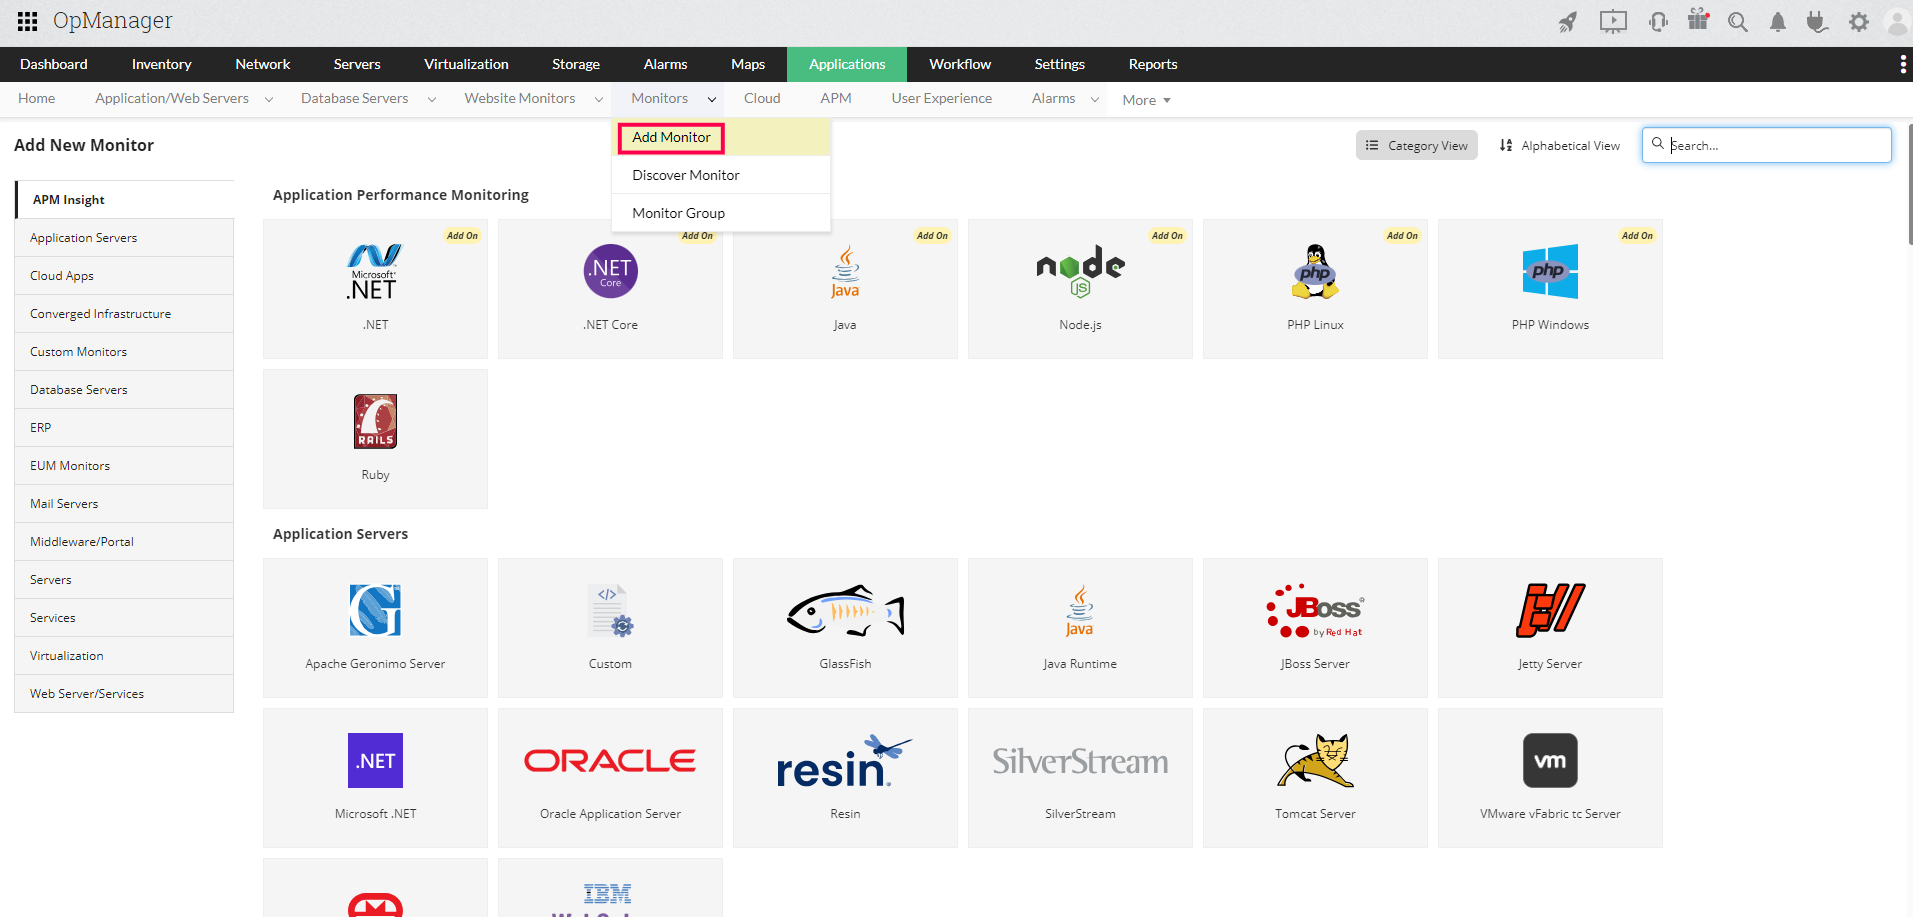
To add a new monitor in Applications Manager Plugin, go to Applications tab and select the Add Monitor option under Monitors dropdown. Upon selecting, the Add New Monitor page will be displayed wherein you can select the required monitors to be added.

APM Plugin helps you to discover and monitor servers and their corresponding applications automatically from OpManager during initial startup. Auto-discovery in plugin offers various configuration options that include disabling discovery, limiting the number of applications added, and prioritizing specific applications. To learn more, visit Plugin discovery.
Note: Auto-discovery occurs only upon initial startup of APM Plugin for Trial and Professional Edition users in Windows.
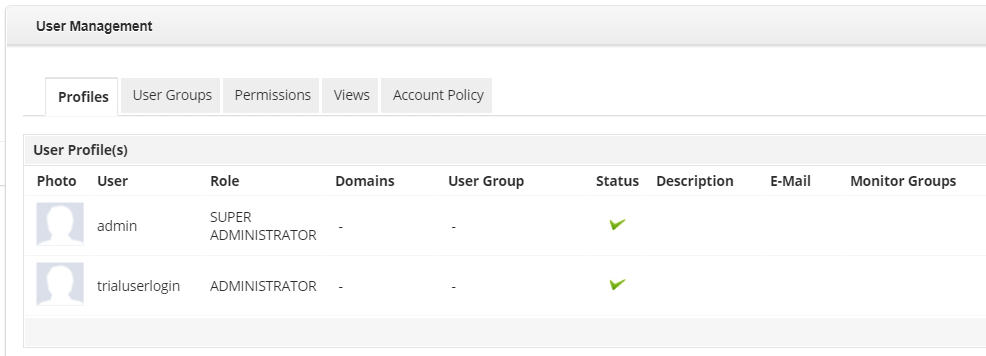
OpManger automatically creates user profiles in Applications Manager plugin based on the OpManager users. To view Applications Manager plugin user profiles, navigate to Apps → Settings → User Management. You will be taken to the User Management dashboard, where there are 5 tabs - Profiles, User Groups, Permission, Views and Account Policy.
Profiles: You will be able to view the list of user profiles available here. However, you would not be able to click or edit the user profile details such as User Name, Update Password, E-Mail, and Role.

User Groups: You can add user groups and associate users to them here.

Permissions: A set of Admin, Delegated Admin, Operator, User and IBM i permissions are given from which you can enable/disable the ones that are applicable to your infrastructure.

Views: Select how you view the monitors in the Home tab. You can choose between "Show the subgroups from the corresponding top level Monitor Group" and "Show the associated subgroups directly in the home tab itself."

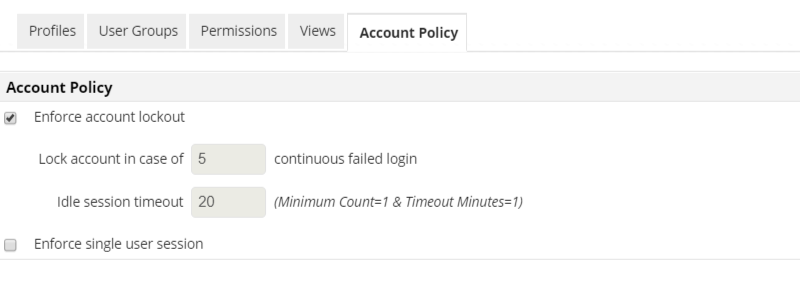
Account Policy: Option to Enforce account lockout is given here wherein you can specify the number of continuous failed login attempts and idle session timeout (in minutes) after which the account should be locked.

To ensure high availability of the APM Plugin, a secondary server can be configured to act as a failover instance. This setup involves pointing the secondary APM Plugin server to the same database as the primary server. Follow the steps below to configure failover:
Since APM Plugin uses the same database server as OpManager, it is sufficient to configure failover the OpManager database server alone. To learn how to configure failover for the OpManager database server, refer here.
Thank you for your feedback!