Archive Settings
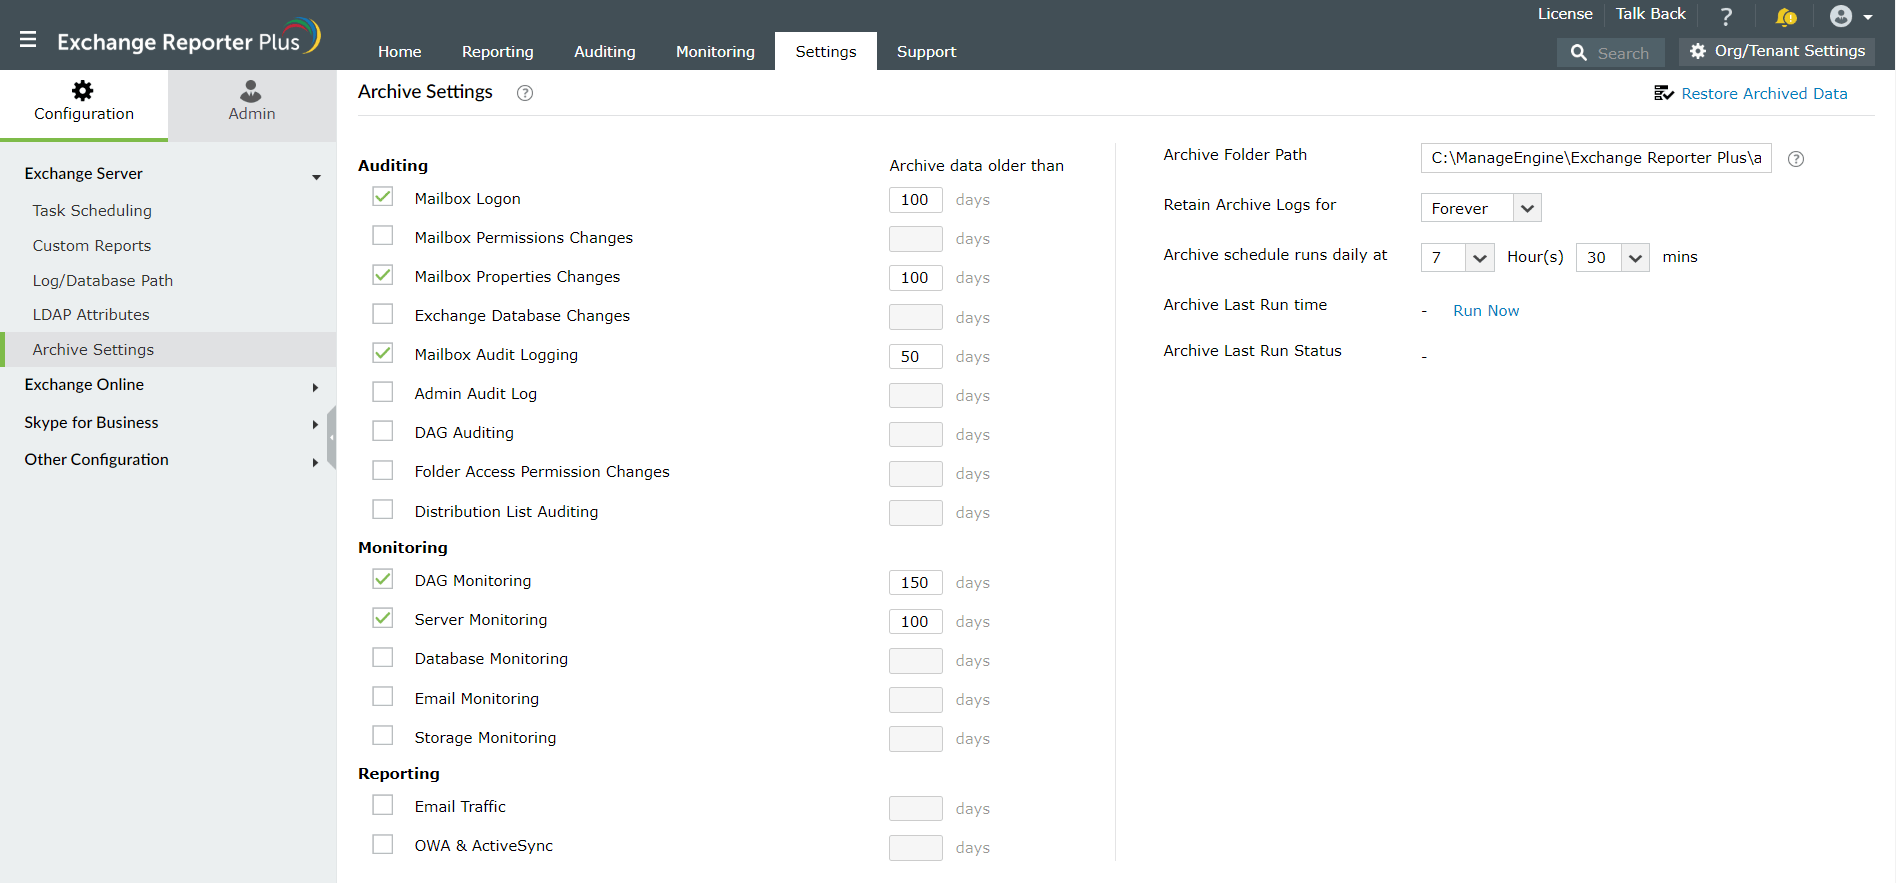
The Archive Settings option in Exchange Reporter Plus allows you to archive the auditing, monitoring, OWA, and email traffic reports that consume most of the disk space. Archiving this data helps free up disk space, resulting in improved performance of the product.
Once the archive settings are configured, data in the database older than the chosen period will be loaded to a CSV file and saved as a zipped folder in the installation directory, or in the specified location. Once archived, the data will be removed from the product. It must be restored in order to view it again.
Steps to archive data
- Go to the Settings tab.
- Navigate to Configuration → Exchange Server → Archive Settings.
- Select the reports that you want to archive under various categories. Also, enter the number of days after which the reports must be archived in the boxes given beside each report.
- In Archive Folder Path, specify the location where you want to store the archived files.
Note: The default storage path is C:\ManageEngine\5500\Exchange Reporter Plus\archive.
- From the Retain Archive Logs for drop-down, select the duration for which the archived files should be held until permanently deleted.
- Specify the time at which the archive schedule should run every day.
Note: The default run time is 2am GMT.
- You can also view the recent Archive Run Time and Status. Click Run Now to archive files as and when required.
- Click Save.

Steps to restore archived data
- Go to the Settings tab.
- Navigate to Configuration → Exchange Server → Archive Settings.
- Click the Restore Archived Data option in the top-right corner.
- Select the Restore option found under the Action column, corresponding to the reports to be restored.
- You can also restore multiple archived files by selecting the check box found in each row, and clicking the Restore option at the top of the table.
Steps to re-archive the restored data
- Go to the Settings tab.
- Navigate to Configuration → Exchange Server → Archive Settings.
- Click the Restore Archived Data option in the top-right corner.
- Click the Archive option found under the Action column, corresponding to the row of restored reports.
Note: Restored data older than two days (48 hours) will be automatically re-archived.
Note: When you choose to archive a category, all the reports under the chosen category will be archived. Each report will be saved under a different file name, usually the same as the report name.
