Adding switches for mapping
With OpUtils, you can add switches to be mapped using the Switch Port Mapper module by following any of the following steps,
- Add switches manually
- Import switches using CSV file imports
- Discovering switches by scanning a IP address range
Adding switches manually
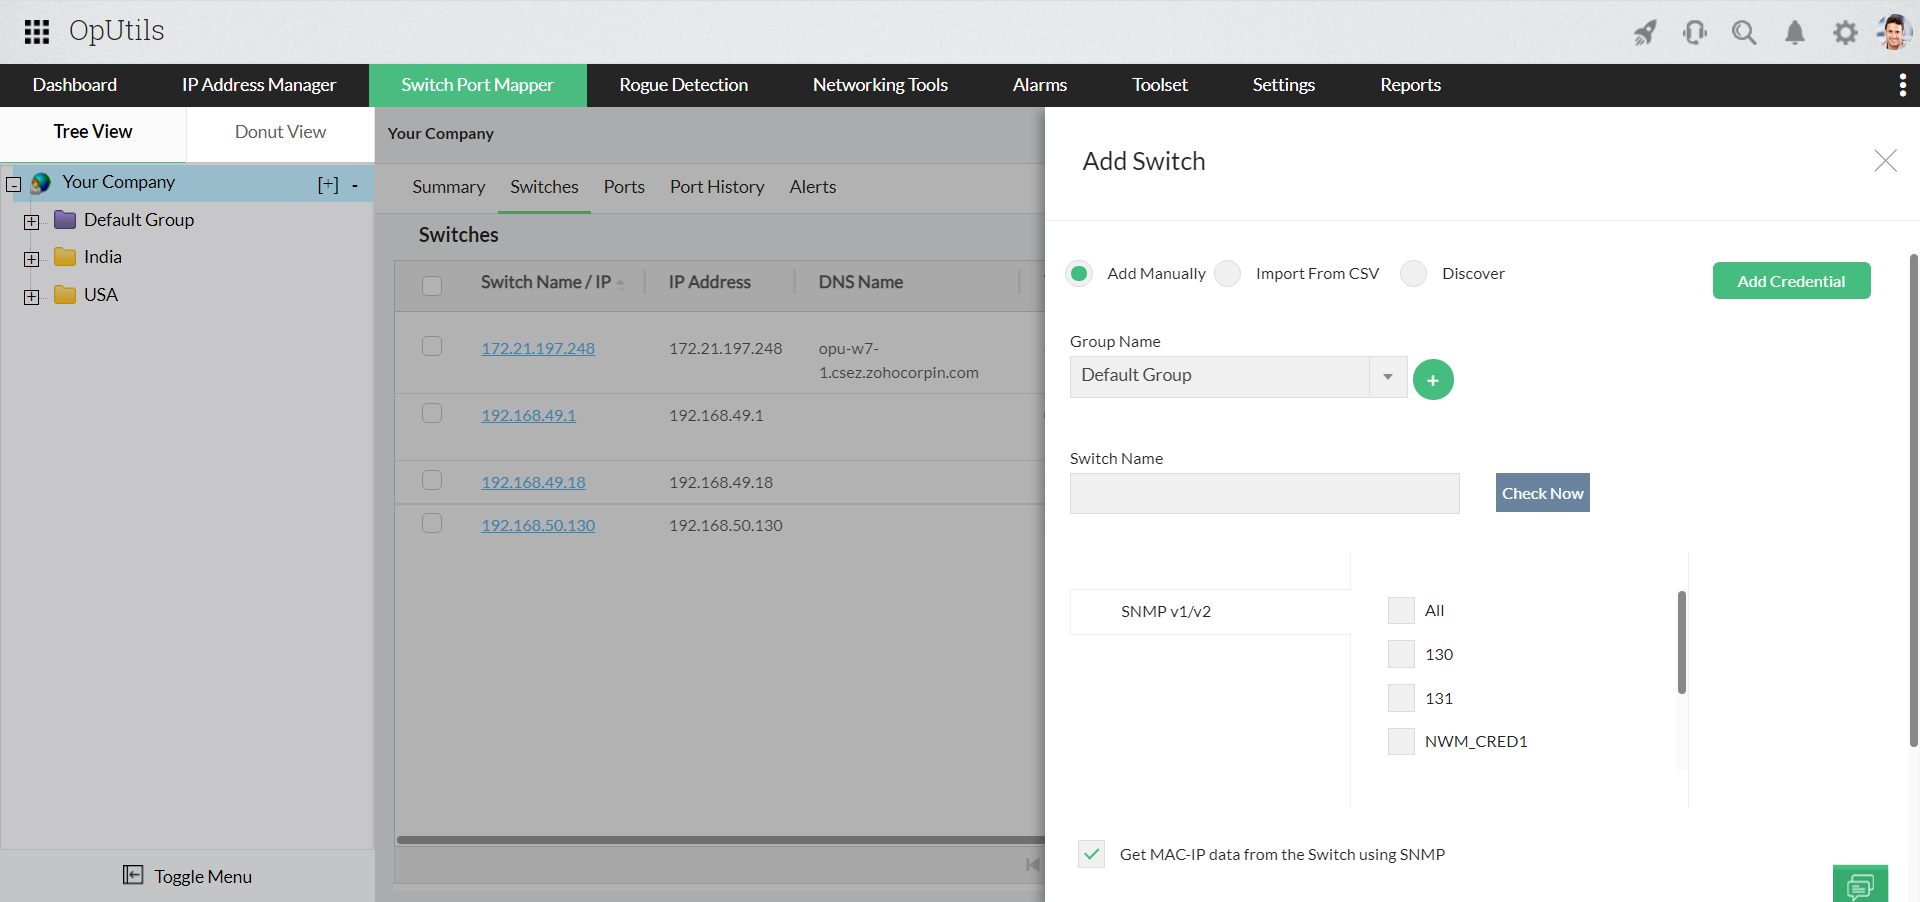
- In the Switch Port Mapper module, under Add in the top right corner, click on Add Switch option. This will open a dialog to accept the switch input.
- Select the Add Manually option.
- Select the Group Name to which the switch has to be added.
- Specify the Switch Name and its corresponding SNMP credential.
- Click the Add Switch button.

The switch gets added to the Switch Port Mapper module. The added switch will be automatically mapped in the background and the status is displayed.
Importing Switch Inputs from a CSV File
Adding a large number of switches manually can be a tedious task. In such cases, you can import switches in bulk from a CSV file. Create a csv file as specified below and import this file into the Switch Port Mapper module.
- The CSV file should contain the mandatory fields: Tree Hierarchy, and Switch Name.
- If you have more than one subnets added for a switch you can add them as comma separated within double quotes. For example, "192.168.112.0, 192.168.111.0"
- All the subnets specified here should be subnetted to class C. This means that the first three octets should only be 255. This is to avoid unnecessary traffic.
Sample CSV entry
Tree Hierarchy, Switch Name, Task Name, Subnet Address
Zohocorp\ME\India,procurve2524,First Floor,192.168.112.0,255.255.255.0
Zohocorp\ME\India,192.168.109.4,Admin Team,"192.168.113.0,192.168.113.128","255.255.255.128,255.255.255.128"
Zohocorp\ME\USA,3com4400,Test
Zohocorp\ME\USA,foundry2402,Default Group,10.1.23.0,255.255.255.128
Zohocorp\ME\USA,catalyst2900,First Floor,132.232.2.0,255.255.255.0
Zohocorp\ME\UK,cisco2081,Default
Zohocorp\ME\UK,cisco0587,Default
Note: To view a sample CSV file to bulk import switches, go to demo.oputils.com -> Switch Port Mapper -> Add -> Import Switch(es) from CSV and click on Sample File.
To import your CSV file,
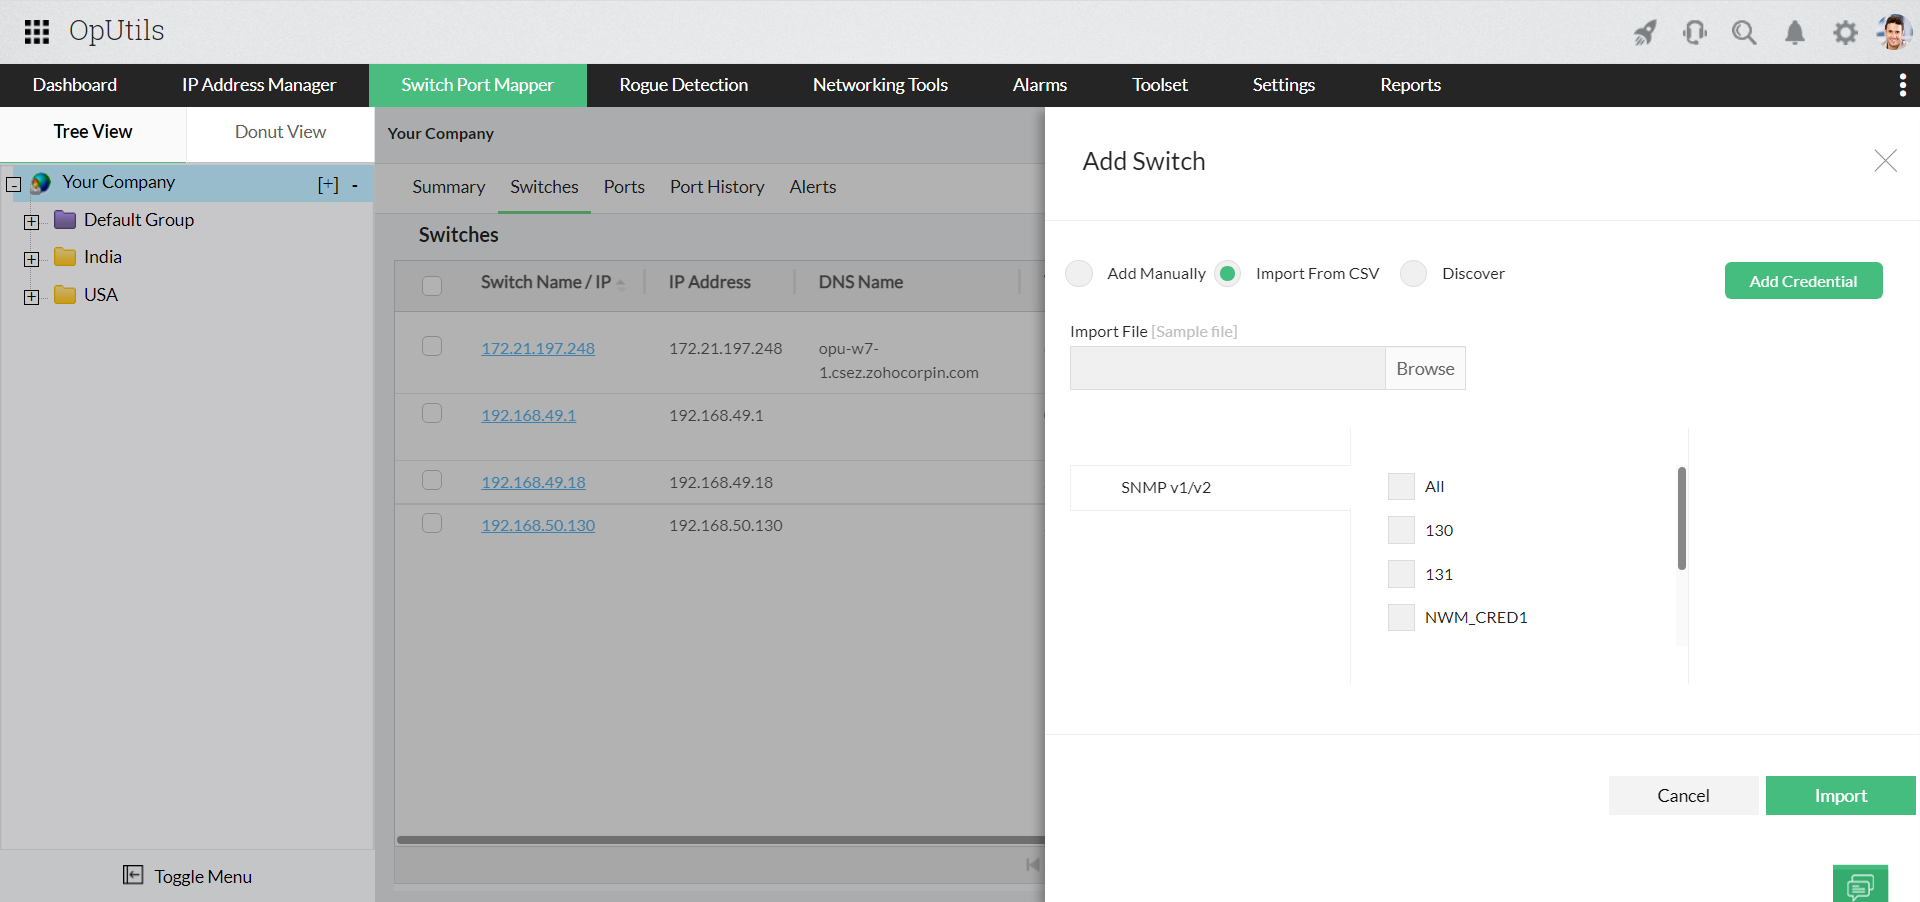
- In the Switch Port Mapper module, under Add in the top right corner, click on Import Switch(es) from CSV option. This will open a dialog to accept the switch input.
- Select Import From CSV option.
- Click on the Import File input tab, and browse to select the CSV file.
- Note: The CSV file should contain the Switch Name / IP Address, Switch Community, Group Name, Subnet Address, and Subnet Mask as comma separated values. The Subnet Address and Subnet Mask are optional. If you are not specifying the group, just add a comma after the switch community. When the Group Name is not specified, the switch gets added to the Default Group. If you specify a non-existing group, it gets created. Multiple switch inputs should be in a separate line.
- Click on Import.

The switches get added to the Switch Port Mapper module. The Switch Port Mapper will scan five switches at a time and the remaining switches are shown as Yet to Scan. The scanned switches will be automatically mapped in the background and the status is displayed. If any errors are obtained during scan, the same is shown as Scanning Failed. Clicking the failed count will show the details of the errors from where you can modify and scan them again.
Note:
- Only Switches and Hubs that support the BRIDGE-MIB can be mapped because device details for Switches and Hubs that do not support a BRIDGE-MIB cannot be discovered.
- Multiple devices may seem connected to the single port. This is because, if a Hub is connected to the Switch that is specified (Cascading) and multiple devices are connected directly to that hub, multiple devices appear as if they are connected to the same port of the switch.
Discovering switches by scanning IP address range
You can also make OpUtils discover the switches automatically from the subnets that you have added in the IP Address Manager tool. To discover the switches, follow the steps below:
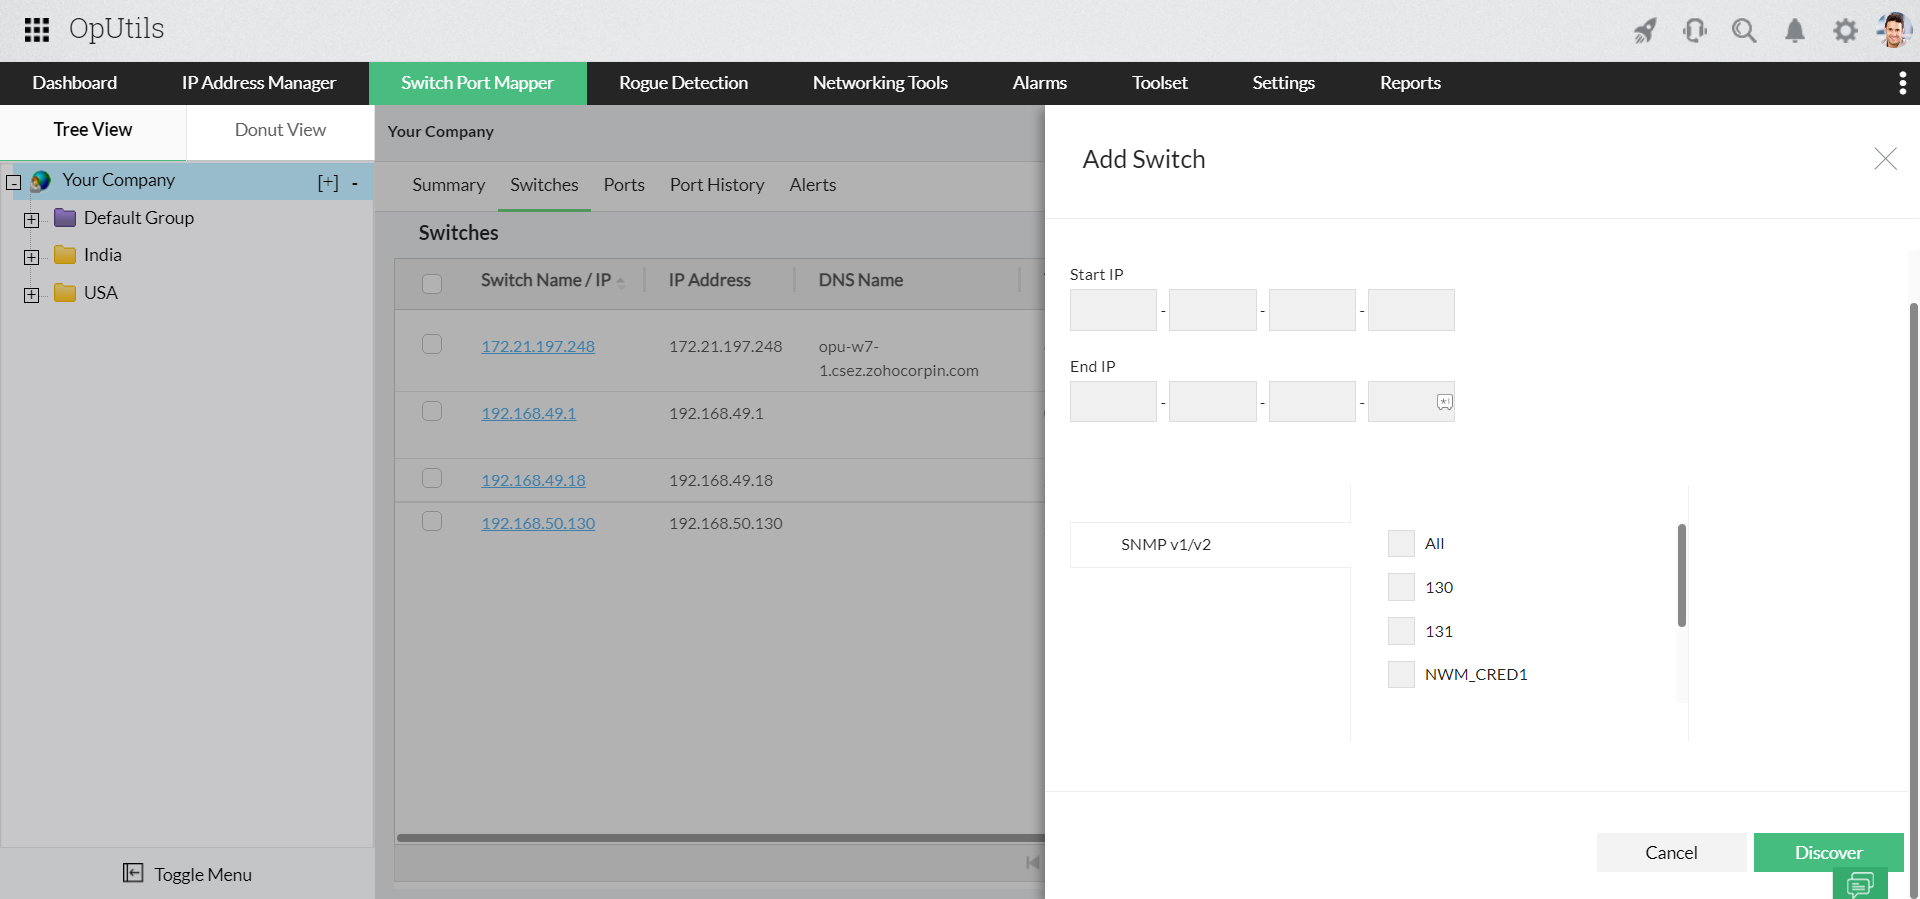
- In the Switch Port Mapper module, under Add in the top right corner, click on Discover Switch(es) option. This will open a dialog to accept the switch input.
- Select the Discover option.
- Enter the IP range to be discovered.
- Select the SNMP Credential for scanning.
- When done, click Discover.

Schedule Scanning of Switches
To set up scan schedule for switches follow the steps mentioned below,
- In the Settings under Switch Port Mapper, click on Scheduler.
- Click Add Task to create a new task.
- Provide a name for the task and choose the switches to be added to this task. The "Available Switches" will list all the switches that have been added in the Switch Port Mapper tool.
- Select the Enable option.
- Specify the interval to perform the scan:
- Hourly - to update every 6, 8, or 12 hours from the specified time
- Daily - to update everyday. You need to specify the starting time.
- Weekly - to update on specific day(s) in a week. You need to specify the starting time and the day(s) on which the update should happen.
- Monthly - to update on a specific day every month(s). You need to specify starting time, select a day and select a month.
- Once Only - to run the tool only once at the scheduled time.
- Click Save.
Note:
While you schedule scanning, you can logically group the switches to a task and scan them separately. A switch cannot exist in more than one task.
Thank you for your feedback!