Cisco DHCP server monitoring
OpUtils supports monitoring Cisco DHCP servers. Users can discover, scan, and monitor the server, its scope, and its subnets. Tightly integrated with IP Address Manager, OpUtils enables effective DHCP server monitoring and IP management from a single console.
Learn more about OpUtils DHCP server monitor.
Adding Cisco DHCP servers
- Click 'Add' under the 'IP Address Manager'.
- Choose the 'Add DHCP Server' option.
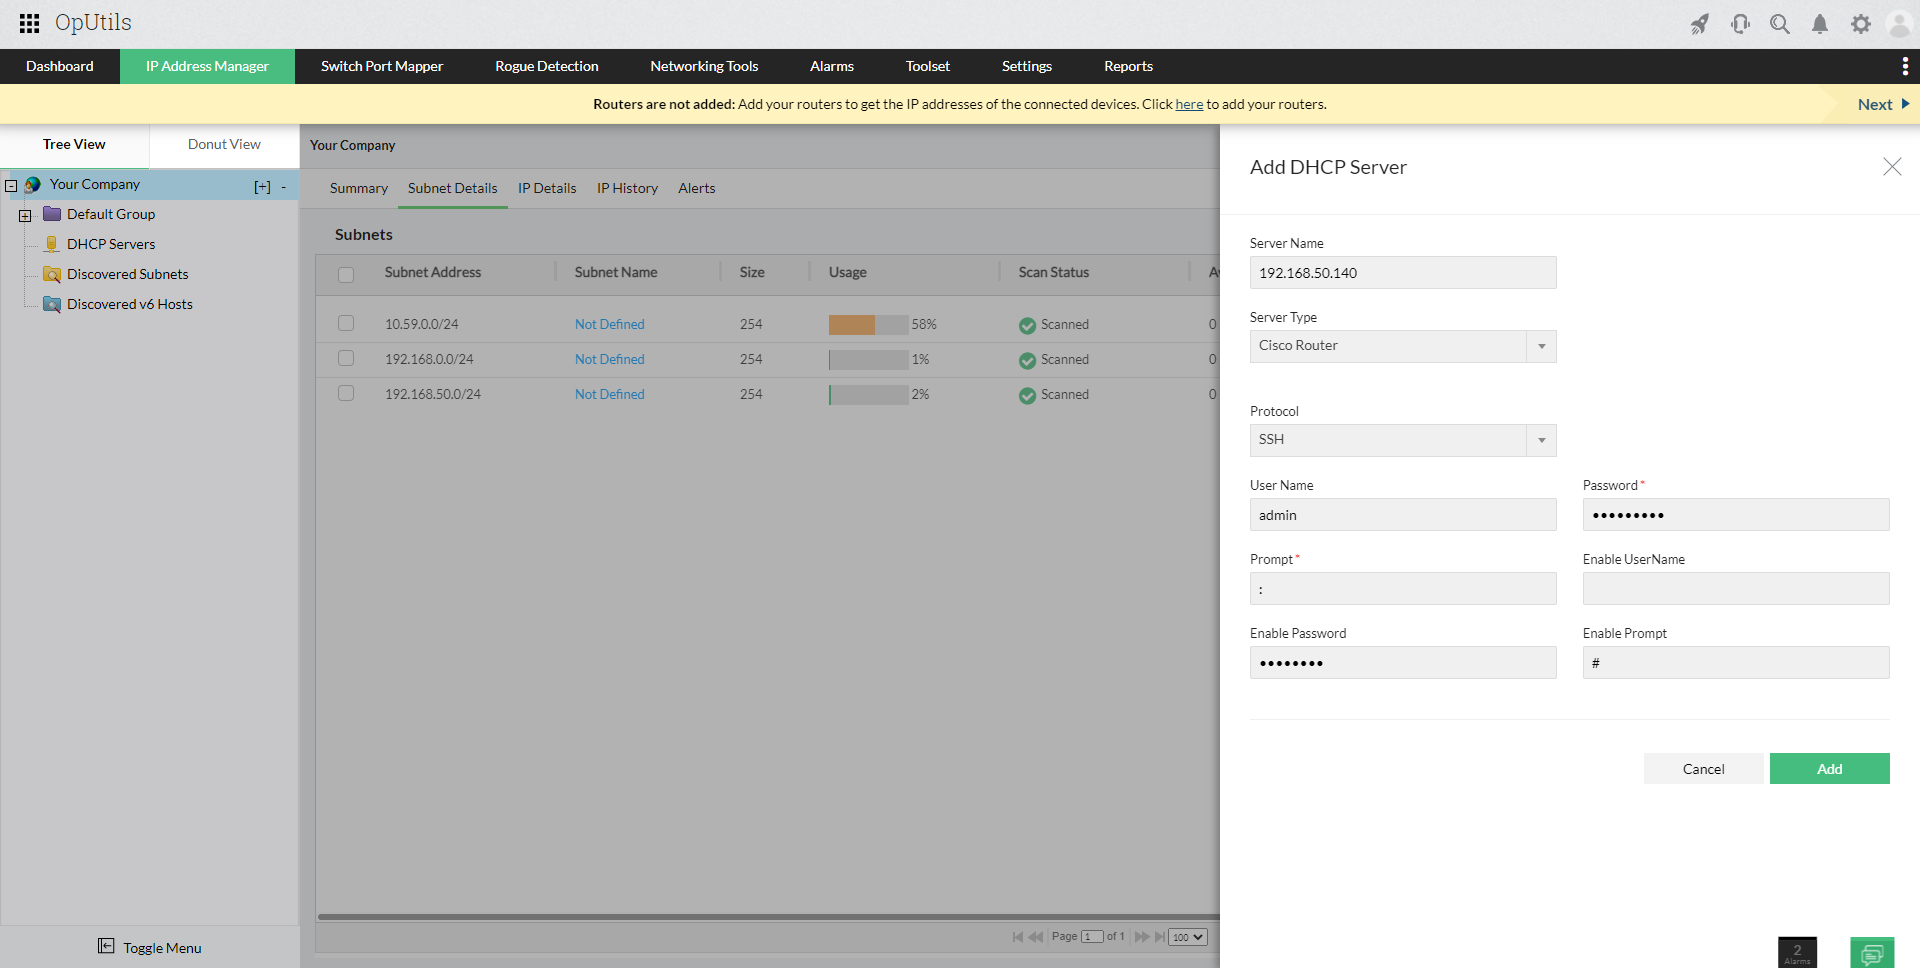
- Under 'Add DHCP Server' select the Cisco DHCP server in the 'Server Type' drop down.
- Specify the 'Server Name' of the Cisco DHCP server.
- Select the protocol to be used, from the 'Protocol' drop down box.
- Specify the required DHCP server values in the fields, 'User Name', 'Password', and 'Prompt'.
- If needed, specify the required DHCP server values in the fields, 'Enable User Name', 'Enable Password', and 'Enable Prompt'.
- Click add.
The DHCP server to monitored is added to OpUtils. You can now monitor, scan, and manage the server, its scope, IP pool, and subnets.

Cisco DHCP server monitor settings
Scan scheduling
- Click the Settings tab to open the settings page.
- Select the Scheduler tab.
- Under 'OpUtils' click on 'DHCP'.
- Under Scheduler, create a new schedule and change the Status to 'Enabled'
- Specify the interval to perform the scan 'Daily', 'Weekly', 'Montly' or 'Once Only'.
Configuring alerts
Alerts can be configured to be triggered via email or syslog, when lease utilization of the server or scope is greater than 80% .
- Click the Settings tab to open the settings page.
- Under 'OpUtils' click on 'DHCP'.
- Under 'Configure Alerts' enable the required alerts. You can choose to receive the alerts via syslog, email, or both.
OpUtils also supports Microsoft, Linux ISC, and Palo Alto servers to be monitored using its DHCP server monitoring capability.
Thank you for your feedback!