Schedule Reports
Using the Schedule Reports [  ] option available on each report, you can automatically generate and email reports to the admin or the manager.
To schedule reports, perform the following steps:
- Navigate to Reports > Schedule Reports button to view the list of schedulers.

- To edit an existing scheduler, click the edit icon [
 ]. if you wish to create a new scheduler, click the Schedule New Reports button.
- Enter the Scheduler Name and add a description using the Add Description option.
- Use the Select Domain section to select the desired Domain or OU(s).
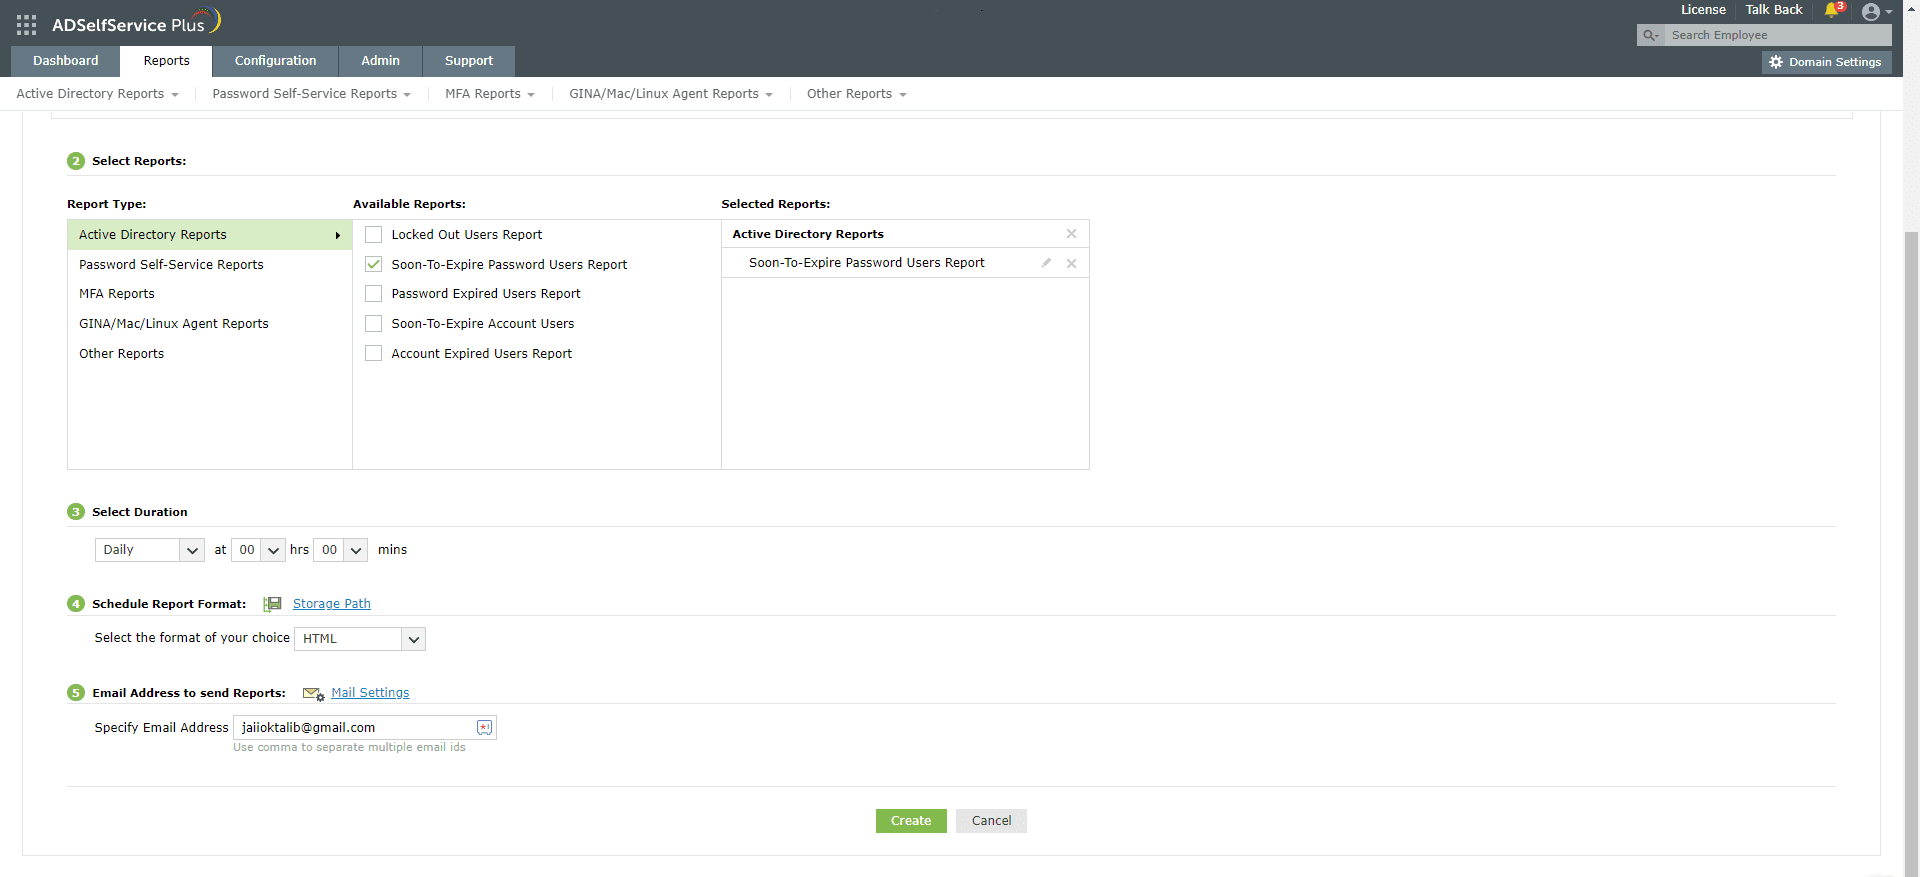
- In the Select Reports section, select the Report Type. From the list available, select the reports required. If required, filters can be applied to the reports being generated by clicking on the edit icon [
 ] next to the chosen report.

- Active Directory Reports can be filtered based on specific subsets such as the time remaining for expiry, disabled users, or smart card users.
- Under Select Duration, specify the time at which the updated reports are to be generated regularly.

- In the Schedule Report Format section, select the desired report format. You can also click on the Storage Path option to specify the destination for storing the generated reports.
- Under the Email Address to send Reports section, use the Specify Email Address field to enter the email address to which the generated reports need to be sent. Click Mail Settings, and in the tab that pops up, specify the subject and message of the email. You can also select the Send as ZIP format checkbox if you wish to send the reports as a compressed ZIP file.

- Click Save in the Mail Settings pop-up.
- Click Update if you are making these changes to the existing schedule. If you are creating a new schedule, click Create.
Don't see what you're looking for?
-
Visit our community
Post your questions in the forum.
-
Request additional resources
Send us your requirements.
-
Need implementation assistance?
Try OnboardPro
![]() ] option available on each report, you can automatically generate and email reports to the admin or the manager.
] option available on each report, you can automatically generate and email reports to the admin or the manager. 


