Business Rules for Incidents
Business rules are used to automate certain actions for requests that fulfill certain incoming criteria. Some of the actions that can be automated using business rules include assigning groups, technicians, status, and priority.
Business rules are common for the entire organization. They are not site-specific. You can now create business rules for not only incidents and service requests, but also for notes and notifications. However, there are specific differences in the conditions and actions that can be configured for notes and notifications.
Role Required: SDAdmin or HelpDesk Config
Business rules are categorized and organized under rule groups. You can configure a rule group for all related groups, such as rules for category, priority, assets, etc. Rule groups are incredibly useful because you can restrict or apply only specific rules for an incoming request.
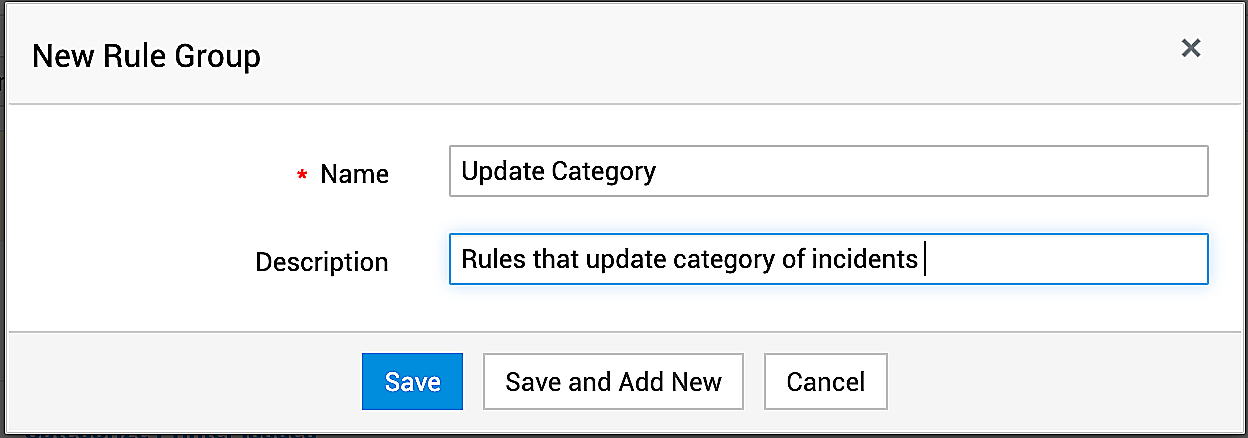
To create a new group, click Rule Group. On the displayed page, provide a name and description and click Add.
Configuring a Business Rule
After creating a rule group, create a business rule.
Hover over the rule group and click Add Rule. Fill out the displayed form using the following pointers.
Use the toggle button to enable the business rule. You can disable it when you want to pause its execution later.
|
Fields |
Explanation |
Rule name and Description |
Provide an appropriate rule name, along with a brief and clear note on how the business can be used. |
Execute on actions |
Choose when to execute the rule in the request life cycle: If you choose Edited, you will have the option to choose whether to execute the rule every single time or only the first time, when you configure the Condition.
If you choose Deleted Permanently and configure Abort process execution as the action, the deleted request will be retained in trash.
|
Execute during |
Choose the rule execution time window:
Any Time |
Cascade Execution |
Choose the order of rule execution:
Execute next rule Skip remaining rules in this group Skip remaining rules across all groups Cascade execution establishes an order in which the rules are executed. This is helpful when the result of one rule execution is the input for the following rule. Cascade execution can be incredibly useful for contexts that require multiple levels of approvals or the evaluation of various criteria for a specific decision. |
Condition |
Define the condition for the incoming request.
Apply conditions based on criteria Apply conditions using custom function Apply no condition |
Actions |
Choose whether to Abort process execution or Execute custom actions. |
Executing Custom Actions
Business rules are configured to execute various actions for requests that fulfill specific incoming criteria.
In ServiceDesk Plus MSP, you can configure 6 custom actions for your business rules, as follows:
Field Update
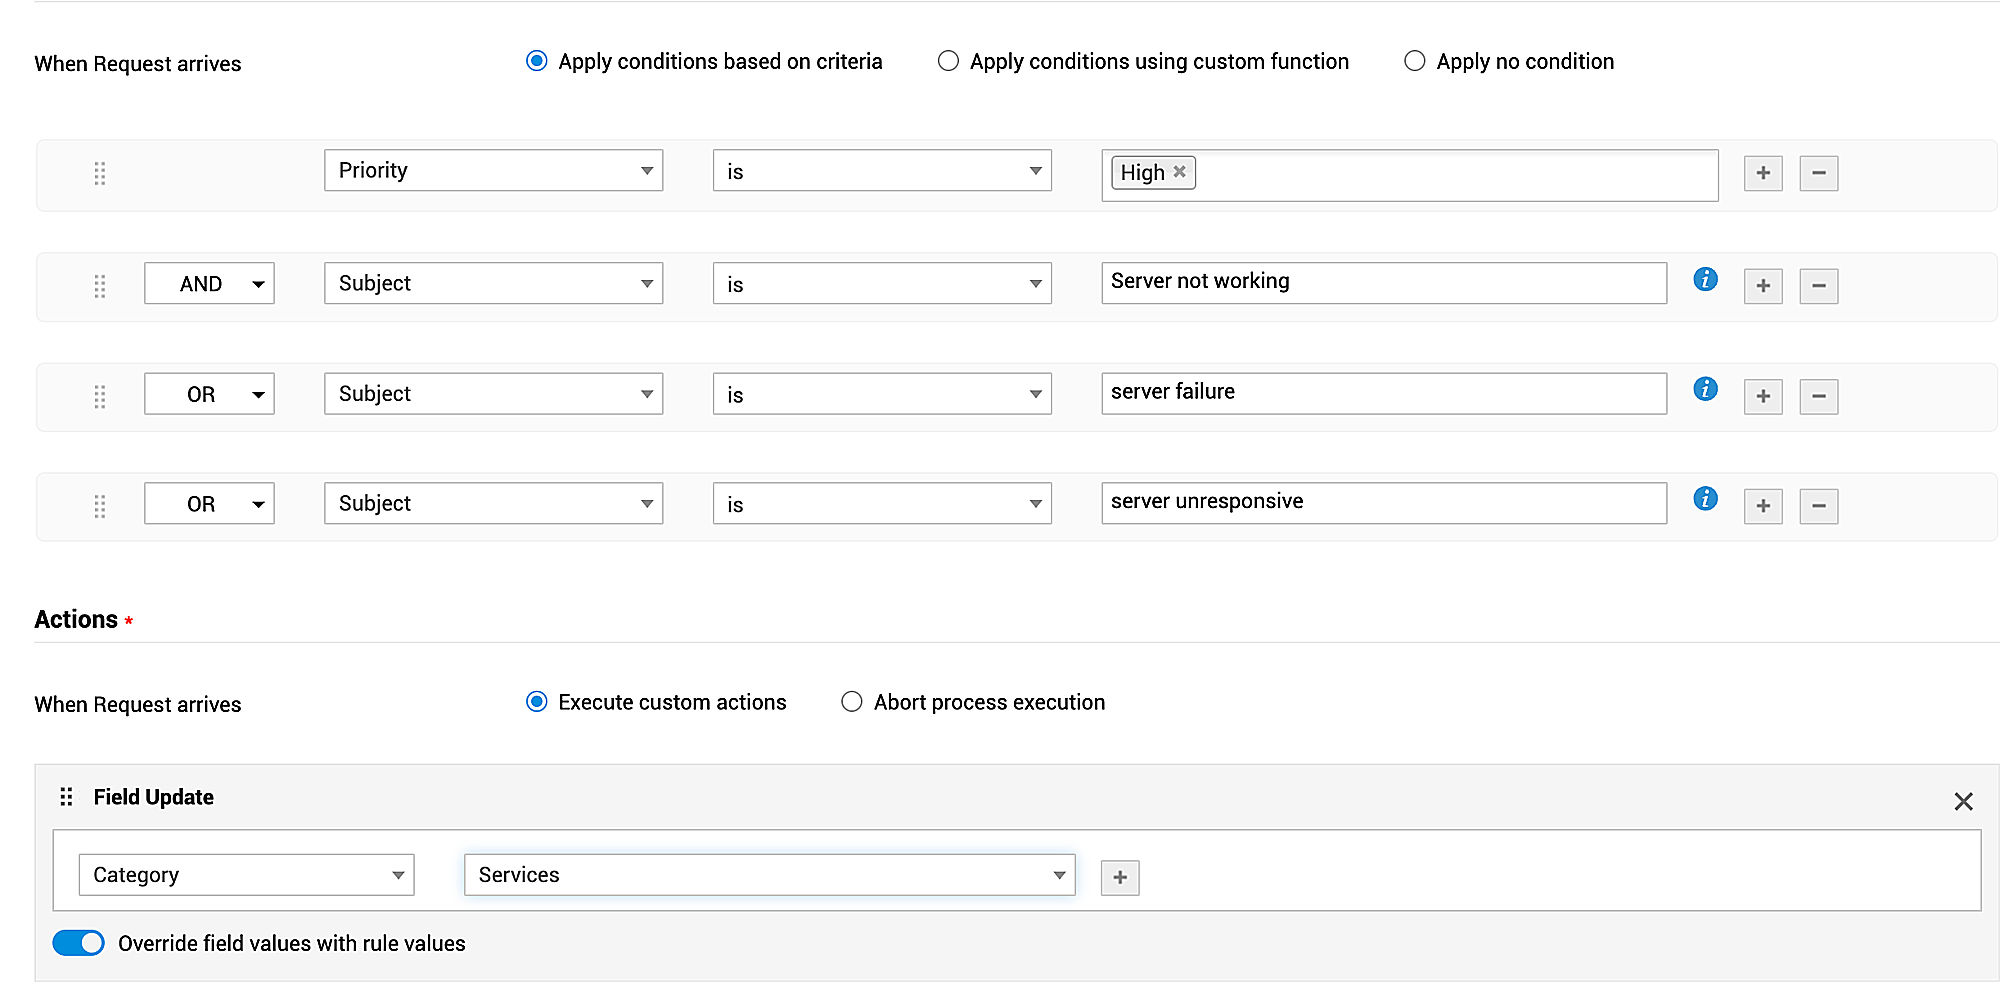
This is one of the easiest and simplest of actions that can be accomplished through a business rule. It merely involves modifying the field of an incoming request.
Modifying the field may lead to various other actions due to associated configurations. Moreover, in one Field Update action, you can modify up to 15 fields.
For example, if the incoming request is a high-priority request, you can configure business rules to check for keywords in the request's Subject and accordingly update the Category field.
This Field Update action will ensure that a technician is automatically assigned, and that the high-priority request gets the required attention so that it is closed at the earliest possible.
Custom Function
For actions that cannot be performed out of the box, you can create custom functions by using the application data, along with data from external applications to perform actions required in your environment.
Some of the actions that you can use custom function for are creating/closing a request or notes and associate with changes/problems.
The custom functions in ServiceDesk Plus MSP are built on Deluge, Zoho's propriety scripting language.
Follow these steps to create a new custom function:
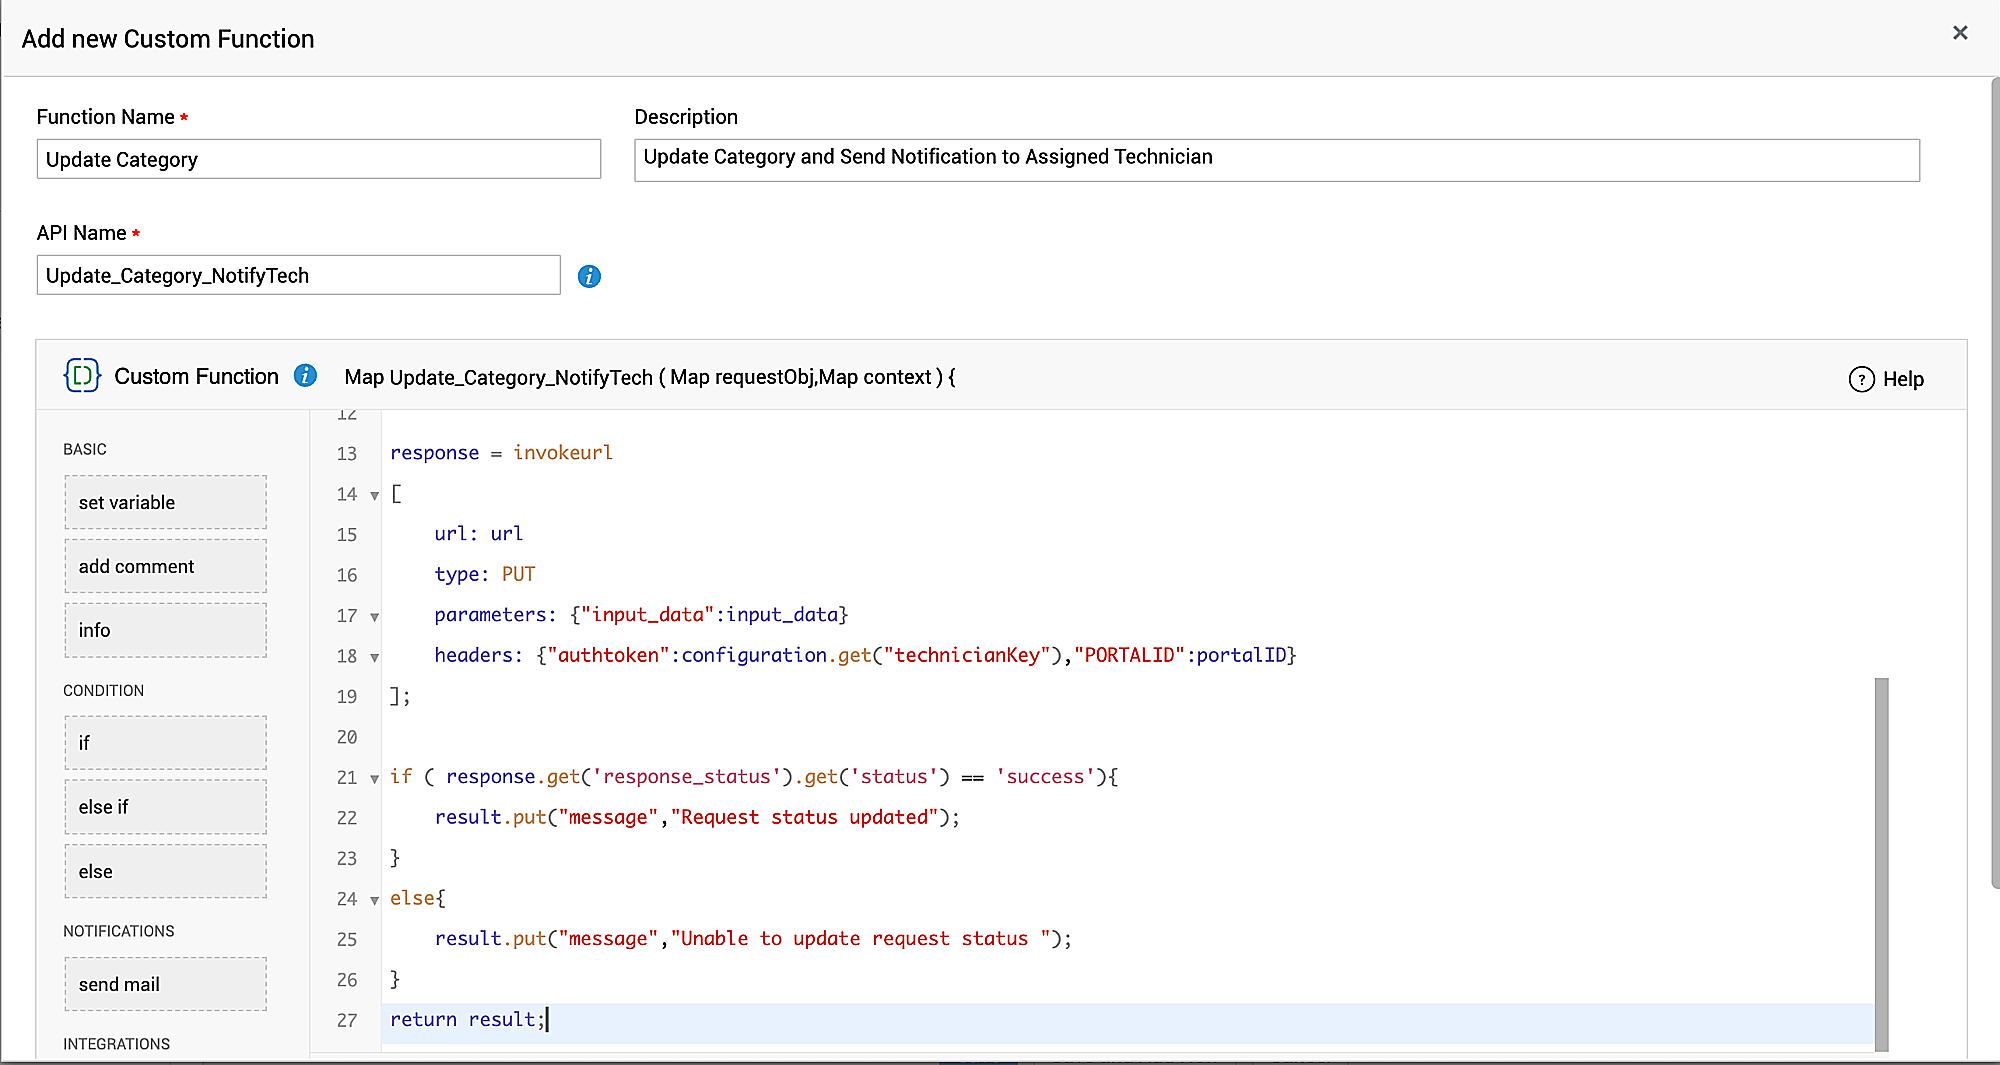
- Click Create new custom function.
- On the displayed page, provide a name and description for your custom action.
- Create the custom function through simple drag-and-drop actions on the Deluge Script Editor.
- On the left pane, besides the various code snippets, several built-in functions are available for various actions, such as sending mails and notifying stakeholders.
- Then, save and test the custom function. If required, you can test whether the script is working as expected.
Execute Script
Scripts, like custom functions, are required to perform actions that are not available out of the box. Scripts are created by using the application data, along with data from external applications to perform actions required in your environment.
However, unlike custom functions, you cannot create scripts within the application. You will have to use an external executor file to configure scripts for your specific requirement.
If-If
The If-If custom action allows you to define actions when multiple conditions are met. You can configure up to 10 conditional actions using the If-If clause.
For each fulfilled If condition, you can configure Field Update, Custom Functions, Negate Action, and Execute Script.
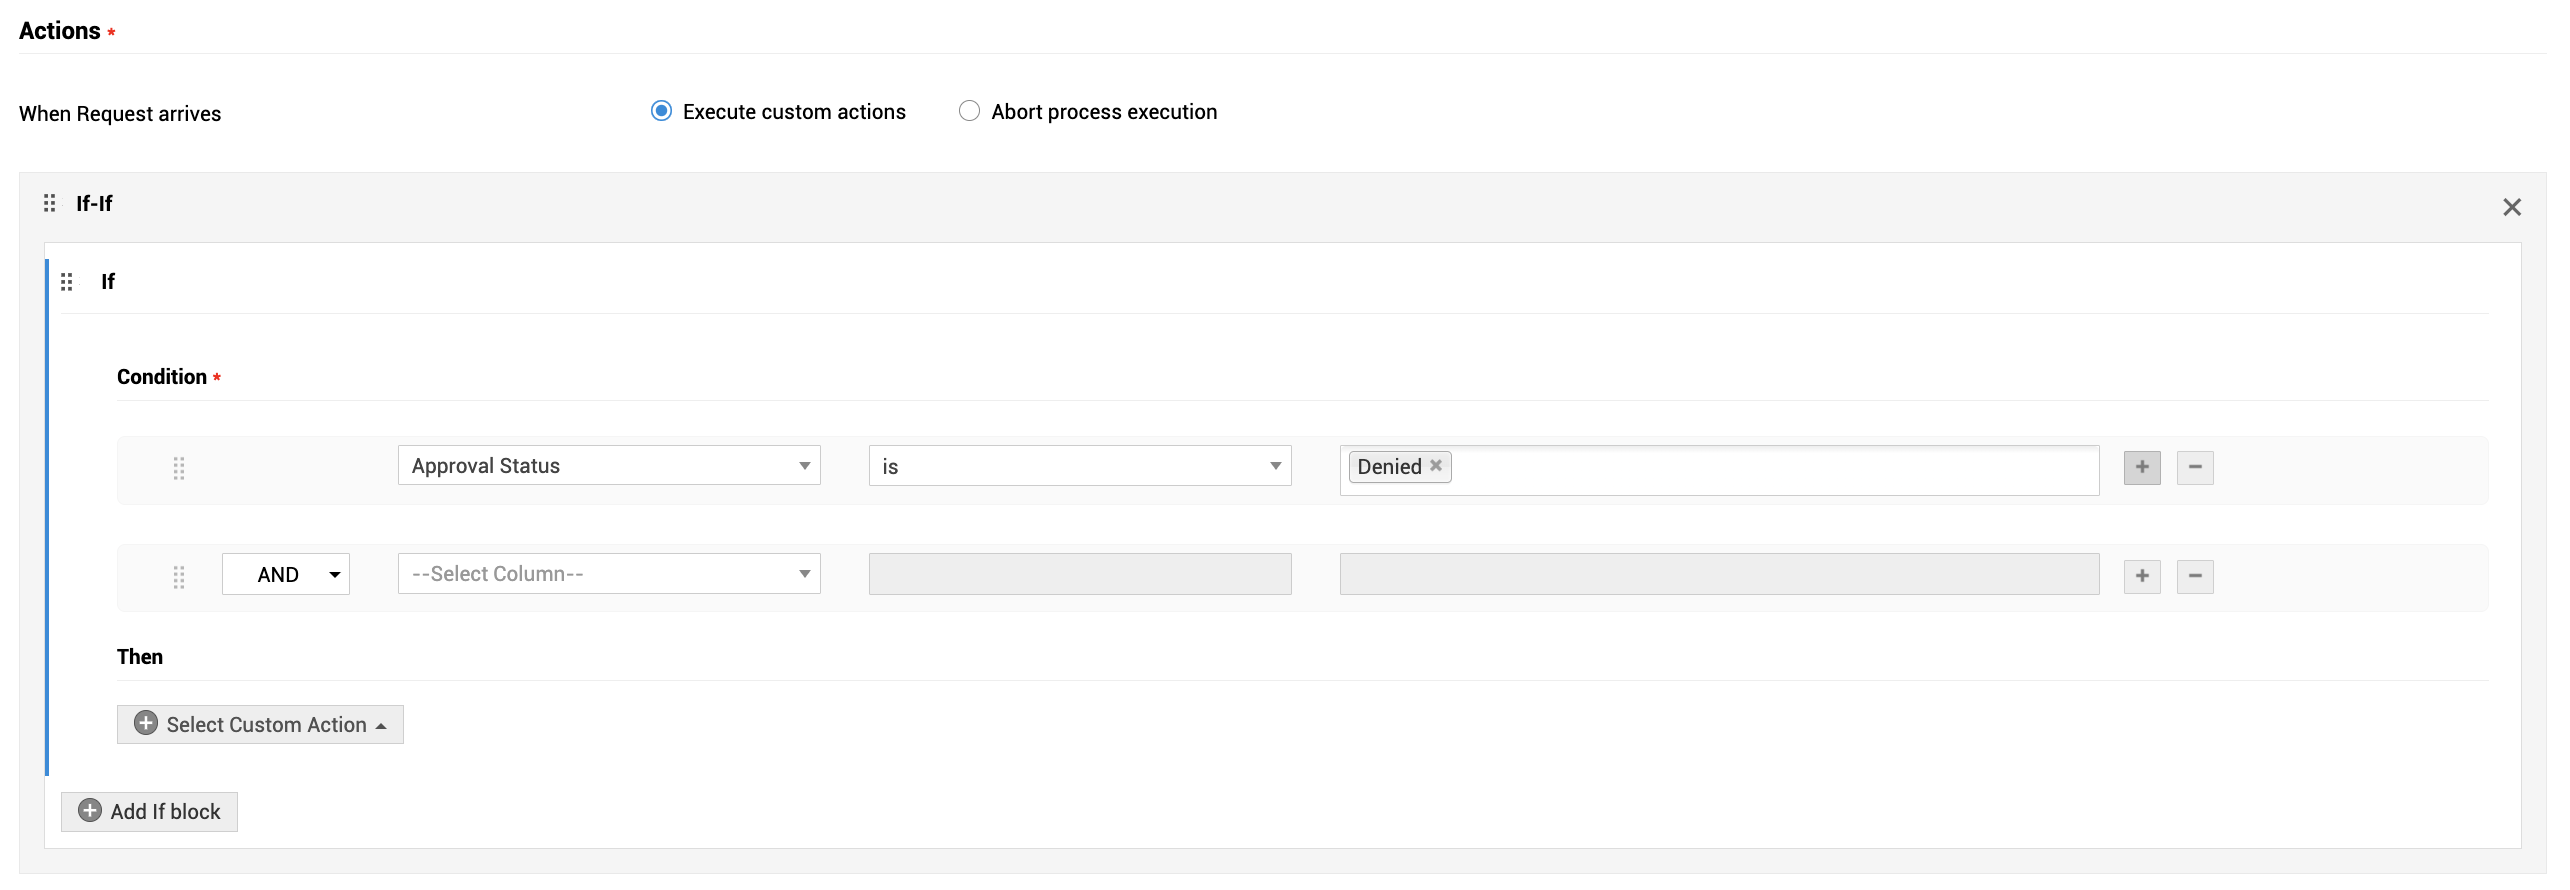
To configure the If-If condition, click Select Custom Action, and select If-If.
On the pop-up, under Condition, click the criteria drop-downs and make the required selections.
You can click the + symbol to add more conditions. Use the drop-down to select between the OR/AND operators.
Then, click Select Custom Action to select the required custom actions as mentioned earlier.
Let's consider a simple scenario to understand how you can configure the If-If clause.
Let's say there's a maintenance activity scheduled for the printers in the company. Despite announcements regarding printers, users log incidents for issues they face with printers. Note that users may use the same template to raise incidents in other categories as well. Therefore, you cannot configure a business rule to stop the process (Abort process execution) even as the incident is being logged.
So, after a user logs an incident, the first step would be to check the priority and accordingly place it in the right group using Field Update.
You can do this by configuring the condition as Priority > High and the corresponding action as Field Update, Group > Hardware Problems.
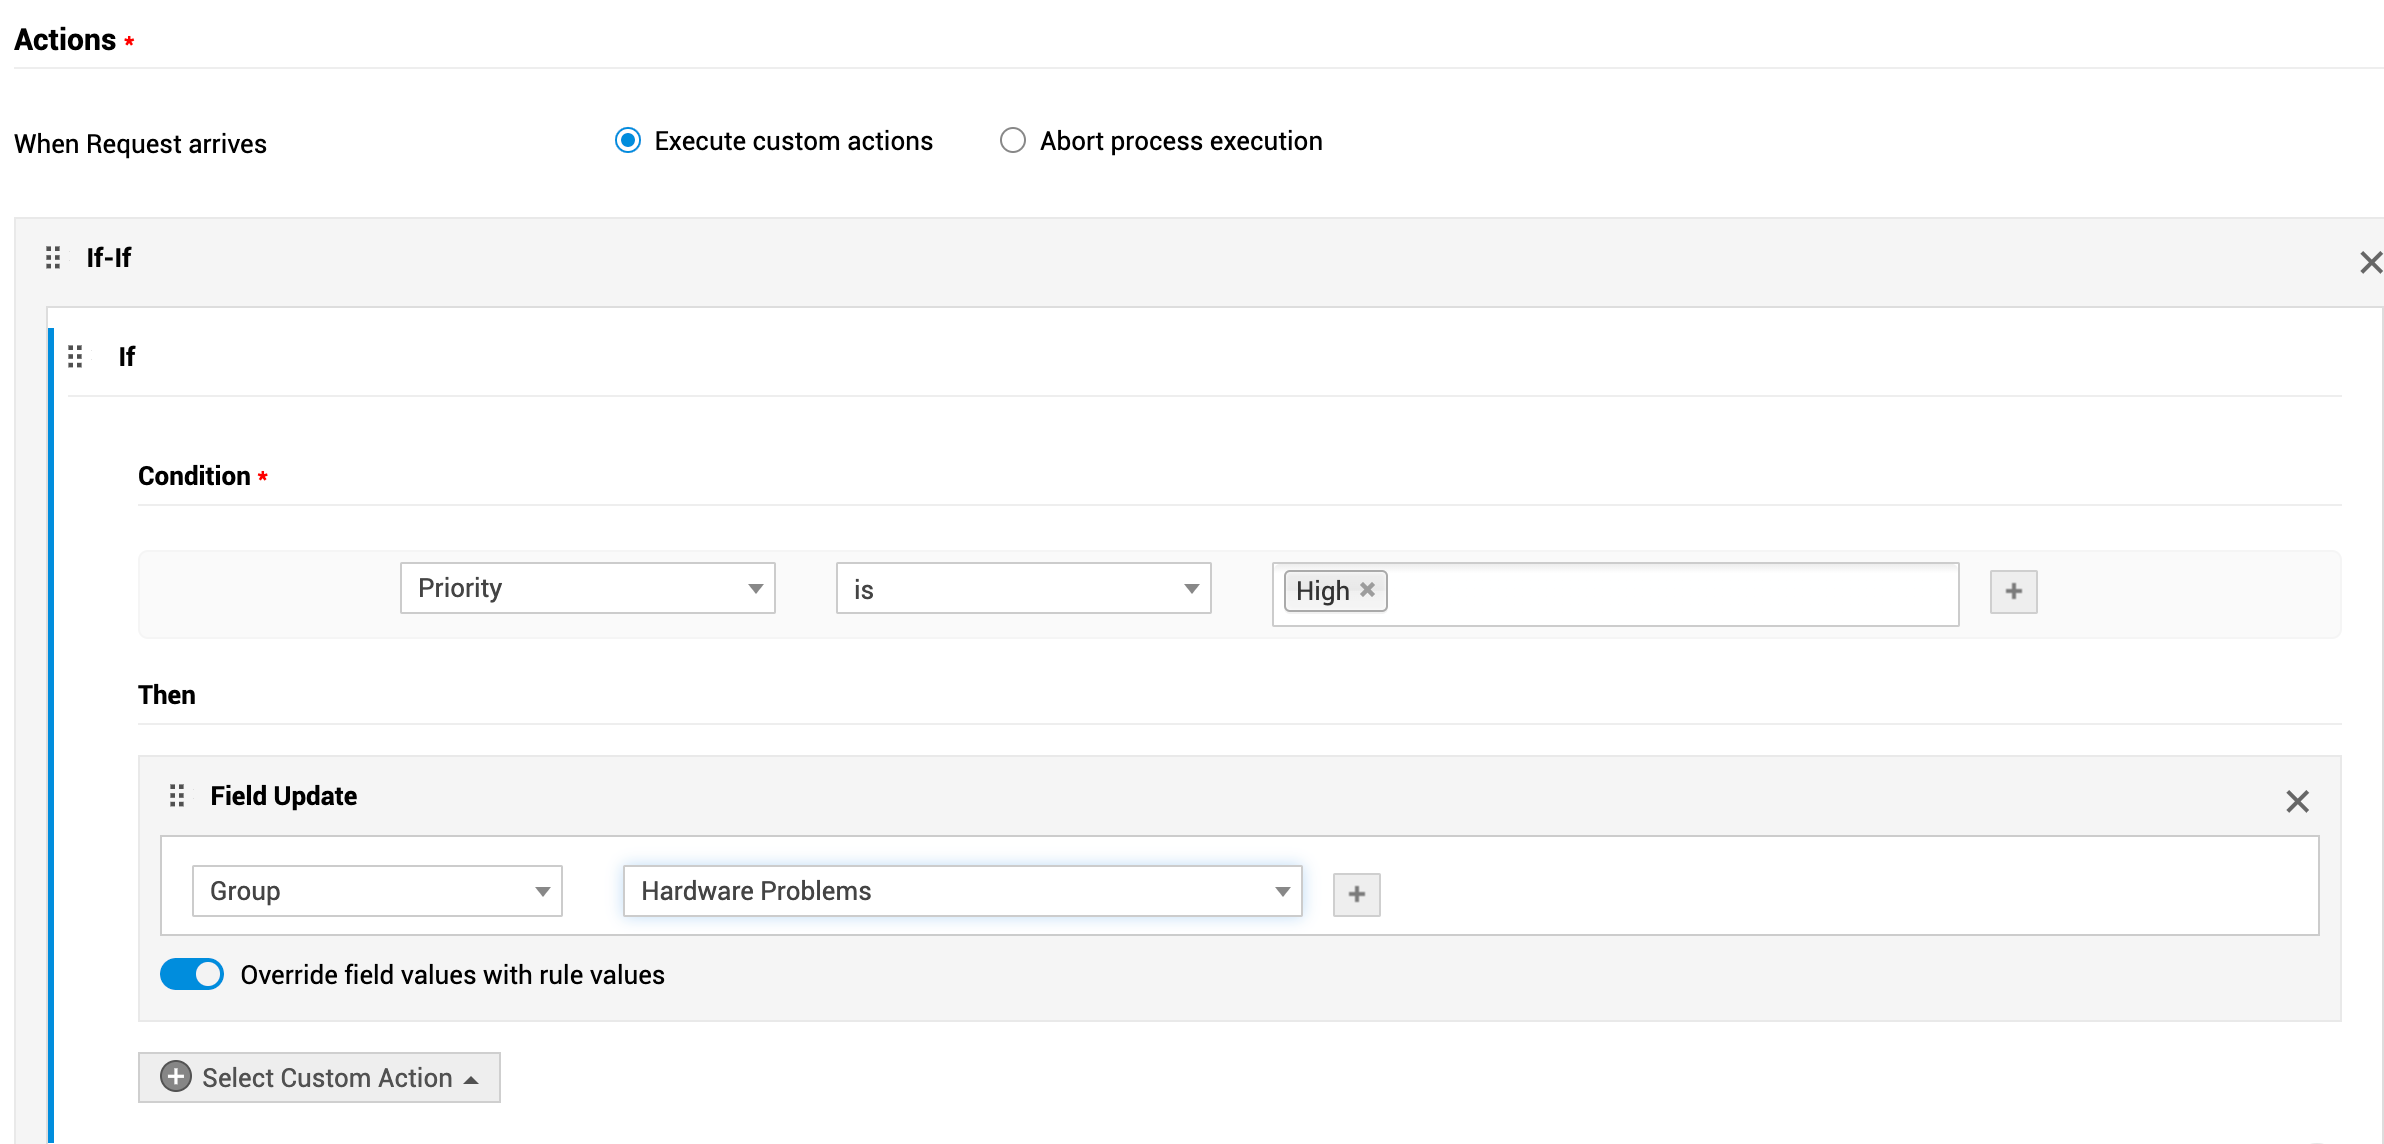
Then, the request must be checked for Category. For Printers, further processing of the request must be stopped and an appropriate message displayed to the users.
You can do this by configuring the condition of Category as Printers and the corresponding action as Negate Action.
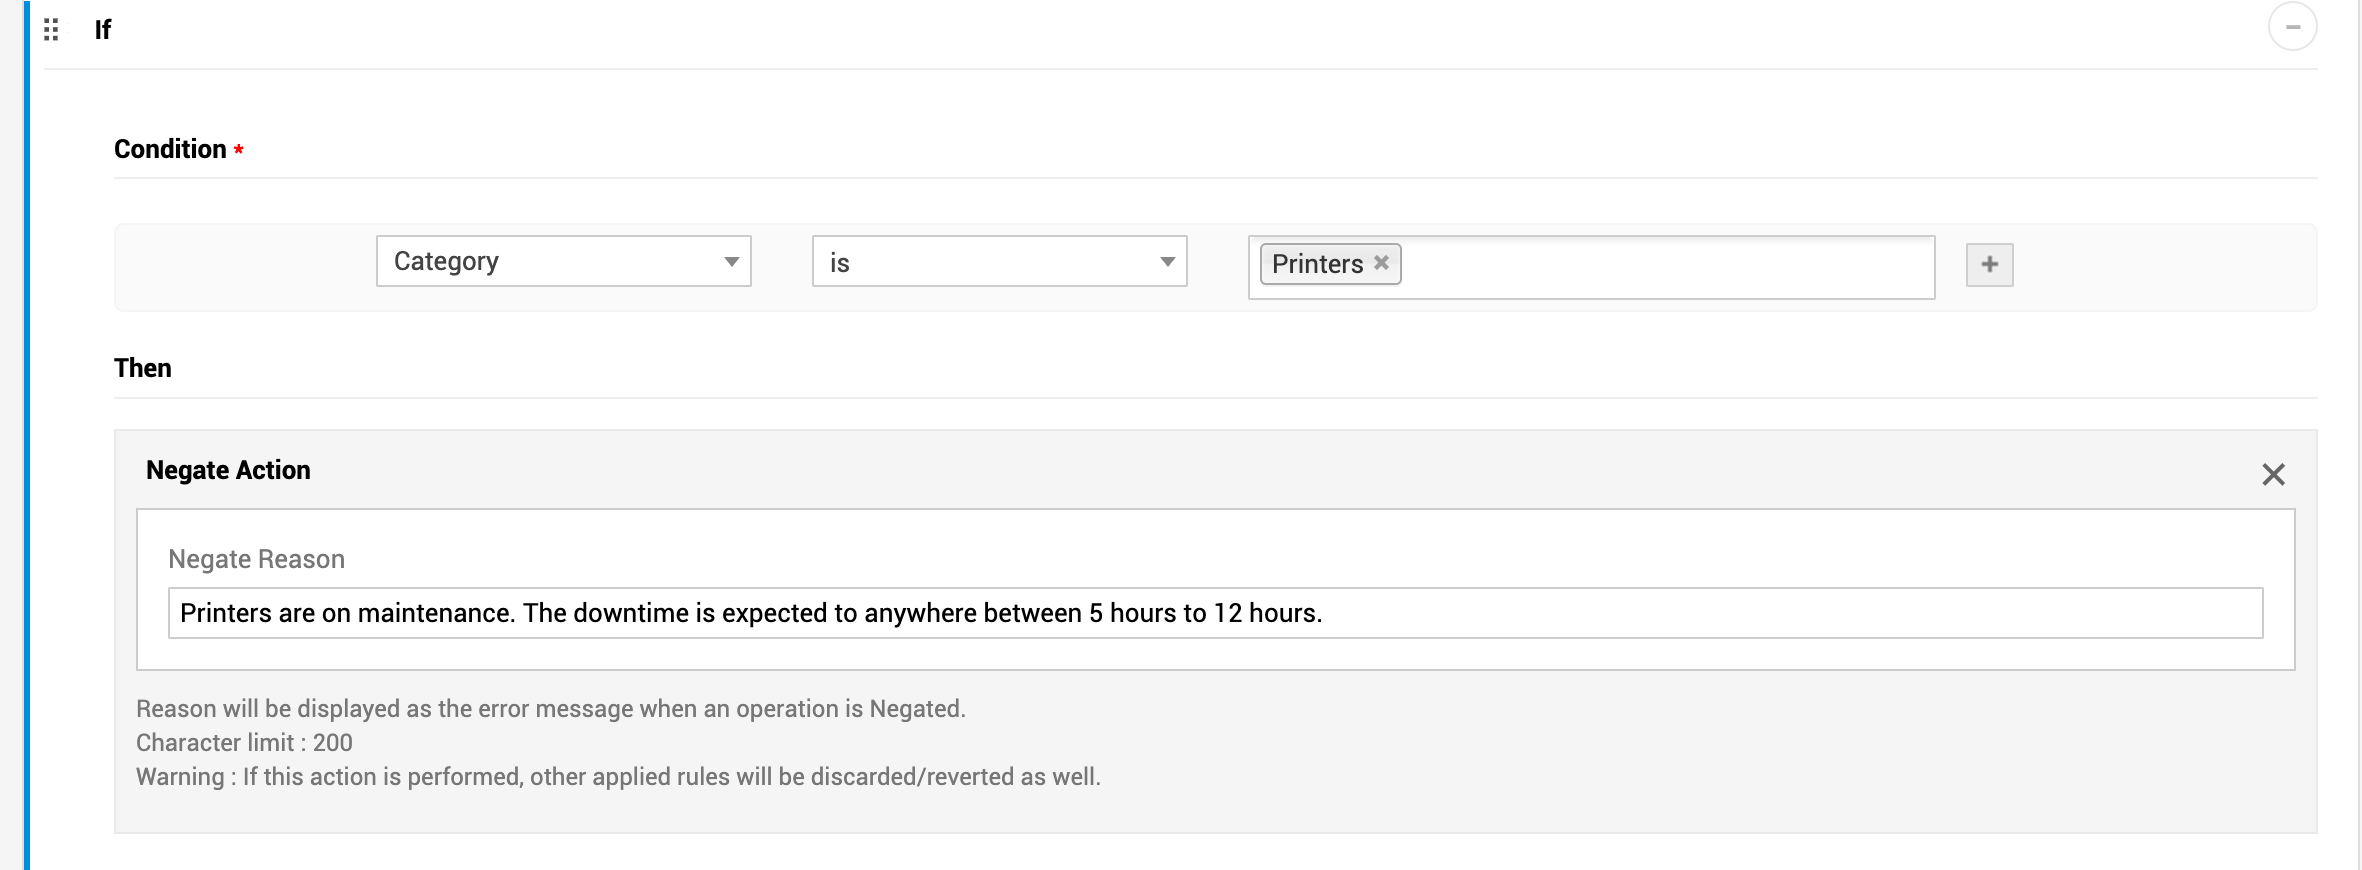
For other Categories, you can configure appropriate actions, such as Executing Script or Field Update or Custom Actions.
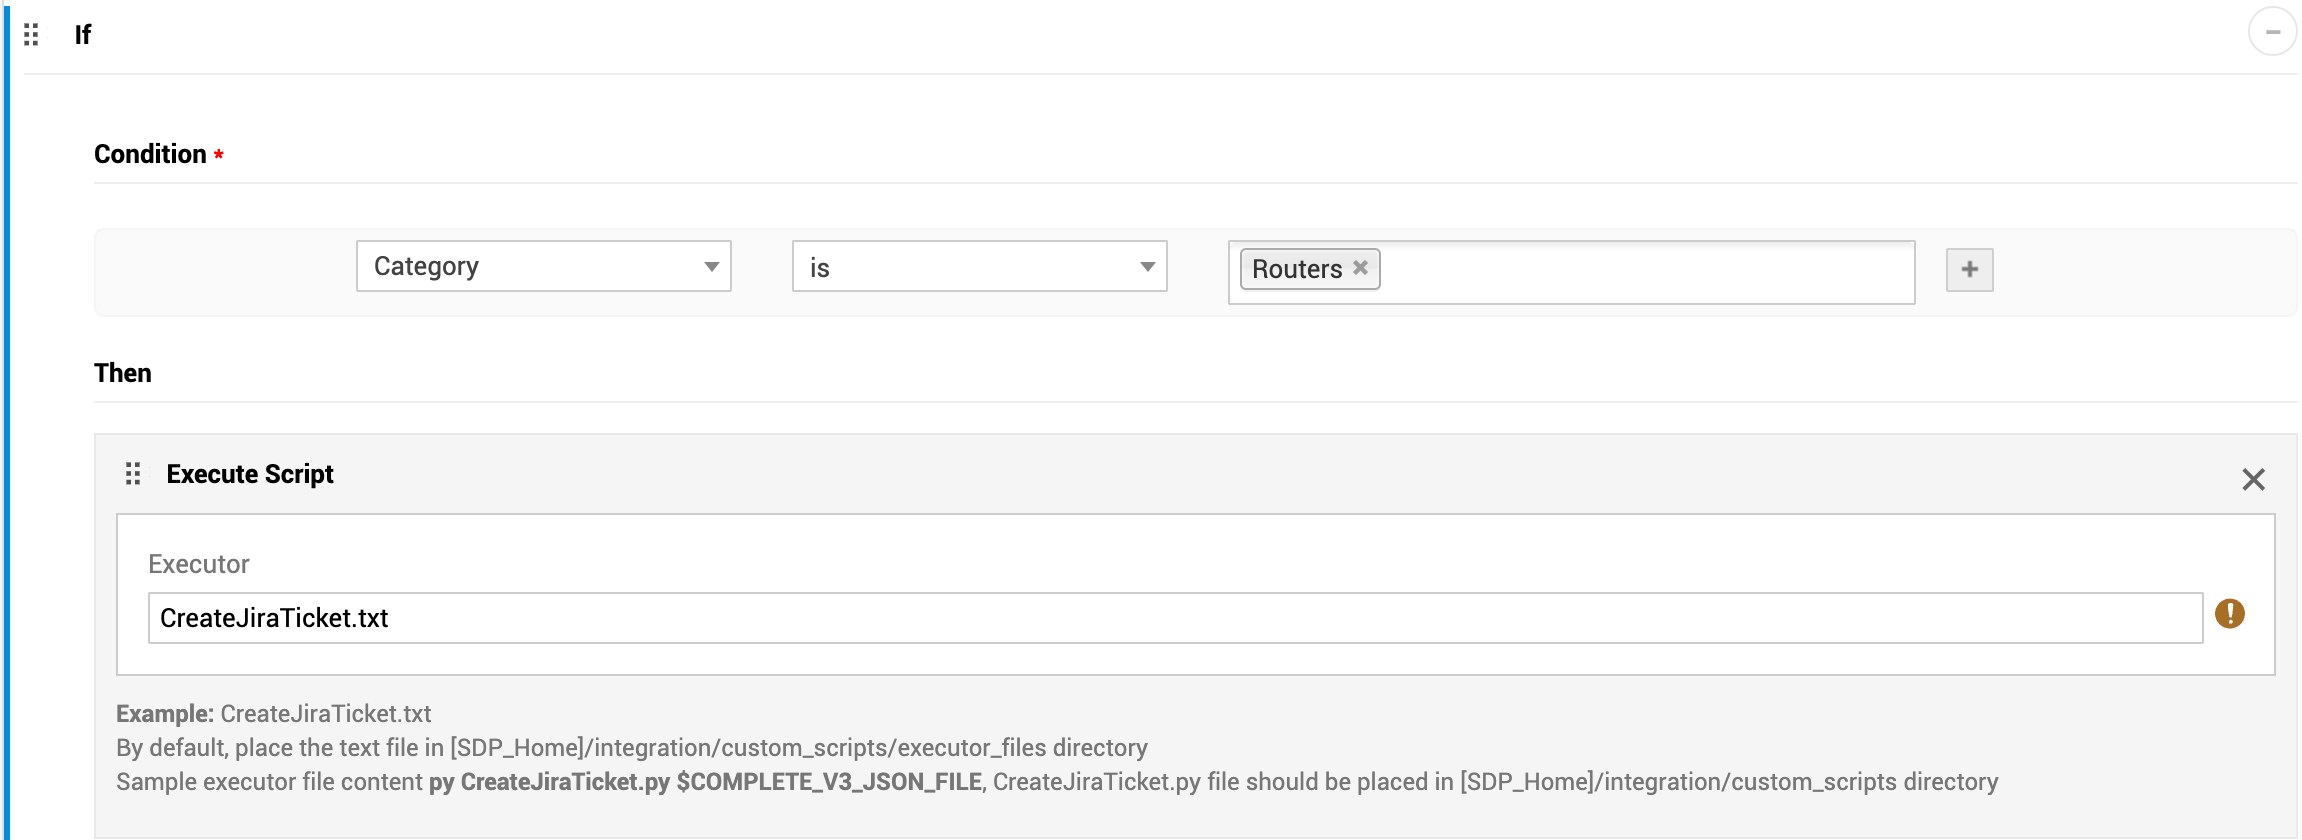
In this manner, you can nest several conditions within a single If block and configure the required custom actions.
If-Else
The If-Else clause allows you to define actions when a set of conditions are met and also when they are NOT met.
The If clause configurations work exactly as the If-If clause. You can configure up to 10 conditions using the OR and AND operator. The Else clause is used when the configured If conditions are not met. Then, you can define the Else custom actions such as Field Update, Custom Actions, Execute Scripts, and Negate Action.
These actions for unmet conditions can be based on newer conditions. You can again configure up to 8 conditions for the Else-If clause.
To configure the If-Else condition, click Select Custom Action, and select If-Else.
On the pop-up, under Condition click the criteria drop-downs and make the required selections.
You can click the + symbol to add more conditions. Use the drop-down to select between the OR/AND operators.
Then, click Select Custom Action to select the required custom actions as mentioned earlier.
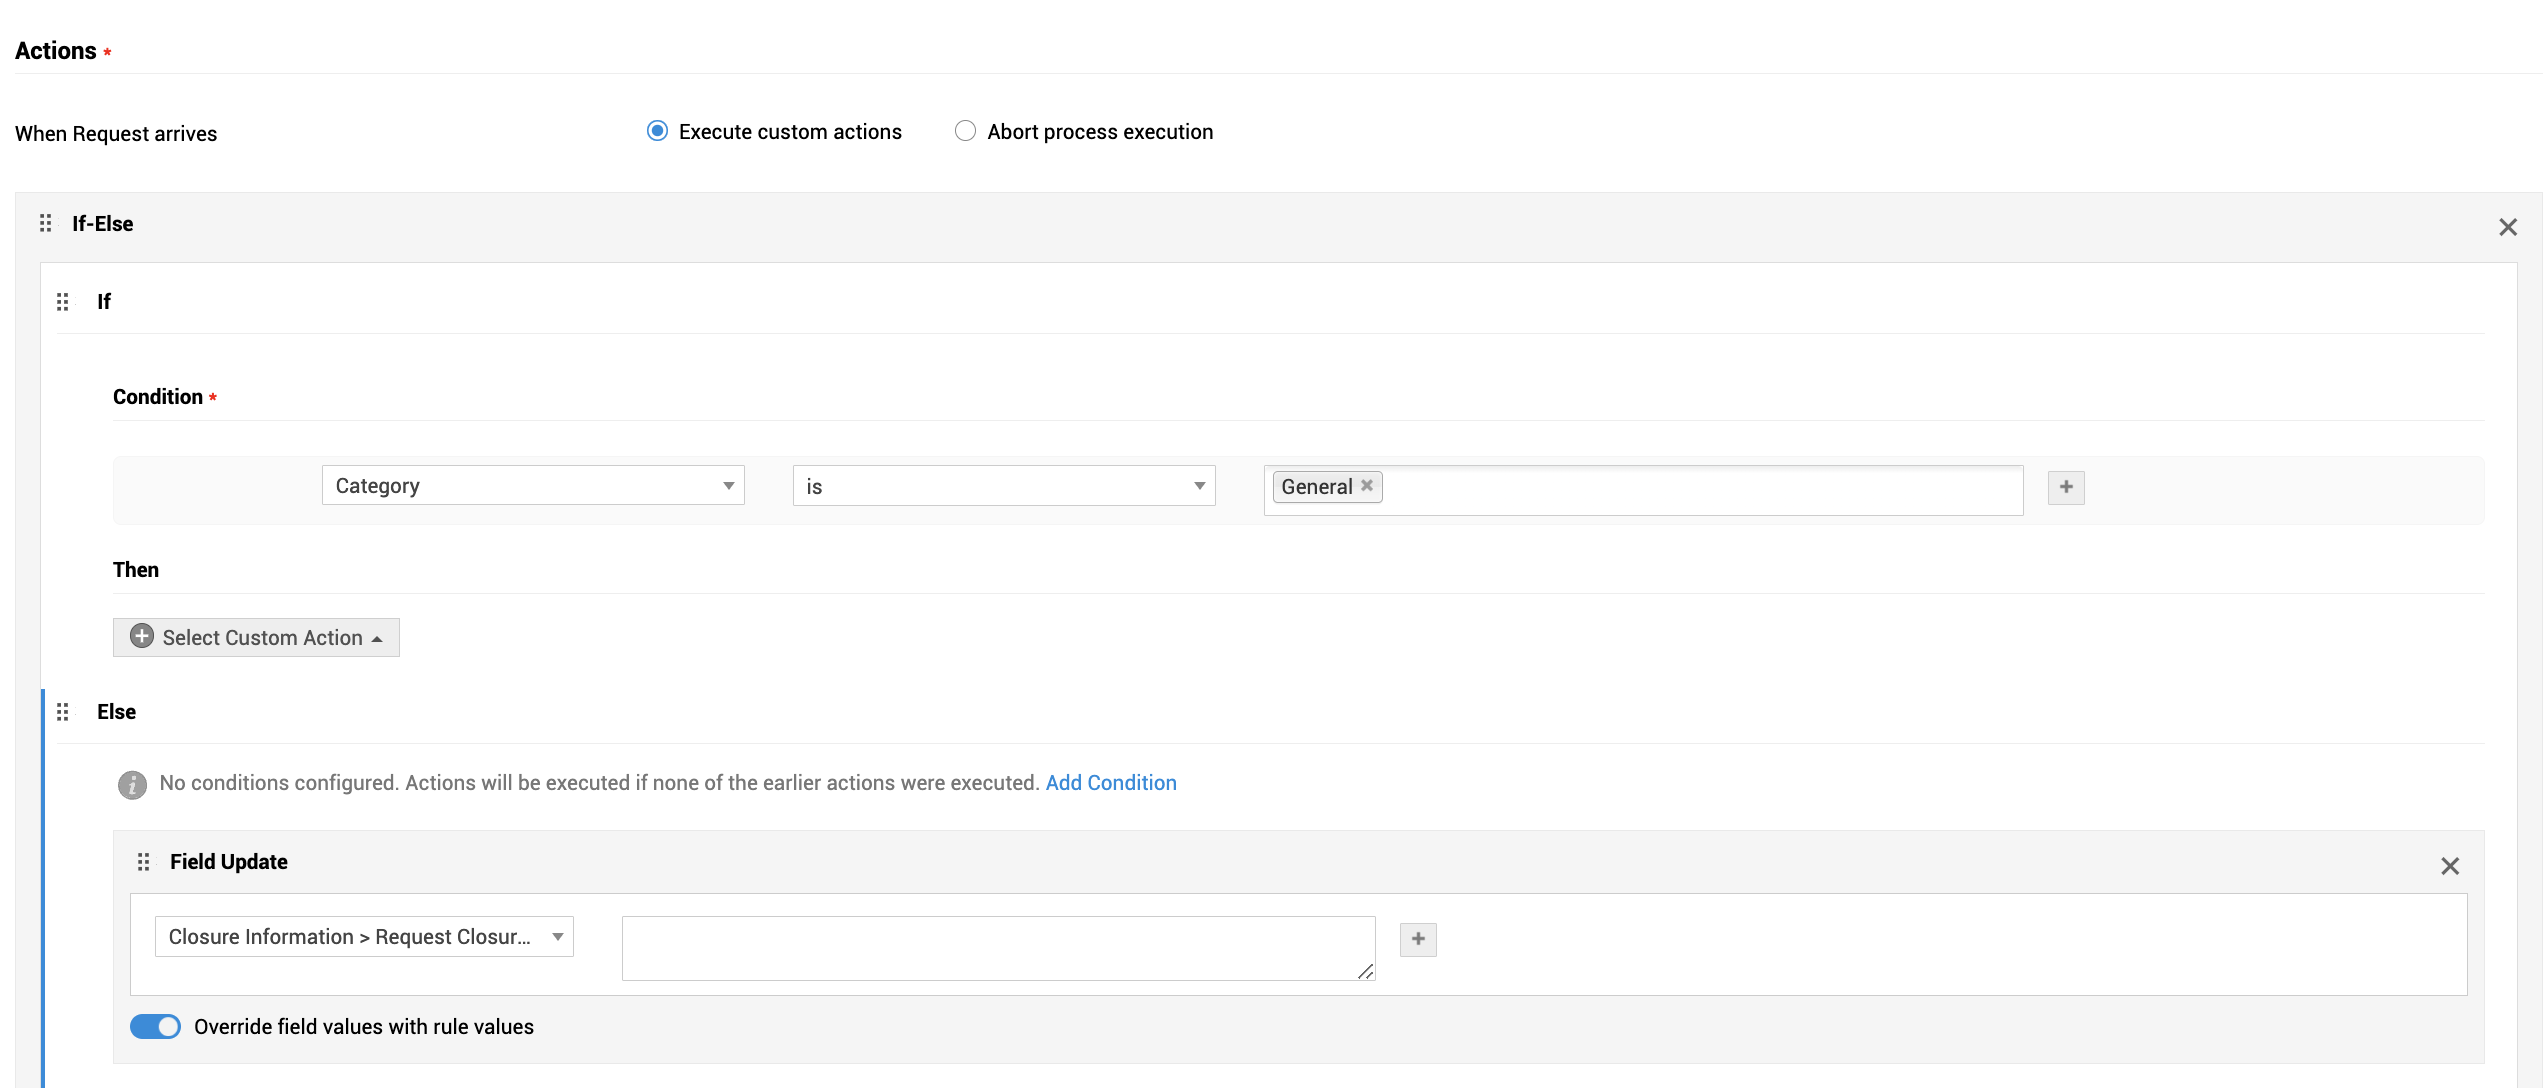
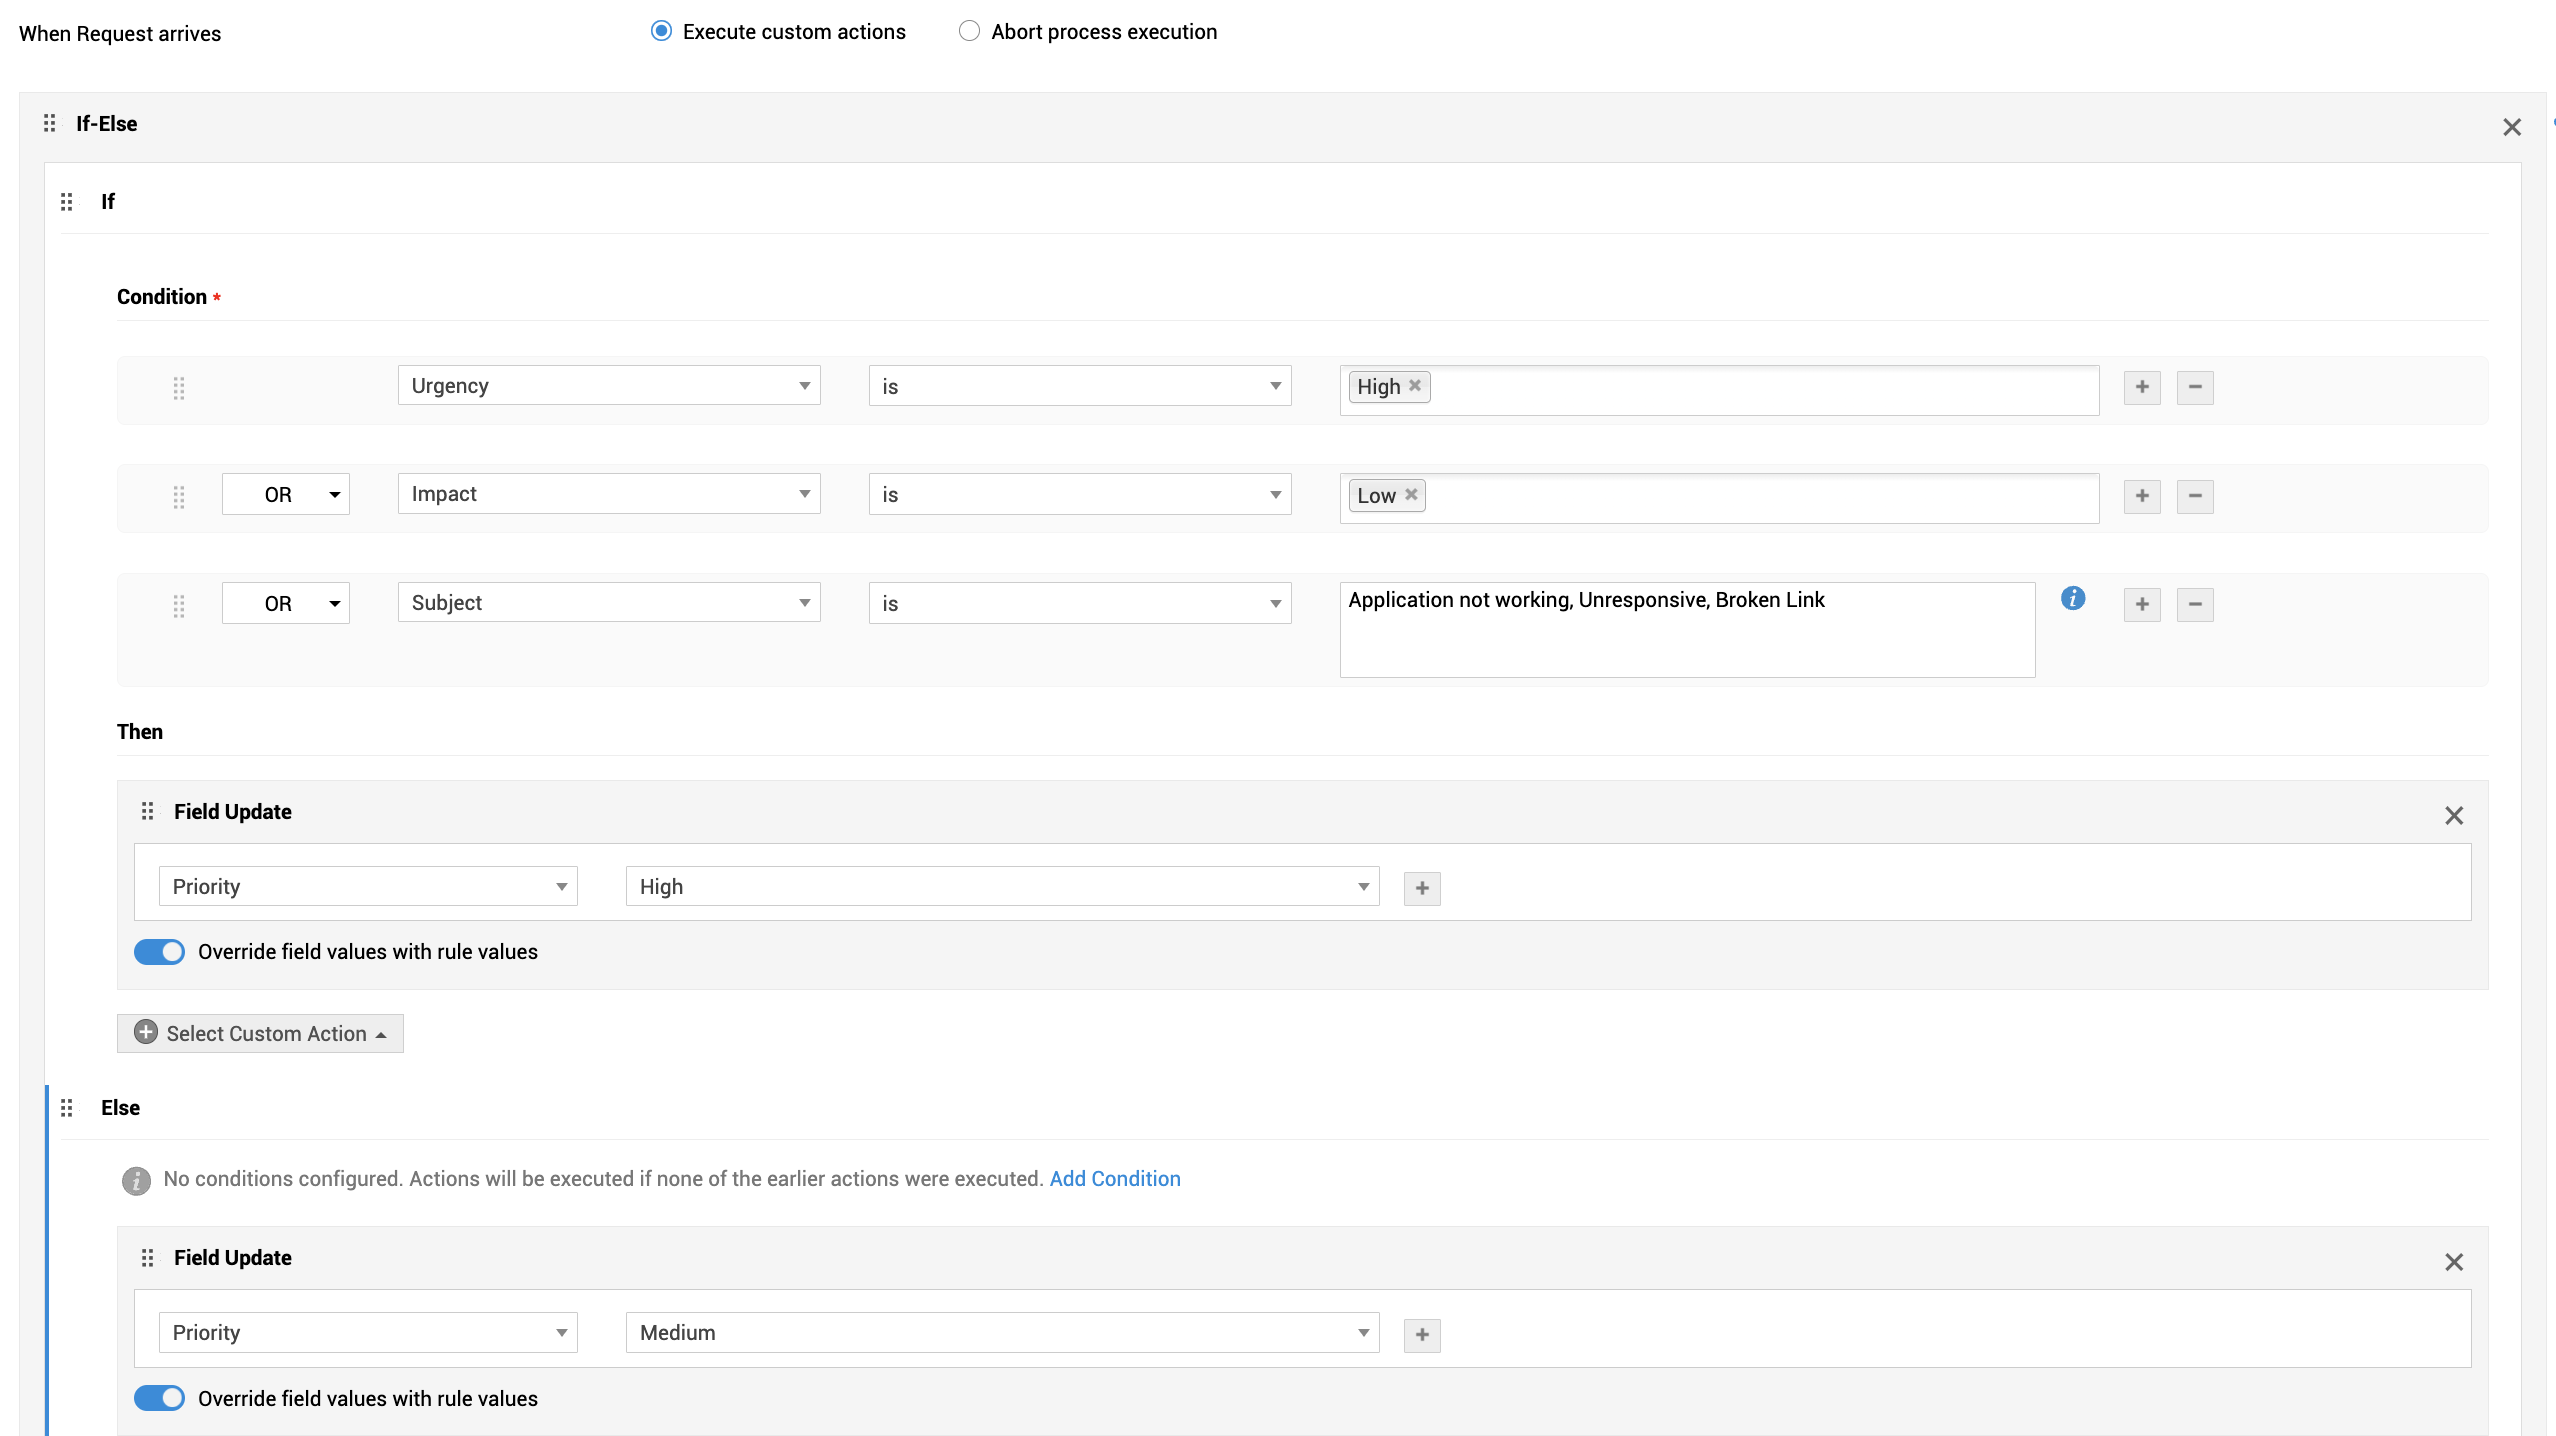
Let's consider the following scenario to understand the working of the If-Else clause.
If the incoming request does not have the priority assigned, you could configure the If-Else clause to accurately assign the priority by checking various request fields.
Note that priority can also be assigned using the Priority Matrix, which operates even as the request is being logged.
So, if the incoming request does not contain priority, then you configure certain conditions to be checked and the respective actions performed. And, if none of the conditions are fulfilled, you configure another set of conditions to be fulfilled and corresponding actions performed through the Else-If clause.
You can configure up to 8 conditions under this clause. If none of them match, you can finally configure one Else action from Field Update, Execute Script, Custom Functions, and Negate Actions.
| If-Else Conditions (up to 10 conditions with OR/AND operators) | Actions |
| Urgency is high | Update Priority to High |
| Impact is low | Update Priority to High |
|
Subject contains: |
Update Priority to High |
|
Else-If Conditions (up to 8 conditions with OR/AND operators) |
Actions |
|
Category is empty |
Update Priority field to Low |
|
Category is Internet Issues |
Update Priority field to Medium |
|
Else |
Update Priority to Medium |
Conditional Actions
These are field update actions that can be automated based on a matching criteria. For any given field in the incoming request, you can update a maximum of 5 field values in the request. Moreover, you can configure up to 20 such conditions, along with their corresponding field update actions.


