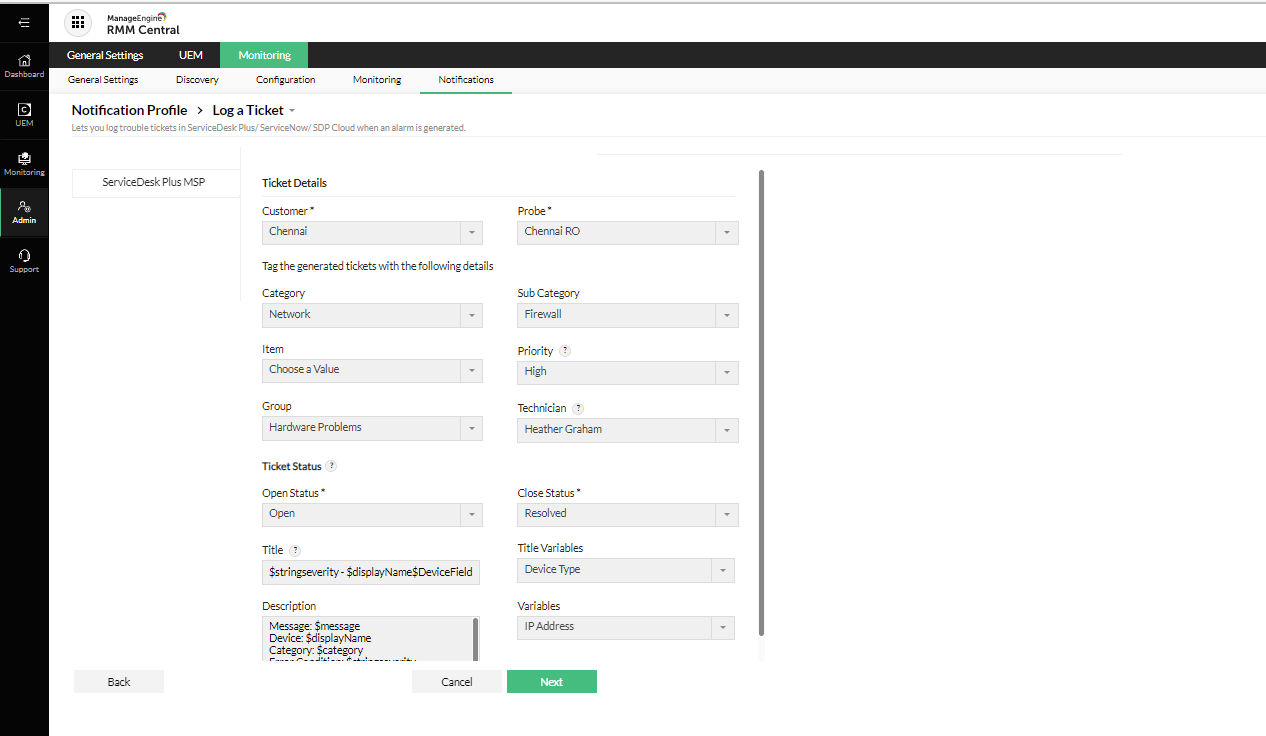
After configuring the integration of RMM Central with ServiceDesk Plus MSP, you need to configure the Log a Ticket Notification Profile to set the properties of the automated tickets. To do this, follow the steps below:
Go to Admin > Monitoring > Notifications > Notification Profiles > Add > Log a Ticket.
Select the Customer and Probe to which the Notification Profile needs to be associated.

Select the desired Category, Sub Category, Item, Group, and Priority for the ticket. You can also select a technician to be assigned to the ticket.
Set the Open Status and Close Status for the ticket. The Open Status indicates when the ticket gets created in ServiceDesk Plus MSP and the Close Status indicates when the ticket needs to be closed.
Enter a Title and brief Description of the issue. You can also choose additional ticket fields to be added in the message and description from the respective drop-downs provided.
Click Next.
Select the devices for which this Notification Profile needs to be configured.
Note: The Notification Profile can only be configured for the devices from the selected Customer-probe network.
Configure any other required settings and click Save.