Copy Site Contents
Copy Site Contents allows users to migrate selected files and folders within document libraries from one SharePoint environment to other. This includes both on-premise and Microsoft 365 sites.
Add a new task
- Click Add New Task.

- Select the source farm from the dropdown.

- Click + button near the Select Site drop down.

- Select the source site from where the files need to be copied.

- Navigate the explorer to select the items to be copied.
Use Ctrl + Click to select multiple items and Shift + Click to select consecutive items.

- Click Next.
- Select the target farm and site where the files need to be copied to.

- Select a folder as the target directory.

- Click Next.
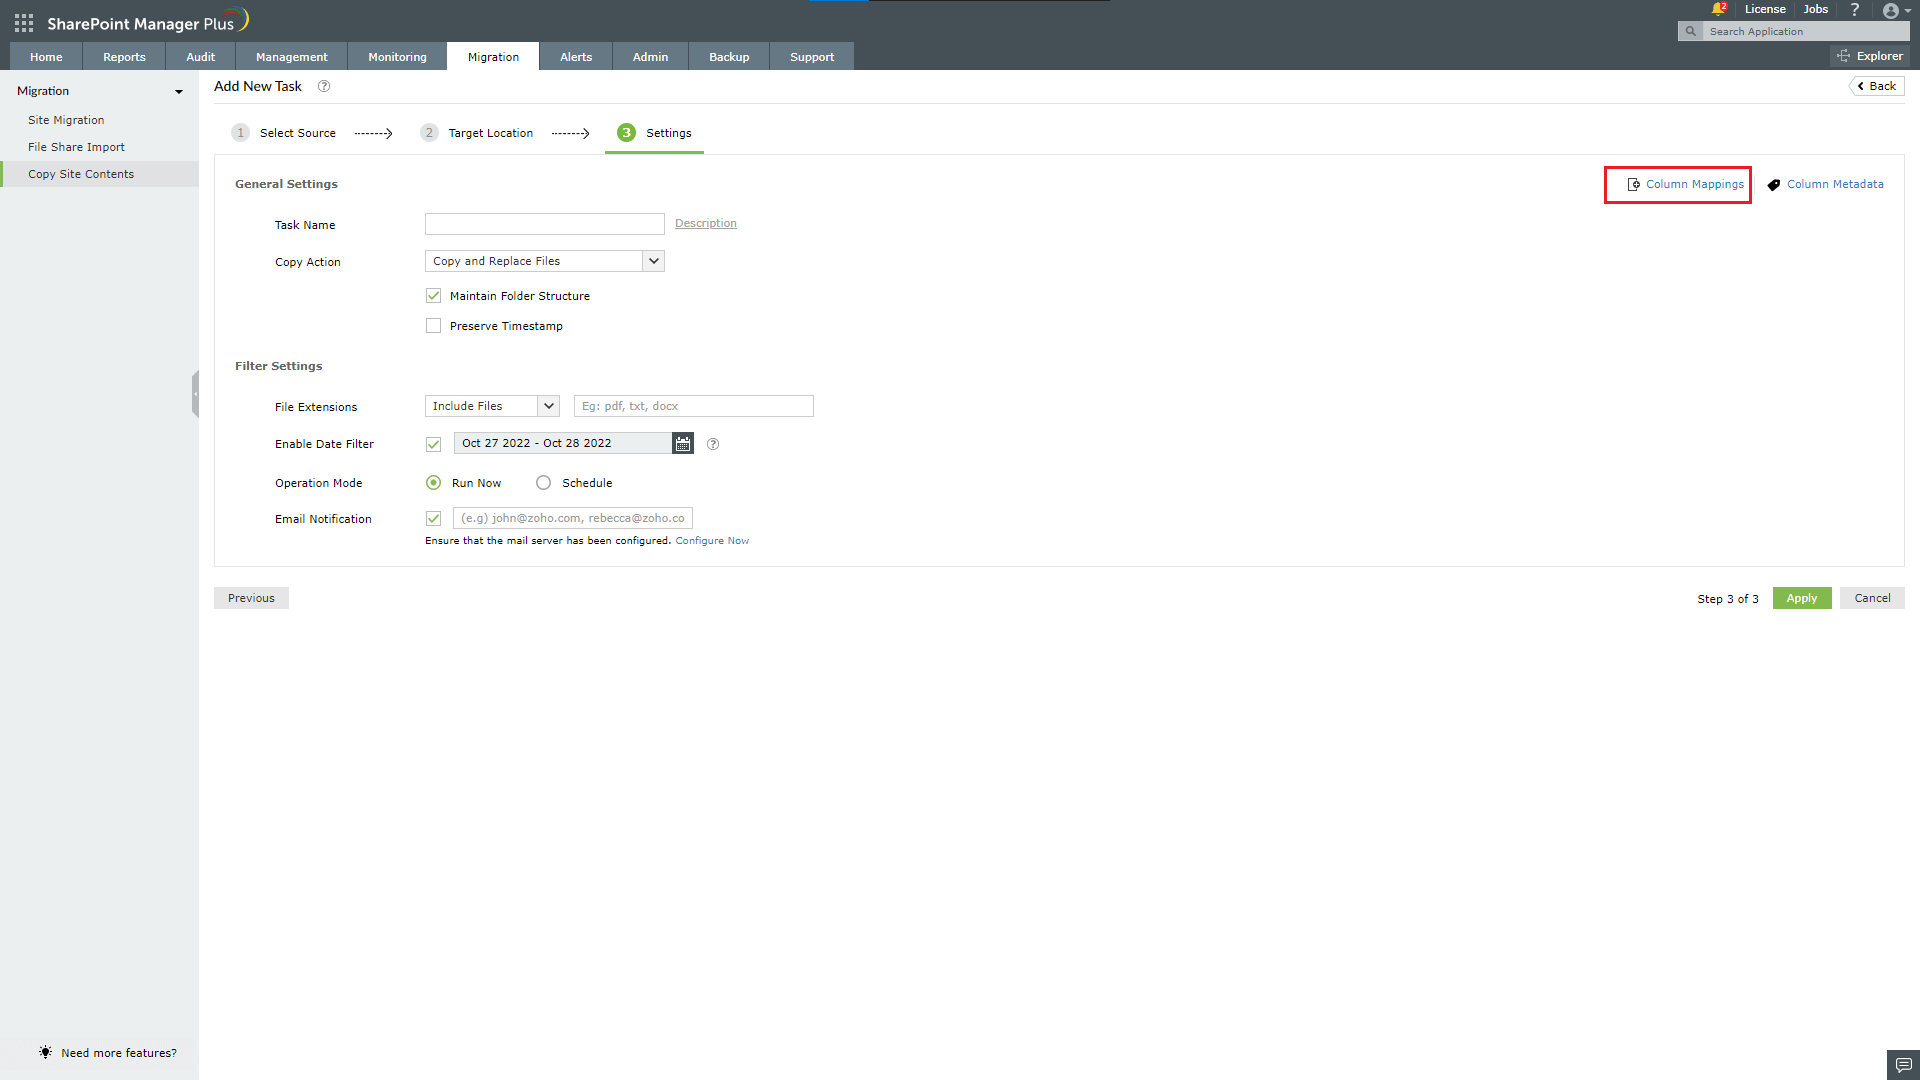
- Configure the following details.
- Task name
- Copy Action
| Copy and Replace Files |
Copy the file and replace, if it already exists. |
| Skip if the file already exists |
Copy the file and skip, if it already exists. |
| Keep Both Files |
Copy the file and rename it, If it already exists. |
| Incremental |
Copy the file and replace it only if the source file's modified time is greater than the target file. |
- Maintain Folder Structure - if selected, this option creates the same folder hierarchy as source in the target, else copies all the files to the same selected directory.
- Preserve Timestamp - If selected, this option copies the modified and created time along with the files from source to target.
- File Extensions
| All Formats |
Copies all the files |
| Include Files |
Input the extensions separated by comma to copy only the files that have one of those extensions |
| Exclude Files |
Input the extensions separated by comma to copy only the files that don't have any of those extensions |
- Enable Date Filter - If enabled, this option copies only the files that have either the created time or modified time within the selected date range.
- Operation mode
| Run Now |
The task runs only once and can be run again manually in future. |
| Schedule |
Select a schedule to run the task periodically. |
- Email Notification - Enable this option to send notifications on the task status. Separate individual email IDs with commas.

- Set metadata for the files.
- Column Mappings
- Click Column Mappings.

- Select a source field whose value can be copied to the mapped target field based on the field type.

- Click Save.
- Column Metadata
- Click Column Metadata.

- Type in the default values for the custom fields in target but this will be skipped if the target field has a source field mapped to it.

- Click Save.
- Click Save.
- Click Ok in the confirmation popup.
Note: Supported metadata columns in file share import are Text, Note, Number, Currency, DateTime, Boolean, URL, Choice, and Multiple Choice.
View task status, results, and history
- While the task is running, click View Results to view the progress of the task.


- Once the task completes click the View Results button in the progress popup or the View Results in tasks list to visit the results page.
- The Success tab shows the list of files that have been copied successfully, while the Failed tab shows the list of files in which the task failed, along with the reason for failure.

- You can retry copying the failed files with the Retry button in the top-right which will be shown only if there are any failed files.

- You can view the results of past executions of a task by clicking the View History button in the top-right.

- Select the time of execution from the dropdown to view the results of that execution.

How to migrate contents from/to OneDrive sites:
- While choosing the source site or target site, select the OneDrive tab, where the available OneDrive sites will be listed.

- Choose the required site.
- If you can't find the site you need, check if the configured account has access to that site.
- Add the OneDrive site as a site collection in Admin tab.

- While choosing the Farm in the source or target tab, choose SiteCollection and select the OneDrive site.


