How to use the SharePoint Migration Tool
Microsoft's native SharePoint Migration Tool (SPMT) allows you to migrate to SharePoint Online from different on-premises SharePoint versions. The tool helps you migrate site contents and file shares and provides a scan option to check for any potential issues. Follow these steps:
Getting started with SPMT
- step 1 Download and install the SharePoint Migration Tool.
- step 2 Once installed, sign in using your admin account's credentials to get started. This requires the account to have at least the Site Admin privilege.
- step 3 Once logged in, you can choose your preferred migration option:
Steps to migrate SharePoint site content
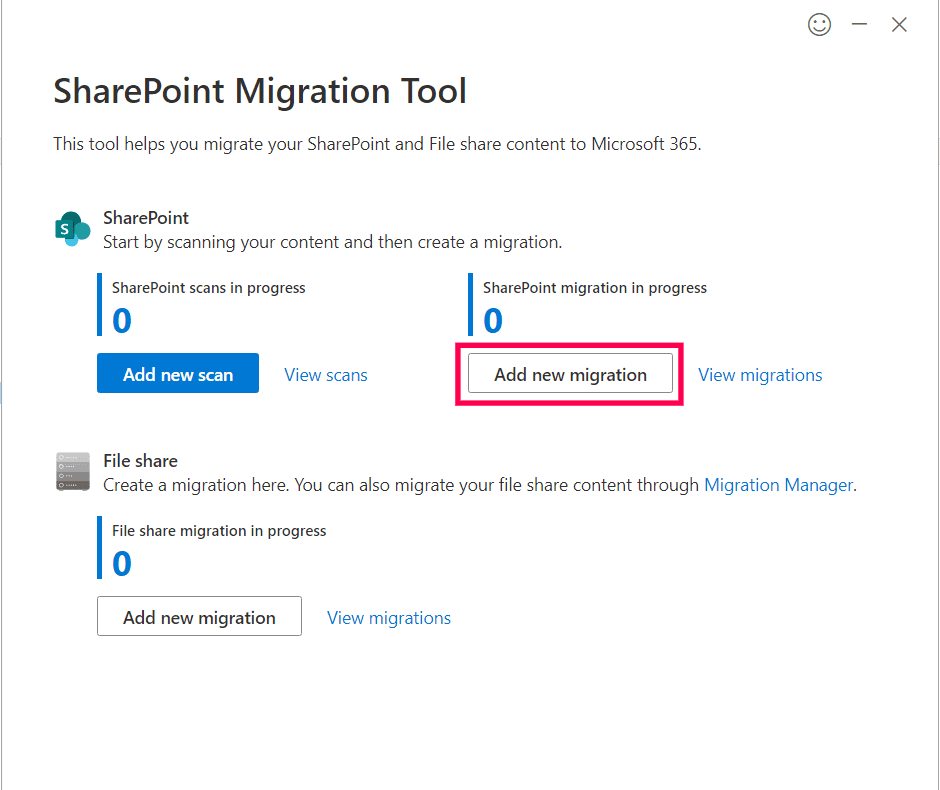
- step 1 Click Add new migration under the SharePoint section.
- step 2 Select the Single source URL method to migrate your SharePoint on-premises server.
- step 3 Select the migration type as Site migration.
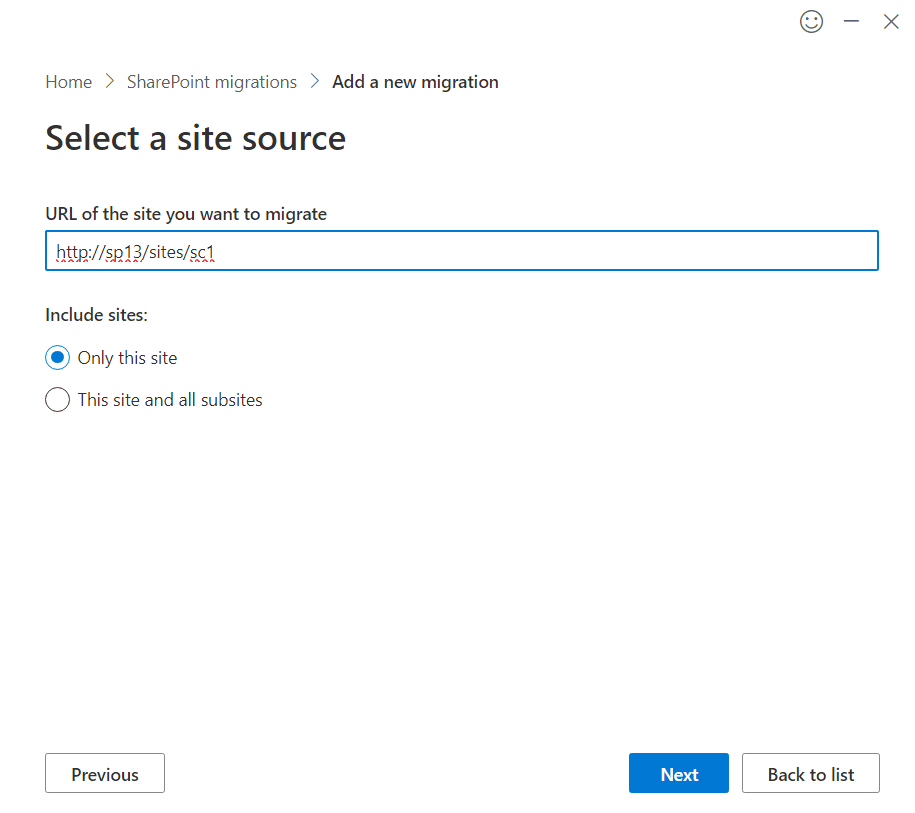
- step 4 Enter the URL of the source site you'd like to migrate and provide the login credentials if prompted. It is recommended that you use the site collection admin's details. Select Only this site to migrate this site alone and click Next.
- step 5 Enter the URL of your destination site and click Next.
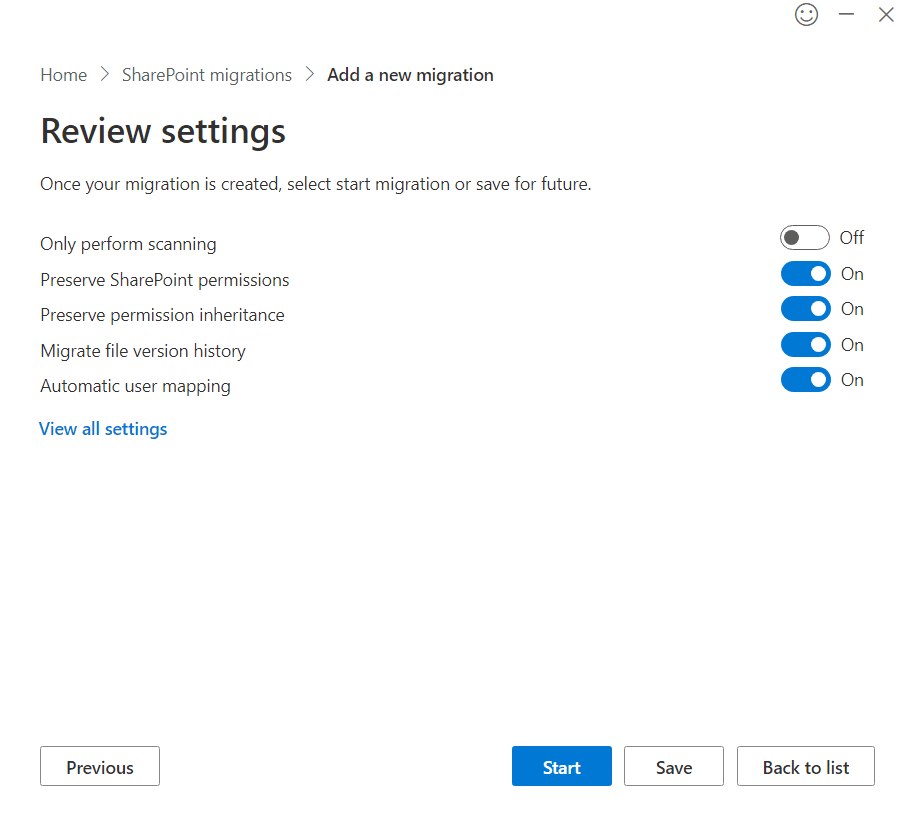
- step 6 Review your migration task and migration settings, and click Start to begin the migration process.
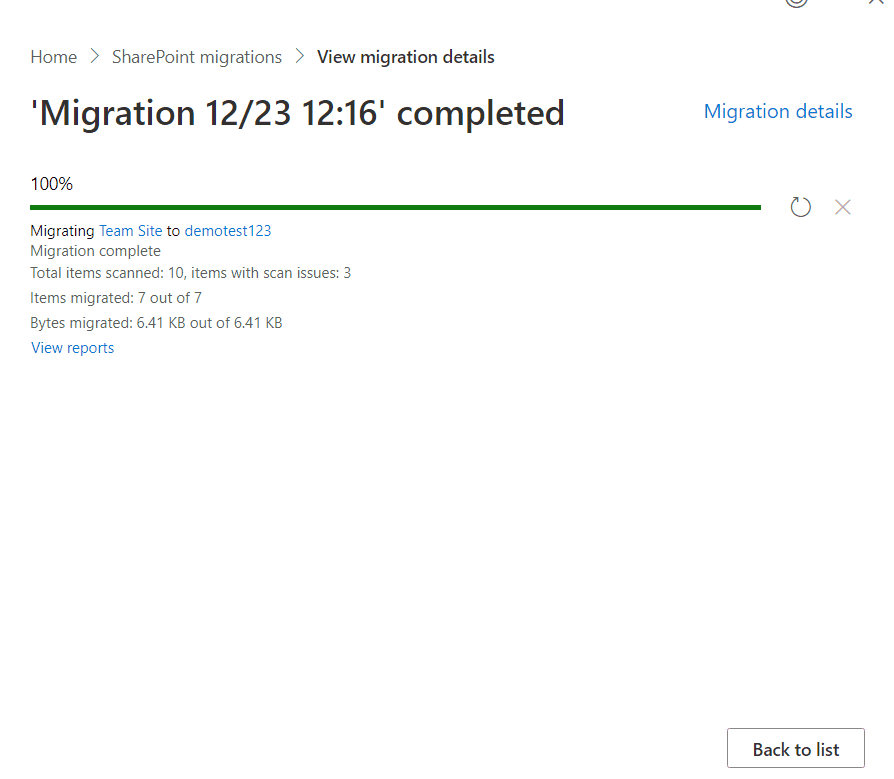
- step 7 Once the migration is completed, click View reports to get detailed information on the migration.
Steps to migrate file share content
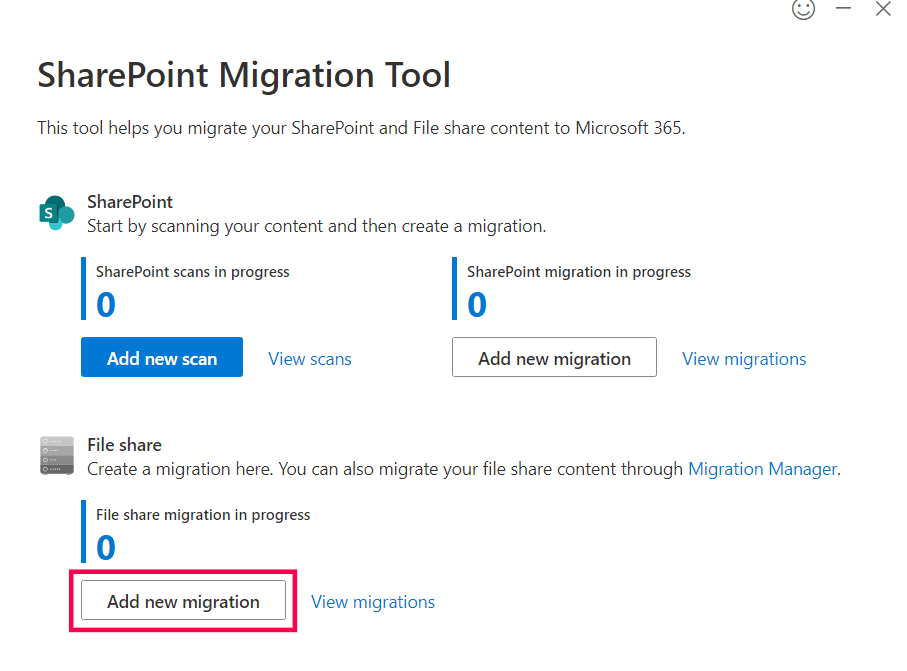
- step 1 Click Add new migration in the File share section.
- step 2 Select the Single file share source method.
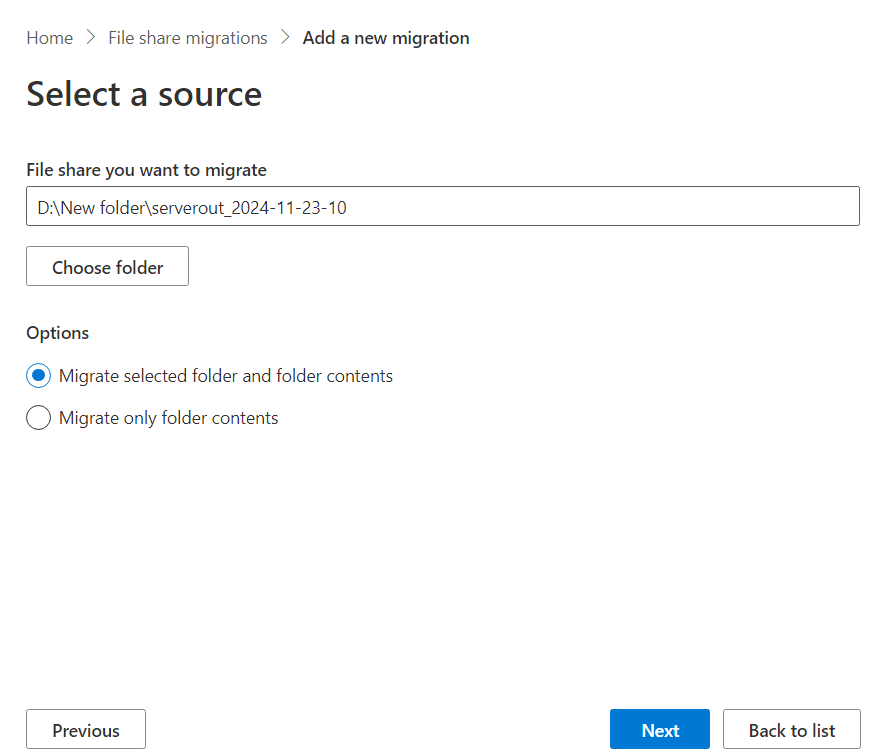
- step 3 Select the source folder that you'd like to migrate and choose if you'd like to migrate the folder or only the contents inside the folder. Click Next.
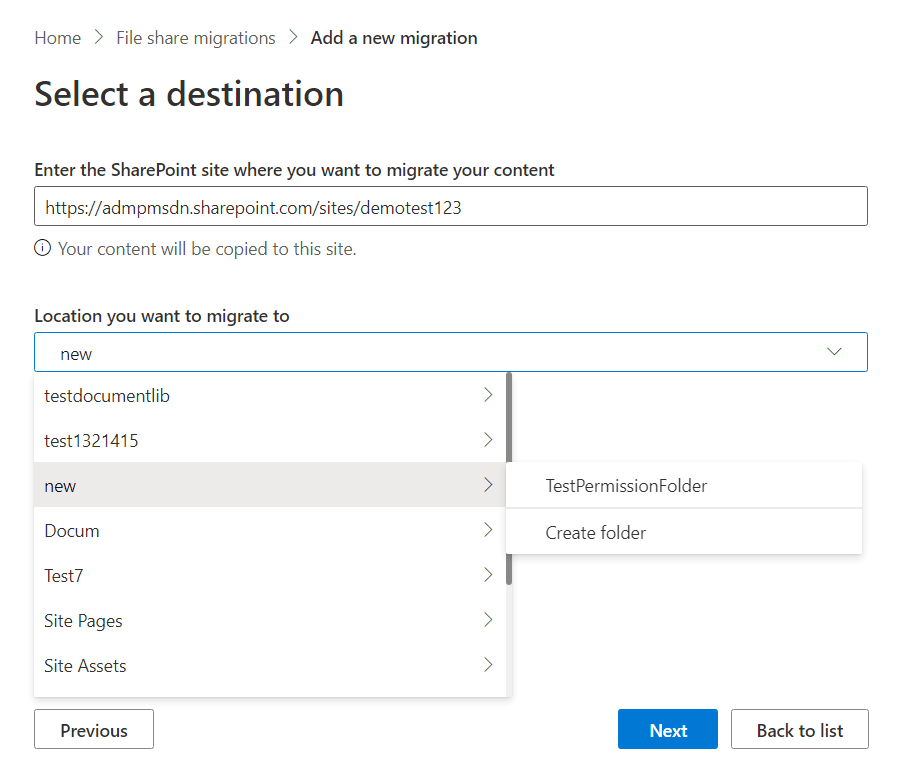
- step 4 Select the destination site and the document library or its folder to which you'd like to migrate. Click Next.
- step 5 Review your migration task and migration settings, and click Start to begin the migration process.
- step 6 Once the migration is completed, click View reports to get detailed information on the migration.
Limitations of using SPMT for SharePoint migrations
- Lack of automation features require you to use PowerShell scripts.
- Requires elevated privileges like Global Admin, SharePoint Admin, or Site Admin.
- Restrictions in file types and selection levels limit your migration scope.
Benefits of using SharePoint Manager Plus for SharePoint migrations
SPMT's limitations make migration a hassle. ManageEngine SharePoint Manager Plus helps you overcome these migration challenges with a unified solution.
- Seamless migration: Migrate to SharePoint Online or between different tenants and farms without any PowerShell scripts.
- Automate tasks: Schedule your files to migrate automatically during nonbusiness hours to save time and effort.
- Preserve metadata: Set values for custom columns to preserve metadata and prevent confusion.
- Granular delegation: Assign migration, auditing, and management tasks to non-admin users without elevating their native privileges.
- Complete visibility: Generate detailed reports on your SharePoint infrastructure to understand your source and target to ensure a smooth migration.
Related Links
- An overview of SharePoint
- How to add an user to a SharePoint site?
- How to change SharePoint group permissions?
- How to check permissions of SharePoint users and groups?
- How to configure audit logging for a SharePoint site collection?
- How to check the size of a SharePoint site?
- How to check the size of SharePoint storage?
- How to migrate sharepoint on premises to online?
- How to view audit log reports in SharePoint Online?
- How to audit a SharePoint site collection?
- How to audit file usage in SharePoint?
- How to configure audit log trimming?
- How to migrate list from one site collection to another site collection?