How to integrate ManageEngine Vulnerability Manager Plus with Splunk?
By integrating Vulnerability Manager Plus with Splunk, organizations reap numerous benefits. This integration gives you visibility by consolidating all vulnerability data in one place for easy monitoring and management. Splunk’s advanced analytics gives you a deep dive into vulnerability trends, patterns and anomalies so you can prioritize remediation based on risk assessments and impacts. Customize your dashboards and reports with Splunk flexibility to present vulnerability data in a clear and actionable way. Overall integrating Splunk with Vulnerability Manager Plus enhances vulnerability management by leveraging Splunk’s advanced analytics, real-time monitoring and visualization capabilities.
Note: Splunk integration feature is available on build 11.3.2430.01 and above.
This section talks about:
Installing the ManageEngine Vulnerability Manager Plus add-on in Splunk
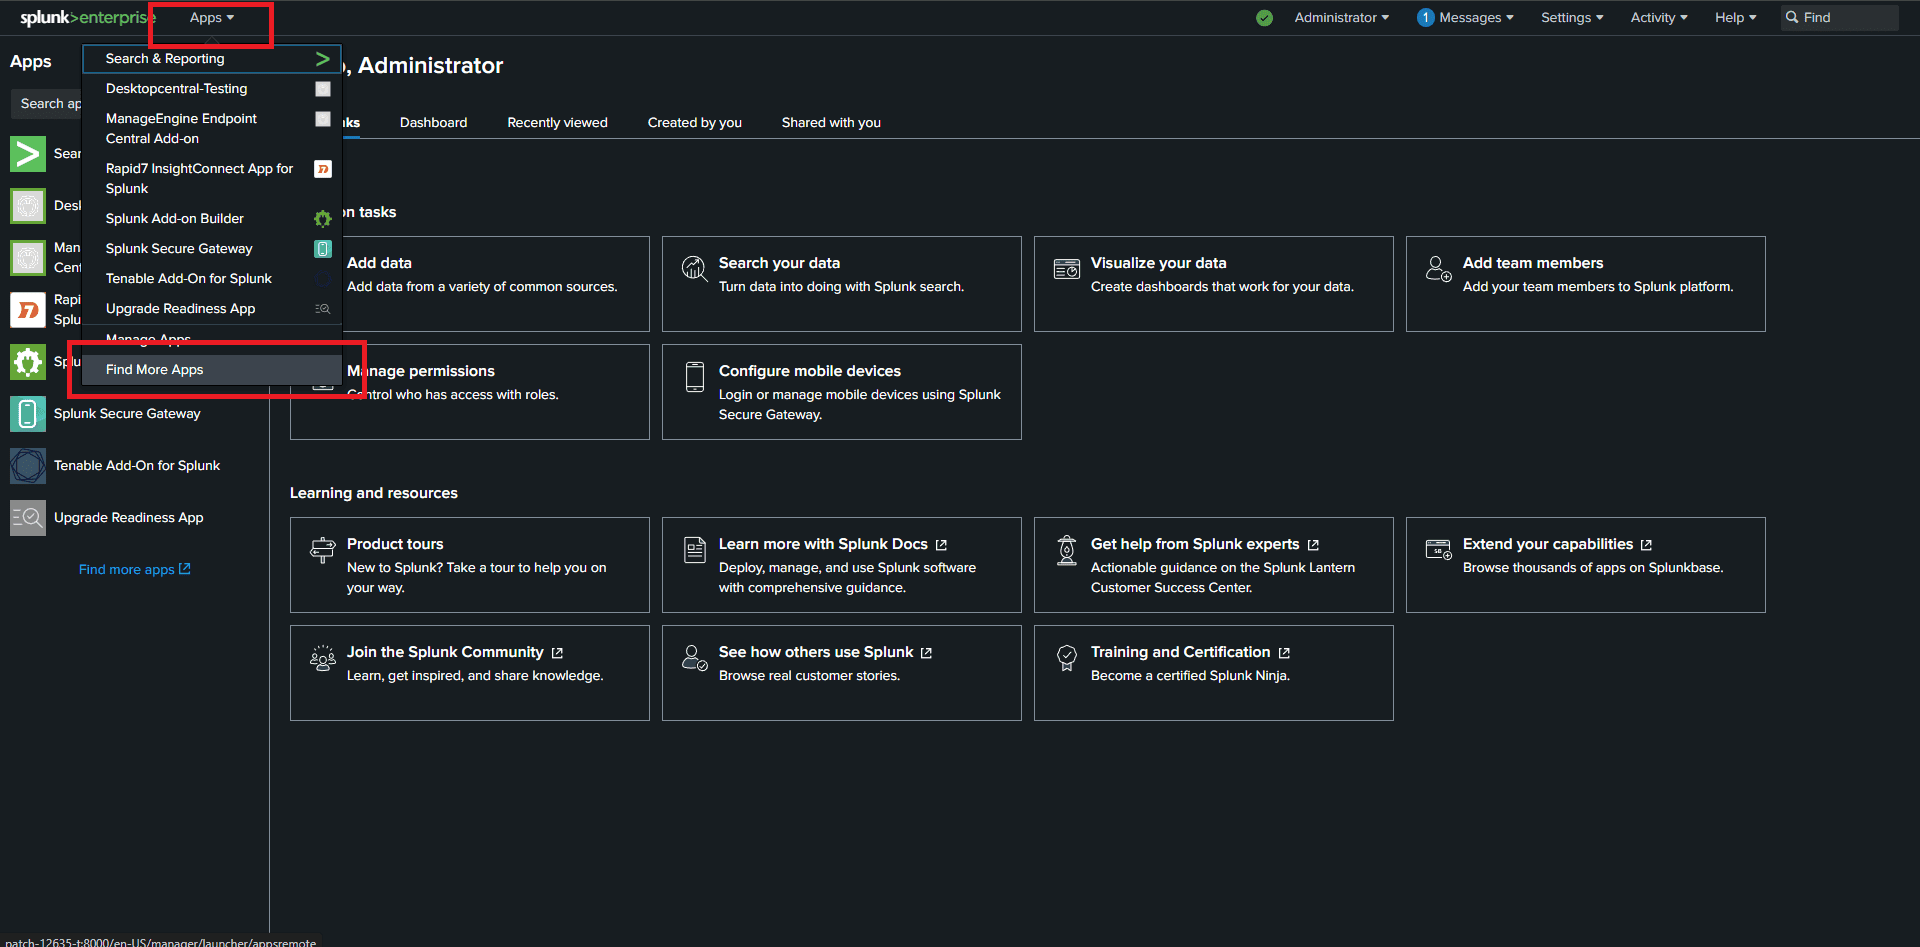
- Navigate to the Splunk Home page.
- In the Header menu, click on Apps.
- Select Find More Apps to be redirected to Splunk's Marketplace.
- Search for the ManageEngine Vulnerability Manager Plus Add-On app.
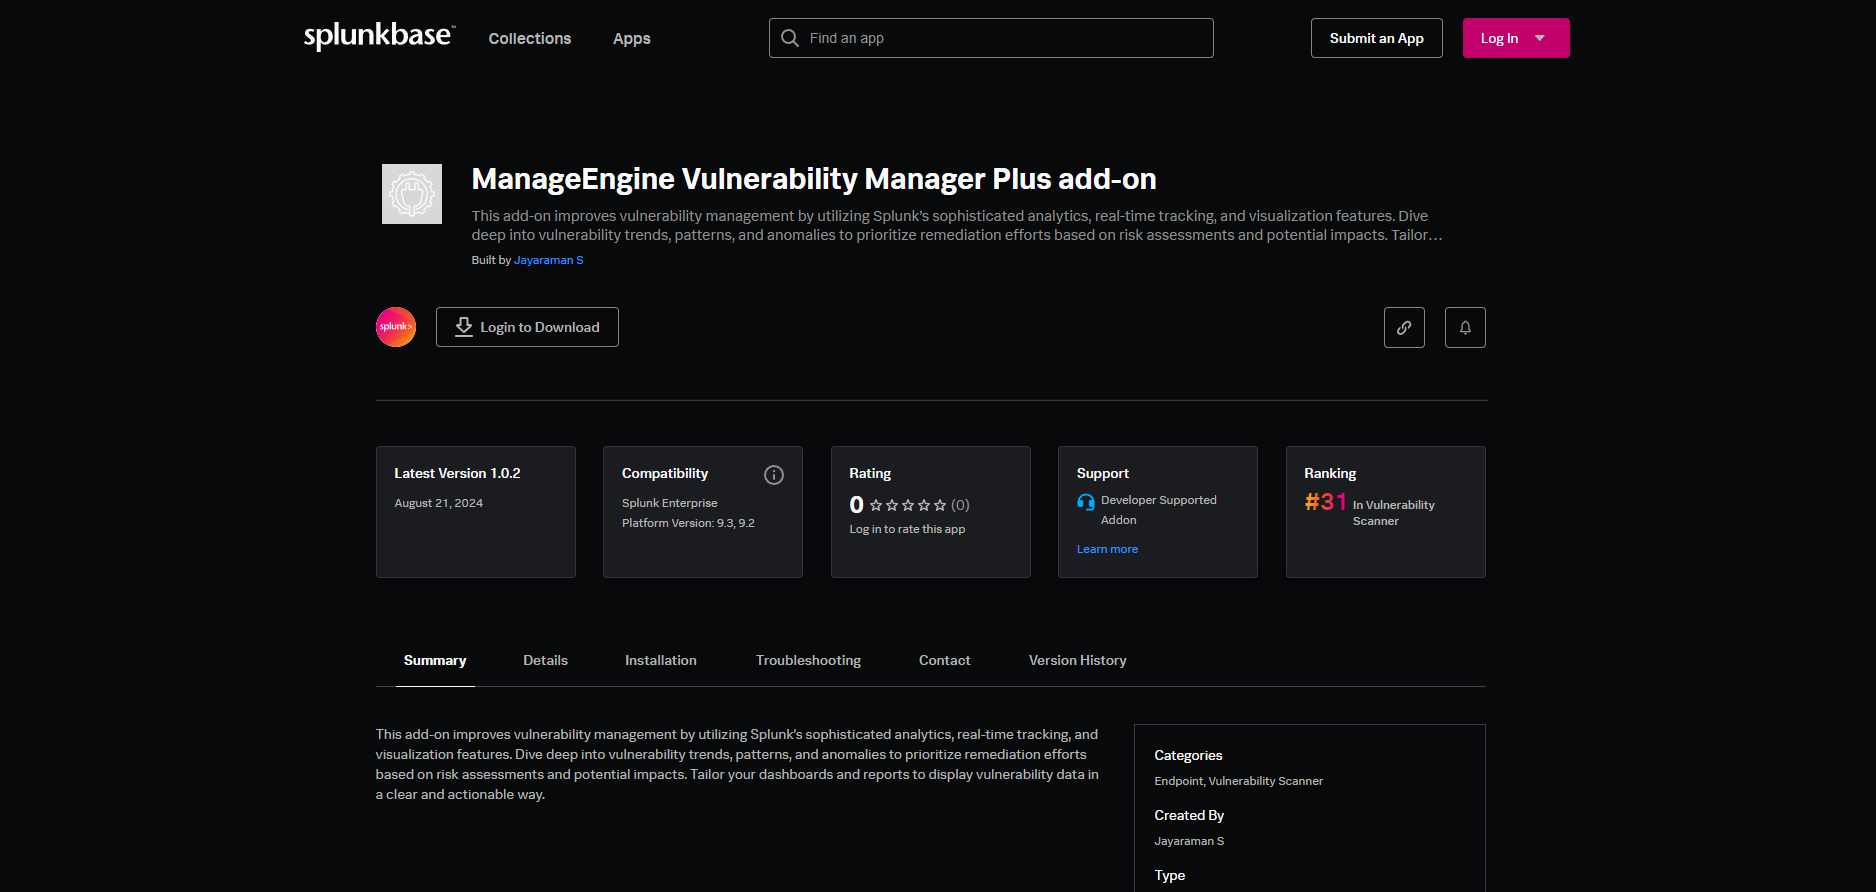
- Click Install and enter your username and password.
- Click Agree and Install and now you can access the application from the Splunk home page or the Apps menu.
Creating a CA-Bundle (Certificate Authority bundle) for SSL validation
- Navigate to the Vulnerability Manager Plus Server installation directory on your system. Then, go to the %VMP Server Home Dir% -> nginx -> conf folder.
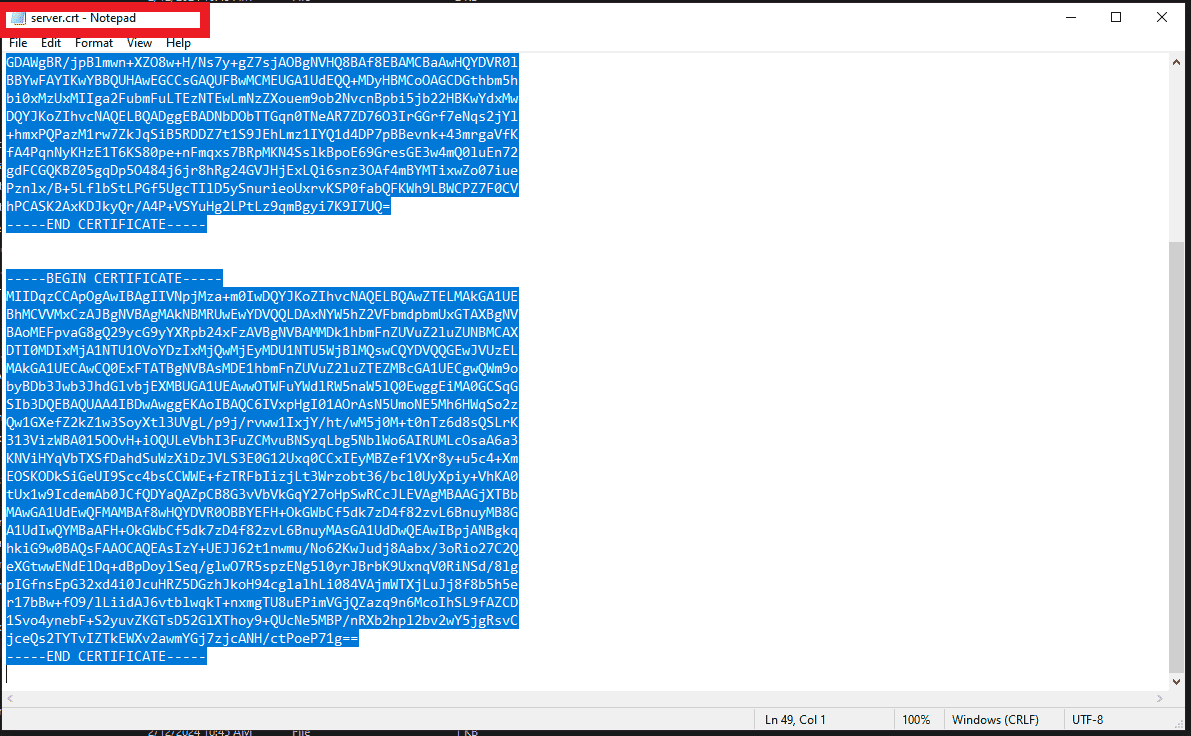
- Open the server.crt file with a text editor and copy the contents of the certificate file.

- Now go to the Splunk installation directory on your system.
- Navigate to %Splunk Home Dir% -> etc -> apps -> TA-manageengine-vulnerability-manager-plus-add-on
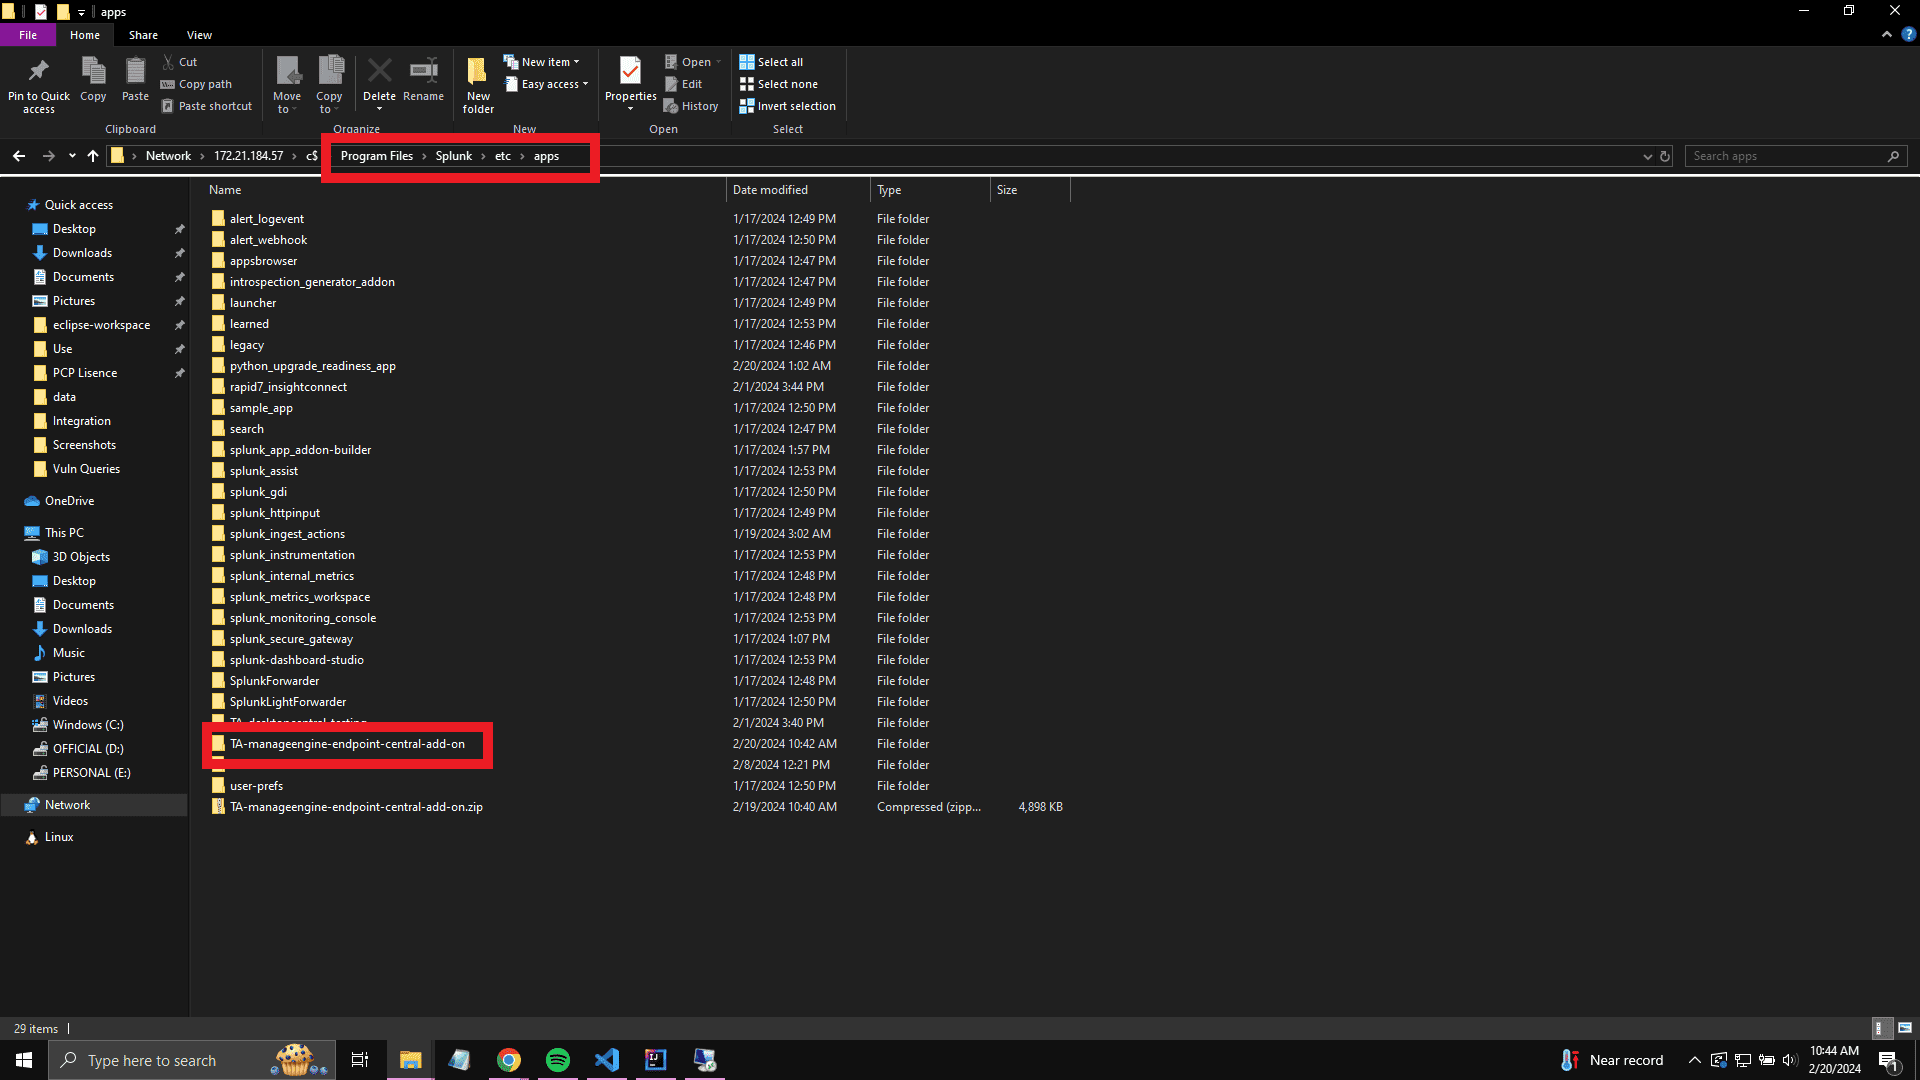
- Within the TA-manageengine-vulnerability-manager-plus-add-on folder, create a new folder named certificates
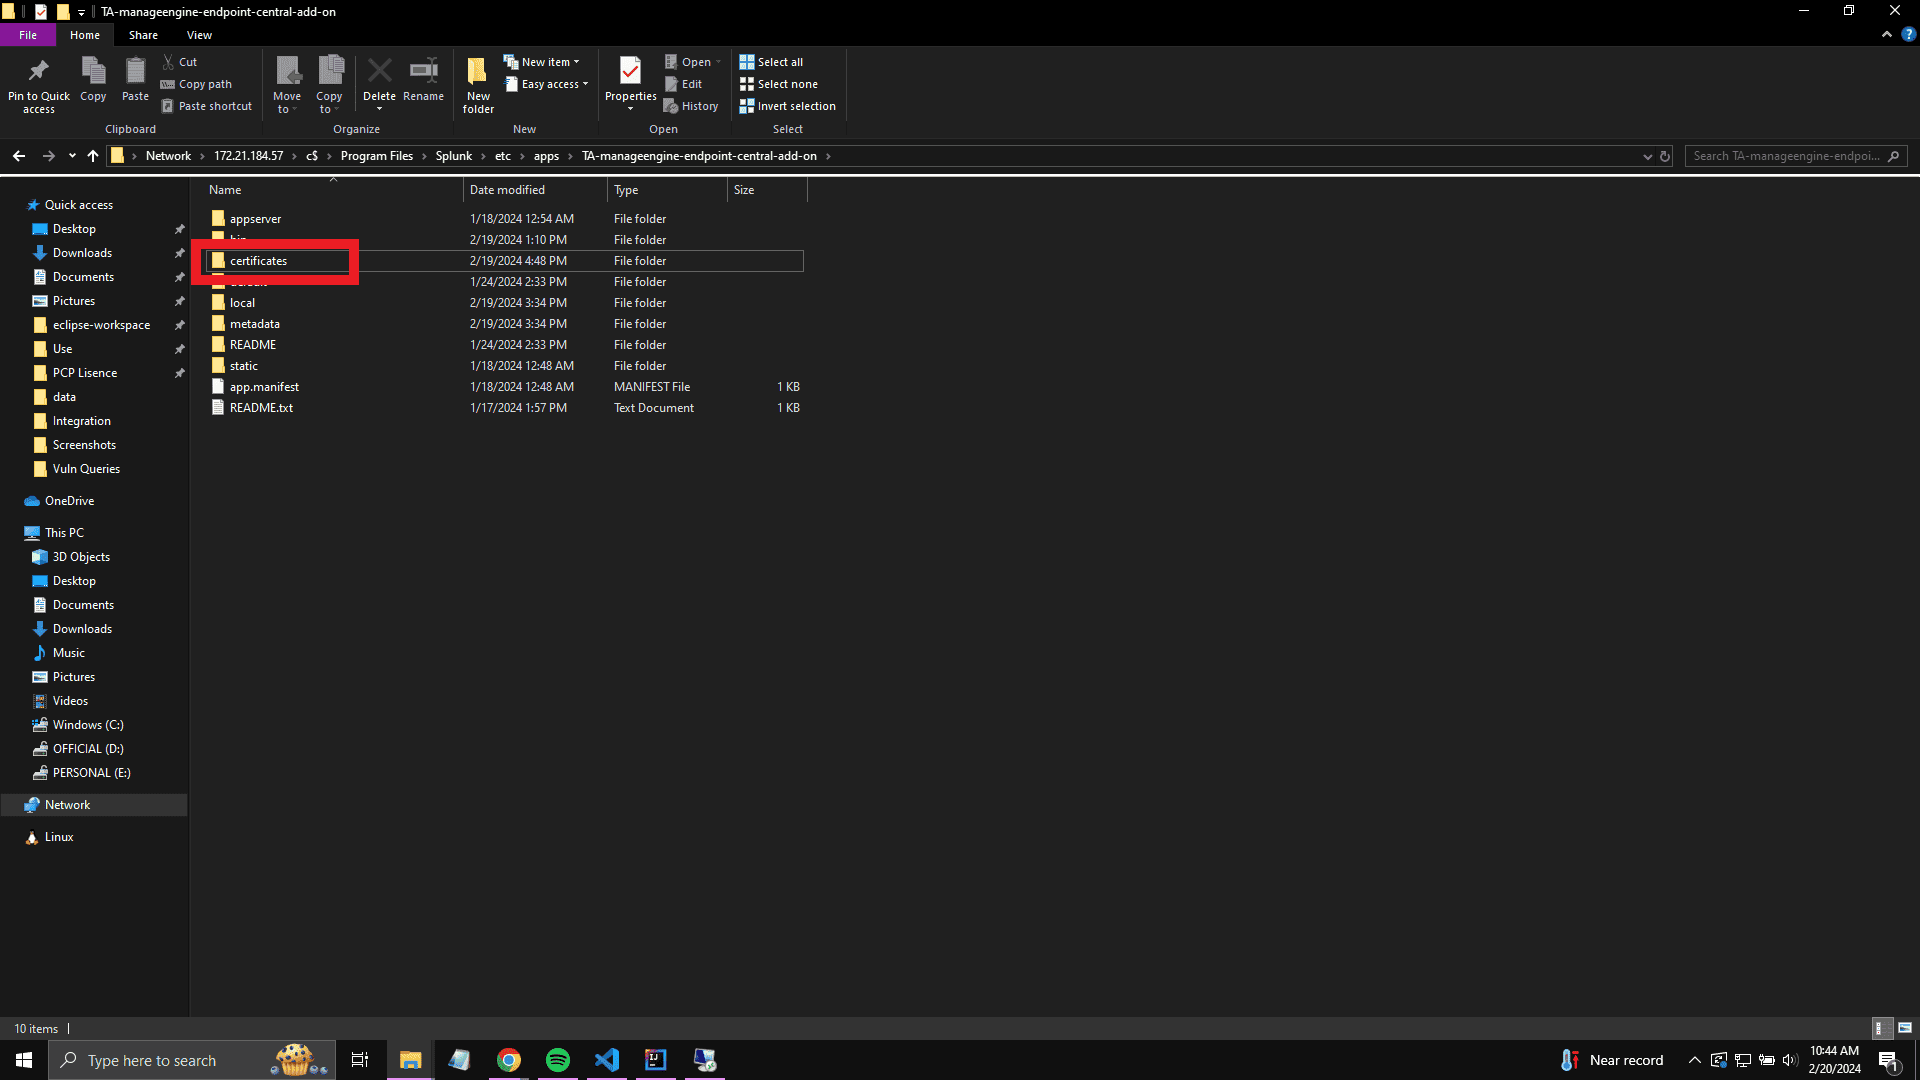
- Inside the certificates folder, create a new text file and rename it to ec.ca-bundle

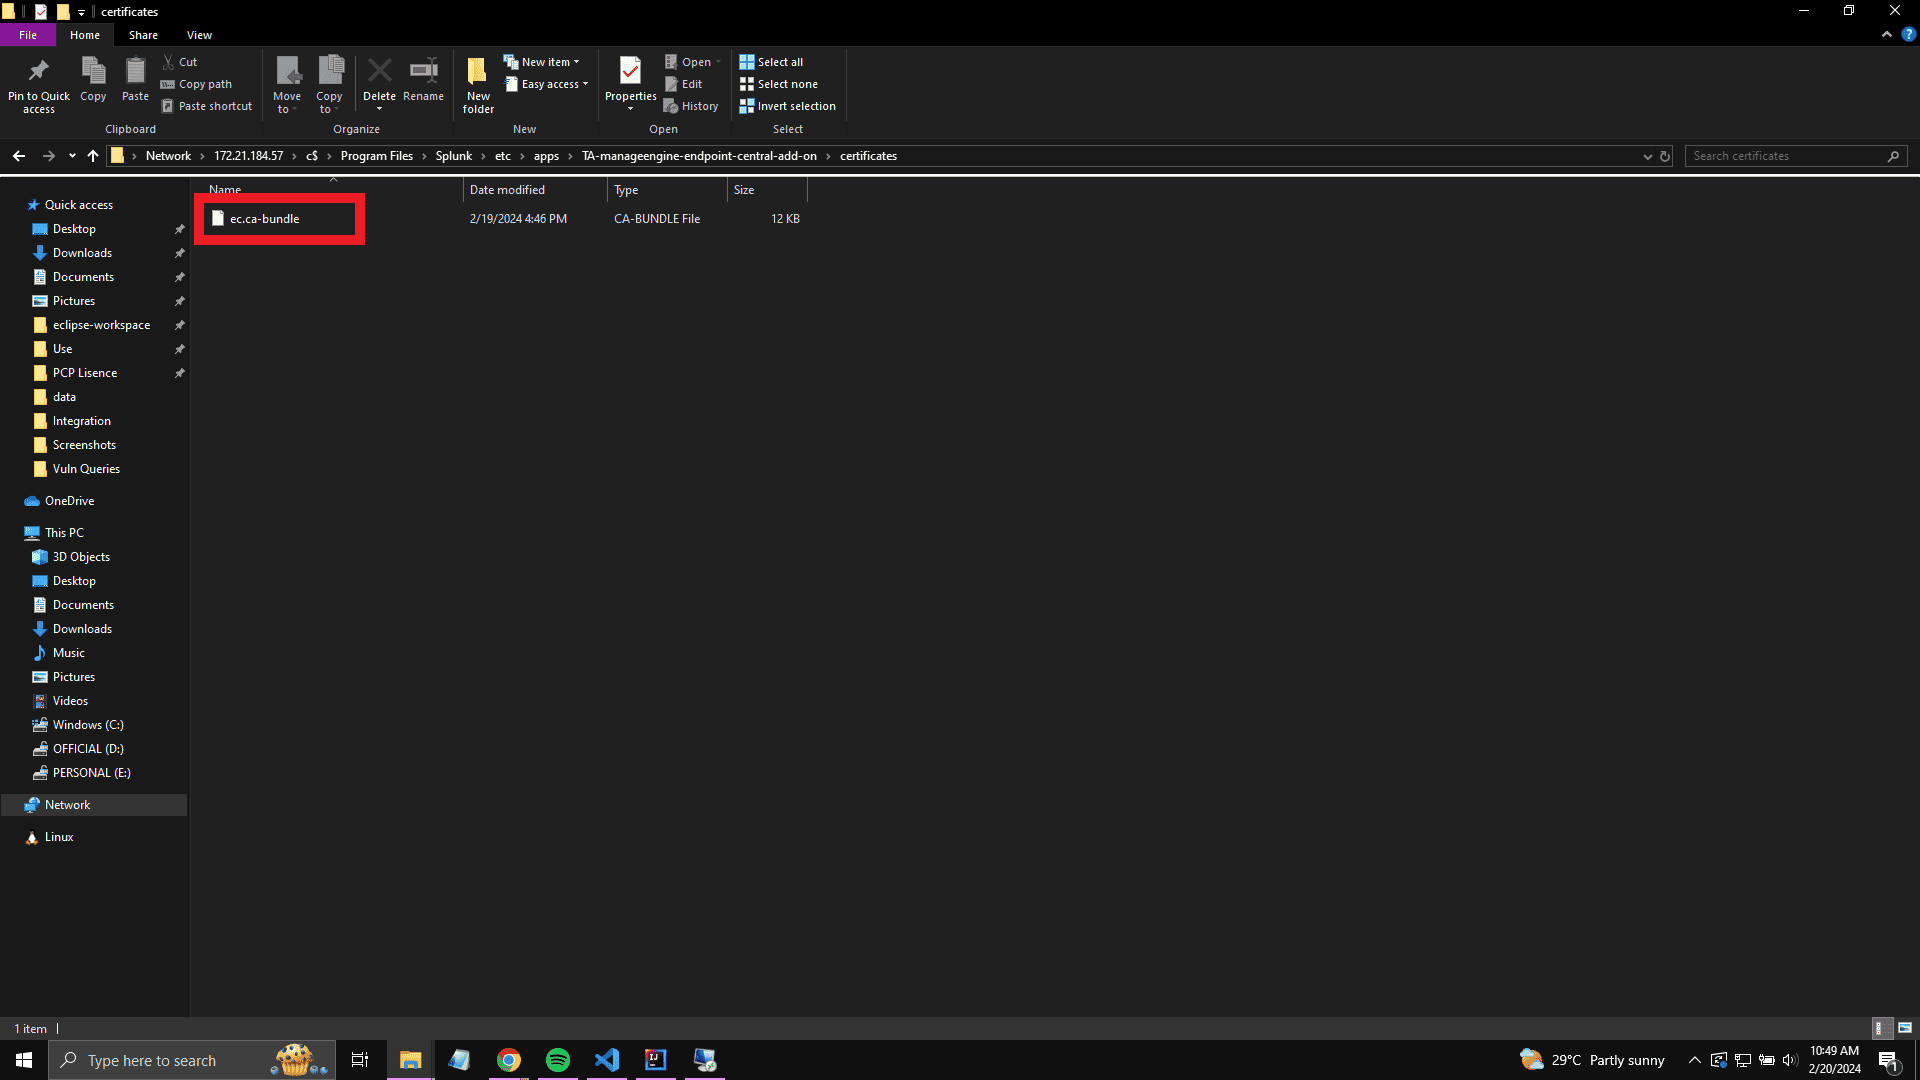
- Open the ec.ca-bundle file with a text editor and paste the contents of the server.crt file from the Vulnerability Manager Plus On-premises server installation directory into the ec.ca-bundle
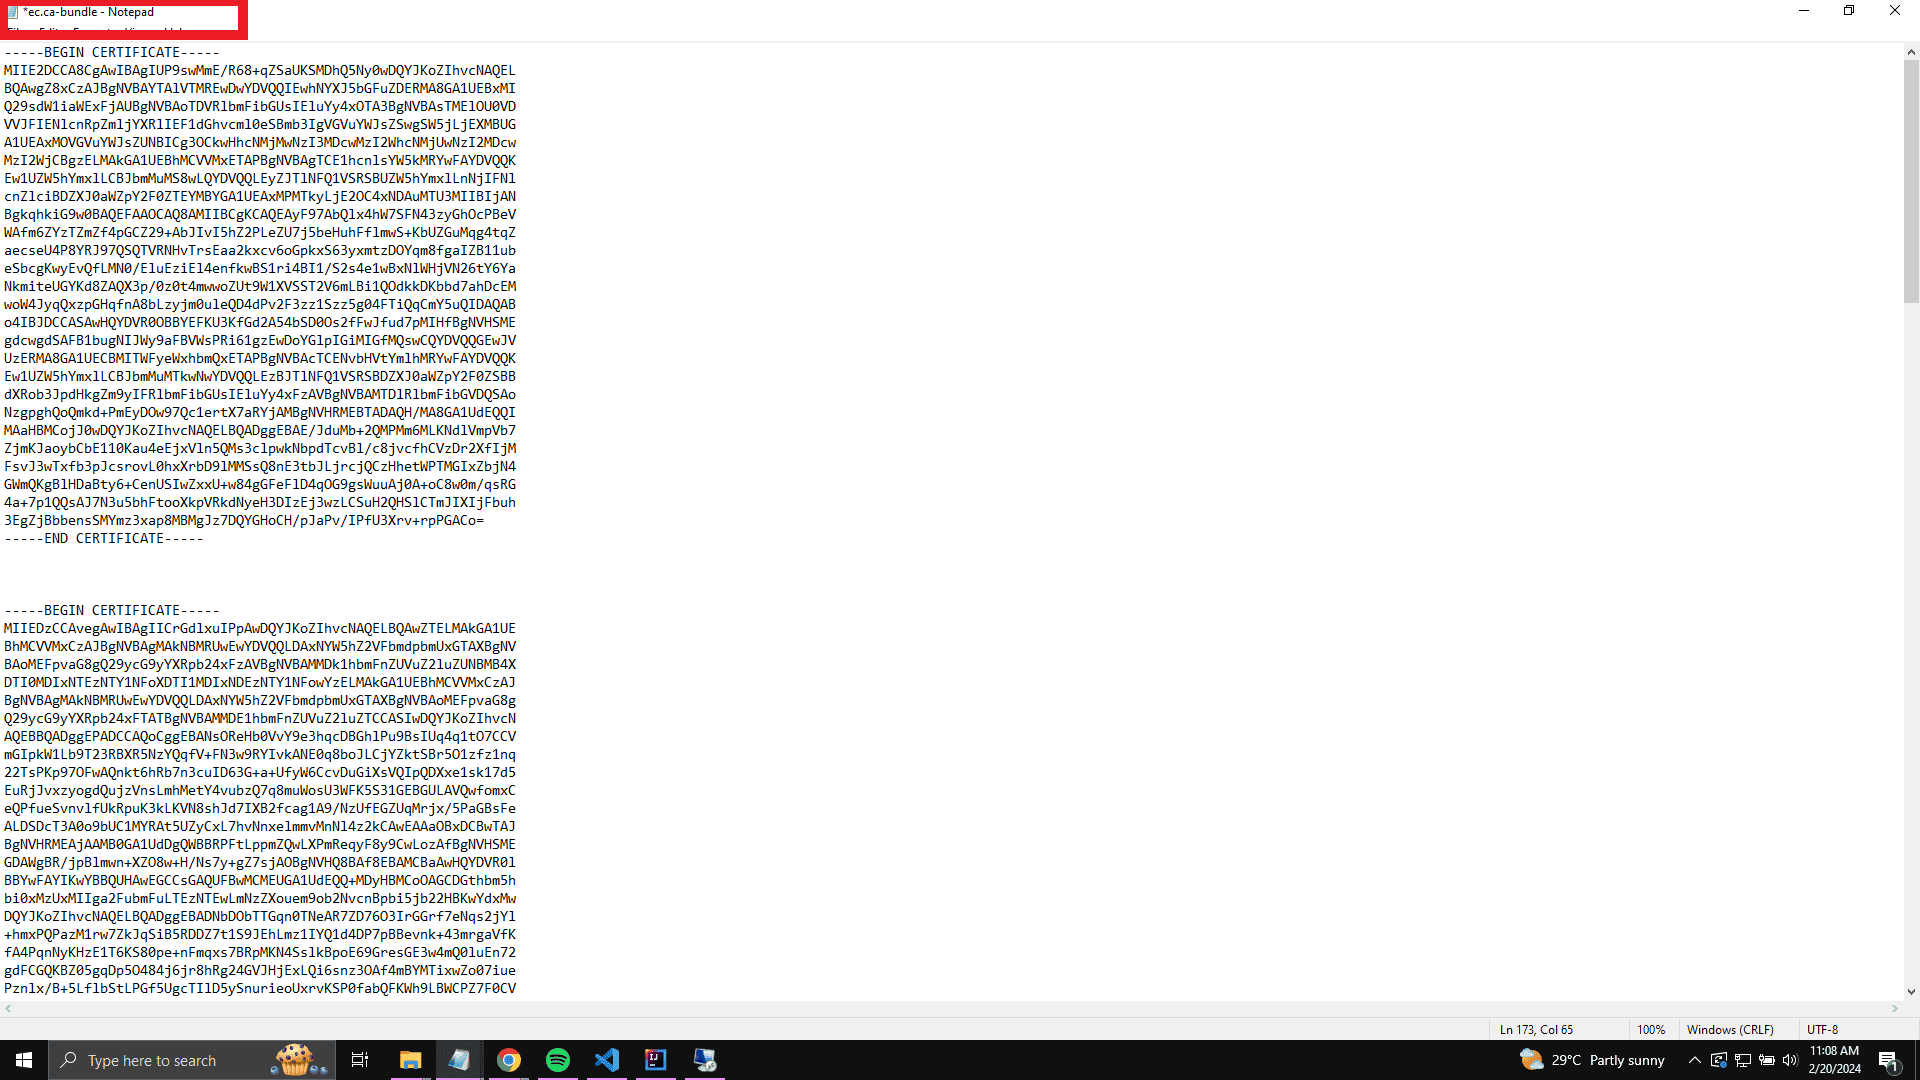
- Save and close the ec.ca-bundle file.
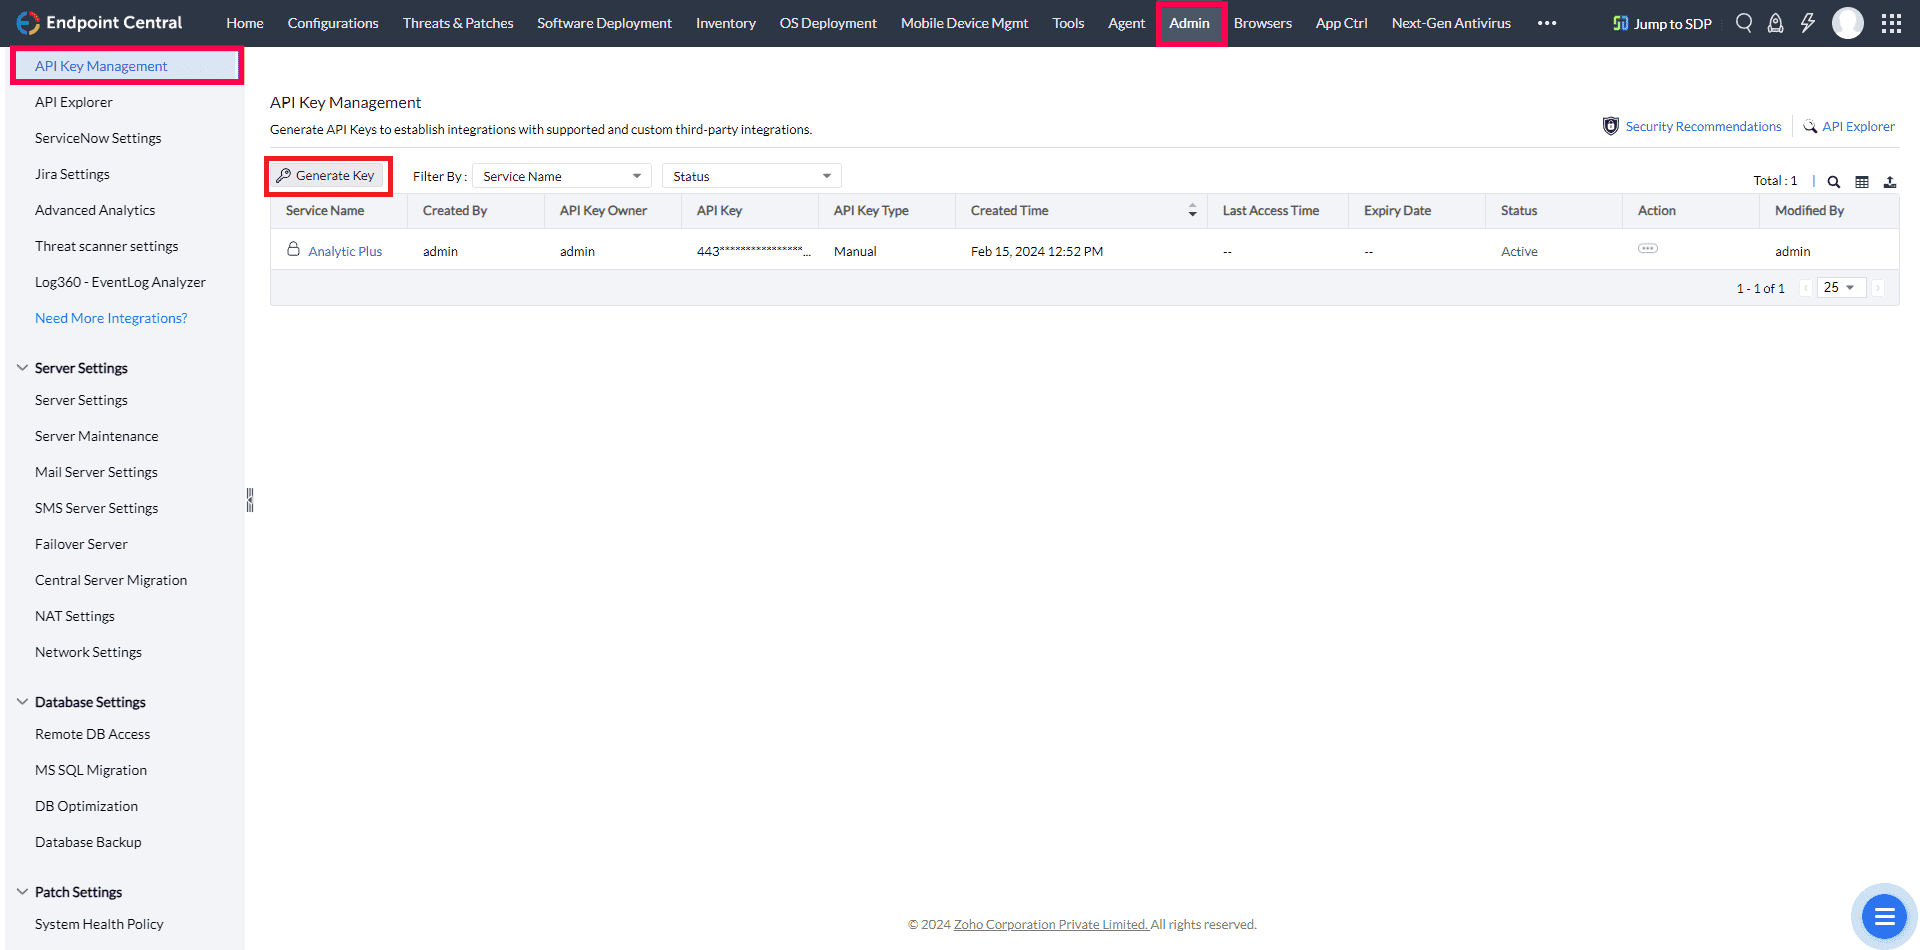
Generating an Auth-Token in Vulnerability Manager Plus
- In the Vulnerability Manager Plus console, navigate to the Admin tab -> API Key Management and click on Generate Key.
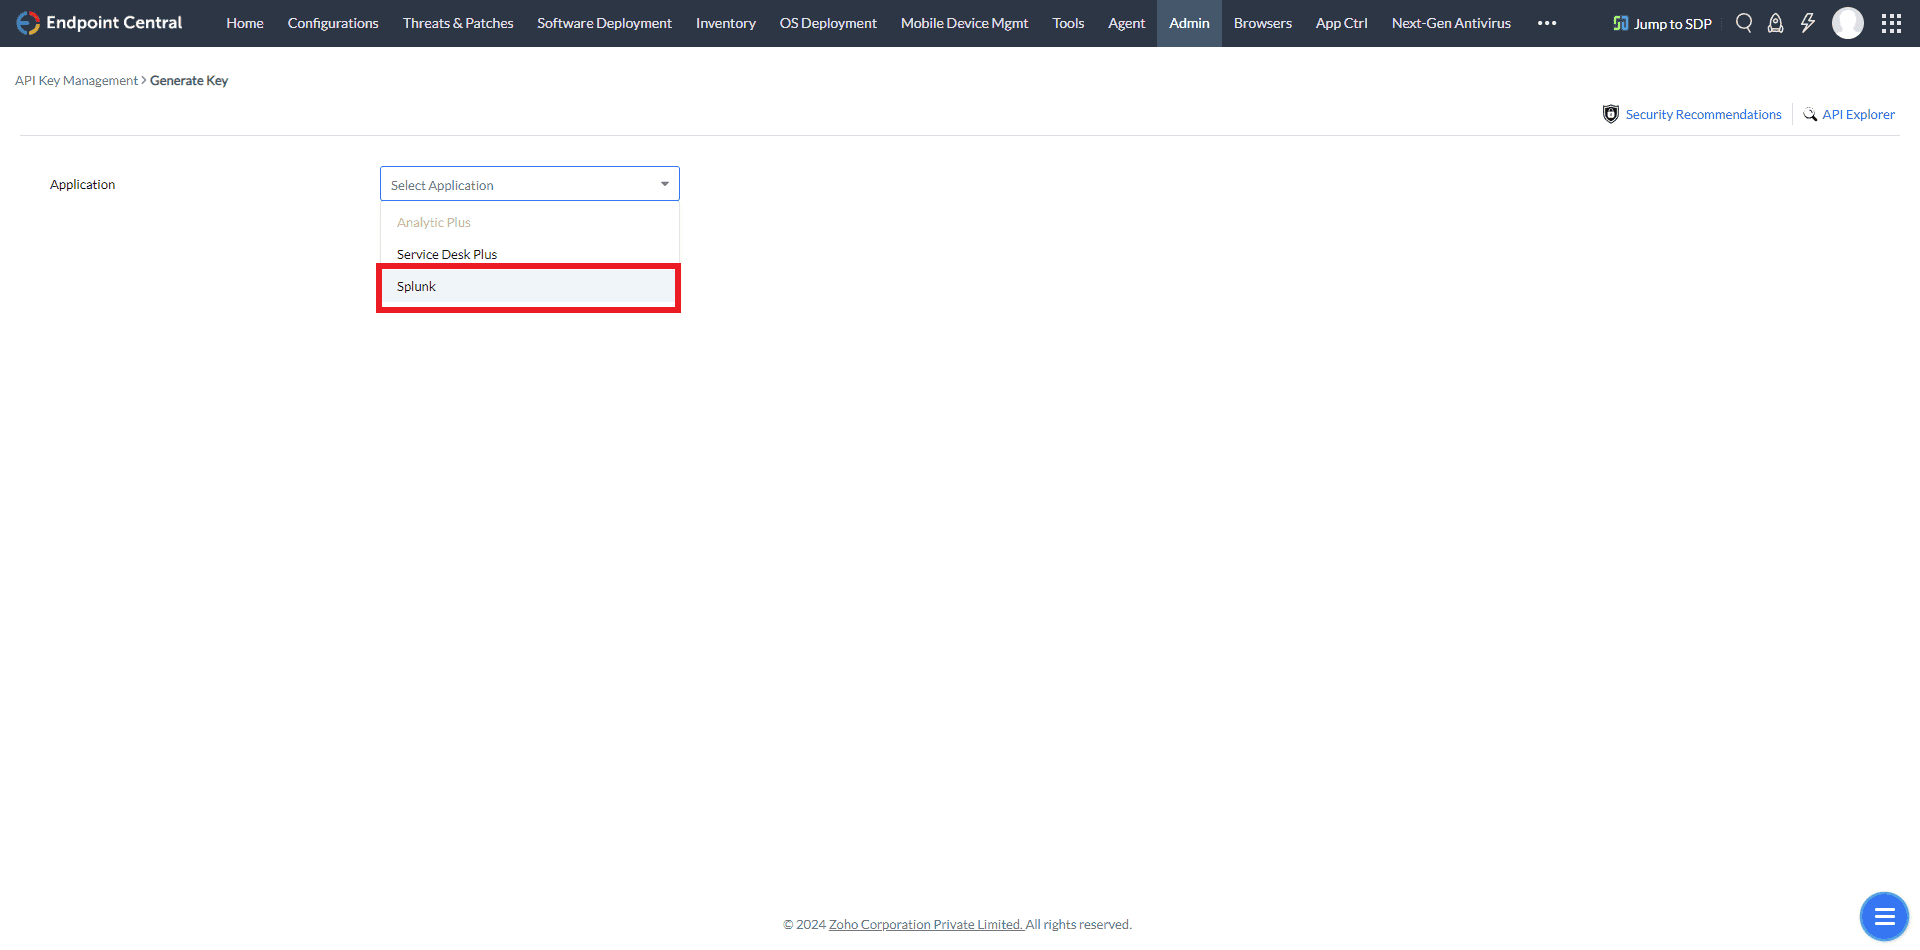
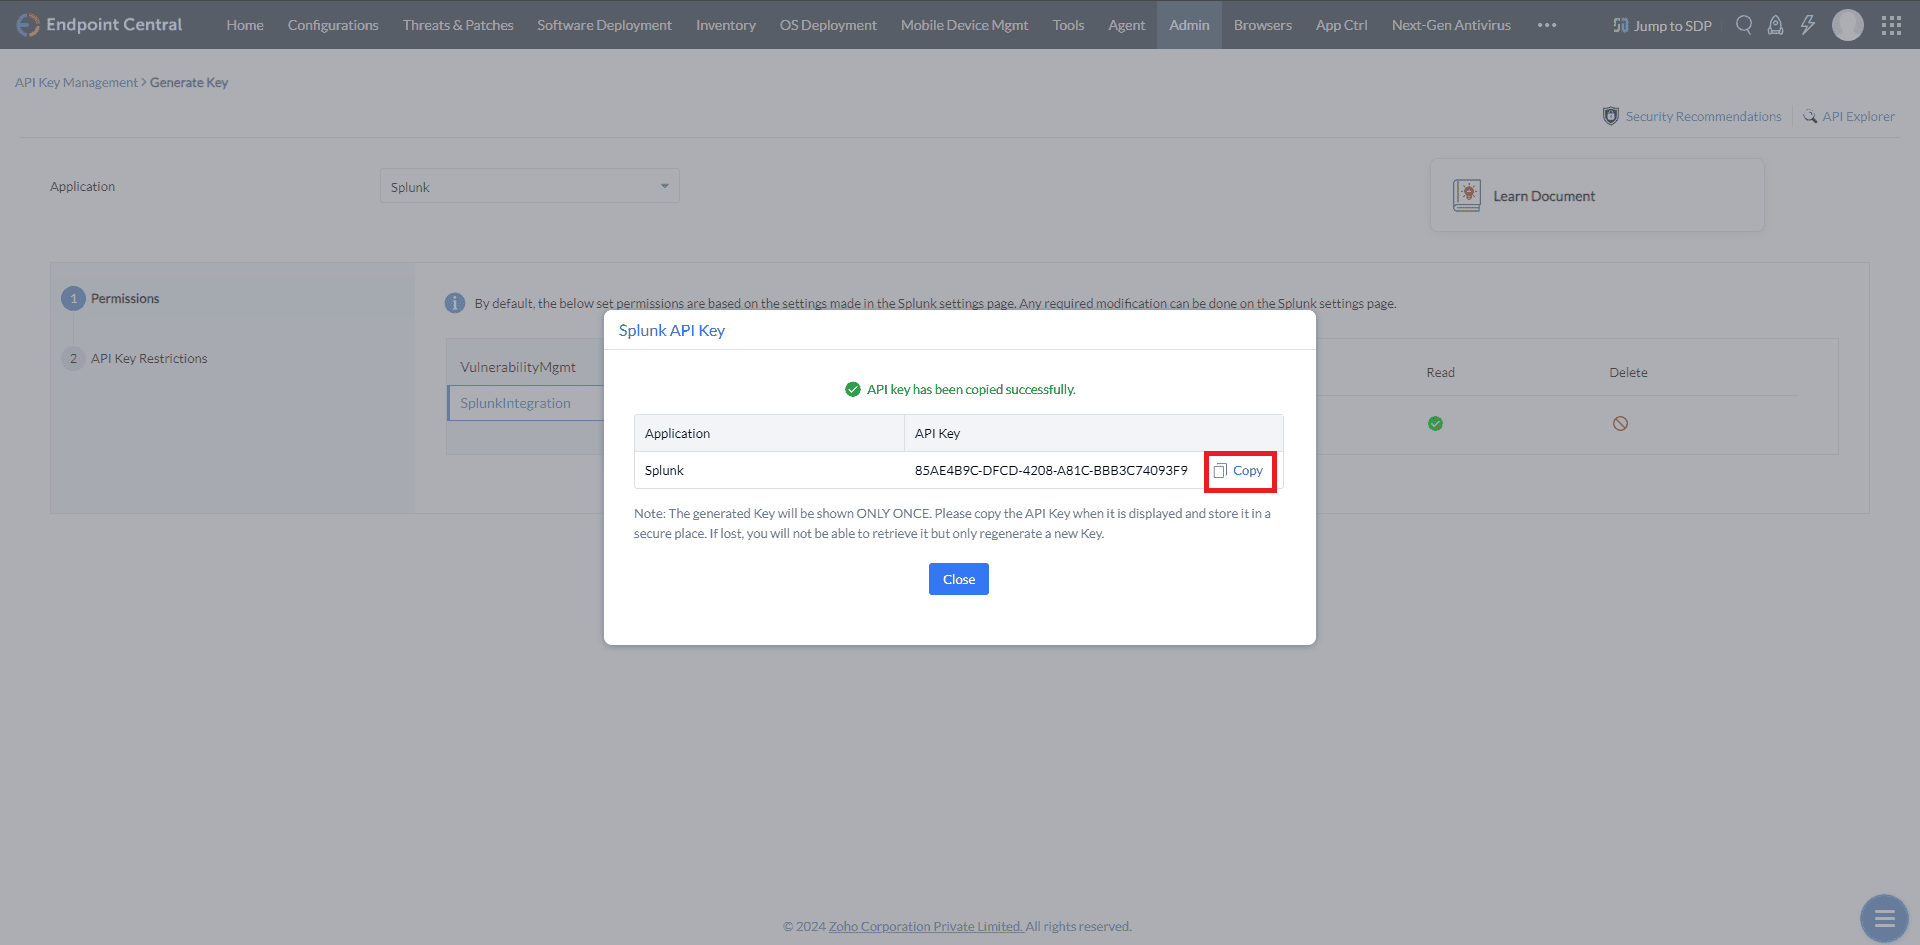
- Select Splunk from the Application menu and click on Generate Key to generate your Auth token.
- Then you can copy your authentication token.
Note: The generated Key will be shown ONLY ONCE. Please copy the API Key when it is displayed and store it in a secure place. If lost you will not be able to retrieve it but only regenerate a new Key.
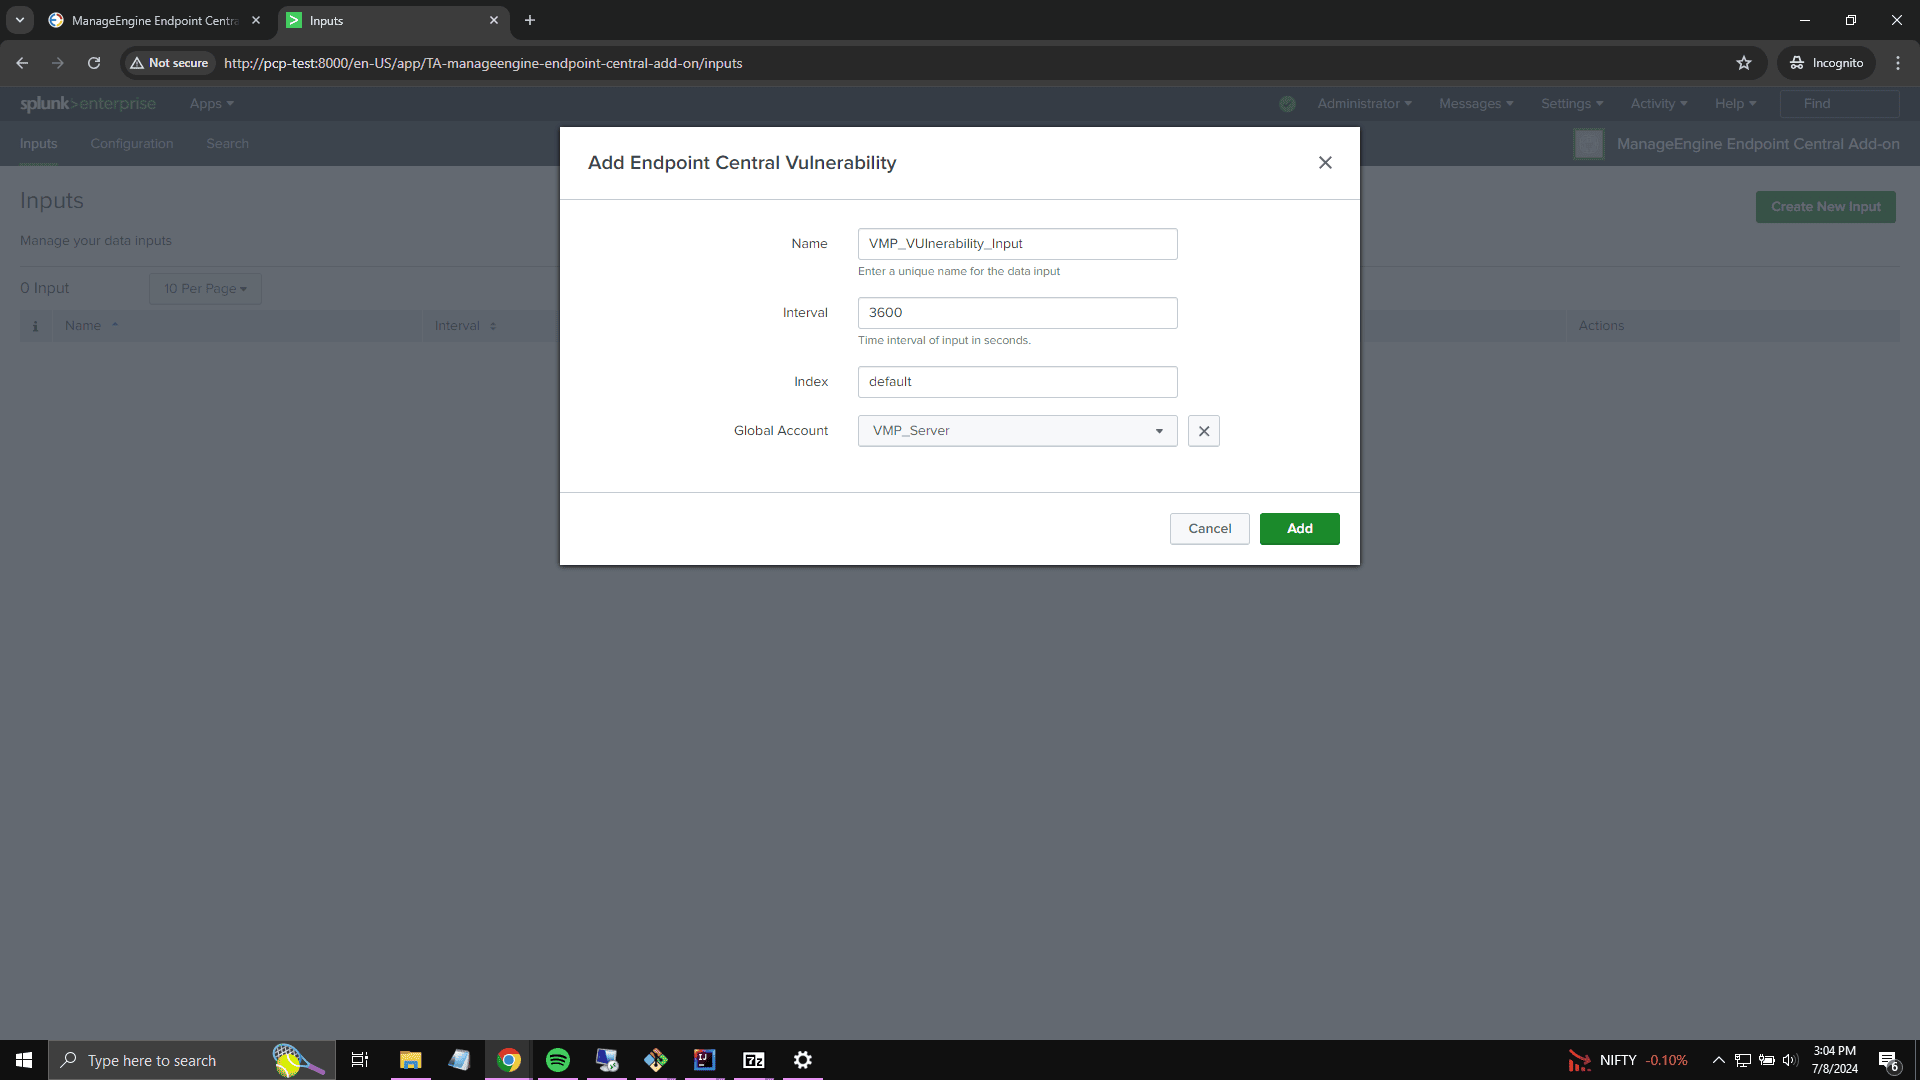
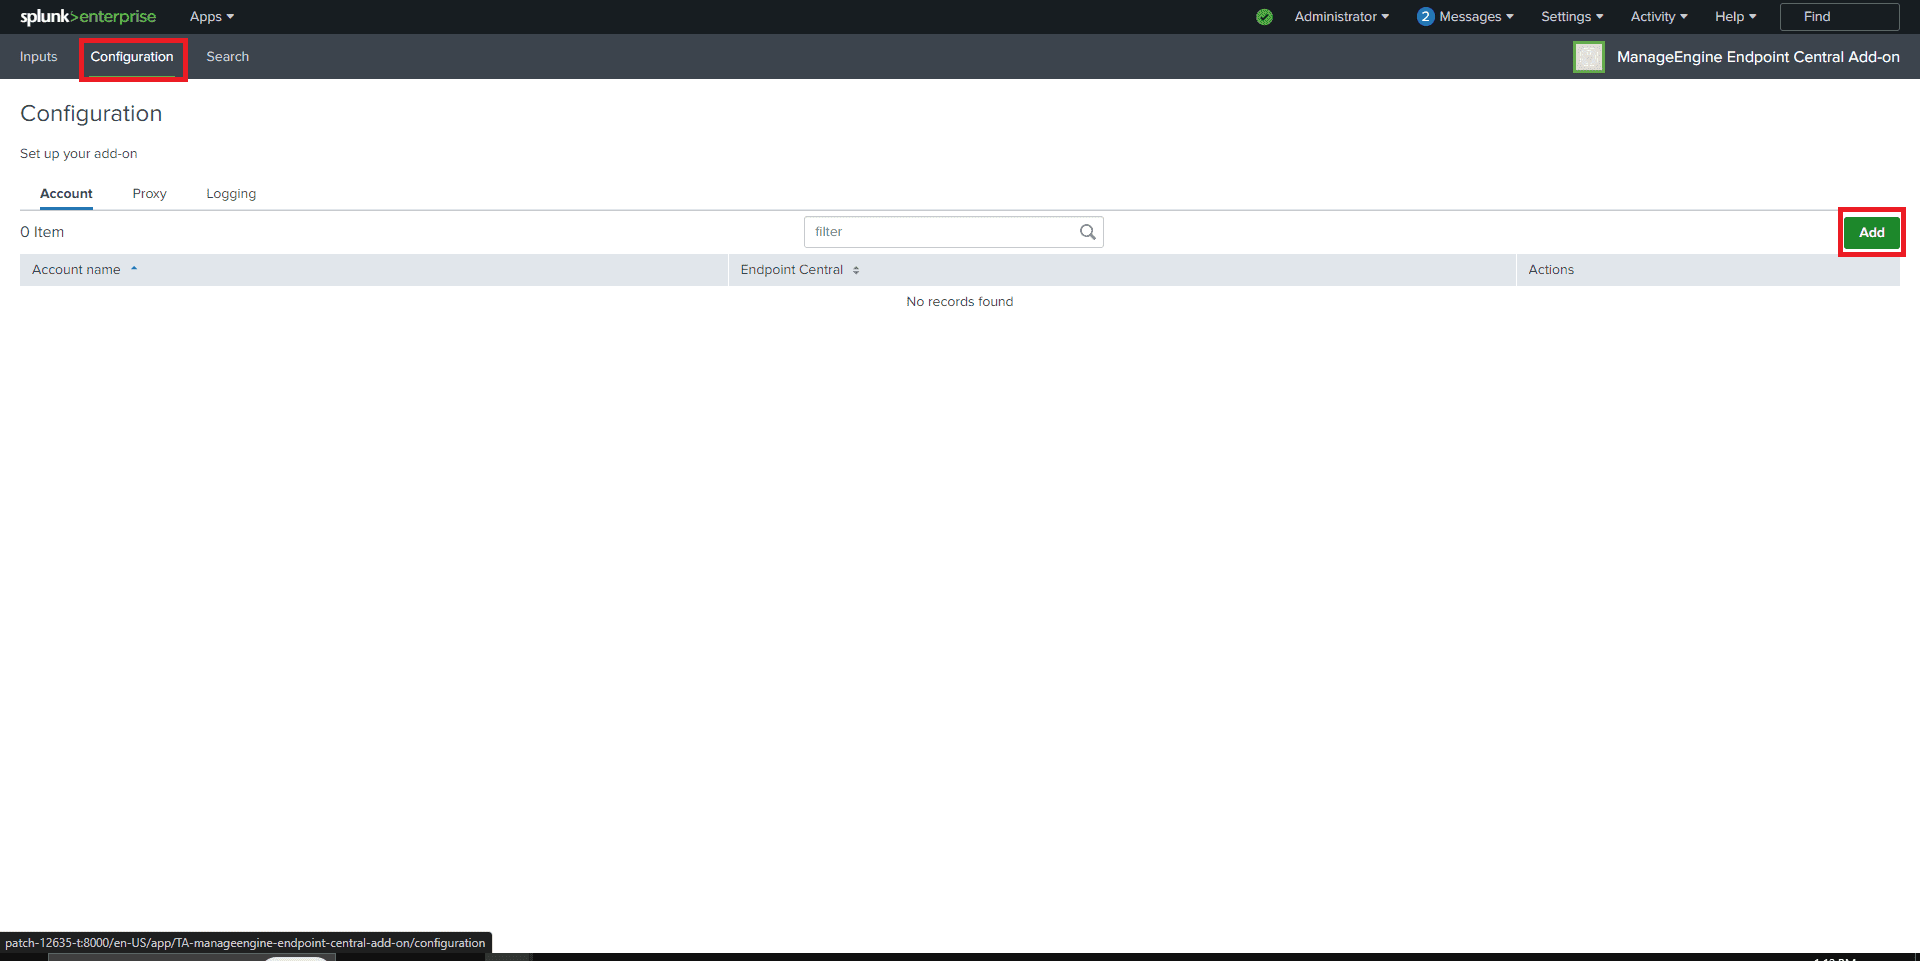
Configuring the app in Splunk with the Vulnerability Manager Plus server
- Navigate to the Splunk home page and access the header menu and click on Apps.
- Select the ManageEngine Vulnerability Manager Plus Add-On App.
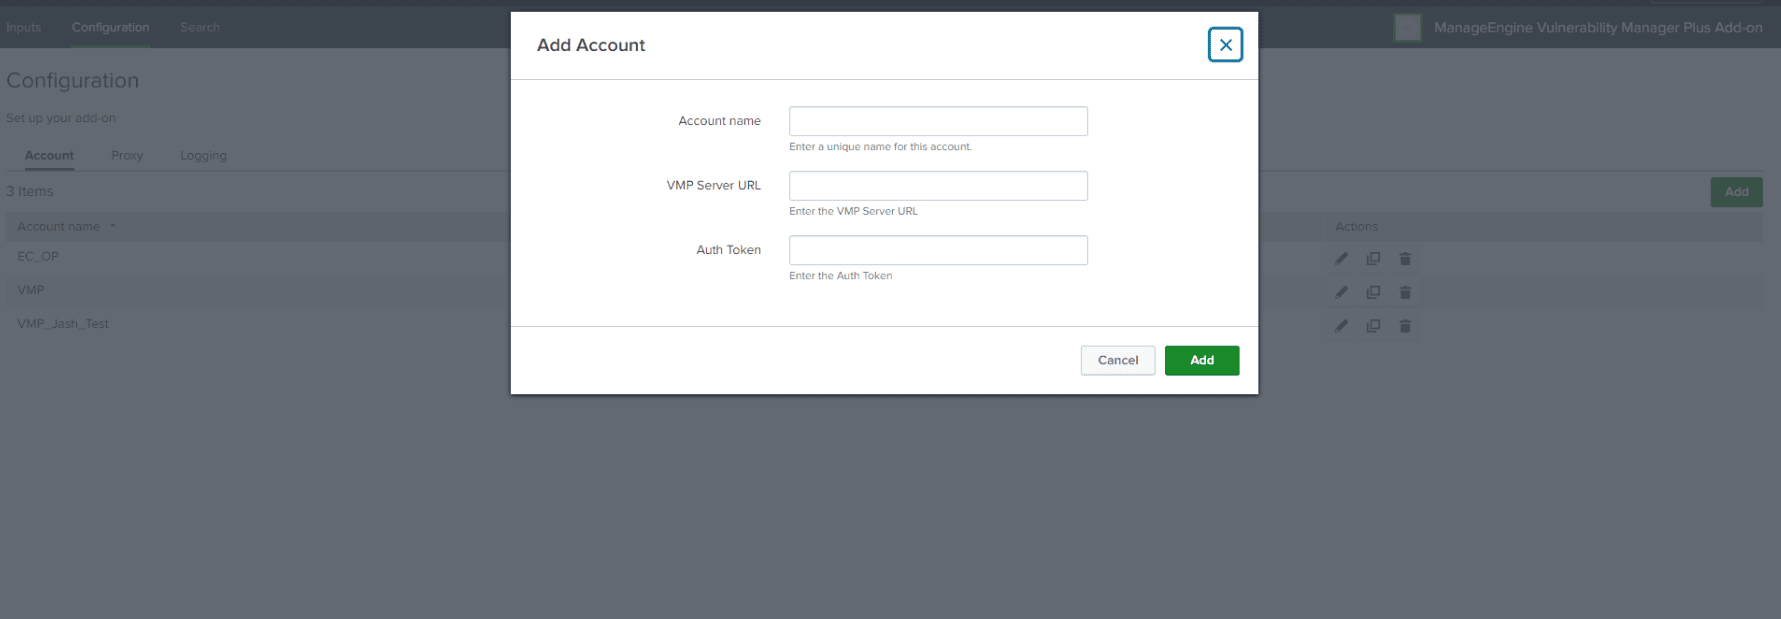
- Within the App, navigate to the Configurations page. Click the Add button to include your server configuration.
- In the pop-up, complete all necessary fields and paste the Auth Token copied from Vulnerability Manager Plus Server.
- Click Add. If all the information is correct, it will be validated successfully.
Valid inputs:
- Account Name: Should be unique and without spaces.
- Vulnerability Manager Plus Server URL: URL with the scheme (https://). This URL must be accessible from the machine hosting Splunk. If using a proxy, configure proxy settings before adding configuration details.
- Auth Token: Use the auth token generated from Vulnerability Manager Plus without any modifications.
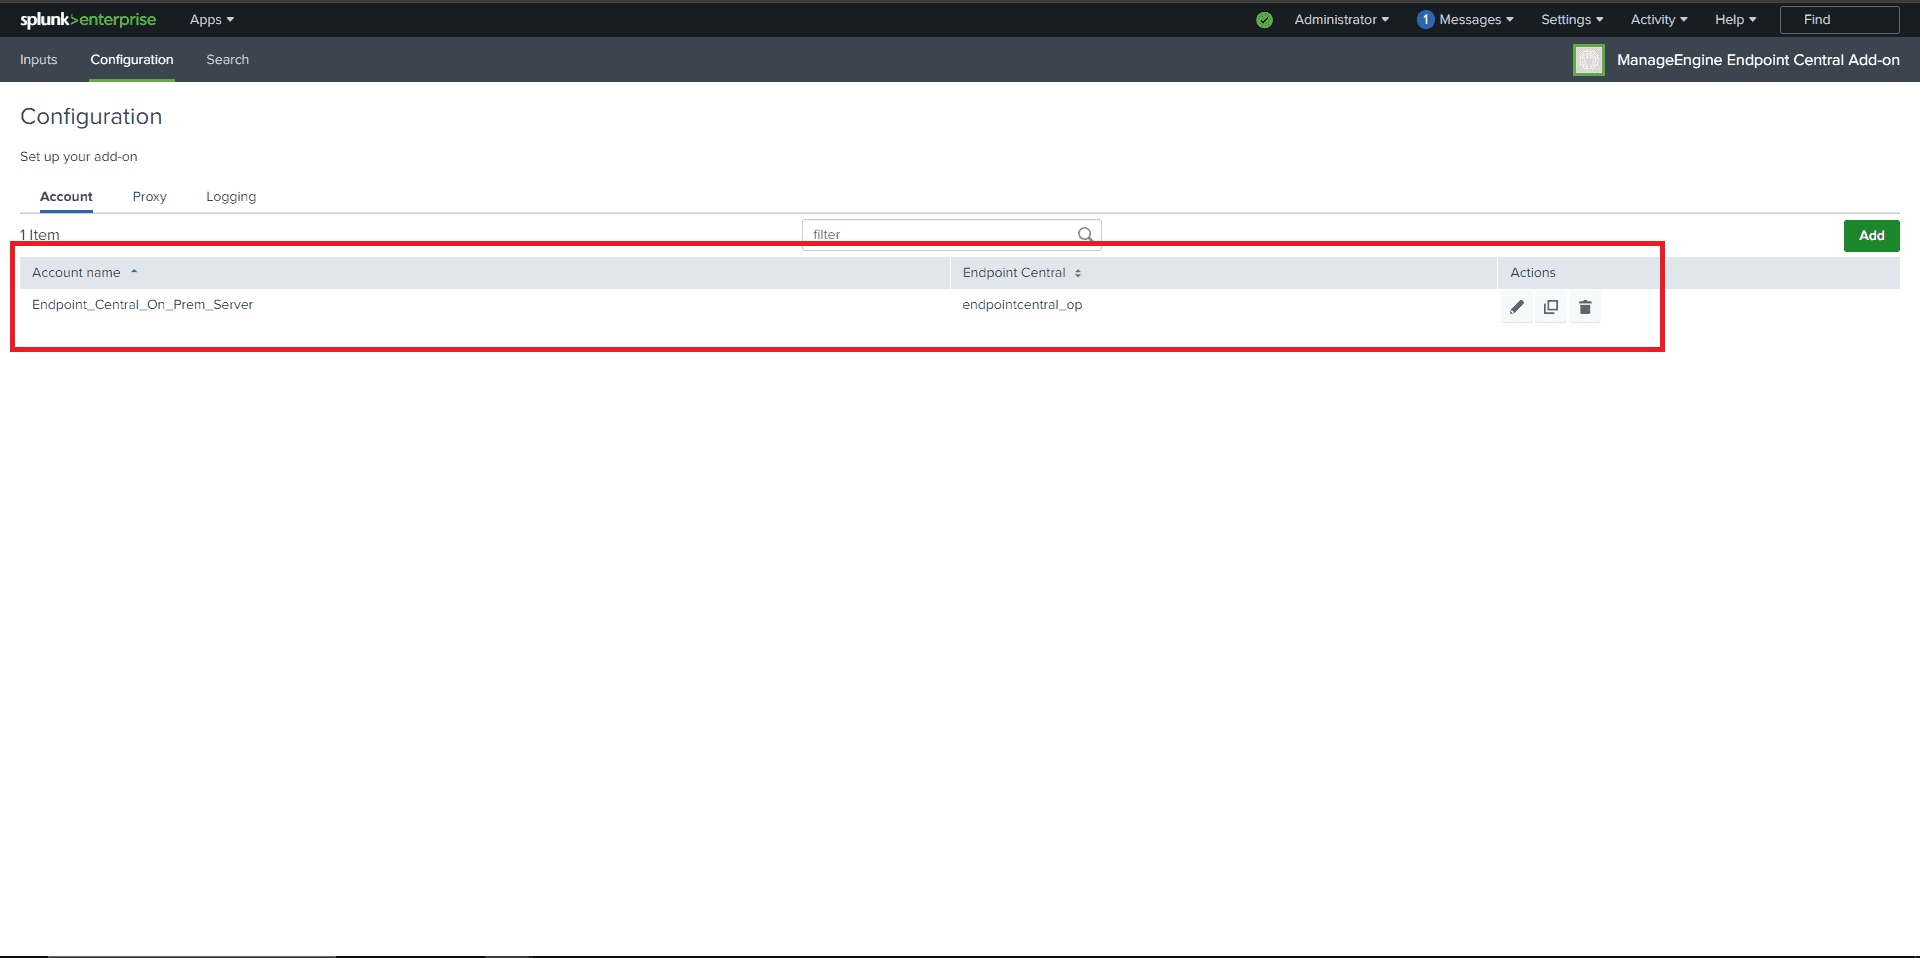
- The added configuration will appear in the Accounts section.
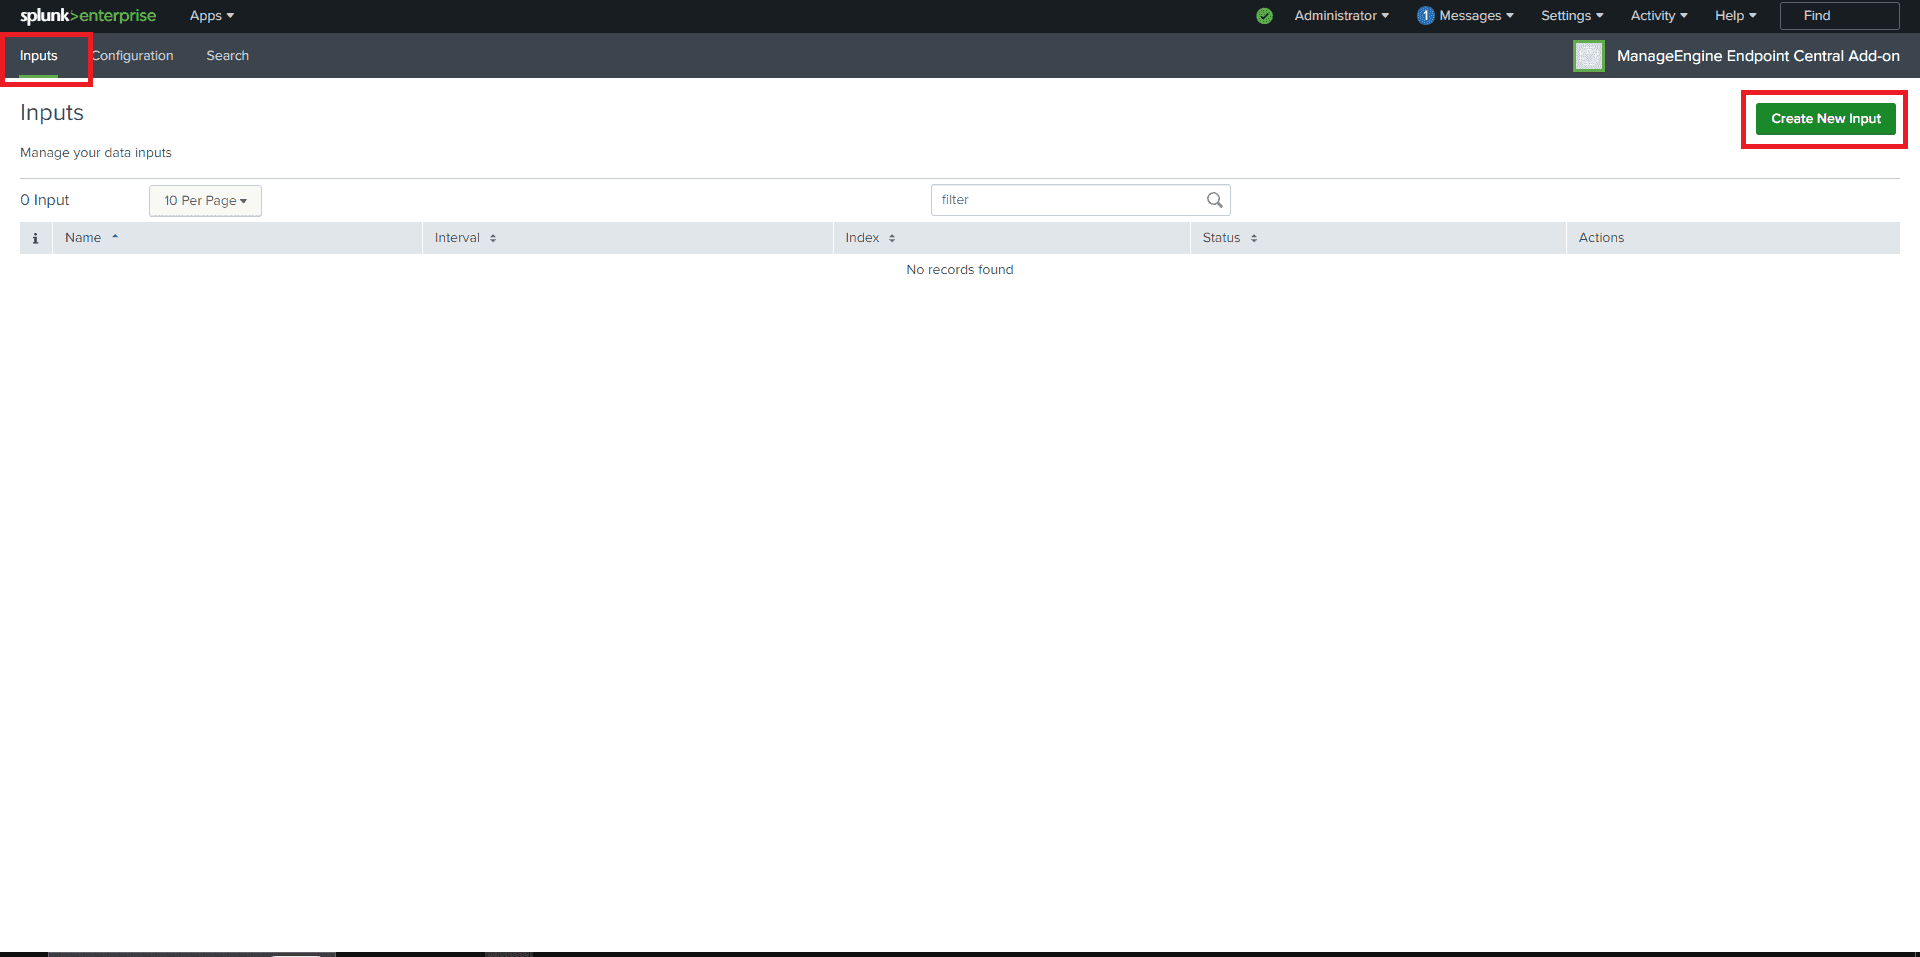
Viewing data in Splunk
- Navigate to the Search tab in the app.
- Once an input is configured, synchronization with the Vulnerability Manager Plus server will begin, and data will start posting to Splunk.
Currently, only vulnerability data from Vulnerability Manager Plus is posted to Splunk.
- The vulnerability data will be posted under the sourcetype: manageengine:vmp:vulnerability
- To view the posted data, use the following command:
index=* sourcetype="manageengine:vmp:vulnerability"
Initiating Full Sync
- Navigate to %Splunk Home Dir% ->etc->apps->TA-manageengine-vulnerability-manager-plus-add-on->default
- Create a file named custom.conf
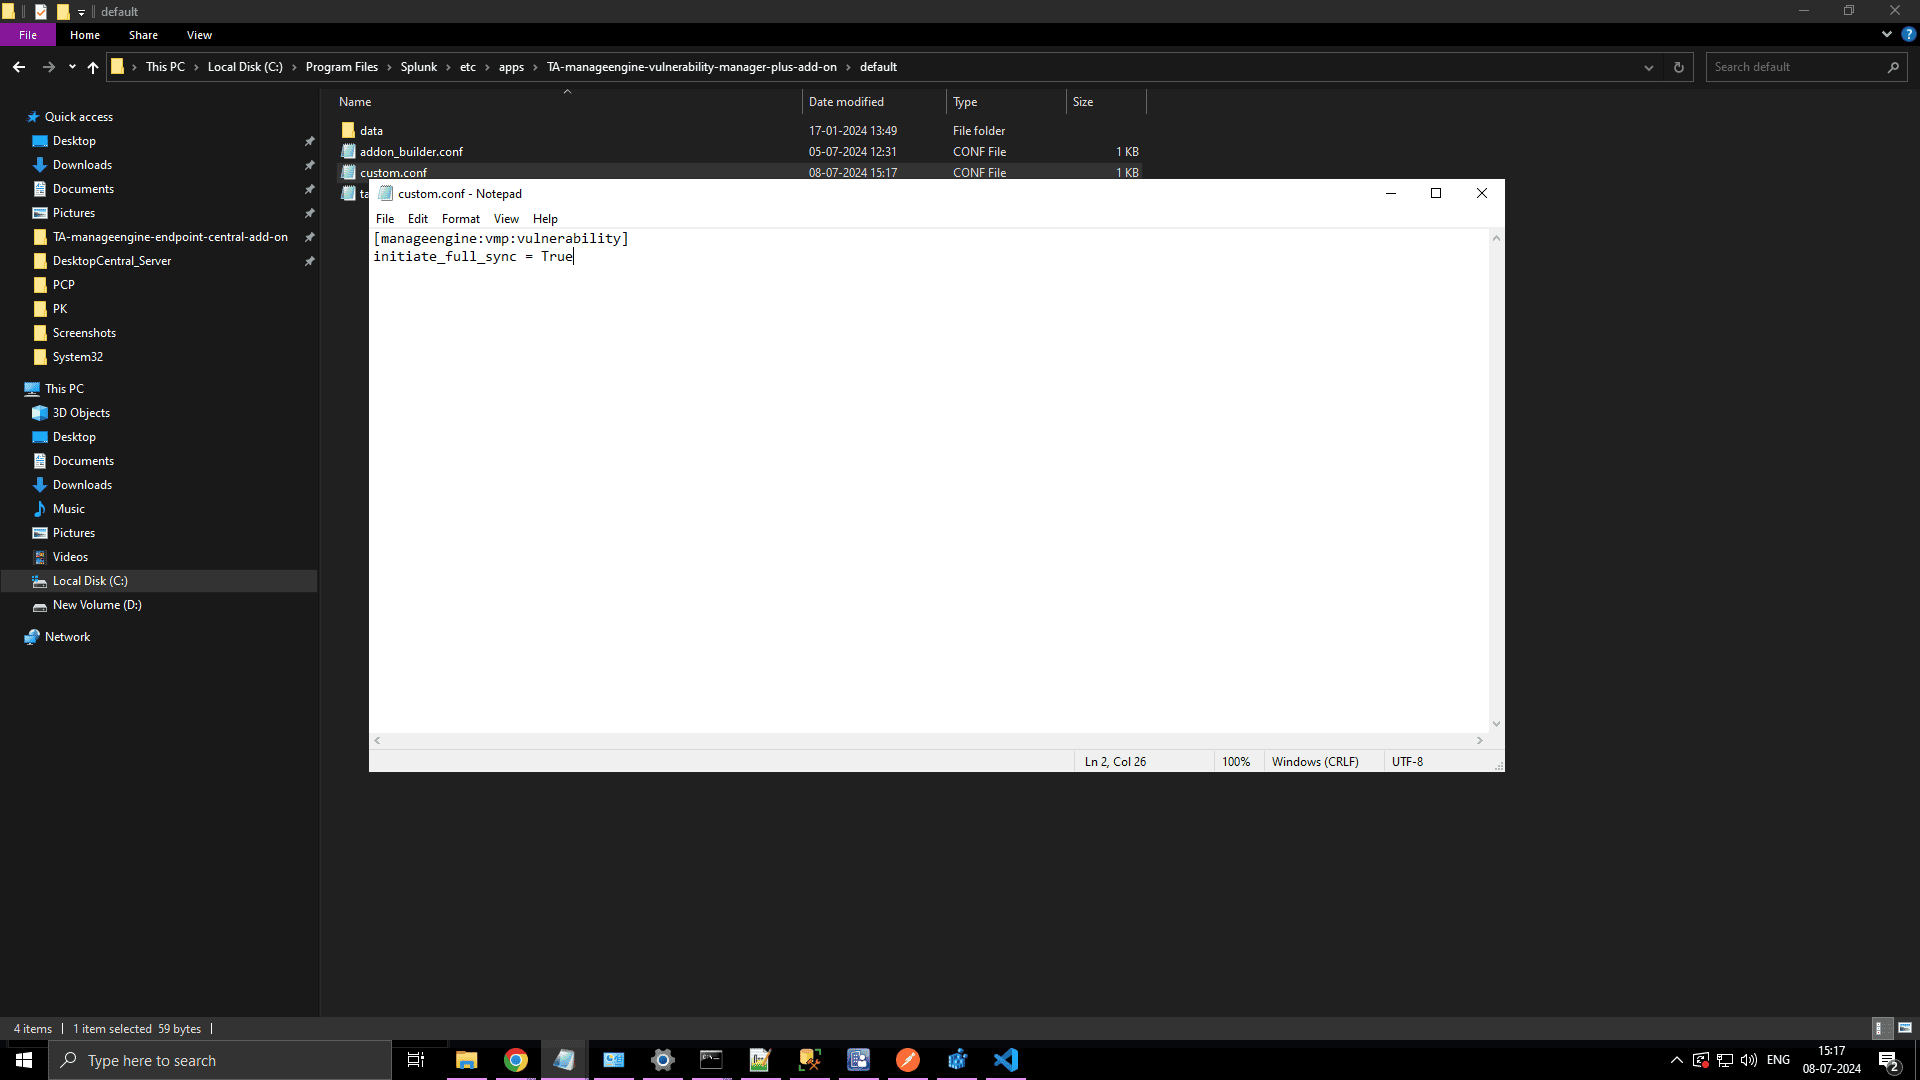
- Save the file to trigger full sync.
- During the next sync, full sync will be initiated.
Configuring Multiple Vulnerability Manager Plus Servers in Splunk
Kindly contact support for any queries.