Configure Custom Fields
What are Custom Fields
IT administrators can use Custom Fields to create a separate view and show customized data. IT administrators can customize this field and have the data automatically filled in after an inventory scan. By doing so, IT administrators can create identifiers for IT assets that closely aligns with business internal jargons and helps them manage assets at ease.
For example
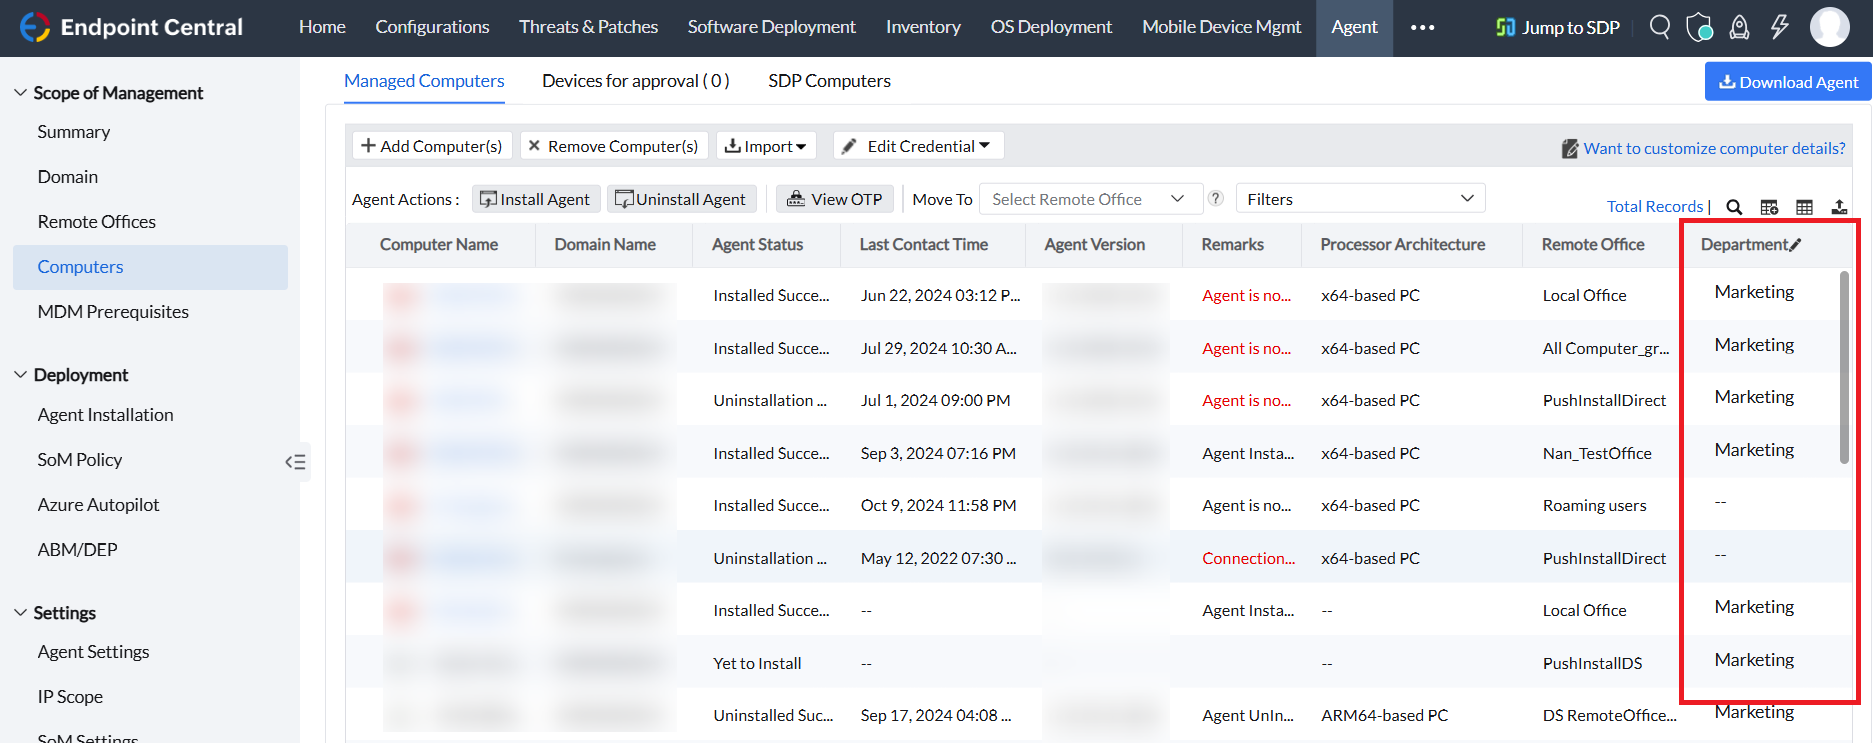
John, an IT administrator, wants to submit a report on the managed devices. These devices need to be grouped based on the mapped user's department, such as engineering, marketing, sales, HR or any. To achieve this, John can do this by defining a rule and creating a custom field.

You can view the created custom fields in the following places
- Scope of Management (SoM) -> Computers
- Admin -> Global Settings -> Custom Group
- Inventory -> Scanned Computers
- Inventory -> All Computers
- Inventory -> Software Summary
How to create a custom field?
To create a custom field,
- Navigate to Admin -> Global Settings -> Custom Field -> Add Custom Field.
- Furnish the required details and add the custom field.
- You can modify/delete the details by clicking the ellipsis icon under Action tab.

To add your own data type format,
- Navigate to Admin tab -> Global Settings -> Custom Field
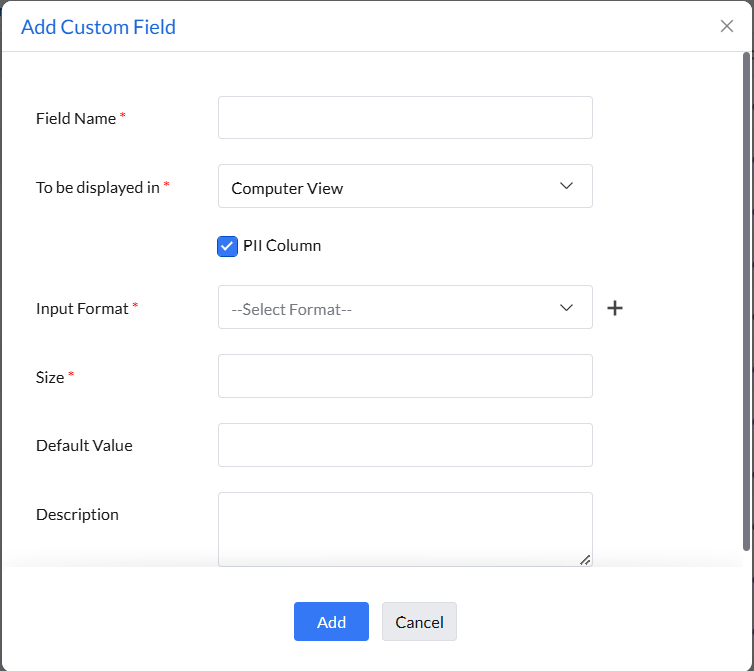
- Click on the Add Custom Field.
- Give the Field Name based on the Custom Field you want to add.
- From the To be displayed in field,select Computer View to add your Custom field data in the computer view or Software View to add your Custom Field data in the Inventory Software Summary view.
- Check the PII Column to mask your Custom Field data as personal information.
- Select a primary Input Format and specify the size.
- Give a Default value based on your requirement
- Give the Description of your Custom Field based on your requirement.
- Click on Add to add your custom field.

Related Articles


