To add JBoss server logs, first import the logs into EventLog Analyzer and extract the custom fields that are specific to JBoss server logs.
Import JBoss server logs
You can import JBoss server logs from a local, shared, or remote path, as well as from the cloud. To import logs from a local or shared path or the cloud, click here.
To import logs from a remote path, follow the given steps:
- Navigate to the Import Configuration page using any one of the following menu options:
- +Add > Import Logs
- Settings > Configurations > Import Log Data
- Home > Applications > Imported Logs
- Home > Applications > Actions > +Import
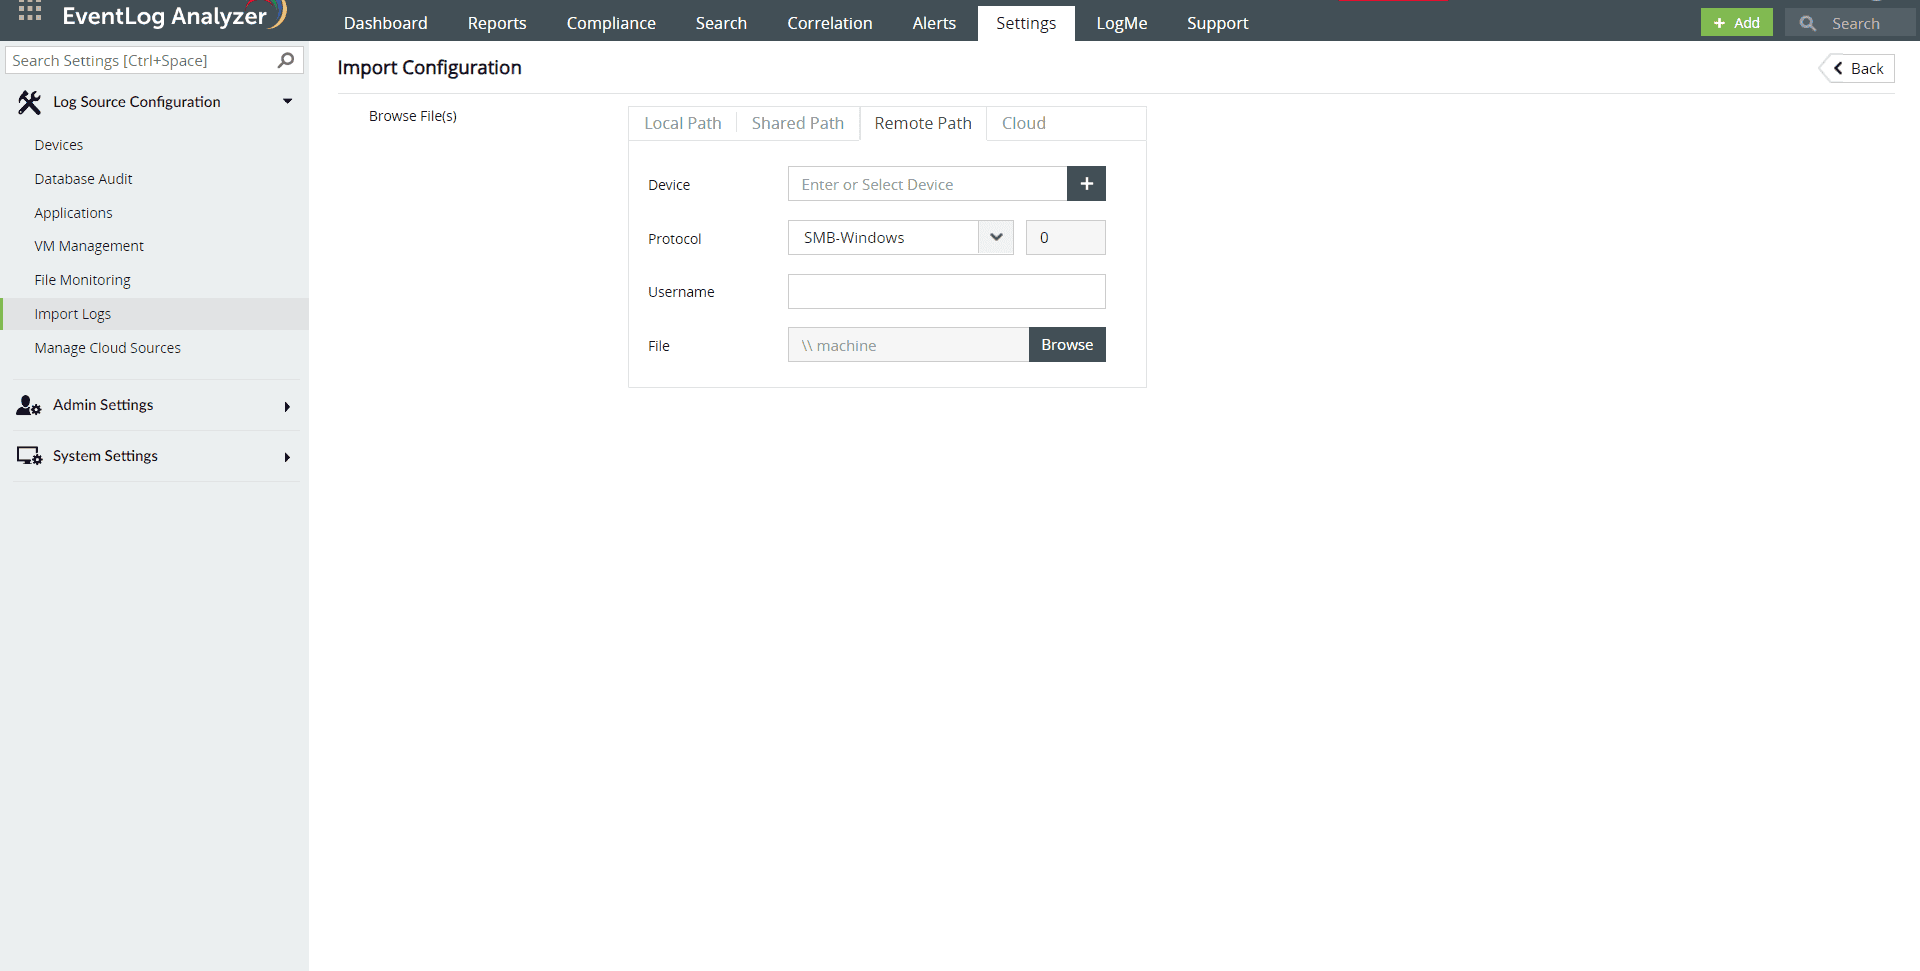
- Importing log files from a remote path in EventLog Analyzer needs authentication. This authentication can be achieved in two ways:
- Using password
- Using SSH private key file sharing (Specific to SFTP protocol)
Password based Authentication
- From the Browse Files option, select Remote Path.
- Enter the Device name from which you wish to import the log file. Alternatively, you can click on the + icon to browse and select the Windows device.
- Choose the required Protocol (Ethernet, FTP and SFTP) and enter the port number.
- Provide the Username of an account with admin privileged over the remote device.
- Select Password as the Authentication Type, if you had chosen the SMTP protocol.
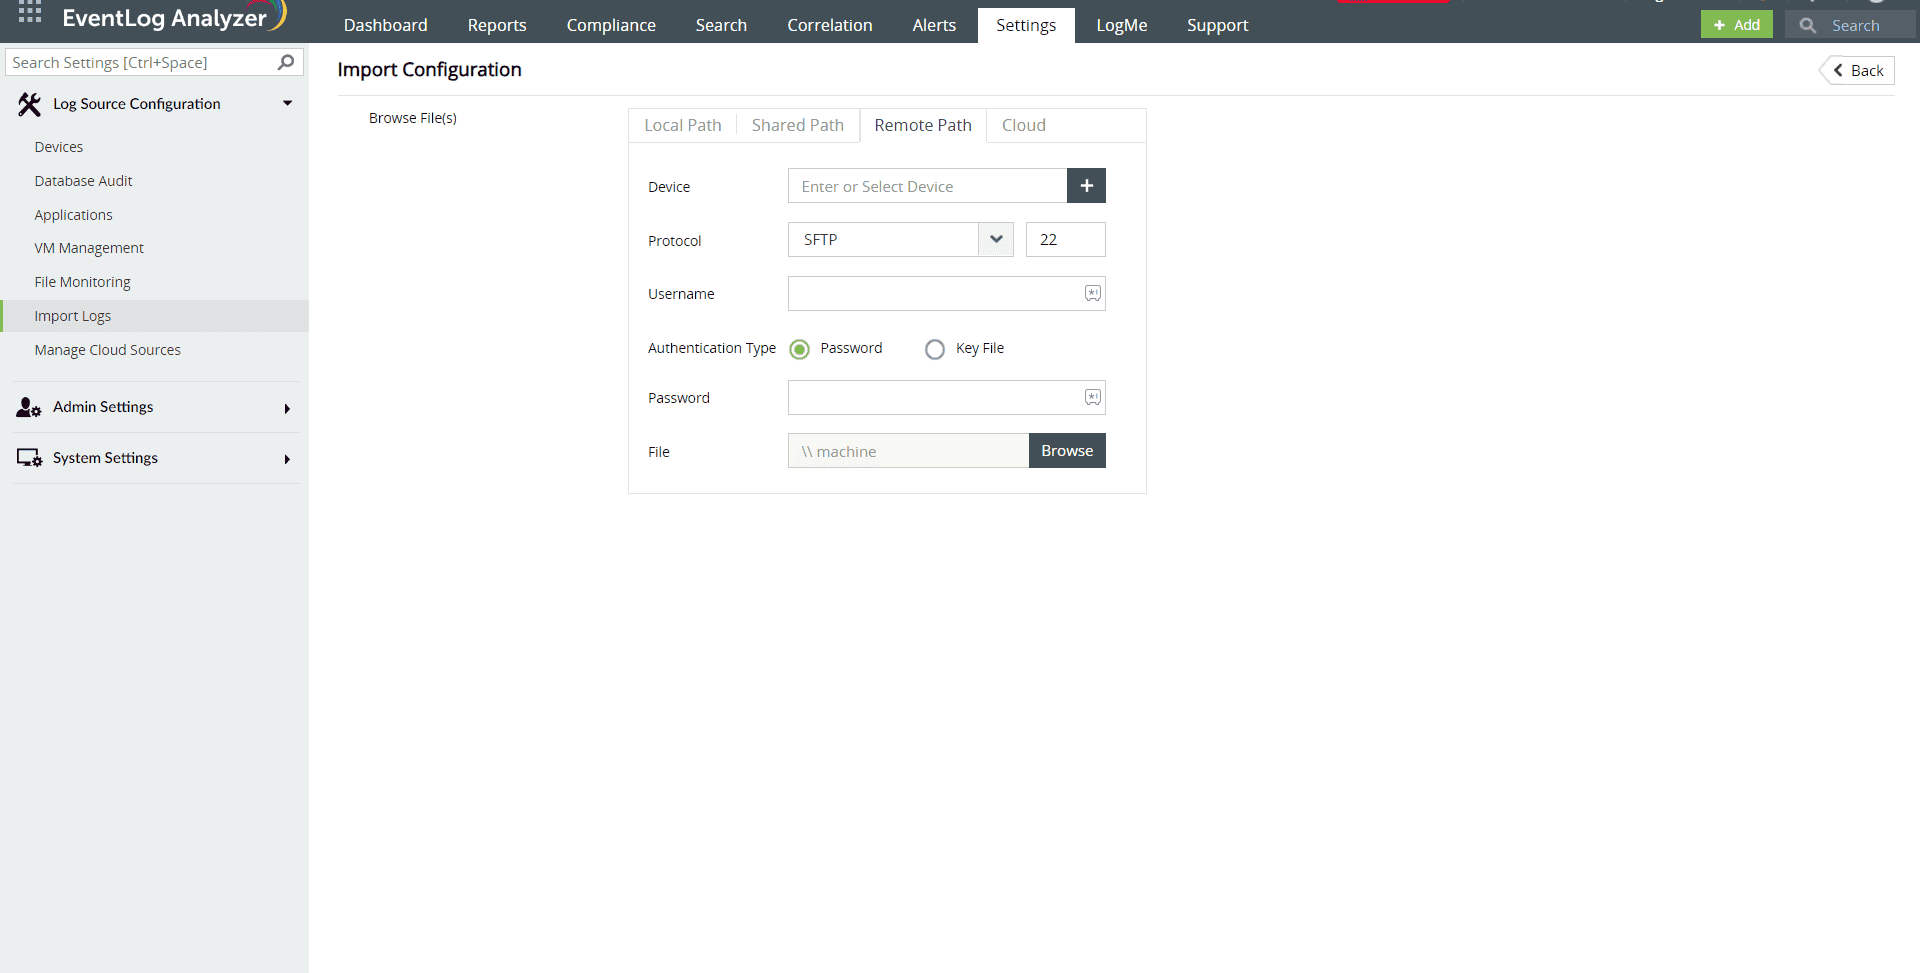
- For other protocols, you can directly enter the Password.
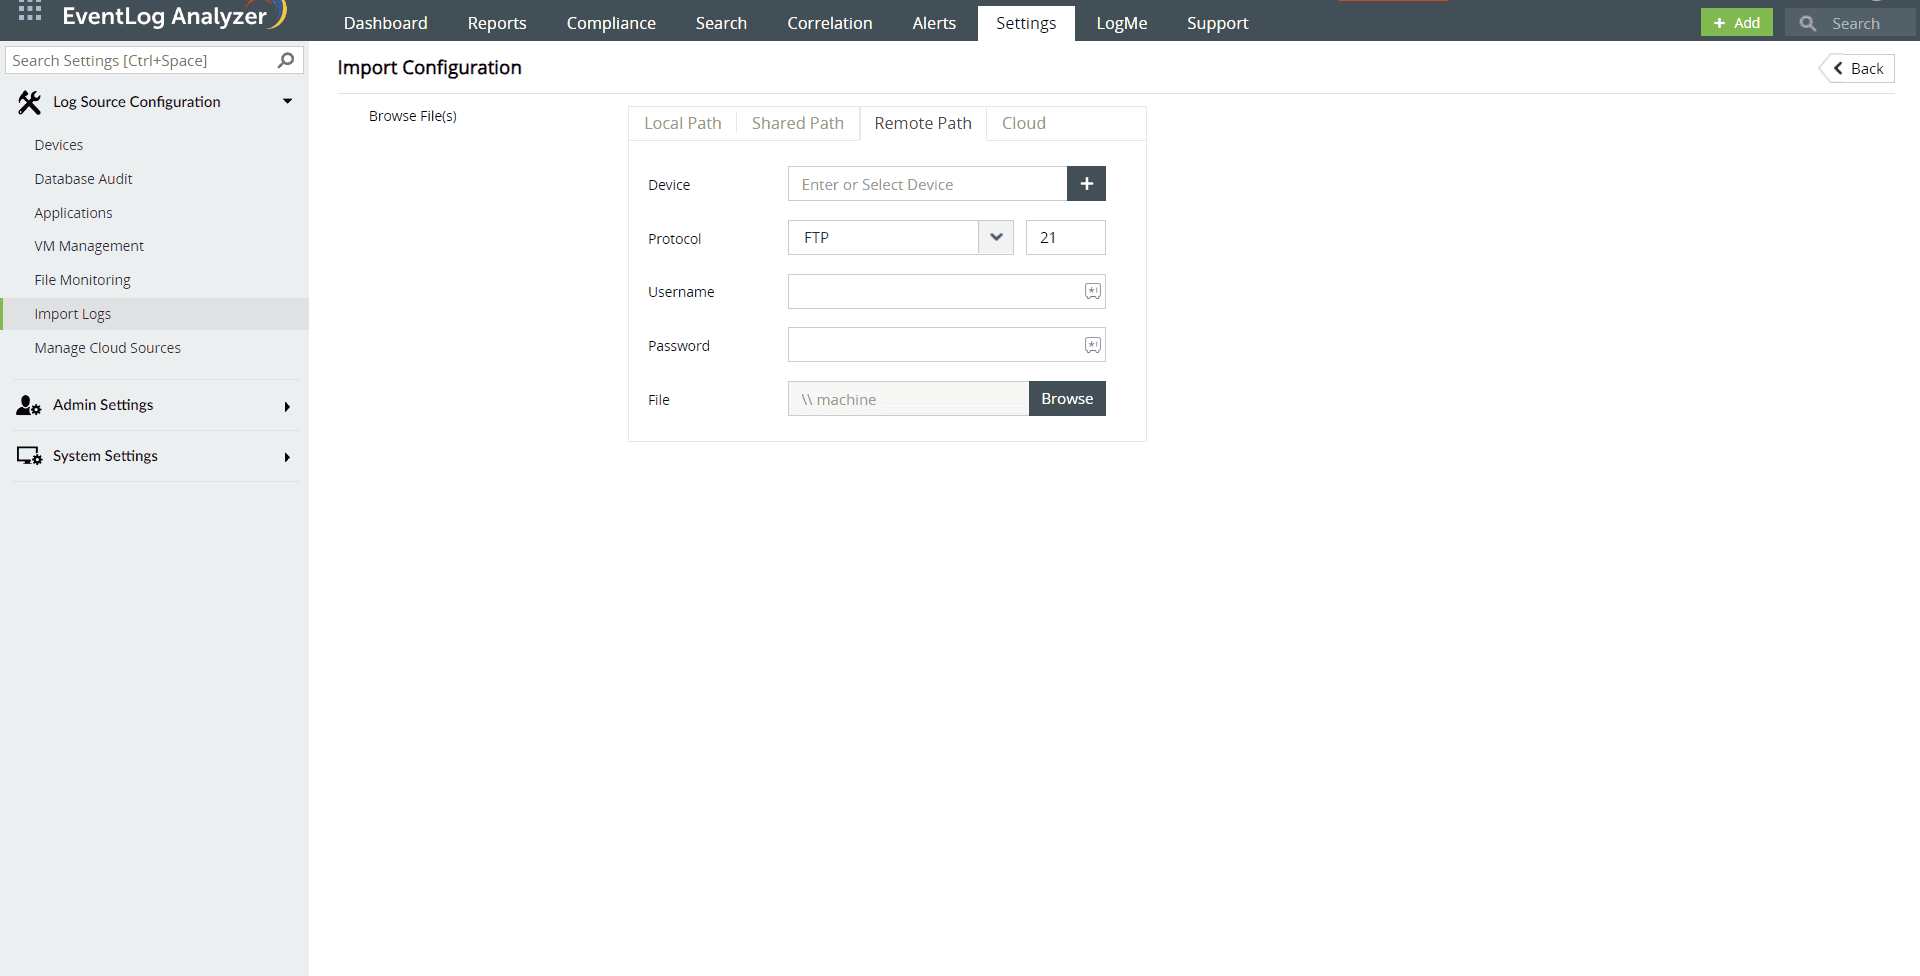
- Select the desired file from the device and click OK.
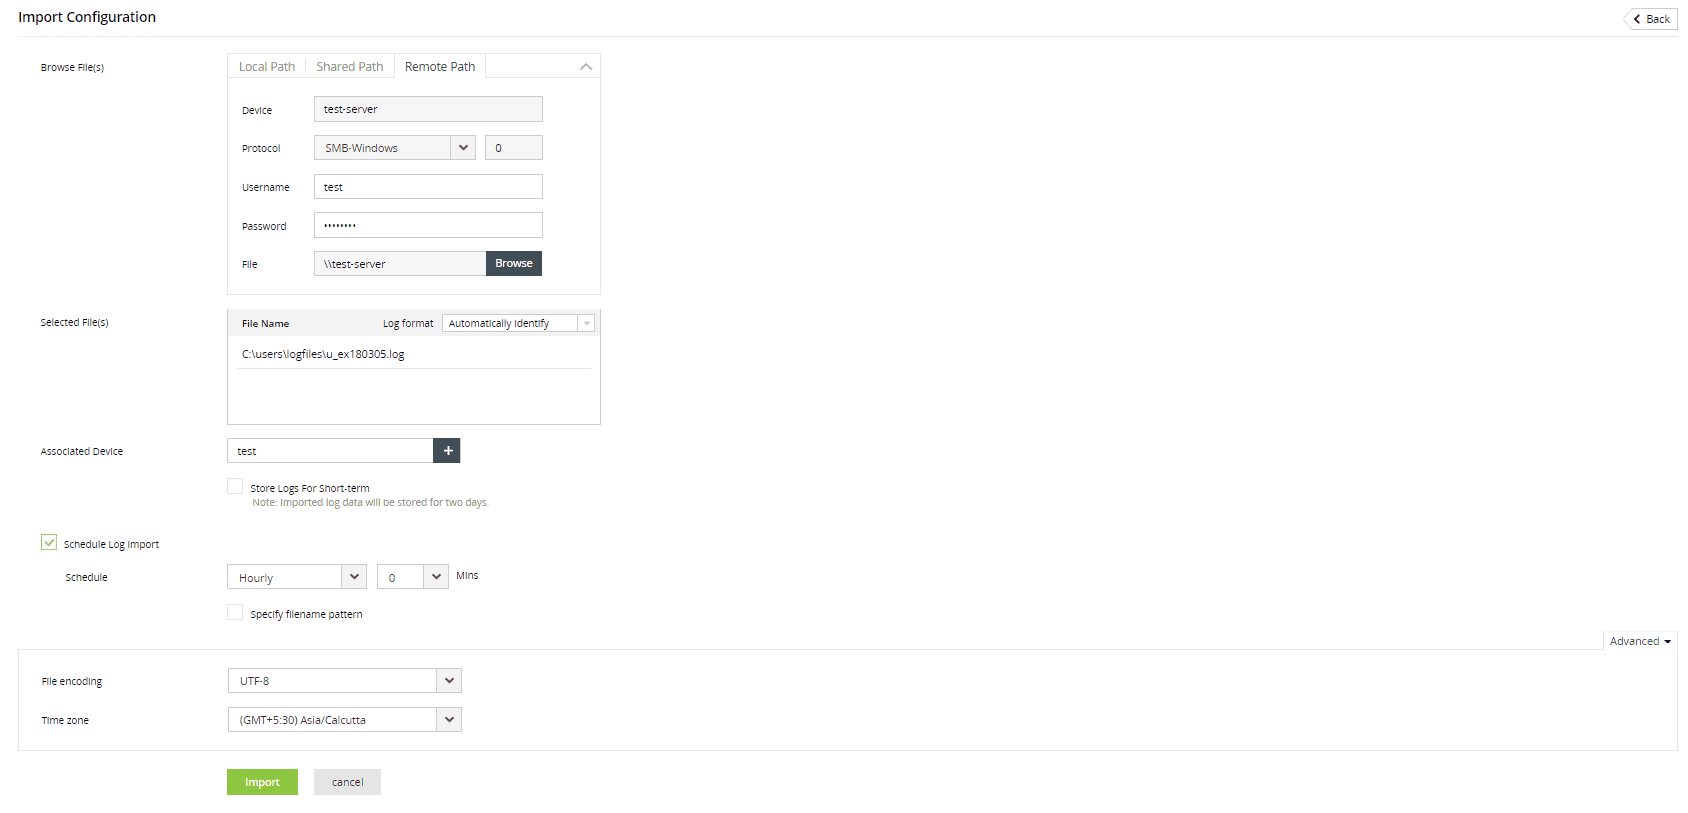
- Select the Log format from the drop-down. If you do not know the log format, select Automatically Identify.
- Browse and select the Associated Device.
- The Store Logs for Short-term option will store the imported log data in EventLog Analyzer for a brief period of two days. If the option is left unchecked, the logs will be stored as per your database retention configuration.
- If you would like to automate a log file import at regular time intervals, enable the Schedule Log Import option.
- With the Schedule drop-down menu, you can customize the time interval between each log file import.
- Additionally, you can build a Filename Pattern for the imported log files using the time format options given. The name of the file stored at the specified time will be updated in accordance to the file name pattern.
SSH private key file sharing based authentication
- Select Remote Path from the Browse Files options listed.
- Enter the Device name from which you wish to import the log file. Alternatively, you can click on the + icon to browse and select the Windows device.
- Choose SFTP as the Protocol and enter the port number. (Default port value is 22)
- Provide the Username and choose Key File as the Authentication Type.
 |
Note: EventLog Analyzer supports OpenSSH key file format only.
|
- Browse and select the key file from the device. You can refer to this link to learn how to generate a key file with ssh-keygen, a standard component of Secure Shell protocol.
- If the key file is passphrase protected, select the Use Passphrase checkbox and enter the phrase in the field.
- Follow steps 7 to 13 under password authentication to complete log import.
Field extraction from logs
- Under Selected files, click on the eye beside the required file.
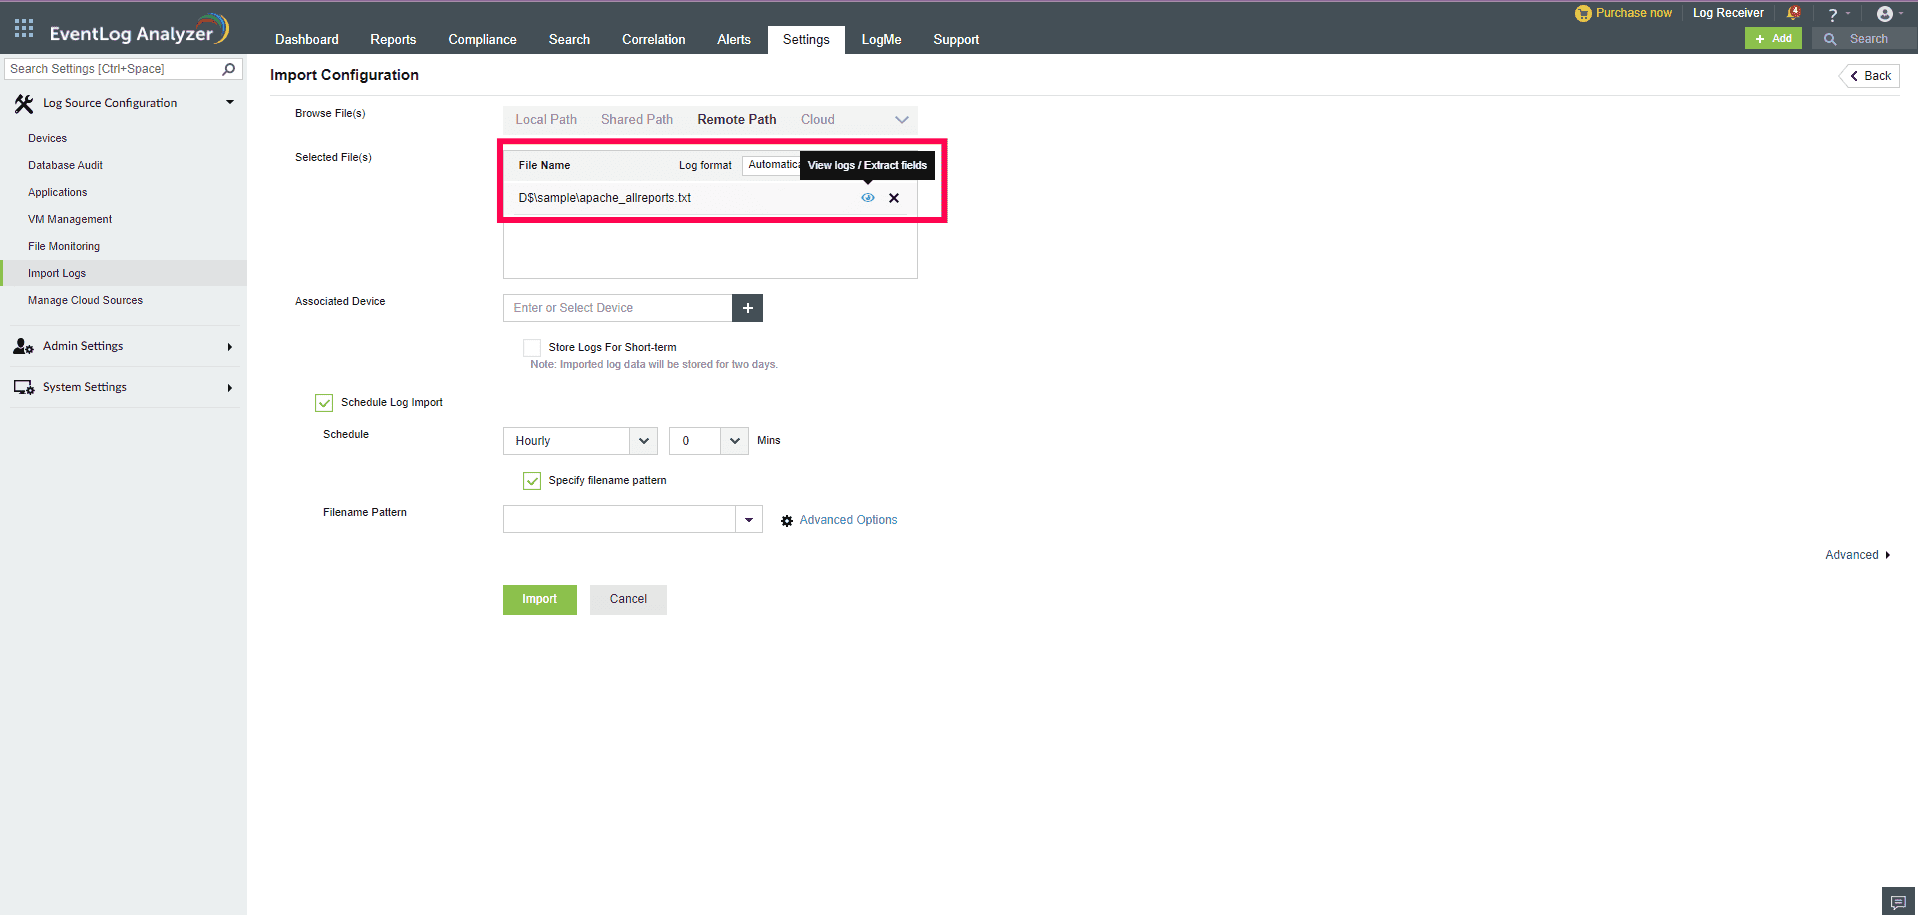
- You can create a custom field by clicking on the tools icon at the top right corner of your log message. Follow the steps given in this page to use custom patterns for logs.
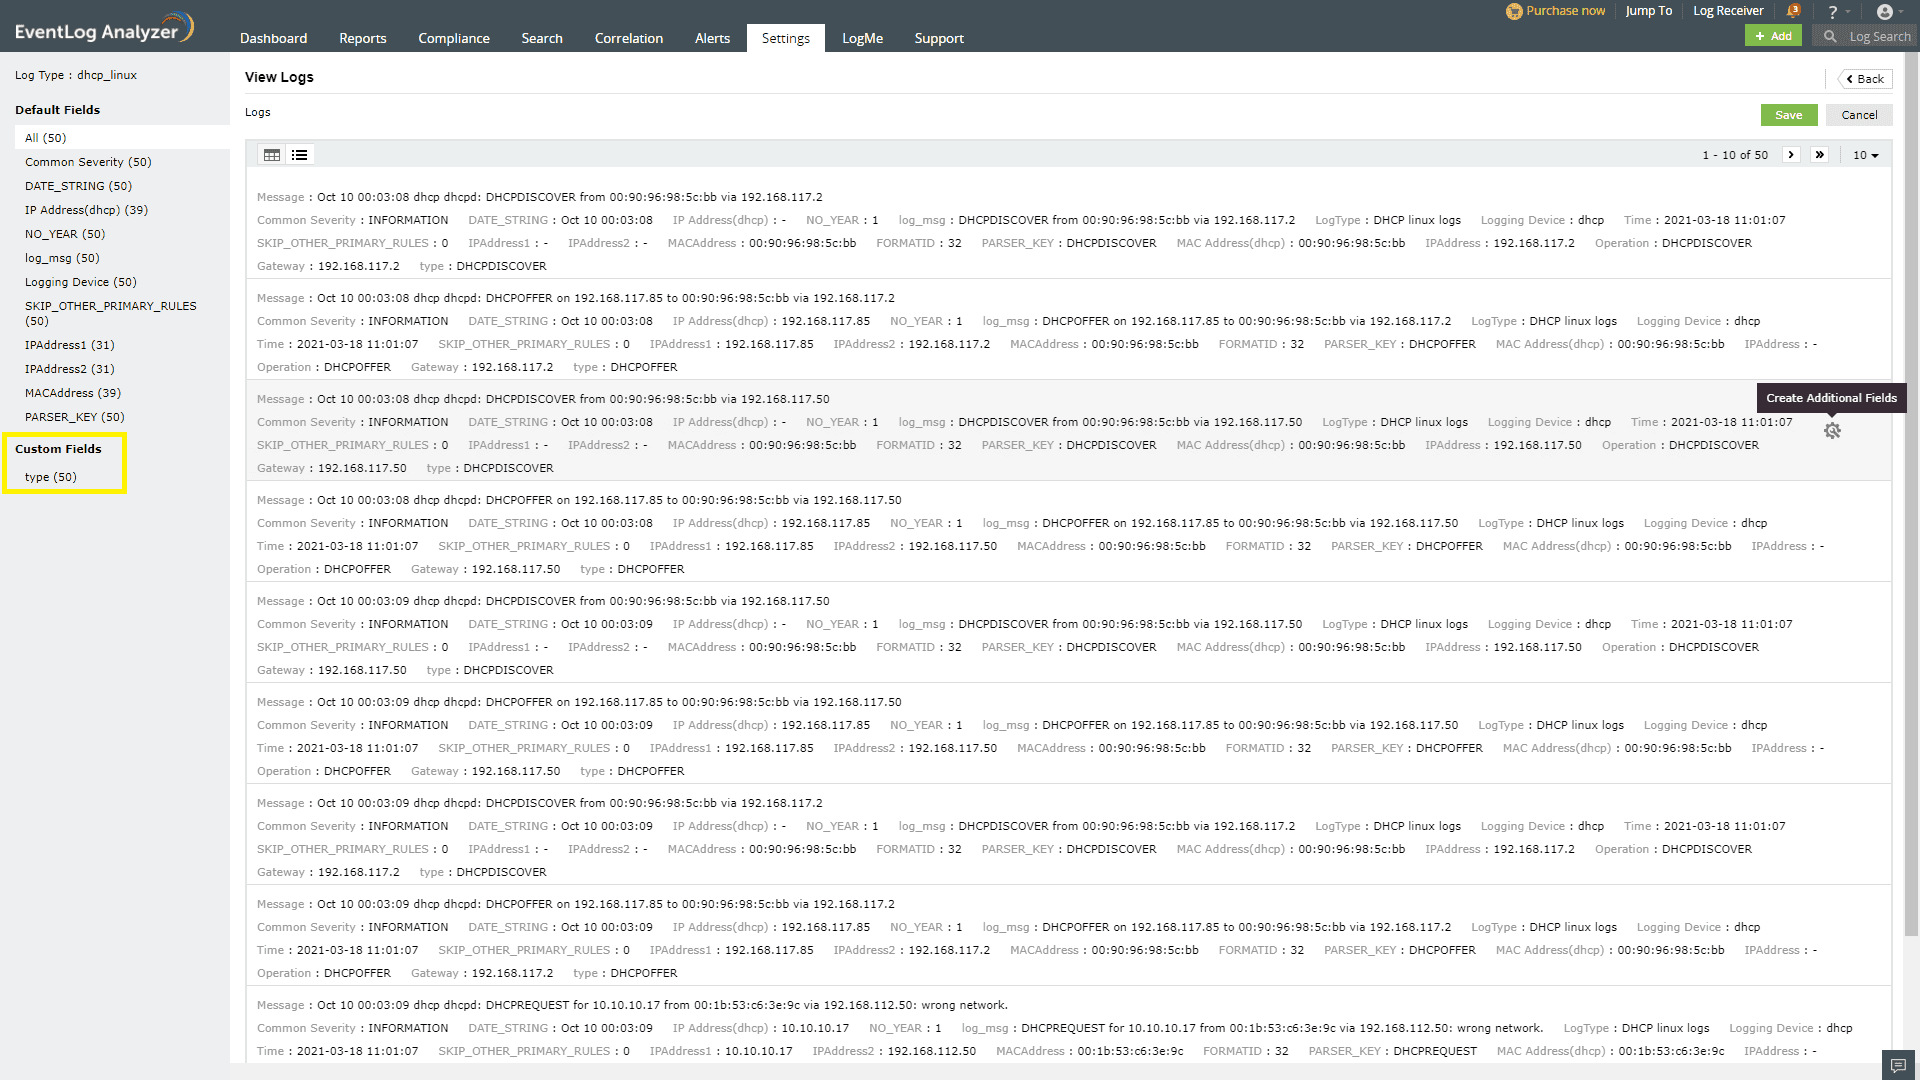
- You can see the created custom fields on the left pane.
- Finally, click Save.


