DNS Reporter Tool
DNS Reporter is a powerful tool designed to simplify and ensure the proper configuration of your DNS server, providing information related to your network's DNS infrastructure. You can view the details of the available DNS records, their corresponding record types, IP addresses, and the servers' service details simply by entering the Domain Name.
Why DNS Reporter is the perfect tool for you
- It provides instant insight into your organization’s DNS environment and the various DNS records available in it.
- It helps you get rid of lengthy and elaborate command-line tools to query DNS-related information.
- It's simple, it saves time, and it comes in handy with the Single Window ~ Triple Tab dashboard.
- This tool is a real task saver for IT administrators, as it returns DNS data with a single click of your mouse.
- This free tool extracts information about DNS records in a network and presents it in a user-friendly interface.
How to use the DNS Reporter tool
- Ensure that the DNS Manager snap-in has been created in your machine. Use the following steps:
- Click the Start button and search for Run.
- Open the Microsoft Management Console by typing mmc in the text box.
- In the Console, click File, then select Add/Remove Snap-in.
- In the Available Snap-in column, click DNS, then click the Add button. Click OK to continue.
- Perform the following steps to ensure that zone transfer is allowed in the domain name:
- Open the DNS Manager snap-in.
- Expand the DNS by clicking the (+) sign to open the sub-folder view.
- Expand Forward Lookup Zones and identify the domain that requires reporting.
- Right-click the domain and select Properties.
- Go to the Zone Transfer tab and check Allow Zone Transfer > To any server.
How to use the DNS Reporter tool
- Click DNS Reporter from the ADManager Plus Free Tools console.
- In the DNS Reporter window, enter the domain name in the specified text box for which you have already enabled zone transfer.
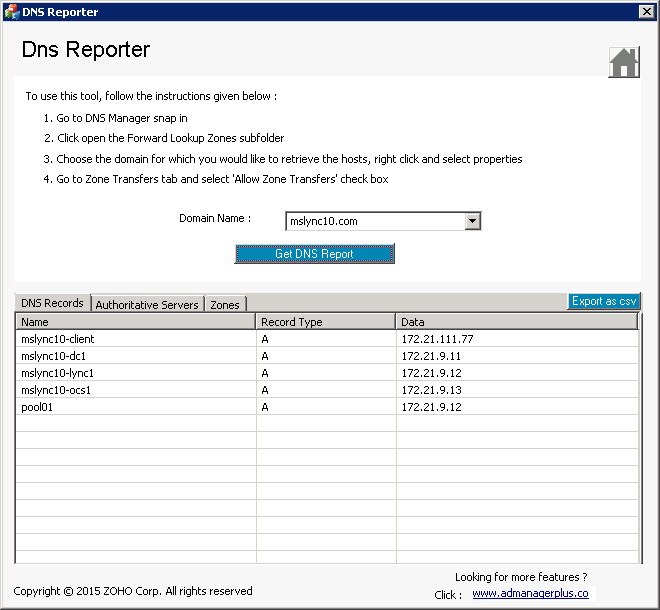
- Click the Get DNS Report button. The results will be displayed in three tabs:
- DNS Records: Displays name server records, record types, and IP addresses of the host
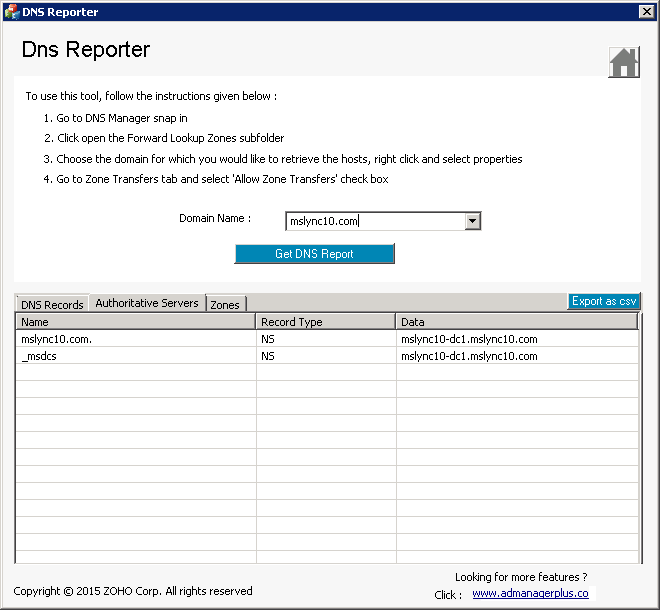
- Authoritative Servers: Shows details of authoritative servers in a zone
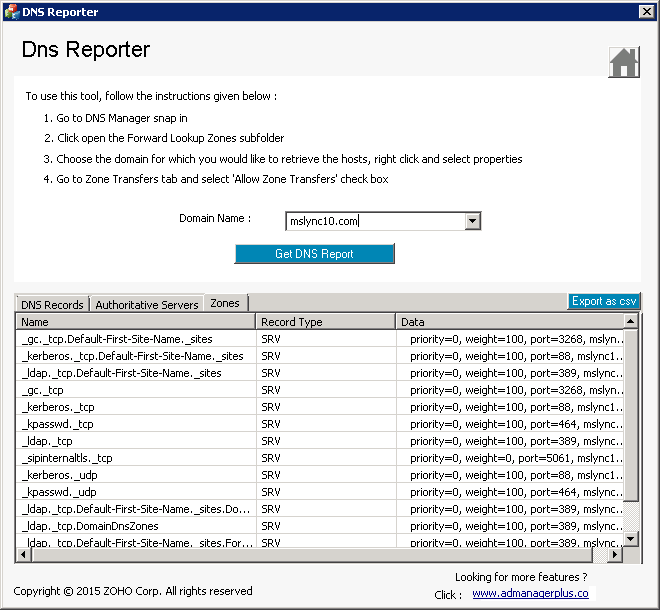
- Zones: Retrieves service records and specifies the server offering services
- DNS Records: Displays name server records, record types, and IP addresses of the host
- Click the Export as CSV button to export the results in a CSV file.
The data reported by this tool provides a clear understanding of your organization’s DNS environment. The organized presentation of the data allows you to easily identify accurate details about the DNS services, verify their correctness, and ensure smooth operations within your organization's IT infrastructure.
Track your domain's DNS configuration changes and back them up for easy restoration in case of a disaster. Try RecoveryManager Plus.