Monitoring supernets with OpUtils' IP Address Manager
Creating a more simpler view of your network, you can use supernets with OpUtils to better organize your IP addresses, and efficiently monitor them with a precise tree view of your network addresses.
Creating supernets with OpUtils
To start monitoring supernets with OpUtils' IP Address Manager, add the supernets by following the steps given below.
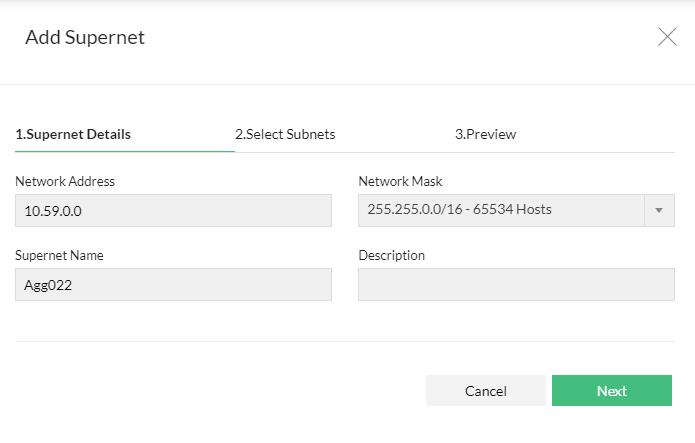
- Under IP Address Manager, click on Add and select the Add Supernet option.
- Under Supernet Details, specify the network address, mask, and supernet name.

- If needed, add a description about the supernet in the respective field under Supernet Details.
- Click on Next, which takes you to the Select Subnets tab.

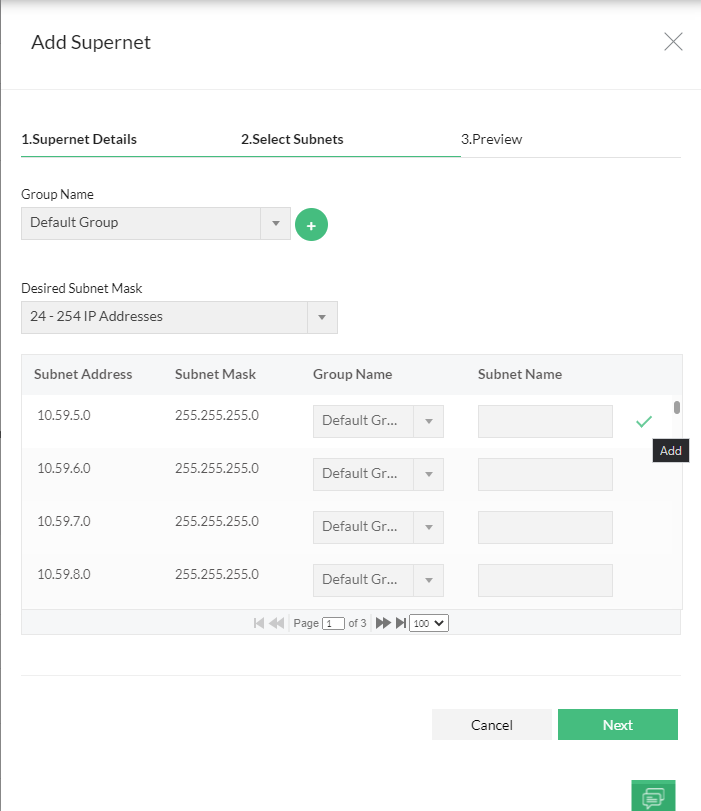
- In the Select Subnets tab, under Group Name, select or add a new group under which you want to add the subnet.
- Select the desired Subnet Mask from the dropdown.
- Select the subnets to be associated with the supernet. Click on Next.
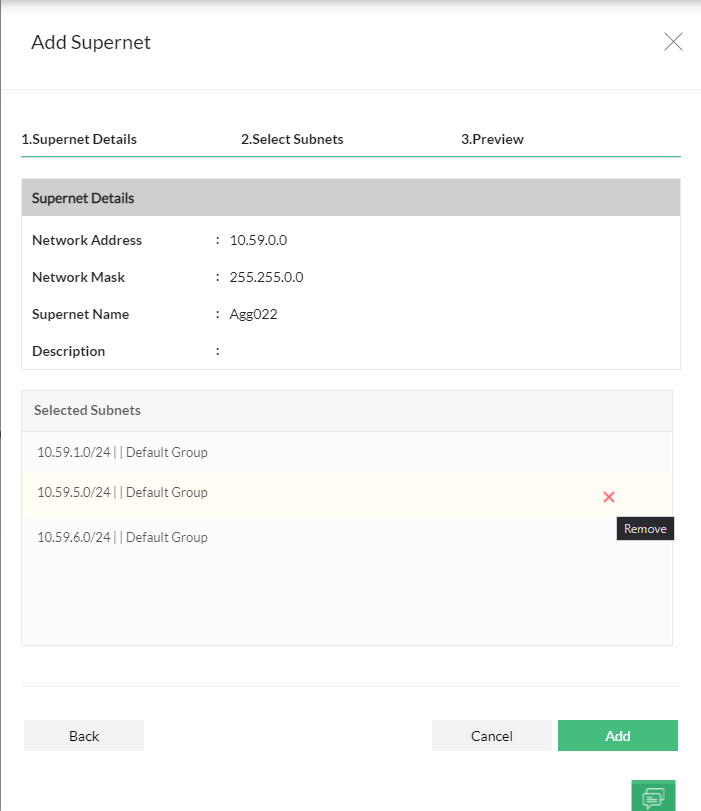
- In the Previewtab, check the details of the new supernet.
- Note: You can remove the subnets selected in the Select Subnets tab, by clicking the 'X' icon next to the subnet, in the Preview tab.

- Note: You can remove the subnets selected in the Select Subnets tab, by clicking the 'X' icon next to the subnet, in the Preview tab.
- Click on Add.
Note:
- Once a supernet is created, newly added subnets that are in the range of that supernet, are automatically associated to the supernet.
- Supernets will be displayed under the parent group, and will not be associated with any other group.
- When a supernet is deleted the subnets under the supernet will not be deleted.
Editing a supernet
You can edit the name and description of the supernet by following the steps given below.
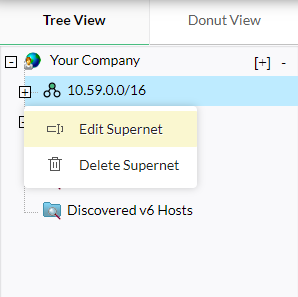
- In the Tree View under IP Address Manager, right click on the supernet to be edited.
- Select the Edit Supernet option.

- Specify the new name and description of the supernet.
- Clicking on Save, saves the changes mad e to the supernet
Thank you for your feedback!