IP Request Tool
OpUtils users can request IP addresses through the built-in IP Request tool.
IP Request tool for Operators
OpUtils users with Operator role can raise IP requests right from their IP Address Manager Module.
To create an IP request,
- Go to the IP Address Manager module and click on the New IP Request button at the top right corner.
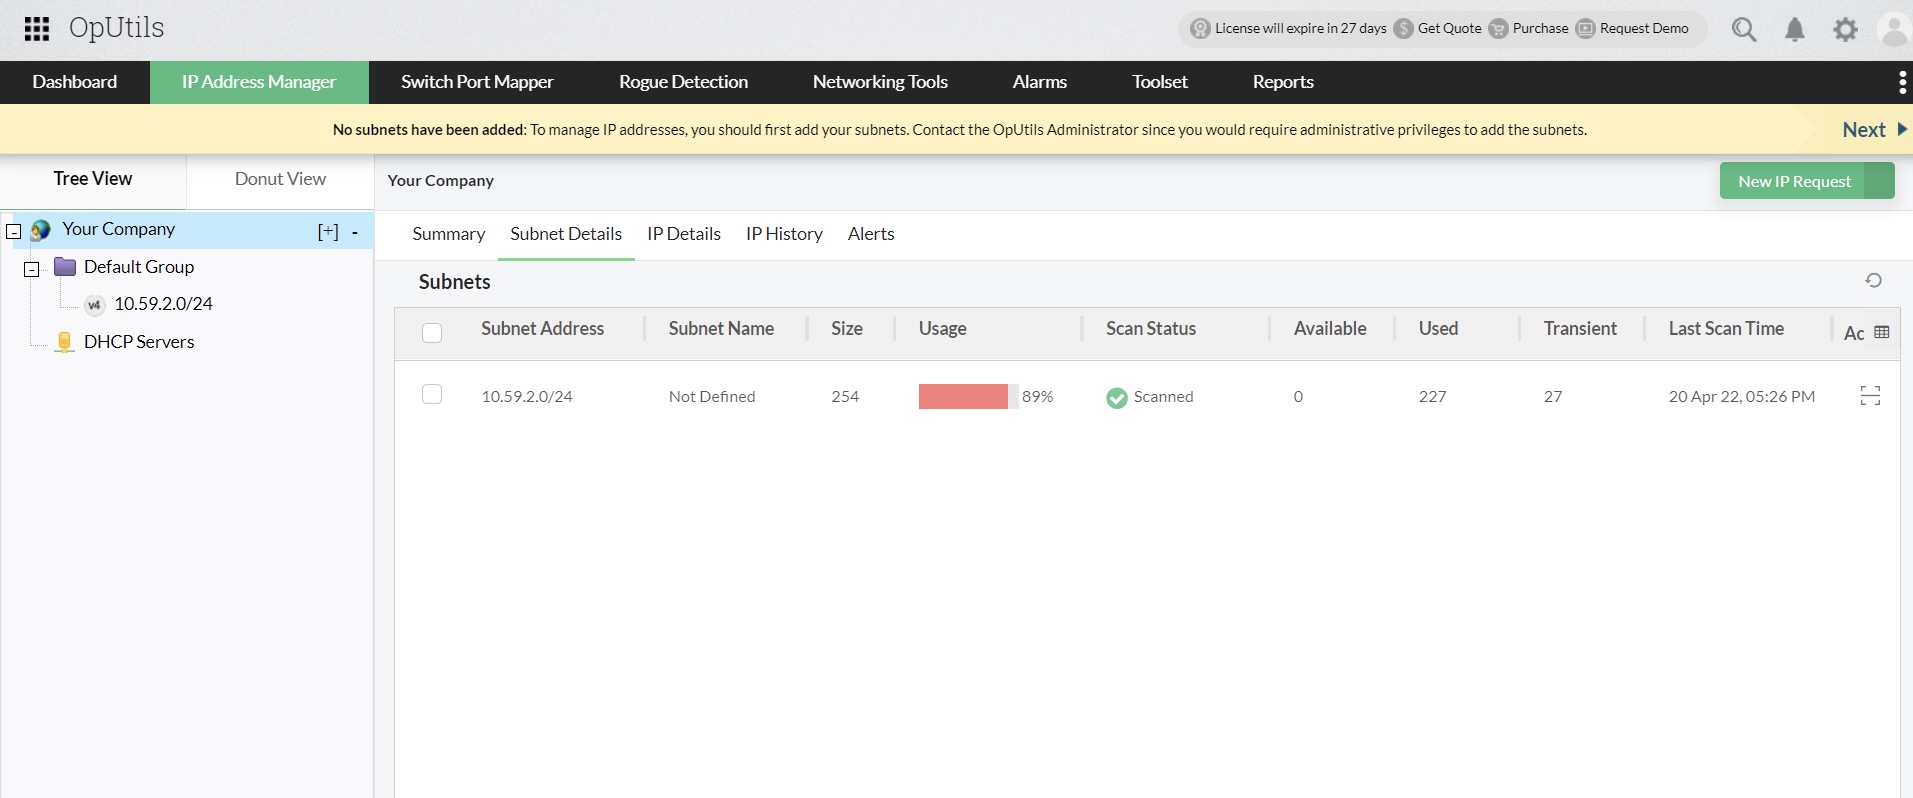
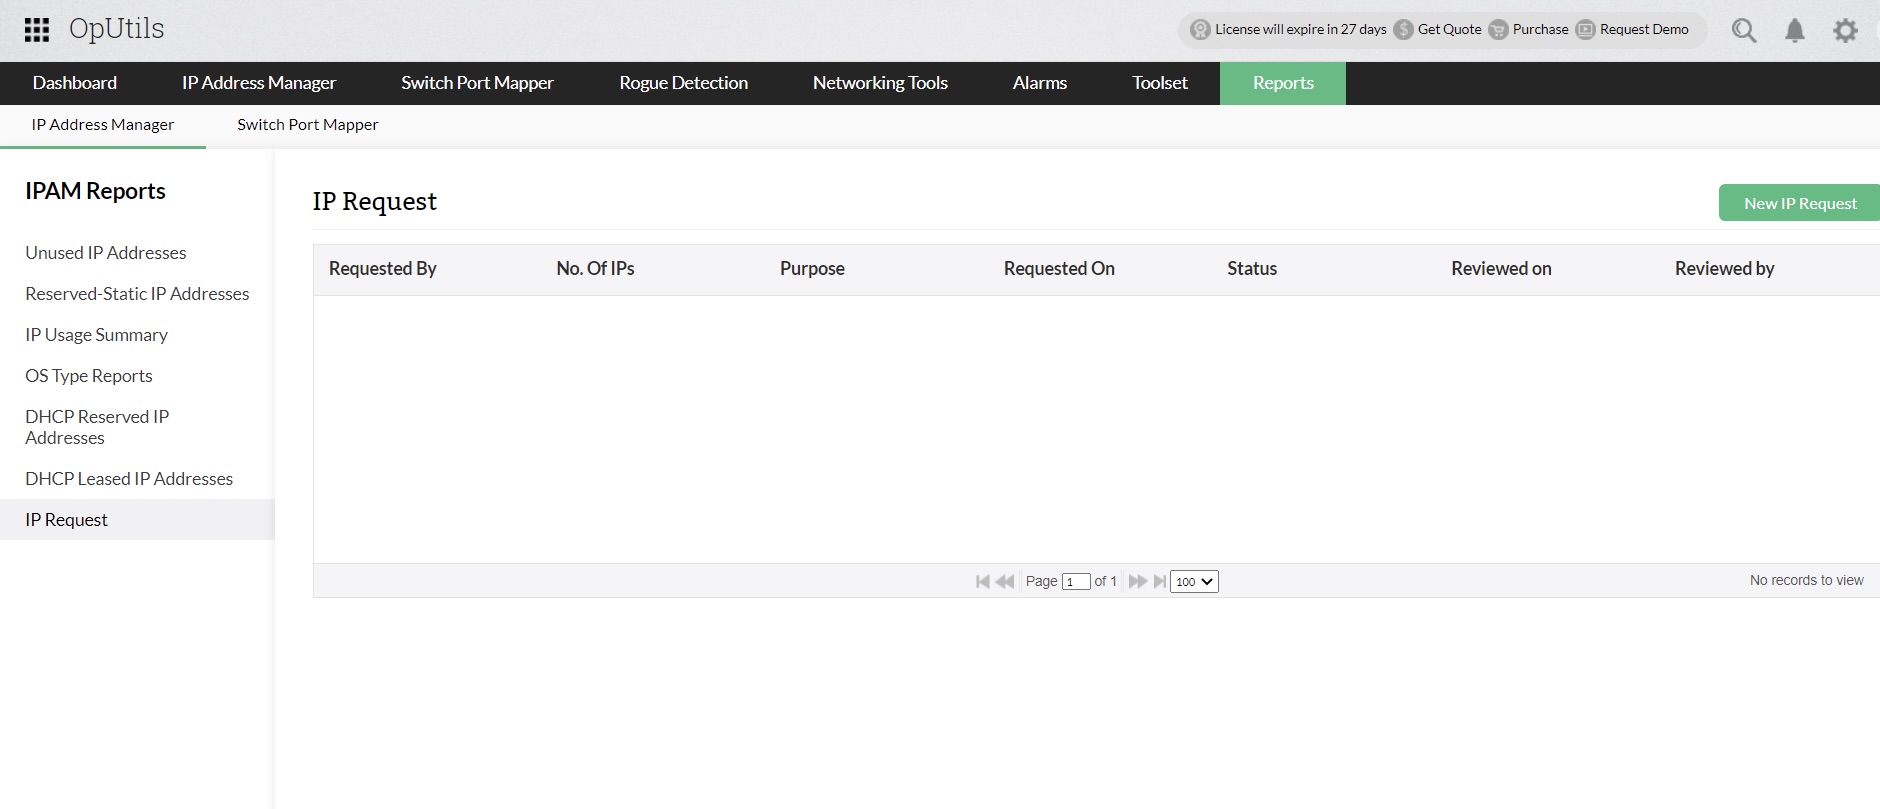
- In the IP Request tab that opens, click on New IP Request.
- Specify the required No. Of IPs, the Purpose of the IP request, your Location, and Department in the respective input fields.
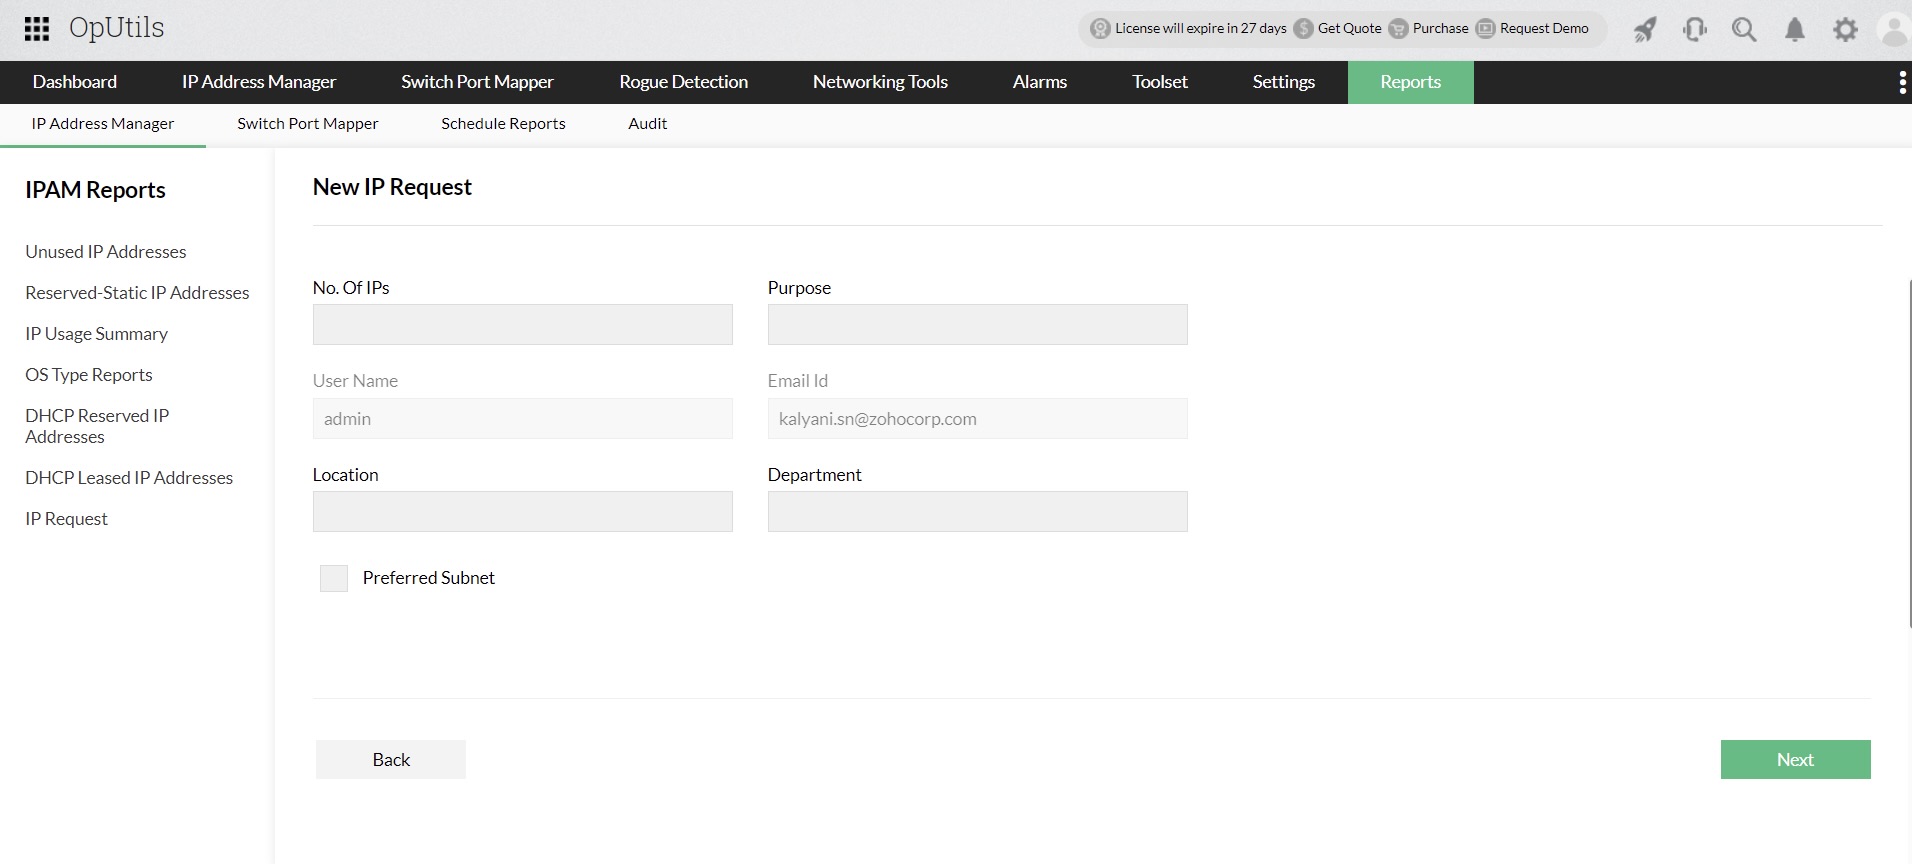
Note: User Name and Email fields are filled by default. - Now, select the Preferred Subnet check box to view the list of subnets.
Note: Operators can also choose not to specify the required subnet. In this case, administrators can allocate IPs from subnets that both the administrator and operator have access to. - Select the required subnet and select all the desired IPs by clicking on the IPs' checkbox.
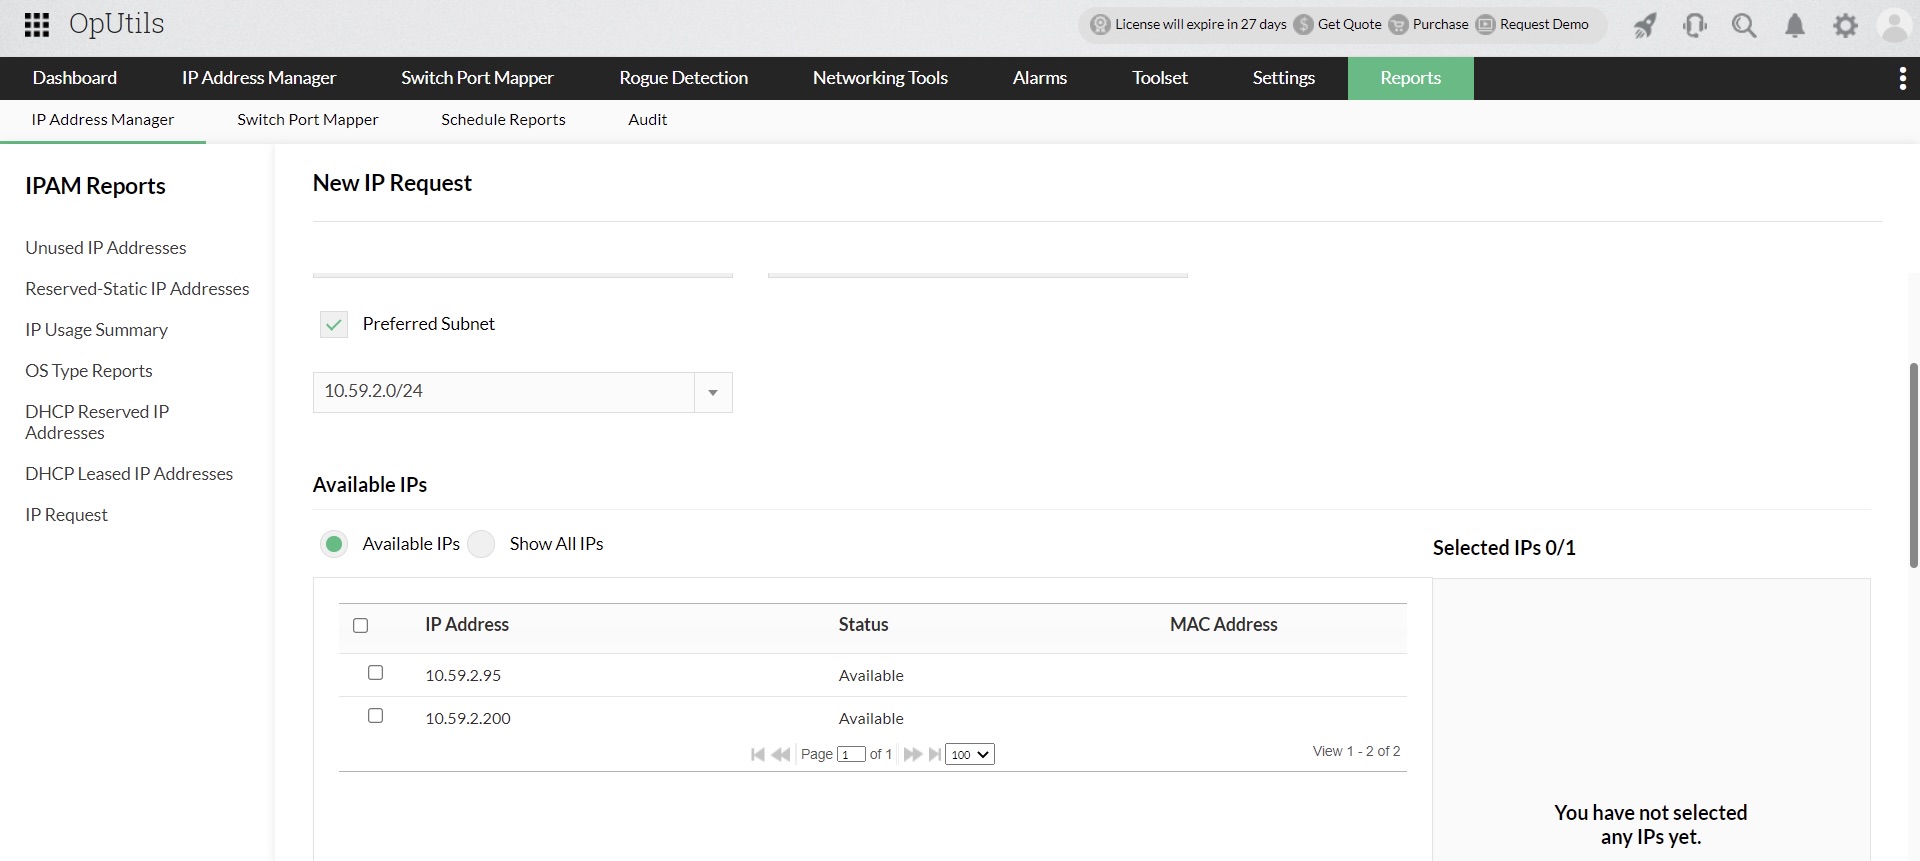
- Review the IPs selected for IP request in the Selected IPs panel and click on Submit.
Your IP request will now be created and notified to your Administrators.
To view the status of Operator's IP request,
Operators can also view the status of their IP request by following the steps below,
- Click on the Reports tab.
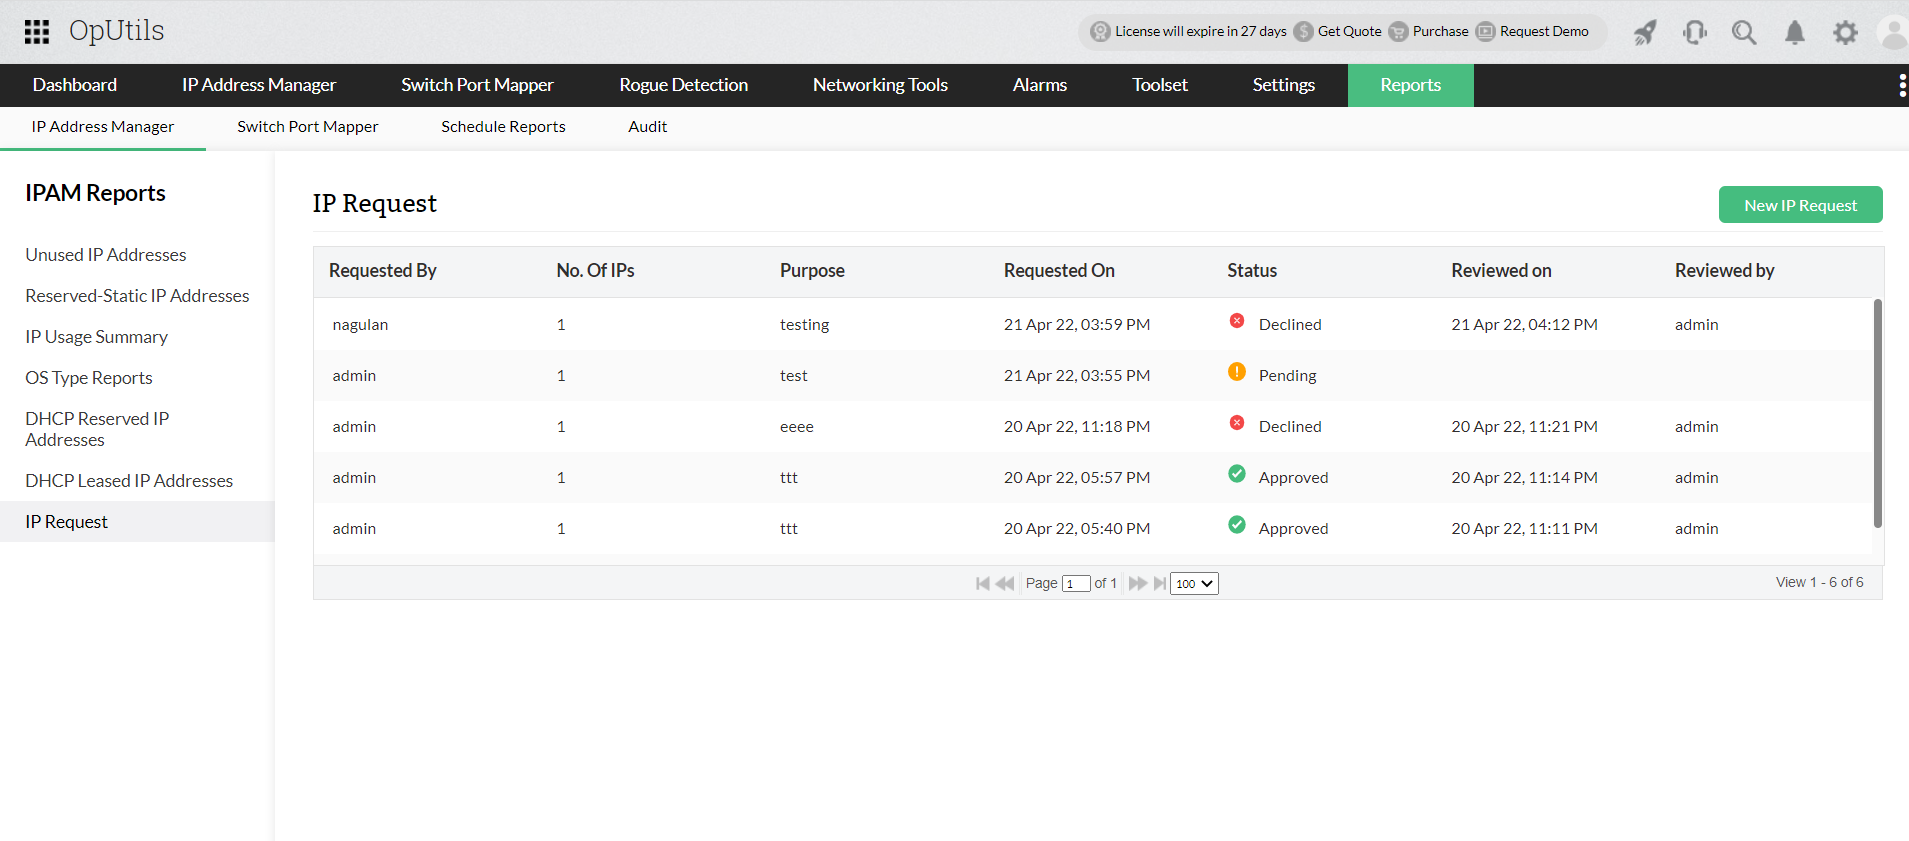
- Under IPAM Reports go to IP Request.
- OpUtils displays to you a list of your IP requests and its status such as Pending, Approved, or Denied.
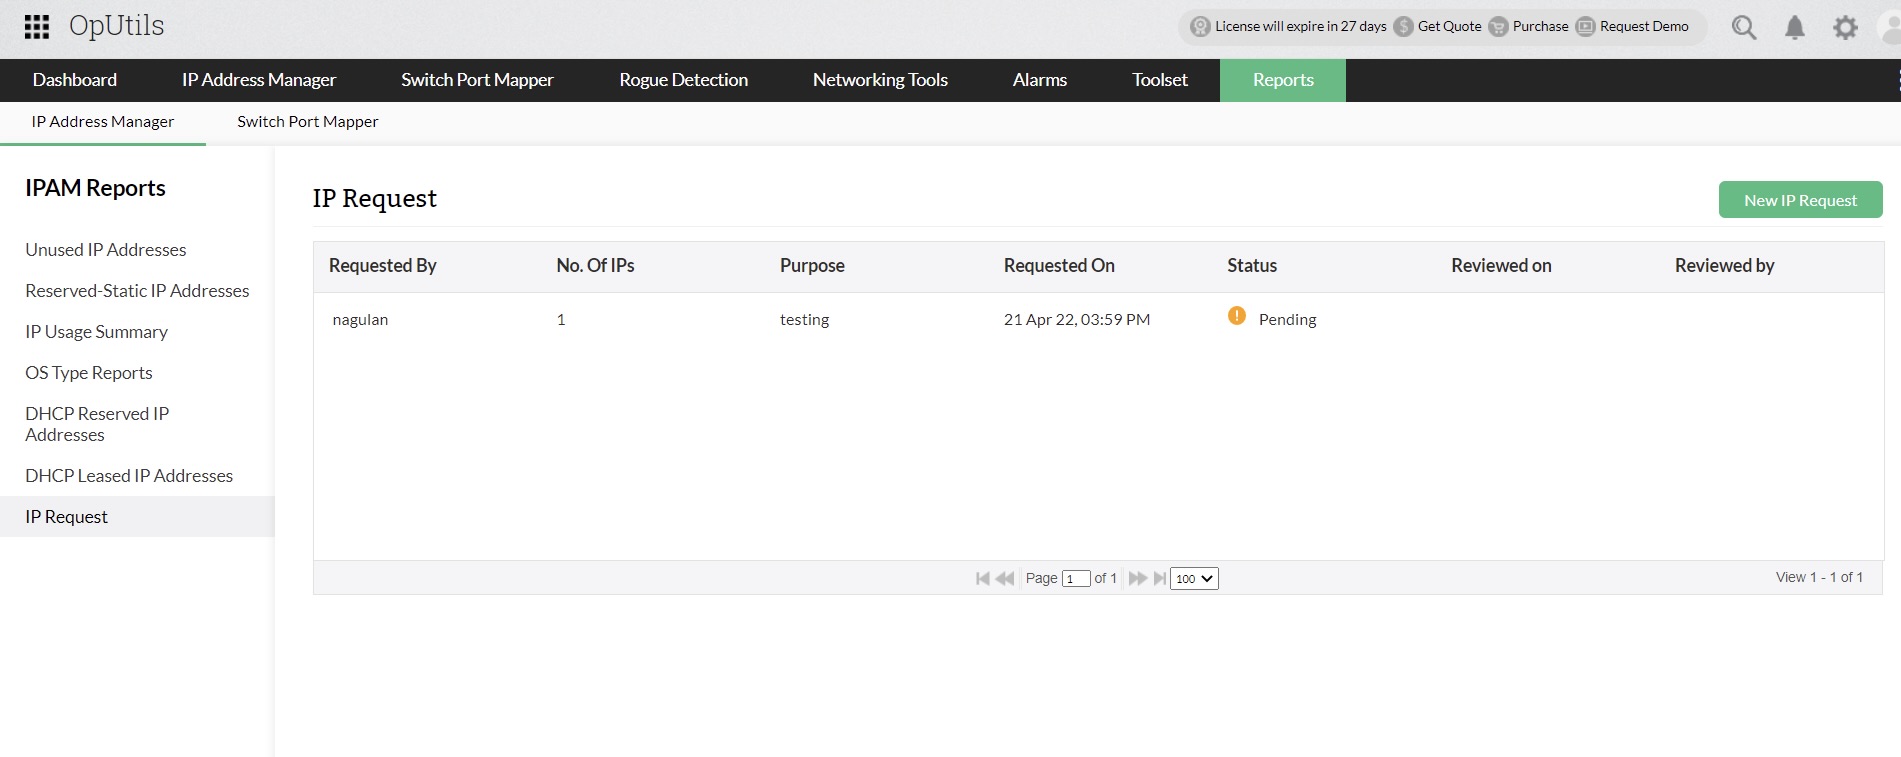
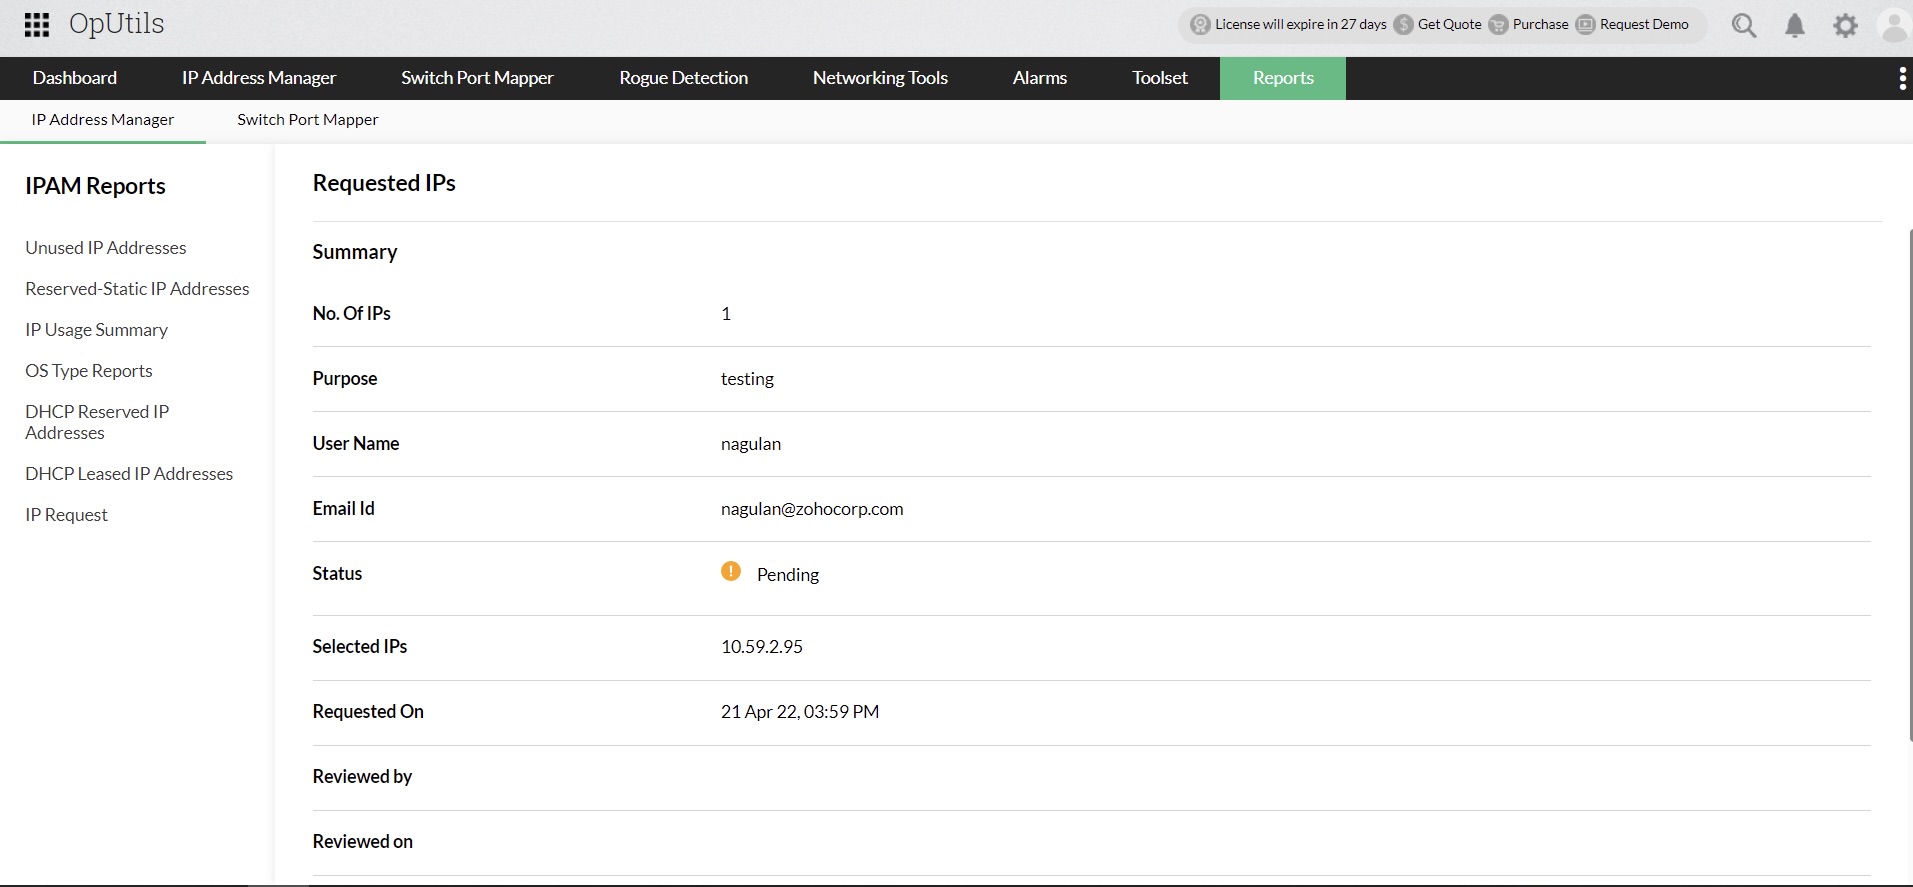
- To view the request summary which includes details such as the number of IPs requested, and its subnet, click on the required IP request in the list.
IP Request tool for Administrators
Administrators can also create, view, edit, approve, or deny IP requests from other OpUtils users right from their OpUtils consoles.
To create an IP request,
Administrators are required to follow a similar process as that of Operators to create an IP request through their OpUtils console.
- In the IP Address Manager module, under Settings, click on the New IP Request option.
- In the IP Request tab that opens, click on New IP Request.
- Specify the required No. Of IPs, the Purpose of the IP request, your Location, and Department in the respective input fields.
Note: User Name and Email fields are filled by default. - Now, select the Preferred Subnet check box to view the list of subnets.
- Select the required subnet and select all the desired IPs by clicking on the IPs' checkbox.
- Review the IPs selected for IP request in the Selected IPs panel and click on Submit.
Once the IP request is created all the OpUtils Administrators are notified through the OpUtils' in-console notifications (the bell icon at the top right corner of the OpUtils UI) and through the respective mail IDs.
To view and approve IP requests,
Administrators can view, edit, and approve the pending IP request for their subnets by following the steps given below,
- Go to Reports > IPAM Reports, and click on IP Request.
- In the list of IP requests displayed, click on the required IP request.
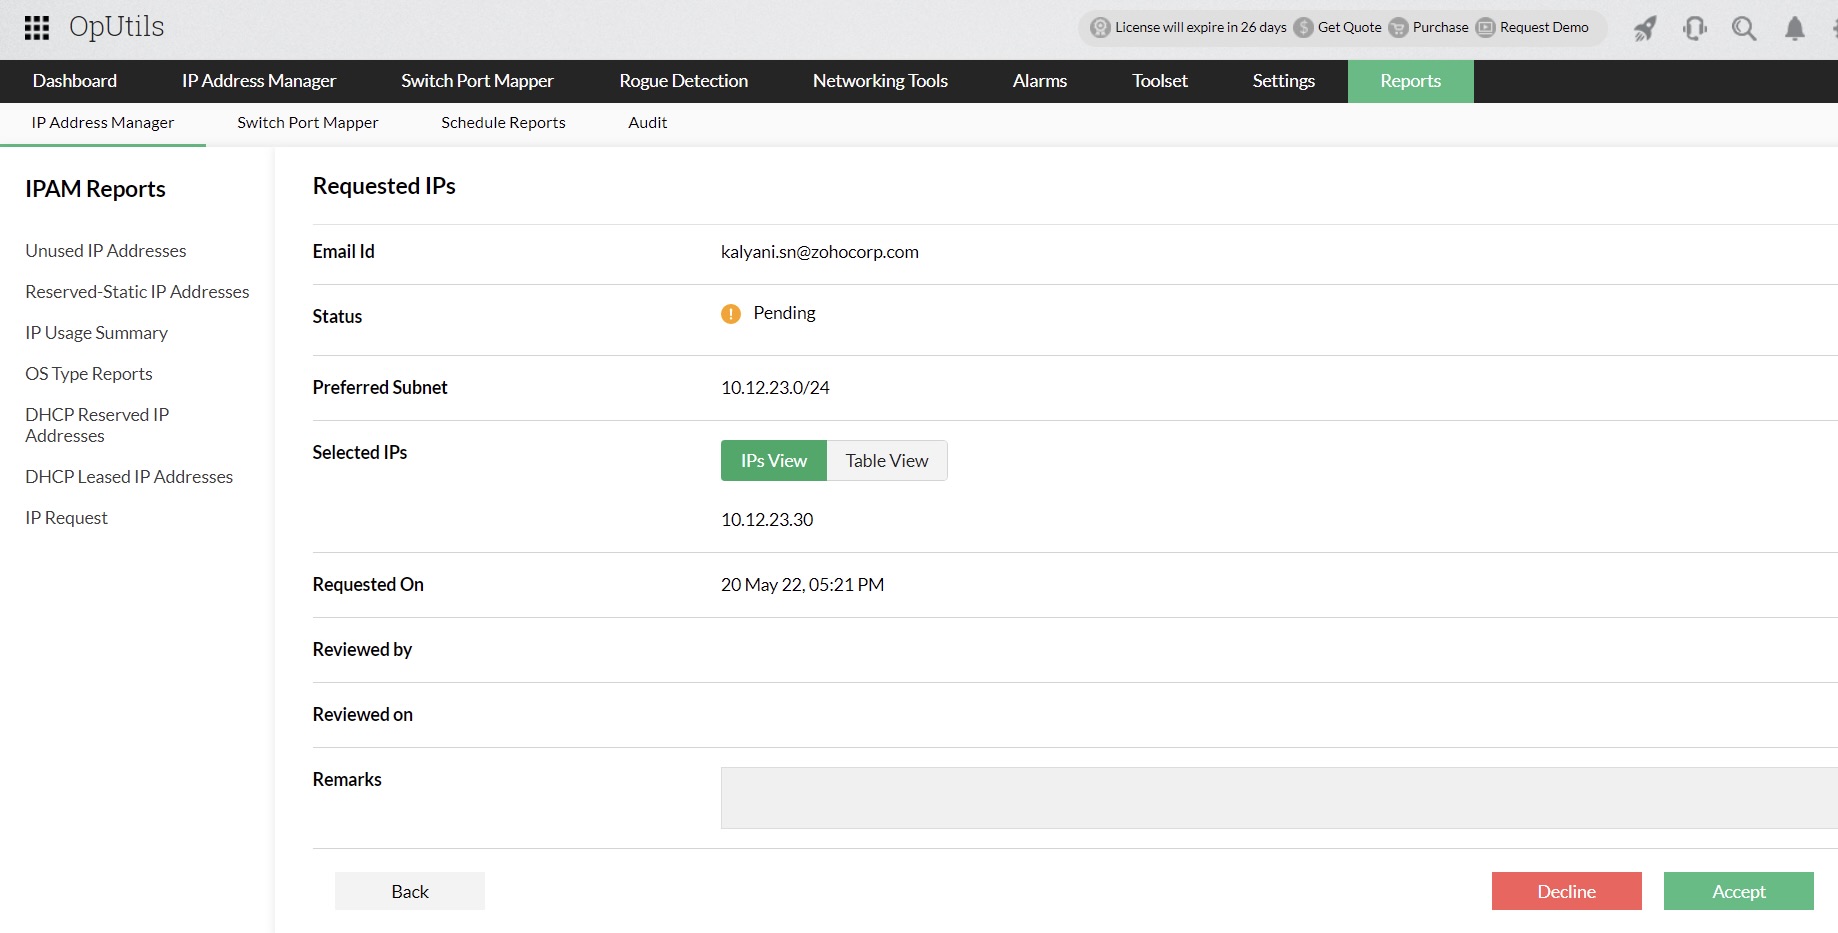
- Review the details of the IP request.
- If you simply wish to approve the IP request, click on the Approve button at the bottom right corner.
- If you wish to make changes to the IP request such as, allocating different IPs than the requested, click on the Table View button which displays to you the list of IPs and their status.
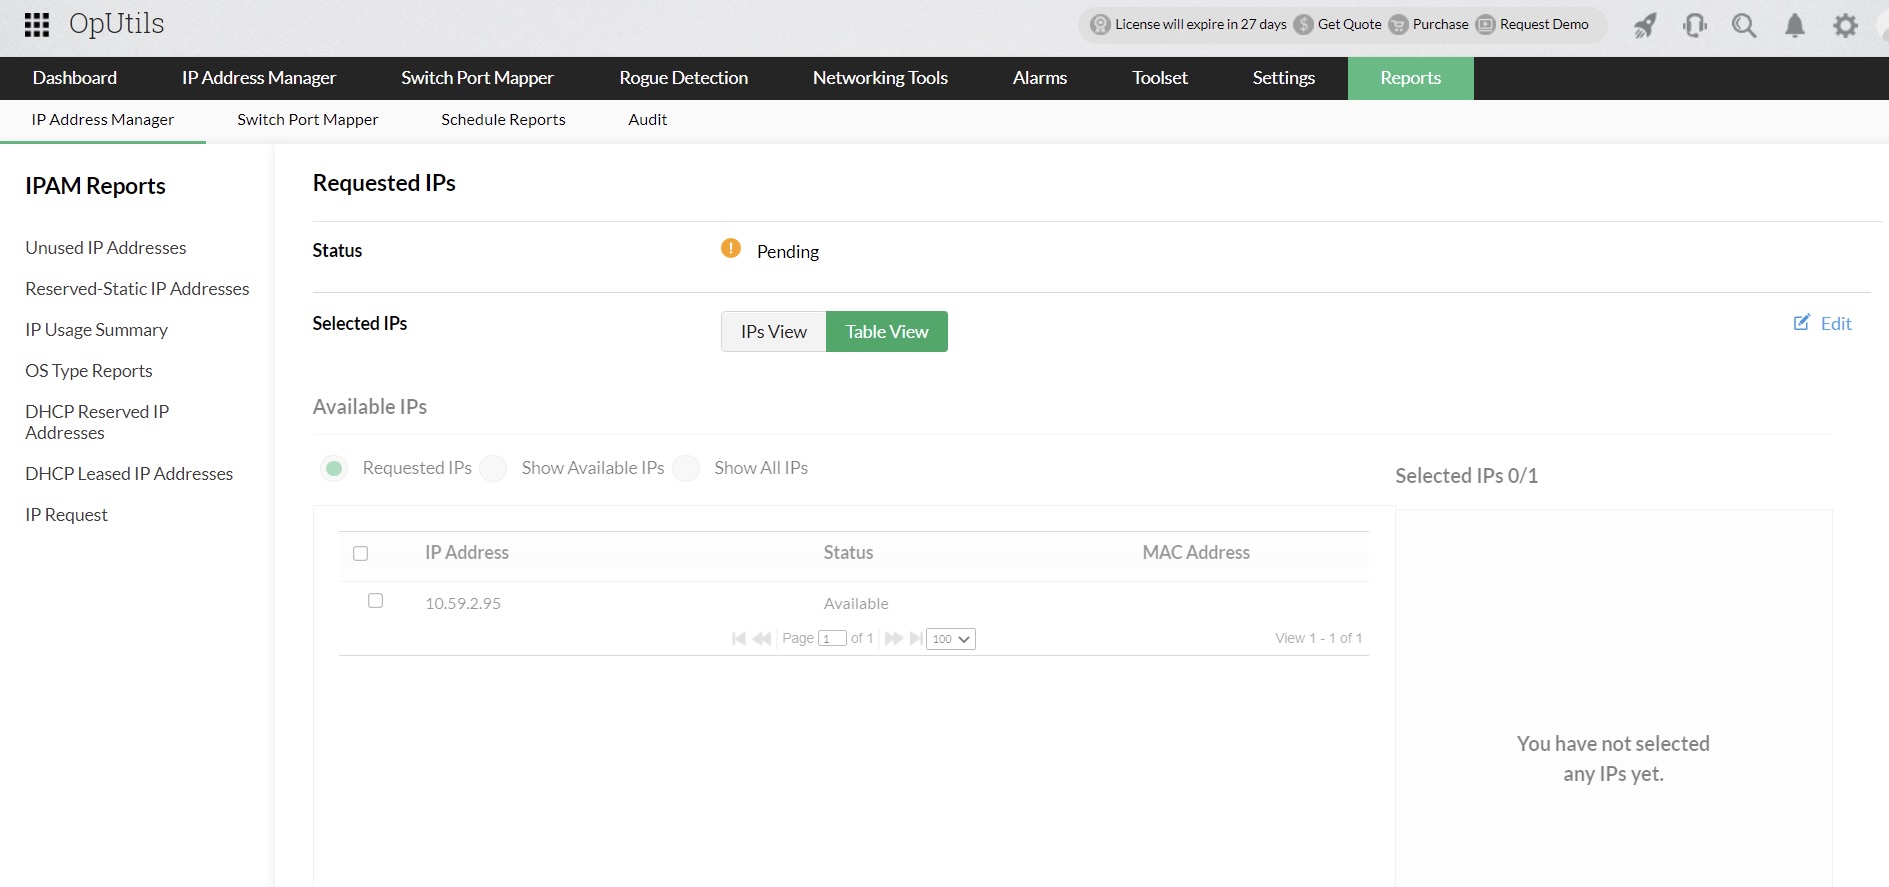
- Click on the Edit button and the select / deselect IPs as required.
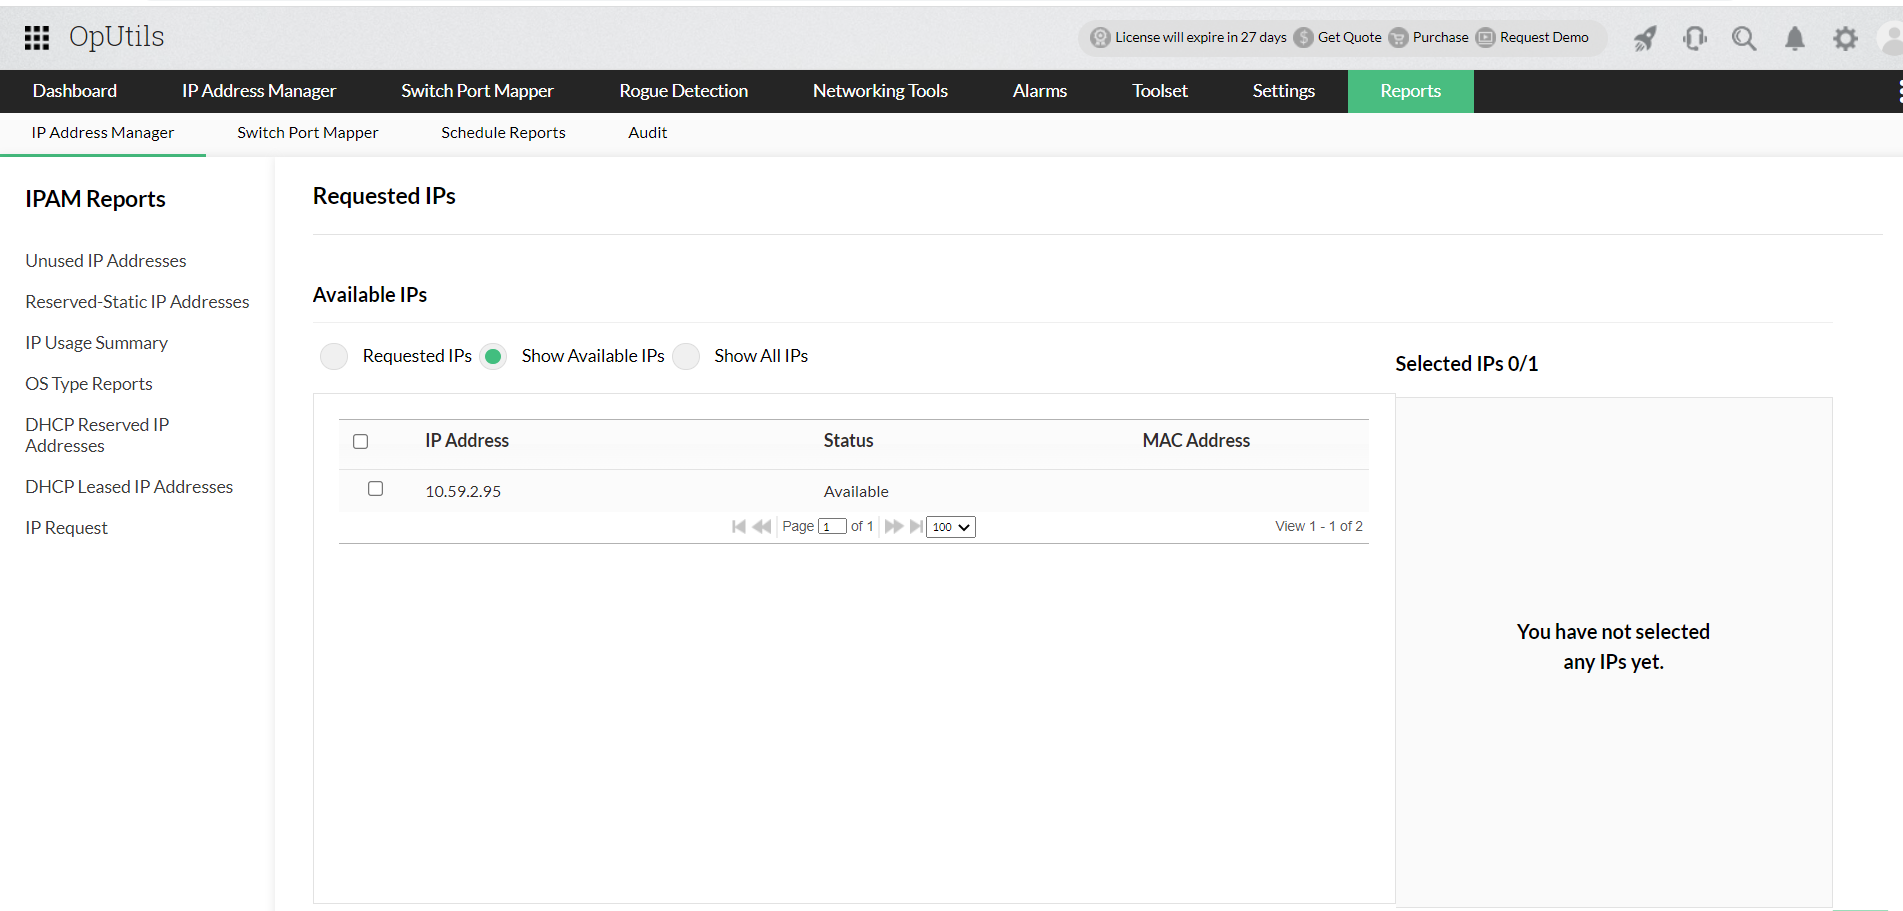
- Once the required changes are made, click on Approve.
The IP request will be approved and the Operator will be notified. Also, OpUtils updates the approved IPs' status from available to reserved.
- If you wish to make changes to the IP request such as, allocating different IPs than the requested, click on the Table View button which displays to you the list of IPs and their status.
- If due to reasons such as insufficient IPs to approve the request, Administrators can decline the IP request by clicking on the Decline button.
- If you simply wish to approve the IP request, click on the Approve button at the bottom right corner.
The same will be notified to the operator.
Thank you for your feedback!