Microsoft ended support for Windows 8.1 on January 10, 2023, ceasing security updates, feature enhancements, and technical assistance for this version. As a result, upgrading to a newer Windows version is critical to maintaining device security and compatibility.
One effective way to upgrade is by creating a system image backups of Windows 10/Windows 11 machine and deploying it to the necessary devices using imaging software. This article outlines the steps to create a system image backup and explores the various deployment options available.
The following steps will help you to download and create a Windows 10/Windows 11 ISO installation media using the media creation tool offered by Microsoft.
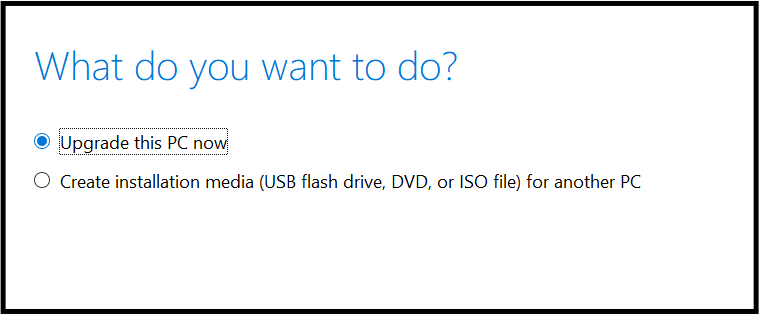
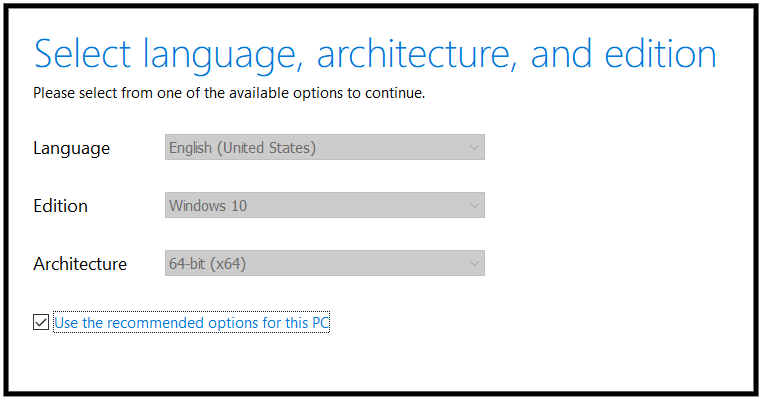
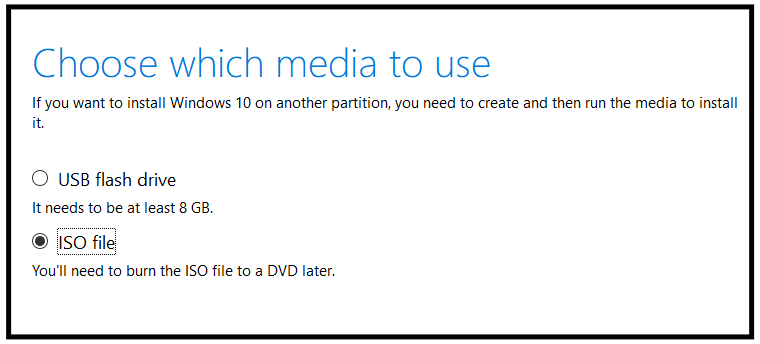
Thus, you can create a Windows 10/Windows 11 installation file that can be used to boot the target computers which can be used for deployment. However the Media Creation tool doesn't offer you the option to customize the Windows 10/Windows 11 installation according to your requirement.
Windows 10/Windows 11 image backup is a file that contains a copy of the OS and other data partitions present in the target computer's hard drive. OS Deployer allows you to create a Windows 10/Windows 11 image for deployment using USB, ISO, and PXE. This image created using a Windows image creation tool includes the applications to be installed, computer name, SID, user profiles, user accounts and much more.
You can also deploy the Windows 10/Windows 11 image to multiple computers simultaneously right from your desk. The Windows 10/Windows 11 image backup can be deployed seamlessly to users working from home outside your network and in remote offices. Also, hardware independent deployment can be performed using automatic collection of drivers.
Let us discuss how to perform Windows 10/Windows 11 imaging and deploy the Windows 10/Windows 11 images using OS Deployer.
The prerequisites for Windows 10/Windows 11 imaging process in OS Deployer involve creating 2 repositories: an image repository and a driver repository. These two repositories must be configured with a network share path to store the created Windows 10/Windows 11 images and relevant drivers in our Windows 10/Windows 11 imaging software.
Follow the steps given below to configure the image repository:
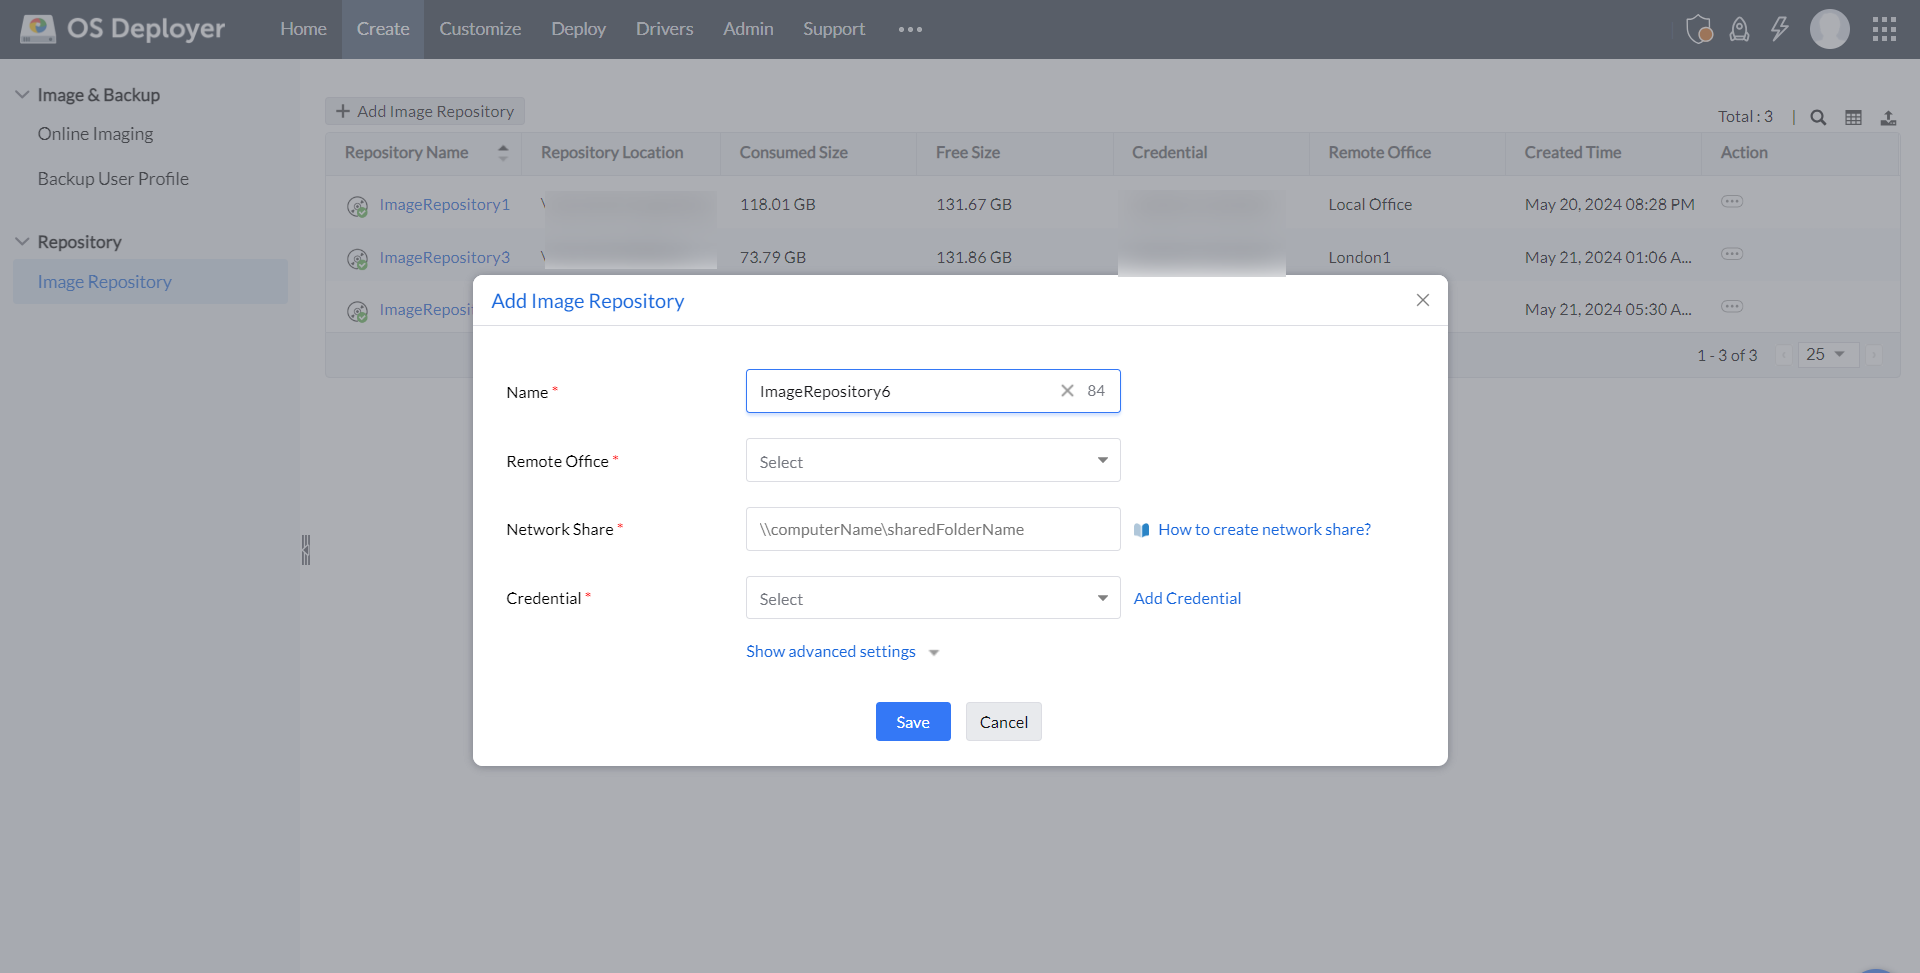
You can also configure the driver repositories using the same steps given above and continue imaging Windows machines.
Ensure that you set up the desired system with the Windows 10/Windows 11 OS and applications, before initiating the Windows 10/Windows 11 image creation process. After setting up the system, follow the steps given below to create an image using our Windows 10/Windows 11 imaging solution,
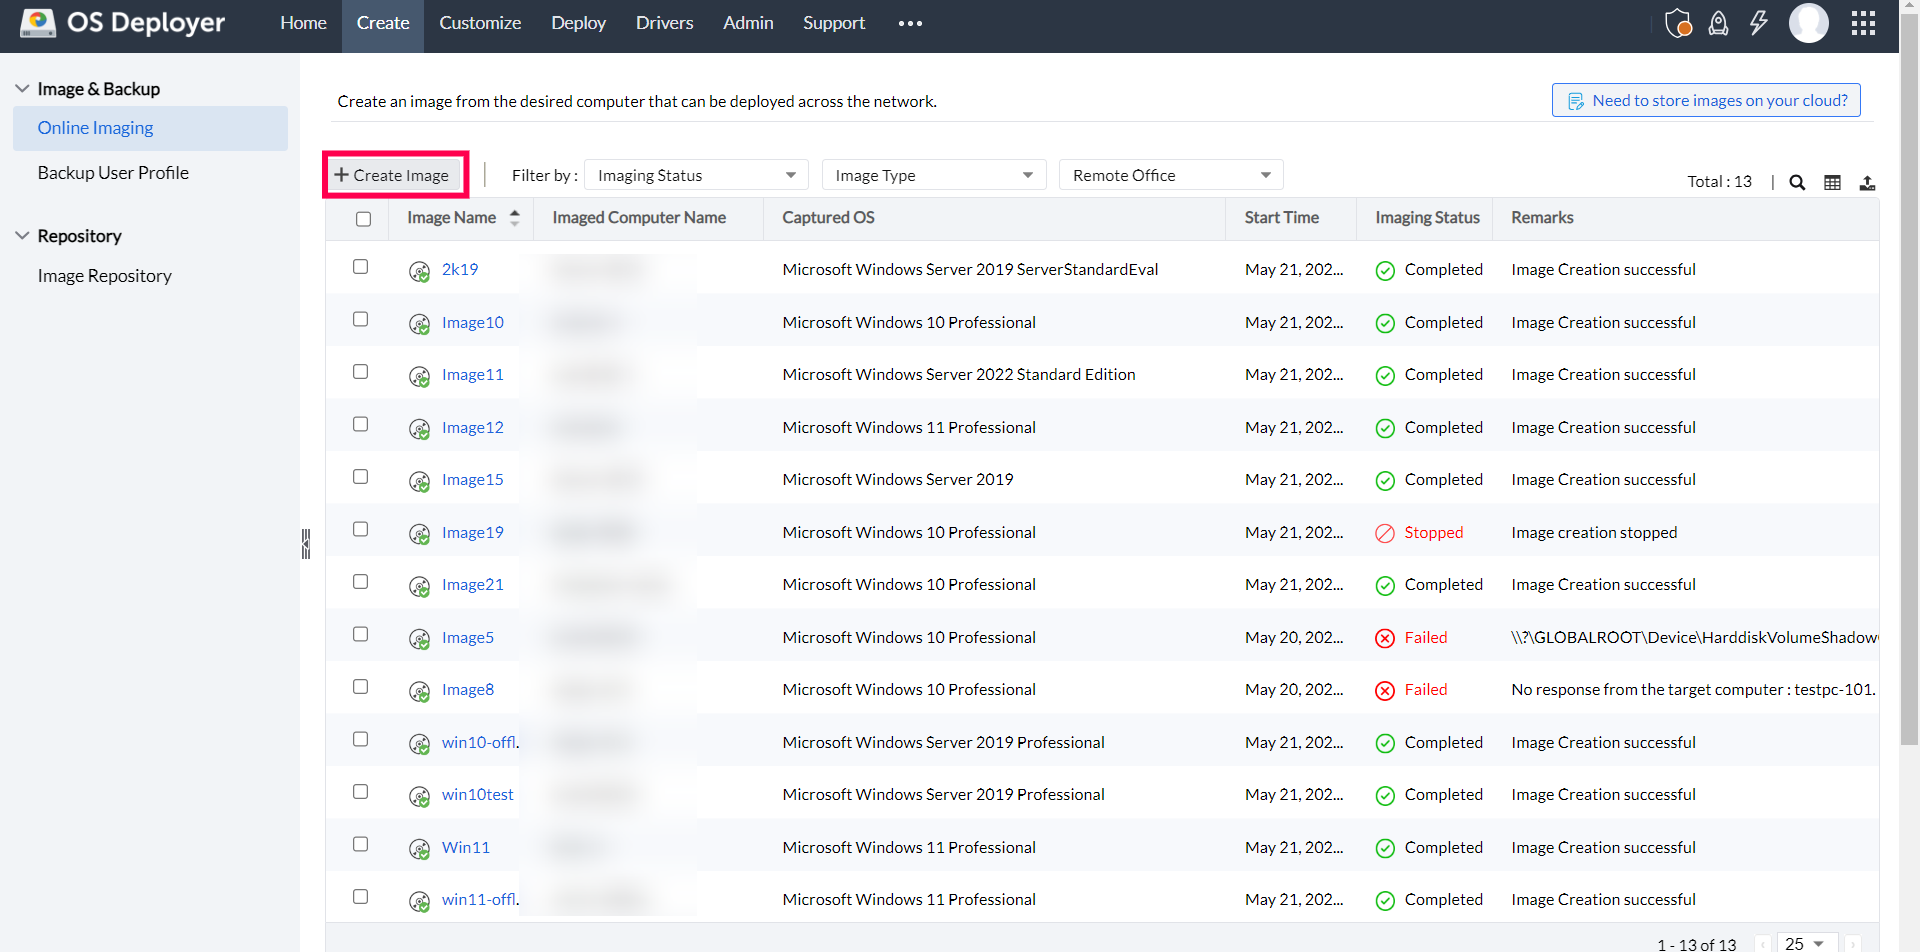
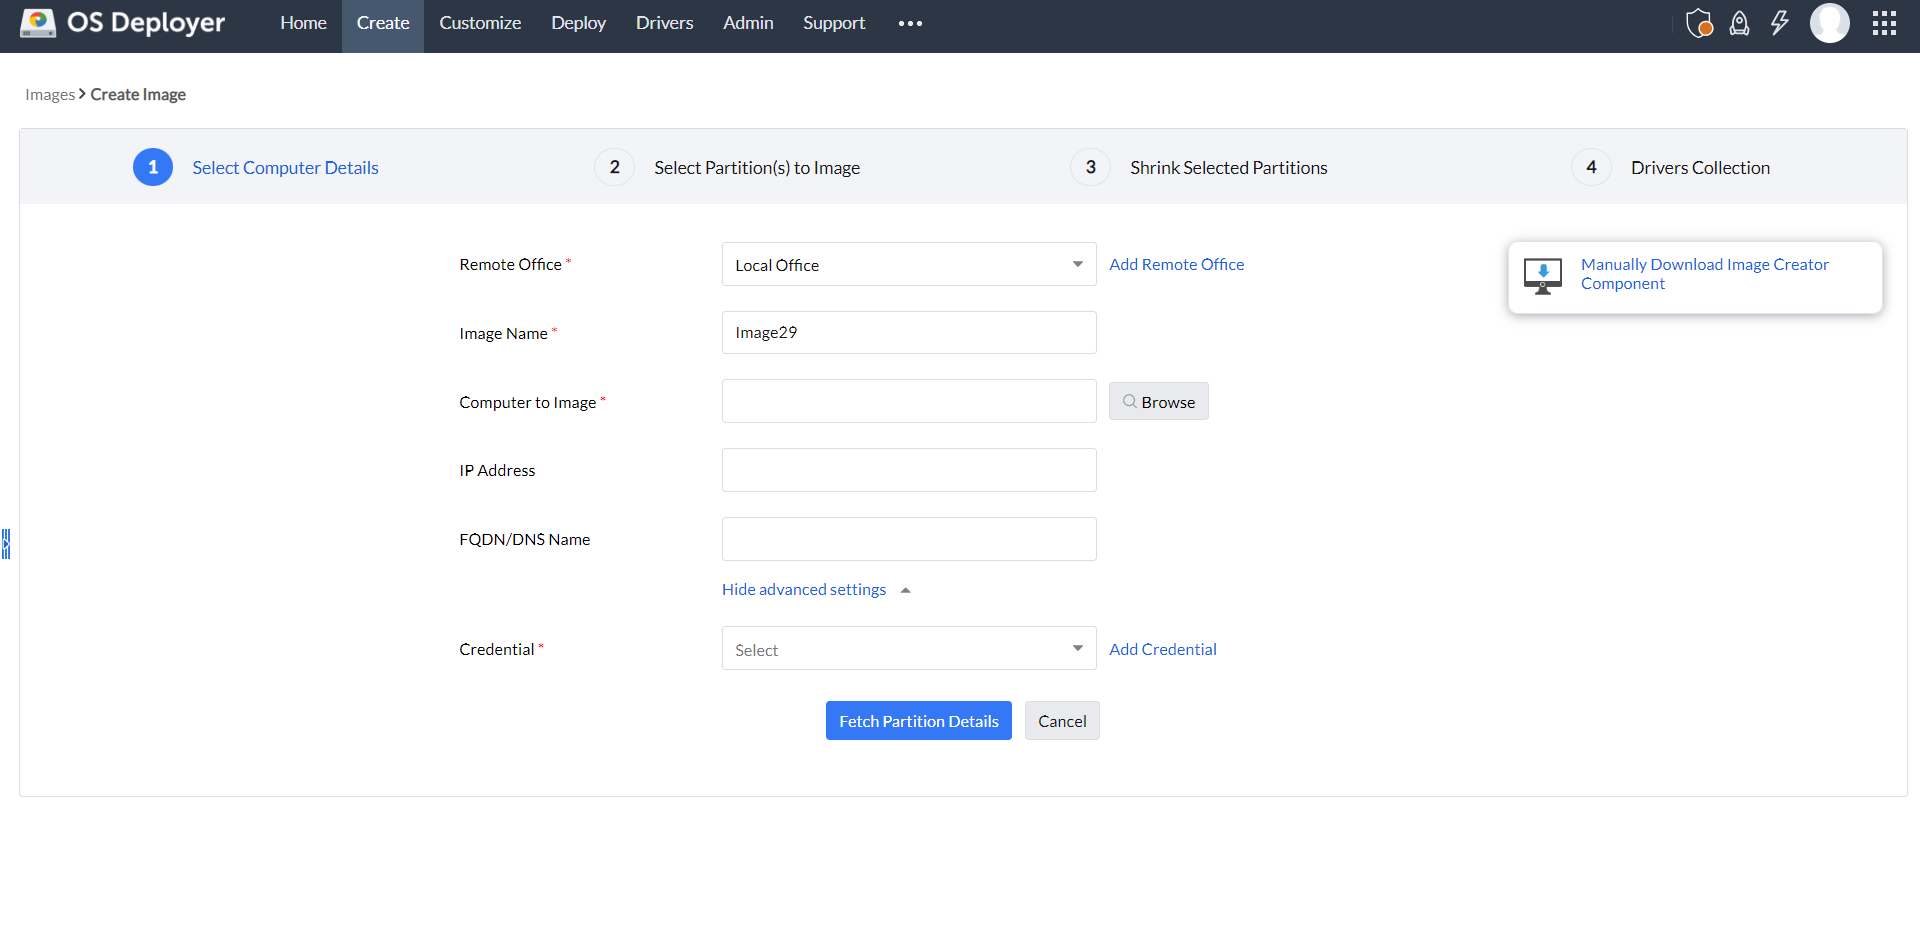
Image creator components will be now installed on the desired system to perform imaging.
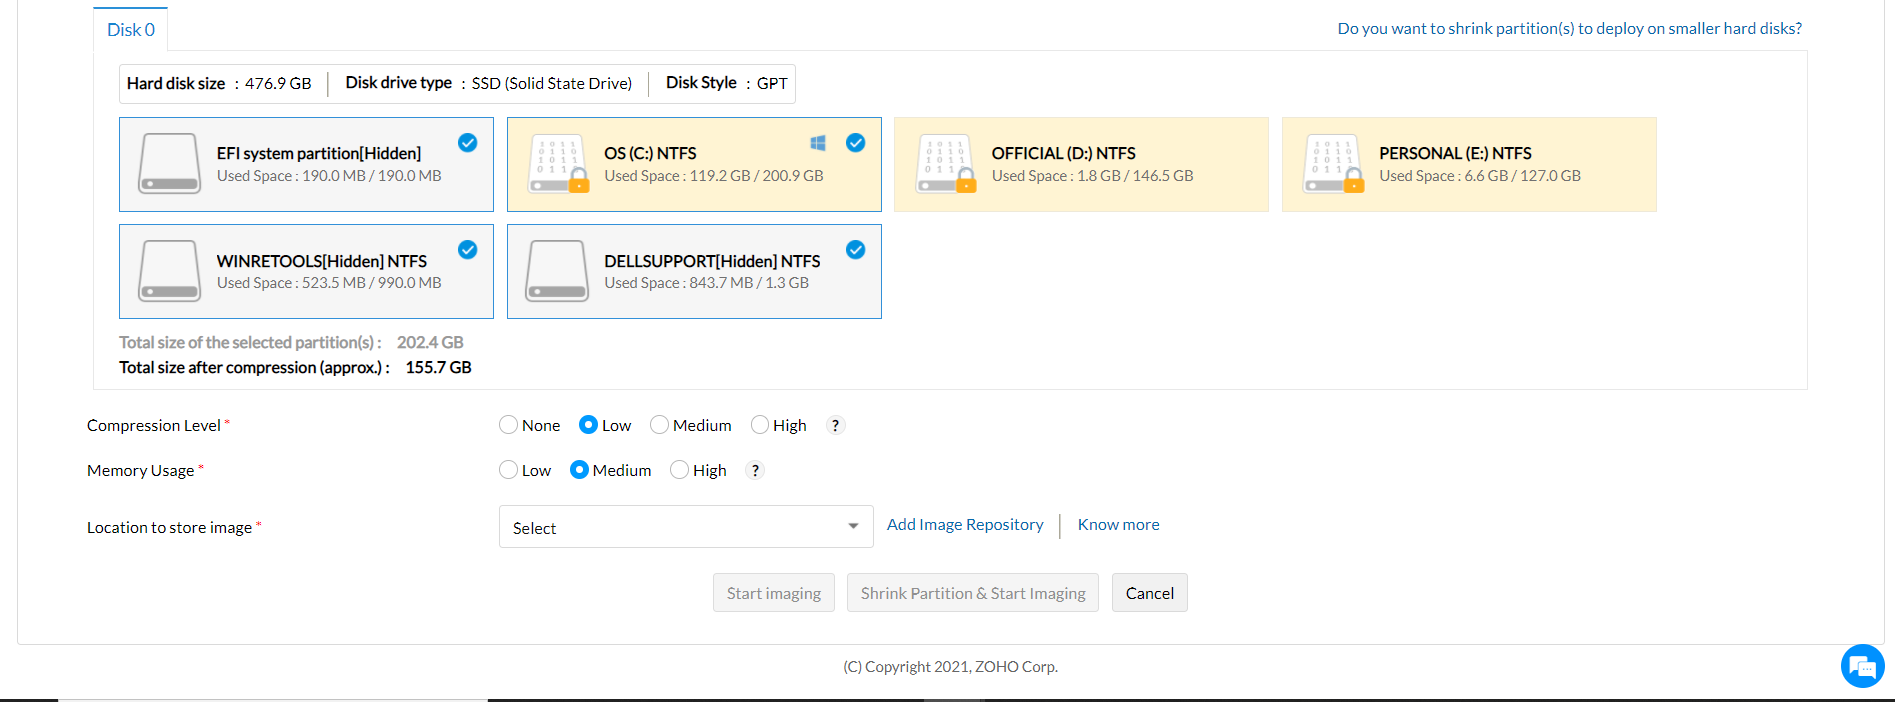
Imaging will now be started on the selected machine. If needed you can pause, stop and re-start the imaging process. The created image backups will then be stored in the selected image repository.
You have now successfully captured the image using our Windows 10/Windows 11 imaging tool. You can also perform offline imaging by creating Bootable media.
The next step in our Windows 10/Windows 11 imaging and deployment guide is to customize the image for deployment using the deployment template. Finally, let us understand the steps involved in scheduling and deploying the created Windows 10/Windows 11 image using a deployment task.
You can deploy image either by generating passcode or by using a MAC address. The MAC address option will allow you to remotely wake the computer up and deploy the created image.
You can select the deployment method to deploy the images.
In multicast deployment method the server sends the image copy to multiple computers at the same time and this prevents excess bandwidth consumption. This method is recommended when you want to deploy images to multiple computers.
In unicast deployment method the target computers reach the image repository and copies the image one by one. This method is recommended for deployment upto 5 computers.
Specify the time interval for the target computers to connect to the server. The waiting time will be initiated once you click the Deploy Now button. If you enable the Schedule Deployment option the waiting time will start at the scheduled time. During this time interval, the server will wait for the target computers to connect and the deployment will be initiated once the target computer is connected to the server.
You can schedule the time interval for deployment based on the feasible time in your organization.
Deployment task has been created successfully. Boot the computer using bootable media and initiate deployment. You can view the status of the deployment under the Deployment status tab.
You can now deploy this image using three different bootable media which are USB, ISO, or PXE. The images can also be deployed using the Standalone task or Zero-touch task.
A Windows 10/Windows 11 image file is an exact copy of a hard drive that contains the Windows 10/Windows 11 operating system, executables, drivers, and other files.
Windows 10/Windows 11 imaging is the process of creating an image of a Windows 10/Windows 11 computer that includes the OS, files, settings, and the required applications.
Prepare a machine with Windows 10/Windows 11 OS and the data to be present in the image. You can then image the prepared machine using a Windows 10/Windows 11 imaging tool like OS Deployer.
Yes, using our add applications feature under the deployment template you can add all the required applications to the created Windows 10/Windows 11 image. These applications will then be installed after all the post-deployment activities are completed.
Yes, you can image the computer with the Windows 1o OS even if it's shut down using our offline image creation process.
Using OS Deployer, you can download Windows 10/Windows 11 ISO files and they can be deployed using USB, CD, DVD, or virtual machines.