MFA Enrolled Users Report
Enrolling for multi-factor authentication (MFA) in ManageEngine ADSelfService Plus lets users log in to their accounts and endpoints—Windows, macOS, or Linux machines, as well as RDPs, VPNs, etc.—securely, sign in to custom enterprise applications with SSO, as well as perform self-service password resets and account unlocks. As an admin, you should be taking appropriate measures to improve enrollment across your organization, which means it's important that you have a list of users who are enrolled for MFA and know which authenticators they have enrolled for.
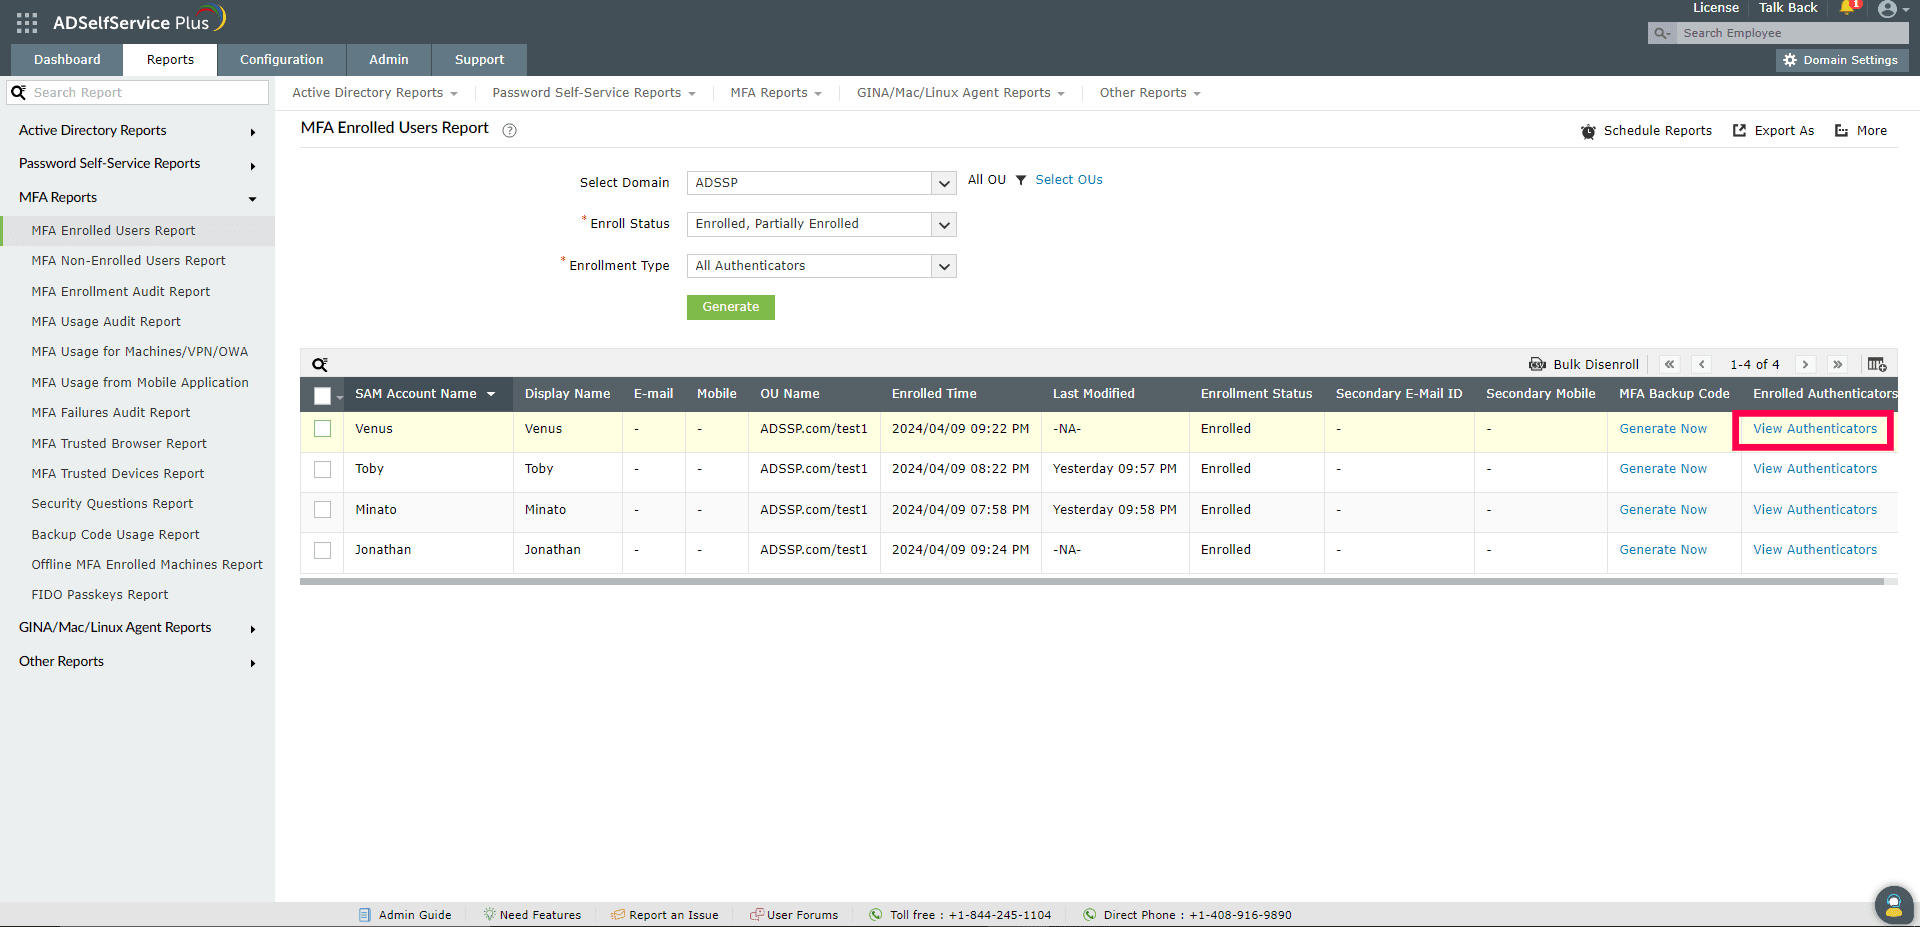
The MFA Enrolled Users Report displays details of every enrollment action, including the username, time of enrollment, authenticator enrolled for, IP address, endpoint type, and who attempted enrollment (user or admin).
You can also disenroll users from MFA and generate backup codes for user accounts from this report.
Report generation
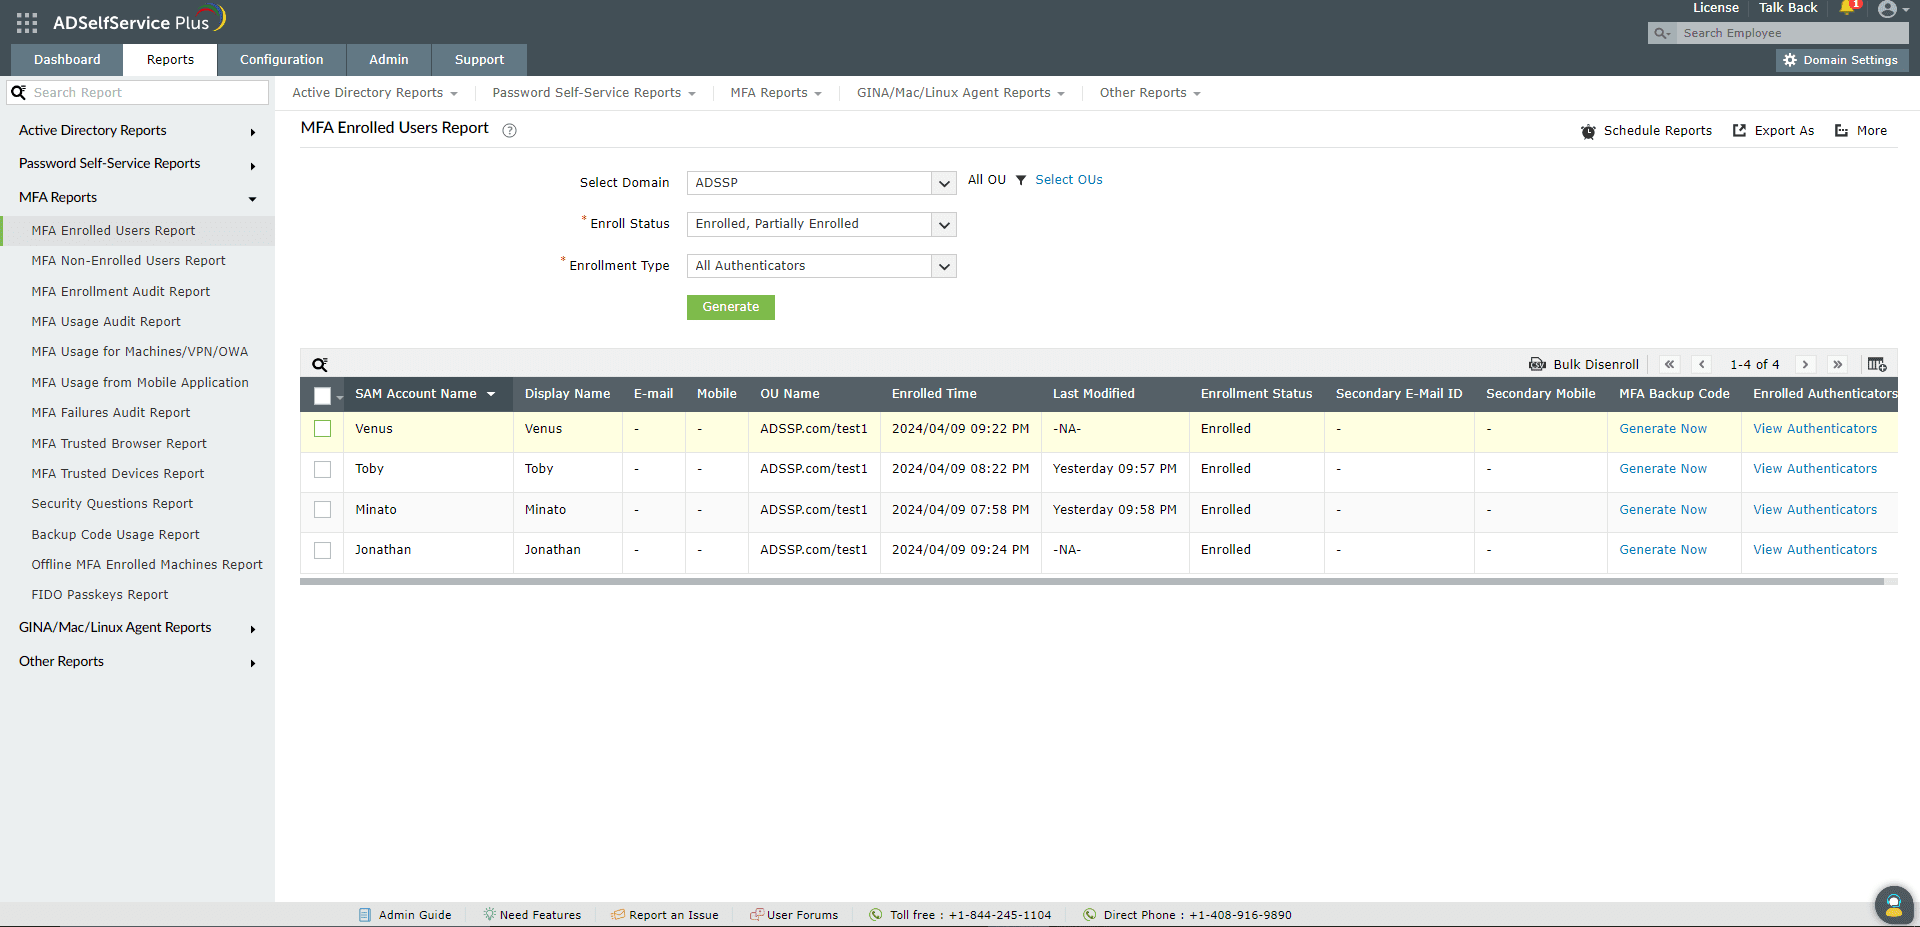
You can generate the MFA Enrolled Users Report by following these steps:
- Log in to the ADSelfService Plus admin portal with administrator or operator privileges and navigate to Reports > MFA Reports > MFA Enrolled Users Report.
- Specify the domain using the Select Domain option.
- Use the Select OUs option to specify the OUs, if necessary.
- Use the Enrollment Status drop-down to filter the entries based on whether the users are Enrolled or Partially Enrolled. Enrollment status is considered based on the fulfillment of the conditions below. If all of these conditions are satisfied, then the user is considered to be Enrolled. If not, the user is considered Partially Enrolled.
- Condition 1: The user has enrolled for all mandatory authenticators.
- Condition 2: The user has enrolled for the required number of authenticators set by administrators.
- Condition 3: If Security Questions and Answer is configured as the authenticator, the user has enrolled with all the mandatory questions and the correct number of questions.
- You can narrow-down the results based on MFA methods using the Enrollment Type drop-down.
- Click Generate.
Report customization
- Adding or removing columns: To add or remove columns, click the Add/Remove Columns [
 ] option at the far right of the report. In the Select the columns to be displayed pop-up that appears, select the required fields under Available Columns and click the right arrow (>>) to move them to the Selected Columns. To remove columns, select the unused fields under Selected Columns and click the left arrow (<<) to move them to the Available Columns .
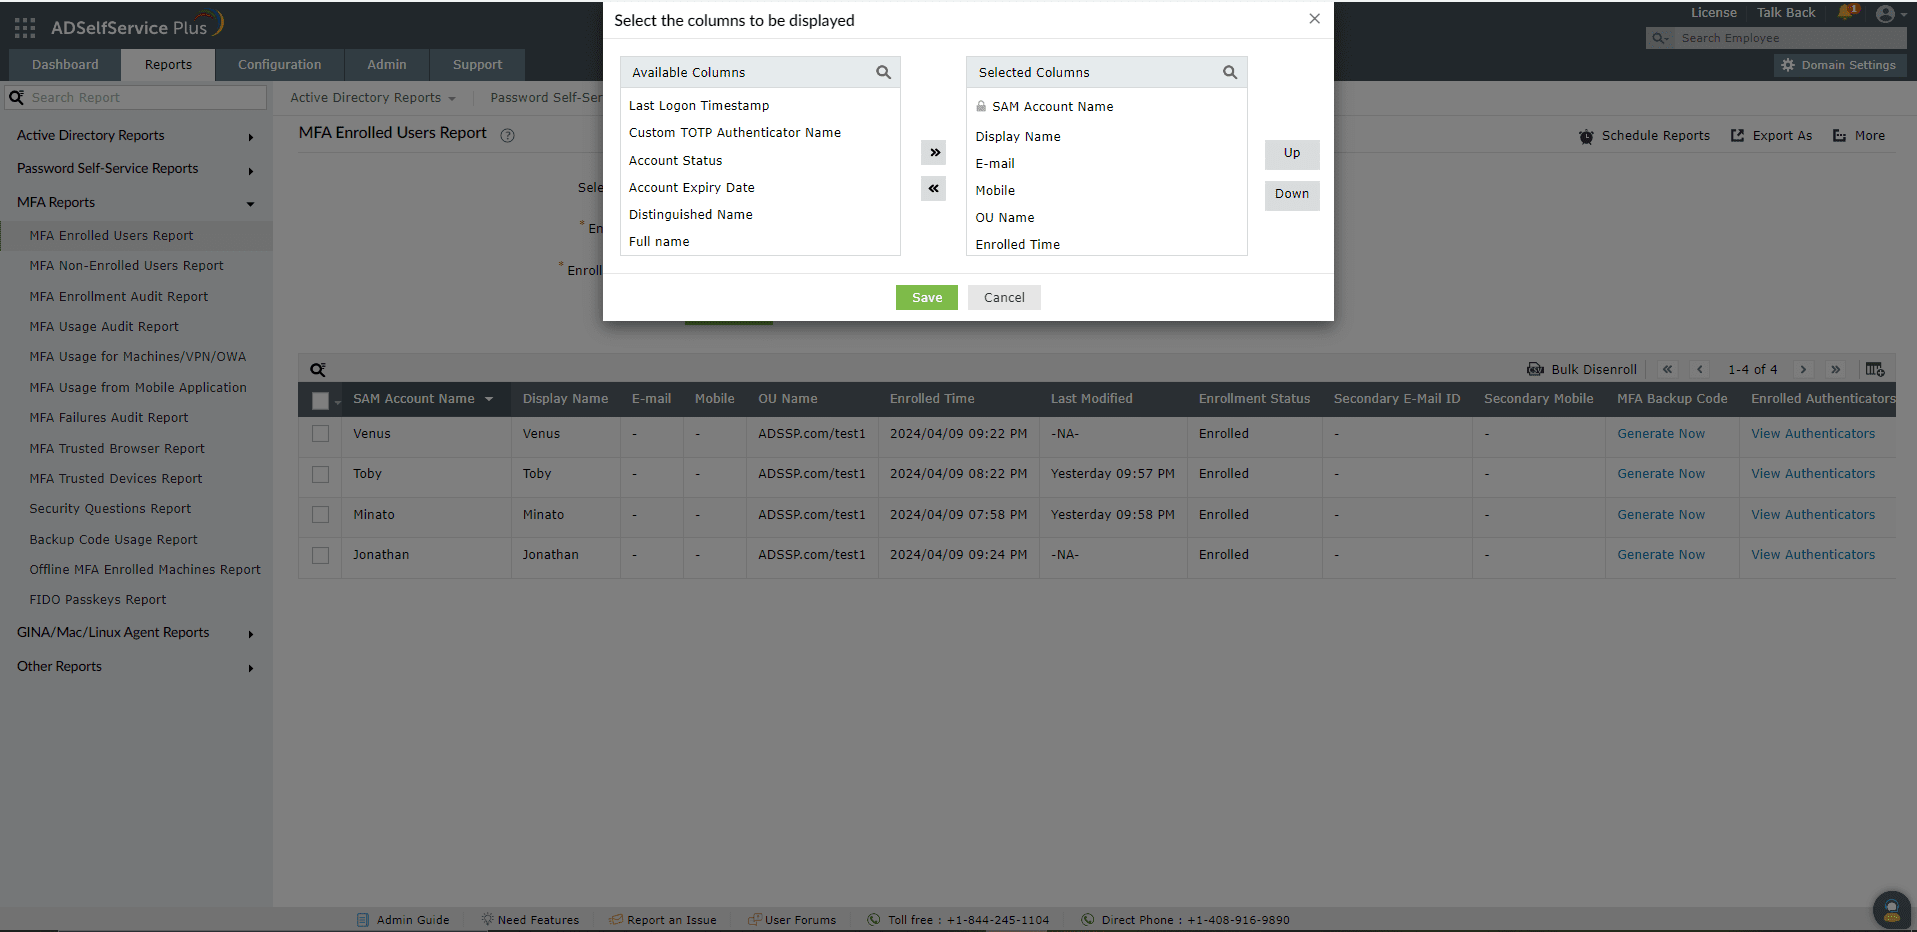
- Ordering the columns: The columns' positions can also be altered by selecting a value under Selected Columns and using the Up and Down buttons to change their position.
Sorting
Click any of the column headers to view the report's entries in ascending or descending order.
Searching
- Click the search icon [
 ] to search for specific data in the columns displayed.
- Specific users can be searched for using attributes such as their sAMAccountName or mobile number.
- Searching happens using the criteria contains. For example, if the username column is searched for the word jack, then all usernames containing the sequence jack will be displayed as a result.
Schedule Reports, Export As, and More
- The Schedule Reports option can be used to schedule the generation of reports at specified intervals, and automatically email them to administrators or specific email addresses. Learn to schedule reports here.
- The Export As option at the right corner of the page helps export the report in CSV, PDF, XLS, XLSX, HTML, and CSVDE formats.
- The More option at the top-right corner of the page lists the Printable View, Send Mail, and Export Settings options.
- The Printable View option can be used to preview and print the report.
- The Send Mail option can be used to email the report to the desired email addresses.
- Additionally, you can configure custom Export Settings, such as a personalized title for the report and a header logo that you may wish to display on each page.
Disenrolling a user
Disenrollment of a user involves partially or completely removing their enrollment information from ADSelfService Plus.
Users will not be able to verify their identity via the authenticators they have been disenrolled from. If a user is completely disenrolled, they must reenroll for at least the minimum number of authentication methods set by the admin to perform MFA and self-service actions.
From the MFA Enrolled Users Report, Users can be disenrolled via two methods:
- Manual disenrollment
- Bulk CSV disenrollment
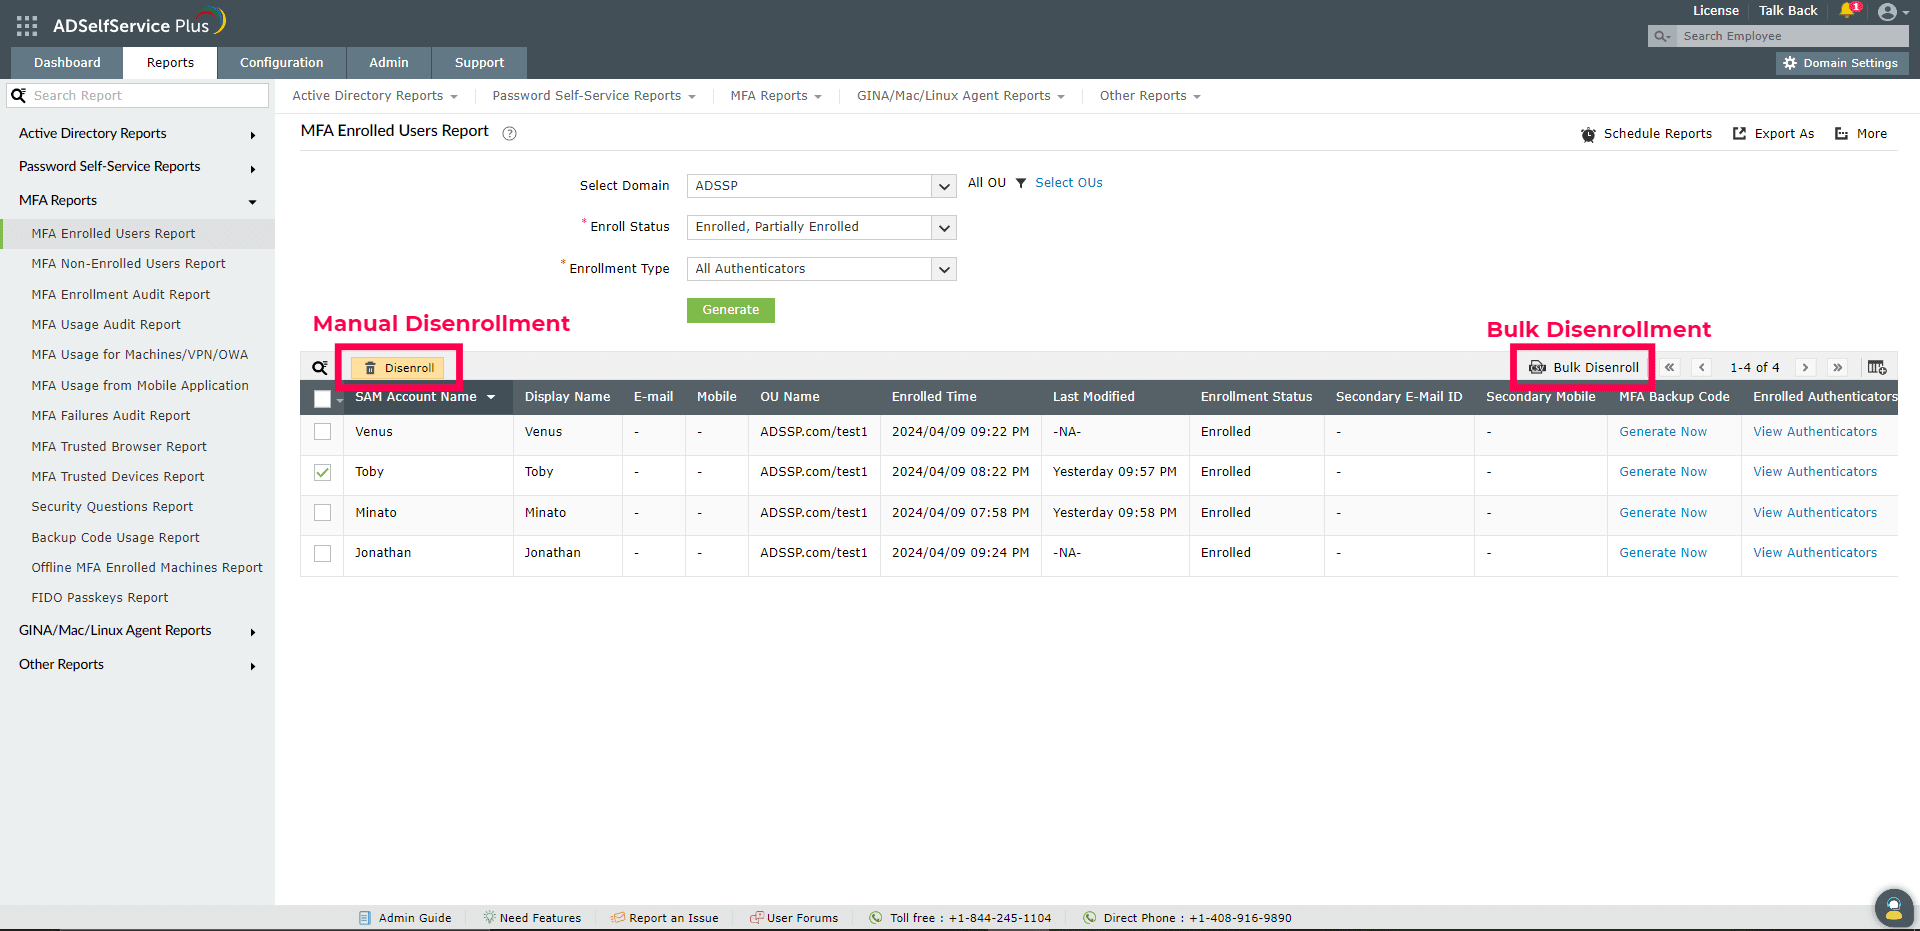
- Manual: Choose the user(s) you want to disenroll by checking the box in the column to the left of the user, and then click Disenroll next to the search button. In the pop-up that opens, select the authenticators you want to disenroll the user(s) from and click OK. Click All Authenticators to disenroll the users from all authenticators.
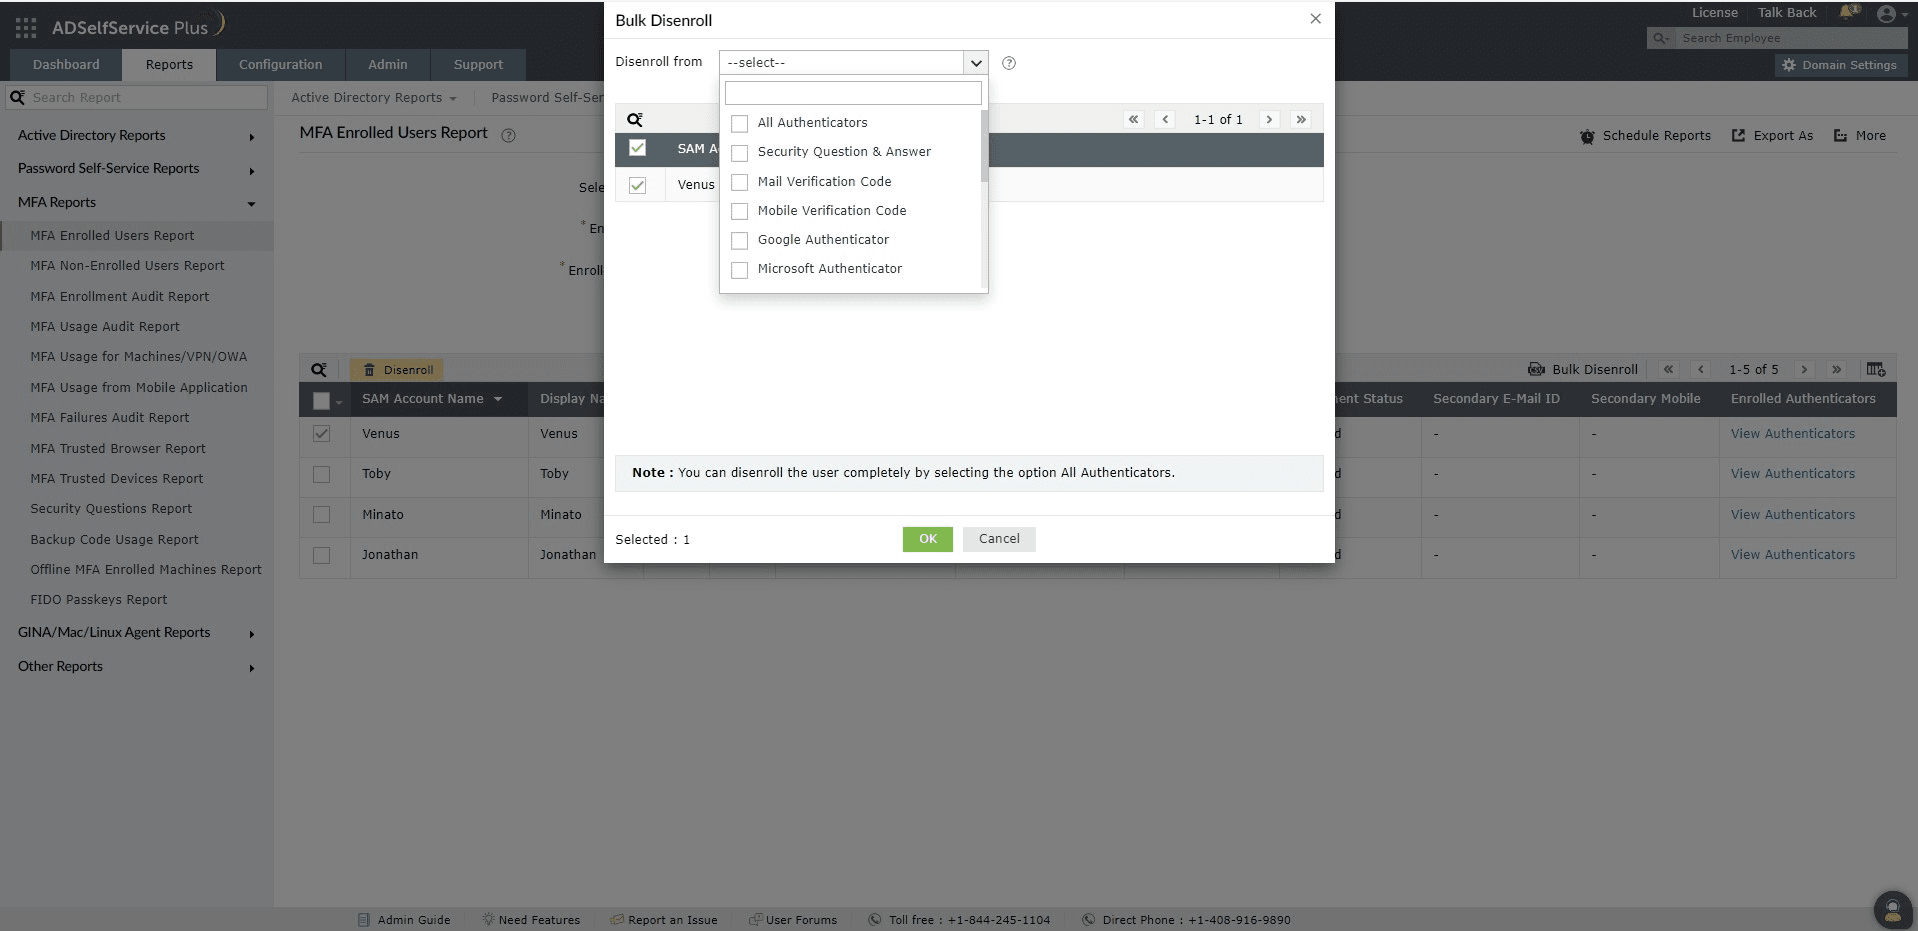
- CSV: Click Bulk Disenroll on the right side of the report header near the navigation buttons. In the pop-up that opens, upload a CSV file containing the SAM Account Name, Mobile Number, Mail ID, Secondary E-mail ID, or Secondary Mobile number of the users to disenroll them. Once the CSV file is uploaded, you can select the authenticators you want to disenroll the user(s) from, and click OK. Click All Authenticators to disenroll the users from all authenticators.
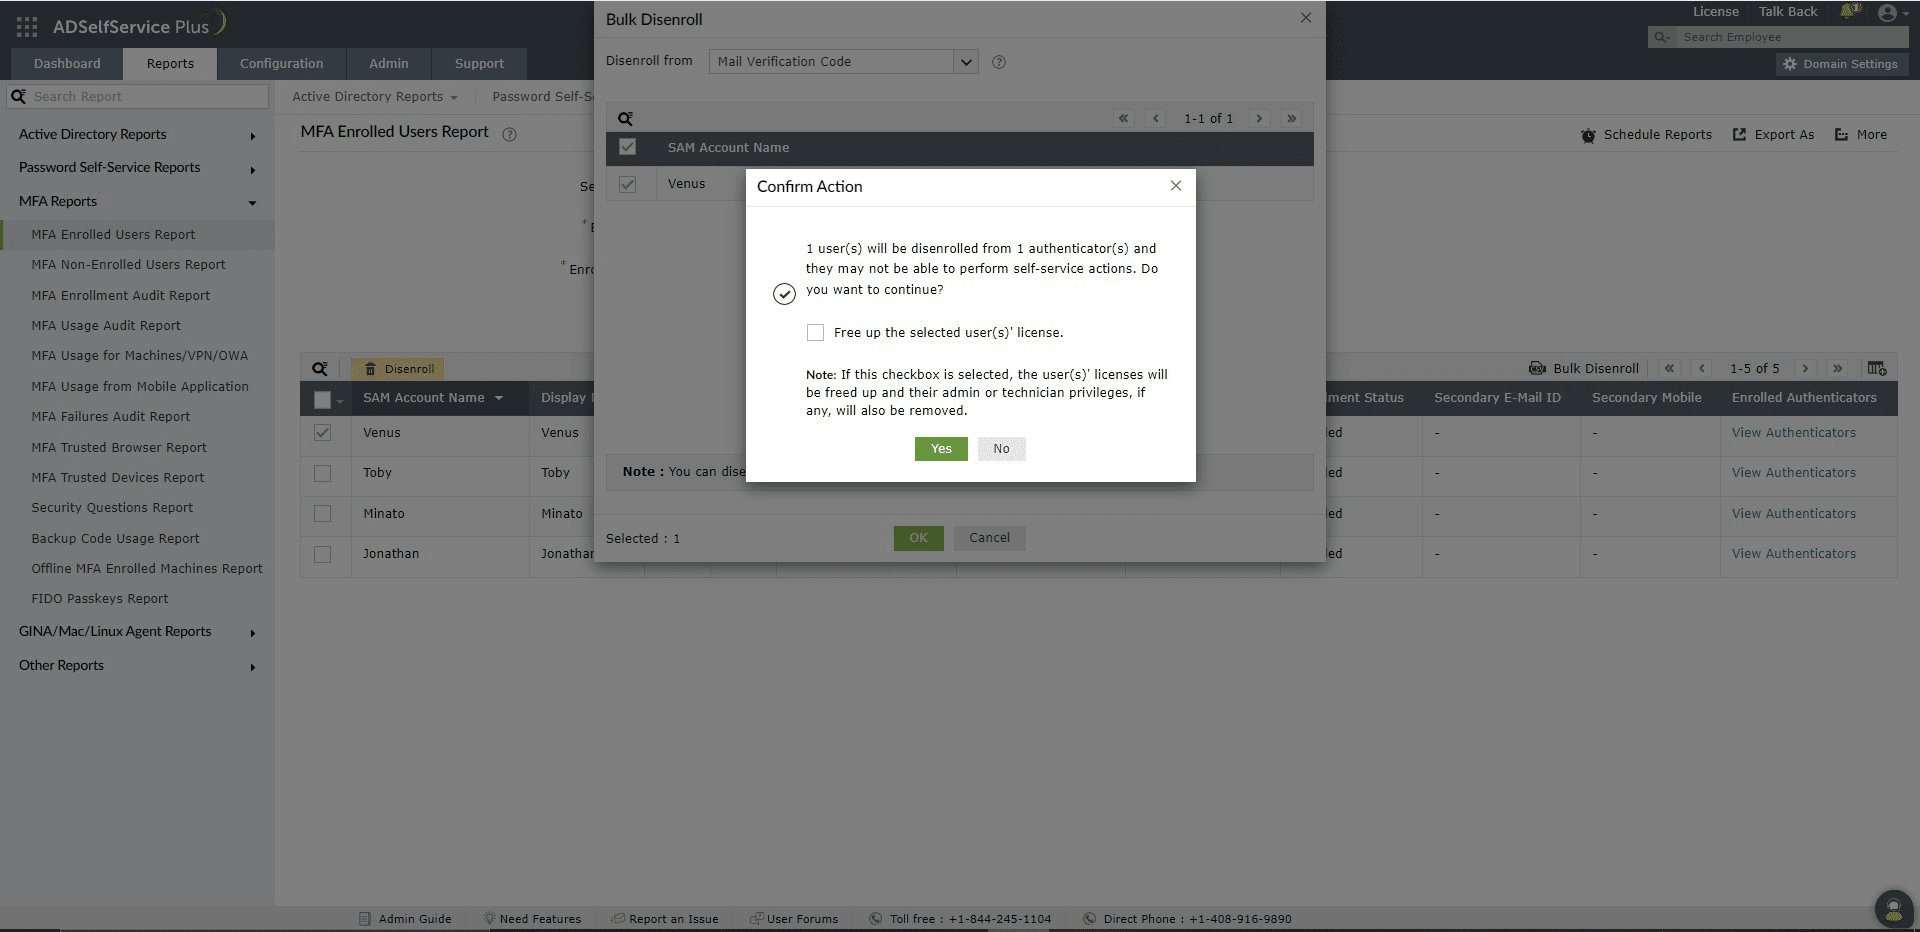
You can use the Free up the selected user(s)' licenses option while disenrolling users from any of the authenticators they are enrolled for. Choosing this option will remove the chosen users from all enrolled authenticators and free up their ADSelfService Plus licenses. As a consequence, these users will become unlicensed and lose any administrator or technician privileges they may have had.
If they are later assigned ADSelfService Plus licenses again, their previous privileges will not be automatically reinstated and will need to be reassigned manually.
Customizing the report
You can customize the report to include or exclude columns containing additional information by clicking the add/remove columns [ ] icon at the far left of the navigation buttons.
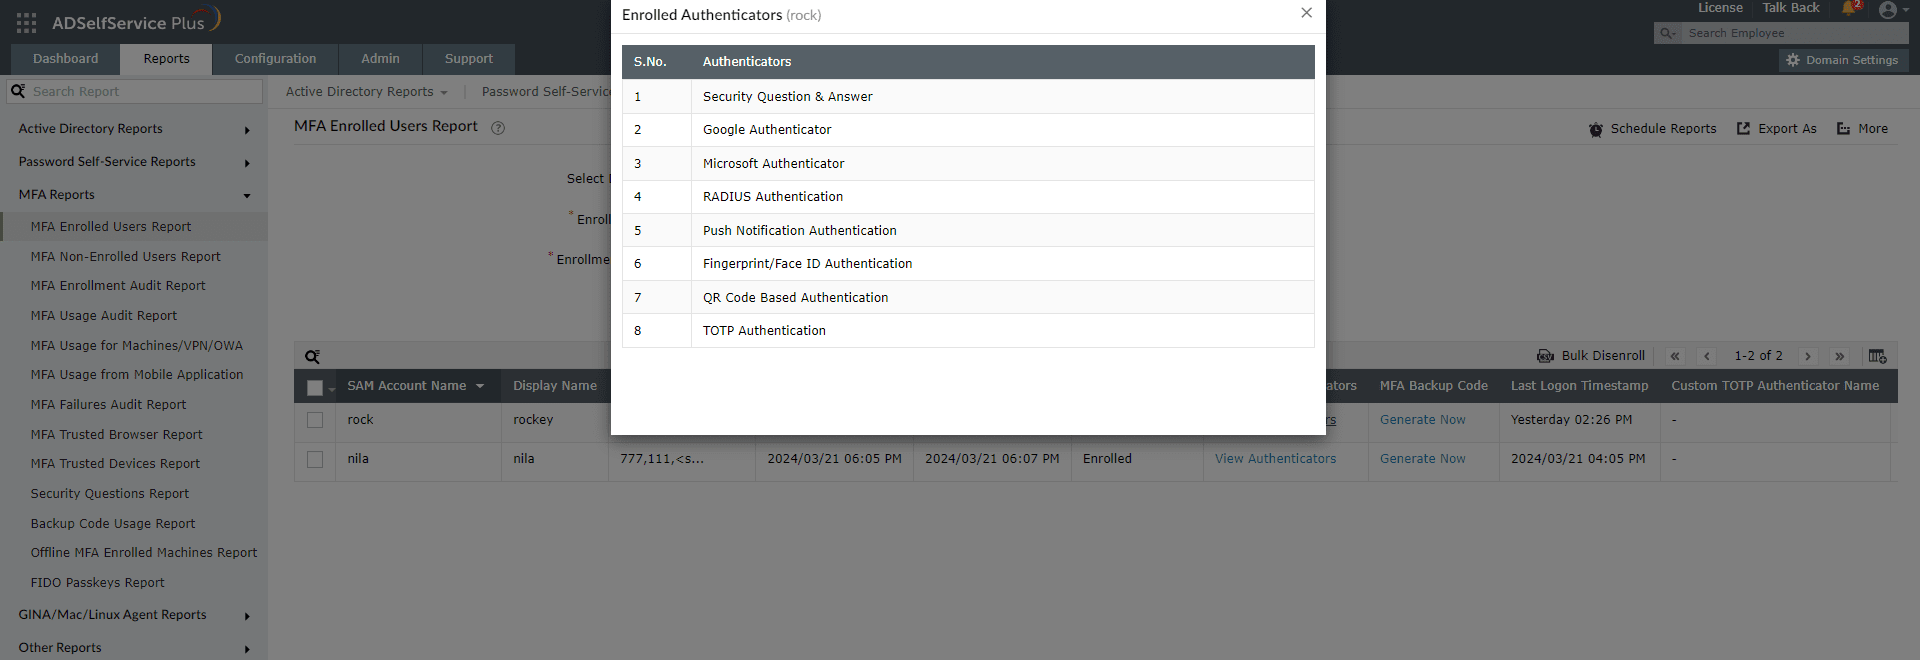
Users' enrolled authenticators
Clicking View List in the MFA Enrolled Users Report will display the list of authenticators a user has enrolled for.
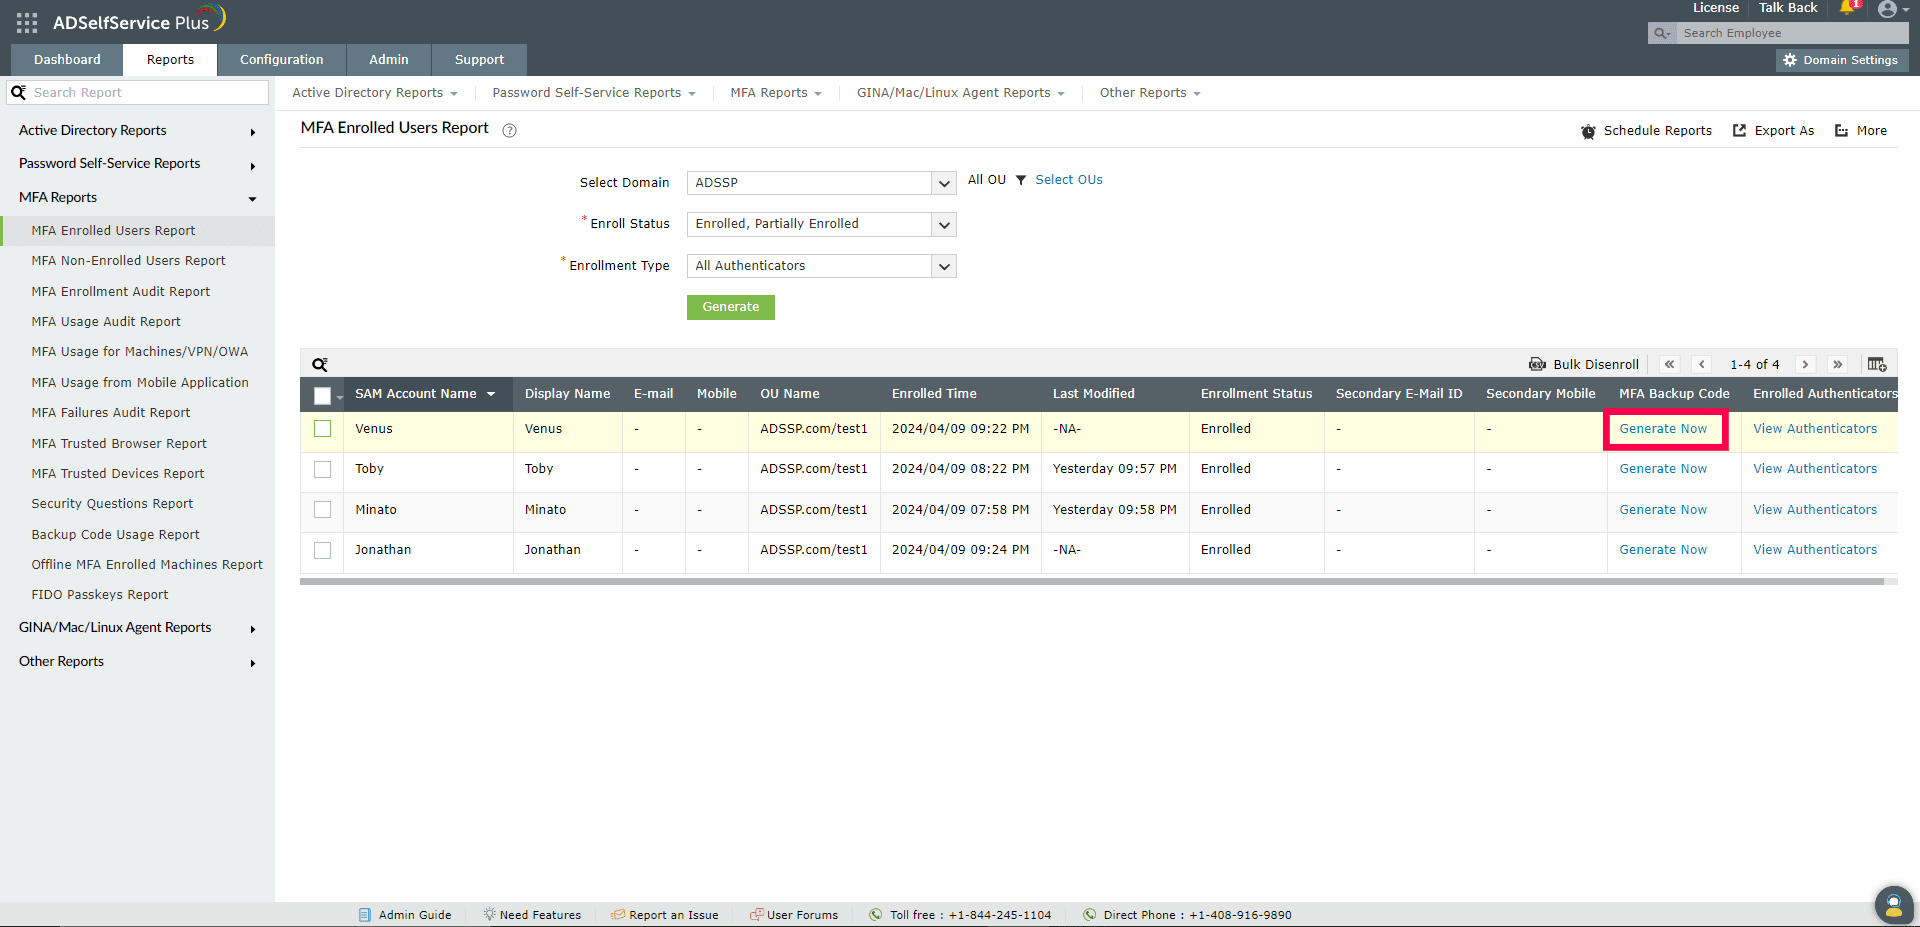
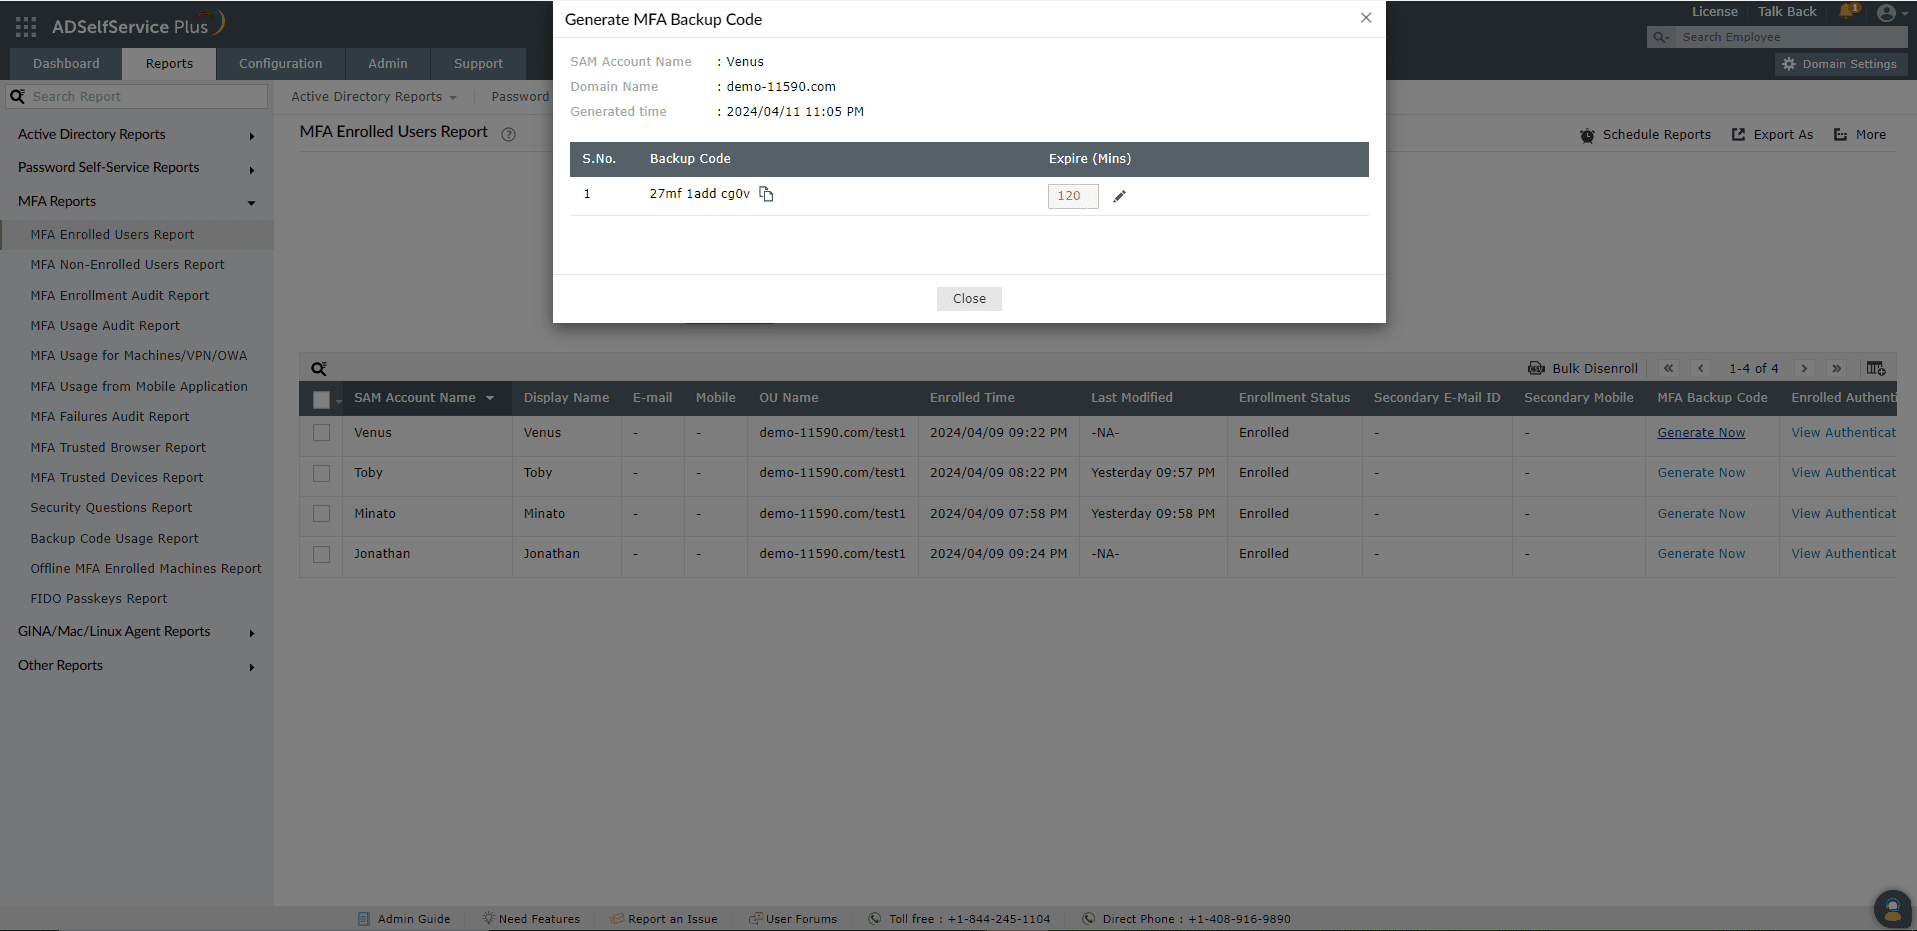
Generating backup codes
Admins can generate a backup code for an enrolled user when the user's MFA device is not reachable. The user can use each backup code only once. To generate a backup code for a specific enrolled user:
- Go to the MFA Backup Code column of the MFA Enrolled Users Report. Click Generate Now.
- In the Generate MFA Backup Code section that appears, you'll find the following details:
- SAM Account Name: The SAMAccountName value for the user.
- Domain Name: The domain the user belongs to.
- Generated time: The date and time that the backup code was generated.
- A table displays the newly generated single-use backup code.
- Use the Expire (Mins) field to specify the number of minutes after which the code will expire.
- Click the
 icon next to the backup code to copy it. The code should be sent or conveyed to the user to let them verify their identity without MFA.
- Click Close.
Note: If more than one technician creates backup codes for the same user, then the most recently generated code becomes valid, and this code can only be used once. If the user had generated a backup code themselves, then that will also remain valid until it's used.
Don't see what you're looking for?
-
Visit our community
Post your questions in the forum.
-
Request additional resources
Send us your requirements.
-
Need implementation assistance?
Try OnboardPro
 ADManager Plus
 ADAudit Plus
 Exchange Reporter Plus
 M365 Manager Plus