Privacy Settings
You can now configure privacy settings in ServiceDesk Plus MSP. Privacy regulations and guidelines, such as the Global Data Protection Regulation, require businesses to protect their user's personal data from misuse. GDPR protects all types of personal data, including the user's name, social security number, insurance details, or racial or ethnic data. You can find Privacy Settings under Admin > Users & Permissions (General Settings in Old UI).
In ServiceDesk Plus MSP, you can completely delete or anonymize all personally identifiable information (PII). The ability to identify PII is available in Incident Additional Fields, Service Catalog, and Resource Questions.
Incident Additional Fields
You can mark PII in Single Line, Multi Line, Pick List, Numeric, and Date/Time fields. You can add these fields to both incident and service requests, as shown in the following screenshot:
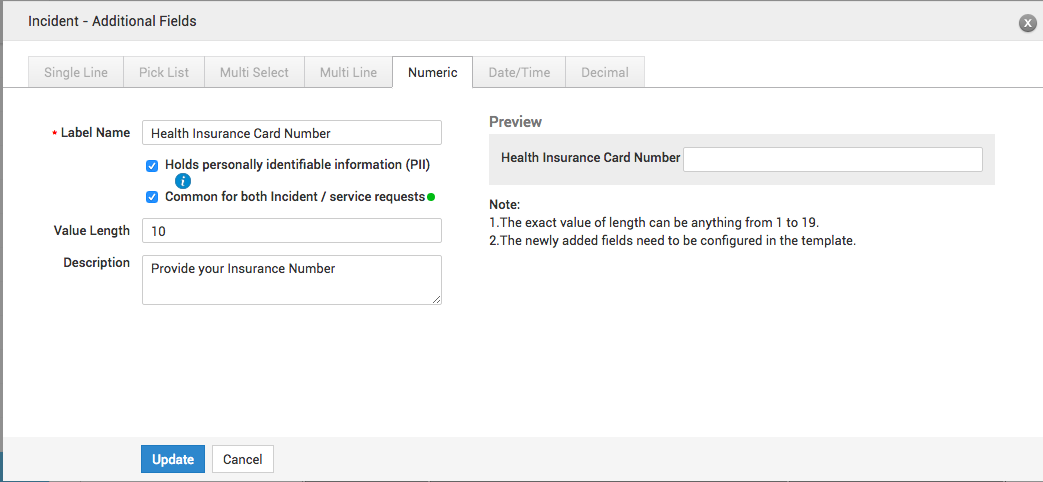
This is sample of all additional fields that contain PII.

Service Catalog Additional Fields
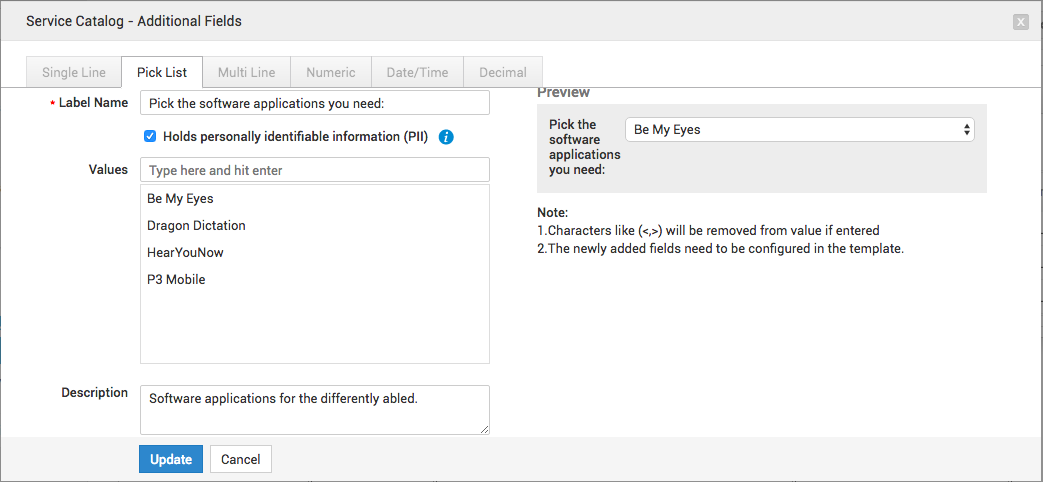
Mark Service Catalog additional fields as holding PII, by clicking the relevant option under the field, as shown below:
User Additional Fields
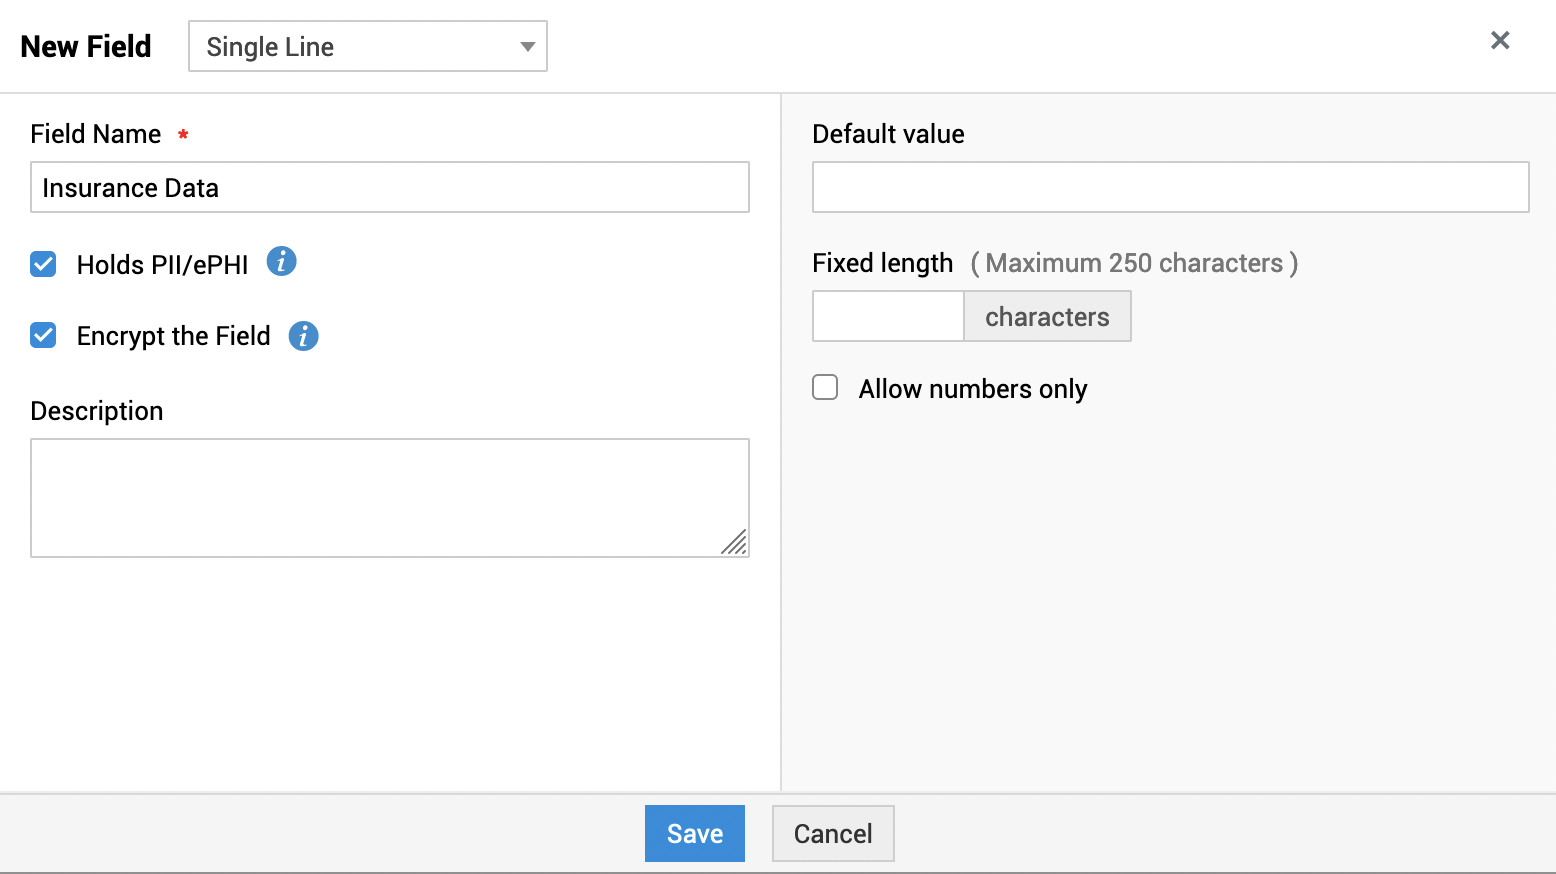
When configuring an user additional field, you can mark a field containing any confidential information as electronic Protected Health Information(ePHI) and encrypt the field. You can mark single-line, picklist, multi-line, numeric, and date/time fields as ePHI.
To add an ePHI field,
- Go to Admin and click Additional Fields under the required entity. You can add ePHI fields to User Additional Fields.
- Click New Field.
- Enter the Field Name and select the Field Type. You can mark single-line, picklist, multi-line, numeric, and date/time fields as ePHI.
- Enable the Holds personally identifiable information(PII)/electronic protected health information(ePHI) checkbox to mark the field as ePHI.
- Enter additional information about the field in the Description.
- Click Save.
Resource Questions
When certain services are provided to your users, you may collect some personal information. For example, when a new employee joins the organization, it's routine to collect their address for communication or the contact details of the next of kin. Now, such details must be marked out so that they can deleted when the user leaves the organization.
- Go to Admin>>Service Catalog>>Select any service.
- On the displayed form, provide the name of your service along with other details and click Add Resource.
- Provide the resource title, description, and click New Question.
- Add your question and if it contains any personal data, select Hold personally identifiable information (PII) and save.
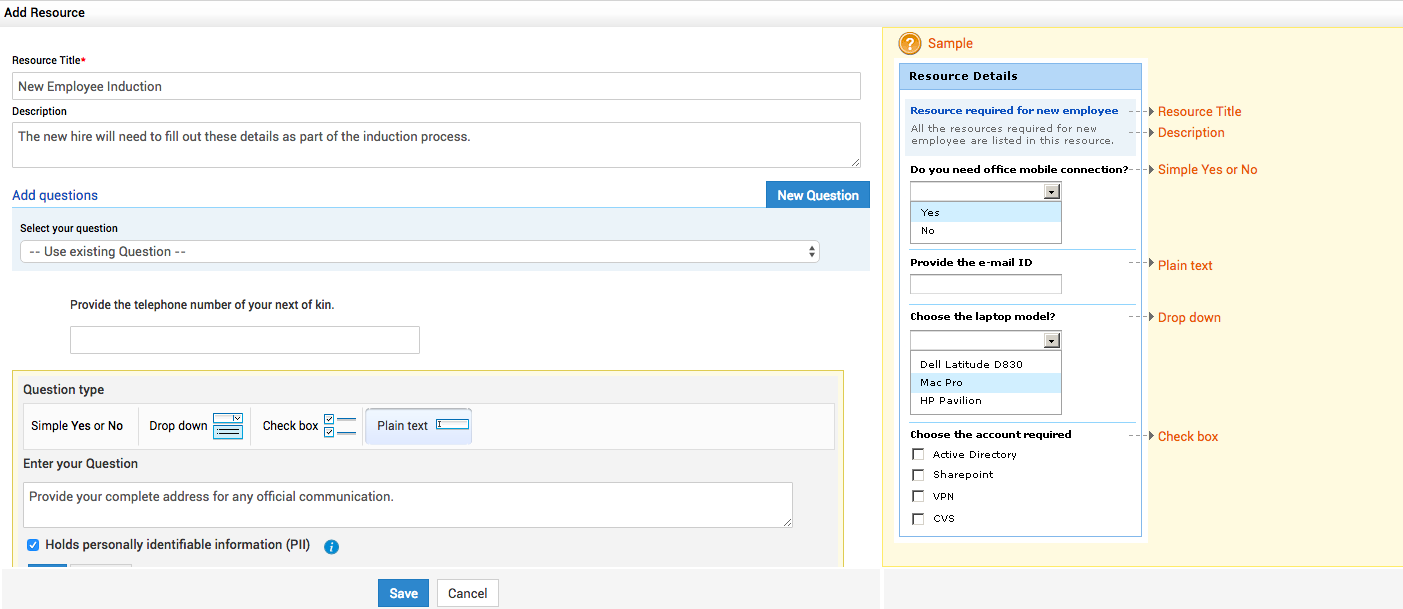
Here are some sample resource questions.

Privacy Settings—Anonymize
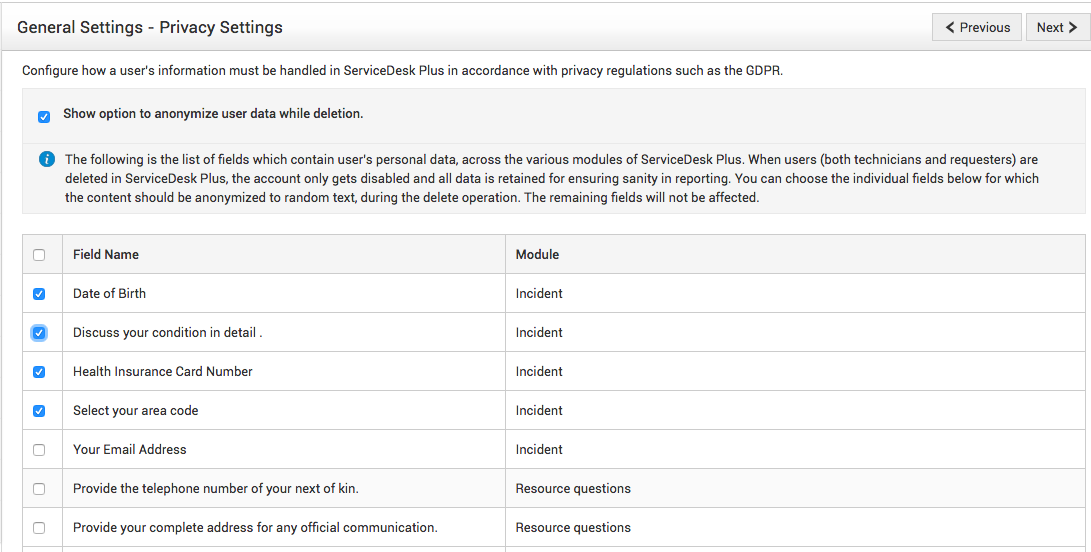
On this page are listed all the fields that you have marked as PII. Here, you can select whether they must be completely removed when the user is deleted.
Anonymization means completely deleting any user data that can be used to accurately identify the user. In case of user names, you will be able to provide a random text in the place of the actual name. All other PII data fields selected on this page will be deleted from the system. Other details in the requests raised by the user will be retained in the system for audit and other regulatory processes.
- To enable anonymization, select the Show option to anonymize user data while deletion option and select all the PII fields that must be deleted when the user exits the organization.
Deleting Requesters/Technicians
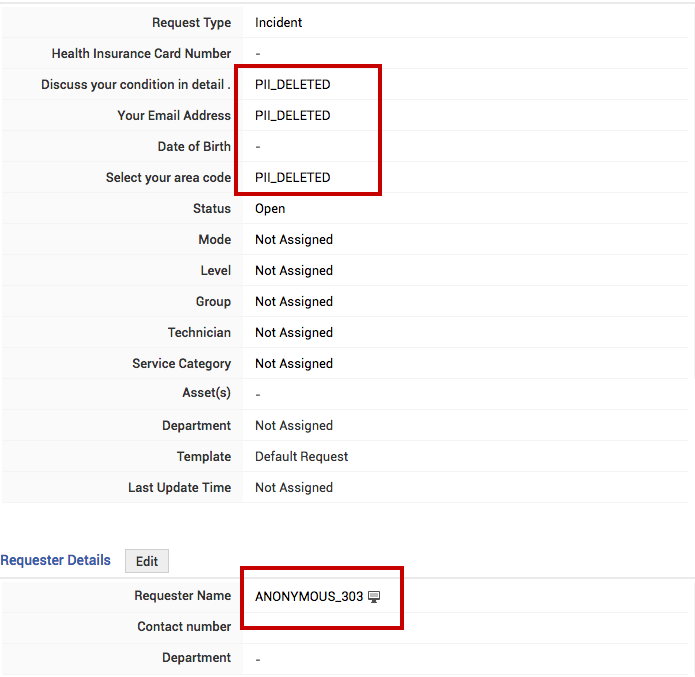
When a user leaves the organization and exercises her right to be forgotten, her name can be changed to random text when it's deleted, as shown in the screen shot.

All other PII of the user will be completely deleted from the system.
When a user, whose PII is marked for anonymization, is deleted, anonymization (of the name) happens immediately, whereas the PII data deletion happens through a schedule, which runs every 8 hours.
After anonymization is complete, the request that once contained PII will appear as shown below:
Anonymization will be possible only when compliance regulations are effected within the application.
Details about when exactly the PII was removed is available in the history of each request. To know when the user was actually deleted from the system go to System Log Viewer under the Community button.
File Protection Password
Ensure secure access to files generated from within the application by enabling the FileProtection Password option. Once this option is enabled, files such as exported reports, scheduled reports, and exported request list will require a password to be opened.
Select the Enable File Protection Password option, enter a common password for non-login users, and share the password with them.

After you enable the file protection password option and when a user triggers a report, a password specific to the user login will be generated. The user can view reset the password under the Change Password wizard. The user can also manually configure a file protection password.

